

Page 1
Using Optional Transformer
(NOT INCLUDED)
• Use only recommended transformer.
• The transformer is not a toy.
• Disconnect transformer before cleaning.
• The transformers used with the toy are to be
regularly examined for damage to the cord,
plug enclosure and other parts, and that, in
the event of such damage. The toy must not
be used with this transformer until the damage
has been repaired.
NOTE : When you plug the transformer into
the unit, the batteries are automatically
disconnected.To use battery power, remove
the transformer plug from the unit.
CAUTION : This unit is designed to
operate with a negative center, DC6V 5W
transformers only. Connecting it to any
other transformers may damage the unit.
Transformers are available in most radio
stores.
IMPORTANT WARNING !
This product contents long cords. Parental
supervision is recommended with this toy
due to the risk of entanglement.
Strangulation hazard.
Not suitable for children under 3 years
due to small parts, choking hazard.
Important
– Please read these instructions fully before use
These instructions contain important information which will help you get the best from your product and
ensure safe and correct assembly, use and maintenance.
If you need help or have damaged or missing parts, call the Customer Helpline: 08456 400 800
Battery Safety
1. Do not mix old and new batteries.
2. Do not mix alkaline, standard (carbon zinc),
or rechargeable (nickel-cadmium) batteries.
3. Remove batteries if unit is not used for a
long period of time to prevent battery leakage
and possible demage to the unit.
4. Only batteries of the same equivalent type
as recommended are to be used.
5. Exhausted batteries are to be removed
from the unit.
6. The supply terminal are not to be
short-circuited.
7. Batteries must be installed by an adult.
8. Do not use rechargeable batteries.
9. Non-rechargeable batteries are not to be
recharged.
10. Batteries are to be inserted with the
correct polarity.
General Safety
• WARNING: To reduce the risk of fire, electric
shock or product damagte, do not expose this
appliance to rain, splashing, dripping or
moisture.
• Never use or place this unit near a heat
source. Do not leave it exposed to direct
sunlight.
• The unit should be situated away from
eqiupment or devices that generate strong
magnetic fields.
• Do not place any objects on top of the unit.
• Care should be taken so that objects do not
fall into and liquids are not spilled into the
unit. Do not subject this unit to excessive
dust, mechanical vibration or shock.
• The unit should only be serviced by qualified
service personnel.
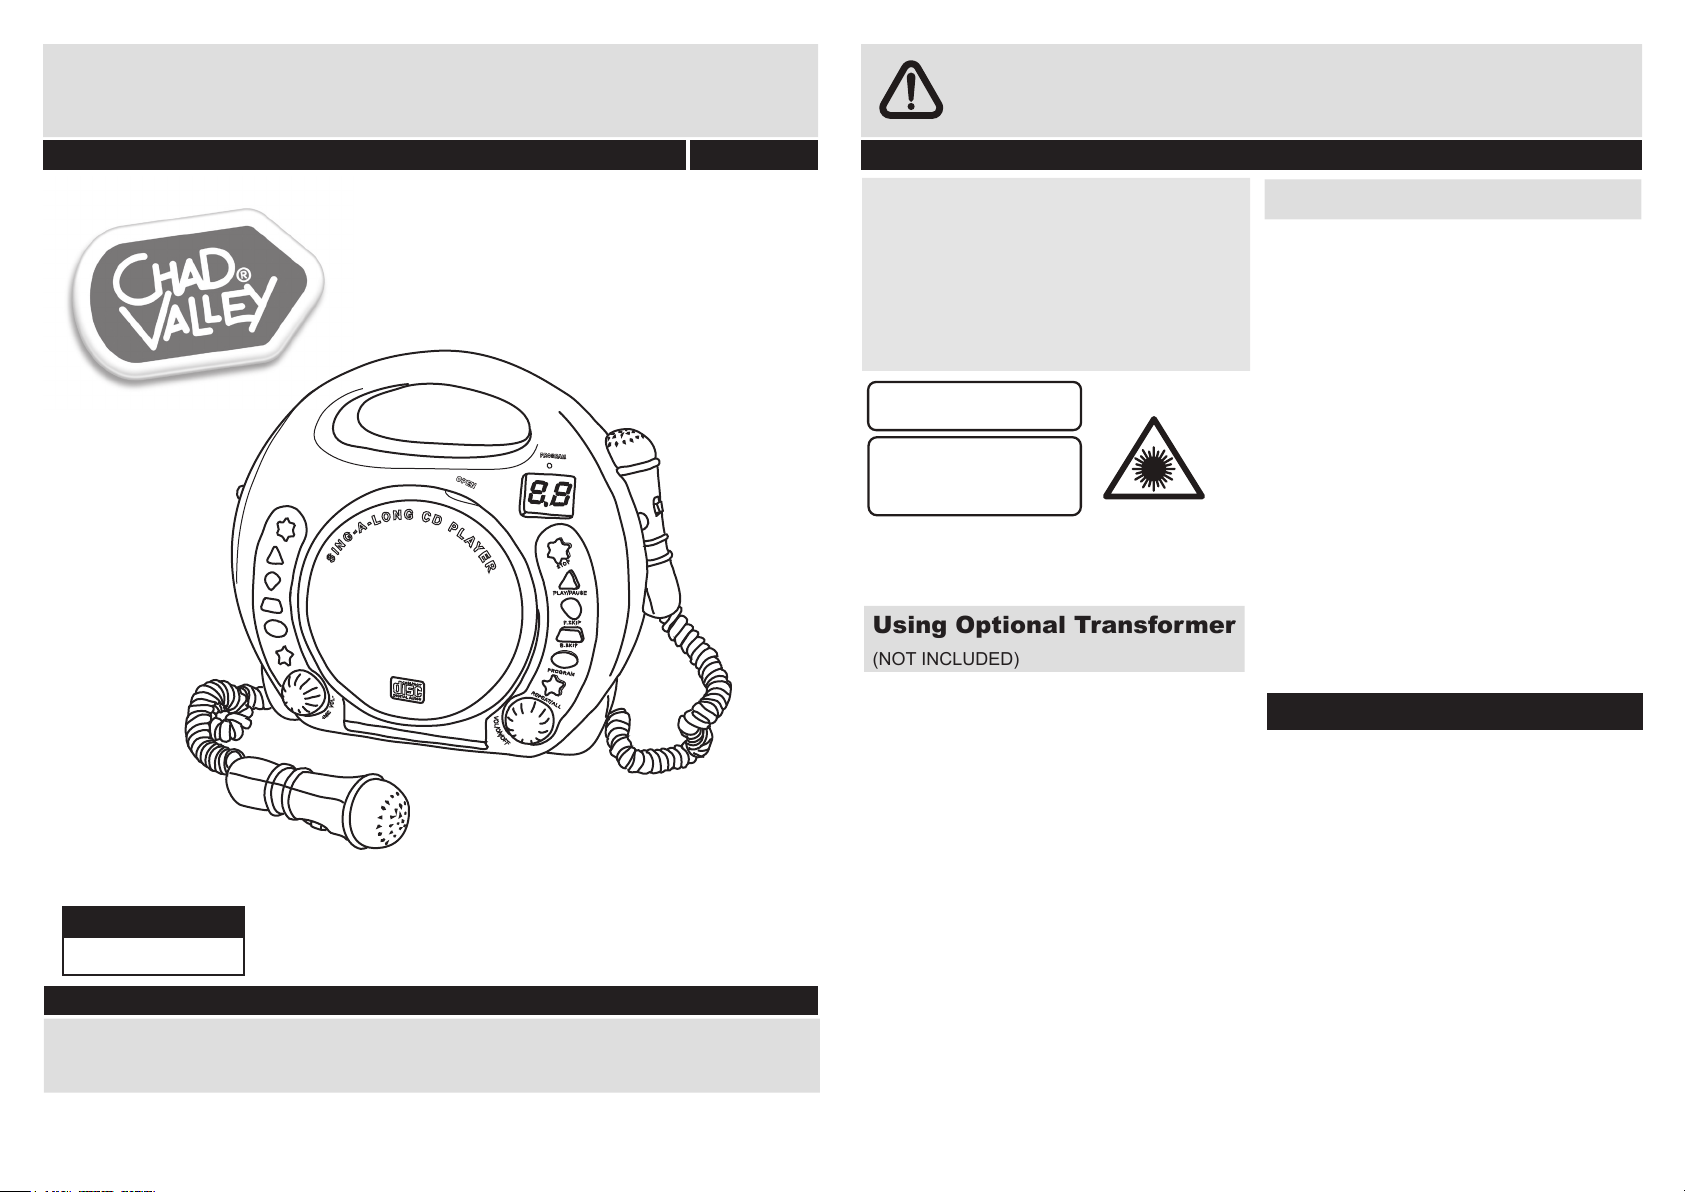
Sing-A-Long CD Player
User Instructions - Please keep for future reference 349/9883
Safety Information
Issue 1 - 25/06/2010
IMPORTANT
Age 3+
1 2
Important – Please read these instructions fully before use
CLASS 1 LASER PRODUCT
CAUTION
INVISBLE LASER RADIATION
WHEN OPEN AND INTERLOCKS
DEFEATED.
AVOID EXPOSURE TO BEAM
This product contains a low power laser device.
CAUTION:
THE USE OF CONTROLS OR ADJUSTMENT OR PERFORMANCE
OF PROCEDURES OTHER THAN THOSE SPECIFIED HERE MAY
RESULT IN EXPOSURE TO HAZARDOUS RADIATION.
Page 2
CD OPERATION
1. Switch the unit ON by turning
VOL/ON/OFF (POWER ON/OFF SWITCH
MASTER VOLUME CONTROL) knob.
2. Lift up the lid to reveal the CD player.
"NO" shows on the LED DISPLAY indicating
there is no disc inside the CD compartment.
Lift up the CD compartment door and place a
disc on the center spindle, with the printed
label side facing up. Then close the CD
compartment door.
3. The LED DISPLAY will show " --" for a few
seconds, then the total number of tracks on
the disc will appear on the display.
4. Press PLAY/PAUSE button to start
playback.
5. Adjust VOL/ON/OFF (POWER ON/OFF
SWITCH/ MASTER VOLUME CONTROL)
knob to the desired level.
6. During CD playback, press PLAY/PAUSE
button to pause the disc momentarily. Press
PLAY/PAUSE button again to release pause
and resume normal CD playback.
7. Press STOP button to stop playback.
SING-A-LONG
1. Place a disc inside the CD compartment.
2. Press PLAY/PAUSE button until it latches.
3. Slide MICROPHONE ON/OFF switch to
ON position while singing.
4. Adjust MIC VOL (MICROPHONE
VOLUME CONTROL) knob to the desired
level.
NOTE :
Do not put the microphone too close to the
speaker as this may cause feedback
(squealing noise) through the speaker.
TO USE ASA PA (PUBLIC
ADDRESS) SYSTEM
No disc is needed. Just talk through the unit.
1. Press PLAY/PAUSE button without a disc
in the unit.
2. Slide MICROPHONE ON/OFF switch to
ON position.
3. Adjust MIC VOL (MICROPHONE VOLUME
CONTROL) knob to the desired level.
4. Speak or sing into the microphone.
NOTE :
Do not put the microphone too close to the
speaker as this may cause feedback
(squealing noise) through the speaker.
TO BEGIN PLAYBACK FROM A
SPECIFIC TRACK
1. After you insert the disc into the CD player
and the total number of tracks appear on the
display, you may press either F.SKIP
(FORWARD SKIP) or B.SKIP (BACKWARD
SKIP) button to select a specific track for
playback.
2. When the desired track number appears in
the display, press PLAY/PAUSE button.
Playback will begin on the track you desired.
SKIP FORWARD AND REVERSE
DURING PLAYBACK
1. Press F.SKIP (FORWARD SKIP) button to
listen to the next track.
2. Press B.SKIP (BACKWARD SKIP) button
to listen to the previous track.
User Instructions
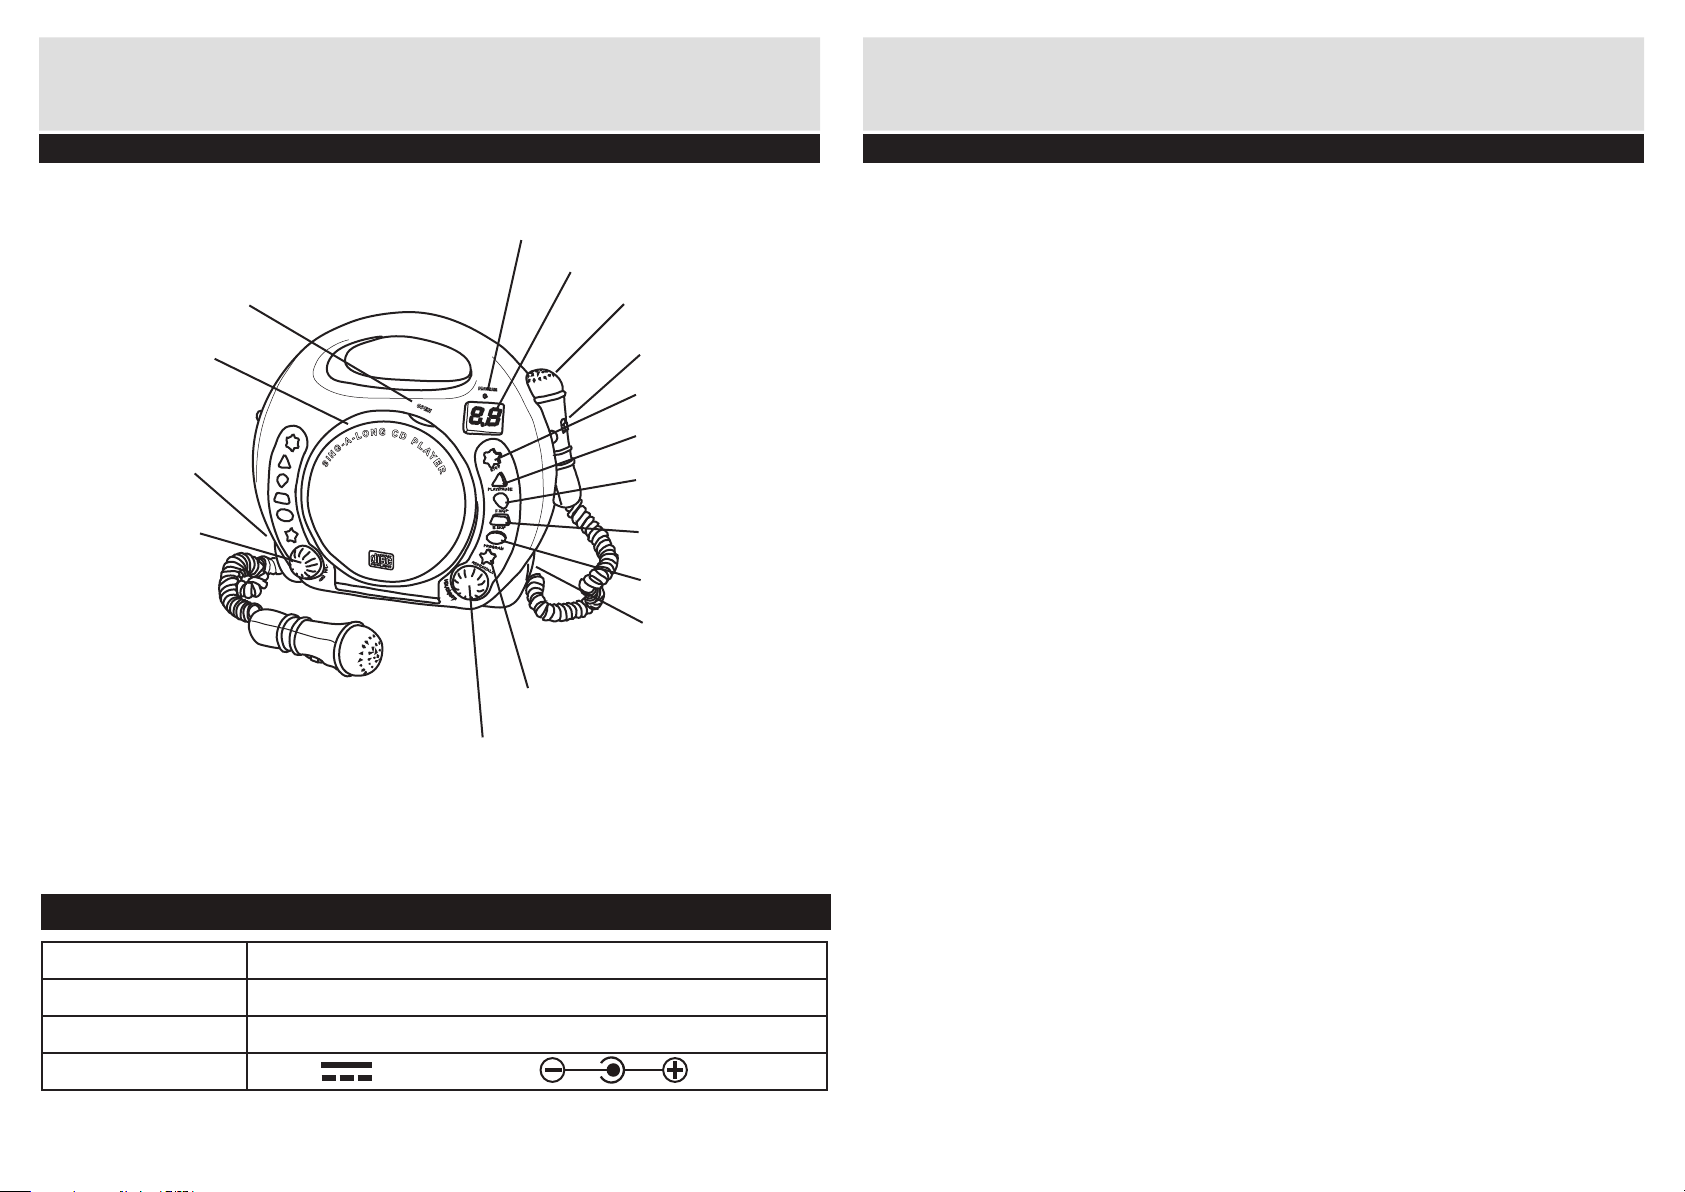
Parts
Technical Specifications
Repeat / All Button
Battery Compartment
Door (rear of unit)
Microphone
Volume Control
CD Compartment
Door
Open (CD
Compartment Door)
VOL/ON/OFF (Master
Volume Control / Power
ON/OFF Switch)
Program Button
DC Adaptor Jack &
Headphone Jack
(side of unit)
B.SKIP (Backward
Skip) Button
F.SKIP (Forward
Skip) Button
Play / Pause Button
Stop Button
LED Display
Program LED
Indicator
Microphone
Microphone
ON/OFF Switch
Battery Operation 4 x “C” Size (UM-2/LR14, 1.5V) (NOT INCLUDED)
Power Adaptor AC / DC Adaptor (NOT INCLUDED)
Adaptor INPUT 220V - 240V ~ 50 Hz
Adaptor OUTPUT DC 6V 600mA, polarity
3
4
Understand all the parts of the CD Player
Rules of using the CD player
Page 3
REPEAT PLAYBACK
1. To select the single track repeat function,
choose the track that you want to repeat, then
press PLAY/PAUSE button to play the track.
2. Press REPEAT/ALL button once to
activate the single track repeat and the
display will flash.
3. To select the "AII Tracks Repeat" function.
Press PLAY/PAUSE button to start the track.
Press REPEAT/ALL button twice to activate
the "All Tracks Repeat" function.
PROGRAMMED PLAYBACK
1. Press PROGRAM button twice, the LED
DISPLAY showing "00", and the PROGRAM
LED IN DICATOR will both flash.
2. Press F.SKIP (FORWARD SKIP) or B.SKIP
(BACKWARD SKIP) button to select a track.
3. Press PROGRAM button again to store the
selected track number.
4. Repeat steps 2 and 3 above to program
other tracks.
5. Press PLAY PAUSE button to start
programmed playback and the PROGRAM
LED INDICATOR should light up.
6. To erase the programmed sequence, switch
the unit OFF by turning VOL/ON/OFF
(POWER ON/OFF SWITCH/ MASTER
VOLUME CONTROL) knob.
7. Press PROGRAM button in succession to
review the tracks currently memorized and
change the track number as desired.
NOTE : A maximum of 20 tracks can be
programmed to play in any order.
Caring for Compact Discs
• Treat the compact disc carefully. Handle the
compact disc only by its edge. Never allow
your fingers to come in contact with the shiny,
upprinted side of the compact disc.
• Do not attach adhesive tape, stickers, etc. to
the compact disc label.
• Clean the compact disc periodically with a
soft, lint-free, dry cloth.
• Never use detergents or abrasive cleaners to
clean the compact disc. If necessary, use a
CD cleaning kit.
• If a compact disc skips or gets stuck on a
section of the compact disc, it is probably dirty
or damaged (scratched).
• When cleaning the compact disc, wipe in
straight lines from the center of the compact
Cleaning the unit
• To prevent fire or shock hazard, disconnect
your unit from the AC power source when
cleaning.
• The finish on your unit may be cleaned with a
dust cloth and cared for as other furniture.
General
Care and Maintenance User Instructions
“C “(L R14)1 .5V ”
“C “(L R14)1 .5V ”
“C “(L R14)1 .5V ”
“C “(L R14)1 .5V ”“C “(L R14)1 .5V ”
“C “(L R14)1 .5V ”
“C “(L R14)1 .5V ”“C “(L R14)1 .5V ”
Operation of Power Adaptor
1. Only use a common DC 6V/600mA
power adaptor (not included)
2. Connect the power adaptor to the
DC jack.
3. For Operation only with a
short-circuit-proof safety isolating
transformer according to EN61558-2-6
or toy transformer according to
EN61558-2-7.
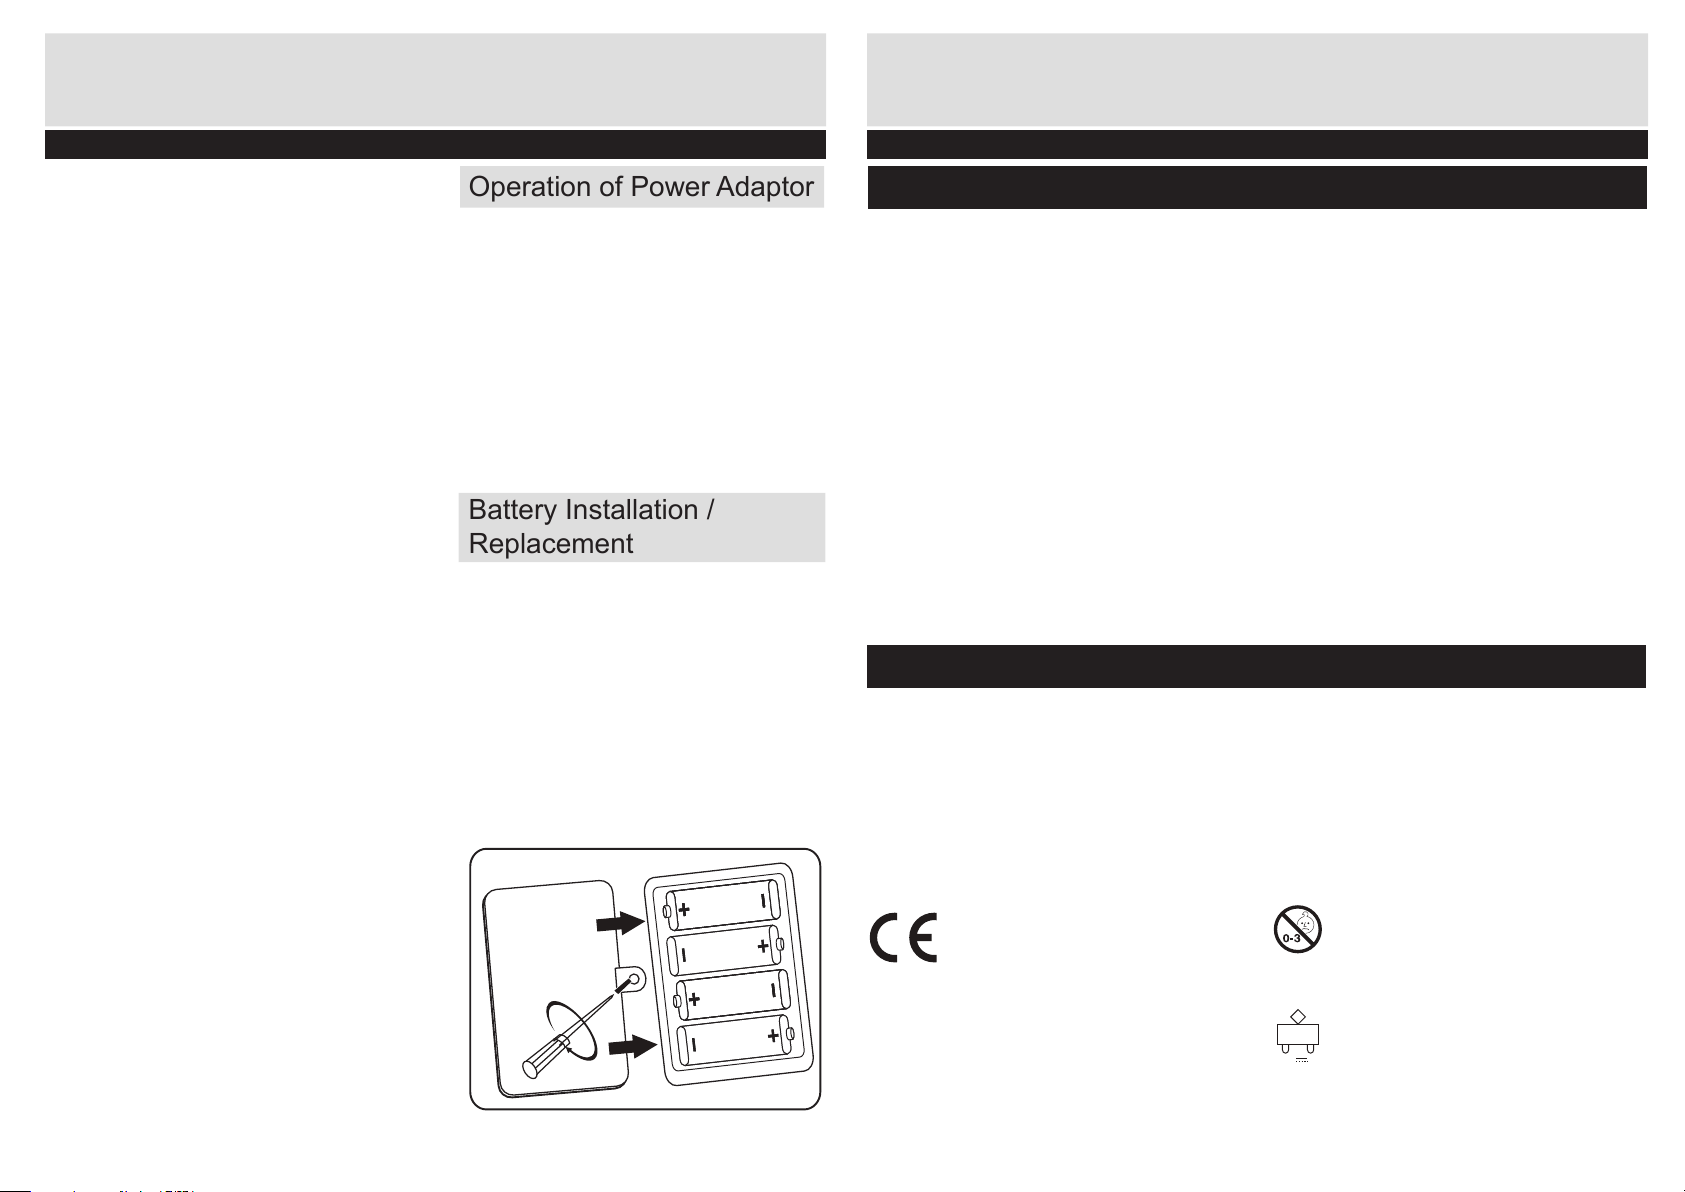
Battery Installation /
Replacement
1. Open the battery compartment : Loosen
the screw on the cover of battery
compartment with a screwdriver and
remove the cover.
2. Insert 4 x “C” Size (UM2 / LR14 1.5V)
type batteries (not included). Make sure
that you follow the polarity markings inside
the compartment!
3. Close the battery compartment and
tighten the screw.
disc to the outer edge of the disc, Never
wipe in circular motions.
• This unit is designed to play only compact
discs. Other discs may not conform to the
CD standard and may not play properly.
• Compact discs should be stored in their
cases after each use to avoid damage.
• Do not expose compact discs to direct
sunlight, high humidity, high temperatures, or
dust, etc. Prolonged exposure of extreme
temper atures can warp the compact disc.
• Do not stick or write anything on either side
of the compact disc.
• Sharp writing instruments or the ink may
damage the surface.
• Use caution when cleaning and wiping the
plastic parts.
• Mild soap and a damp cloth may be used on
the front panel.
5
6
DC 6V 600mA
WARNING: Not suitable for children
under 3 years due to small parts,
choking hazard and Strangulation
Hazard.
Use recommended type and rating of
external transformer only
Rules of using the CD player
Page 4
If you need help or have damaged or missing parts, call the Customer
Helpline: 08456 400 800
Produced for Chad Valley Toys.
Country of origin: China
Address: 489 - 499 Avebury Boulevard, Central Milton Keynes, MK9 2NW.
The symbol on the product or its
packaging indicates that this
product may not be treated as
household waste. Instead it should
be handed over to the applicable
collection point for the recycling of
electrical and electronic equipment.
By ensuring this product is
disposed of correctly, you will help
Disposal information
prevent potential negative consequences for
the environment and human health, which
could otherwise be caused by inappropriate
waste handling of this product. For more
detailed information about recycling this
product, please contact your local council
office, your household waste disposal service
or the shop where the product was
purchased.
7
Table/Troubleshooting
General
Cannot close the cover
• Is the disc properly secured in place?
Cannot play discs
• Is the battery exhausted?
• Is the power supply disconnected?
• Is there condensation on the lens?
(wait for about a few hours and then try again)
• Is the repeat single track function activated.
(see section repeat playback)
A single track repeat all the
times
Speaker does not produce
sound
• Is earphone plug being inserted to headphone jack?
• Is the microphone switched on?
• Is the microphone sound and master volume switch turned
to minimum volume level?
Headphone cannot hear
music
• Separate the unit from mobile phones.
• Have the headphone plug been inserted firmly?
• Is the plug dirty? (wipe away dirt on plug)
Problem
Check this
Before requesting service for this unit, check the chart below for possible cause of the problem
you are experiencing. If the remedies indicated in the chart do not solve the problem, get help
on customer helpline or consult your qualified professionals.
 Loading...