

Page 1
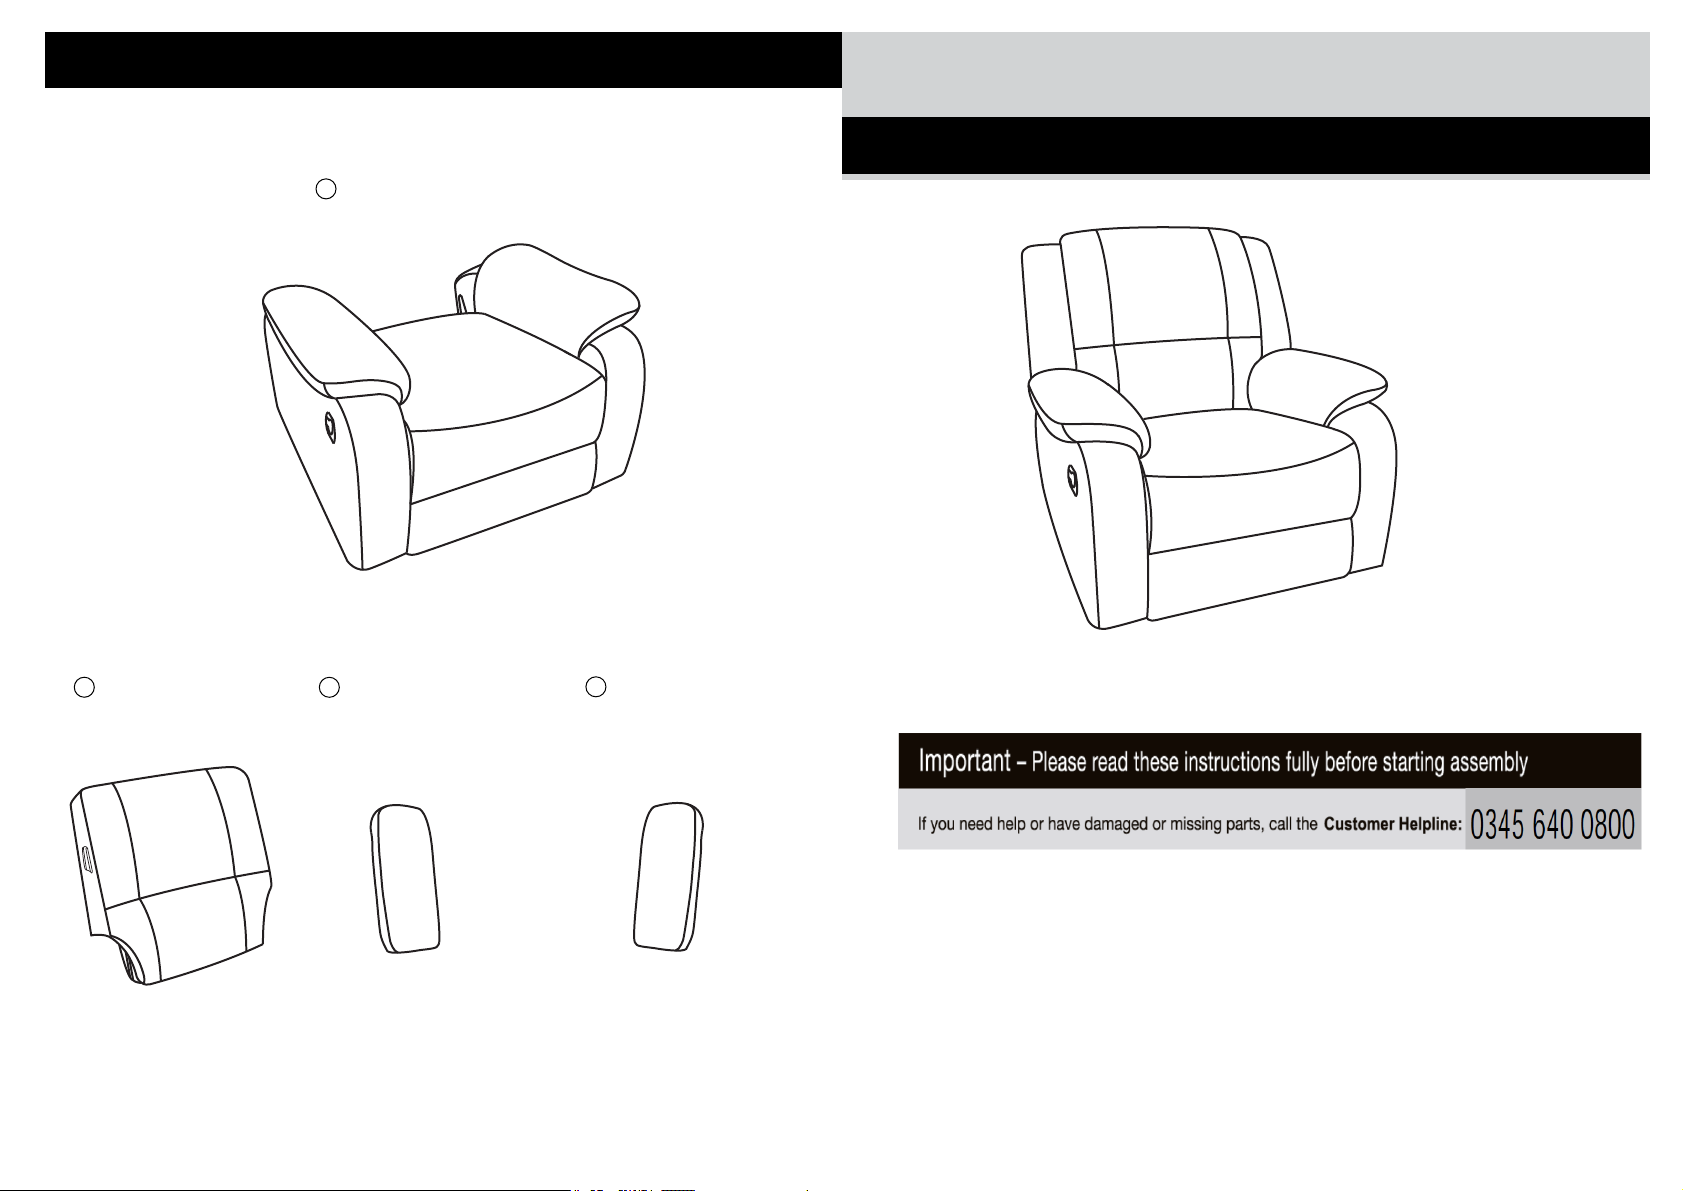
Components
BRUNO CHAIR
B
1 x
Back Rest
A
1 x Seat Cushion
1 x Left Ear
C
1 x Right Ear
D
Simple Assembly Instructions - Please keep for future reference
35538
339955
1. Read these instructions carefully and
familiarise yourself with the procedure
before assembling the unit.
2. Check that you have all the component
parts following the list on the back
cover and familiarise yourself with
each part before proceeding.
3. Take all the fittings out of the plastic bag
and separate them into their groups.
4. Ensure you have enough space to lay out
all the parts before assembly.
5. To avoid scratching it is recommended
that you assemble the unit on a soft
level surface.
Page 2
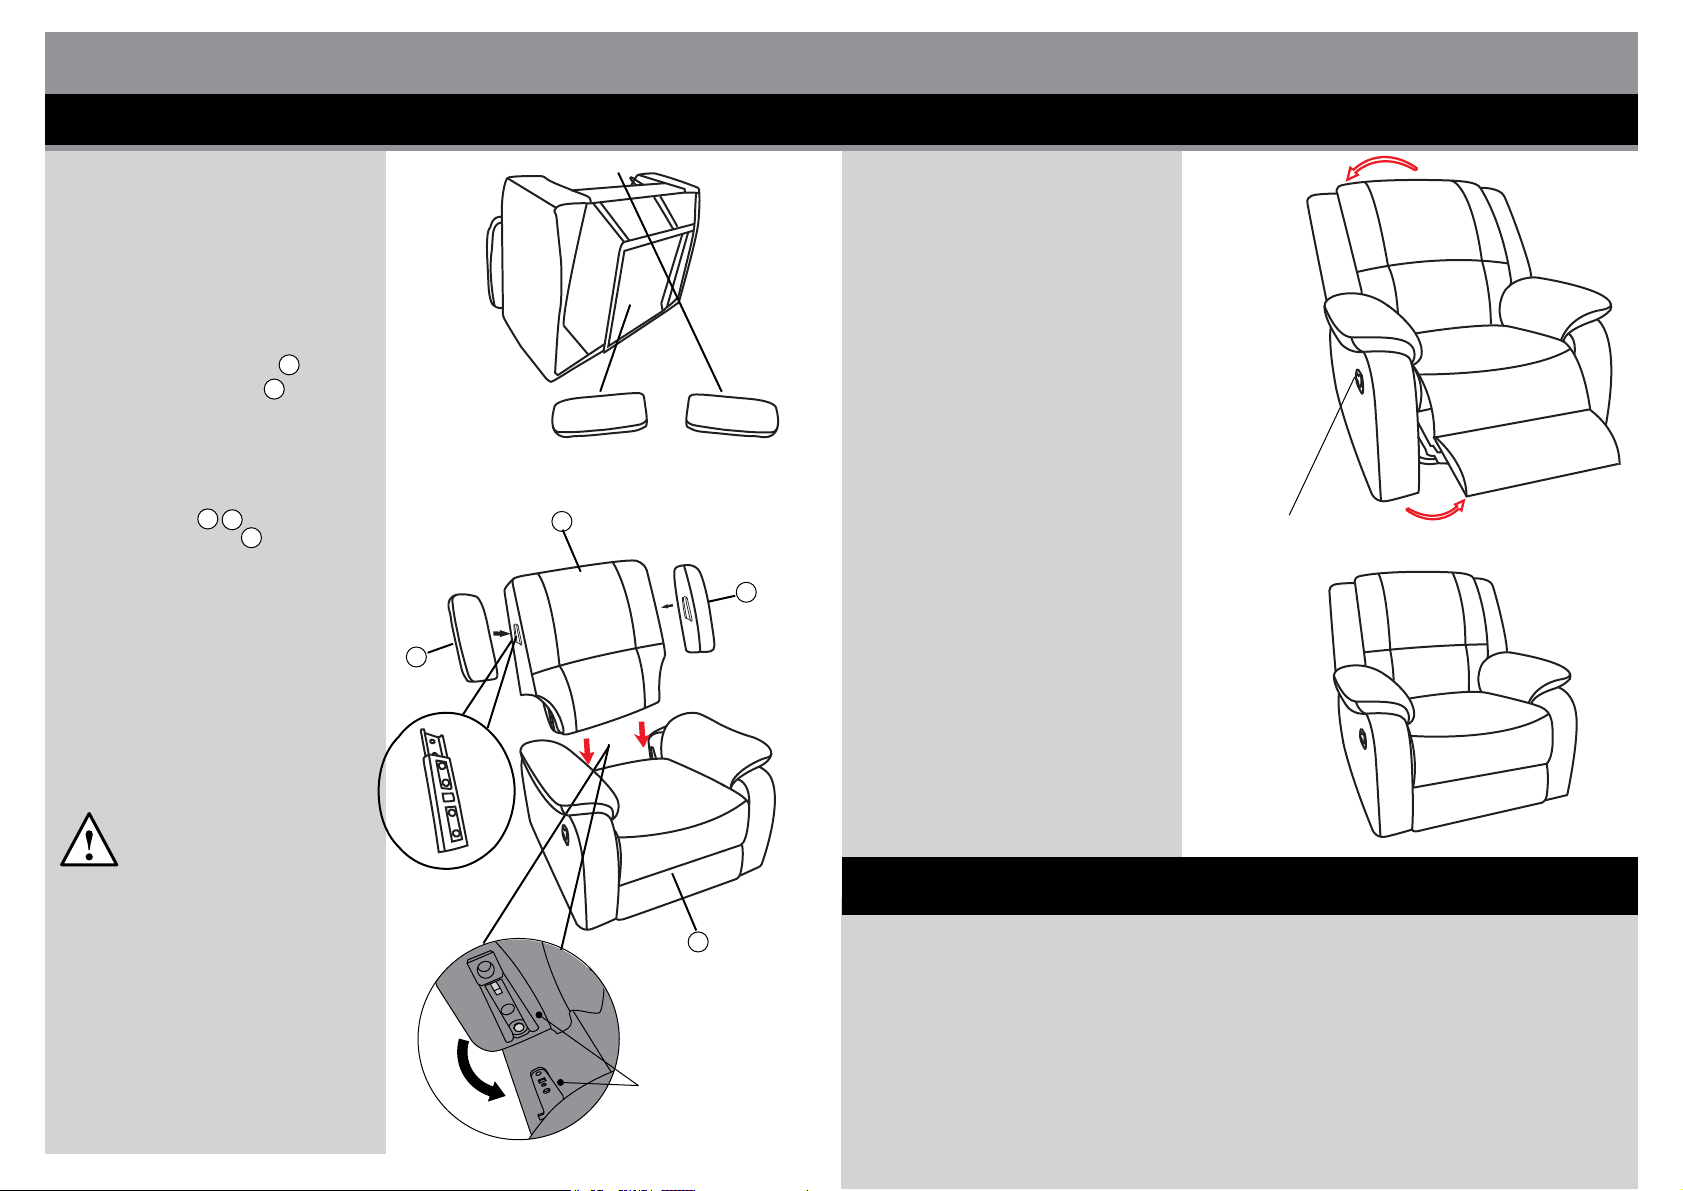
Assembly Instructions
NOTE: It would be useful to ask
someone to help you at this
stage.
1.
One ear is tied the bottom
of sofa,and the other is
put behind of seat cushion
See fig.1.
Attach the Back Rest
2.
to the Seat
Engage the metal locks and
push fit. You should hear them
lock
3.
Attach the ear
to the back cushion
See fig. 2.
4.
Fit the velcro cover on the back
rests onto the velcro on the
seat cushion.
Cushion
into position.
C
B
A .
D
B
.
C
Assembly Instructions
Stage 2 – Finishing the UnitStage 1 – Fitting the Unit
Back and Foot Rest Adjustment
This Chair features a reclining
back rest and raised foot rest.
You need to be sitting in the chair
to activate the features.
1. Pull the "Adjustment Lever" then
gently lean back. The chair will
recline and the foot rest will
automatically lift up.
See fig. 3.
fig. 1
B
D
2. Sit up and lock the foot rest.
The sofa return to the normal
position.
See fig. 3.
3. Adjust the recliner to your own
requirements.
Adjustment
Lever
fig. 4
fig.3
NOTE: Carefully line up the two
side metal locks. Ensure they
align correctly.
CAUTION:
- Beware of entrapment. Keep
hands and fingers clear of the
tilt mechanism when operating
the controls.
- Ensure that children or pets are
not playing or lying in the
way when the tilt
mechanism is
- Prevent children from
playing on the
furniture or with the
operated.
controls.
A
Metal Lock
fig. 2
4. Finally carefully place the unit in
the desired location.
See fig. 4.
Care and Maintenance
Safety
To avoid any risk of suffocation to animals or children dispose of the plastic
bags immediately.
Cleaning
As with all surfaces clean with a damp cloth and mild detergent, do not use bleach
or abrasive products.
Fitting
From time to time please ensure there are no loose screws on the product.
If you need help or have damaged or missing parts,call the Customer Helpline:
0345 640 0800
489-499 Avebury Boulevard Milton Keynes MK9 2NW,Argos Limited
 Loading...