

Page 1
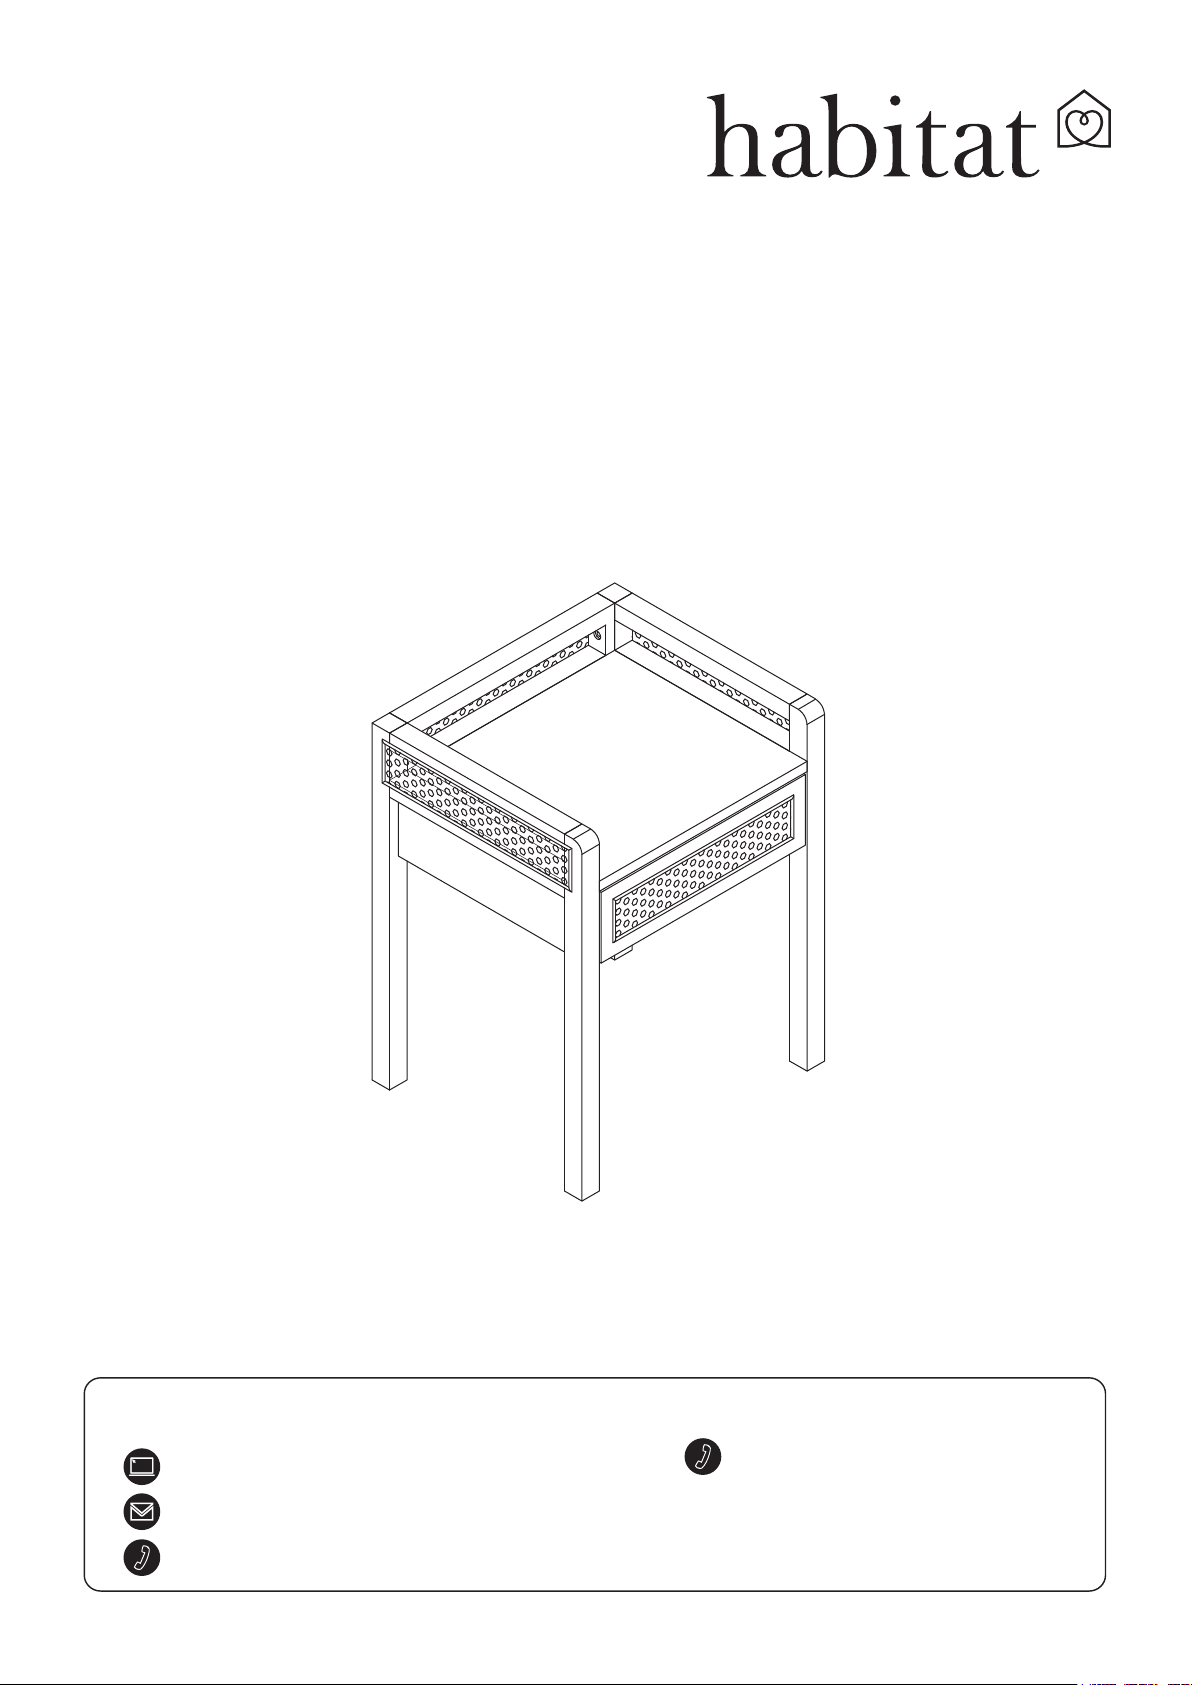
PEIO
Spare Parts
www.argos-support.co.uk
0370 112 1928
Customer Support
0345 640 2020
Issue 1 - 20/04/22
Page 2

Safety and Care Advice
Product Details
Peio cane 1Drw bedside 5643558 black
Peio cane 1Drw bedside 3296787 oak
IMPORTANT, RETAIN FOR FUTURE REFERENCE: READ CAREFULLY.
Keep children and animals
away from the work area, small
parts could choke if swallowed.
Make sure you have enough space
to layout the parts before
starting.
· This product has been
constructed to be used in the
domestic environment only and
not for commercial purposes.
Care and maintenance
Only clean using a damp cloth
and mild detergent. Do not use
abrasive cleaners.
Use a dry cloth to clean the
product, furniture polish is
not recommended.
Assemble the item as close
to its final position(in the same
room) as possible.
Assemble on a soft level
surface to avoid damaging the
unit or your floor.
From time to time check that there
are no loose screws, nuts or bolts.
If there are please re-tighten.
We do not
recommend the
use of power
drill/drivers for
inserting screws
as this could damage the unit.
Only use hand screwdrivers.
Parts of the assembly will be
easier with 2 people.
Dispose of all packaging
carefully and responsibly.
This product should not be
discarded with household
waste. Take to your local
authority waste disposal
centre.
Additional Guidance
● Assemble all parts and bolts loosely during assembly, only once the product is complete should you
fully tighten the bolts.
● Regularly check and ensure that all bolts and fittings are tightend properly.
Maximum loading weight 20kg.
•
● This product is compliant EN14749,BS4875-7.
● Any additional or replacement parts are obtained from the manufacturer.
Argos Limited, 489-499 Avebury Boulevard, Milton Keynes, MK9 2NW. Argos (N.I.) Ltd, Forestside Shopping Centre, Upper Galwally, Belfast,
United Kingdom, BT8 6FX. Argos Distributors (Ireland) Limited, Unit 7, Ashbourne Retail Park, Ballybin Road, Ashbourne, County Meath, Ireland.
1
Page 3
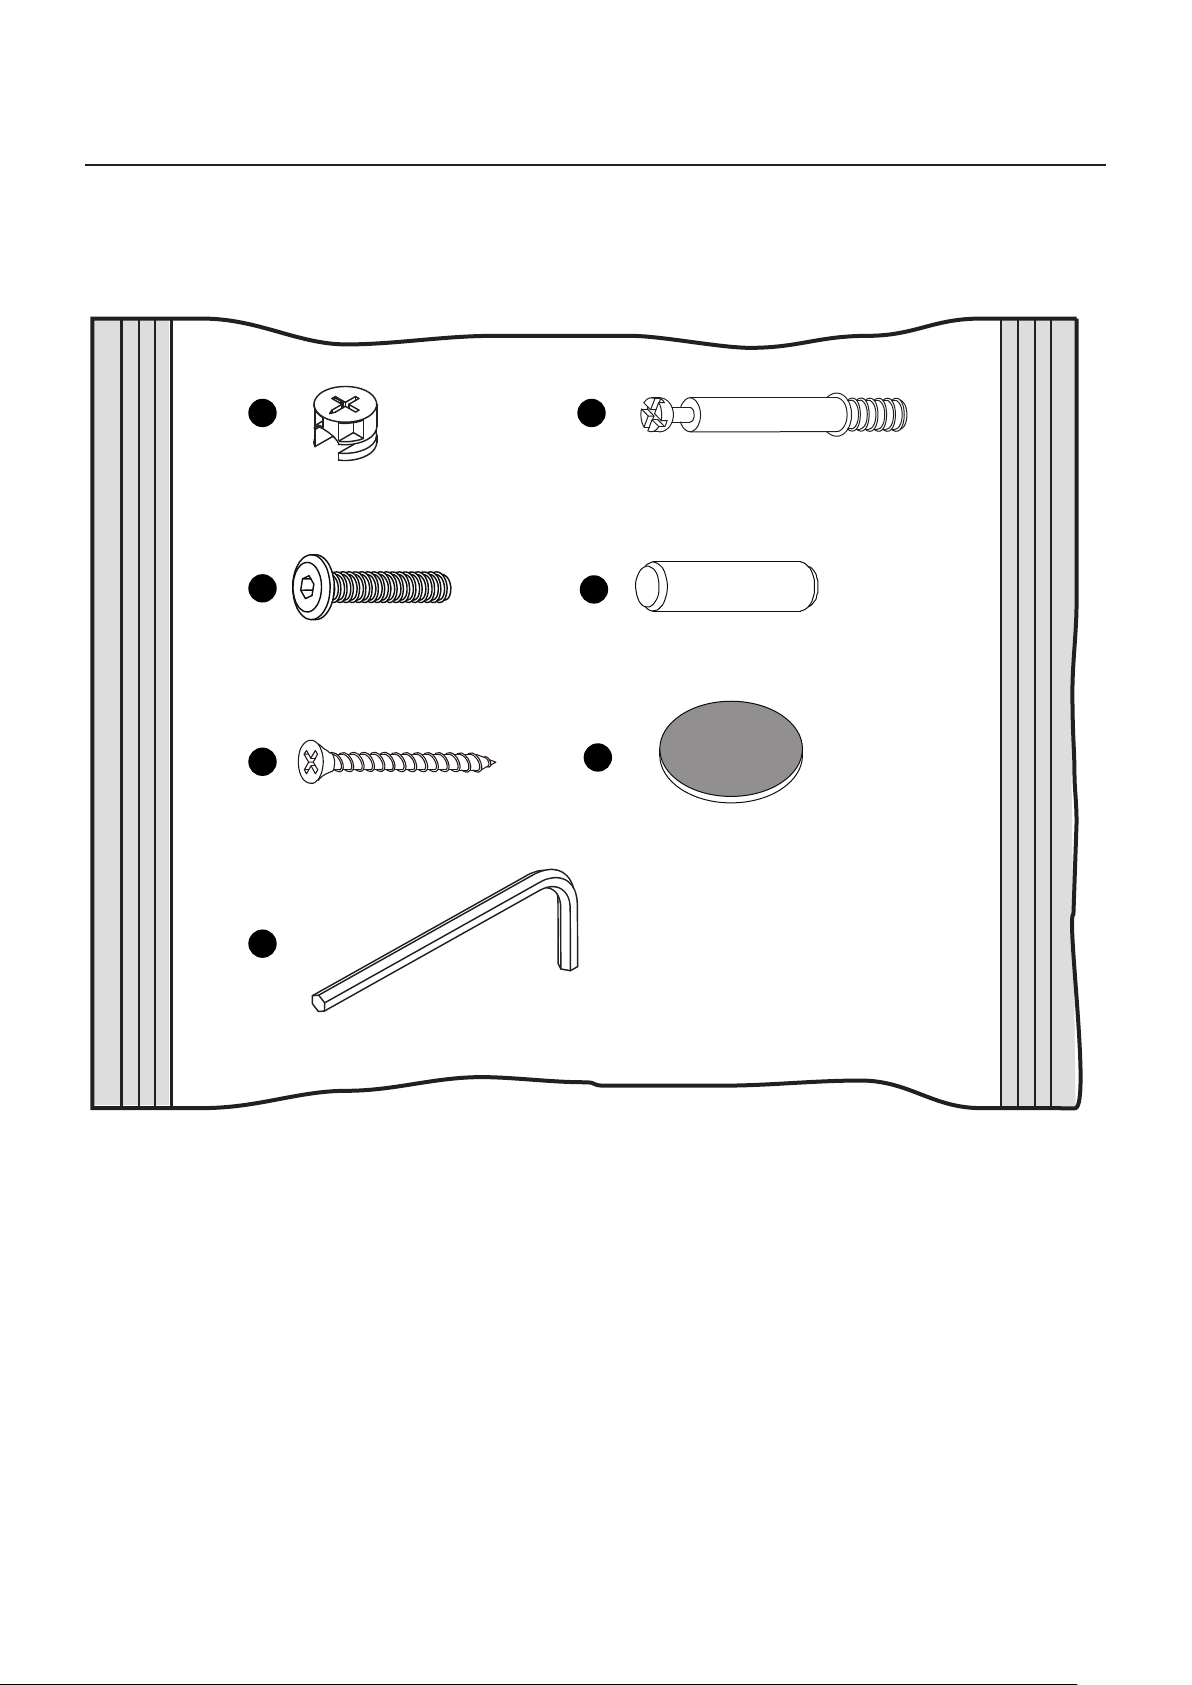
Fittings (Shown to scale)
Bag 1
A
Locking Nut x14
C
M6*25mm Bolt x 2
E
35mm Screw x 4
G
B
Metal Dowel x14
D
30mm Wooden Dowel x 12
F
Ø25mm Foot Pad x 4
M4 Allen Key x 1
2
Page 4

Tools required
Phillips screwdriver
(small)
Phillips screwdriver
(small & medium)
3
Page 5
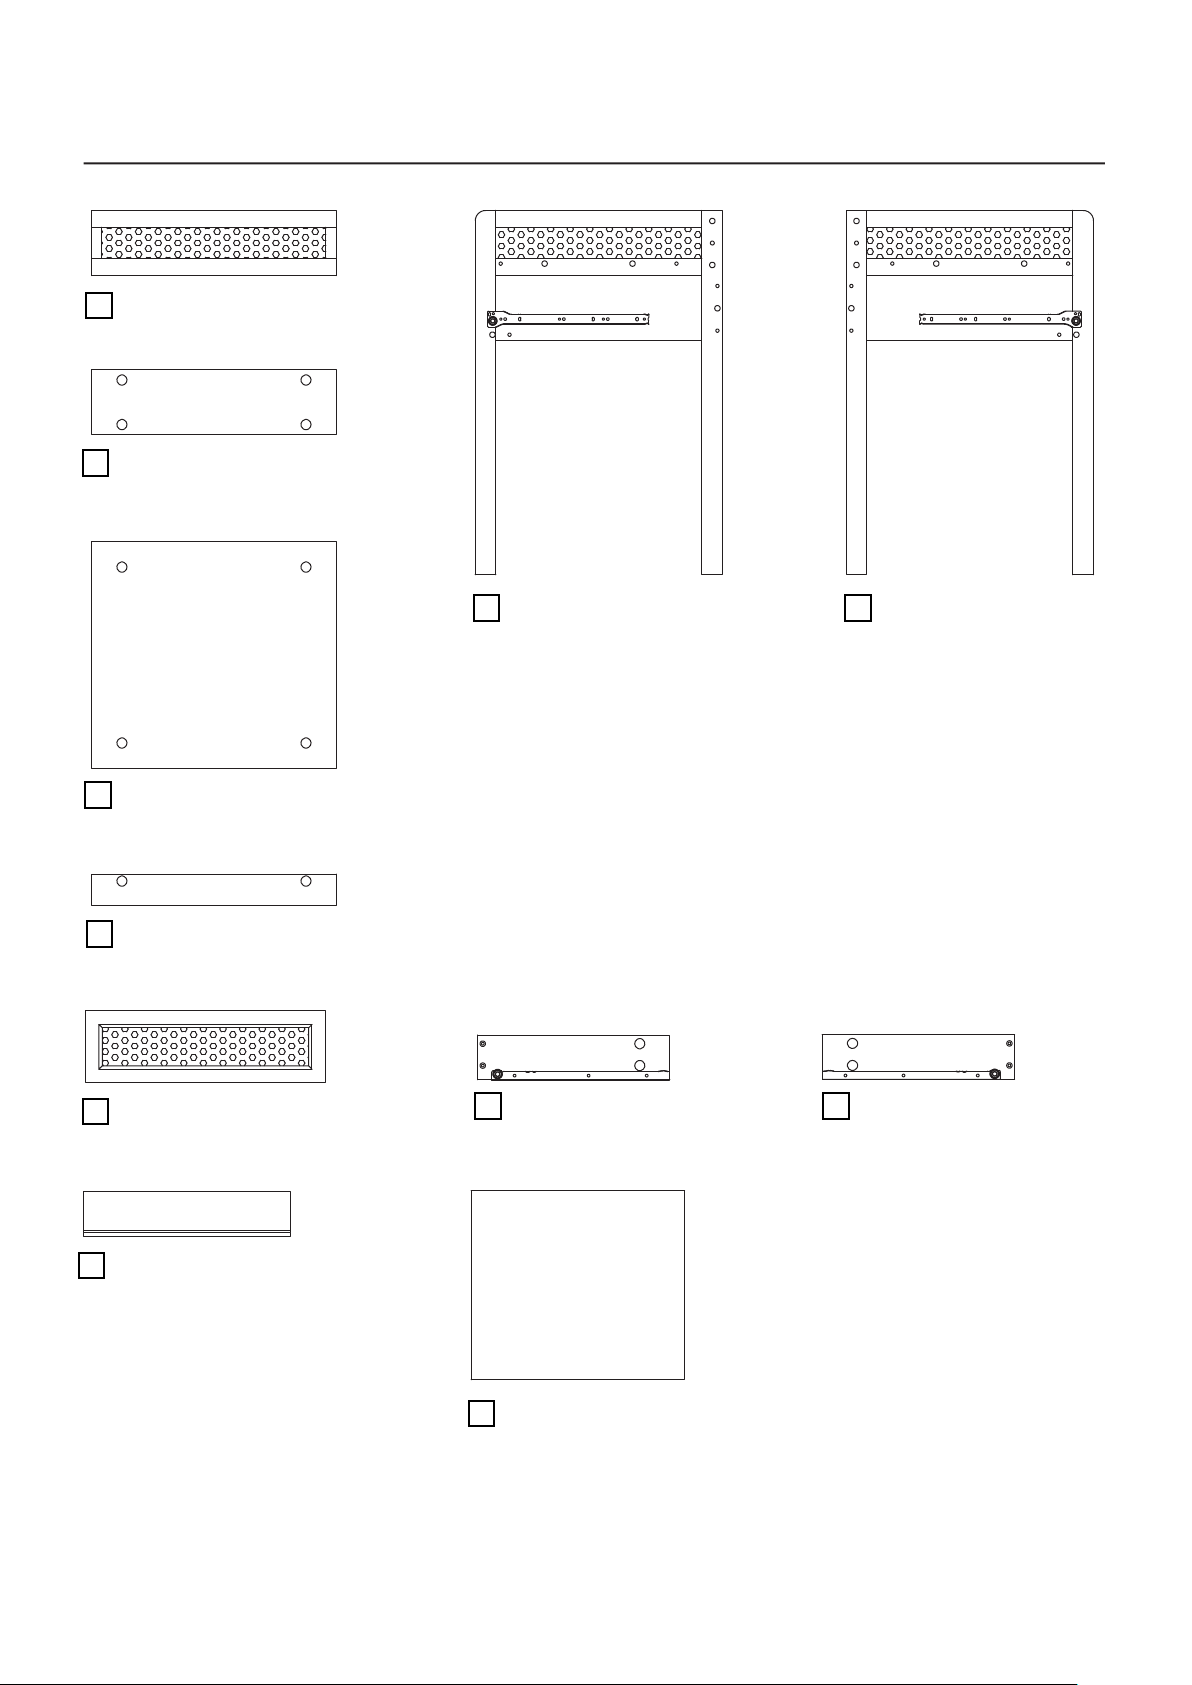
Panels
1
Back Frame x 1
(356 x 95mm)
2
Back Panel x 1
(356 x 95mm)
3
Top Panel x 1
(356x 330mm)
Rail (356 x 45mm) x 16
7
Drawer Front x 1
(350 x 105mm)
4
Left Side Frame x 1
(530 x 360mm)
Drawer Left Side x 1
8 9
(280 x 67mm)
Right Side Frame x 1
5
(530 x 360mm)
Drawer Right Side x 1
(280 x 67mm)
Drawer Back x 1
10
(303 x 67mm)
11
Drawer Bottom Panel x 1
(314x 273mm)
4
Page 6
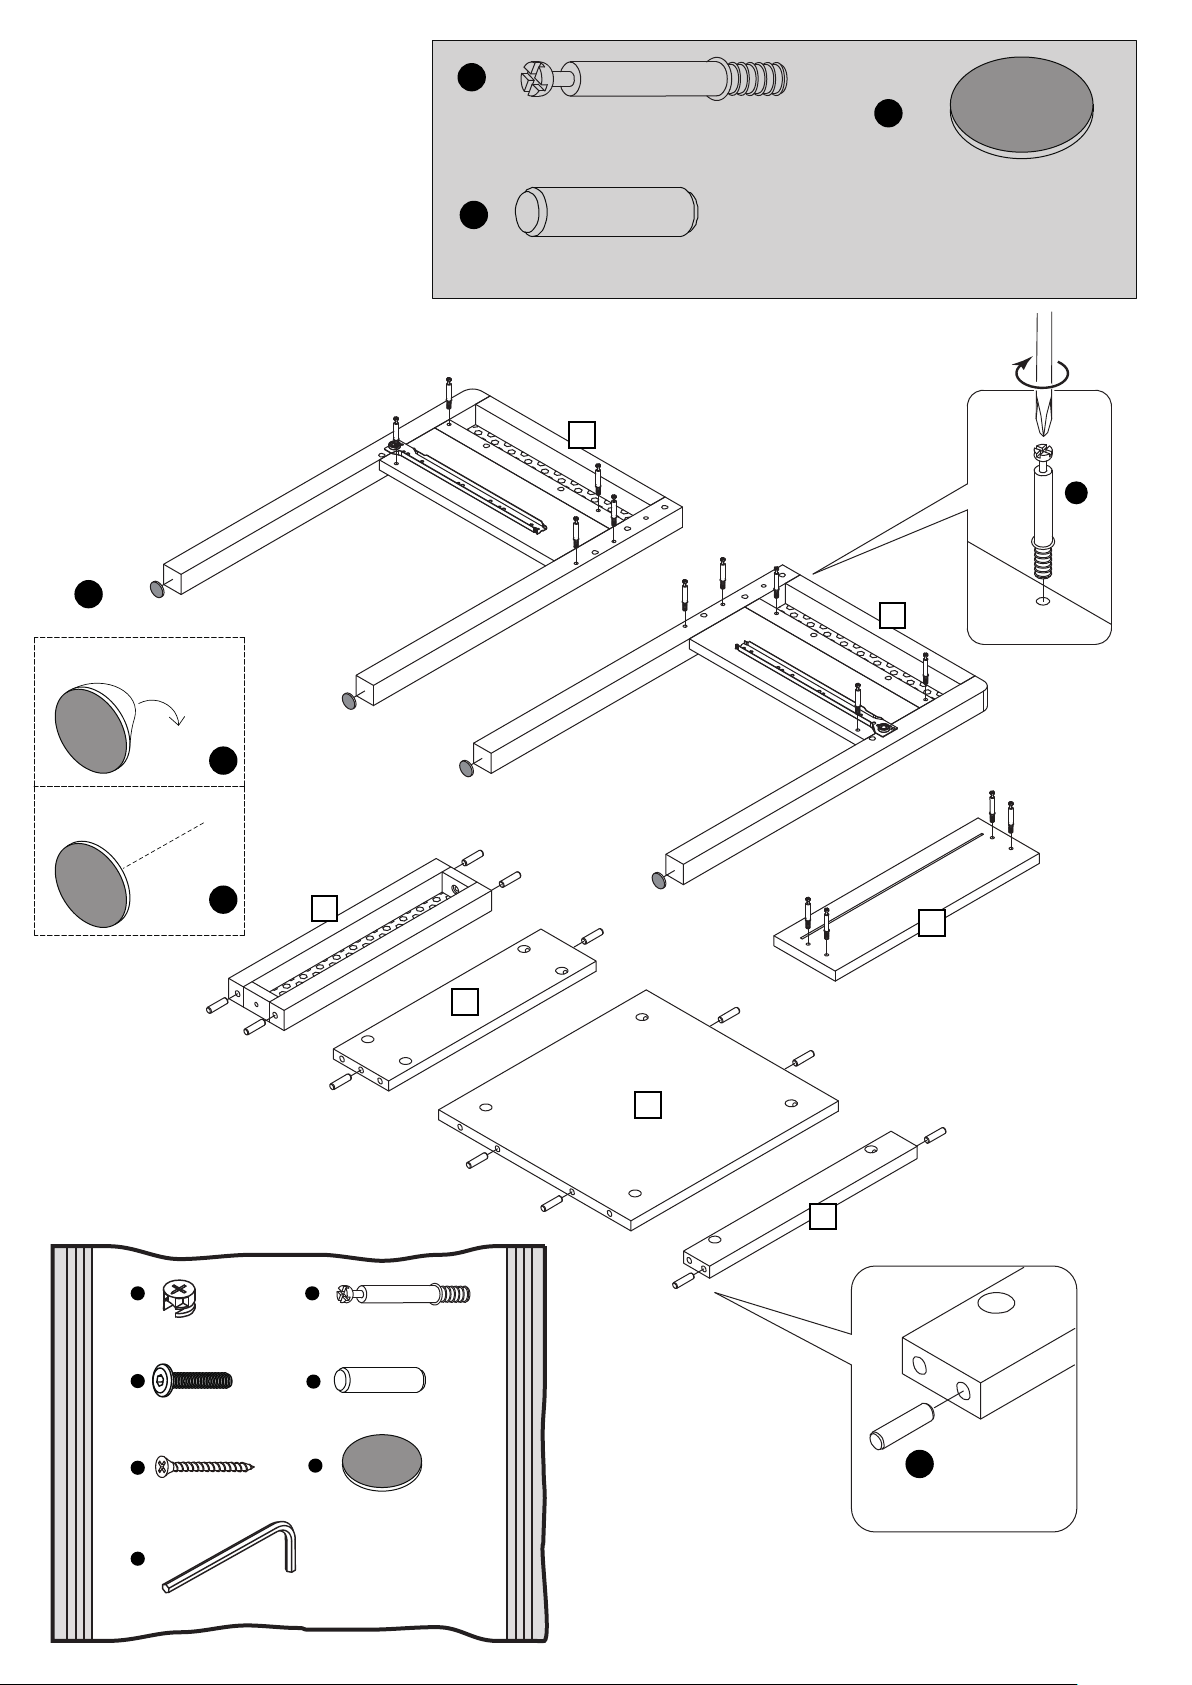
B
1
F
x4
1
Peel off
the back
Metal Dowel x14
D
30mm Wooden Dowel x 12
4
F
Ø25mm Foot Pad x 4
B
5
2
A
Locking Nut x14
F
F
1
B
Metal Dowel x14
7
2
3
6
C
M6*25mm Bolt x 2
E
35mm Screw x 4
G
M4 Allen Key x 1
D
Ø8*30mm Wooden Dowel x 12
F
Ø25mm Foot Pad x 4
D
5
Page 7
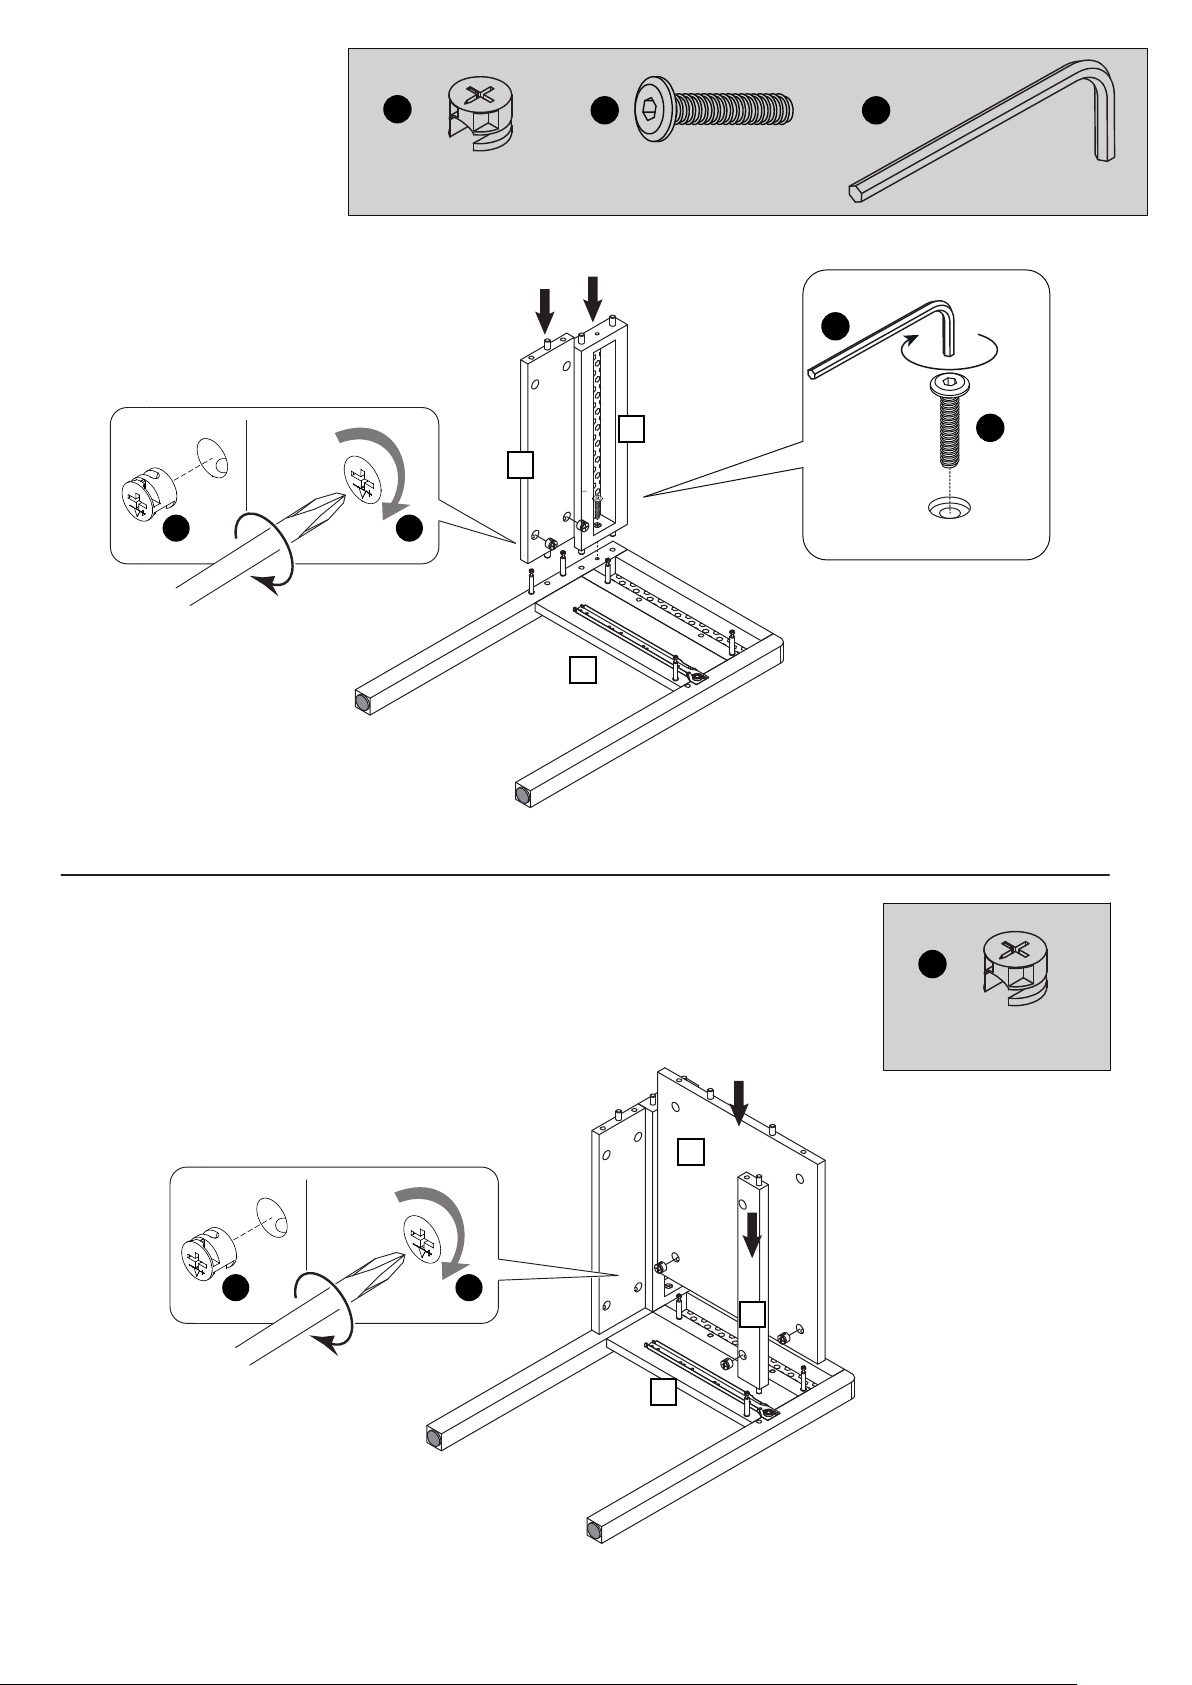
A
C
G
2
Locking Nut x2
A A
M6*25mm Bolt x 1
G
1
2
5
M4 Allen Key x 1
C
3
A
Locking Nut x 3
3
A A
6
5
6
Page 8
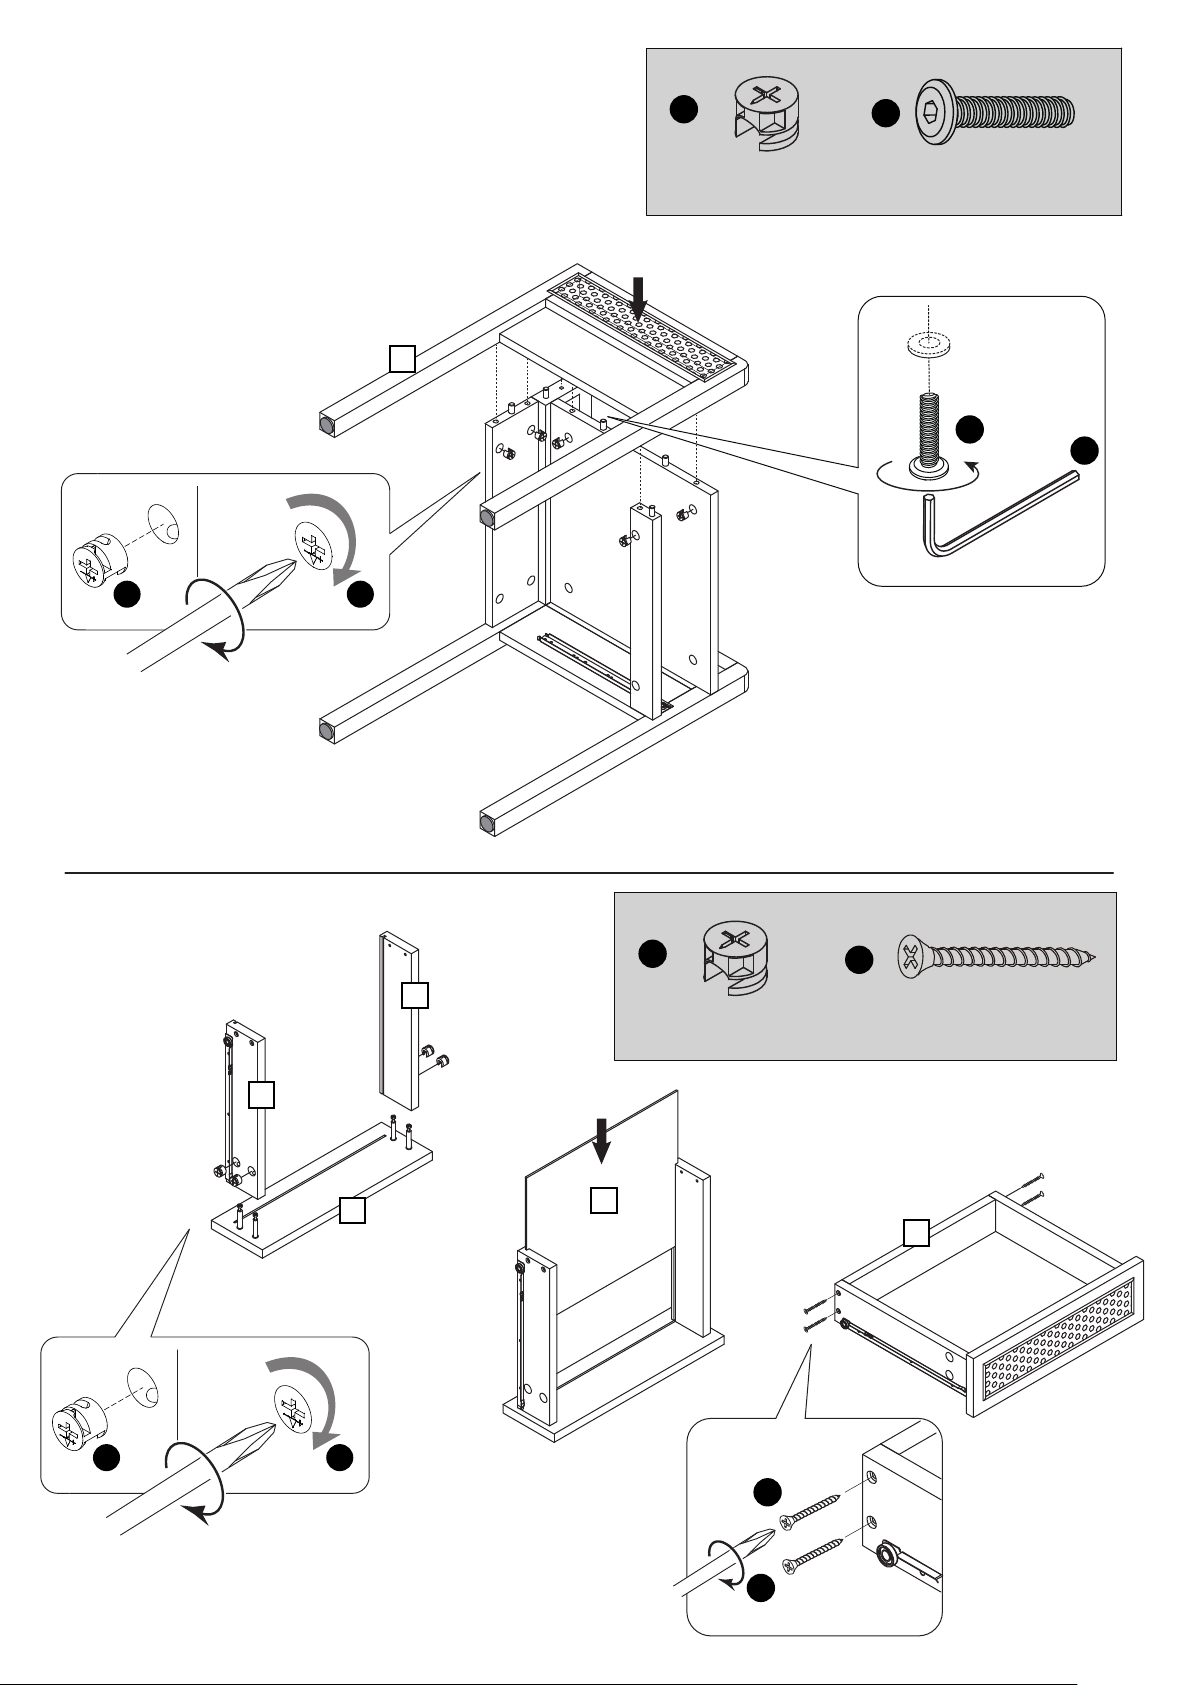
A
C
4
A A
Locking Nut x 5
4
M6*25mm Bolt x 1
C
G
5
8
A A
A
9
Locking Nut x 4
7
11
E
E
35mm Screw x 4
10
E
7
Page 9
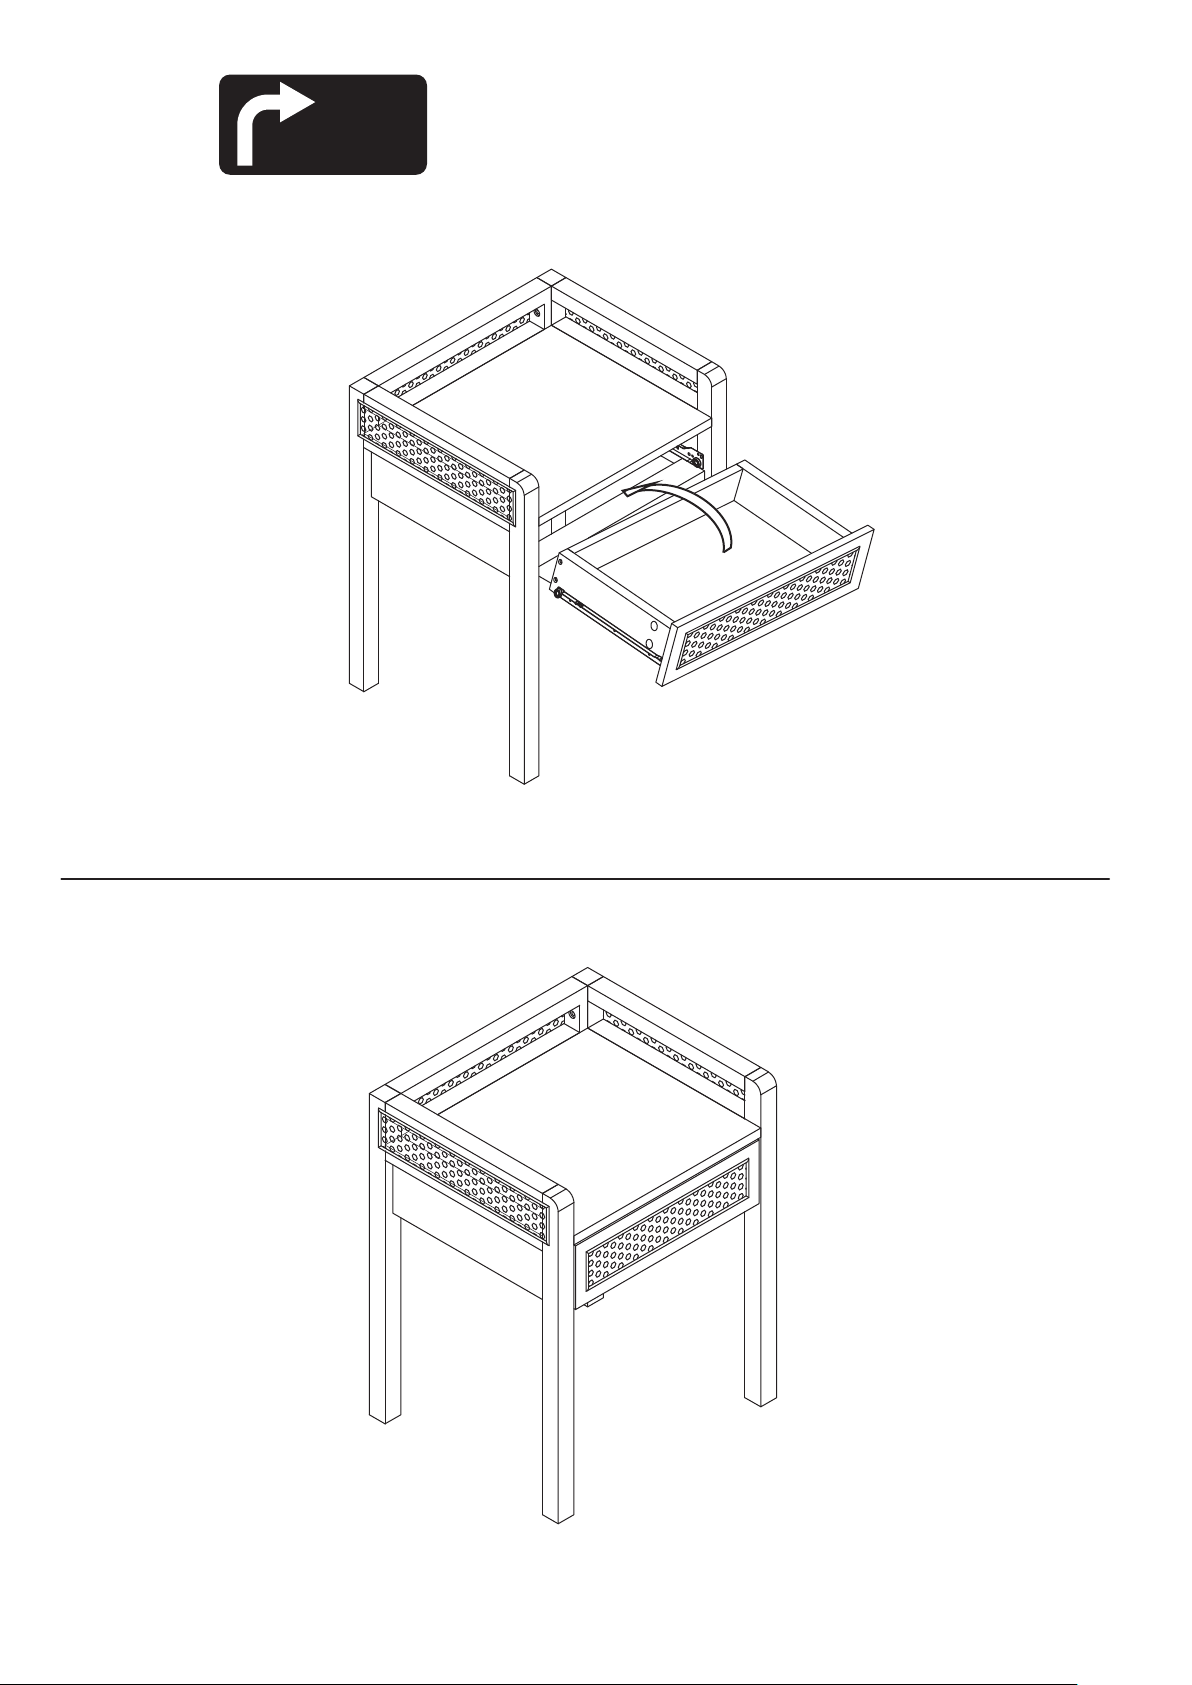
6
Turn
Product
7
Assembly is complete.
8
 Loading...