

Page 1
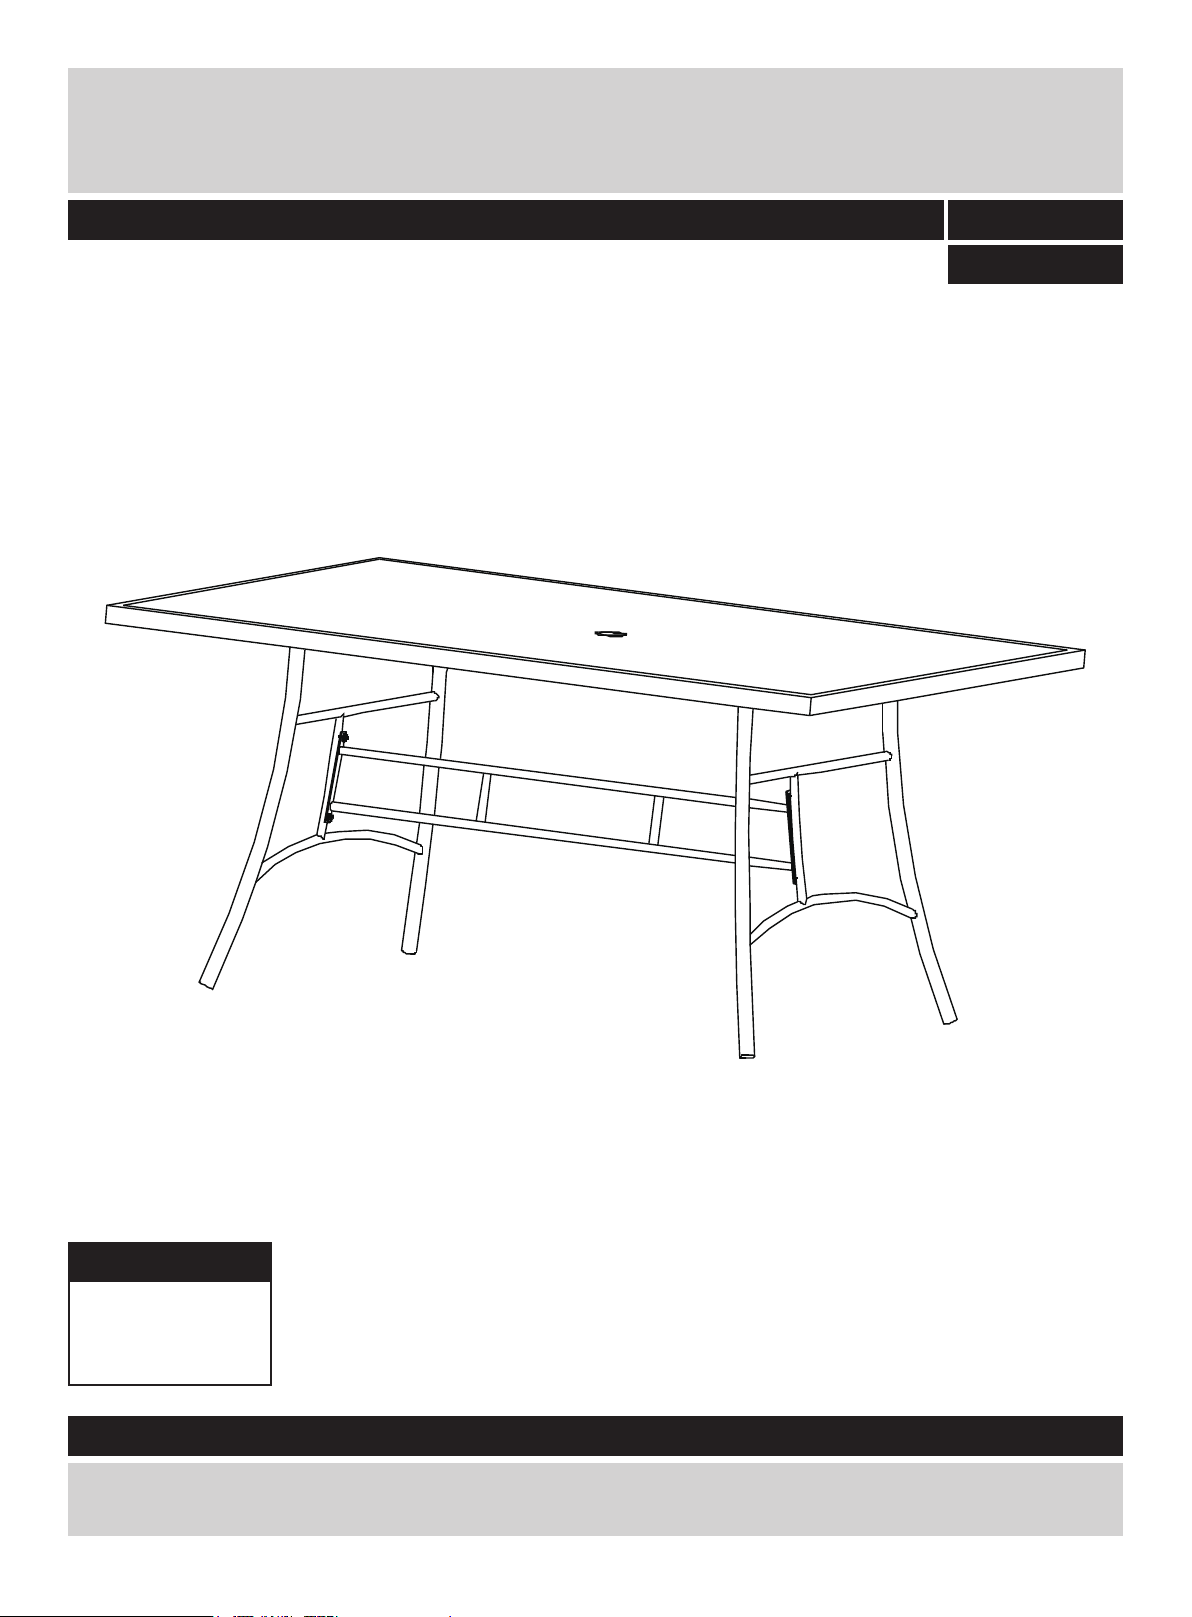
elbaT retaeS 6 tceR ila M
Assembly Instructions -
Please keep for future reference
149123
292/2117
Dimensions
Width - 100cm
Depth - 170cm
Height - 74cm
Important –
Please read these instructions fully before starting assembly
03450 778 888 :enilpleH remotsuC eht llac ,strap gnissim ro degamad evah ro pleh deen uoy fI
Issue 1 - 26/05/10
Page 2
This product is
manufactured from
toughened safety glass.
In the unlikely event that
the glass fails it will break
in to a large number of
small fragments that may
be spread over a wide
area. This is a feature of
toughened glass,
designed to remove the
risk of injure from glass
breaking into large shards.
If the glass is chipped
or broken, stop using the
product and consult the
manufacture
Check you have all the
or supplier.
components and tools
listed on page 2.
Remove all fittings from
the plastic bags and
separate them into their
groups.
Keep children and
animals away from the
work area, small parts
could choke if swallowed.
Make sure you have
enough space to layout
the parts before starting.
Do not stand or put
weight on the parts during
assembly, this could
cause
damage.
Assemble on a soft
level surface to avoid
damaging the unit or your
floor.
Dispose of all packing
carefully and responsibly
Do not sit or stand upon
horizontal glass surface.
Do not place very hot or
very cold items on the
glass
thick tablemats are used to
prevent such items from
coming into contact with
the glass.
Warning:
weights approximately
32.5 kgs.
Please lift with care
unless adequately
The unit
.
.
Wash frame parts with
mild soap and water, rinse
thoroughly, and dry frame
completely. Do not use
b leach, acid, or other
solvents on the frame
parts.
Wash glass with mild
soap and water, rinse
thoroughly, and dry glass
completely.
When moving the table,
remove the umbrella. Do
not drag.
We recommend the use
of furniture covers when
not in use.
Do not use the glass as
chopping surface. Do not
strike t
or pointed items.
he glass with hard
In order to prolong the
life and beauty of your
table, we recomm end it be
stored in a dry and
protected area during off
season periods.
Do not use washing
powders or any abrasive
substances which may
scratch the surface.
Page 3
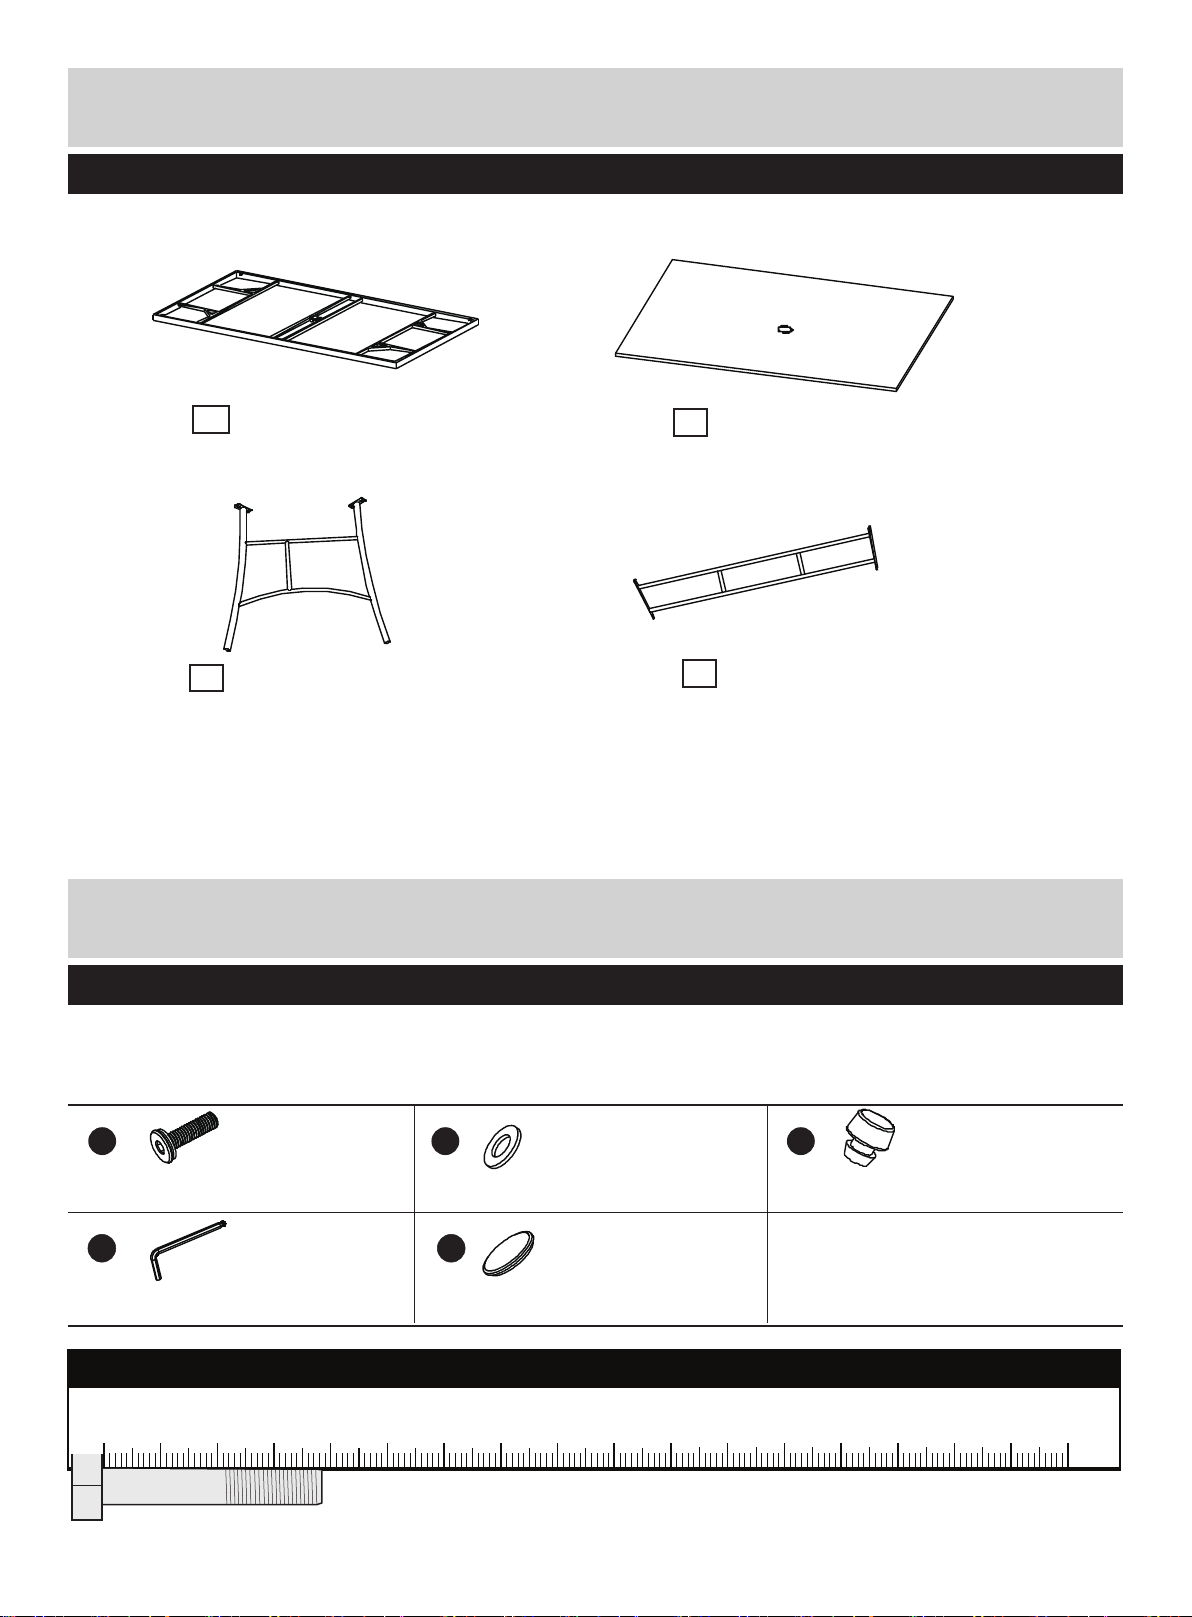
Components - Parts
Please check you have all the parts listed below
1
Table top x 1
2
Glass x 1
3
Table leg with panel x 2
Components - Fittings
Please check you have all the fittings listed below
Note:
The quantities
A
Screw x 12
Allen key x 1
below are the correct amount to complete the assembly.
B
Metal
washer x 12
ED
(Prefixed on the table top)
Plastic
cap x 1
4
Panel x1
C
(Prefixed on the table rim)
Plastic support x 18
Ruler - Use this ruler to help correctly identify the screws
105
0 5 10 15 20 25 30 35 40 45 50 55 60 65 70 75 80 85 90 95 100
110 115 120 125 130 135 140 145 150 155 160 165 170
2
Page 4
Assembly Instructions
Step 1
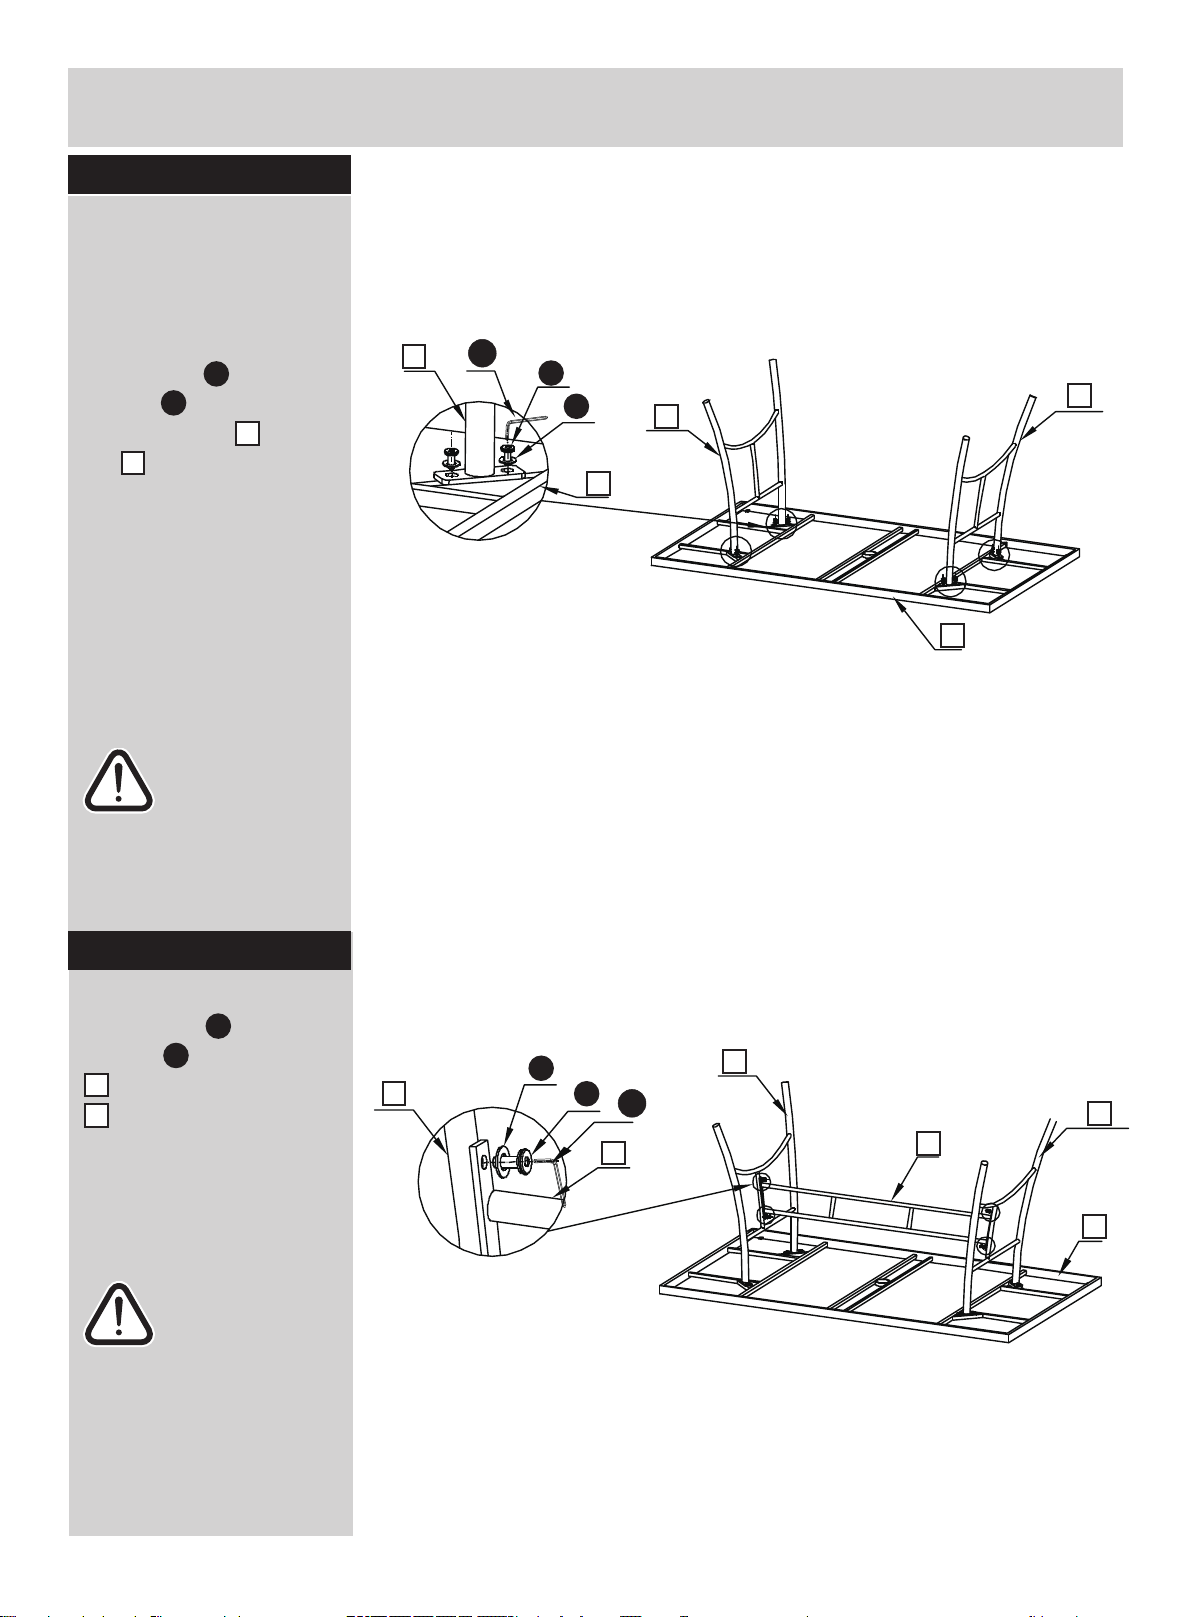
Assembly frame
Suggest to complete this
product assembly by two
person.
Use screws A and metal
3
washer B to fix 2 table
legs with panel 3 to table
top 1 .
D
A
B
1
3
1
3
Important:
Do not fully
tighten all screws
until assembly is
complete.
Step 2
Use screws A and metal
washer B to fix the panel
4 to table legs with panel
3 .
Important:
Do not fully
tighten all screws
until assembly is
complete.
B
3
A
D
4
3
3
4
1
3
Page 5
Assembly Instructions
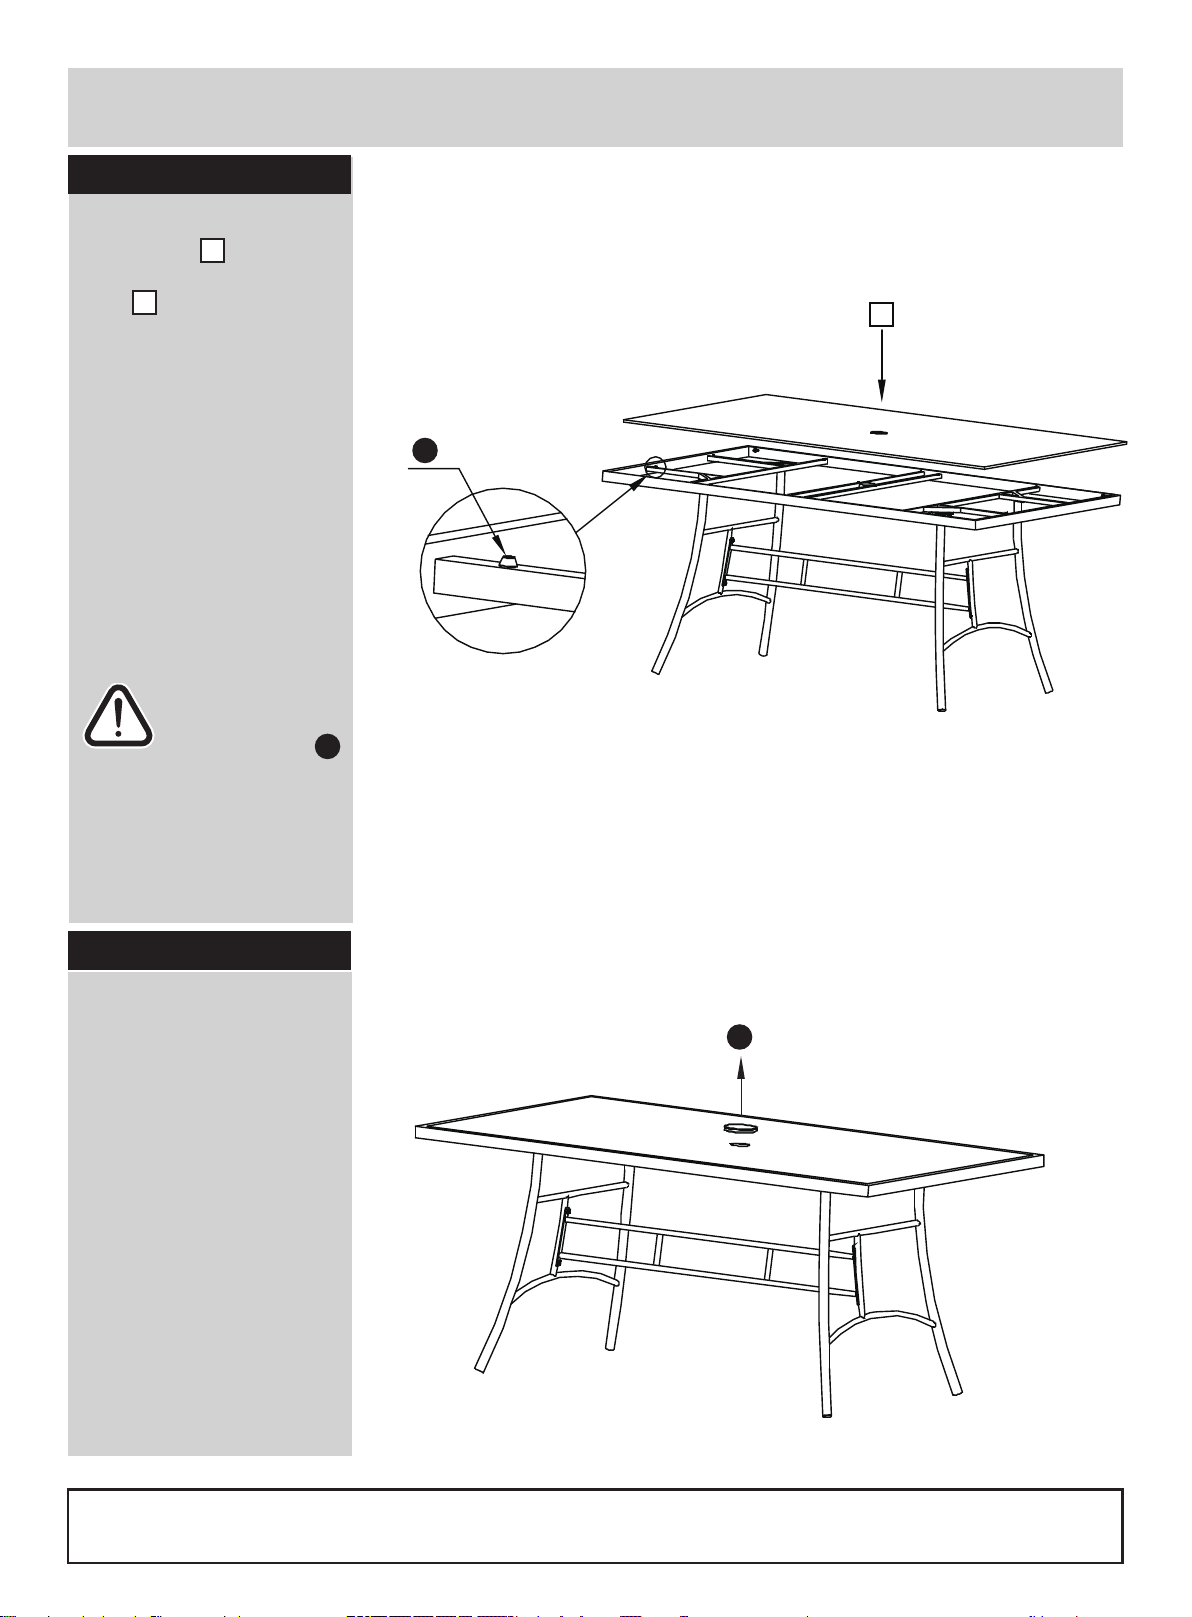
Step 3
Turn the top 1 to its up
right position and put on the
glass 2 .
C
Important:
Make sure the
plastic support
not detached from
table rim.
C
2
Step 4
Please remove the cap if
you want to insert parasol.
Warning:
The parasol must be
placed into the parasol's
base if the table set need
to match a parasol.
Assembly is complete.
If you need help or have damaged or missing parts, call the
Homebase Limited
489-499 Avebury Boulevard Saxon Gate West Central Milton Keynes Bucks,MK9 2NW
E
03450 778 888 :enilpleH remotsuC
4
 Loading...