

Page 1
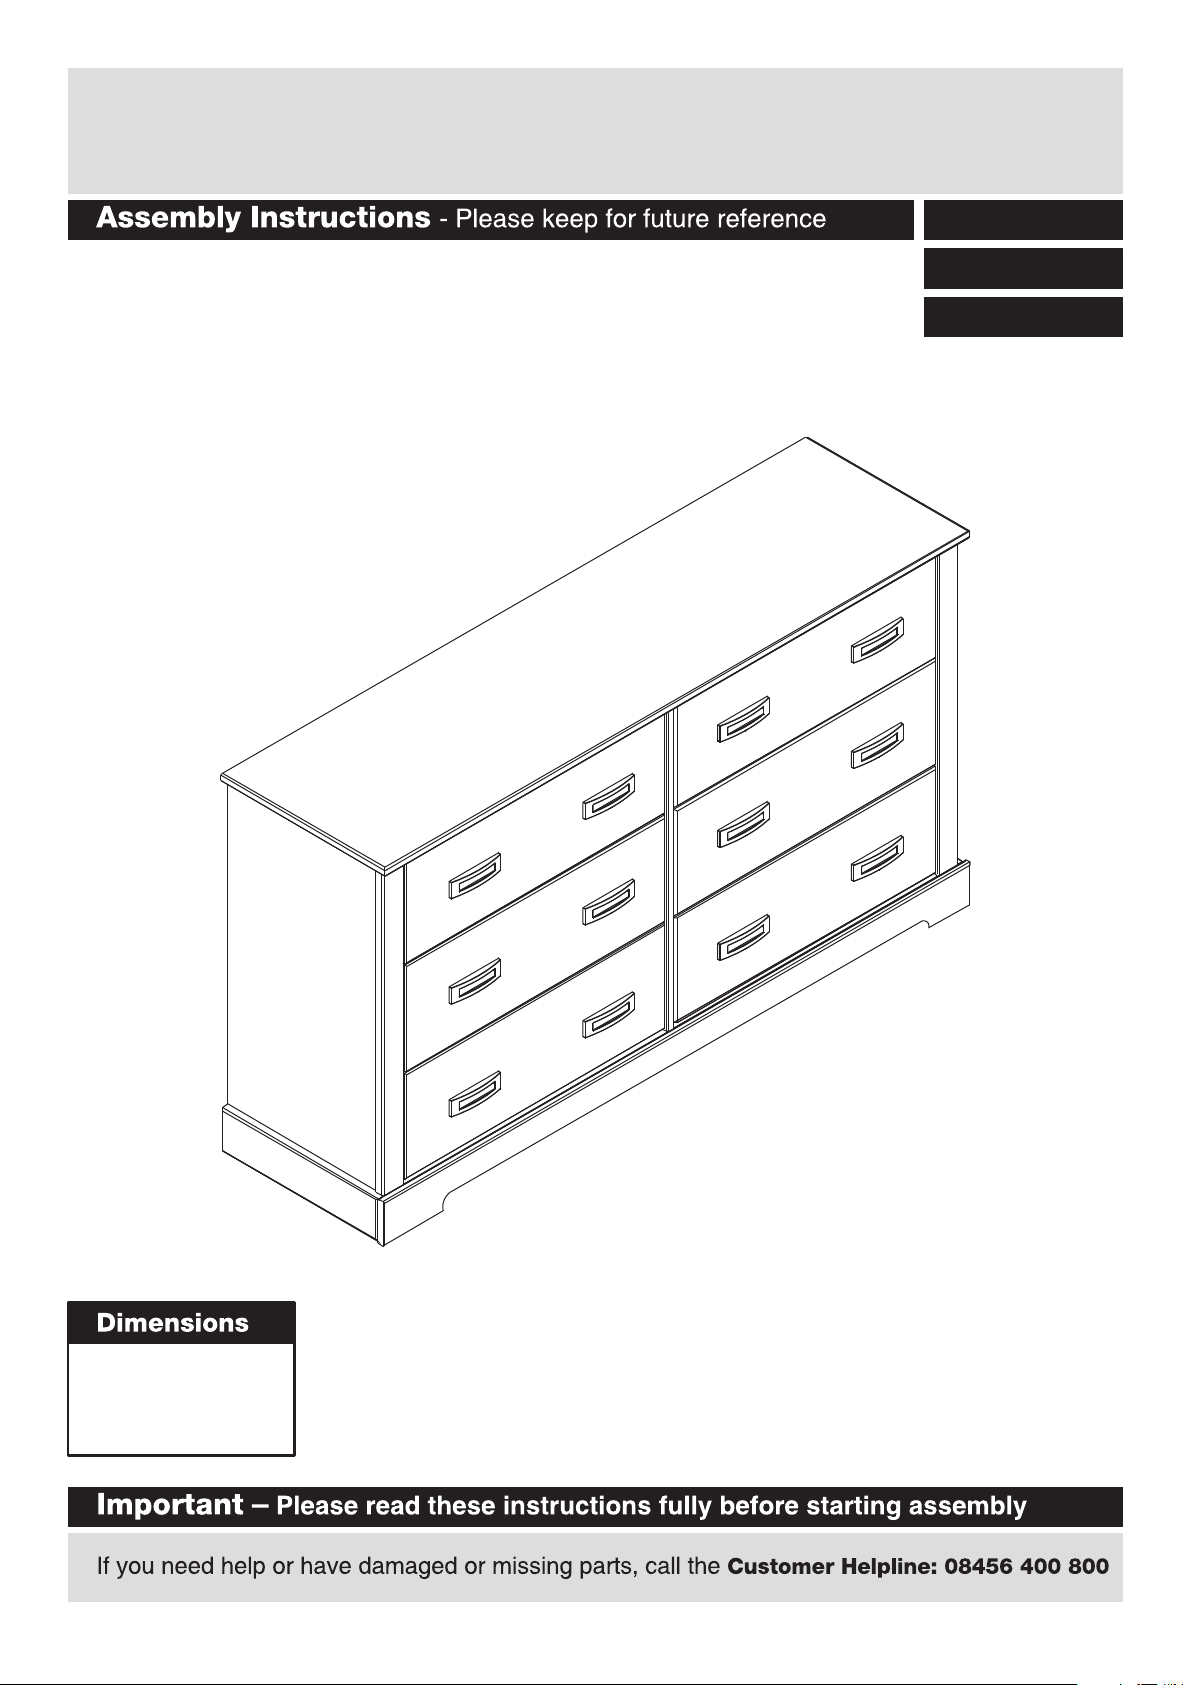
Mendoza - 3+3 Drawer Chest
241/9132
245/8746
248/8589
Width - 140.2cm
Depth - 39.4cm
Height - 78.5cm
Issue 1 - 12/09/12
Page 2
Page 3
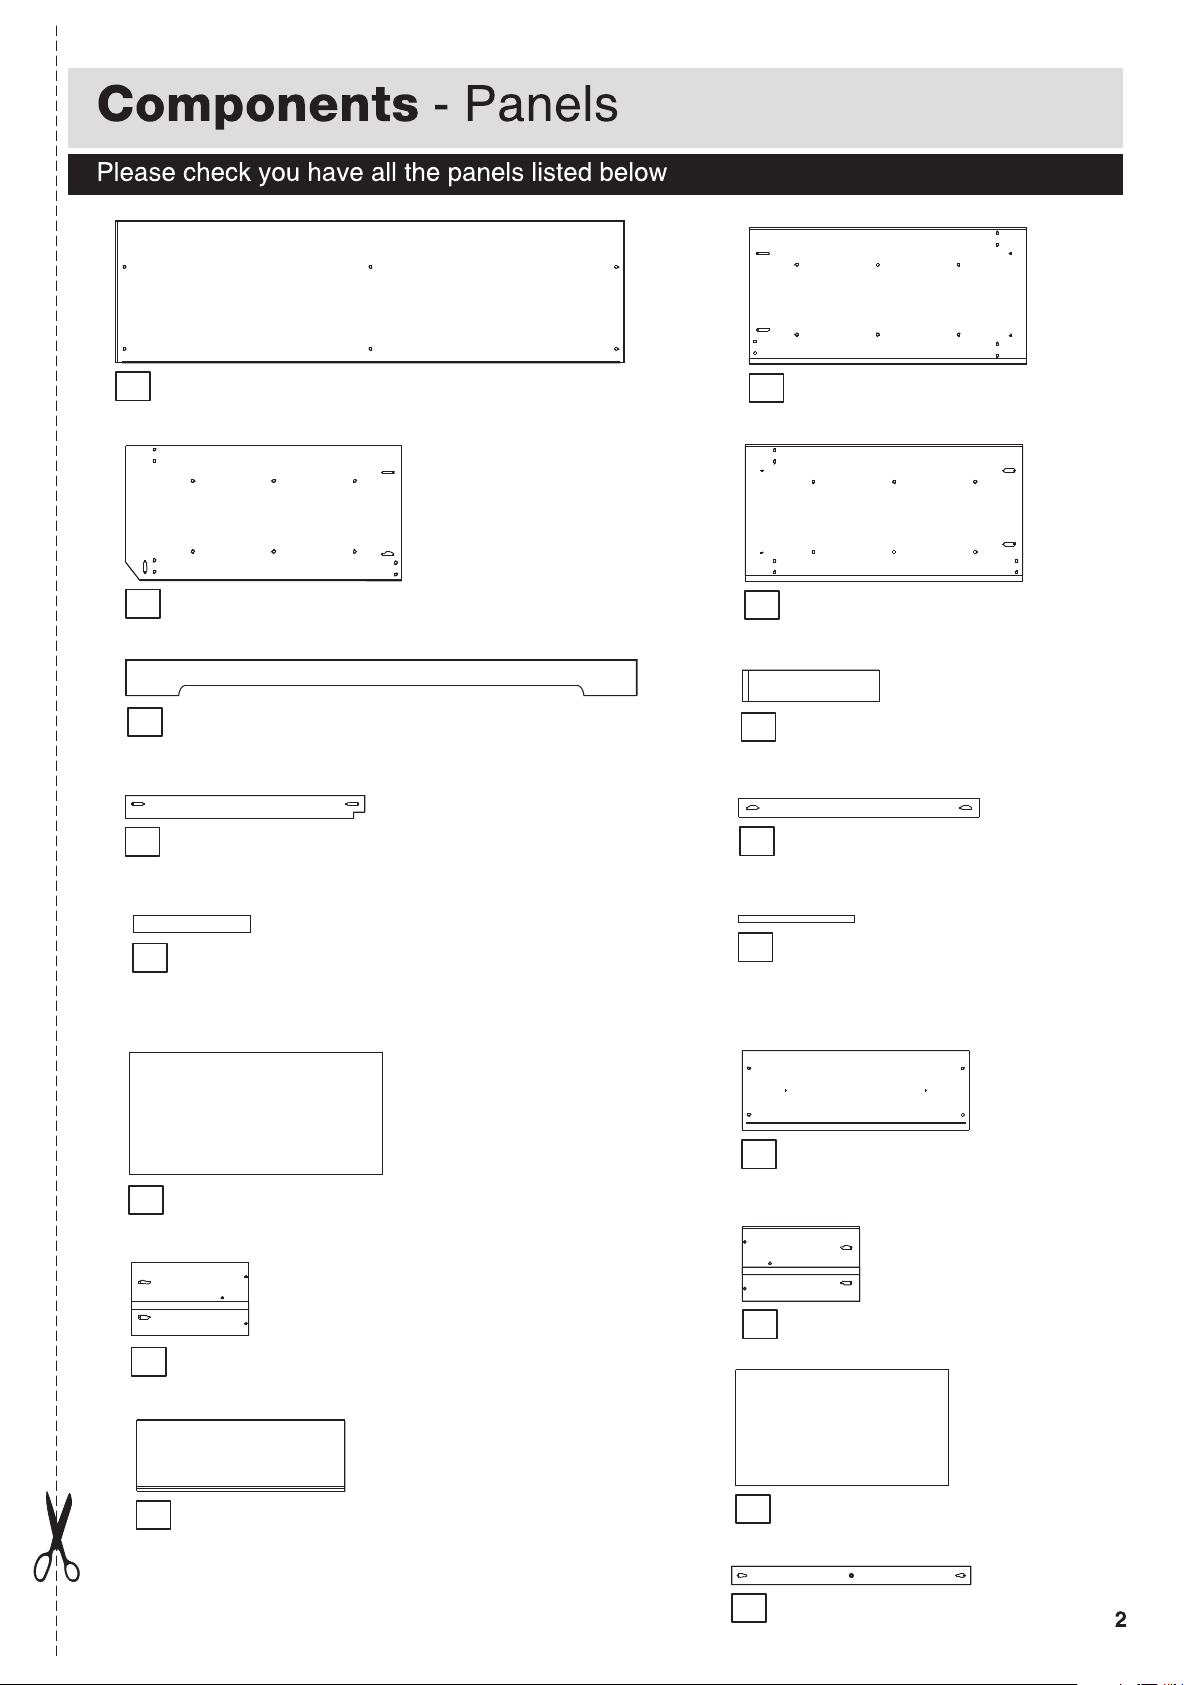
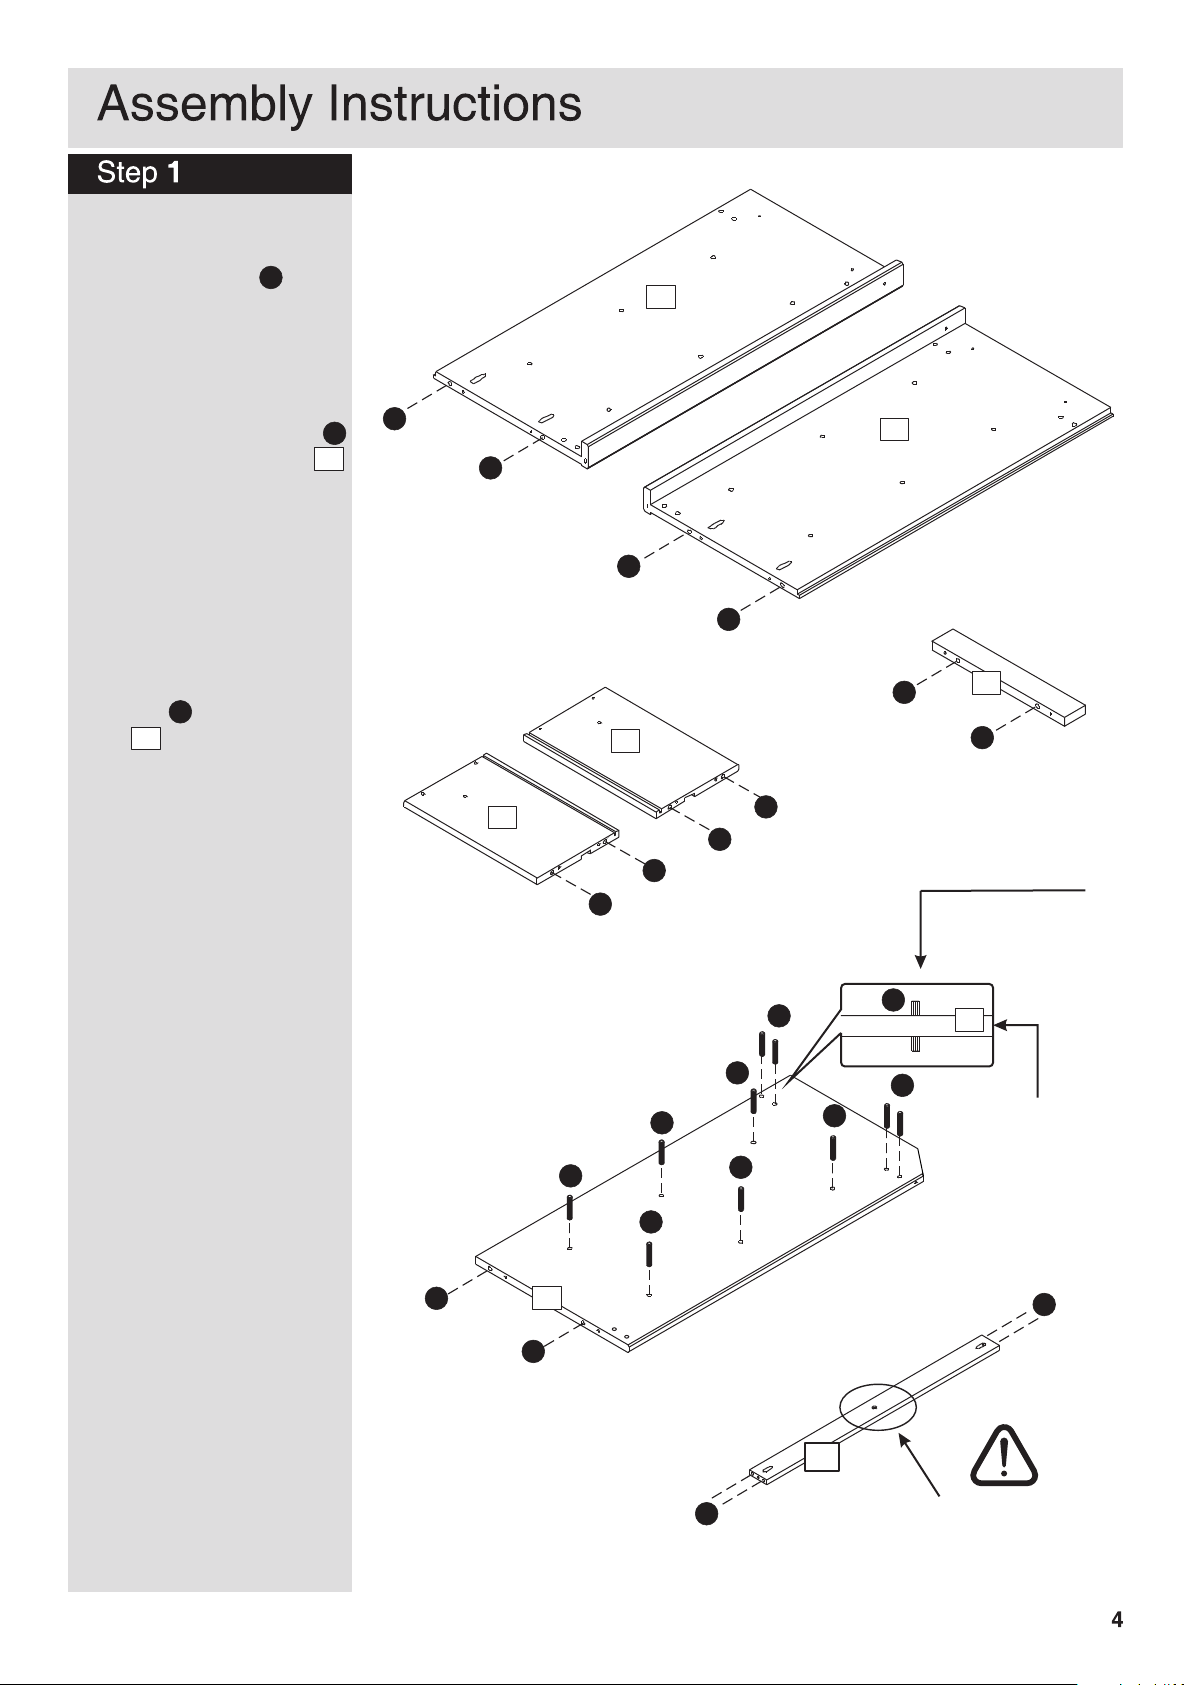
Top panel
1
Division
3
(140.2 x 39.4cm)
(76 x 37.2cm)
Left side panel
2
Right side panel
4
(76 x 36.7cm)
(76 x 36.7cm)
Front plinth
5
Bottom front rail x 2
7
(65.9 x 6.4cm)
Large drawer
9
runner x 6
(32 x 5.1cm)
Back panel x 4
11
(69.8 x 33.6cm)
(140.1 x 9cm)
Side plinth x 2
6
(37.7 x 8.8cm)
Back rail x 2
8
Small drawer
10
runner x 6
(32 x 2cm)
Drawer front x 6
12
(62.4 x 21.9cm)
(65.9 x 5cm)
Drawer right side x 6
13
(32 x 19.4cm)
Drawer back x 6
15
(57.4 x 18.9cm)
Drawer left side x 6
14
(32 x 19.4cm)
Drawer bottom x 6
16
(58.6 x 31.8cm)
Top front rail x 2
17
(65.9 x 5cm)
Page 4
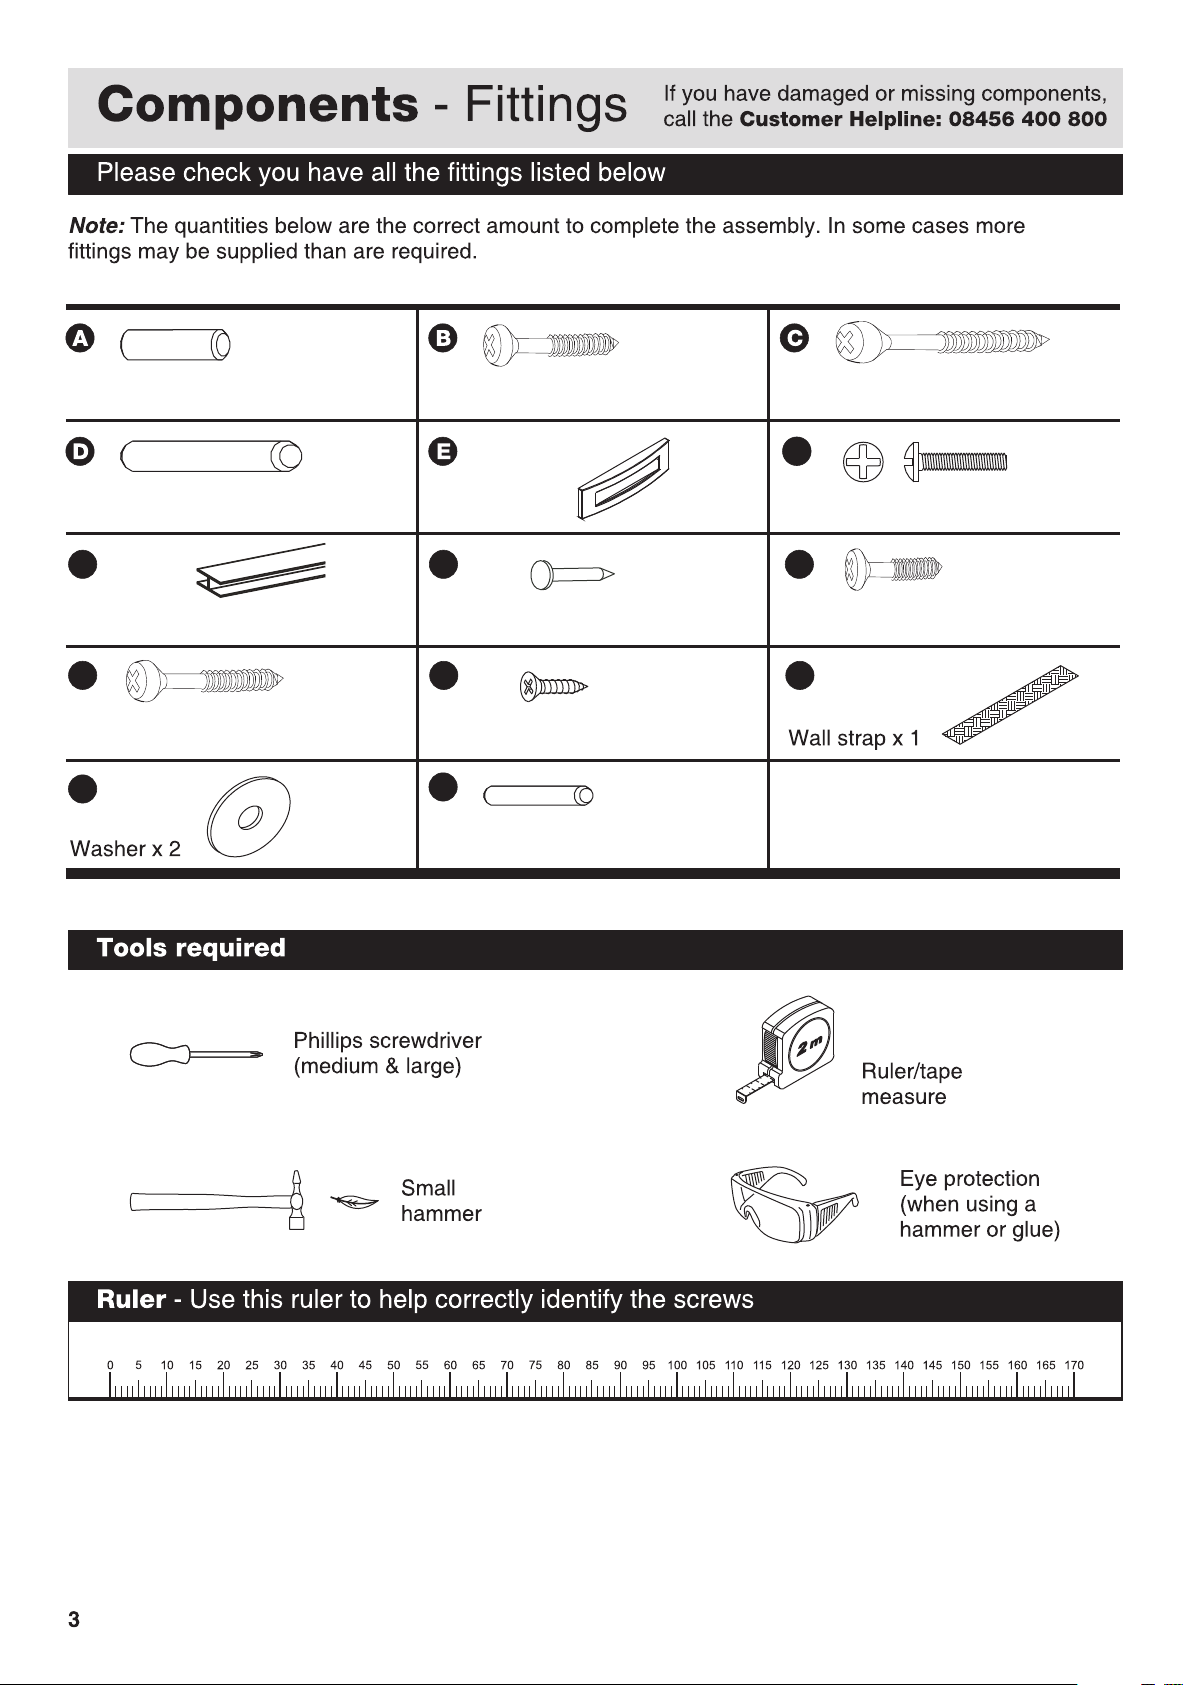
Ø8x25mm Wooden dowel x 62 50mm Screw x 18
30mm Screw x 61
F
Ø8x35mm Large wooden dowel x 16
G
H profile 670mm x 02
J
35mm Screw x 06
M
Handle x 12
H
Nails x 50
K L
16mm Screw x 1
N
Ø6x25mm Thin wooden dowel x 08
22mm Bolt x 24
I
25mm Screw x 26
Page 5
Fitting wooden dowels:
a:
Insert dowels into
the indicated parts.
A
a:
2
Insert large dowels
b:
through division panel
as shown.
Make sure dowels are
equally divided in both
sides of the panel as
shown in the diagram.
Insert thin wooden
c:
dowels on top front
rail only.
N
17
D
3
A
A
A
A
3
6 X
6 X
6 X
13
14
A
A
A
A
A
Attention to the
correct position
of the dowels.
9
A
b:
c:
D
D
D
D
D
D
A
3
A
D
N
D
17
=
3
=
D
Division
panel
N
2 X
Note the hole
Page 6

Assembling the cabinet:
a:
Insert dowels in the
bottom front rail and
back rail as shown.
8
A
7
View from top.
17
B
3
B
Note: Holes on top
front rail must be
facing up as shown in the
diagram.
Fix bottom front rail
b:
back rail and top front
17
rail to the division panel
3
and left side panel
using screws .
8
B
7
2
Note: Note correct
position of the parts.
Step 3
Assembling the cabinet:
Insert dowels in the
a:
bottom front rail and
back rail as shown.
8
Note: Holes on top
front rail must be
facing up as shown in the
diagram.
b:
Fix bottom front rail
back rail and top front
rail to the division panel
3
and right side panel
8
17
using screws .
A
7
7
4
B
A
A
A
View from top.
17
B
2
B
7
B
B
8
B
8
B
7
Note
3
B
B
17
B
3
B
17
3
3
B
4
B
7
8
B
A
A
B
4
8
A
Note: Note correct
position of the parts.
Note
B
B
3
7
Page 7

Assembling cabinet;
a:
Fix the top panel to
the sides , and
2
division panel
using screws .
Fix top front rail to
b:
the top panel using
screws .
J
1
I
1
4
3
17
Note
1
17
I
17
1
1
17
J
I
J
J
J
2
I
3
J
J
4
4
Assembling cabinet:
Fix side plinths to
a:
6
the side panels using
screws .
I
Note: Make sure
side plinths are
aligned to the
bottom and front edges of
the side panels.
b:
Fix front plinth to
5
the sides using screws
and to the division panel
using screw .
B
Note: Make sure
front plinth is
5
aligned to the
bottom edges of the side
panels and in line to the
side plinths.
5
B
I
I
I
I
Attention to the
use of screw .
5
6
6
I
I
I
B
6
6
Page 8

Step 6
Fixing large drawer
runners.
Carefully stand the
product upright.
Fix large drawer runners
9
to the side panels
4
and using screws .
2
C
1
C
9
C
4
9
C
9
C
C
C
C
9
9
2
9
C
C
9
Step 7
Fixing small drawer
runners.
Fix small drawer runners
10
to the division panel
3
using screws .
Make sure holes on
runners are facing up
before fixing.
I
1
I
I
I
4
I
10
10
3
10
I
I
10
I
10
I
10
10
I
3
I
2
10
I
I
Holes to
face up.
Holes to
face up.
7
Page 9

Step 8
Fixing back panels:
Important:
Cabinet MUST be
“square” when back is
attached.
Attach the right and left
a:
back panels first using
H
nails .
11
G
H
H
H
Position profiles onto
b:
back panels (just attach).
Carefully slot the middle
c:
back panels into the
profiles and fix them to the
cabinet using nails .
11
G
H
Step 9
Assembling the
drawers:
a:
Attach drawer sides
13
and to the drawer
front using screws .
b:
Slide drawer bottom
16
into slots on drawer
sides.
c:
Holding the drawer
back in place and flush
to the edge of drawer
side, fix them to the
drawer back using screws
B
.
15
12
14
B
a:
H
11
15
H
H
H
H
11
c:
11
G
B
G
11
11
11
11
6 X
b:
6 X
16
B
13
12
14
B
B
F
F
Using bolt attach
d:
the drawer handles to
the drawer front.
Repeat step 9 for the
other drawers.
F
E
E
6 X
E
d:
8
Page 10

Step 10
Insert wooden dowels:
Carefully insert wooden
dowels fully into the
holes on the small drawer
runners as shown in the
diagram.
A
A
A
A
A
Only in the
front holes.
Step 11
Insert drawers into unit.
With the back of the
drawers past the front
frames, use a hammer to
tap the dowels and
D
in flush to the drawer sides
as shown in the diagram.
This is a safety catch to
stop drawers falling out.
A
Note
left drawers
D DAA
12
A
D
12
Note
right drawers
12
A
D
12
12
12
12
12
9
Page 11

Step 12
Fixing to wall.
Furniture must be fixed to
a wall. Fix wall strap to
top of furniture using
washer and screw .
M
With help, move furniture
into position.
L
K
wall
M
L
K
M
10
Page 12

 Loading...