

Page 1
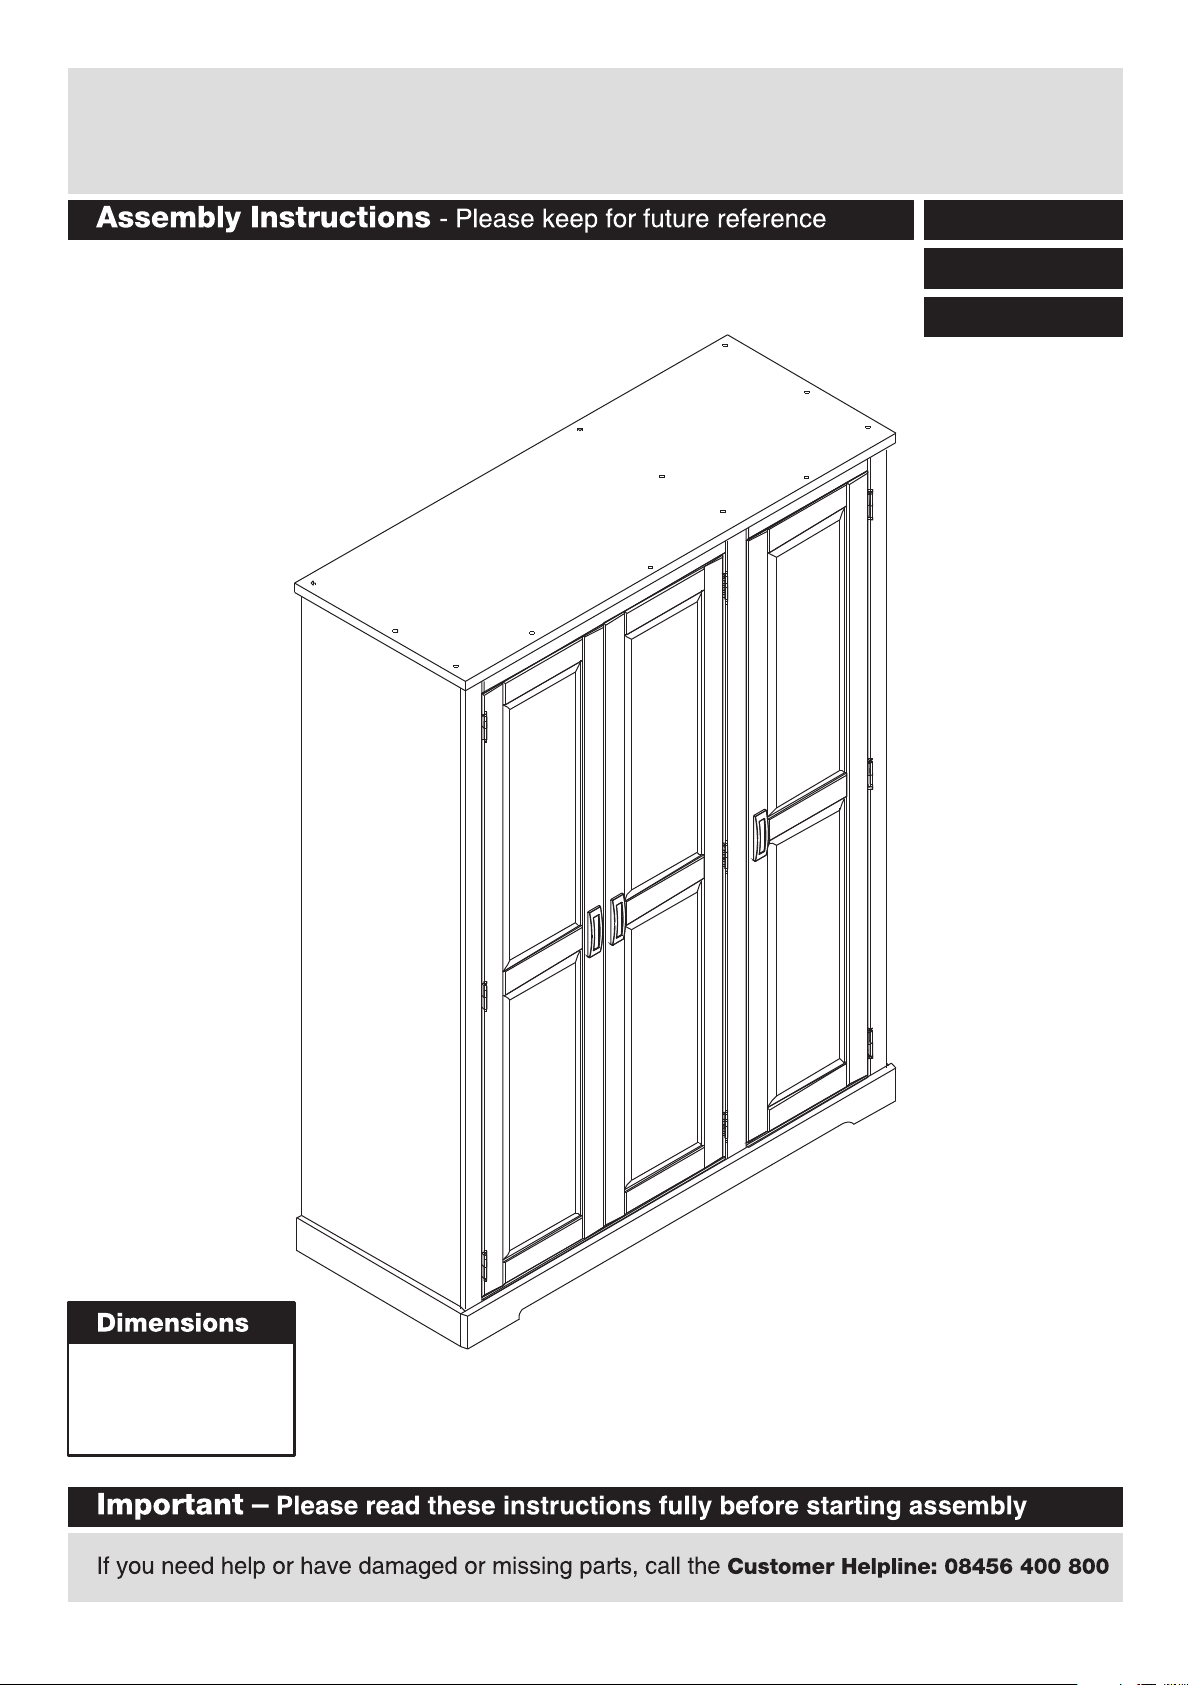
Mendoza - 3 Door Robe
228/2723
241/9620
246/7988
Width - 134.7cm
Depth - 53cm
Height - 180cm
Issue 1 - 12/09/12
Page 2
Page 3
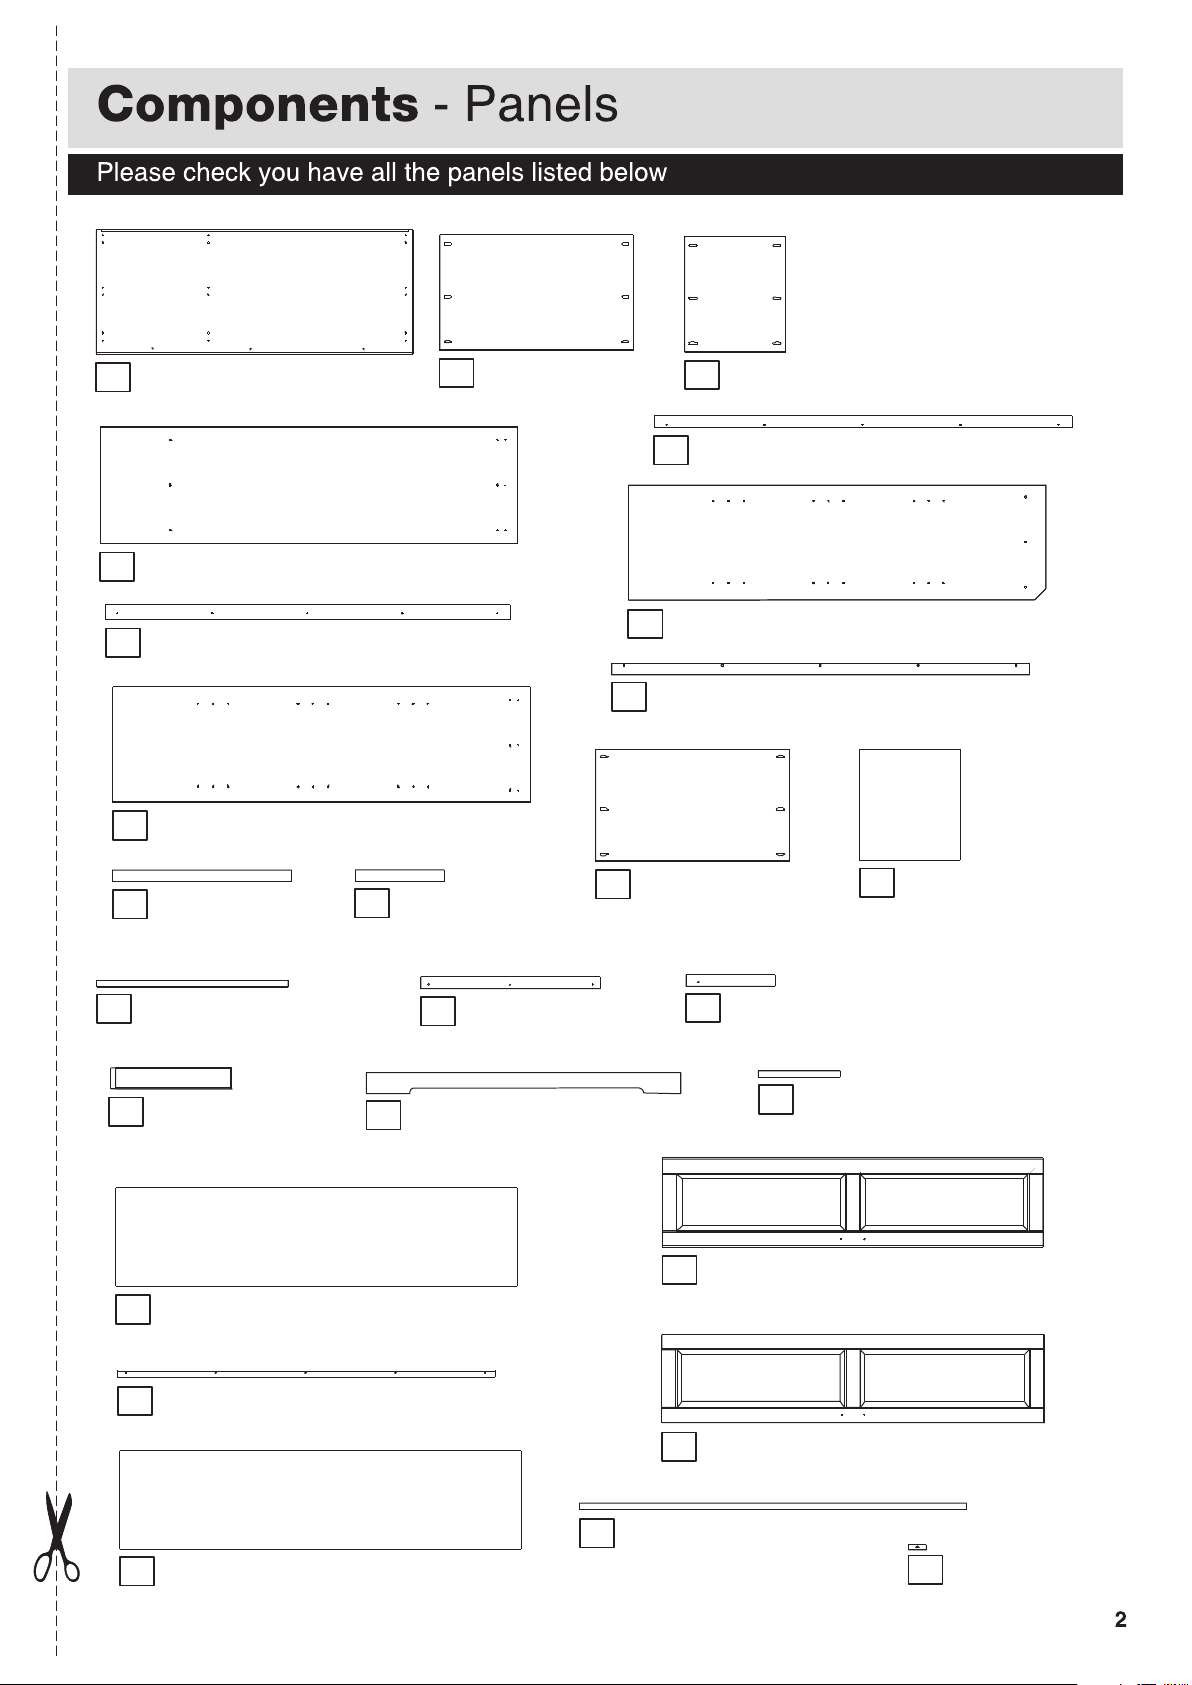
Top panel
1
(134.7 x 53cm)
2
Base
(82.3 x 49.1cm)
Small base
3
(43.1 x 49.1cm)
Left side panel
4
Division front frame
7
Right side panel
8
Large top rail
12
(76.2 x 5cm)
Hanging rail
14
(177.5 x 49.6cm)
(177.5 x 49.6cm)
(81.5 x 3cm)
(177.5 x 6.5cm)
Small top rail
13
(38.3 x 5cm)
15
10
Large bottom rail
(76.2 x 5cm)
Left front frame
5
Division
6
Right front frame
9
Fixed shelf
(82.3 x 48cm)
Small bottom rail
16
(38.3 x 5cm)
(177.5 x 5cm)
(177.5 x 49.1cm)
(177.5 x 5cm)
Adjustable
11
shelf x 3
(42.8 x 47.5cm)
Side plinth x 2
17
(51.4 x 8.8cm)
Small back panel x 2
20
22
Door knocker
Large back panel
24
18
(170.5 x 41.5cm)
(161.6 x 3cm)
(170.5 x 44.9cm)
Front plinth
(133.6 x 9cm)
25
Left door
21
Right door x 2
23
Large H profile
(136.4 x 2.8cm)
Small H profile
19
(28.8 x 2.8cm)
(162.6 x 37.6cm)
(162.6 x 37.6cm)
Blocks x 12
26
(6.4 x 1.9cm)
Page 4
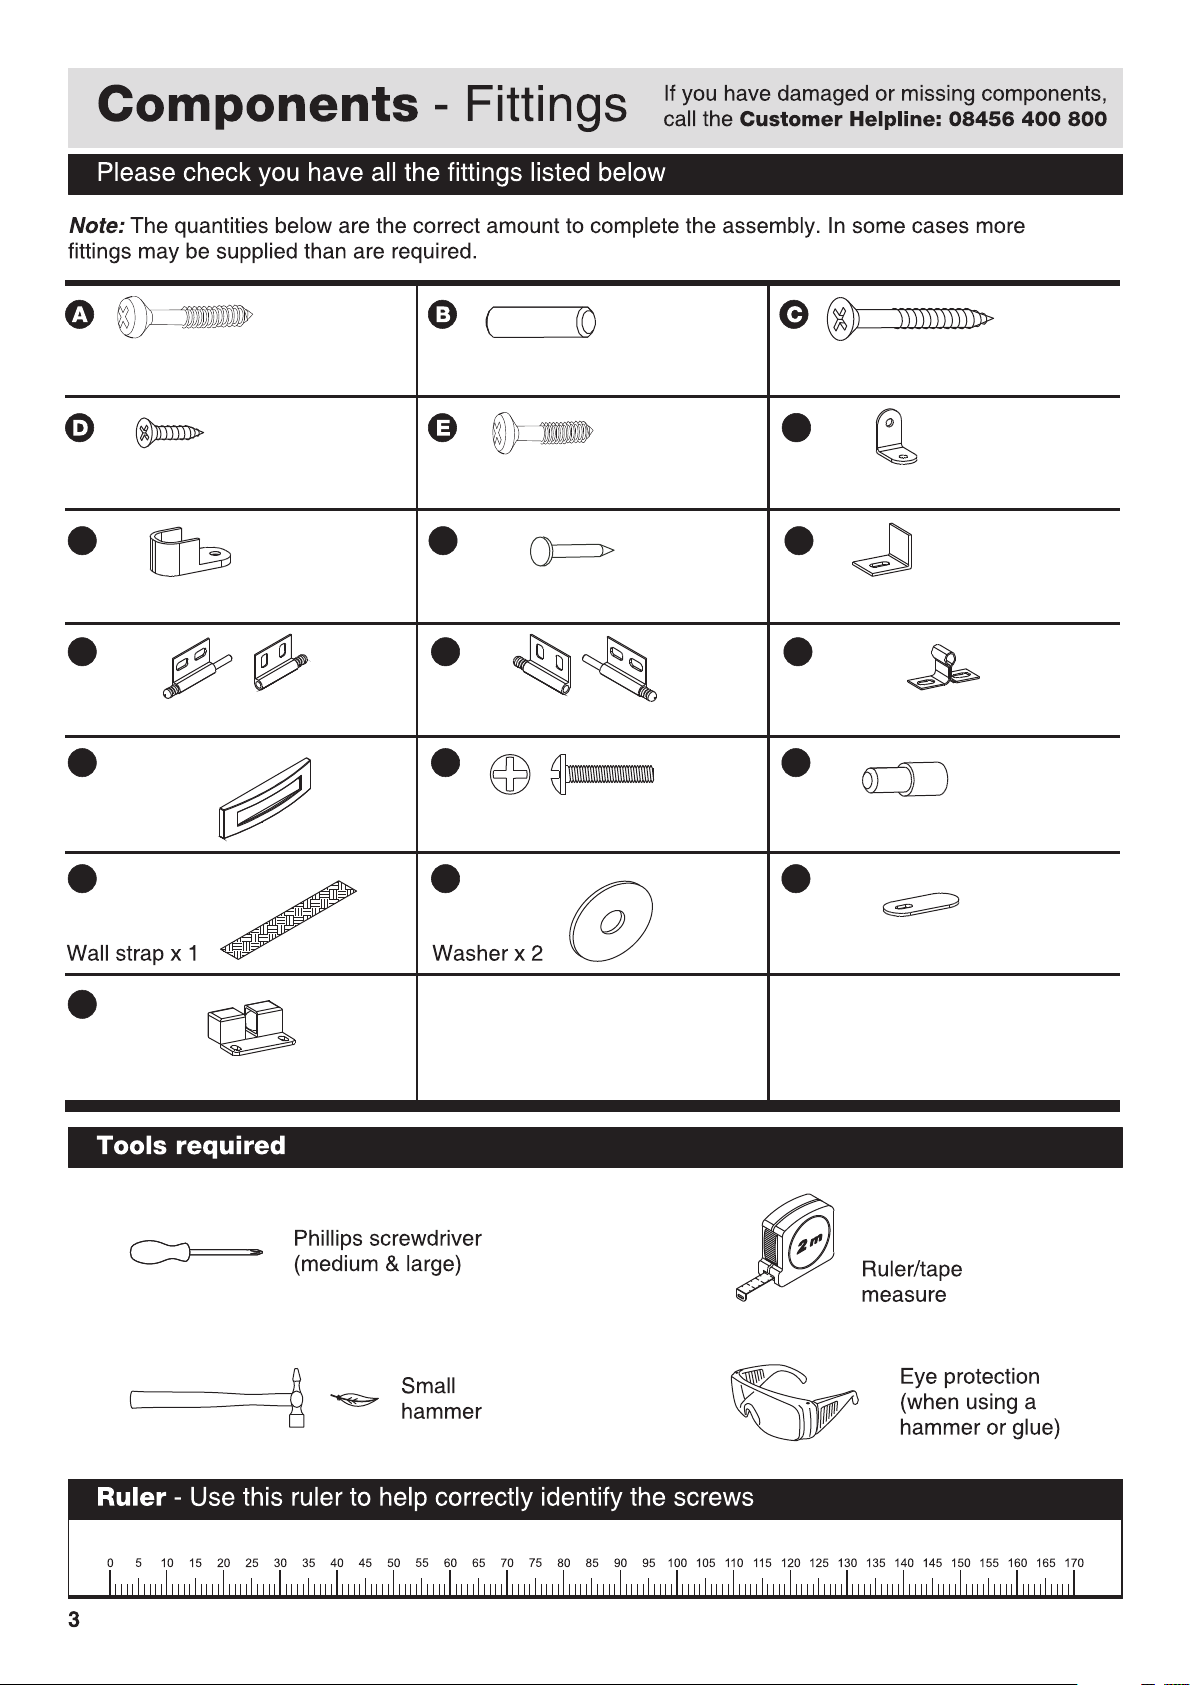
30mm Screw x 54
Ø8x25mm Wooden dowel x 58
45mm Screw x 12
F
16mm Screw x 70
G
Hanging rail support x 02
J
Right door hinge x 6
25mm Screw x 10
H I
Nails x 60
K L
Left door hinge x 3
M N O
Handle x 03
22mm Bolt x 06
P Q R
S
Metal bracket x 03
Metal door knocker x 01
Door clip x 04
Shelf support pins x 12
Straight metal door knocker x 01
Door clip x 04
Page 5
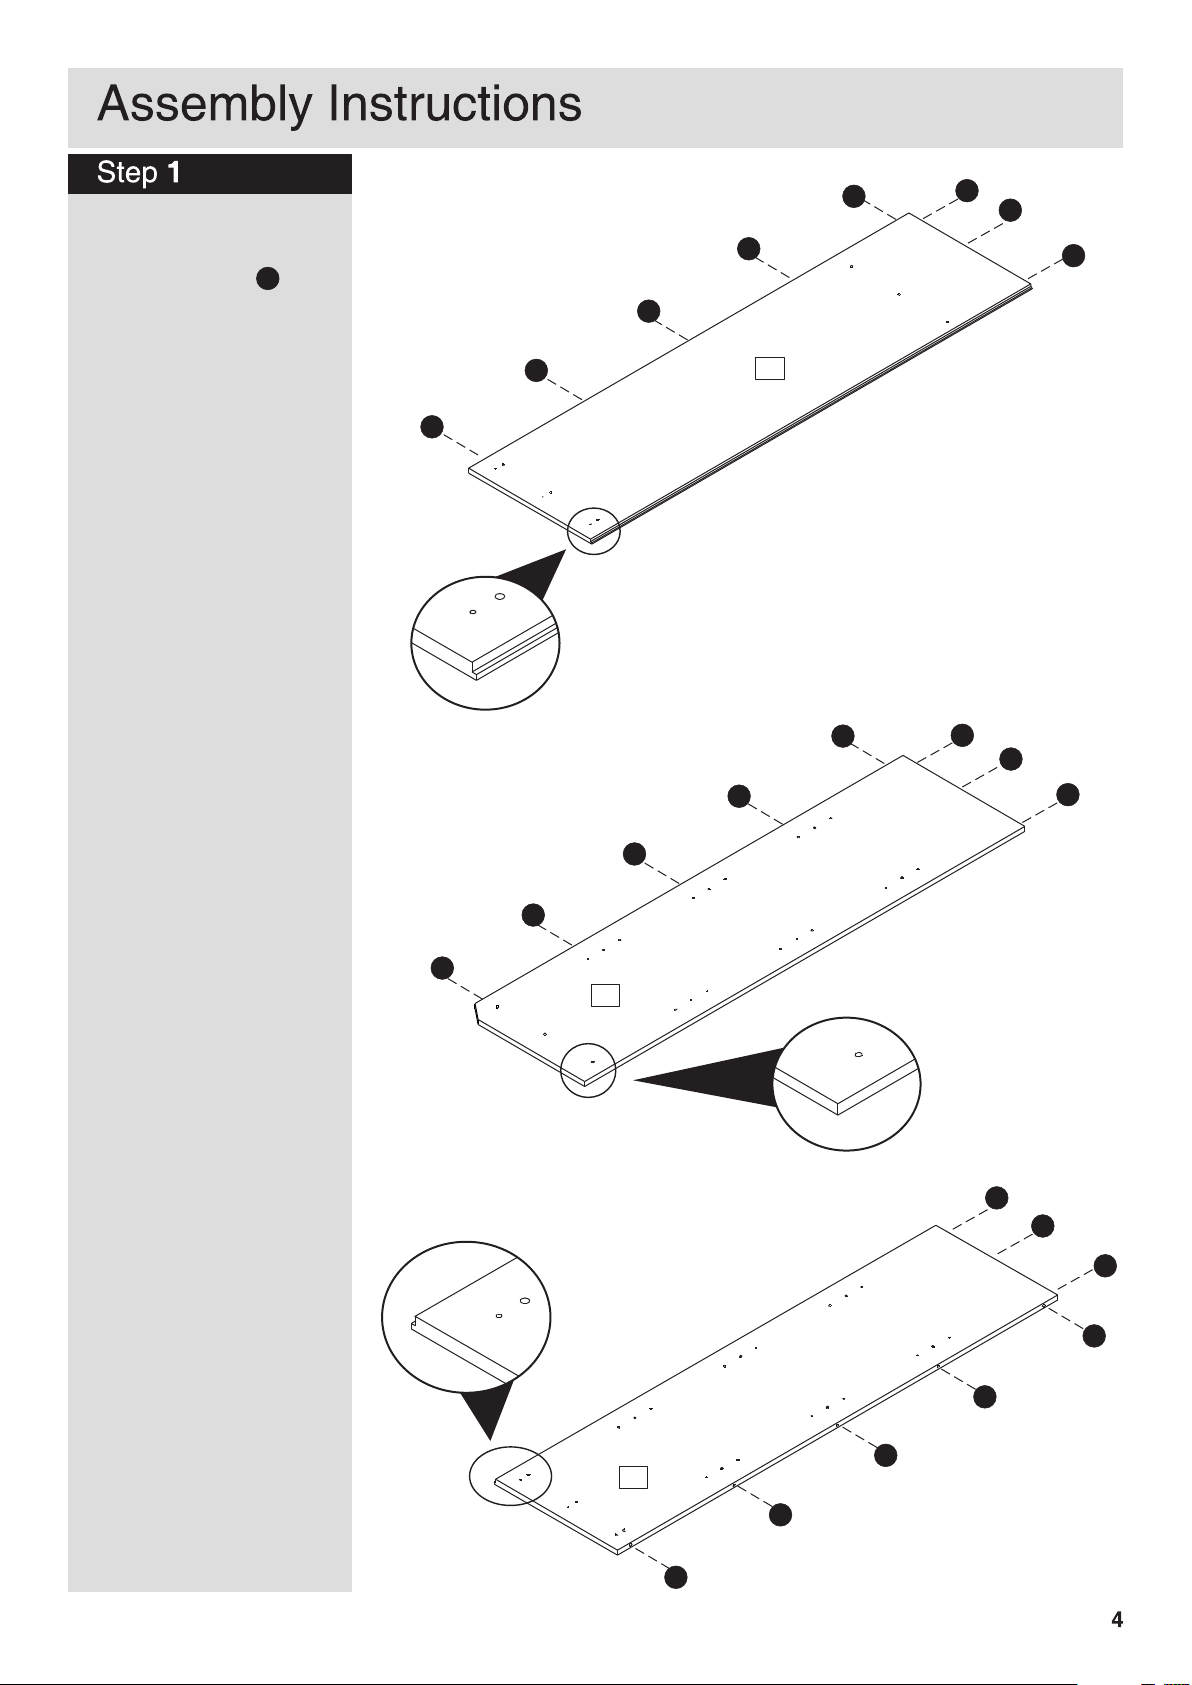
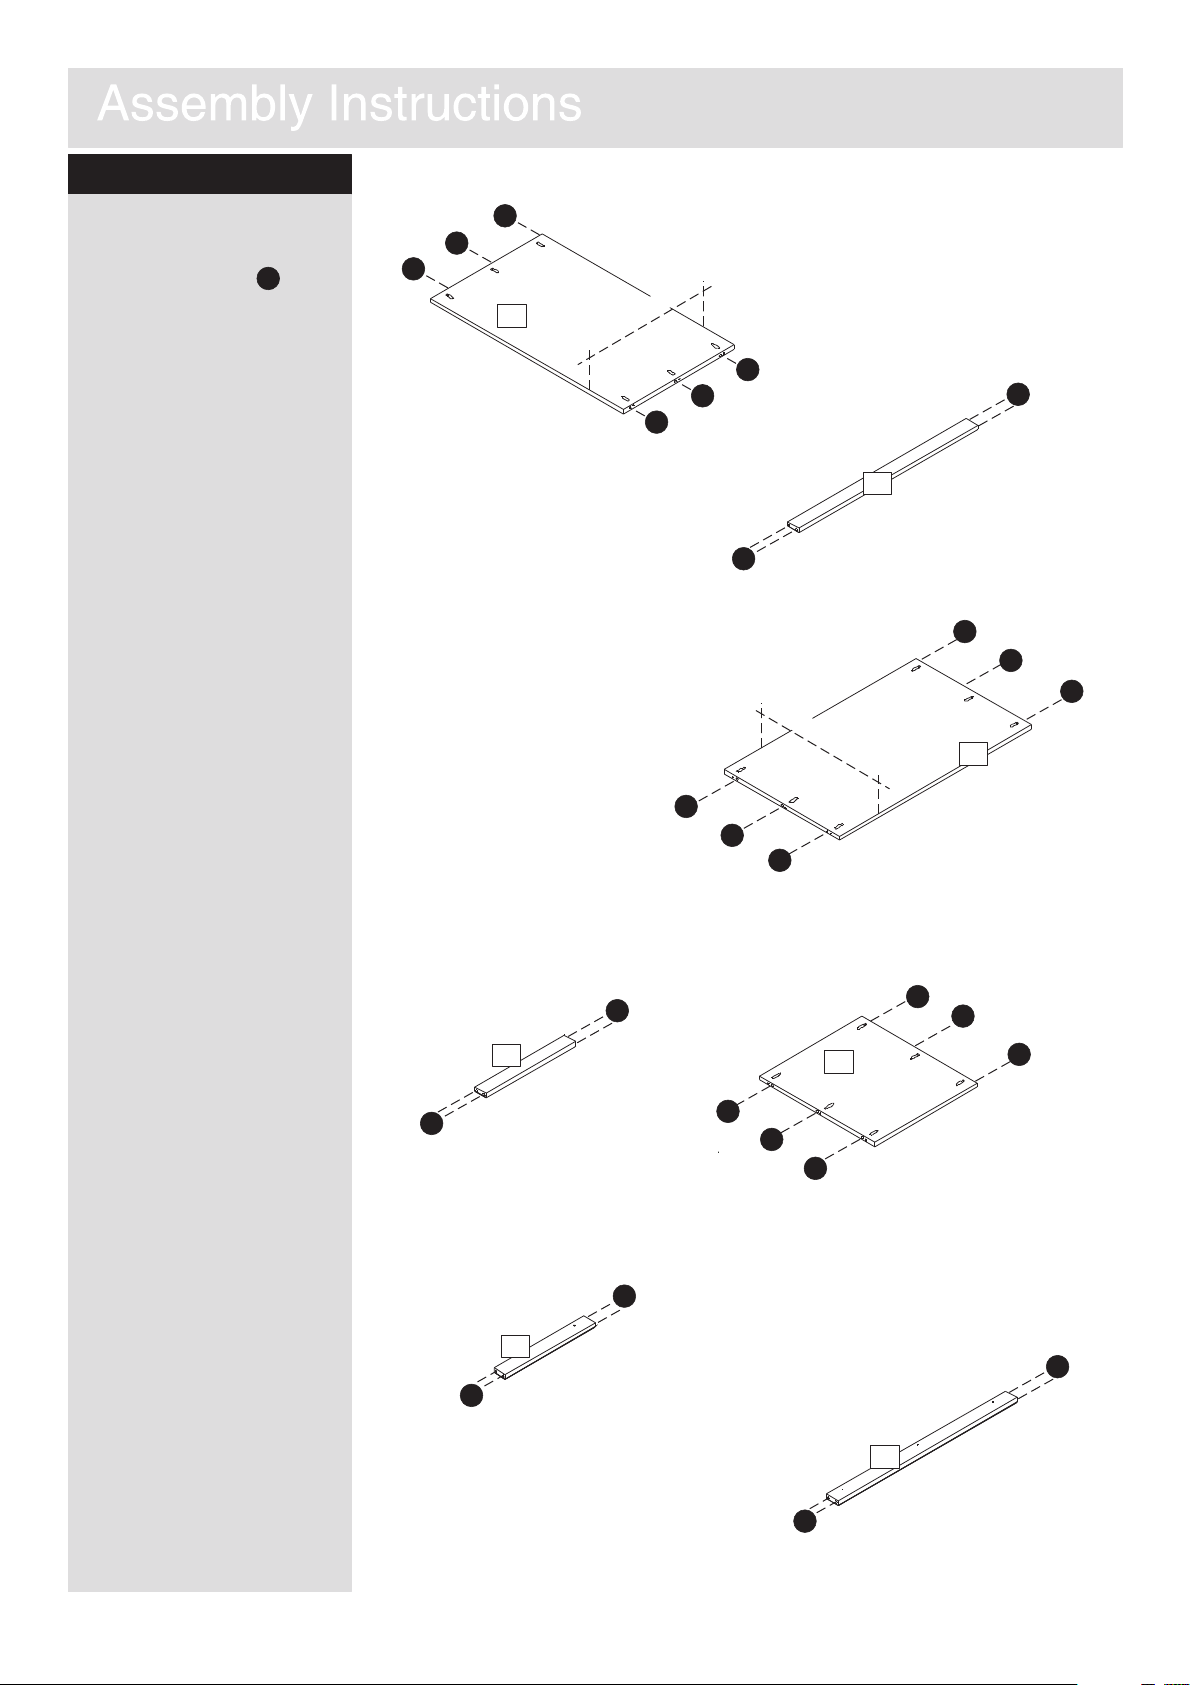
Fitting wooden dowels:
a:
Insert dowels into
B
holes in the indicated
parts.
B
B
B
B
B
B
Continued on next page.
B
B
B
B
4
B
B
B
B
B
B
6
B
B
B
B
B
B
8
B
B
Page 6
Step 1
Fitting wooden dowels:
b:
Insert dowels into
B
holes in the indicated
parts.
B
B
B
2
91mm
4
B
B
B
12
B
4
7
5mm
B
B
B
B
10
B
B
B
B
13
B
B
16
B
B
B
3
B
B
B
B
B
15
B
5
Page 7

Fix hanging rail support:
Fix hanging rail support
G
in the pre marked holes
on the left side panel
and division panel
using screws .
D
4
6
G
D
D
Step 3
Fix shelf support pins:
Fix shelf support pins
to the holes indicated
on the division panel
and right side panel
as shown.
O
6
8
4
Attention pre
marked holes
G
G
6
O
O
O
O
6
O
O
12 X
O
O
O
O
O
8
O
O
6
Page 8

Step 4
Fixing front frames:
(Two people required
for an easier assembly)
a:
Fix blocks in
the pre marked holes
on right side panel
as shown using screws
A
.
26
8
Attention!
a:
26
b:
A
A
26
Pre marked holes
Important: Make
sure blocks are
26
flush to the edge on side
panels before fixing.
Fix blocks in
b:
26
the pre marked holes
on left side panel
as shown using screws .
4
A
8
Attention!
a:
A
A
8
A
26
A
b:
A
A
26
Important: Make
sure blocks are
26
flush to the edge on side
panels before fixing.
Continued on next page.
7
Pre marked holes
A
4
4
A
A
A
Page 9

Step 4
Fixing front frames:
c:
Fix blocks in
the pre marked holes
on division panel
as shown using screws .
26
6
A
Attention!
a:
26
b:
A
A
26
Important: Make
sure blocks are
26
flush to the edge on side
panels before fixing.
Step 5
Pre marked holes
A
A
6
A
A
Fixing door clip and
knocker:
a:
Fix door clip in the
S
pre marked holes on large
13
12
D
top rail and small top
rail using screws
as shown.
b:
Fix straight door
knocker in the pre
marked holes on large top
rail using screws
12
R
D
as shown.
S
Attention
pre marked holes
13
12
R
D
12
D
D
S
S
R
8
Page 10

Step 6
Fixing front frames:
Fix right front frame to
the right side panel
through blocks using
screws as shown.
A
Attention: Note
correct position of
parts before fixing.
9
8
26
Attention correct
holes position.
5mm.
9
8
A
26
Attention correct
holes position.
9
A
48mm.
Step 7
Fixing front frames:
Fix left front frame to
the left side panel
through blocks using
screws as shown.
A
5
4
26
26
9
A
A
8
A
A
A
4
8
A
Attention: Note
correct position of
parts before fixing.
9
26
5
48mm.
A
Attention correct
holes position.
5
4
A
A
Page 11

Step 8
Fixing front frames:
Fix division front frame
to the division panel
through blocks using
screws as shown.
A
26
7
6
Attention: Note
correct position of
parts before fixing.
5mm.
A
7
A
A
A
7
26
Attention correct
6
holes position.
A
6
Step 9
Assembling the cabinet:
(Two people required for
an easier assembly)
With help, fit base panel ,
and fixed shelf to the
left side panel .
Fix base panel and
fixed shelf using screws
A
.
10
4
2
10
Note correct
position of parts
before fixing.
2
A
A
4
A
A
A
2
A
10
480mm
491mm
10
Page 12

Step 10
Assembling the cabinet:
(Two people required for
an easier assembly)
Door clip to be
facing down.
12
Note: Make sure rounded
edges are facing up and
holes are facing down on
large bottom rail .
15
With help, fit base panel ,
fixed shelf , large top rail
12
and large bottom rail
15
to the division panel .
Fix base panel and
fixed shelf using screws
.
A
10
2
10
2
6
Note correct
position of parts
before fixing.
Step 11
Assembling the cabinet:
(Two people required for
an easier assembly)
12
Door clip to be
facing down.
13
10
15
A
A
A
4
6
A
15
A
2
A
Note: Make sure rounded
edges are facing up and
holes are facing down on
small bottom rail .
16
With help, fit small base
panel , small bottom rail
16
and small top rail to
the right side panel and
division panel .
Fix small base panel
and using screws .
3
13
8
6
3
A
Note correct
position of parts
before fixing.
11
13
16
8
6
16
A
A
3
A
Page 13

Step 12
Fixing top panel:
Fix top panel to the
1
assembled cabinet using
screws as shown.
C
Step 13
C
C
C
C
C
C
C
C
1
C
C
C
C
1
C
Assembling the cabinet:
a:
Fix side plinths to
17
the side panels using
screws .
E
Note: Make sure
side plinths are
aligned to the bottom and
front edges of the side
panels.
b:
Fix front plinth to
the large bottom rail
and small bottom rail
using screws .
18
15
16
E
Note: Make sure
front plihth is
18
aligned to the bottom edge
of the side panels and in
line to the side plinths.
17
18
17
Attention to the
parts alignment
18
E
16
18
15
E
E
E
E
E
E
E
E
E
17
17
12
Page 14

Step 14
Fixing metal brackets:
Fix metal brackets to
F
the base panel and bottom
frame using screws as
D
shown.
F
F
F
D
D
D
D
D
D
F
Step 15
Placing shelves and
hanging rail:
Carefully turn the
product upright.
a:
Place hanging rail
into the supports within the
cabinet as shown.
Place adjustable
b:
shelves to the cabinet
11
as shown.
14
11
11
14
14
11
13
Page 15

Step 16
Fixing back panels:
Important:
Cabinet MUST be
“square” when
back panels are attached.
Attach the large back
a:
H
19
24
20
25
20
H
panel and small back
panel first using nails
.
Position small profile
b:
and large profile to
the attached back panel.
Carefully slot the
c:
second back panel into
profiles and fix it to the
cabinet using nails .
a:
24
20
19
20
c:
H
b:
H
H
20
19
20
Step 17
Fixing door clip:
Fix the door clip and
door knocker to the
pre marked holes on base
panel using screws as
shown.
S
I
D
25
b:
H
H
D
D
D
S
I
Pre marked
S
S
I
holes.
14
Page 16

Step 18
Preparing the doors:
Right door:
a:
Fix door clips to the
L
pre marked holes on right
23
door using screws
D
as shown.
Attach right hinge
b:
J
to the pre marked holes on
right door using screws
D
.
23
Note: Make sure
hinges are
positioned as shown in the
diagram.
Attention
pre marked holes
J
2 X
D
L
D
D
L
D
J
23
D
J
23
D
L
D
D
J
Left door:
a:
Fix door knocker to
22
the pre marked holes on
the left door using
screws as shown.
Attach left hinge
b:
21
D
K
to the pre marked holes on
left door using screws
D
.
21
Note: Make sure
hinges are
positioned as shown in the
diagram.
Attention
pre marked holes
D
D
K
K
D
D
Attention
pre marked holes
D
17
D
D
21
D
K
22
D
D
K
15
D
15
Attention
pre marked holes
Page 17

Step 19
Carefully turn the
doors with their
front facing up.
Fix handles to the
doors using bolts .
M
N
21
M
N
N
M
23
M
N
N
23
Step 20
Fixing hinges:
a:
Fix left door
hinges to the pre
marked holes on the left
front frame as shown.
Note correct
position of the
hinge prior to fixing.
Fix right door
b:
hinges to the pre
marked holes on the
right front frame as shown.
Note correct
position of the
hinge prior to fixing.
K
J
N
N
J
J
D
K
D
K
K
D
D
D
D
D
J
J
D
J
J
D
Attention
pre marked holes
J
D
D
D
D
K
Attention
pre marked holes
16
Page 18

Step 21
Fitting doors:
With help fit door hinges
together as shown in the
diagram.
23
23
21
Step 22
Fixing to wall.
Furniture must be fixed to
a wall. Fix wall strap to
top of furniture using
washer and screw .
Q
With help, move furniture
into position.
P
D
wall
Q
P
D
Q
17
Page 19

 Loading...