

Page 1
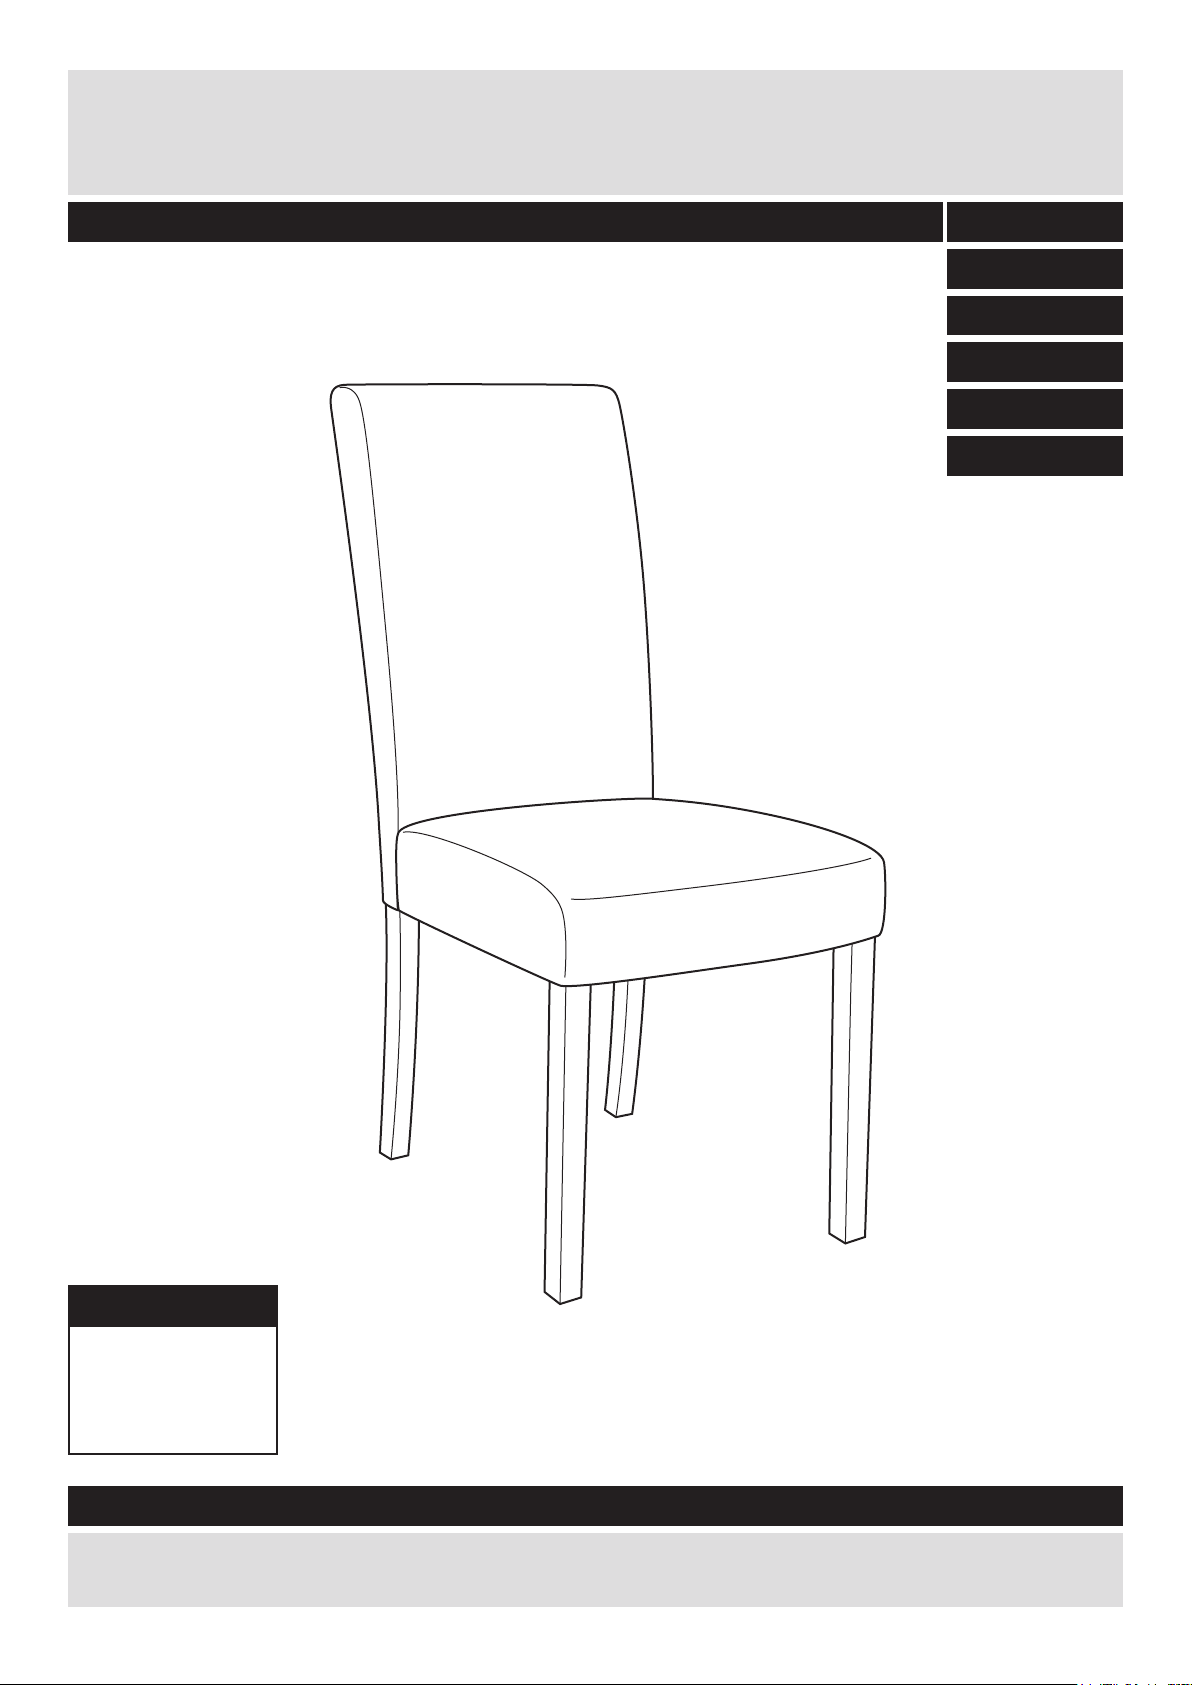
Dining Chair
Assembly Instructions - Please keep for future reference 603/4135
603/2333
603/2900
133/6948
602/9834
603/2364
Dimensions
Width - 44cm
Depth - 54cm
Height - 92cm
Important
If you need help or have damaged or missing parts, call the Customer Helpline: 08456 400800
- Please read these instructions fully before starting assembly
Issue 1 - 08/09/13
Page 2

Safety and Care Advice
Important - Please read these instructions fully before starting assembly
• Assemble this product on a flat
surface.
• Assemble all parts loosely
before tightening any bolts.
• Do not discard any of the
packaging until you have
checked that you have all the
parts and the pack of fittings.
Warnings
• This product should only be
used on firm, level ground.
Care and maintenance
• Please clean the product using
either damp (not wet) cloth and
a mild domestic soap solution or
by using an appropriate polish.
• Discard all extra fittings and
keep fittings out of reach of
children.
• Unit weight: 4.9kgs.
• Maximum safe weight of user:
110kgs.
• Retain Assembly Instructions
for future reference.
• Make sure the legs remain in
contact with the ground.
• Do not use any abrasive
materials when cleaning.
• We do not
recommend the
use of power
drill/drivers for
inserting screws,
as this could damage the unit.
Only use hand screwdrivers.
• Dispose of all packaging
carefully and responsibly.
• Do not stand on the product.
• From time to time check that
there are no loose bolts on this
unit.
1
Page 3
If you have damaged or missing components,
Components - Parts
call the Customer Helpline: 08456 400800
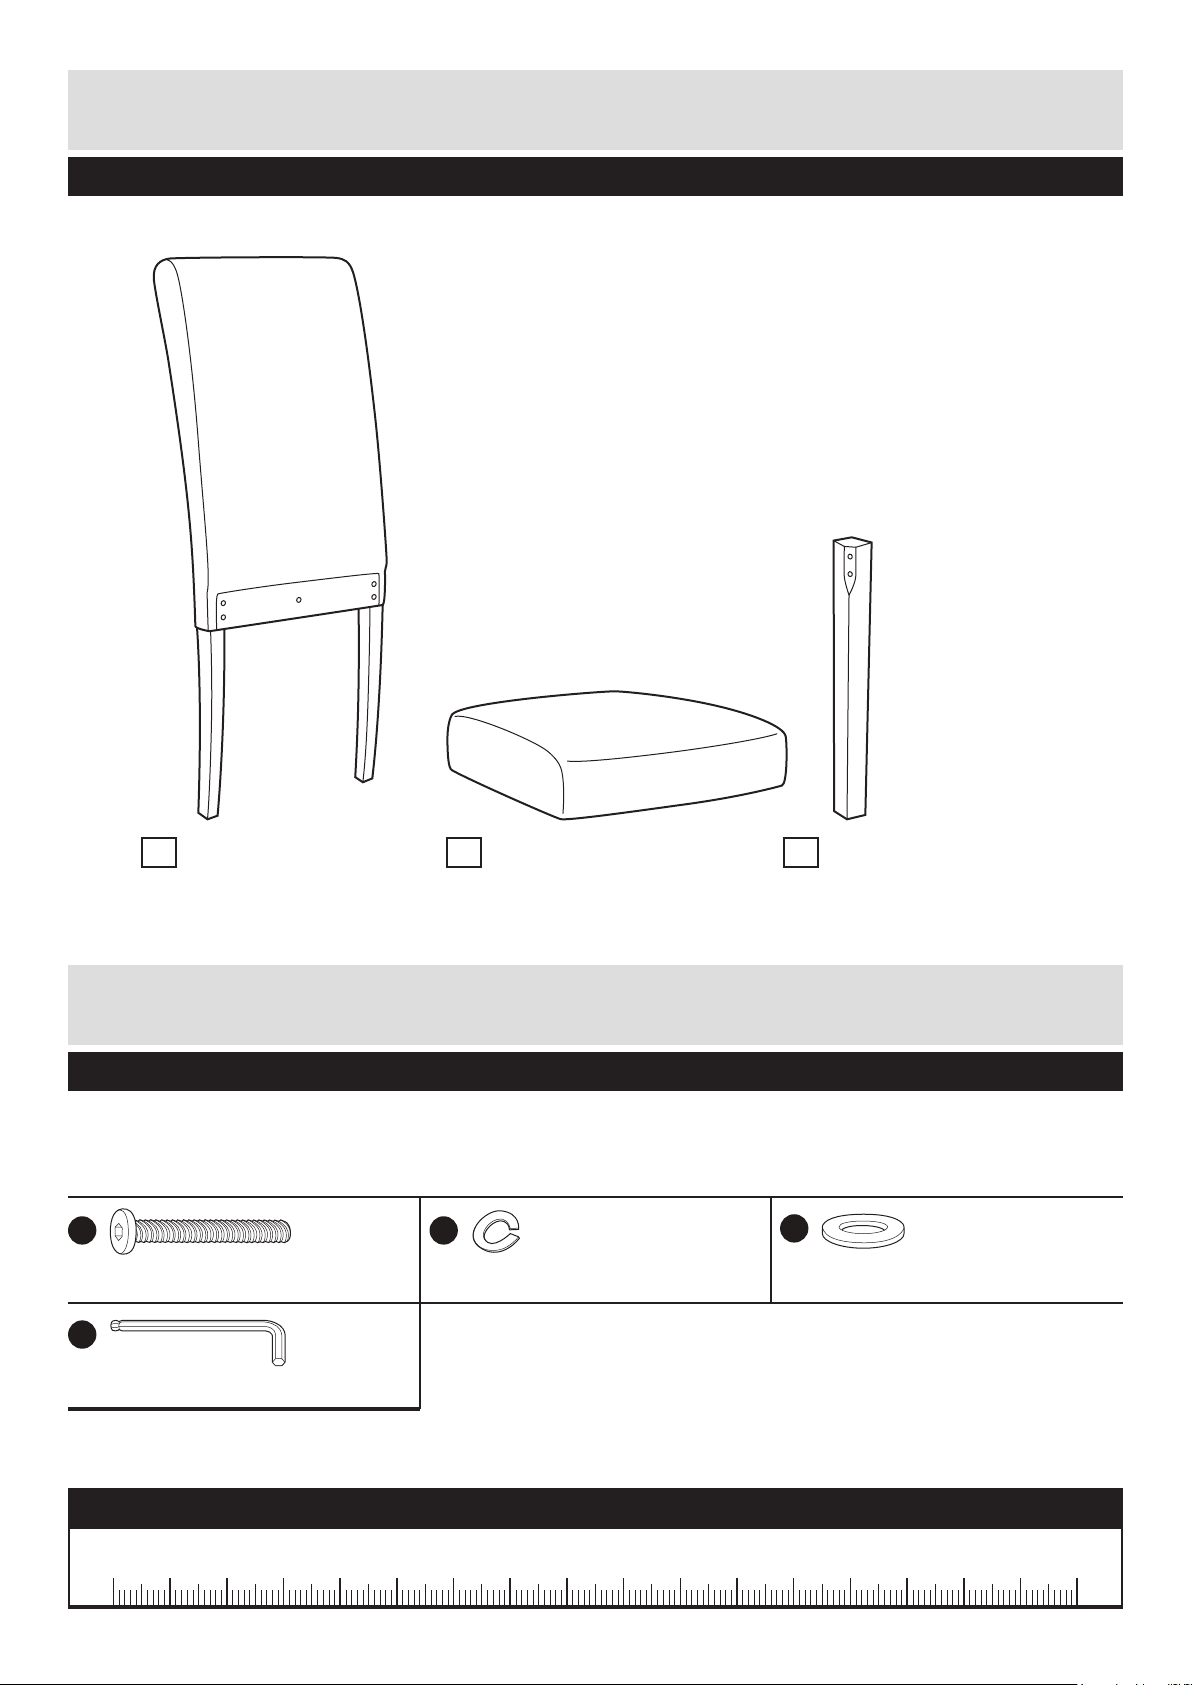
Please check you have all the parts listed below
Backrest
1 Seat
(36 x 10 x 92cm)
2 Leg x 2
(43.5 x 41 x 9.5cm)
3
(3 x 3 x 43cm)
Components - Fittings
Please check you have all the fittings listed below
Note: The quantities below are the correct amount to complete the assembly. In some cases more fittings
may be supplied than are required.
A
M6 x 50mm Bolt x 9
D
Allen key x 1
B
Spring washer x 9
C
Flat washer x 9
Ruler - Use this ruler to help correctly identify the screws
0 15 30 45 60 75 905 20 35 50 65 80 9510 25 40 55 70 85 100 120 140105 125 145110 130 150115 135 155 160 165 170
2
Page 4
Assembly Instructions
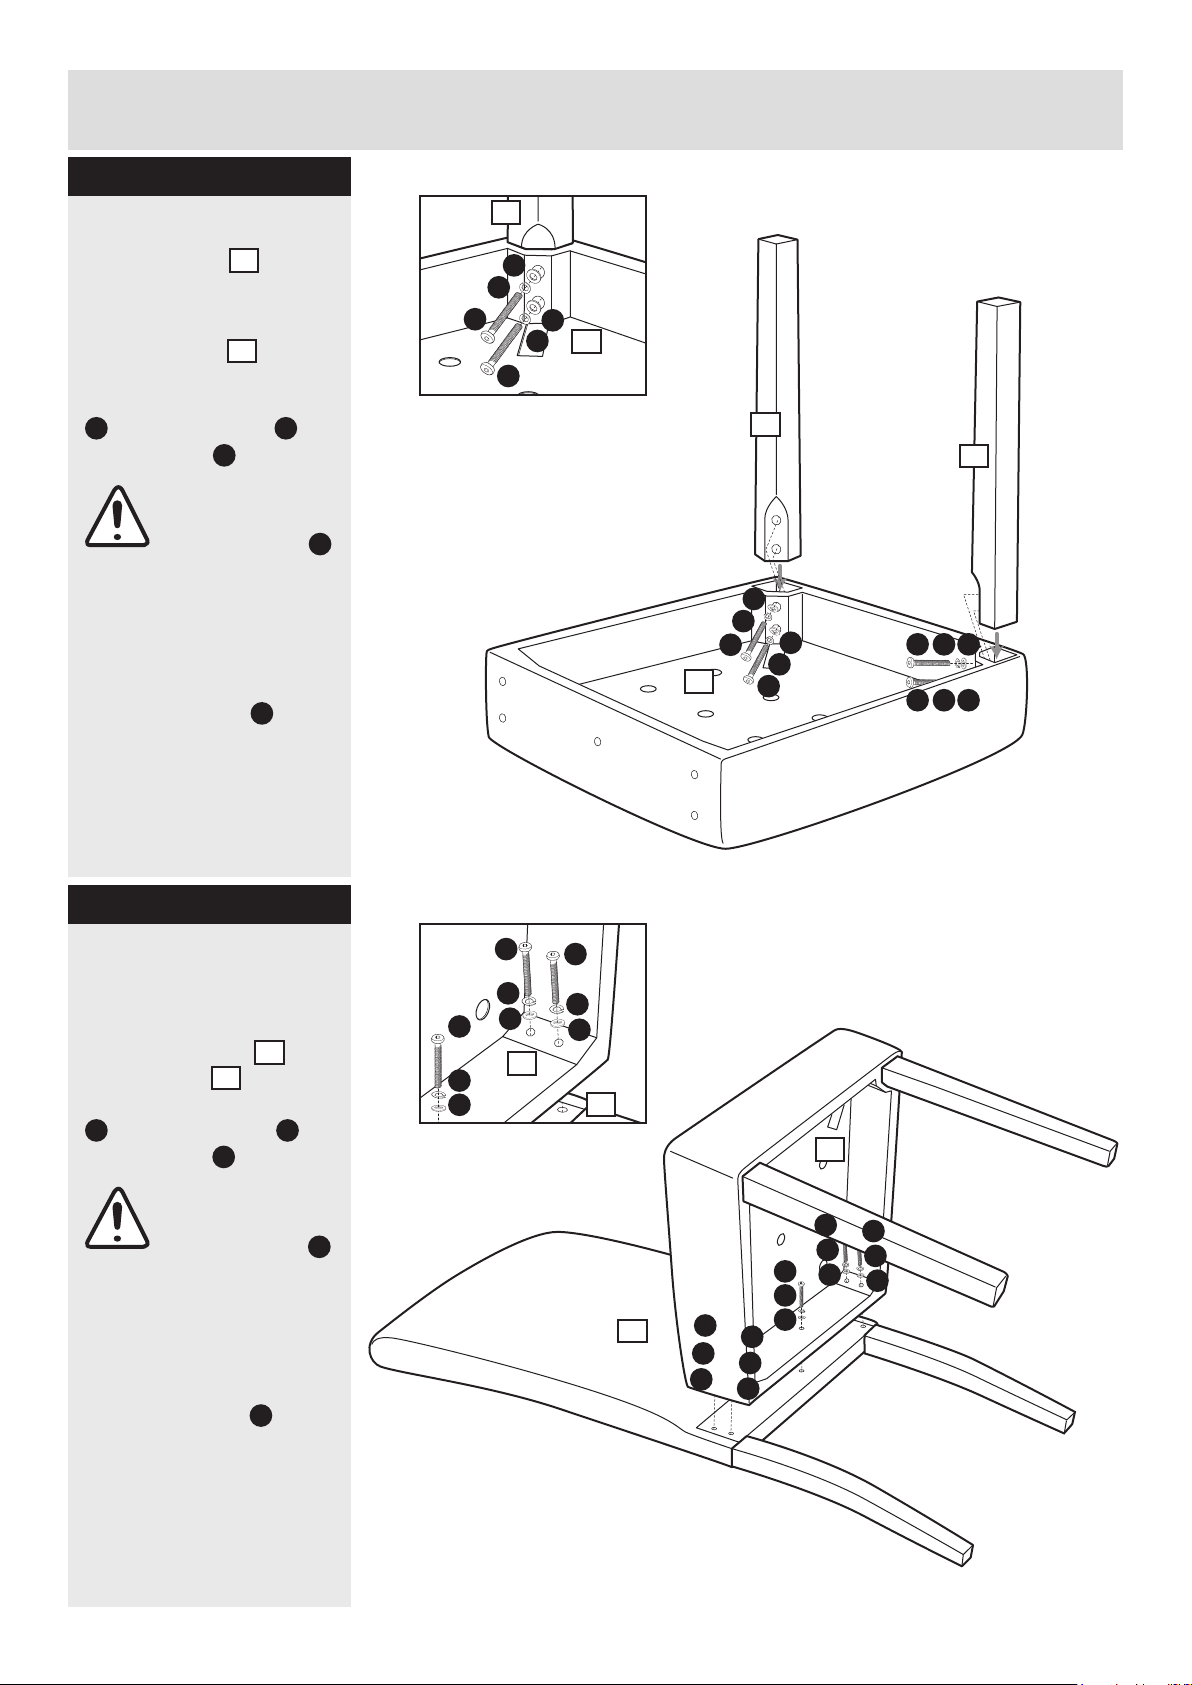
Step 1
Attaching legs
Place the seat upside
2
down on a flat protected
surface.
Insert the legs into the
3
holes of the seat as
shown and fix using bolts
A
, spring washers
and washers .
C
B
Important:
Fasten bolts
using allen key
D
but do not fully
tighten at this
stage.
Note:
Use oval head of
allen key on
D
tight angles.
3
C
B
A
B
A
C
2
3
3
C
B
C
A
2
B
A
A
A CB
CB
Step 2
Attaching backrest
Place the backrest on a
flat protected surface.
Position the seat on
the backrest as
shown and fix using bolts
A
, spring washers
and washers .
Important:
Fasten bolts
using allen key
but do not fully
tighten at this
stage.
Note:
Use oval head of
allen key on
tight angles.
2
1
B
C
D
D
A
B
C
A
B
C
A
B
C
2
1
2
A
A
B
A
B
1
A
B
C
C
A
B
C
B
C
C
3
Page 5
Assembly Instructions
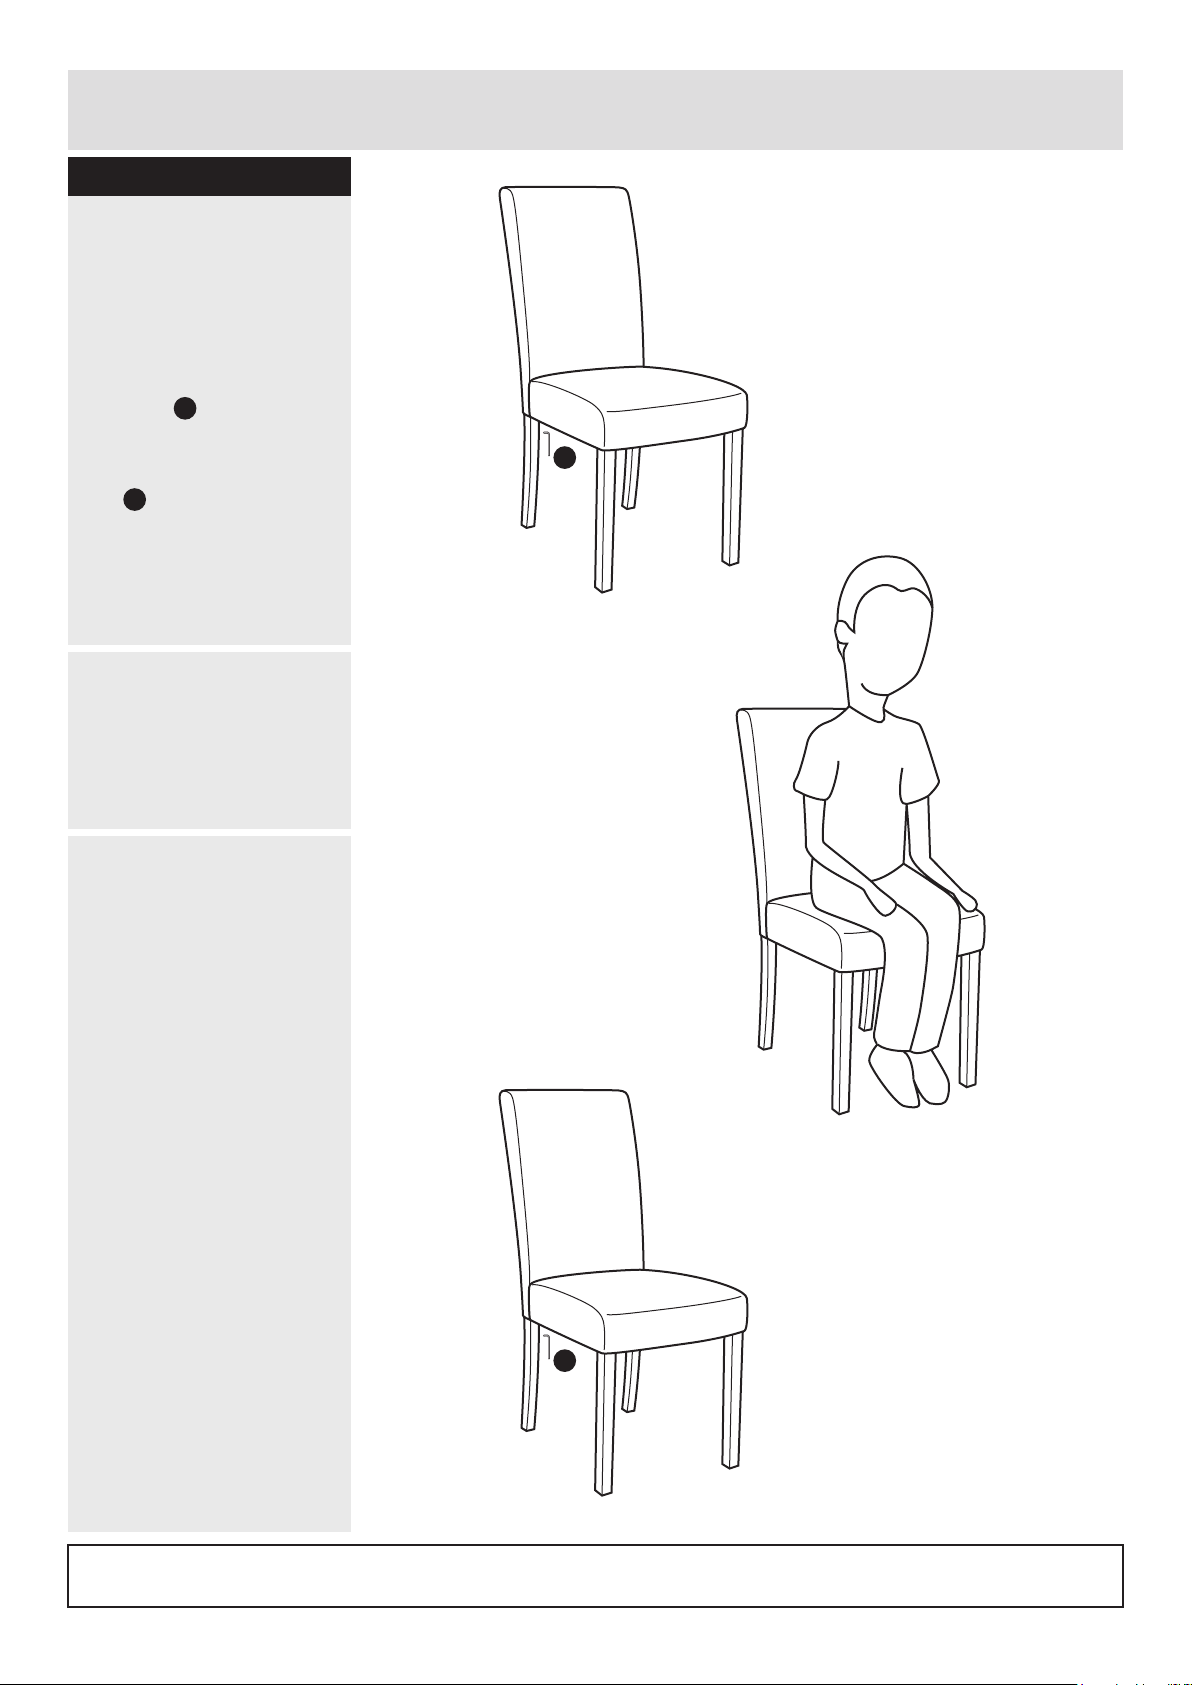
Step 3
Aligning & securing the
legs
Carefully turn the chair
upright and place on a
flat surface.
a: Tighten all bolts using
allen key .
Note:
Use oval head of allen
key on tight angles.
Note: This step is
essential to prevent the
chair from wobbling due
to uneven legs.
D
D
b: Carefully sit on the
chair and make
adjustments to ensure
the legs are flat even on
the floor.
a:
D
b:
c: After the sitting test,
re-tighten bolts again if
any adjustment is
needed.
Note: It is highly
recommended to
re-tighten all bolts after
using the chair for 7
days.
Note: Keep allen key to
re-tighten bolts when
required.
c:
D
Assembly is complete.
If you need help or have damaged or missing parts, call the Customer Helpline: 08456 400800
4
 Loading...