

Page 1
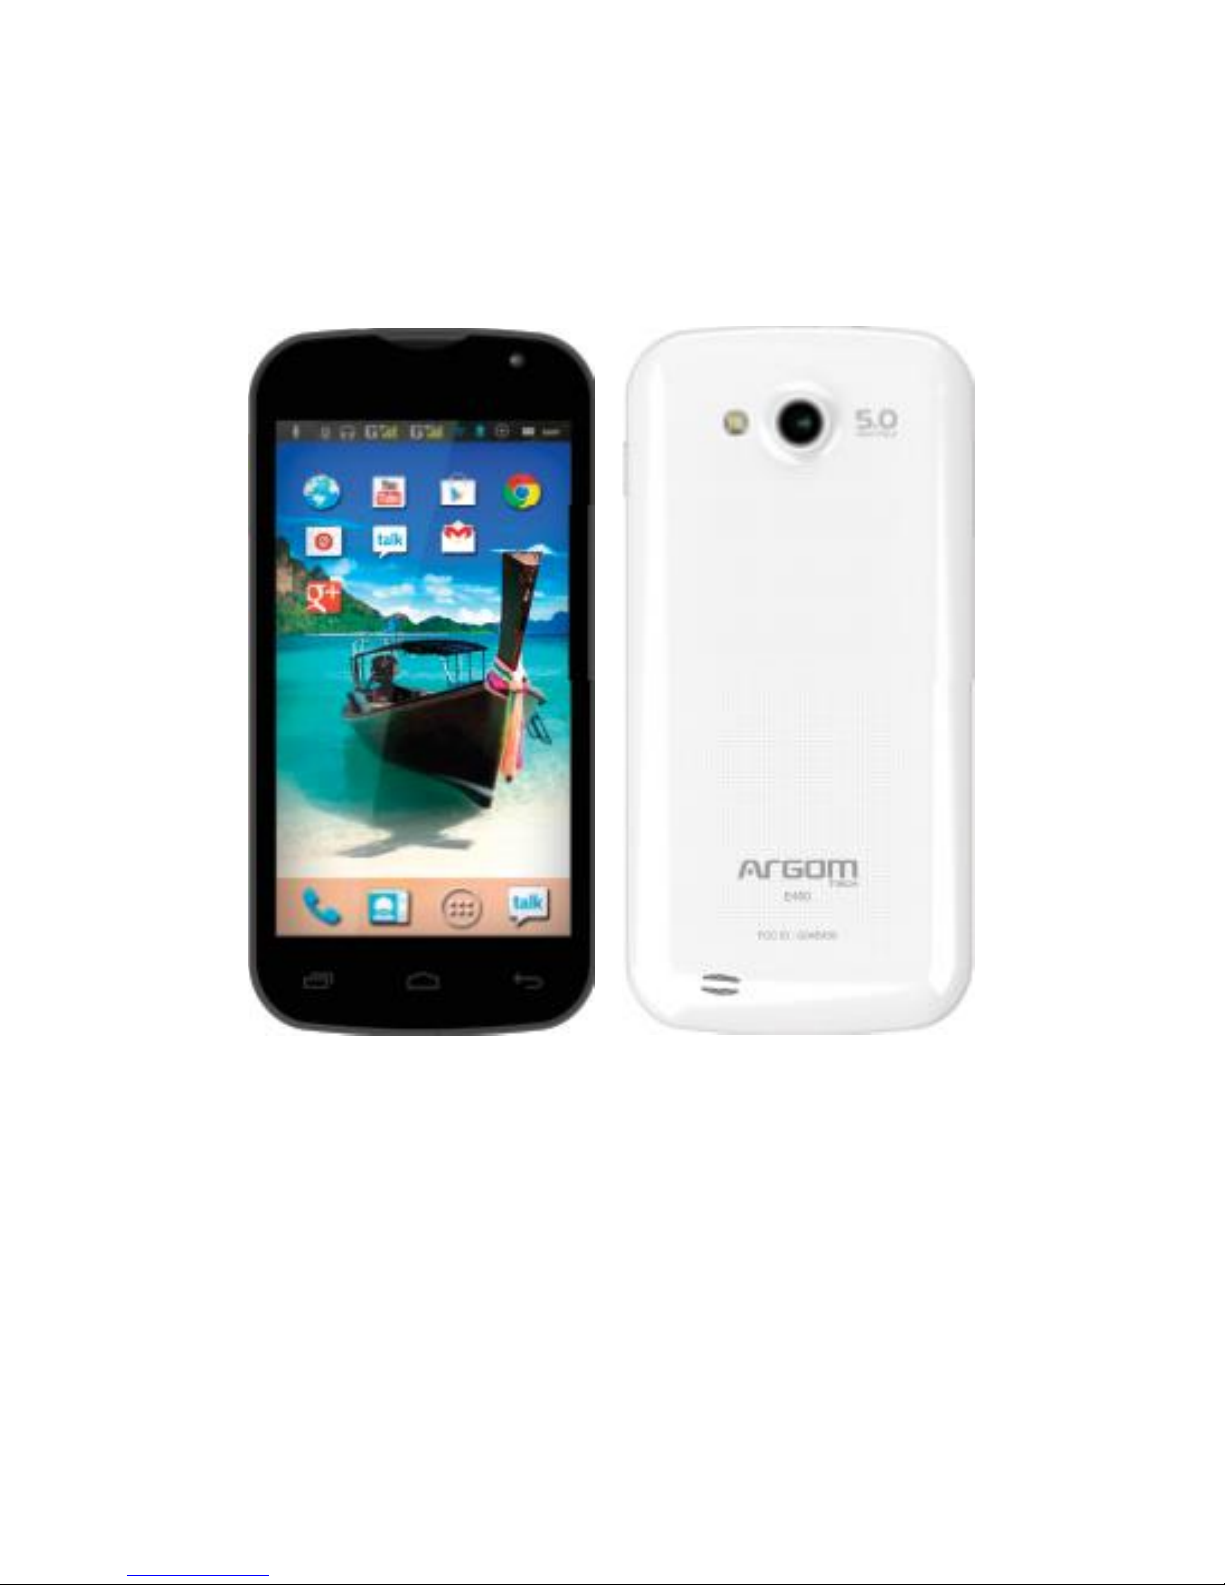
User Manual
Page 2

Page 3

User Guide
1
ENGLISH
CONTENT
01
Foreword ........................................................................
04
1.1
Acknowledgements.............................................
04
1.2
Announcements ...................................................
04
1.3 Safety Tips
..............................................................
05
1.4
Acronym/terms .....................................................
06
02 Brief Description
............................................................
07
2.1 Smartphone Overall
Drawing .............................
07
2.2 Accessories
Introduction .....................................
09
2.3 Use and
preparation............................................
09
03 Quick
start .......................................................................
10
3.1 Boot and shut down
............................................
10
3.2 Screen of opening and closing
..........................
11
3.3 The use of touch
screen ......................................
12
3.4 Page interface
.....................................................
13
3.5 Function of icons
..................................................
15
3.6 Use touch panel
...................................................
15
3.7 Equipment basic settings
....................................
16
3.7.1Silent mode, volume, notification, ringtone,
audible selection, screen lock
sounds........................
17
3.7.2 Application
...........................................................
18
Page 4

2 User Guide
3.7.3 Privacy
...................................................................
20
Page 5

User Guide
3
3.7.4
Storage ..................................................................
21
3.7.5 Language & Keyboard
......................................
22
3.7.6 Date & time
setting ..............................................
23
3.7.7 About device
........................................................
23
3.8 APPS install and uninstall
.....................................
24
3.8.1 APPS install
............................................................
24
3.8.2 APPS uninstall
........................................................
24
04 Establish
connections ...................................................
25
4.1 USB connection
....................................................
25
4.1.1 Copy files to memory cards.
...............................
26
4.1.2 Content of Storage Device
.................................
26
4.1.3 Storage
card .........................................................
26
4.1.4 Input text
...............................................................
27
4.2 Linking to the Networks and devices
.................
28
4.3 WIFI
connection....................................................
29
05
Communication .............................................................
30
5.1 Installing the SIM
...................................................
30
5.2 Phone
....................................................................
31
5.3 Dialing Calls
..........................................................
32
5.4 Messaging
.............................................................
34
5.5 E-MAIL
....................................................................
35
06 Multimedia
......................................................................
38
Page 6

4 User Guide
6.1 Support the file format
.........................................
38
6.2 Music
......................................................................
39
6.3
Camera .................................................................
40
6.4 Gallery
...................................................................
42
07
Internet ............................................................................
45
7.1
Browser...................................................................
45
08 Other applications
.........................................................
48
8.1 Alarm
clock ...........................................................
48
8.2 Calculator
.............................................................
48
09
Troubleshooting ..............................................................
48
10 FCC Warning
Statement ...............................................
50
Page 7

User Guide
5
01 Foreword
1.1 Acknowledgements
Thank you for choosing our products. our Android Smarphone
equipped with a resolution 854x480 capactive multi-touch
screen, it supports high-definition videos and images,
installation of entertainment and other applications.
The dazzle cruel interface can provide you new user
experience. This manual introduces the various functions,
using skills and
announcements.
Please read the manual carefully before using this smartphone.
1.2 Announcements
Maintenances
• Please keep your smartphone dry. Keep the equipment and
battery charger away from water, vapor and wet hand in
case of short circuit, corrosion or equipment failure.
• Keep the equipment, battery and charger away from
strongly impact or vibration in case of
equipment/battery/charger fault, fire or explosion.
• Keep the equipment, battery and charger away from very
Page 8

6 User Guide
high/ low temperature region in case of
equipment/battery/charger fault, fire or explosion.
Page 9

User Guide
7
• Do not hit, throw or acupuncture your smartphone, and
avoid dropping, extruding and bending it as well.
• Keep the equipment and accessories authorized, otherwise
the equipment and accessories would not be under our
company warranty scope.
1.3 Safety Tips
Before you use your smartphone, please read this section
of information and keep your child aware of this
information. For detailed information, please refer to the
safety guidelines.
• Do not use your smartphone during driving for safety.
• In medical sites, please follow the relevant regulations
by turning off your smartphone when you are in
medical sites.
• Please turn off your smartphone or turn on planes
mode when you are boarding, to avoid wireless signals
jamming aircraft control signal.
• Please turn off your smartphone near the use of high
precision electronic equipment, otherwise it may lead
to electronic equipment disability.
• Do not take apart your smartphone or accessories
without authorizing. Only authorized institutions can
repair your smartphone.
Page 10

8 User Guide
• Please keep your smartphone away from magnetic
equipment. The radiation of your smartphone will
erase the information of the magnetic storage
device.
Page 11

User Guide
9
• Please don’t use your smartphone under high
temperature or in flammable areas (example: gas
station).
• Please keep your smartphone and accessories away
from children without supervising.
• Please obey the relevant laws and regulations when
you use your smartphone, and respect others lawful
rights and privacy.
• Please obey the relevant specification of this manual
when you use USB cable. Otherwise it may damage
your smartphone or personal computer.
• Please don’t use your smartphone in the damp
environment such as bathroom etc. keep your
smartphone from being soaked or flushed by the liquid.
• Please choose the appropriate volume, use
headphones should not be too big voice, if feel
tinnitus, lower the volume or stop using it.
1.4 Acronym/terms
Acronym/terms
Full name
Instruction
WIFI
Wireless Fidelity
Based on the IEEE
802.11B
standard
TF
Trans Flash
Also call : Micro SD
Page 12
10 User
02 Brief Description
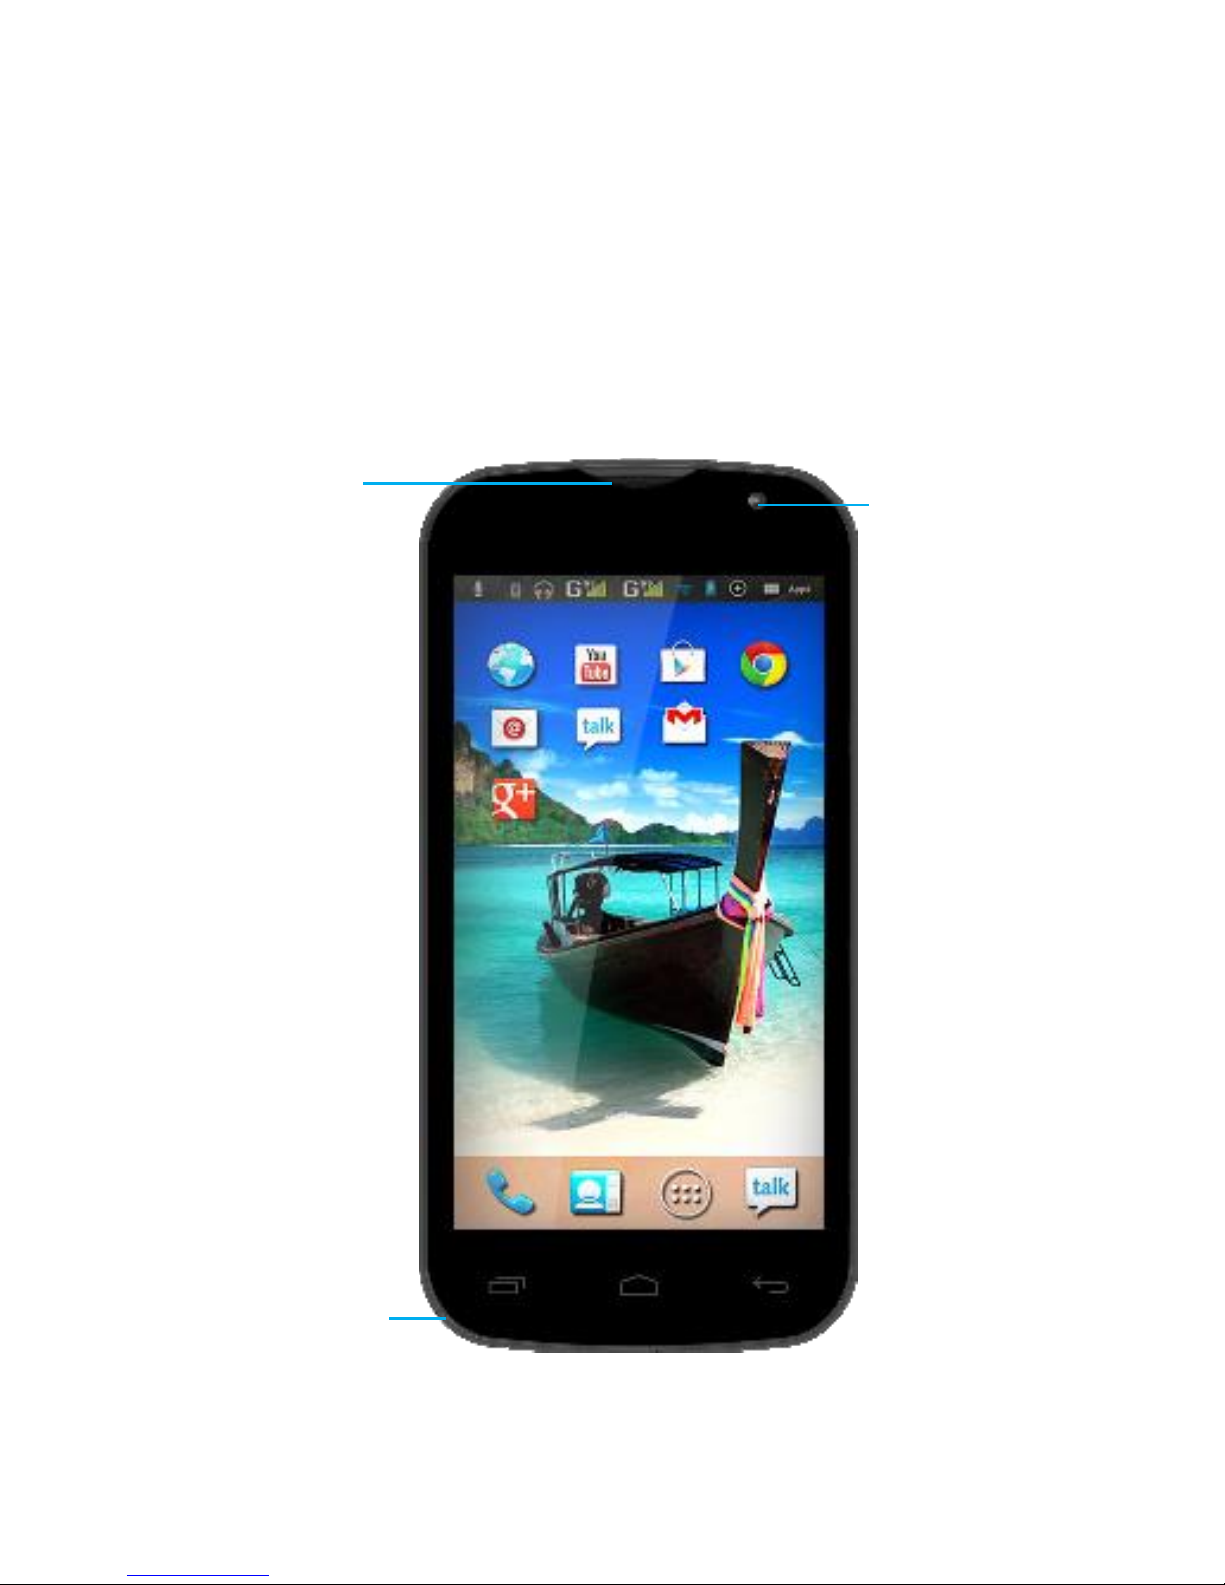
2.1 Smartphone Overall Drawing
Receiver
Microphone
Camera
Page 13
User Guide
11
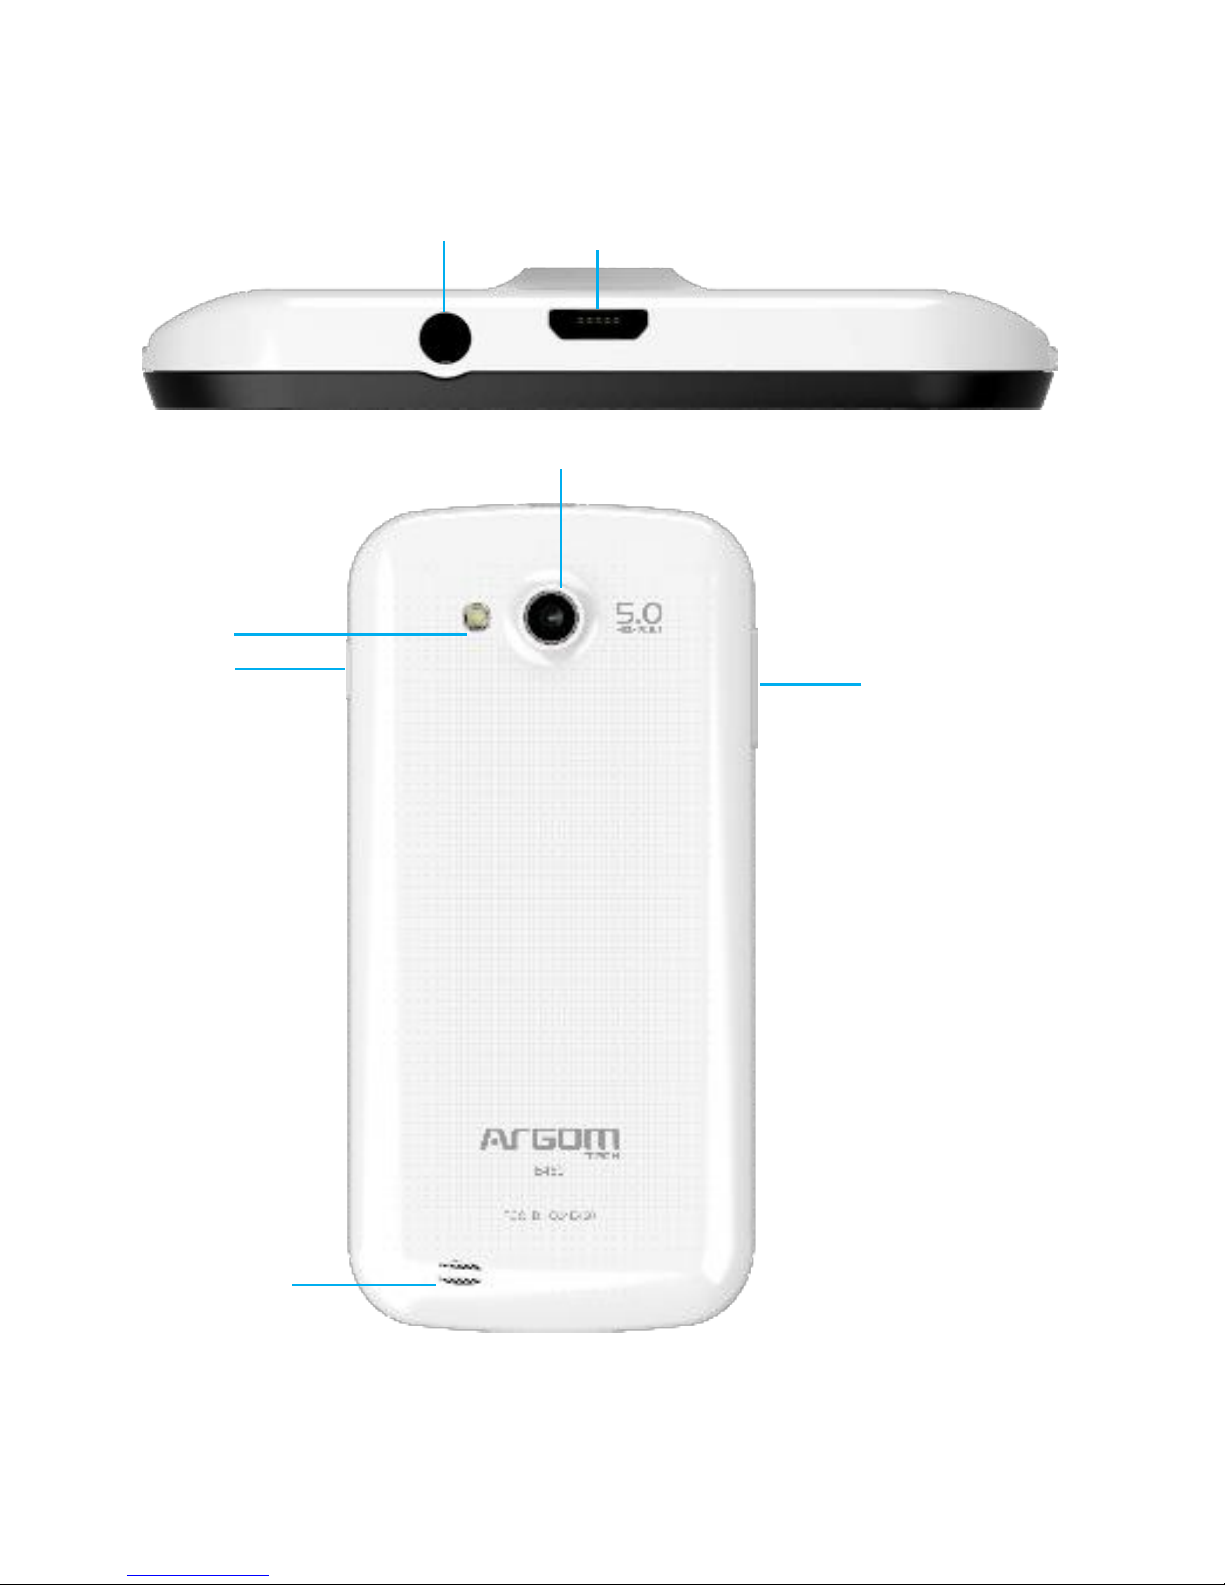
Headset Micro USB
rear Camera
LED
Power
Volume
Speaker
Page 14

12 User
2.2 Accessories Introduction
Packing List
Your smartphone packing box includes the following items
• Complete machine
• Power adapter
• USB cable
• Ear piece
• User manual
2.3 Use and preparation
Battery Management and charging
Before using your smartphone, please charge up the battery.
1. Use the USB adaptor to charge up your smartphone
battery.
This smartphone adopt built-in lithium ion battery, must
be choose standard adaptor for charging.
2. The first two times charging please keep about 6
hours, after that please charge for 4 hours at least.
Please charge in the following
conditions: A: The battery icons shows
have no power.
B: The system automatically shut down, shut down
after boot soon.
C: Press operation buttons have no response.
Page 15

User Guide
13
Remark:
1. If you haven’t use this phone for a long time, in
order to avoid power consumption caused
damage, please
Page 16

14 User
charge the battery once a month.
2. After low battery shut down, connect USB adaptor,
device will remind low battery, charging, need to
wait some time until the battery is enough power
to enter into main menu.
3. Device charging should be in standby status for
each normal charging time.
With device and screen consumption, it may cause
longer charging time.
03 Quick start
3.1 Boot and shut
down
Boot
After long pressing for 2 seconds on the power button, you can
see the boot logo.
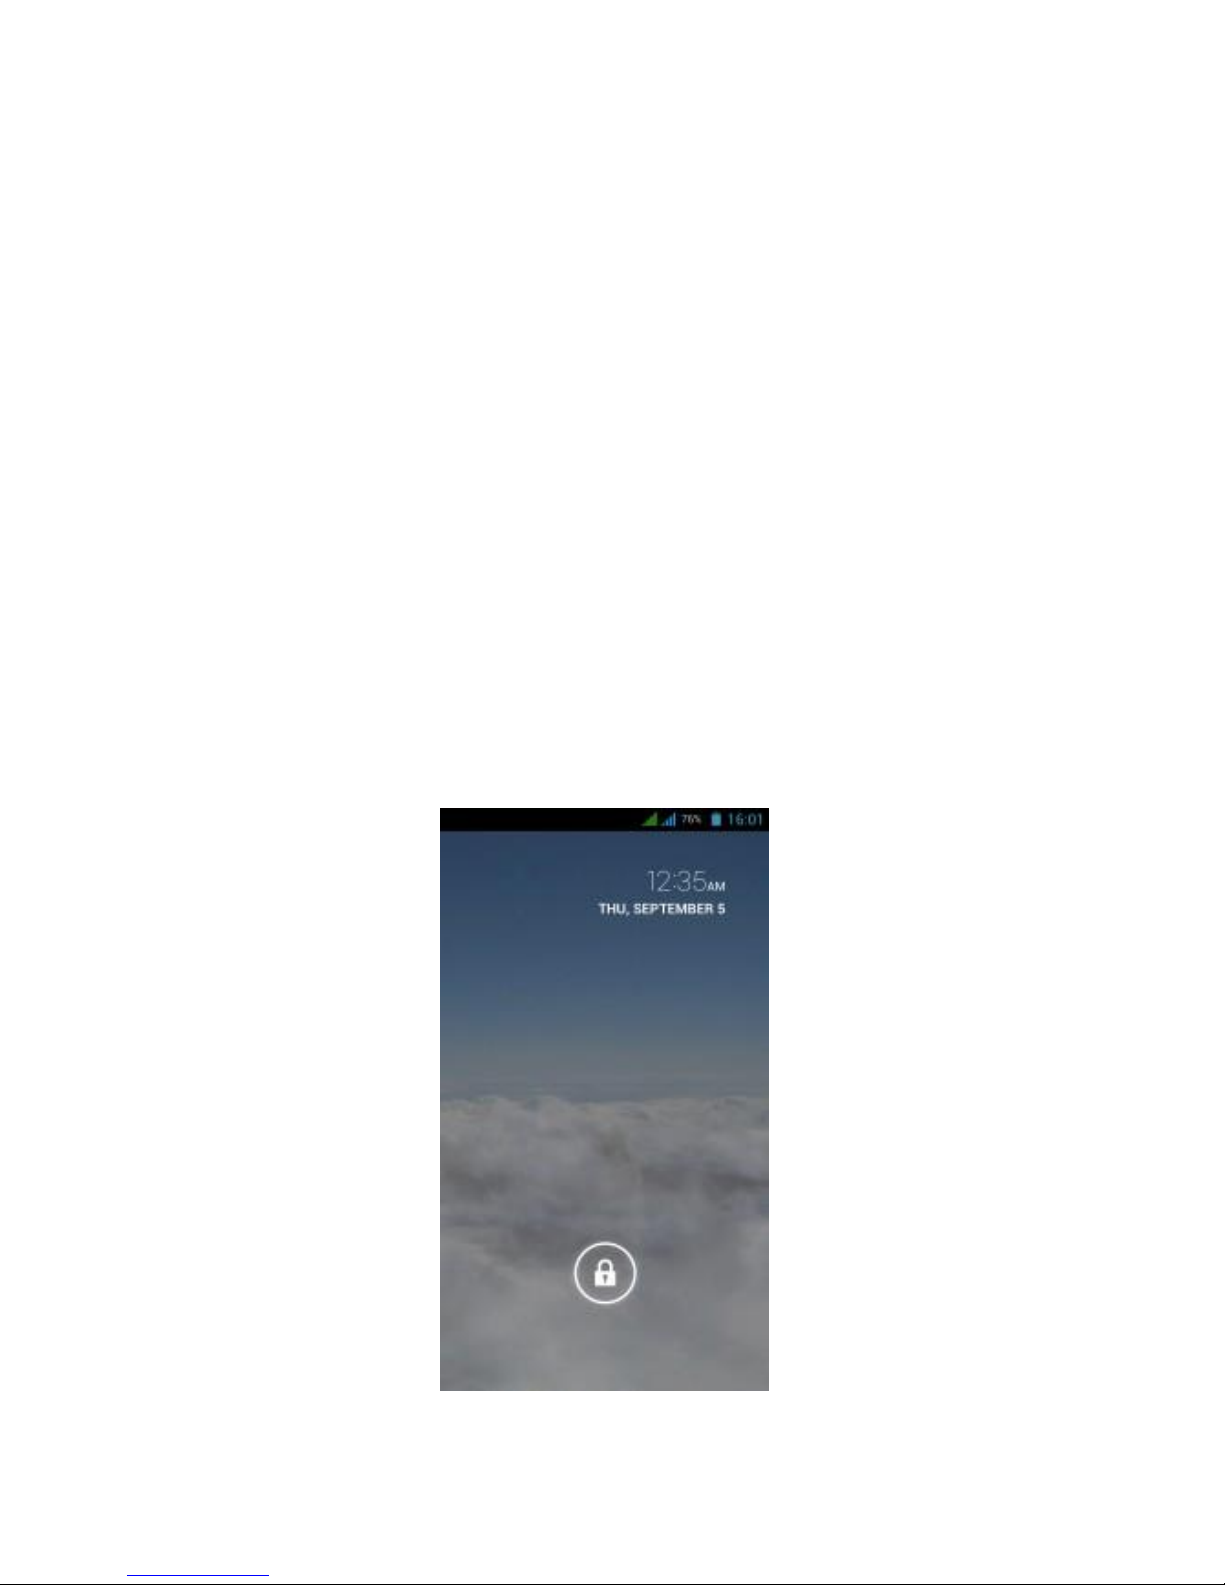
The system access into screen locking status after opening,
please press the Power On/Off button to refresh, and slide up
the unlock icon on the screen.
Power off
1. Long press the Power On/Off button, then “Power
off
”
options
pop up.
Page 17

User Guide
15
2. There is silent mode in device options, Power off and
Cancel.
3. Click Power off.
Page 18
16 User
3.2 Screen of opening and closing
It will be closed during the screen idling.
• After idling period of time, screen will be automatically
closed to save the battery.
• When the screen is on, you can press the power button to
shut down the screen immediately.
Opening in screen closed condition.
When the screen is off, you can press Power On/Off button to
activate it. Enter locked condition after opening it, press “lock
“icon and slide up for unlocking, and holding up “voice ” icon
and slide down for mute condition.
Page 19

User Guide
17
3.3 The use of touch screen
Your smartphone operation mode
There are several ways you can browse screen, menu
and application, etc on your smartphone.
Click
When you want to use the screen keyboard for input, you can
choose applications on the homepage as long as you click a
project with finger.
Press
If you want to open an available option (such as the text box
or web link) or move shortcut and main program menu on
the homepage as long as you press the items.
Fast sliding or sliding
Fast sliding or sliding said in his fingers making rapid
vertical or horizontal drag action.
Drag
Before you start to drag, you must use your finger to press
strongly on it for a short time. When dragging it to the position
you want, you can loosen your finger.
Rotating
For most pictures, you need to turn your smartphone around,
then screen will translate from lateral direction to straight. Such
as in the input text, watch movies, etc.
Page 20
18 User
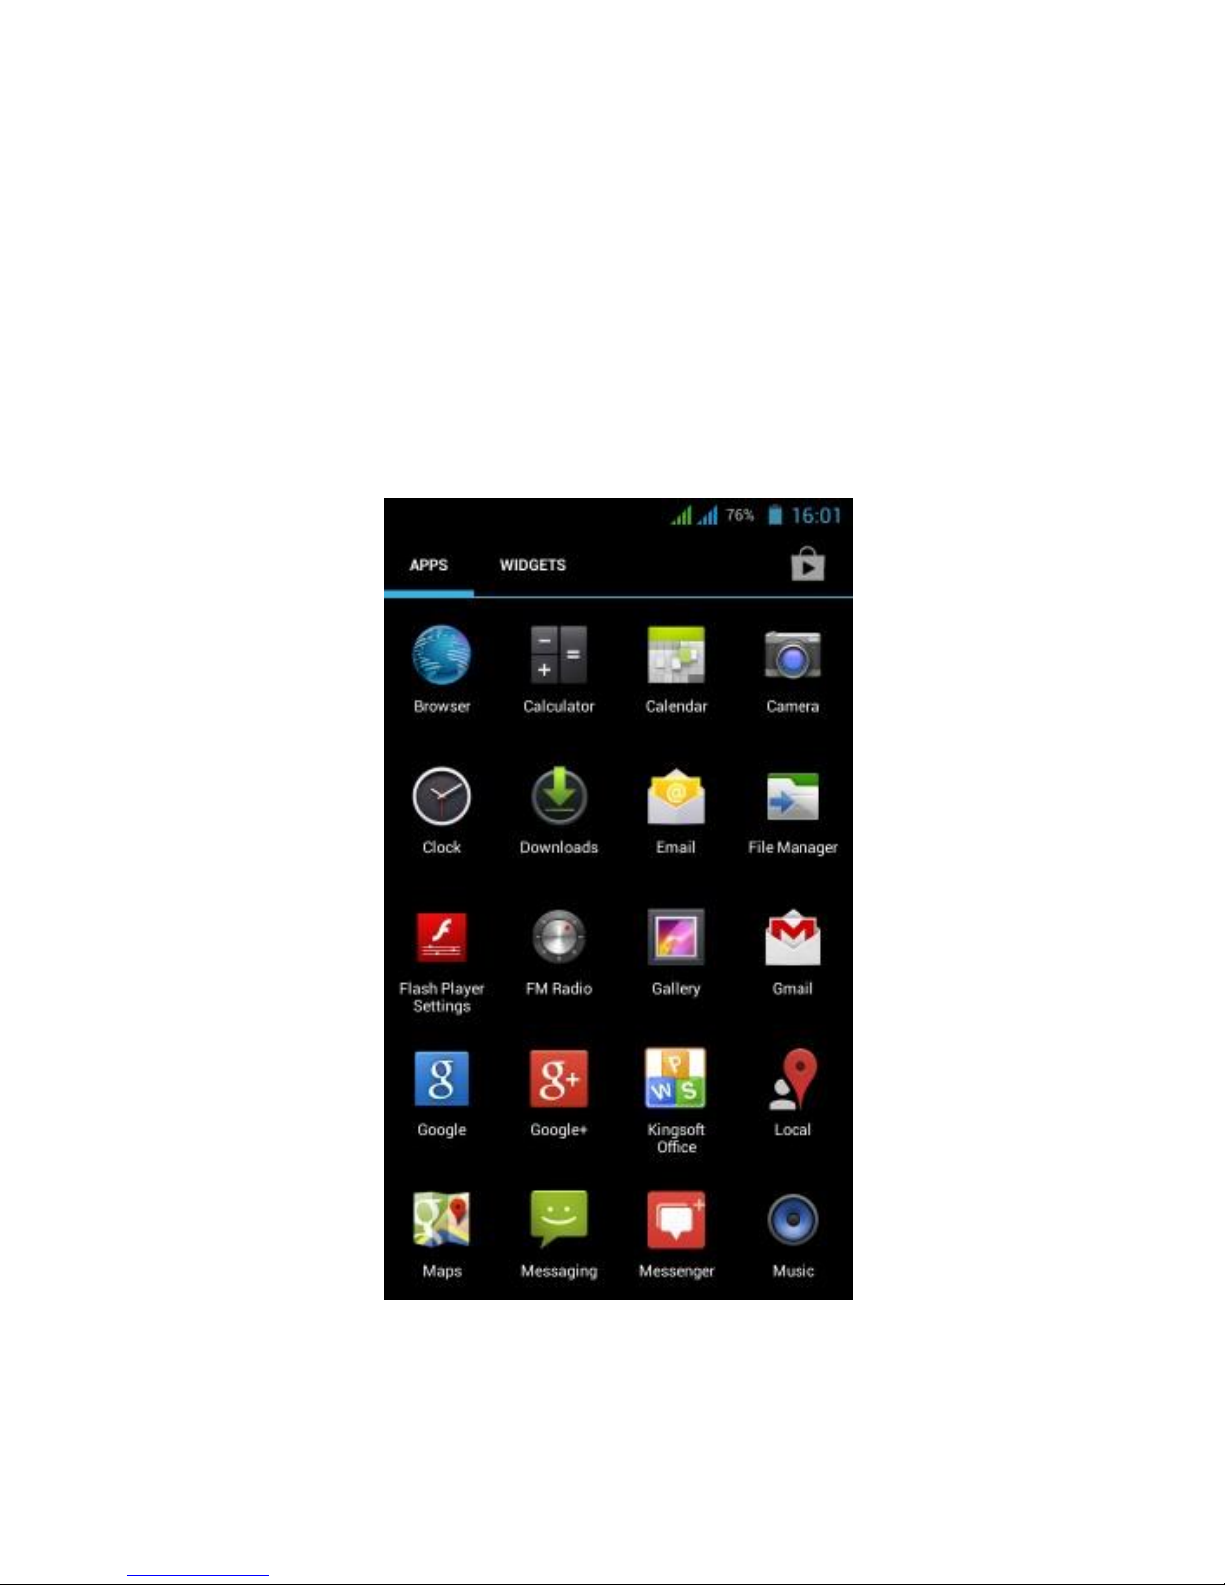
3.4 Page
interface
The main menu screen shows all the applications. You can use
the application, set shortcuts and customize your homepage
interface wallpaper, etc.
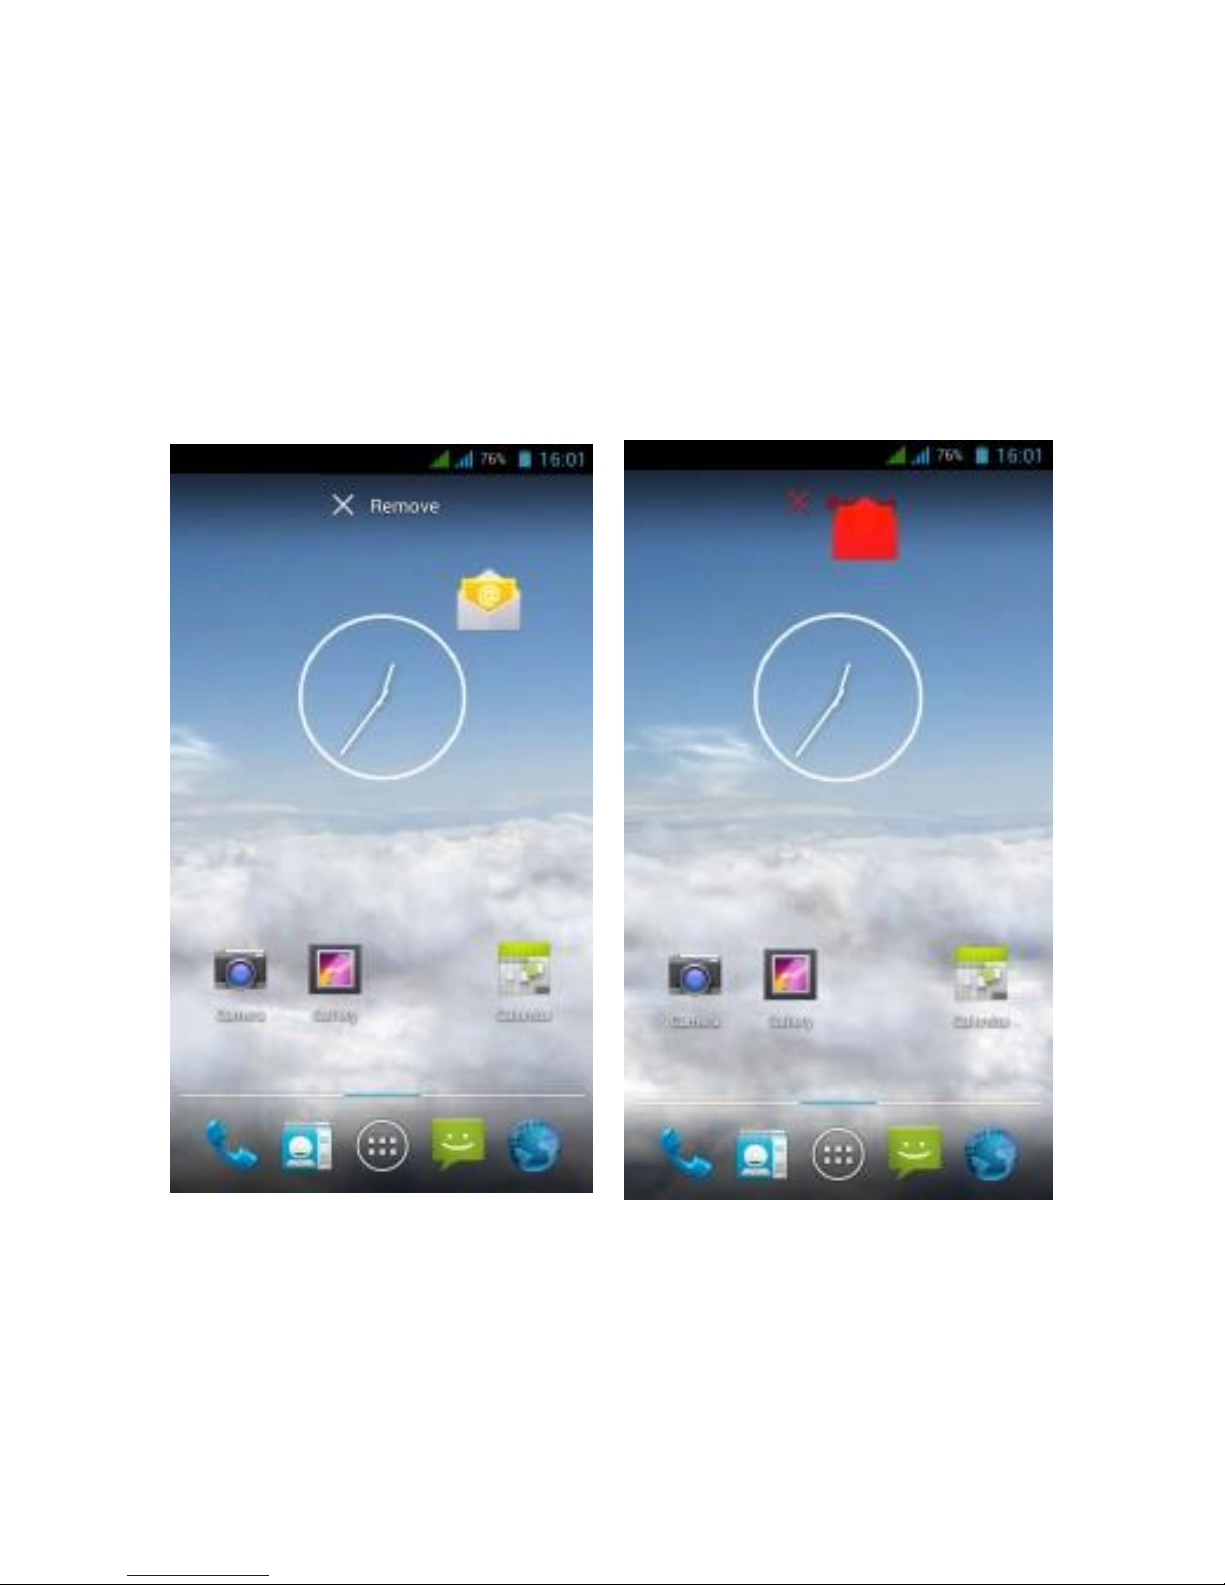
In the main interface, you can management main interface
software ICONS: long press the icons for 3 seconds, after the
Page 21

User Guide
19
icons
Page 22
20 User
become bigger, then you can drag anywhere in the interface
and loosen your finger.
Delete icons: long press the icons for 3 seconds, drag the
icons to the top of the phone where XRemove stands, loosen
your hand, after that you can delete icon.
Page 23

User Guide
21
3.5 Function of icons
• Menu icon
Touch this icon to access options of a selected function.
• Home icon
Touch it to open home screen. If you’re viewing the left or
right extended Home screen, Touch it can enter the central
screen.
• Back icon
Touch this icon to return to the previous screen.
3.6 Use touch panel
Touch-screen tips
• Touch
To act on items on the screen, such as application and settings
icons, to type letters and symbols using the onscreen keyboard,
or to press onscreen buttons, you simply touch them with your
finger.
• Touch & hold
Touch & hold an item on the screen by touching it and not
lifting your finger until an action occurs. For example, to open
a menu
for customizing the Home screen, you touch an empty area on
the
Home screen until the menu opens.
Page 24

22 User
• Drag
Touch & hold an item for a moment and then, without lifting
your finger, move your finger on the screen until you reach
the target
Page 25

User Guide
23
position.
• Swipe or slide
To swipe or slide, you quickly move your finger across the surface
of the screen, without pausing when you first touch it (so you
don’t drag an item instead). For example, you slide the screen
up or
down to scroll a list.
Lock screen
When Screen lock in Security setting is enabled, press Power
key to lock the handset. This helps to prevent accidental
touching of keys and as well as power saving. When Sleep
function in Display setting is enabled, after the handset device
has been idle for preset period, the screen will be locked
automatically to save power.
Unlock screen
Press Power key to switch on the handset device. The lock
screen appears. Touch and slide left to open camera
application. Touch and slide right to unlock screen, and the
screen being locked last time will show.
3.7 Equipment basic settings
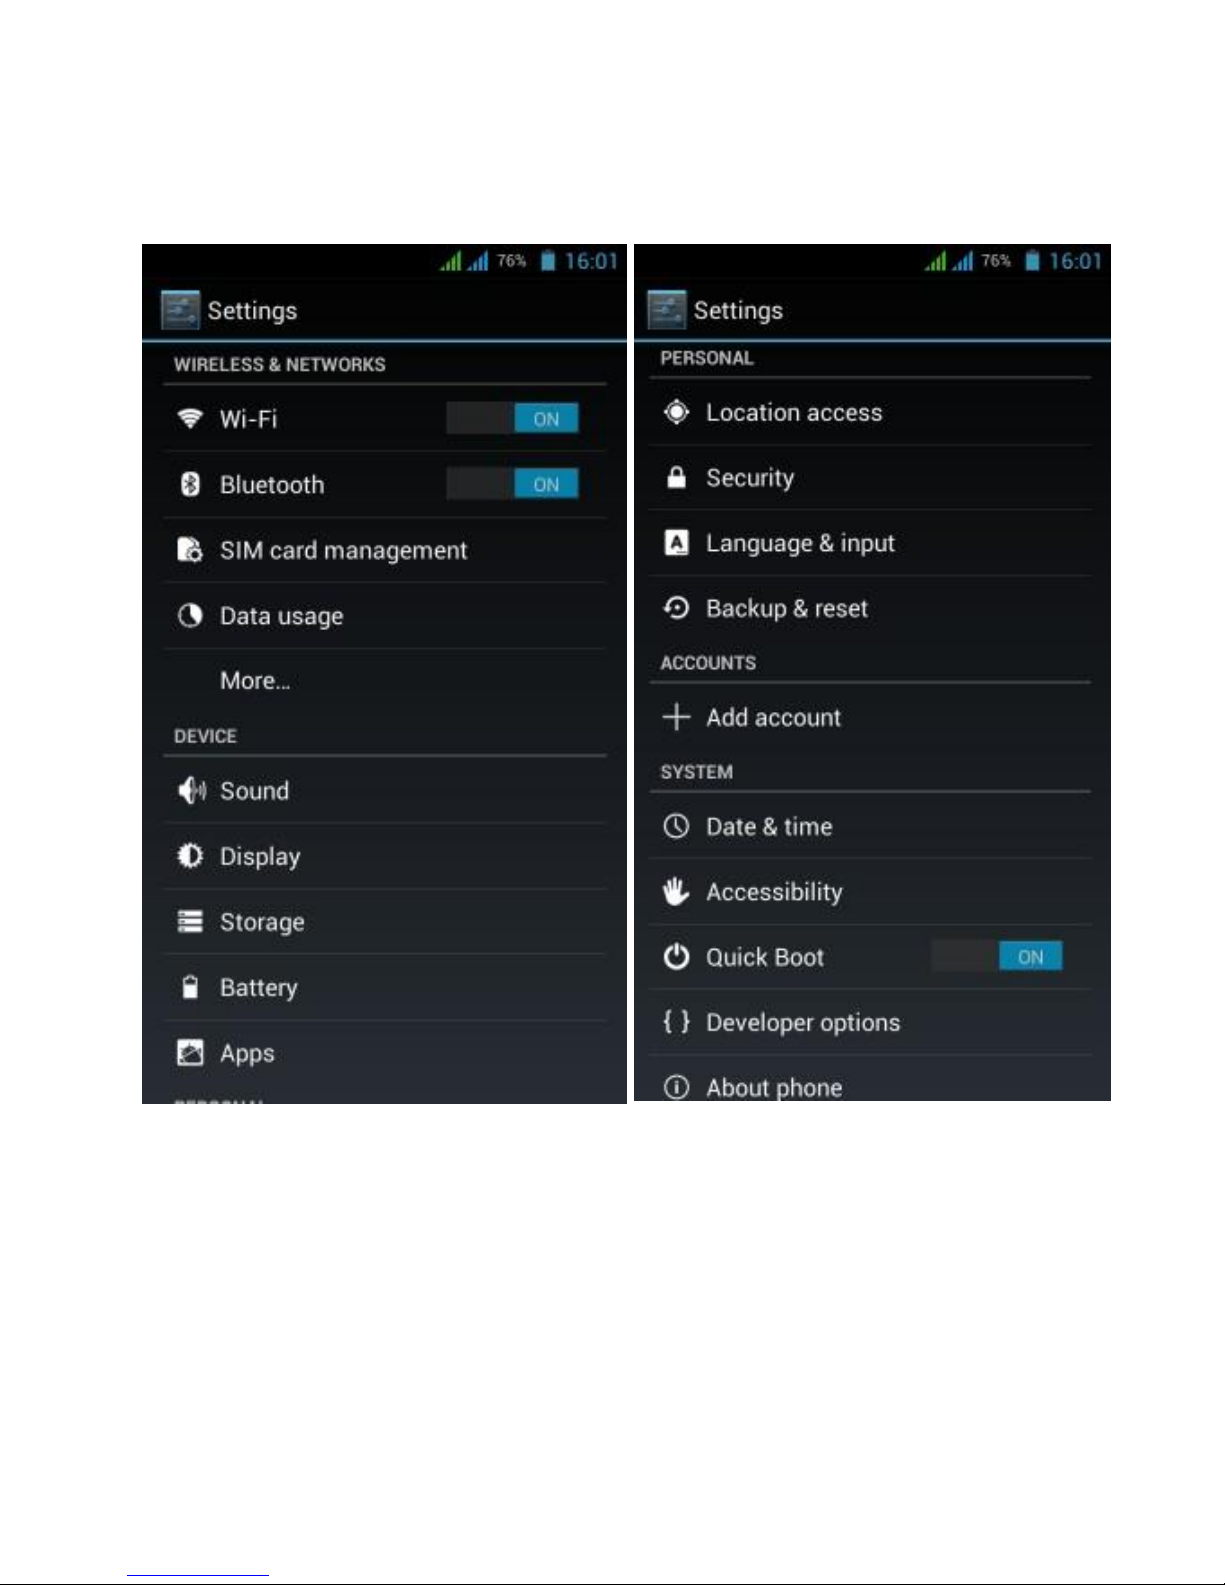
Settings: Click settings icons, enter settings interface.
Page 26
24 User
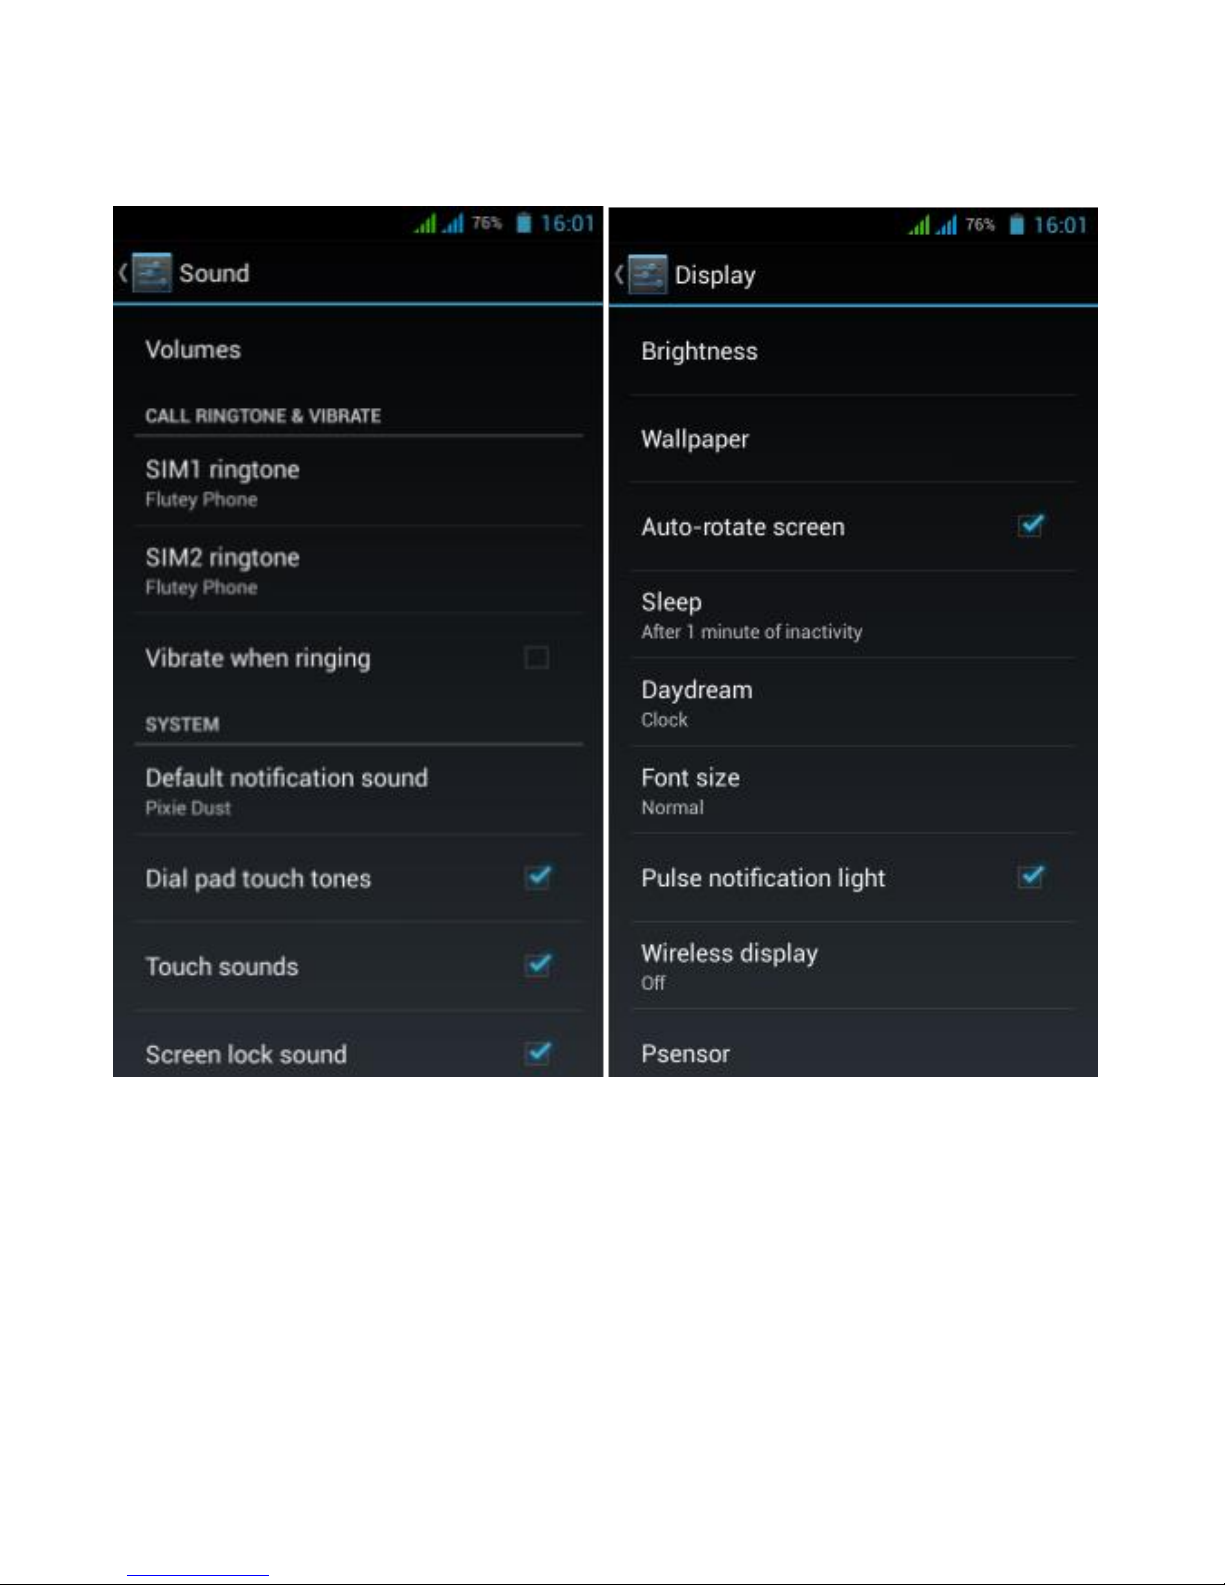
3.7.1 Silent mode, volume, notification,
ringtone, audible selection, screen lock sounds.
Page 27
User Guide
25
3.7.2 Application
Manage applications
Unknown sources: Click “Unknown Sources”, then click
“OK”. Manage application: manager and uninstall
application.
Page 28
26 User
Remark: When you firmware upgrade, please close the USB
connect.
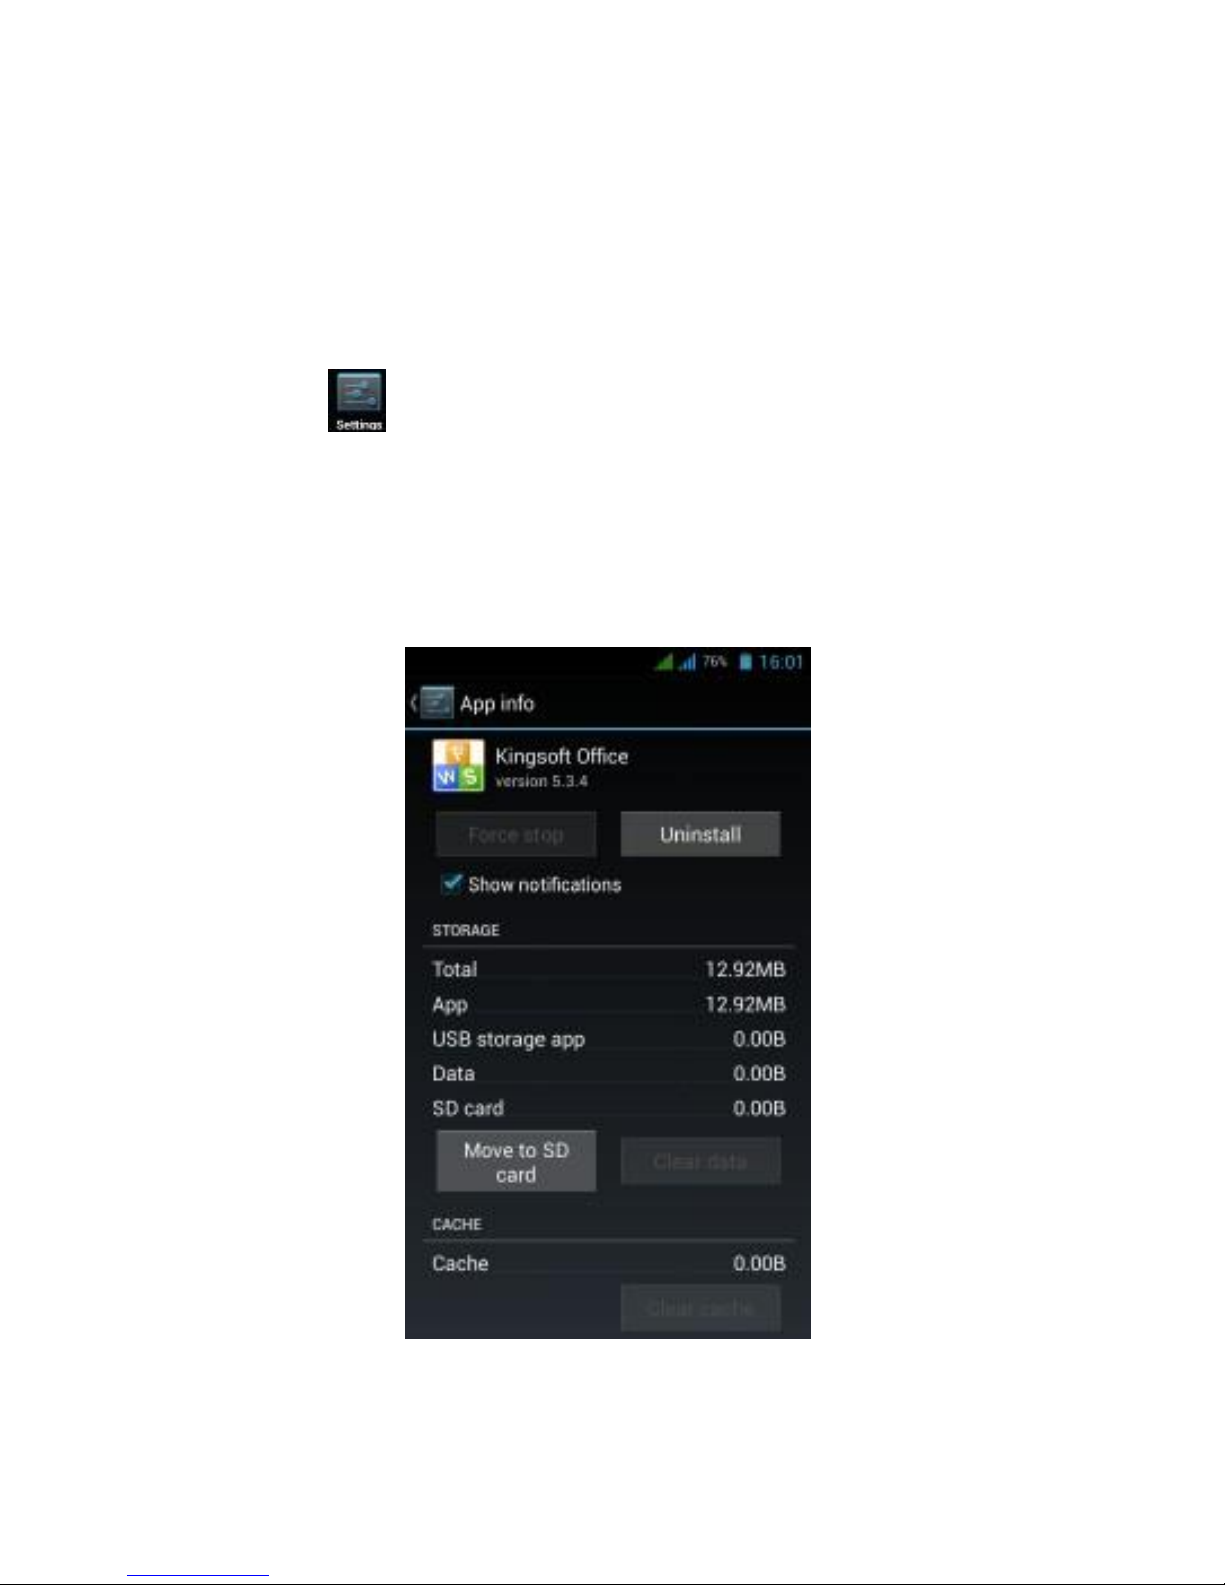
How to uninstall?
1. Enter “Settings”>”Application”>”Manage application”
and then there will be installed the program list.
2. Click you want to uninstall icon, will enter the following
interface.
3. Click Uninstall, then you can delete the application.
Page 29
User Guide
27
3.7.3 Privacy
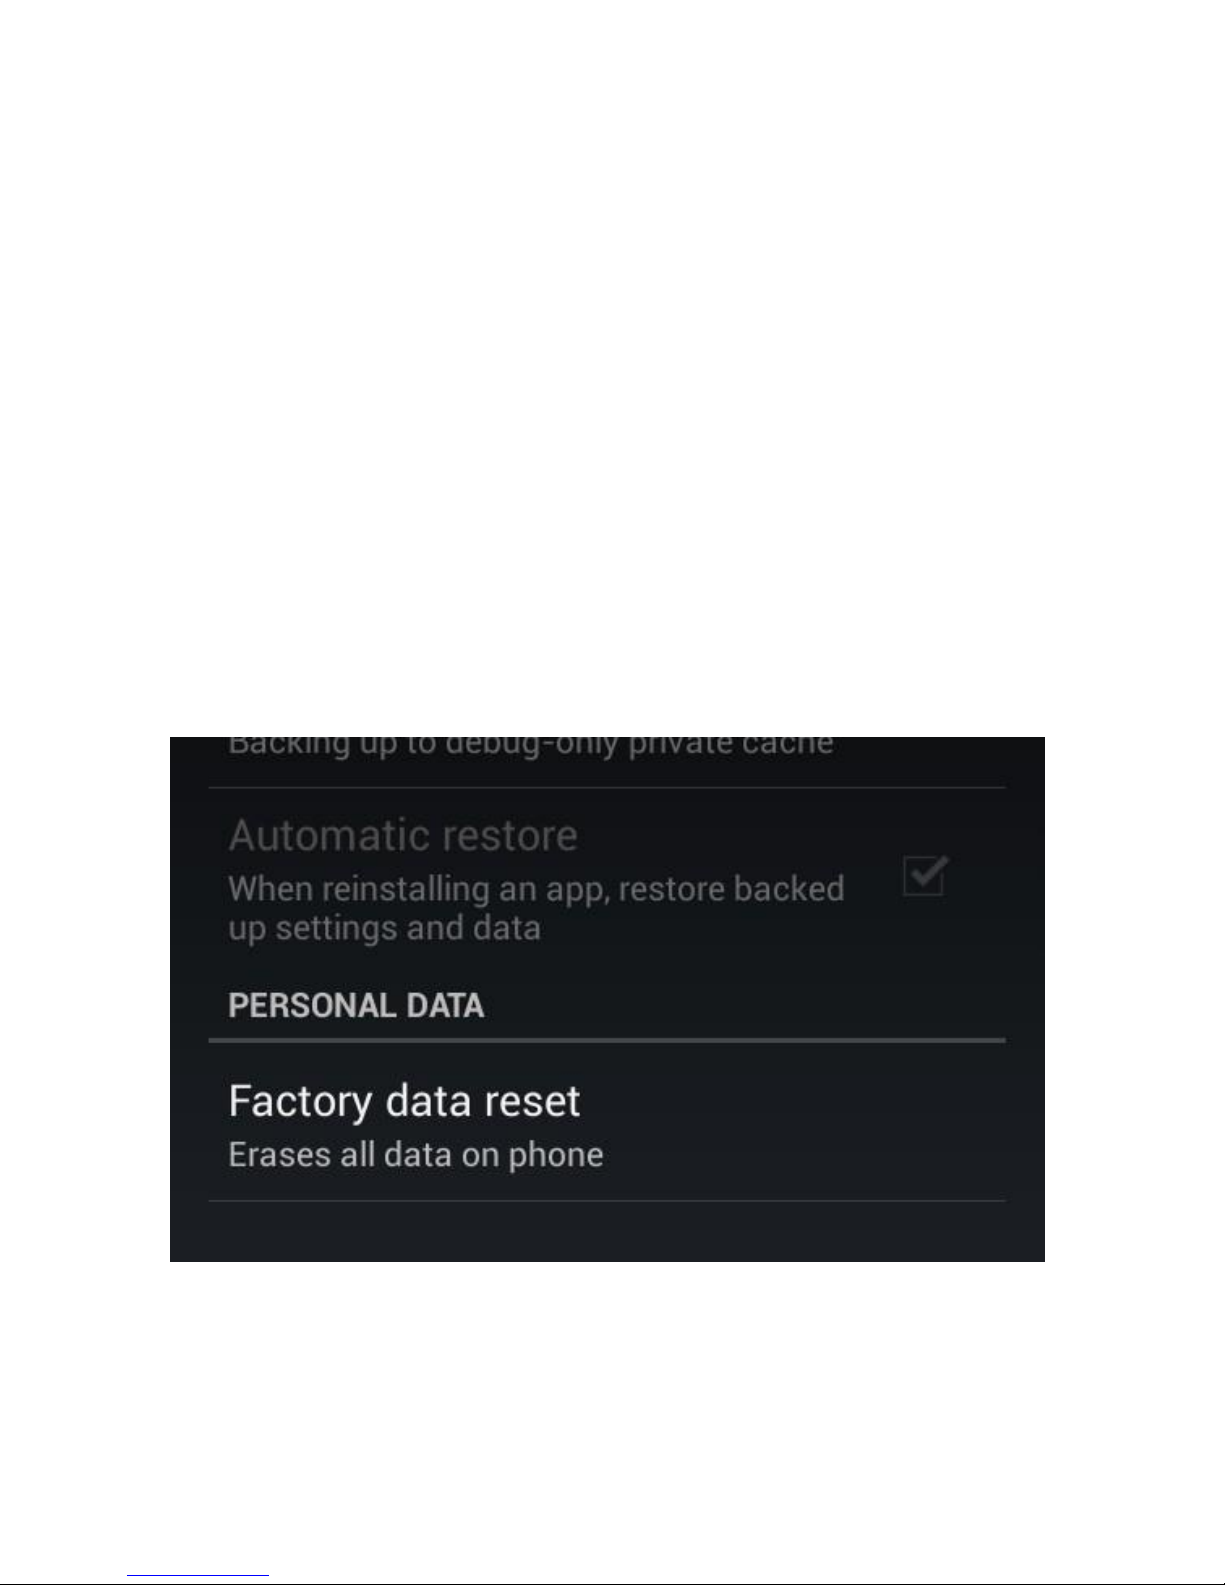
Restore to factory settings
When there are too many errors in your smartphone or you
forget the passwords, you can use Restore to factory Settings
to restore them to Initial State.
Methods:
1. On the homepage interface, press Menu key.
2. Click Settings.
3. Click Backup & reset.
4. Click Factory data reset.
5. Wait for the system to restart.
Page 30
28 User
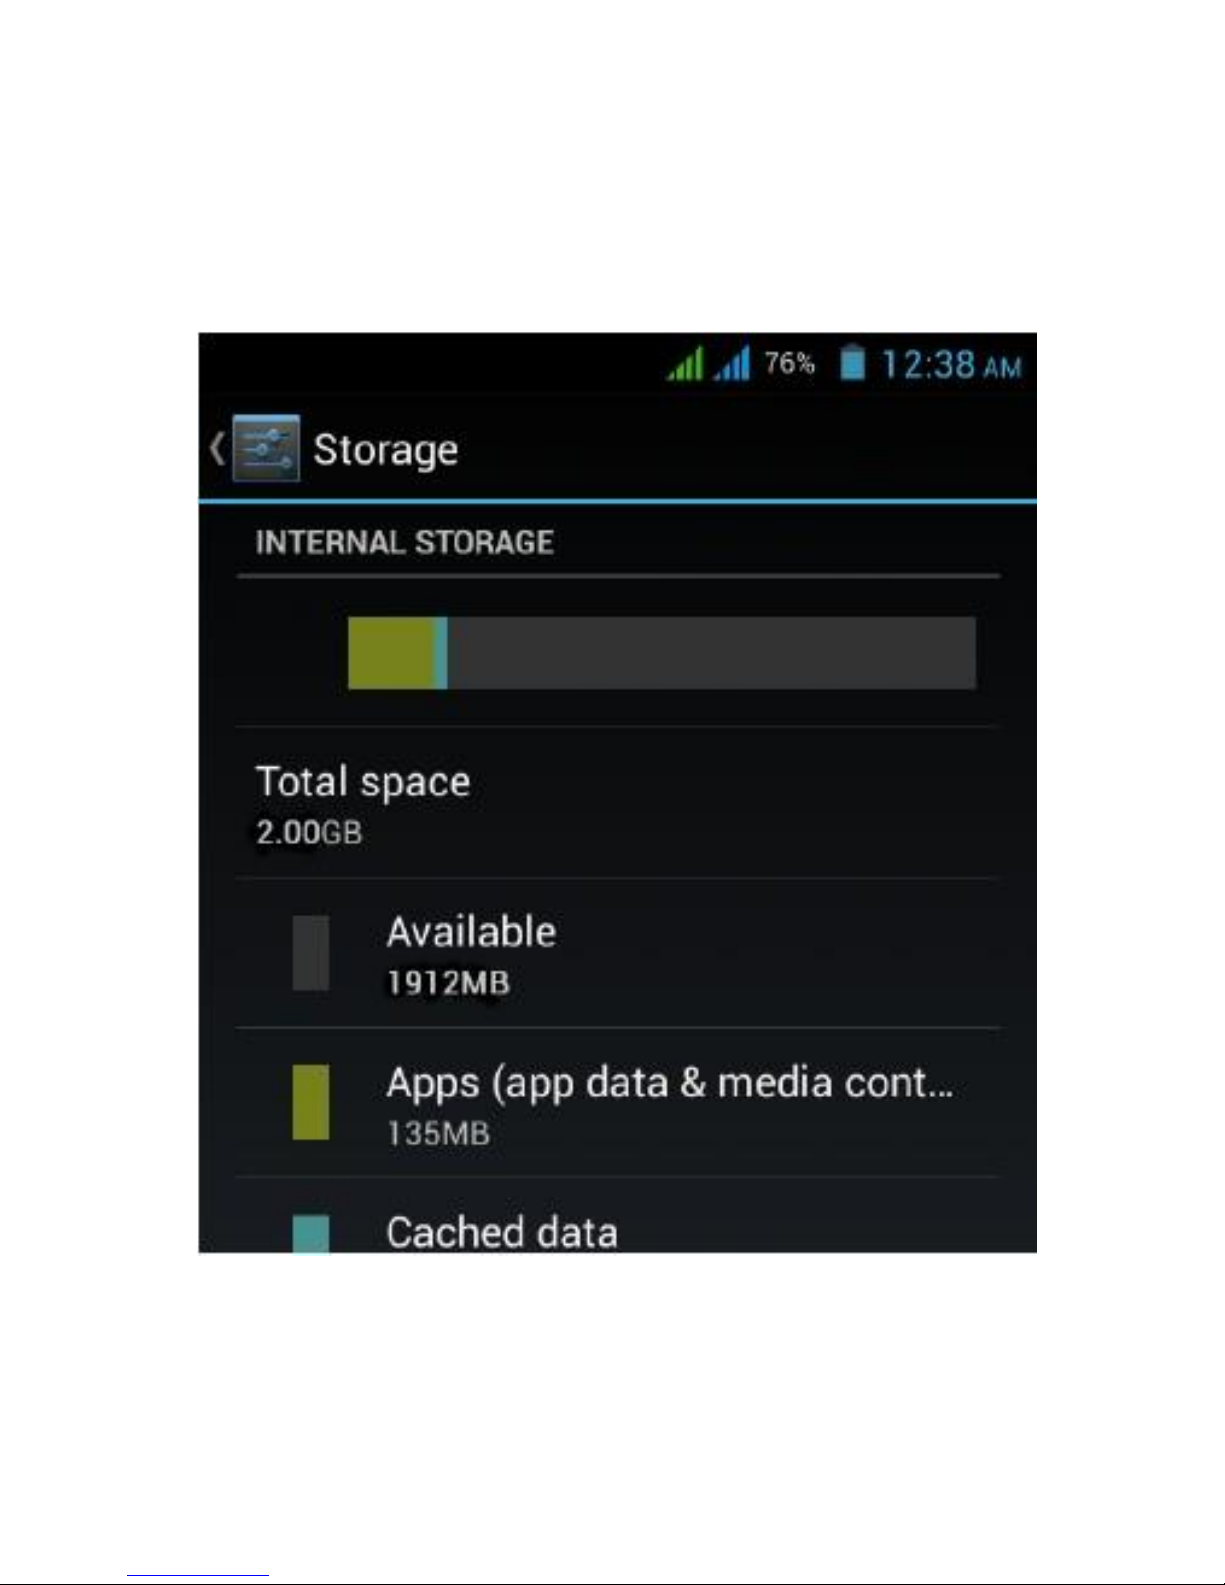
3.7.4 Storage
Remove TF card, view of the available storage space
Remark: Please touch option “delete SD card”, so that can remove
SD card safety.
Page 31
User Guide
29
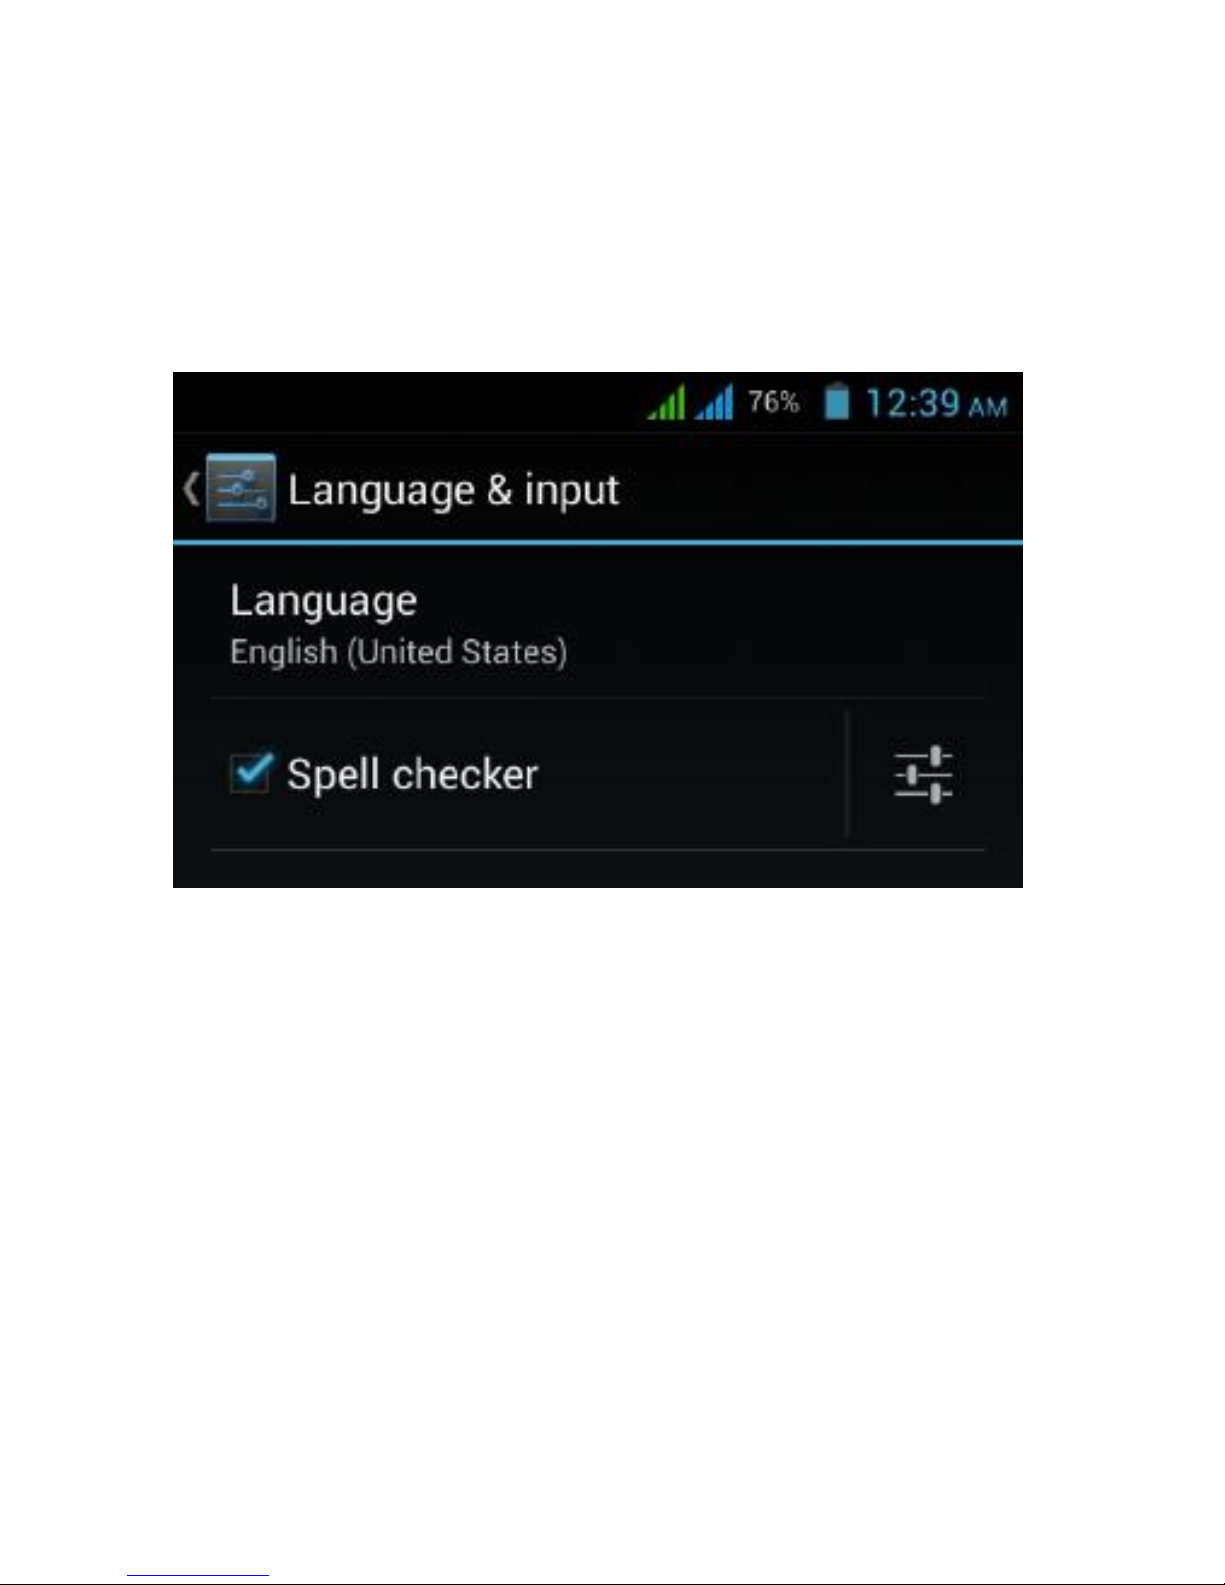
3.7.5 Language & Keyboard
Settings: Language, text input and automatic error
correction options.
Select Language: 54 kinds of national languages are available.
Remark: Android system can support 54 kinds of languages,
now menu interface just support 14 kinds of languages.
Android keyboard: Android keyboard setting
Sound on Key-press
Auto-capitalization
Show suggestions: Display suggested words while typing.
Auto-complete: Spec bar and punctuation automatically
insert highlighted word.
Page 32
30 User
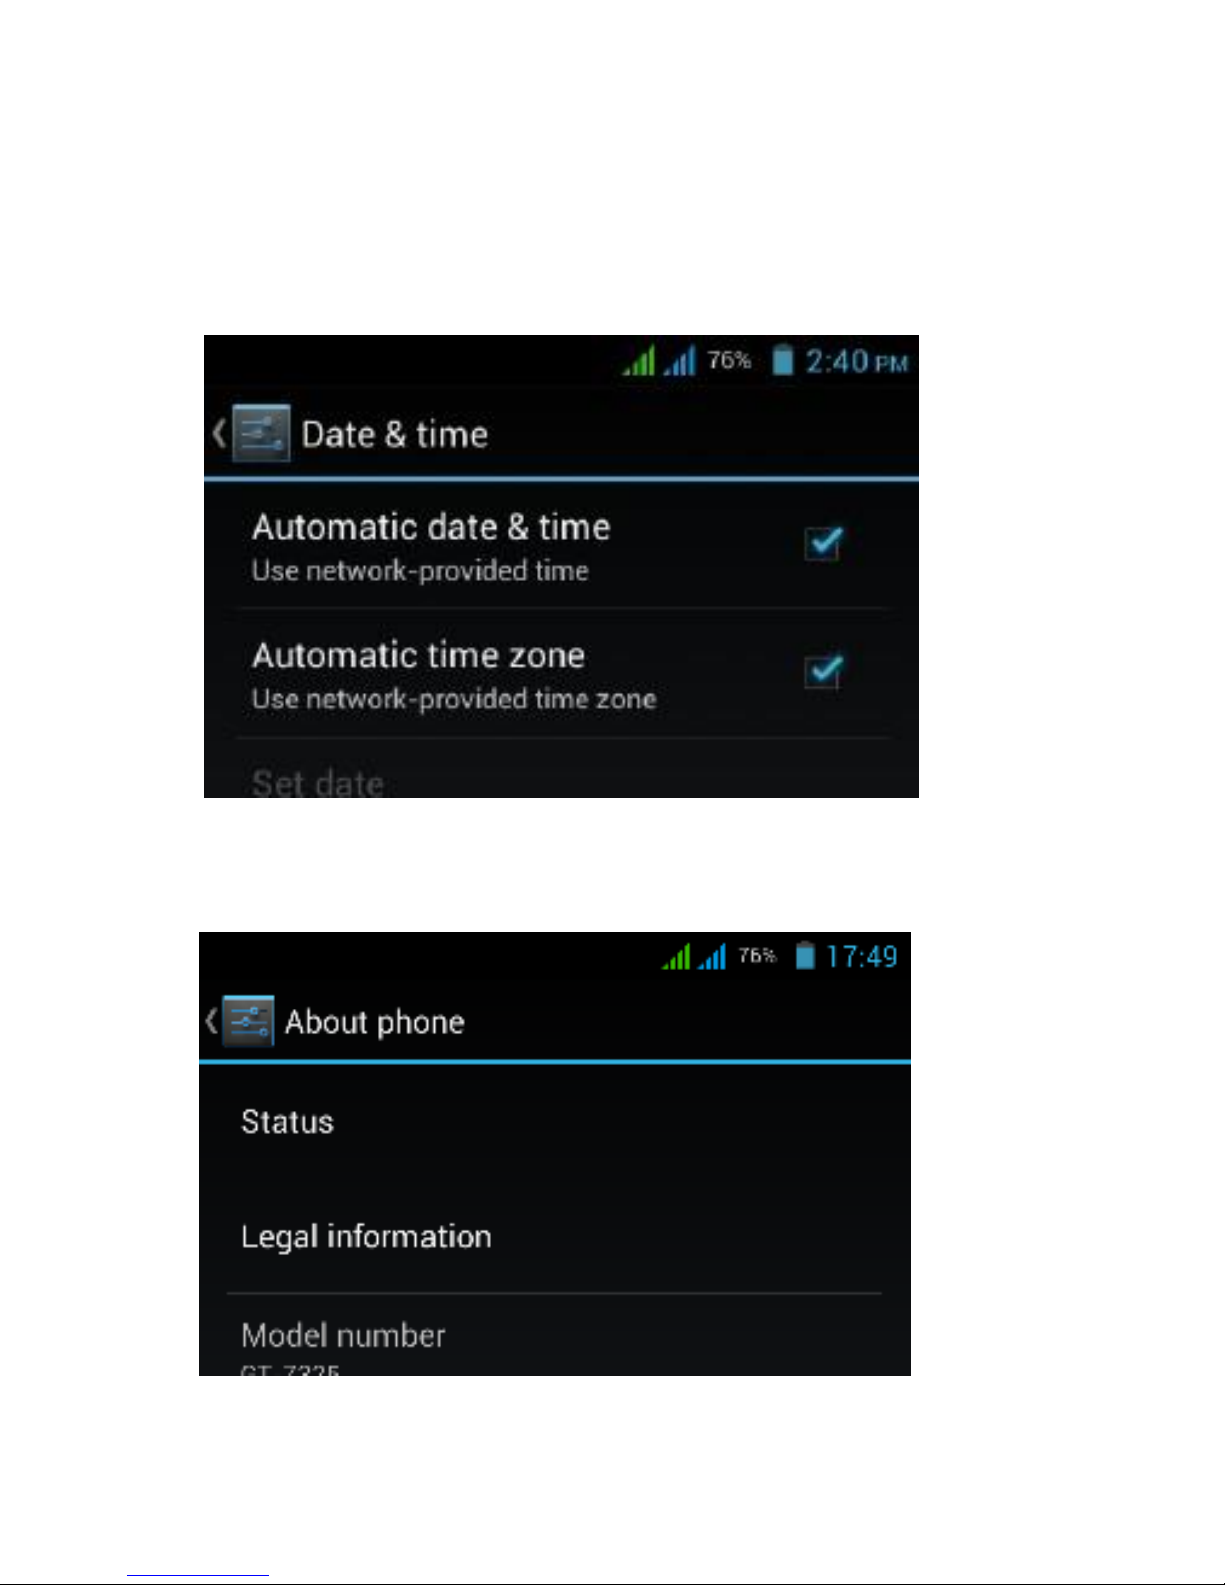
3.7.6 Date & time setting
Set date, set time, select time zone and select date format.
3.7.7 About device
Page 33

User Guide
31
3.8 APPS install and uninstall
3.8.1 APPS install
This phone supports Android APPS in Play Store by third
party, most APPS can be installed from the network, which
can copy to NAND FLASH or SD card.
Remark: Some 3rd APP must install properly by memory
card, downloaded 3rd party app may not install properly
on device.
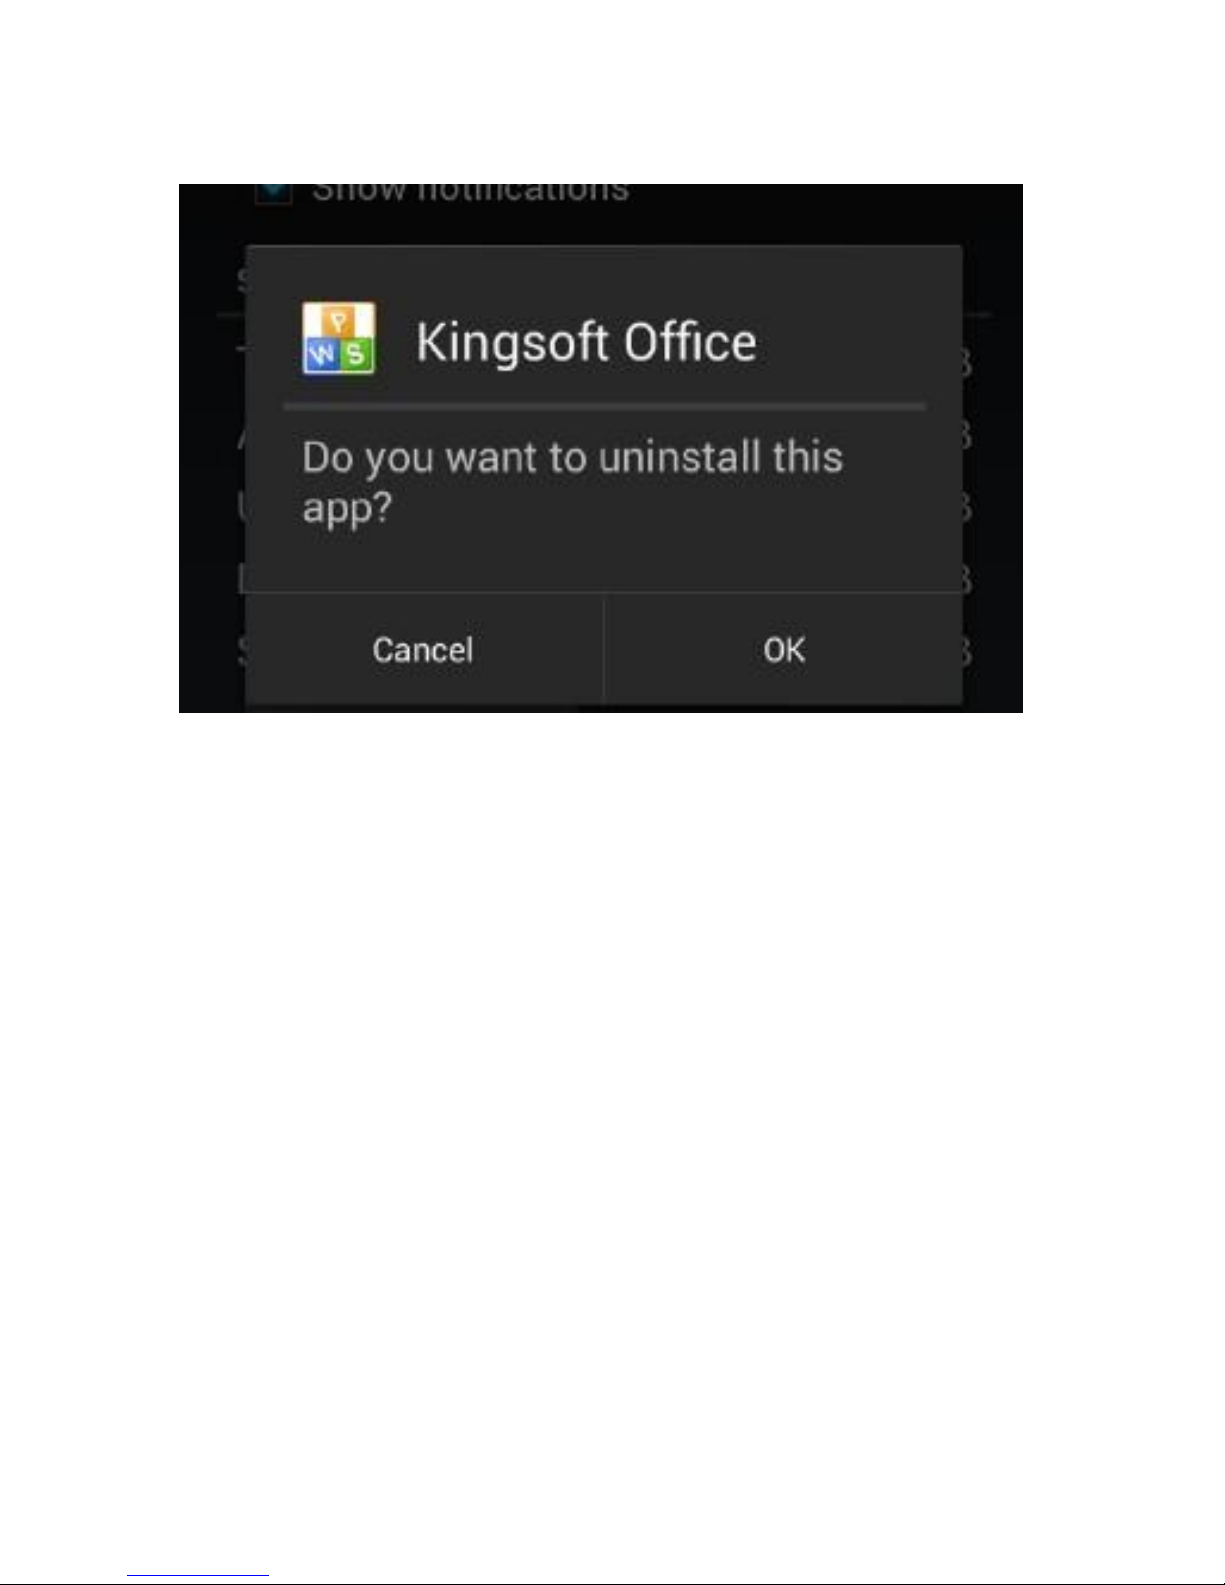
3.8.2 APPS uninstall
Click Settings, choose Apps, select the Apps you would
like to uninstall then click “uninstall” ----> click “OK” as
follows:
Page 34
32 User
Page 35
User Guide
33
04 Establish connections
4.1 USB connection
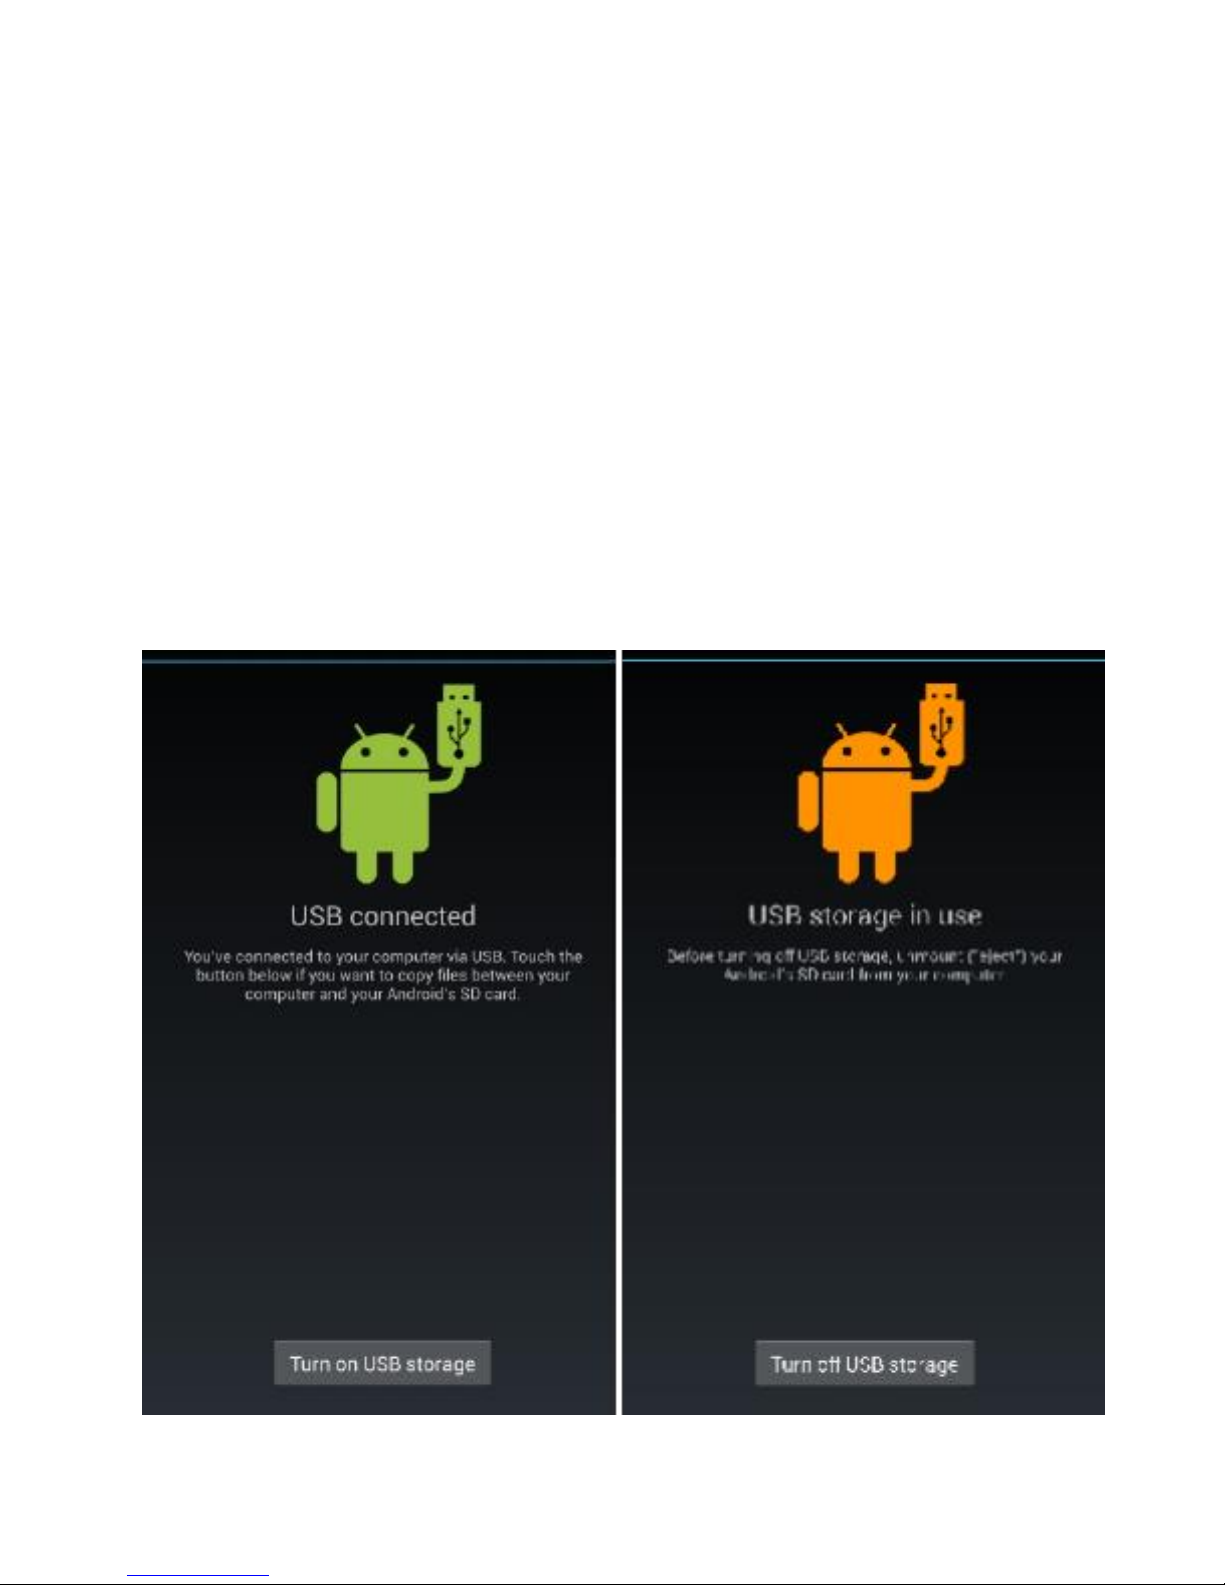
1. Use USB cable to connect your smartphone with computer.
Notice massage will appear in Notice bar.
2. In the notification panel, click on the USB connected, then
click
Turn on USB storage.
3. Then the USB connection will be done successfully.
Page 36

34 User
4.1.1 Copy files to memory cards.
1. Use a USB cable to connect your smartphone with computer.
2. After setting the store setting, connect your smartphone
with computer successfully.
3. Open My Computer of your computer, “portable disk (x)” can
be
seen.
4. Select the intended files and copy to the “portable disk (x)”.
5. After copying the files, click “safe deletion hardware”
icon of your computer task bar to unload.
4.1.2 Content of Storage Device
1. NAND FLASH storage device, your smartphone itself has 8G
storage space for keeping files.
2. TF removable storage card.
3. The above mentioned two storage devices can connect
your computer by using USB.
Note: When you connect the USB cable with your
smartphone, enabling the USB storage device, you will not
get access to Internal Memory; If you want to get access to
Internal Memory, please disconnect the USB device.
4.1.3 Storage card
Copy files to storage card
Page 37

User Guide
35
You can transfer files between your smartphone and computer
such as music and pictures, etc. If you want to check the files,
Page 38

36 User
please click the file browser, then you can browse the
contents of the SD card.
Delete the files on your smartphone memory card.
1. Select the file you want to delete.
2. Click the file you need to delete, then the file menu will
popup.
3. Click “delete”
4.1.4 Input text
Use the screen keyboard
When you start programs or select text edit box which
needs to input text or number, the screen keyboard will
appear.
There is an optional input method of keyboard below:
1. Android keyboard
2. The third party input method (The user can install any
input methods independently)
Select the input method which you want to use.
For pre-installation, Android keyboard will be displayed when
you want to input word.
1. On the homepage interface, press menu button and click
“Settings”.
2. Click the Language& input.
3. List all installed input methods of your smartphone in the text
setup area.
4. Tick the input method you want.
Page 39

User Guide
37
Use and switch input method
Page 40

38 User
1. On the text input interface, hold text edit box area until
“edit text menu” pop ups. Then click the input method.
2. Select the input method you want.
4.2 Linking to the Networks and devices
Your phone can connect to a variety of networks and devices,
including mobile networks for voice and data transmission,
Wi-Fi data networks, and Bluetooth devices, such as headsets.
You can also connect your phone to a computer, to transfer
files from your phone’s SD card and share your phone’s mobile
data connection via USB.
Connecting to mobile networks
When you assemble your phone with a SIM card, your phone
is configured to use your provider’s mobile networks for
voice calls and for transmitting data.
Connecting to Bluetooth devices
Bluetooth is a short-range wireless communications
technology that devices can use to exchange information
over a distance
of about 8 meters. The most common Bluetooth devices are
headphones for making calls or listening to music, hands-free
kits for cars, and other portable devices, including laptops and
cell phones.
Touch
Settings > Wireless & networks > Bluetooth. Check
Bluetooth
Page 41

User Guide
39
to turn it on.
You must pair your phone with a device before you can connect
to
Page 42

40 User
it. Once you pair your phone with a device, they stay paired
unless you unpaired them.
Your phone scans for and displays the IDs of all available
Bluetooth devices in range. If the device you want to pair with
isn’t in the list, make it discoverable.
Connecting to a computer via
USB
You can connect your phone to a computer with a USB cable,
to transfer music, pictures, and other files between your
phone’s SD
card and the
computer.
4.3 WIFI
connection
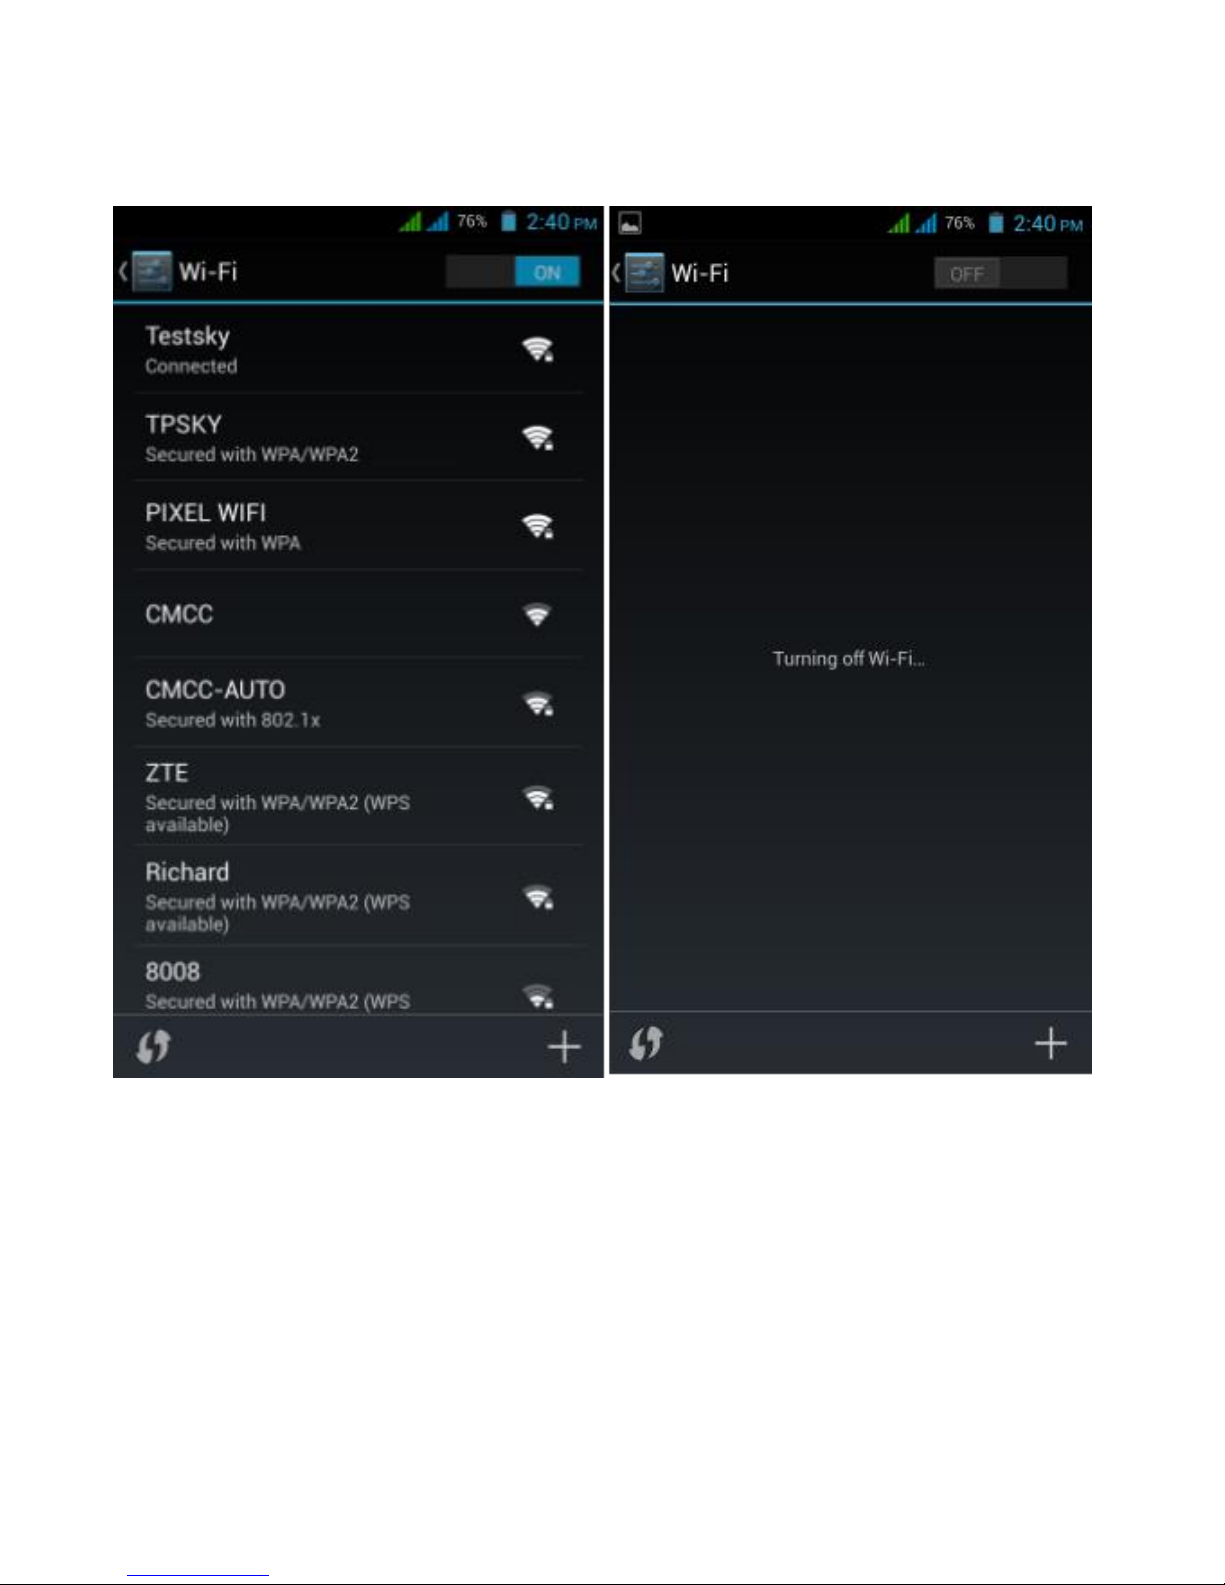
You can connect your smartphone to Wi-Fi
network:
1. In the homepage interface, click the MENU button,
then settings menu will pop up.
2. Click settings.
3. Click wireless and
network.
4. Drag Wi-Fi to “ON”. Your smartphone will automatically
scan
available Wi-Fi networks.
5. Choose the Wi-Fi network you prefer. If it is private
Wi-Fi
network, then the password having been set should be
Page 43

User Guide
41
input.
Page 44
42 User
05 Communication
5.1 Installing the SIM
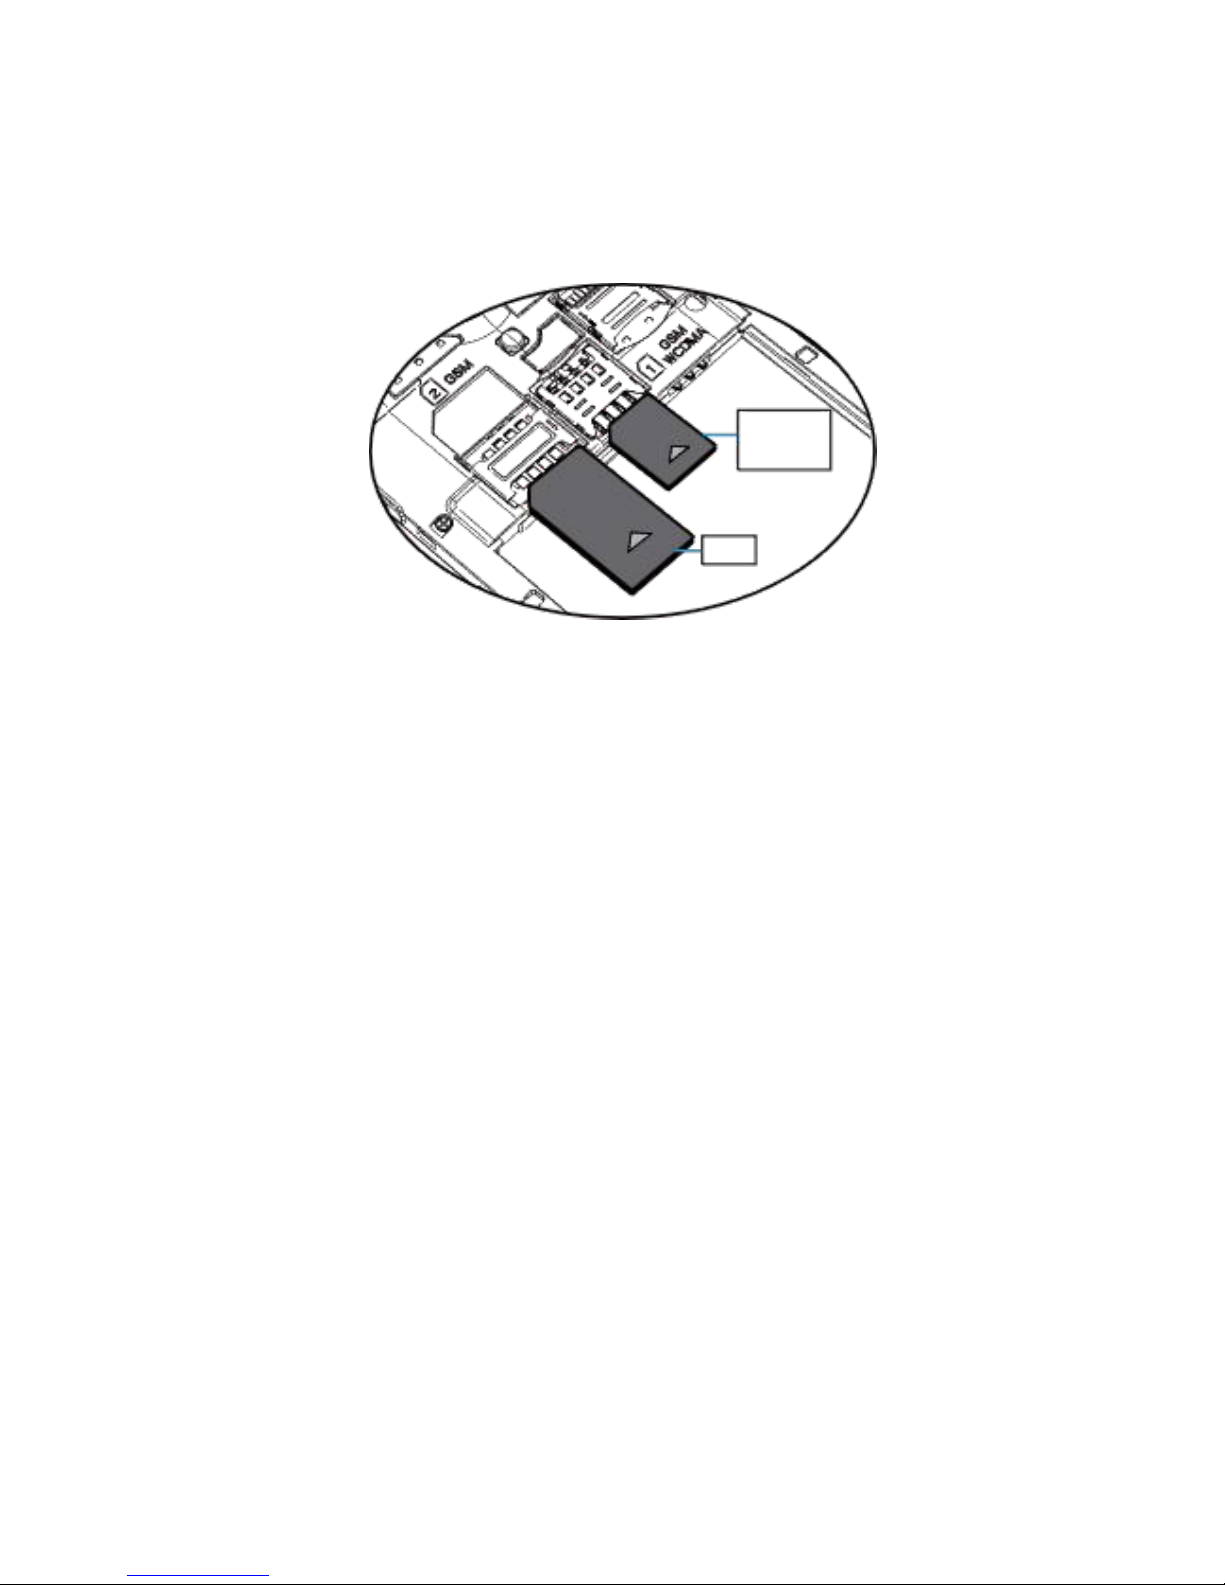
An SIM card carries useful information, including your
mobile phone number, PIN (Personal Identification Number),
PIN2, PUK
(PIN Unlocking Key), PUK2 (PIN2 Unlocking Key), IMSI
Page 45

User Guide
43
(International
Page 46
44 User
Mobile Subscriber Identity), network information, contacts
data, and short messages data.
GSM /
WCDMA
GSM
Note:
After powering off your mobile phone, wait for a few seconds
before removing or inserting an SIM card.
Exercise caution when operating an SIM card, as friction or
bending will damage the SIM card.
Properly keep the mobile phone and its fittings such as the SIM
cards beyond children's reach.
5.2 Phone
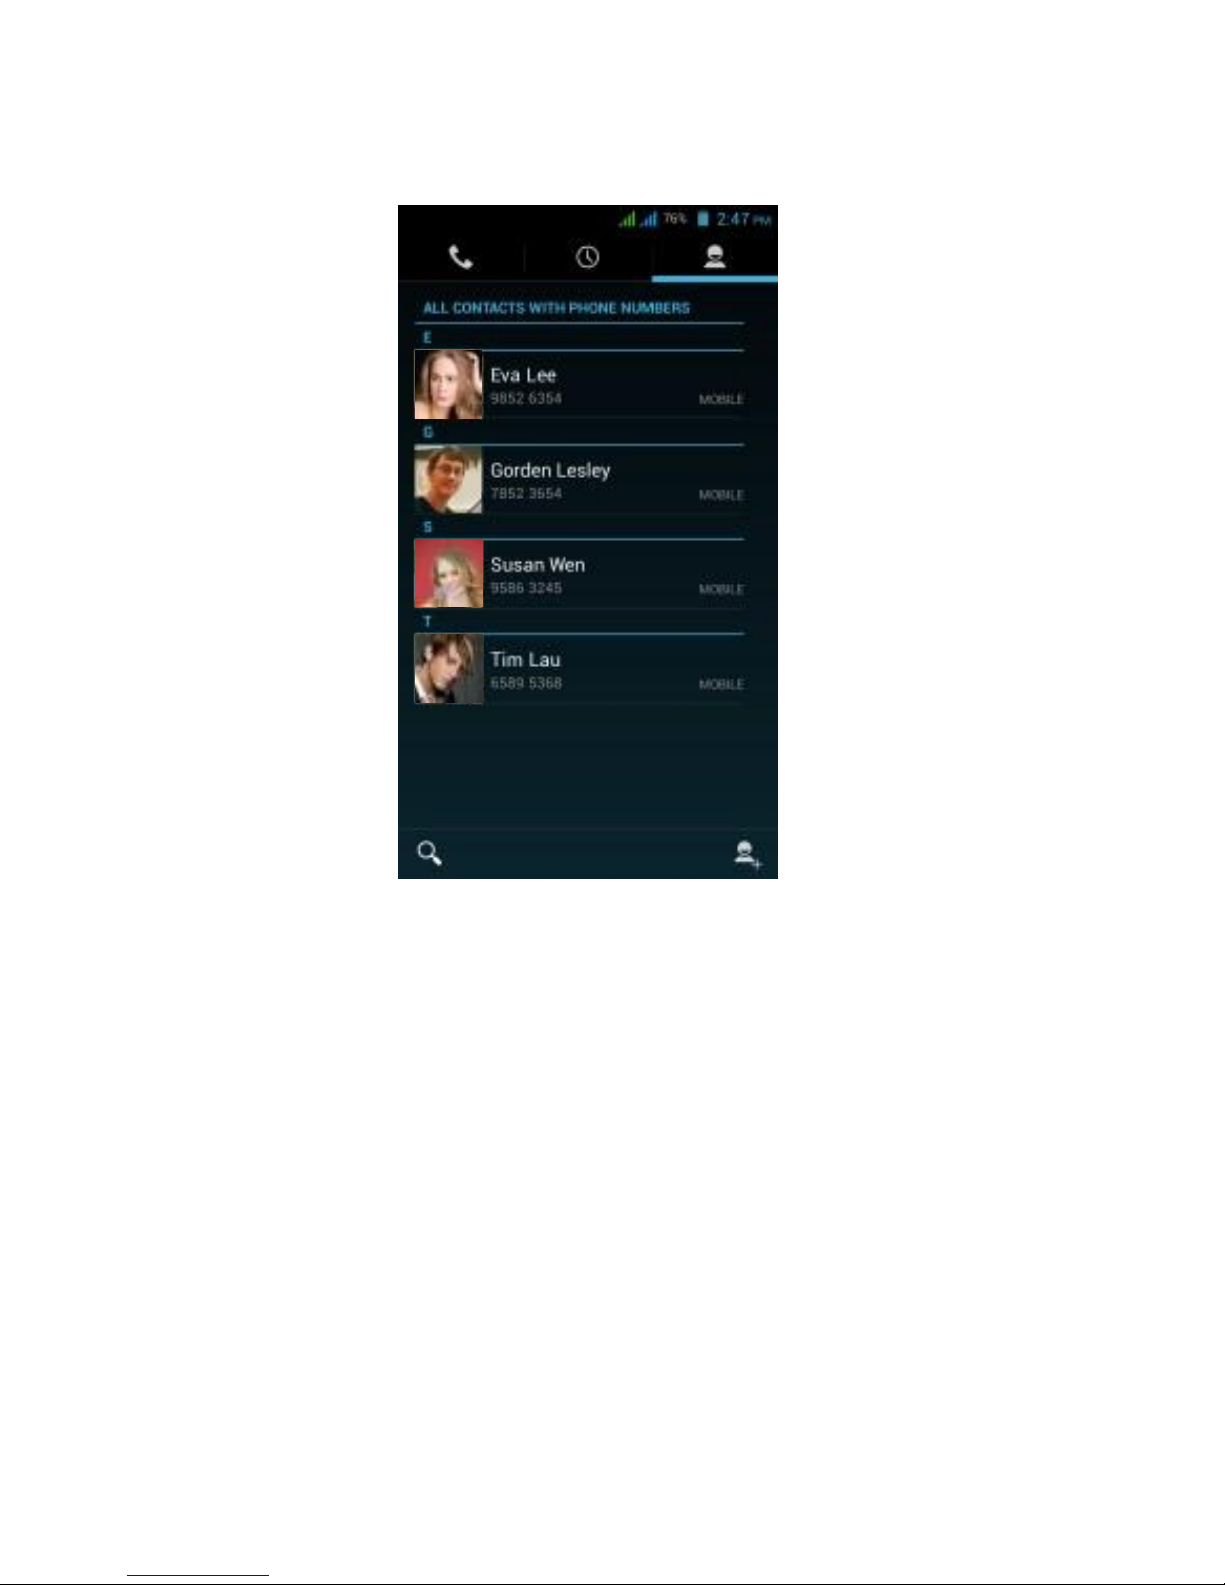
Touch the Contacts icon on the Home screen or in main
menu interface. Three tabs are listed at the
top of the screen. Select the phone tab and you can find a dial
pad screen where you can input phone number to originate a
call.
Note : During a conversation, you can’t originate a new call by
open the dial pad, enter number and press dial key. If you press
dial key, the current conversation would hold.
Page 47
User Guide
45
5.3 Dialing Calls
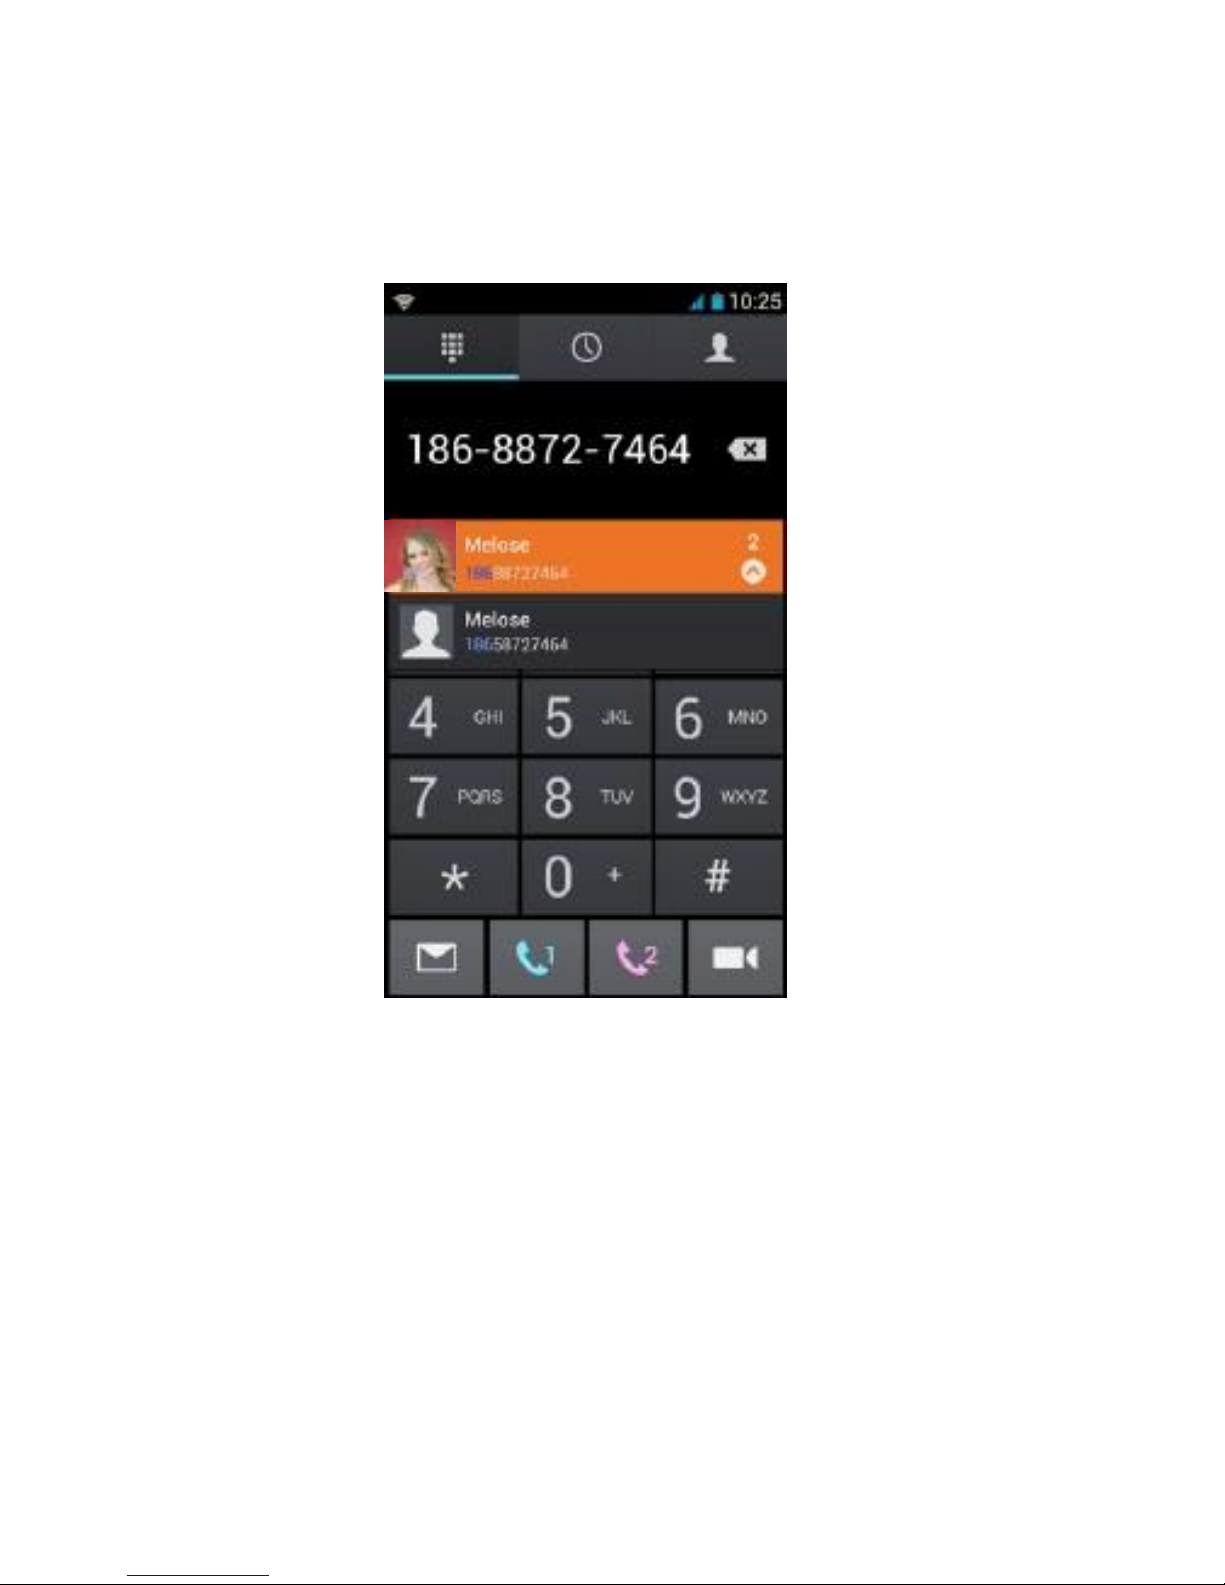
Dialing a call to a number in the contacts
Touch the Phone icon or the phone application icon on the
Home screen, then select the Contacts tab. Swipe or slide
upward/ downward to pick out the target contact. Then you
can touch the dial icon to originate a call.
Dialing a call to a number in call log
Touch the Phone icon or the phone application icon on the
Home screen, then select the call log tab. Swipe or slide
upward/ downward to pick out and touch the target contact.
Page 48

46 User
Then you can
Page 49
User Guide
47
originate a call.
Answering incoming calls
Drag the Answer icon towards right to answer an incoming
call. Touch the End icon to end the current conversation.
To reject an incoming call, drag the End icon towards left.
Managing multiple calls
If you accept a new call when you’re already on a call, you can
drag the Answer icon towards right to answer the current calls.
Page 50

48 User
5.4 Messaging
You can use Messaging to exchange text messages (SMS)
and multimedia messages (MMS) with your friends on their
mobile phones.
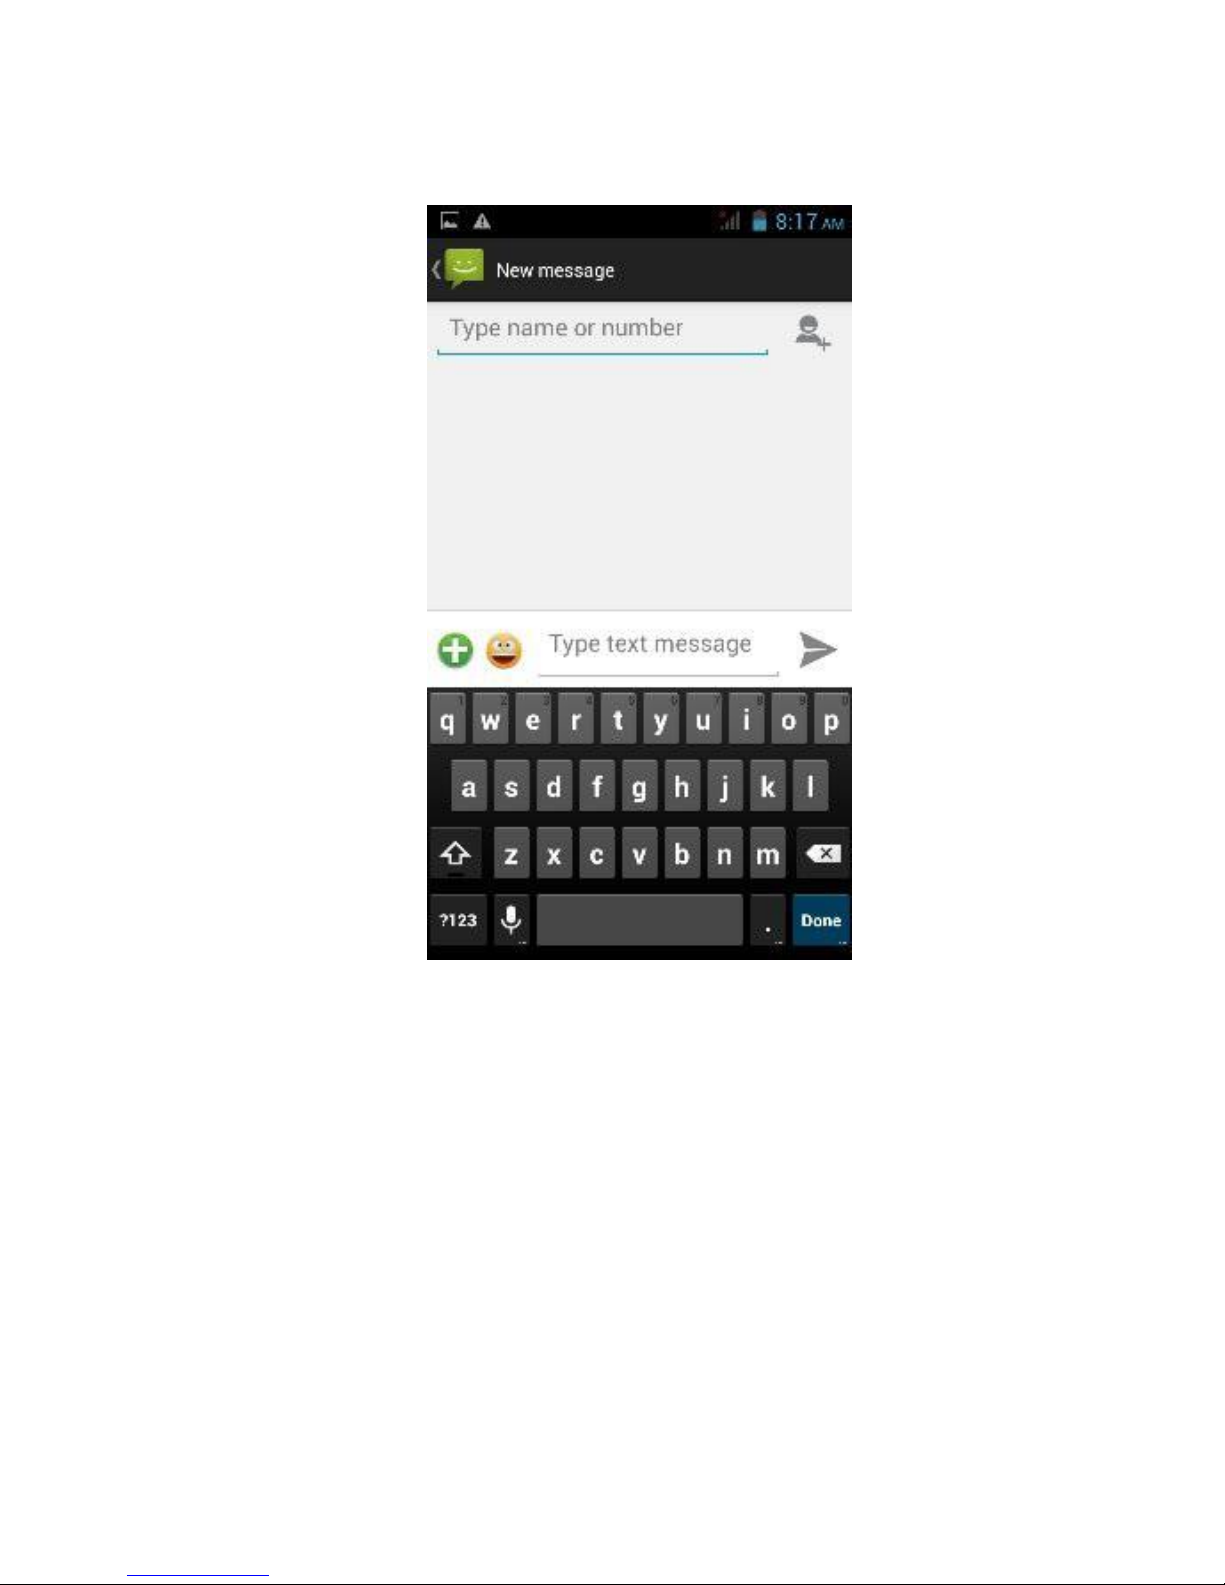
Sending a message
1. Touch message icon on the home screen and touch
New message icon to edit a new message.
2. Enter a contact’s name or call number in the To field. As the
information is entered, all matching contacts appear. Touch
a suggested contact or multiple contacts as message
recipient(s).
3. Touch Enter message to compose your message. Touch to
select a message template.
4. After completing the message, touch Send icon which
beside template icon to send your message.
Message template
Message templates can save your time in editing message
with similar format. To create a message template:
1. Touch message icon on the home screen and touch
application item to enter message settings.
2. Touch Message template to create or edit a message
template.
Page 51
User Guide
49
5.5 E-MAIL
E-mail Settings
E-mail applications accompany with email settings guide, it
can add the common Web email service providers (e.g. Gmail,
Yahoo,
Hotmail and 163 etc) except for POP3 or IMAP email account.
Page 52
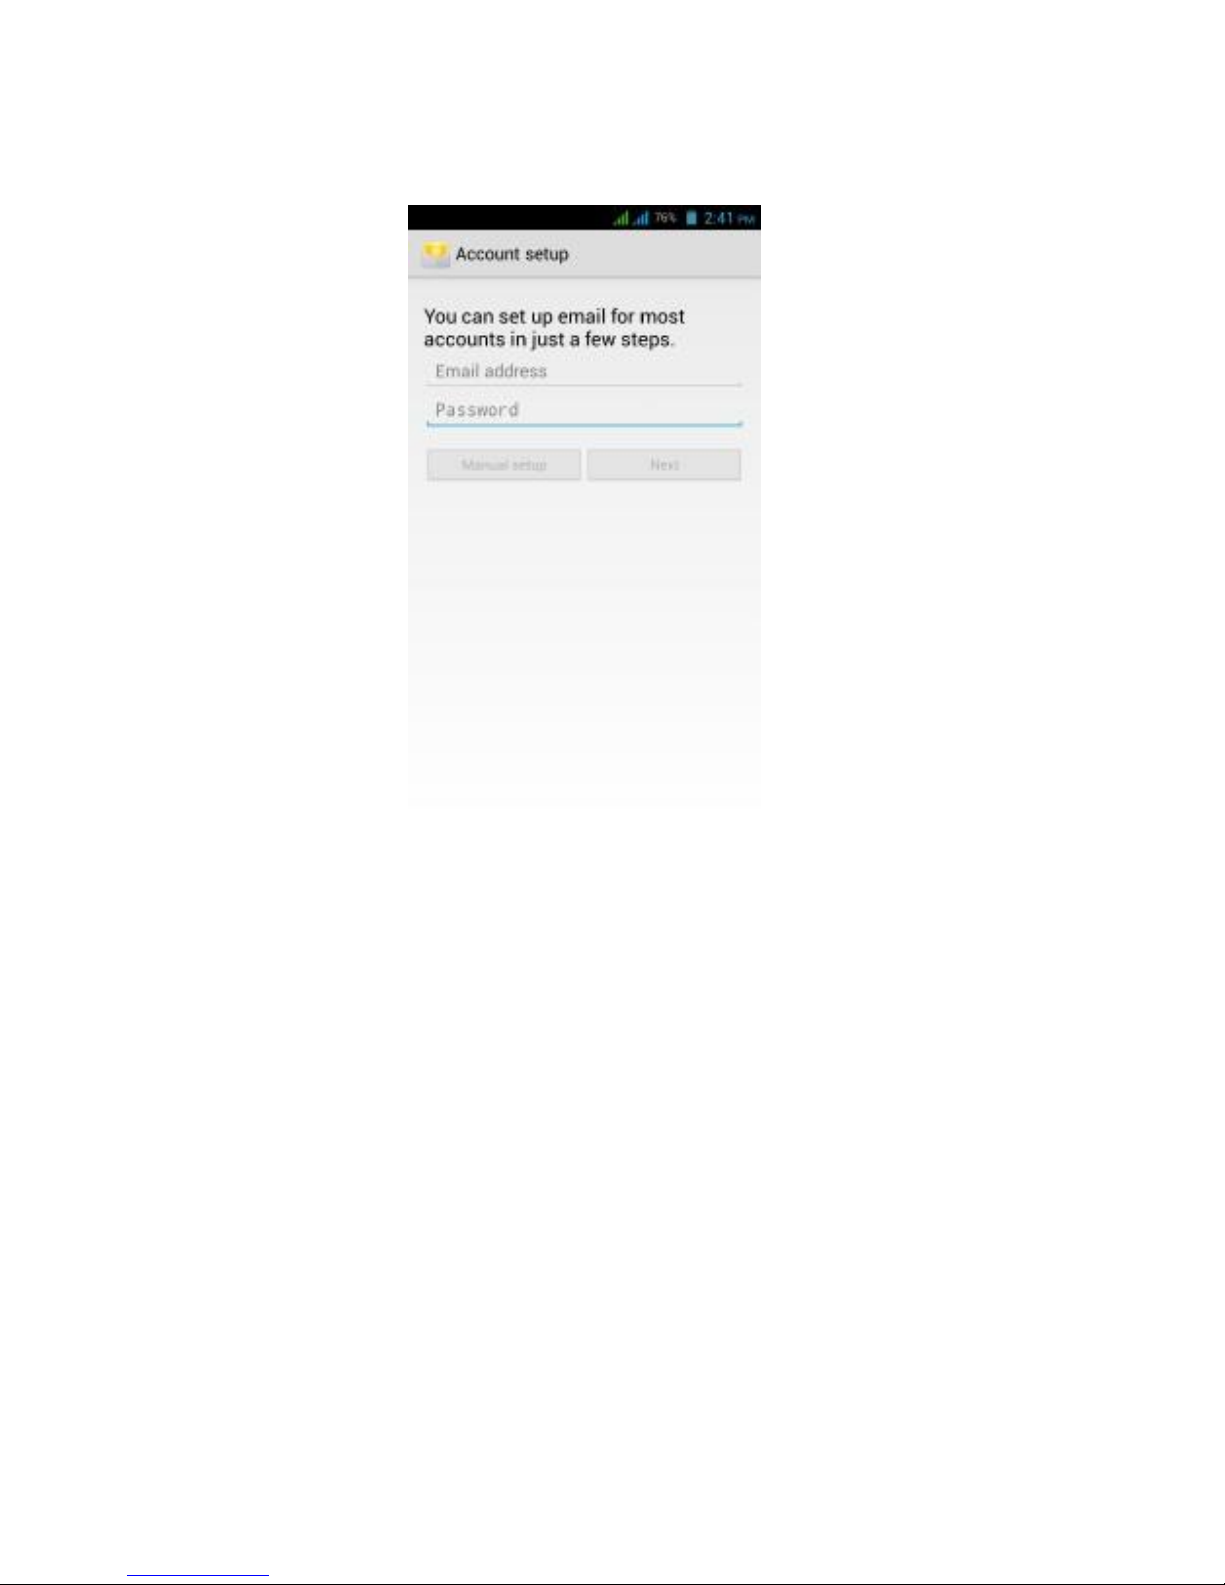
50 User
Note: Before setting the email, please ensure that the network
has been linked.
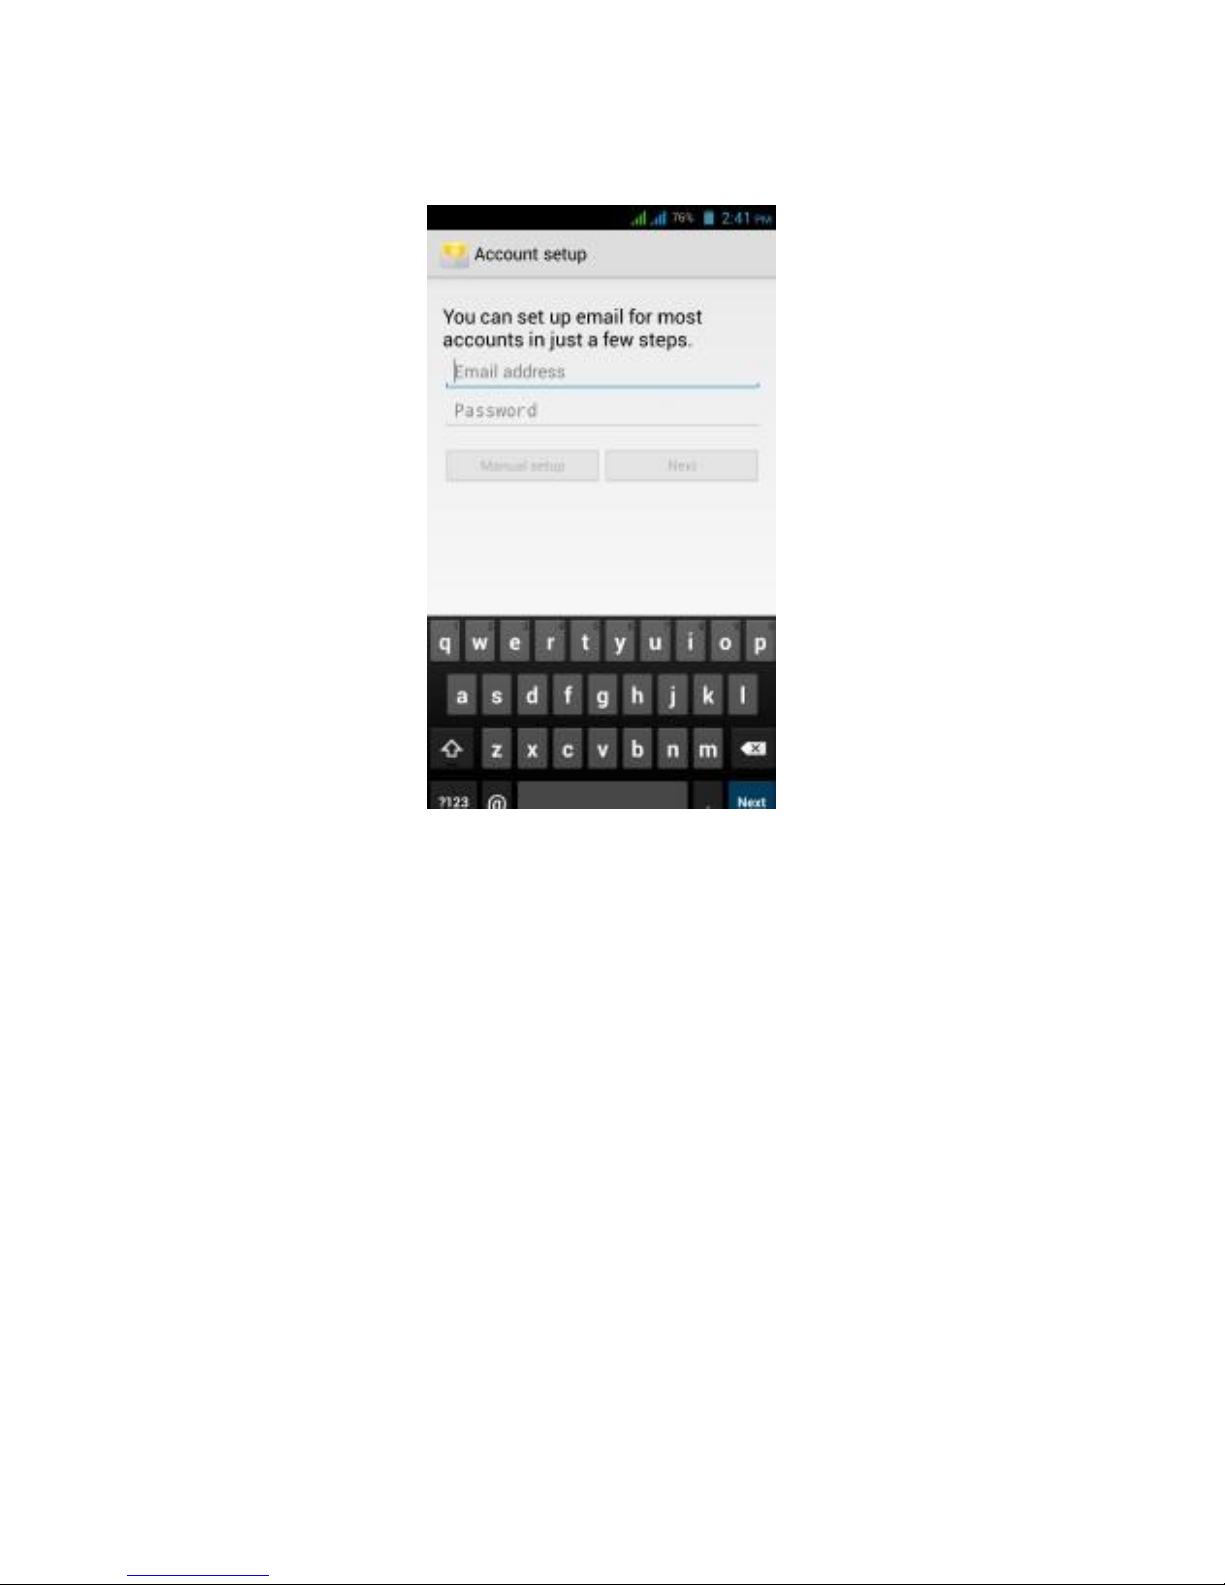
Mailbox setting guide
1. Click the E-mail icon, then the mailbox setup guide will
appear.
2. Click the next step button.
3. Sign in your email account and password.
4. Click the next step button, and select your mailbox type:
POP3
or IMAP.
5. Click next step button to check whether email server is
available.
6. Input your account and click completion.
7. If the mail account is available, it will automatically enter
Page 53

User Guide
51
your inbox.
Page 54
52 User
Delete email accounts
You can delete the POP3 or IMAP email account having been
set in your mobile phone
1. Click E-mail
2. Enter to your E-mail box
3. Press Menu key
4. Click accounts
5. Hold the mail account you want to delete.
6. Menu list popping up, then click “Remove account”
7. Click “OK” to remove it.
Send E-mail messages
1. Click E-mail and get access to your inbox.
Page 55

User Guide
53
2. Click the inbox to enter in. With emails being
refreshed automatically, emails can be read from time
to time.
3. Press the Menu button, menu interface will pop up.
4. Click “compose” to write a new mail.
5. Input the recipient in the recipient column.
6. Input the theme of your e-mail and the content of your e-mail.
7. If you want to add attachments, press the menu button, then
the menu options will pop up.
8. Click “add attachment”
9. Select attachments you want to send (e.g. video, images, etc.)
10. Click “Send” to send the e-mail.
Note: If you have more than one account, click that account
title before you click the main menu key to write an e-mail.
06 Multimedia
6.1 Support the file format
Your phone supports the following formats.
Music file format
• MP3
• AAC(AAC, AAC+ and AAC-LC)
• OGG
• WMA
• WAV
Video format
Page 56

54 User
• AVI(H.264)
Page 57
User Guide
55
• RMVB
• MKV
• MPEG4
• MOV
• VOB
• FLV
• 3GP
6.2 Music
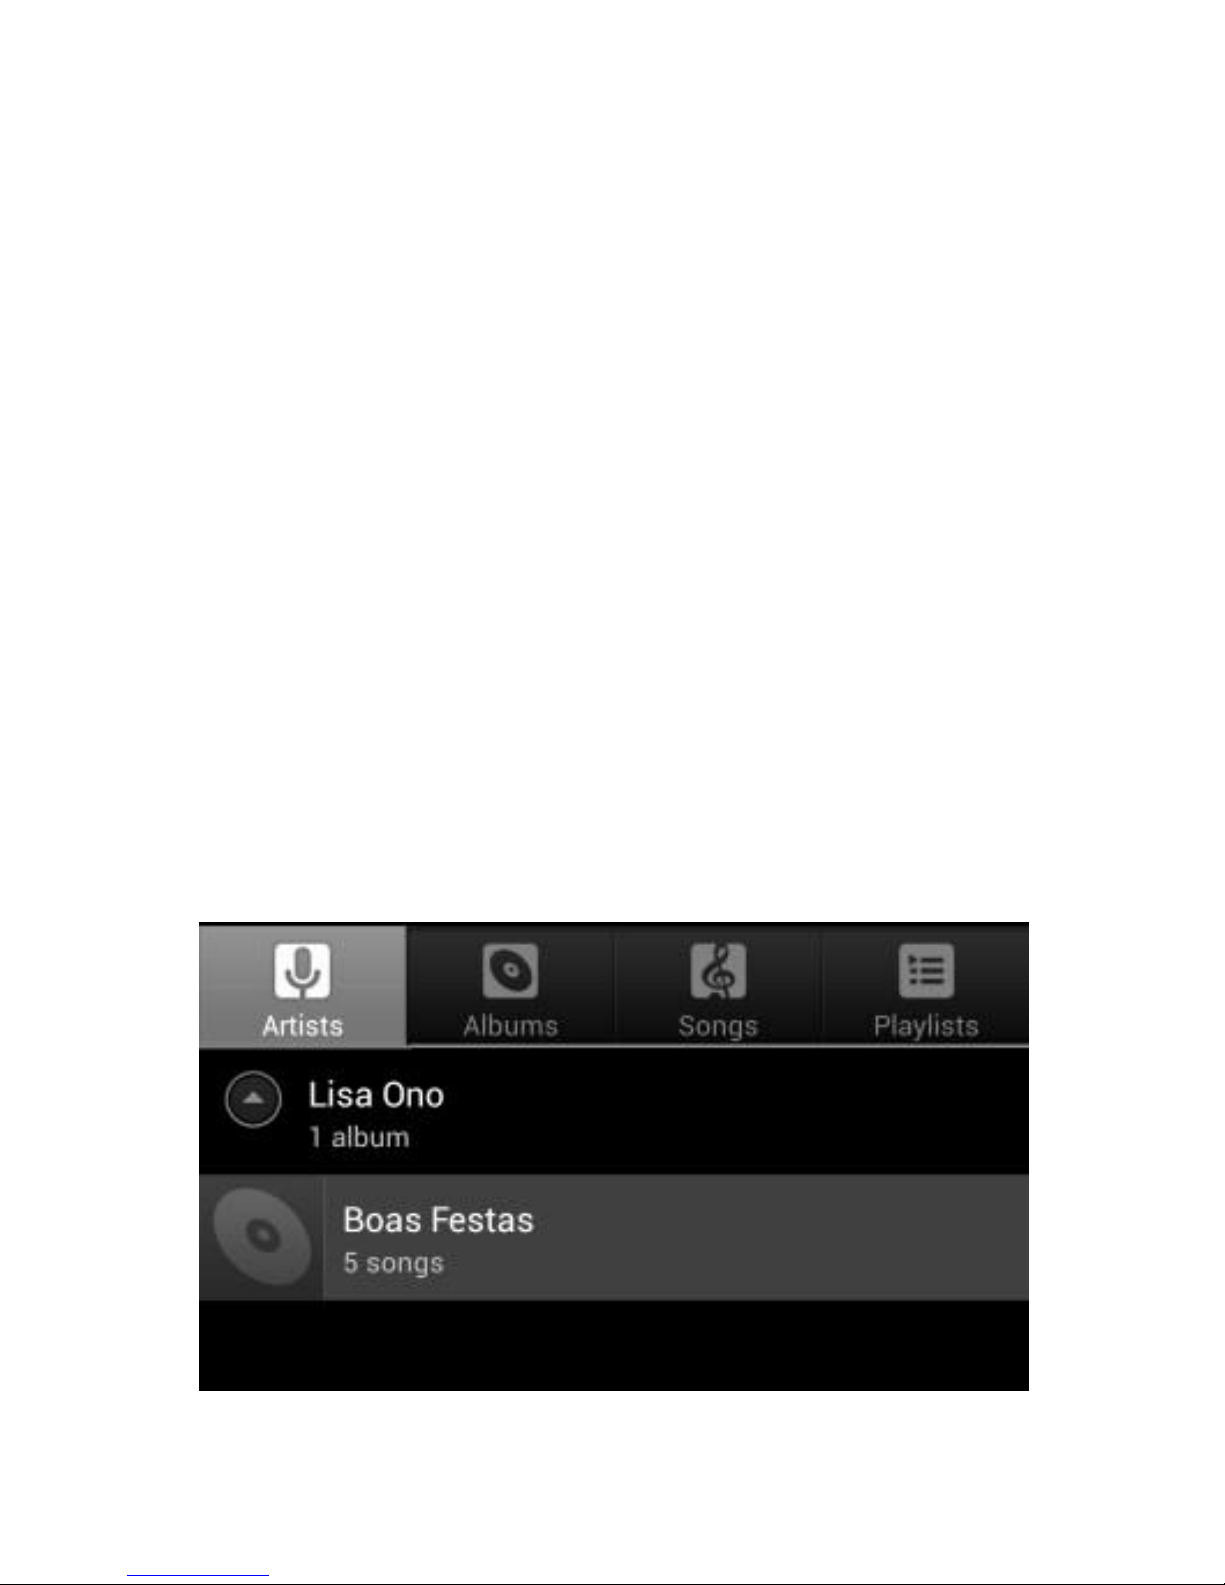
There are four default categories in music player: artist, album,
songs and playlist and now playing. Choose a category to check
list contents. If you enter a category, always choose until you
have to play songs. For example, if you choose the artist
category, you will see a list of artist names arranging in
alphabetical order from A to
Z. If you choose an artist, the list will be presented with a list of
the artist album songs.
Page 58

56 User
Visit and play music
1. Click music.
2. Click songs, also can click artist, album or song list.
3. Choose one song to play.
Add songs to the new playlist
1. Click music.
2. Click songs.
3. Hold the song you want to add to the playlist.
4. With music setting menu being pop up, click add to play lists.
5. Click New.
6. Input a name for the playlist.
7. Click Save.
Delete songs in the playlist
1. Click music.
2. Click songs.
3. Hold the song which you want to delete in the playlist.
4. With music setting menu being pop up, click “delete “.
6.3 Camera
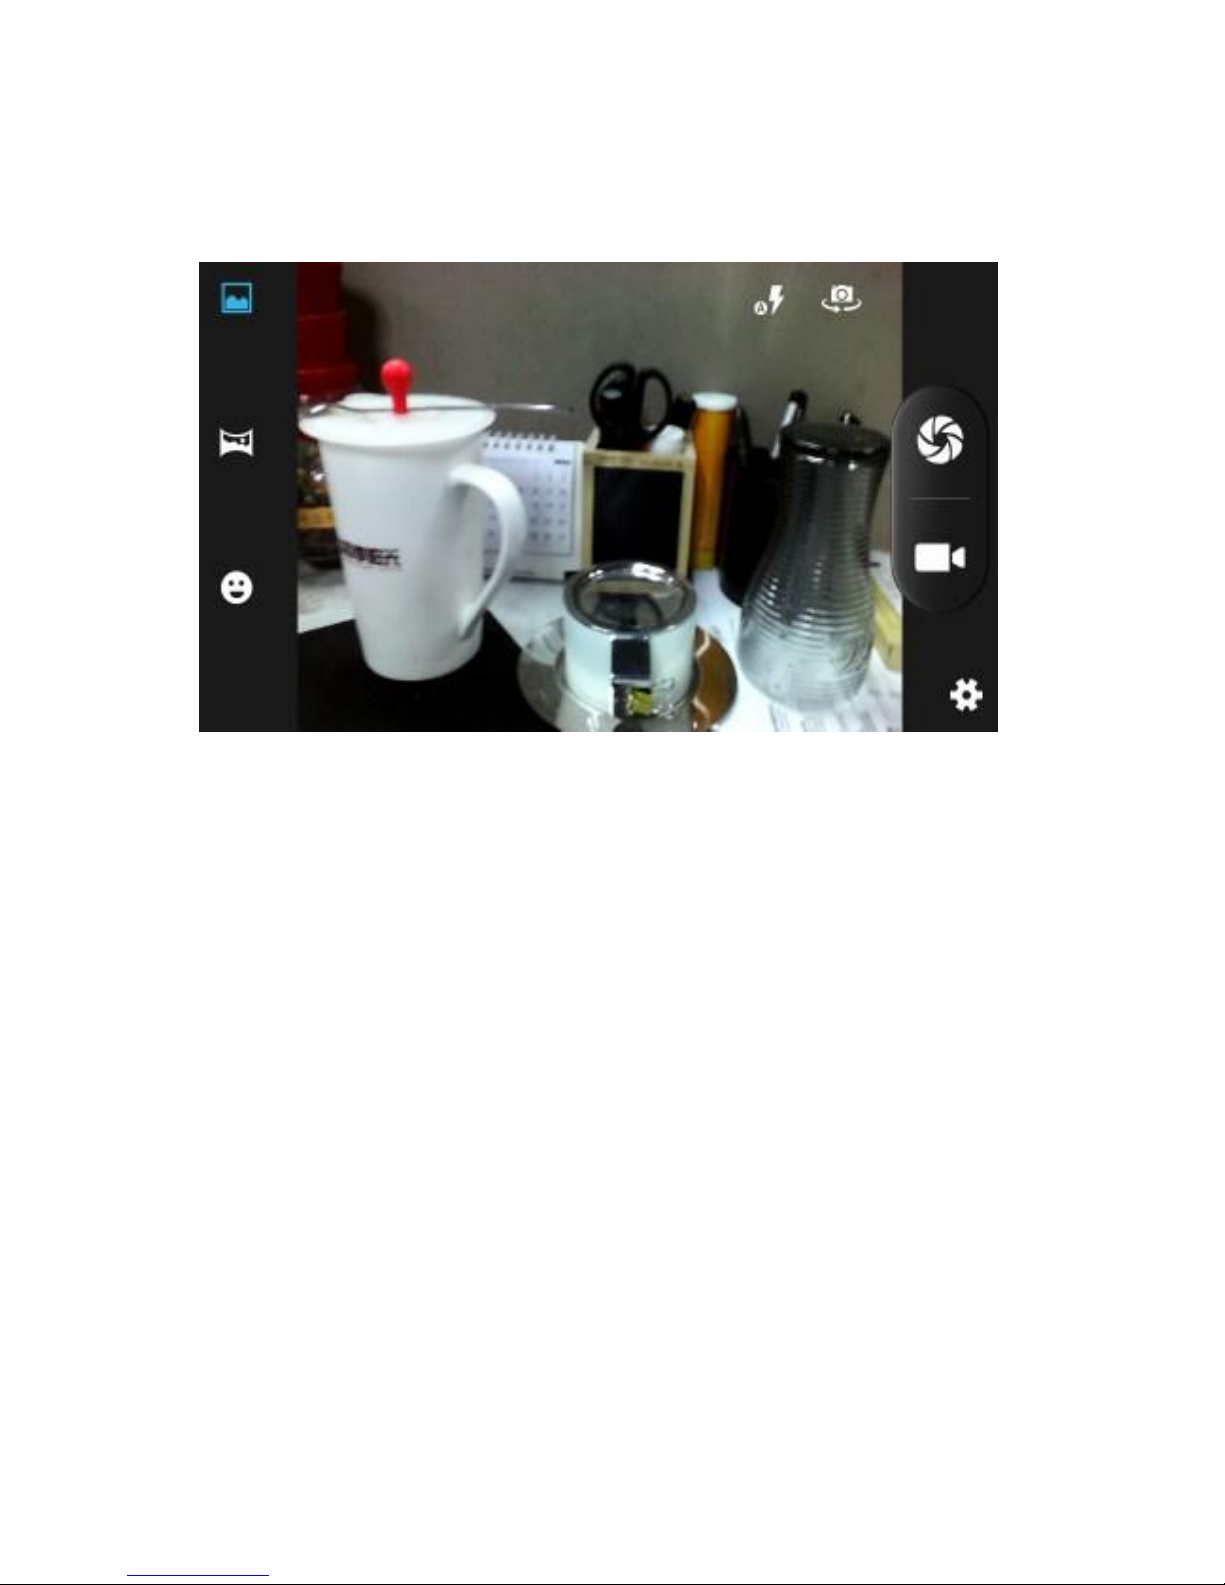
Photo taking function
1. Click Camera.
2. The system enters the Camera interface.
3. Click Shoot button to have photos taken easily.
4. Other functions like sizes, storage locations, white balance
and focusing adjustment can be set as well.
5. After finishing taking a photo, there is a preview of the photo
in
Page 59
User Guide
57
small size.
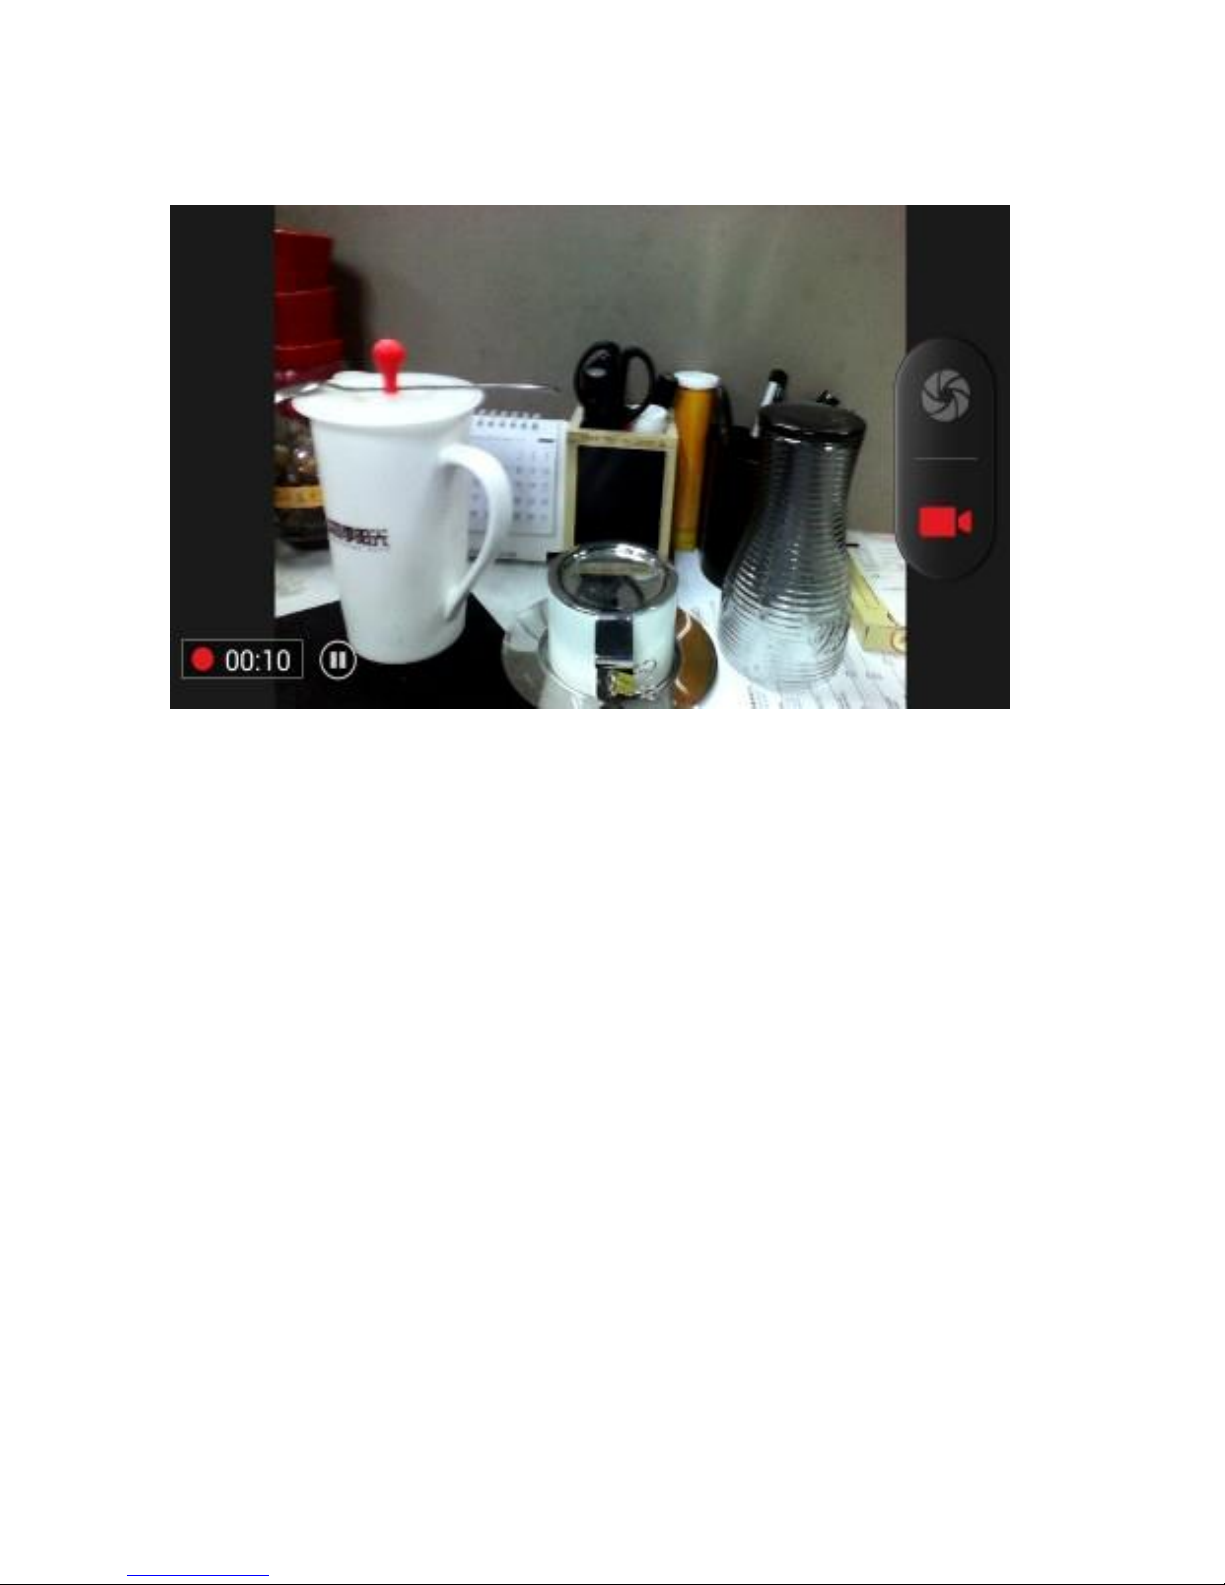
Video recording functions
1. Drag up the switchover button to switch it into the
video recording mode.
2. Click the red Video Record button to perform video
recording.
3. Other functions like color effect, white balance and
video quality can also be set.
4. Click Video Record button again to stop video recording, with
the previous video being able to be seen.
Page 60
58 User
6.4 Gallery
Using the Gallery application program, you can automatically
search all photos and video files in your smartphone and USB
device (including TF card). Moreover, the Gallery will classify
such photos and video files by these folders. You can use the
Gallery program to view and edit photos, take photos as
wallpapers as well as viewing videos.
Check pictures
1. Click the intended folder to check pictures included.
2. Click the intended pictures that will be played in full
screen mode.
3. When touching the screen, arrows will appear on the left
side and right side of the picture, with the previous/next
picture being able to be seen by clicking the arrow.
4. When touching the screen, the zoom-panel will appear under
Page 61
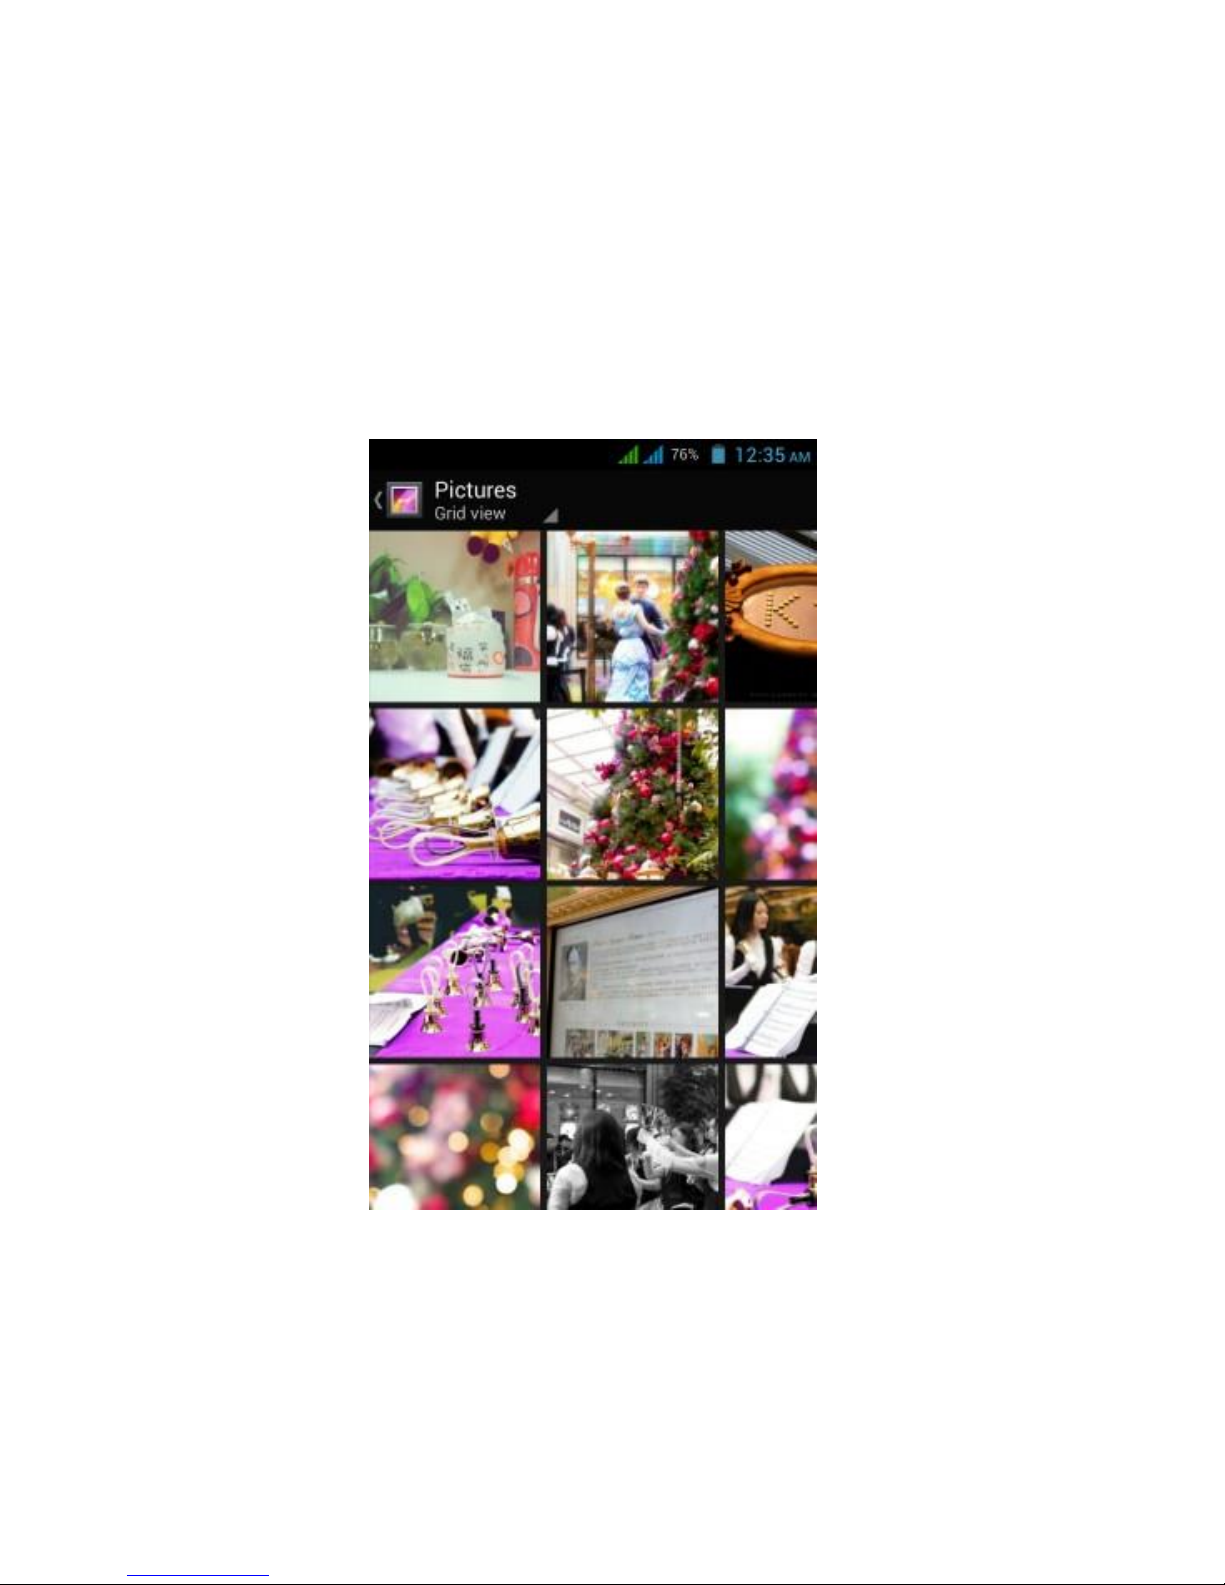
User Guide
59
the pictures; with the pictures being able to be zoomed.
5. Skills: Gallery supports automatically rotating function.
Rotating your smartphone, the picture will automatically
follow the
direction according to the way you rotated.
Edit and set images
Press the menu button to display images in full screen mode,
you can select the intended image to edit and set the image
according to your needs.
Page 62

60 User
• Slide presentation
Open the pictures and click slideshow. All the images can be
shown in the slide folder for broadcasting.
• Sharing
1. Press the menu button and click “share”.
2. The picture will be shared with your friends via Twitter,
Facebook, Messaging, Gmail or Email.
• Rotating
1. Press the menu button and click “More”.
2. Click Rotate Left or Rotate Right.
• Crop
1. Press the menu button, click “More” and select “Crop”
2. Click the image and drag a related region of the image
you want,
3. Adjust the size you want, click “Save”.
4. If you want to quit cropping the image without saving it,
click
“Discard” and return to the
Gallery.
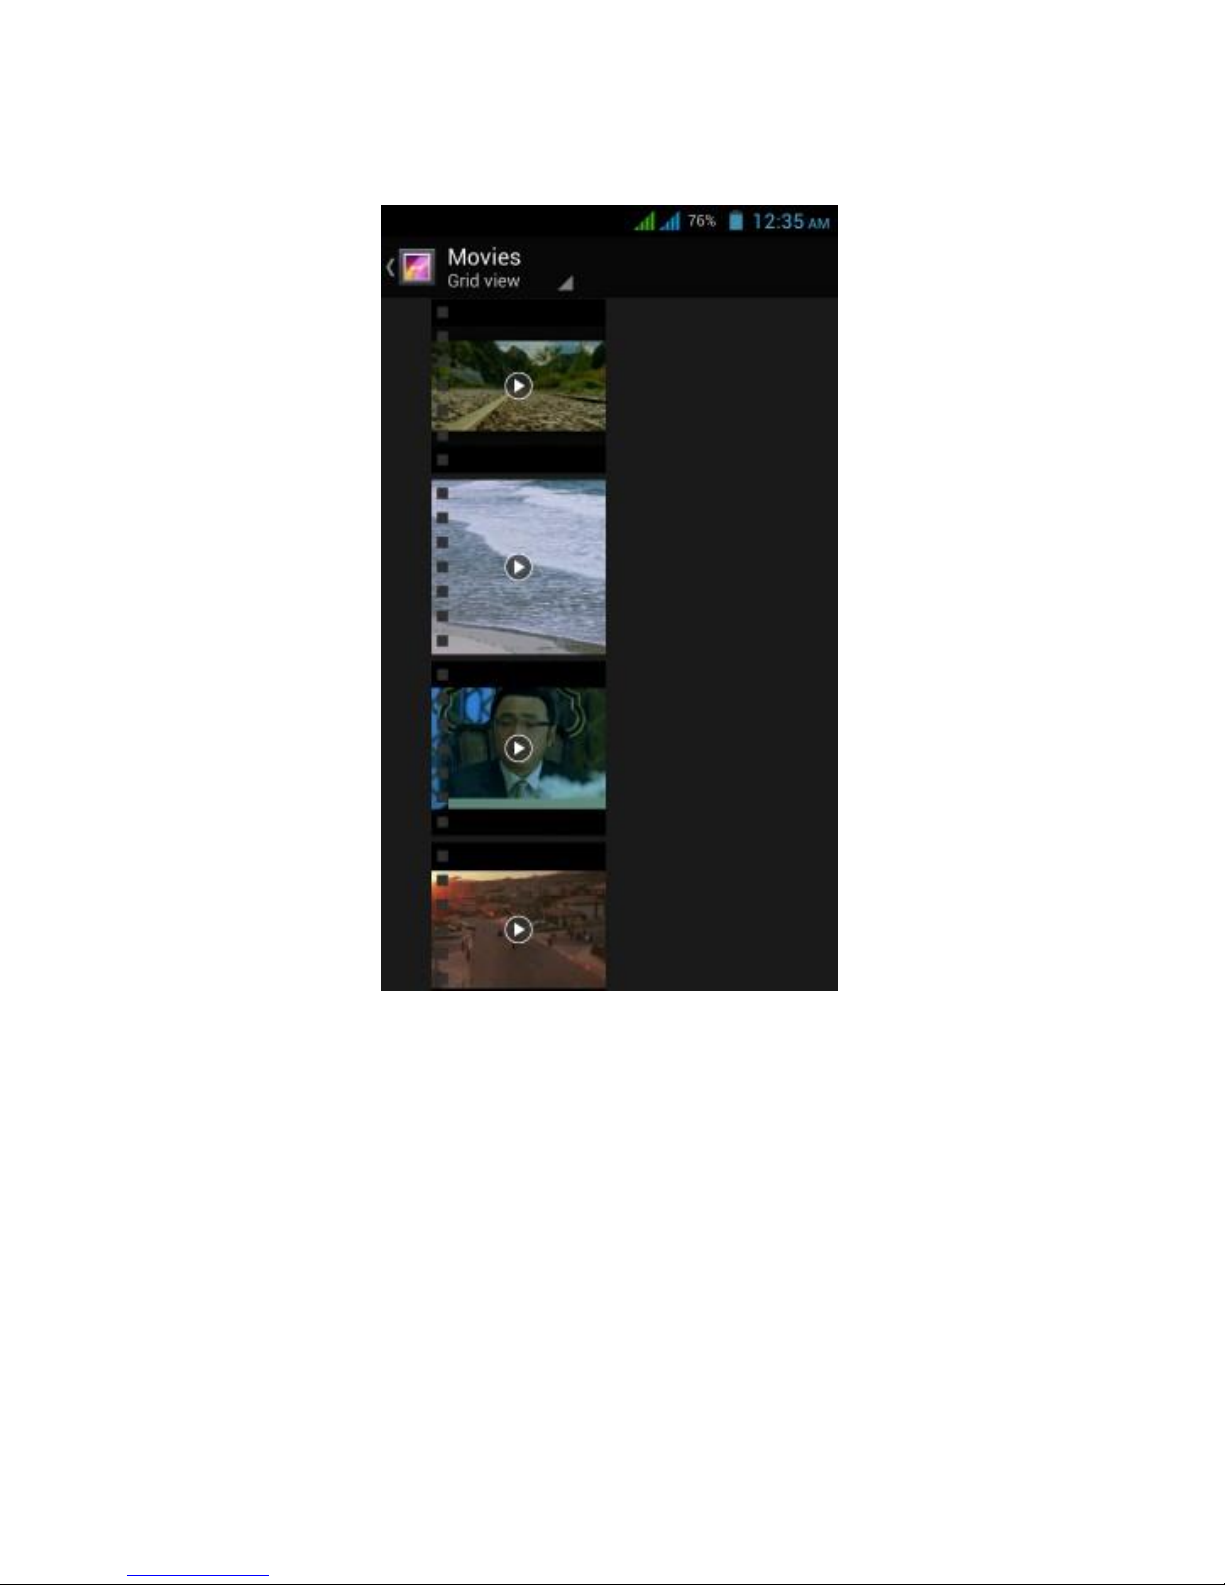
Video preview and play
Operating the Gallery application, you can scan all video files in
the smartphone and in the USB device (including TF card), as
well as previewing playable video files. Click one of them to
play.
In the video preview interface, press Menu button, with
the function window appearing for editing video files as is
Page 63

User Guide
61
shown below
Page 64
62 User
07 Internet
7.1 Browser
Enter into homepage
The browser always habitually shows the last homepage visited
by user, the homepage will appear when it enters into the
browser on
Page 65

User Guide
63
boot.
Change your home page
1. Click browser.
2. Press the Menu button, menu of browser settings pops up.
3. Click more.
4. Click Settings.
5. Click settings home page.
6. Input website, and click “OK”.
Browse website
You can slide the screen up and down to browse the webpage.
Enlarge or shrink pages
Opening a webpage and dragging it, the webpage enlarging
and zoom-out button will appear at the bottom of the
webpage. You can click “enlarge” or “reduce” to browse
webpage.
Find the words in webpage
1. When browsing the web, press menu button and menu
options pop up.
2. Click more.
3. Click a homepage you want to visit.
4. Enter your search projects.
5. When you input characters, words will change from white
to green.
6. Click the arrow on search column to move on searching.
Page 66

64 User
Management bookmarks
Page 67

User Guide
65
• Settings webpage bookmarks
1. Go to a webpage in the browsing interface.
2. Press the menu button and click the bookmarks, then click
add bookmarks.
3. Edit bookmarks and click OK.
• Opening bookmarks
1. Press the menu button and click the bookmarks in the
browser interface.
2. Click the intended bookmarks to open the webpage.
• Editing bookmarks
1. Press the menu button and click the bookmarks in
the browser interface.
2. Click and hold the bookmarks to open the menu options.
3. Click the edit bookmarks to edit it, and click Ok.
Use the browser window
• Open a new browser window
1. Open the browser window; click the menu button and
click new window.
2. Input the website address in the new window.
• Switch browser window
1. In the browser window, press the menu button and click
windows.
2. Click the window you want to open.
Page 68

66 User
• Set browser
In the browser interface, press the menu button and click
more,
then click Settings to set the browser.
08 Other
applications
8.1 Alarm clock
1. Click the Clock program.
2. Enter into programming interface as the picture is
shown below.
3. There were pictures, music, alarm clock and page buttons
4. Pressing the Menu button, alarm setting menu will pop
up.
8.2 Calculator
1. Click calculator.
2. Enter into the basic calculator panel.
3. Press the Menu button, and click the advanced panel.
4. Touch the digital panel or operators on the
counter to calculate.
Skills: You can slide the screen to change basic panel to
advanced panel.
Page 69

User Guide
67
09 Troubleshooting
1. The first time you start your smartphone, it takes
rather a long time.
Page 70

68 User
After your smartphone system upgrades, it takes about 2-3
minutes to install preloaded application software when
starting it at first time. It will be faster and faster later when
you start it.
2. Disability to connect with WIFI
• Check whether the wireless router is at work.
• Check whether your smartphone is near the wireless router,
whether there are walls or other obstacles preventing
you from wireless router.
• Check whether the user name and the password are correct.
3. your smartphone is a little bit overheating.
If you operate many programs at the same time or the
brightness of the screen is very high, it is normal to feel a
little bit hot of your smartphone because of costing more
electricity.
4. The system is abnormal.
Installing the 3rd party program may result in failure
operation, press RESET (near power connector) to reset the
system.
5. Disability of setting an Email and program login.
• Check whether the network is normally connected with
Internet
• Check whether Email setting is appropriate.
• Check whether the time of your smartphone system is the
same as the local time
Page 71

User Guide
69
6. If phone freeze or hang, then press power on/off key
for around 10s to power off. Then power on the
phone.
Page 72

50 User
10 FCC Warning Statement
Changes or modifications not expressly approved by the
party responsible for compliance could void the user’s
authority to operate the equipment.
This equipment has been tested and found to comply with the
limits for a Class B digital device, pursuant to Part 15 of the FCC
Rules. These limits are designed to provide reasonable
protection against harmful interference in a residential
installation. This equipment generates uses and can radiate
radio frequency energy and, if not installed and used in
accordance with the instructions, may cause harmful
interference to radio communications. However, there is no
guarantee that interference will not occur
in a particular installation. If this equipment does cause
harmful interference to radio or television reception, which can
be determined by turning the equipment off and on, the user is
encouraged to try to correct the interference by one or more of
the following measures:
-- Reorient or relocate the receiving antenna.
-- Increase the separation between the equipment and receiver.
-- Connect the equipment into an outlet on a circuit different
from that to which the receiver is connected.
-- Consult the dealer or an experienced radio/TV technician
for help.
Page 73

User Guide
51
For more information, please visit our website
www.argomtech.com
 Loading...