

Page 1

Arecont Vision D4S/D4F Installation Manual
0 | Page
Page 2
Arecont Vision D4S/D4F Installation Manual
D4S/D4F Indoor Dome Installation Manual
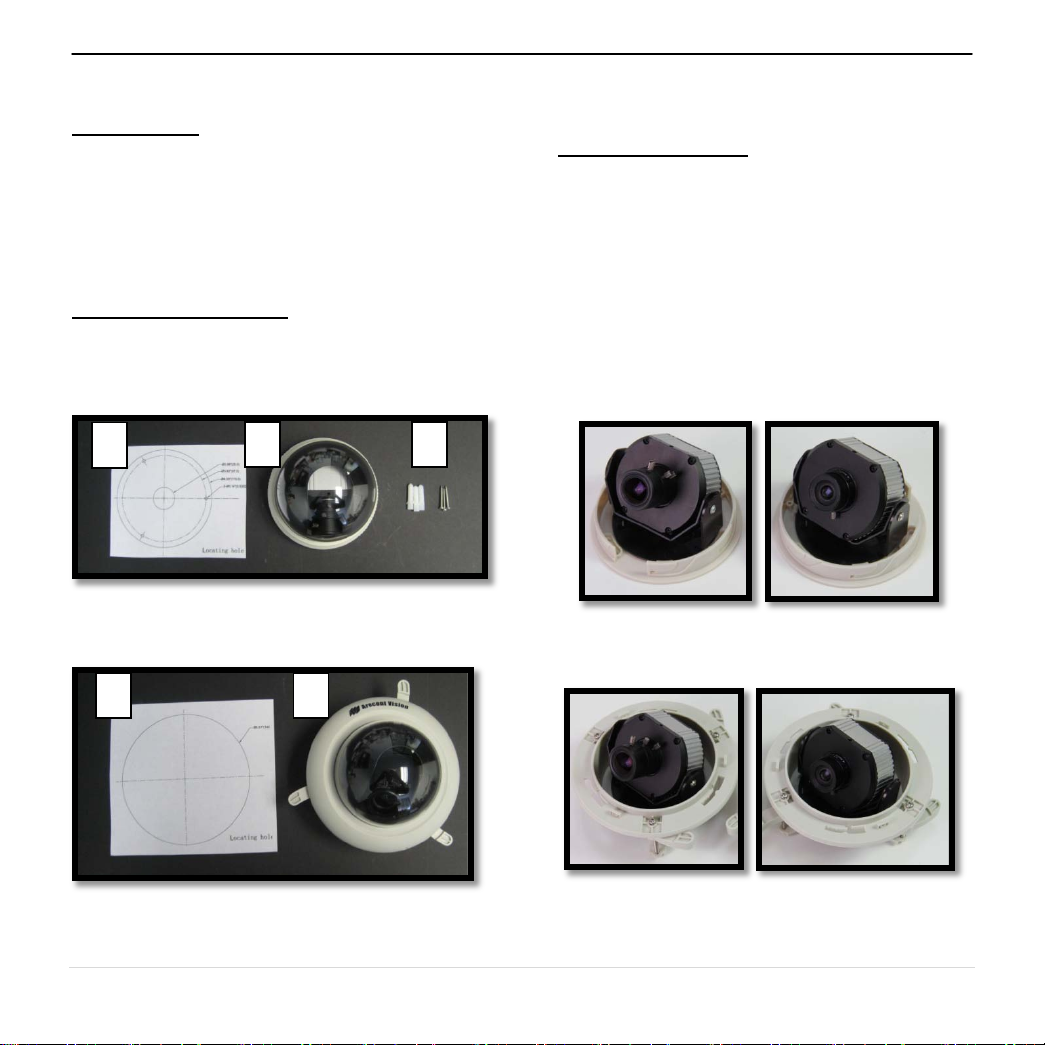
Inside the box:
A. Mounting template
B. Arecont Vision D4S (Image 1-1) or
D4F (Image 1-2)
C. Pack of three (3) wood screws and three
(3) dry wall anchors (D4S only)
Not included but needed:
• #0 Phillips head screwdriver
• #1 Phillips head screwdriver
A
Image 1-1 D4S Indoor Dome
B
A B
Mounting the Camera:
1. Remove camera and hardware from the box.
NOTE : D4S and D4F has two kinds of lens
options, 3.3-12mm and 4mm, as shown in
image 2.
D4S/D4F-AVxxxx-3312 integrated with 3.312mm lens; D4S/D4F-AVxxxx-04 integrated
with 4.0mm lens
C
D4S-AVxxxx-3312 D4S-AVxxxx-04
Image 2-1
Image 1-2 D4F Indoor Dome
D4F-AVxxxx-3312 D4F-AVxxxx-04
Image 2-2
1 | Page
Page 3
Arecont Vision D4S/D4F Installation Manual
2. Use the Mounting template, prepare the
mounting provisions for camera installation.
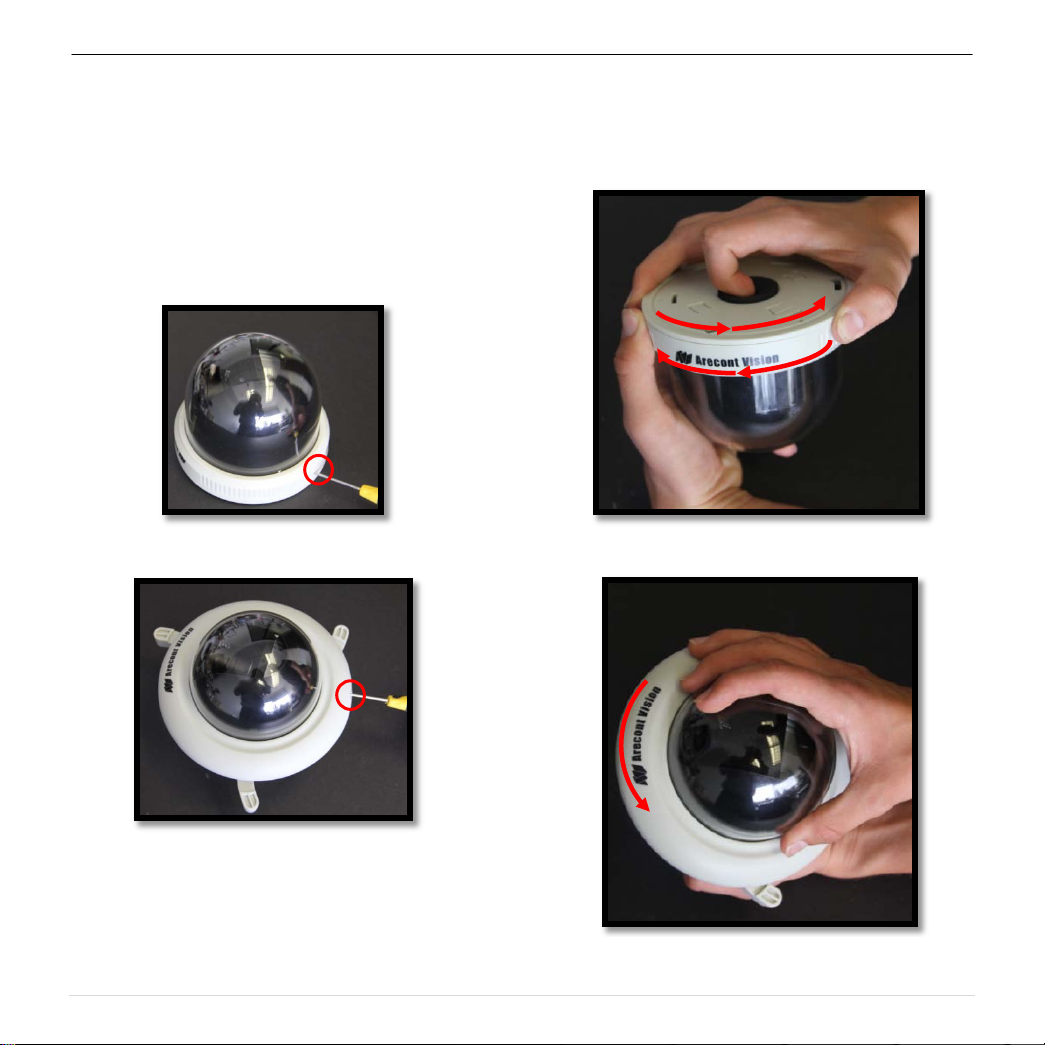
3. Use #0 Philips head screwdriver to loosen the
set screw to release t he dome cov er (Image
3-1 and 3-2). NOTE: Do not remove screw
from the dome cover.
Image 3-1 D4S
4. Remove D4S or D4F dome cover by rotating
counterclockwise as show in Image 4-1 and
4-2.
Image 4-1 D4S
Image 3-2 D4F
Image 4-2 D4F
2 | Page
Page 4

Arecont Vision D4S/D4F Installation Manual
Arm
5. Run Ethernet cable through the hole on the
bottom of D4S or D4F and plug it into the
RJ45 port on AV’s H.264 compact
MegaVideo
®
camera. (Image 5-1 and 5-2)
Image 5-1 D4S
6.1 For D4S models, align the mounting holes in
the dome with the prepared holes on the
mounting surface. Attach D4S to the
mounting surface with the wood screws or
any optional hardware suitable for the
mounting surface. (Image 6)
Image 6
6.2 For D4F models, insert D4F into the prepared
hole in the ceiling or wall then tighten the
three “lever screws” by rotating clockwise until
the D4F is firmly installed, as shown in Image
7. The “Support Arm” will ride down the screw
to compress to the mounting surfac e. NOTE:
Do not over-torque the lever screws.
Support
Lever
Image 5-2 D4F
screw
Image 7
3 | Page
Page 5

Arecont Vision D4S/D4F Installation Manual
Adjusting the Tilt and Pan:
7. To adjust the tilt, use a #1 Phillips screwdriver
to loosen the screw on the sides of the metal
U bracket 1/4 turn (Image 8-1 and 8-2).
CAUTION: Do not remove the screws!
90°
0°
Screw
Image 8-1 D4S
90°
CAUTION: When using D4S/D4FAVxxxx3312, please push camera to the end of U
bracket slot to avoid interference between
bubble and lens. (Image 9-1)
Image 9-1
CAUTION: When using D4S/D4FAVxxxx-04 ,
please push camera to the front of the U
bracket slot to avoid vignette issue resulting
from the black liner blocking the optical path
of the lens.. (Image 9-2)
20°
Screw
Image 8-2 D4F
8. Adjust lens tilt as required and tighten the
screw.
Image 9-2
4 | Page
Page 6

Arecont Vision D4S/D4F Installation Manual
NOTE: Adjust cable to make camera tilt
easier, if cable pushes against plastic
housing. (Image 10-1 and 10-2)
Image 10-1 D4S
9. To adjust the pan, hold and turn the U bracket
as shown in Image 11.
Pan=360°
Image 10-2 D4F
Image 11
5 | Page
Page 7

Arecont Vision D4S/D4F Installation Manual
A
Adjusting the Focus:
10.1 For D4S/FAVxxxx-3312 version, to focus the
lens, loosen the three set screws as shown in
Image 12-1 and adjust each as needed. A
adjusts the zoom, B adjusts the iris, C adjusts
the focus.
Note: Adjust zoom first then focus!
10.2 For D4S/FAVxxxx-04 version, to focus the
lens, loosen the set screws as shown in
Image 12-2 and adjust focus as needed.
Note: For more information on proper
focusing technique, please watch the
“Focusing Arecont Vision Megapixel
Cameras” Best Practices Training Video at
www.youtube.com/ArecontVision.
11. Secure the dome cover to the camera.
B
C
Image 12-1
12. Tighten the set screw on the dome cover
using #0 Philips head screwdriver.
13. Rotate bubble to align camera with slot in
camera shield (Liner).
14. Remove the protective film from the camera
dome. NOTE: be cautious not to scratch the
vandal dome cover.
Image 12-2
6 | Page
 Loading...