

Page 1
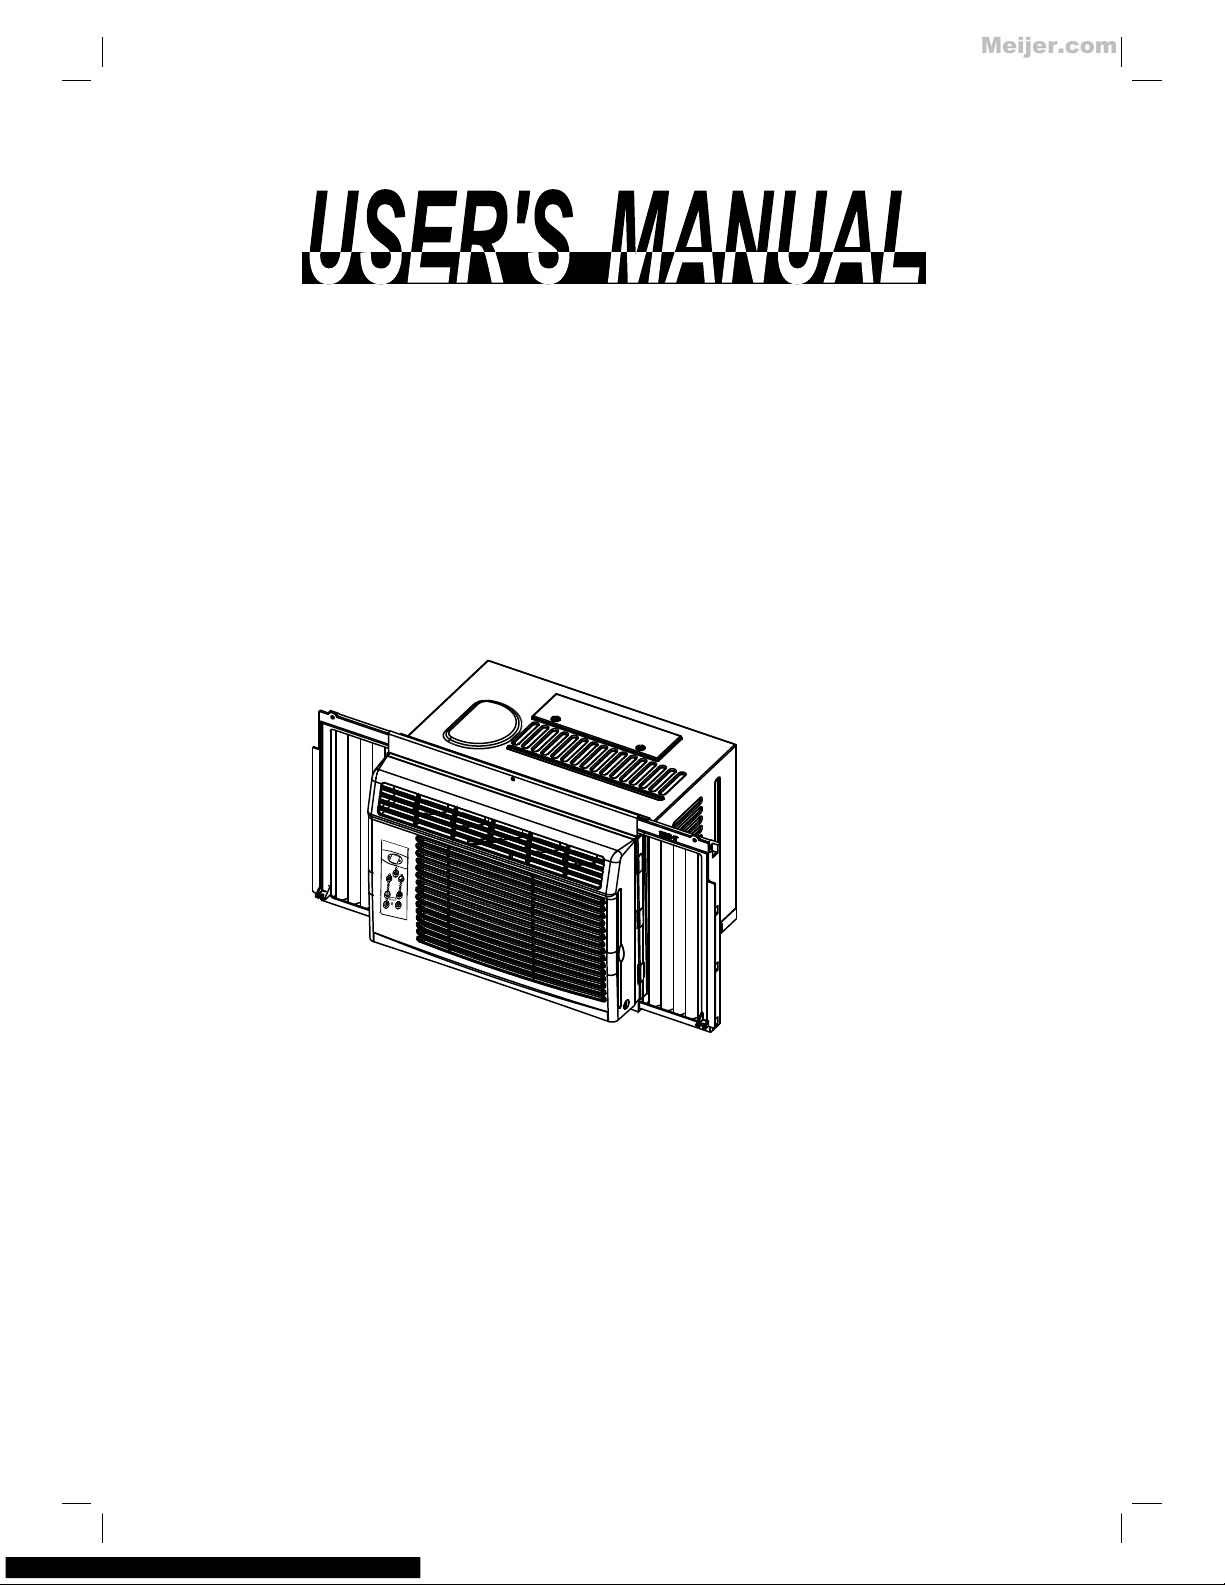
Before using your air conditioner, please read
this manual carefully and keep it for future reference.
WINDOW/WALL TYPE
ROOM AIR CONDITIONER
-
Meijer.com
Page 2
Producto
Meijer.com
Page 3
1 866 7 47 4332
1 866 7 47 4332
Meijer.com
Page 4

CONTENTS
Inside you will find many helpful hints on how to use and maintain your air conditioner
properly. Just a little preventive care on your part can save you a great deal of time
and money over the life of your air conditioner. You'll find many answers to common
problems in the chart of troubleshooting tips. If you review our chart of Troubleshooting
Tips first, you may not need to call for service at all.
Contact the authorized service technician for repair or maintenance of this unit.
Contact the installer for installation of this unit.
The air conditioner is not intended for use by young children or infirm persons
without supervision.
Young children should be supervised to ensure that they do not play with the air
conditioner.
If the power cord is to be replaced, replacement work shall be performed by
authorized personnel only.
Installation work must be performed in accordance with the national wiring
standards by authorized personnel only.
!
CAUTION
Read This Manual
1
1. SAFETY PRECAUTIONS............. .....................................................2
2. IMPORTANT SAFETY INSTRUCTIONS ...... ....................................4
3. NORMAL SOUNDS .... . ...................................................................5
4. AIR CONDITIONER FEATURES ...... .. ... ......................................5
5. INSTALLATION INSTRUCTIONS.... ..................................................10
6. CARE AND CLEANING ..... ..............................................................14
7. TROUBLESHOOTING TIPS...............................................................15
8
..
..
.. ...
.. .. .. ..
.
..
. WARRANTY INFORMATION..............................................................17
9. CUSTOMER SERVICE INFORMATION.............................................17
Meijer.com
Page 5
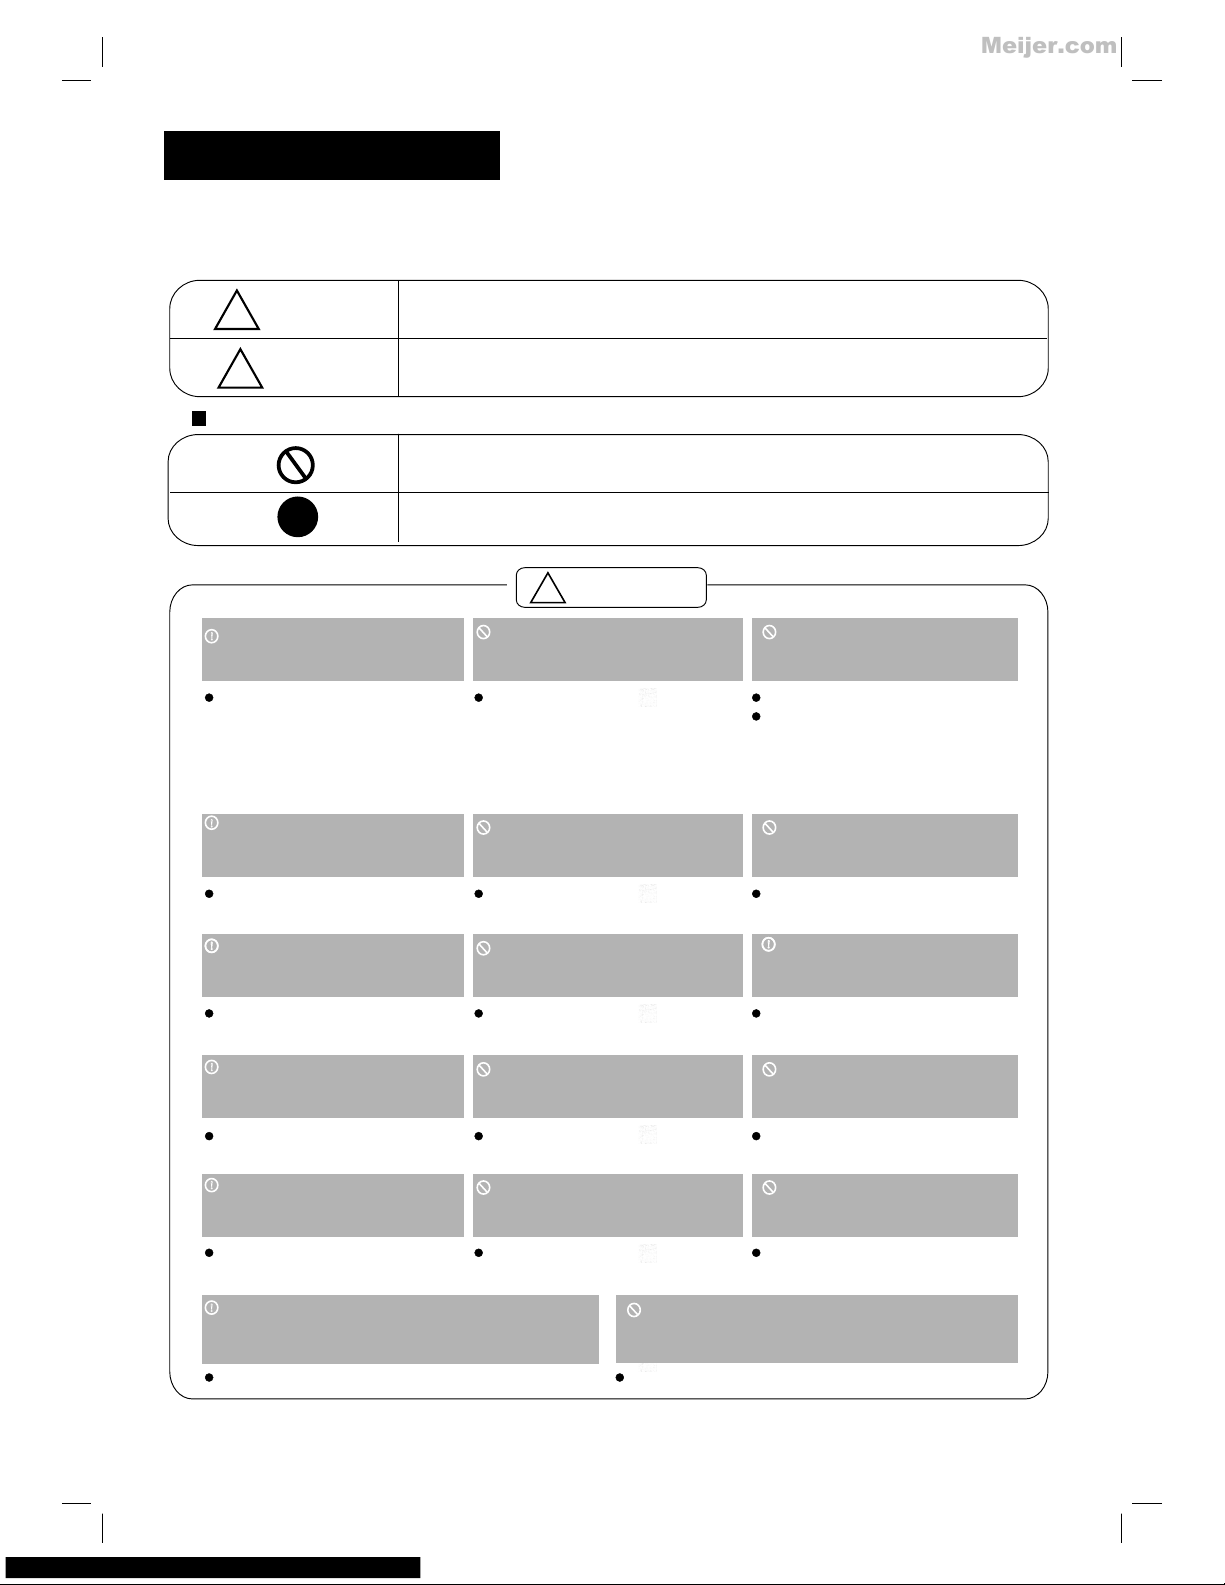
To prevent injury to the user or other people and property damage, the following instructions
must be followed. Incorrect operation due to ignoring of instructions may cause harm or
damage. The seriousness is classified by the following indications.
Safety Precautions
This symbol indicates the possibility of death or serious injury.
Meanings of symbols used in this manual are as shown below.
!
!
WARNING
Always do this.
Never do this.
!
CAUTION
This symbol indicates the possibility of injury or damage to property.
Plug in power plug
properly.
Do not modify power cord
length or share the outlet
with other appliances.
Always ensure effective
earthing.
Unplug the unit if strange
sounds, smell, or smoke
comes from it.
Keep firearms away.
Ventilate room before operating air
conditioner if there is a gas leakage from
another appliance.
Otherwise, it may cause electric
shock or fire due to heat
generation.
excess
It may cause electric shock or
fire due to heat generation.
Incorrect earthing may cause
electric shock.
It may cause fire and electric
shock.
It may cause fire.
It may cause explosion, fire and, burns.
It may cause electric shock or fire
due to heat generation.
It may cause electric shock.
It may cause failure of machine
or electric shock.
It may cause fire and electric
shock.
It may cause fire and electric
shock.
It may cause electric shock or fire.
If the power cord is damaged, it
must be replaced by the manufacturer or an authorised service
centre or a similarly qualified person in order to avoid a hazard.
This could damage your health.
Incorrect installation may cause
fire and electric shock.
It may cause electric shock.
It may cause an explosion or fire.
It may cause failure and electric shock.
Do not operate or stop the
unit by inserting or pulling
out the power plug.
Do not operate with wet
hands or in damp
environment.
Do not allow water to run
into electric parts.
Do not use the socket if it is
loose or damaged.
Do not use the power cord
close to heating appliances.
Do not damage or use an
unspecified power cord.
Do not direct airflow at
room occupants only.
Always install circuit
breaker and a dedicated
power circuit.
Do not open the unit
during operation.
Do not use the power cord near
flammable gas or combustibles, such
as gasoline, benzene, thinner, etc.
Do not disassemble or modify unit.
!
!
!
!
!
!
WARNING
!
2
!
!!
Meijer.com
Page 6

!
CAUTION
When the air filter is to be
removed, do not touch the
metal parts of the unit.
It may cause an injury.
Do not clean unit when
power is on as it may cause
fire and electric shock, it may
cause an injury.
Operation with windows
opened may cause wetting
of indoor and soaking of
household furniture.
When the unit is to be
cleaned, switch off, and turn
off the circuit breaker.
Stop operation and close
the window in storm or
hurricane.
Use caution when unpacking and
installing. Sharp edges could cause injury.
Do not clean the air
conditioner with water.
Water may enter the unit and
degrade the insulation. It may
cause an electric shock.
This could injure the pet or
plant.
It may cause electric shock
and damage.
Do not put a pet or house
plant where it will be
exposed to direct air flow.
Hold the plug by the head
of the power plug when
taking it out.
Ventilate the room well when
used together with a stove,
etc.
An oxygen shortage may occur.
Do not use this air conditioner to
preserve precision devices, food,
pets, plants, and art objects.
It may cause deterioration of
quality, etc.
It may cause failure of product
or fire.
Do not use for special
purposes.
Turn off the main power
switch when not sing the
unit for a long time.
u
If water enters the unit, turn the unit off at the power
outlet and switch off the circuit breaker. Isolate
supply by taking the power-plug out and contact a
qualified service technician.
3
!
!
!
!
!
!
!
It may cause failure of
appliance or accident.
Appearance may be
deteriorated due to change
of product color or
scratching of its surface.
Do not place obstacles
around air-inlets or inside
of air-outlet.
Do not use strong detergent such as wax or
thinner but use a soft cloth.
If bracket is damaged, there
is concern of damage due to
falling of unit.
There is danger of fire or
electric shock.
Ensure that the installation bracket of
the outdoor appliance is not damaged
due to prolonged exposure.
Do not place heavy object on the
power cord and ensure that the cord
is not compressed.
Operation without filters may
cause failure.
It contains contaminants and
could make you sick.
Always insert the filters
securely. Clean filter once
every two weeks.
Do not drink water drained
from air conditioner.
!
!
Meijer.com
Page 7

IMPORTANT SAFETY INSTRUCTIONS
Be sure the electrical service is adequate for the model you have
chosen. This information can be found on the serial plate, which
is located on the side of the cabinet and behind the grille.
Be sure the air conditioner is properly grounded. To minimize
shock and fire hazards, proper grounding is important. The power
cord is equipped with a three-prong grounding plug for protection
against shock hazards.
Your air conditioner must be used in a properly grounded wall
receptacle. If the wall receptacle you intend to use is not adequately
grounded or protected by a time delay fuse or circuit breaker,
have a qualified electrician install the proper receptacle.
Ensure the receptacle is accessible after the unit installation.
Do not run air conditioner without side protective cover in place.
This could result in mechanical damage within the air conditioner.
Do not use an extension cord or an adapter plug.
WARNING
For your safety
Do not store or use gasoline or other flammable vapors and liquids
in the vicinity of this or any other appliance.
Avoid fire hazard or electric shock. Do not use an extension cord or
an adaptor plug. Do not remove any prong from the power cord.
WARNING
Electrical Infor mation
NOTE The power supply cord with
this air conditioner contains a current
detection device designed to reduce
the risk of fire.
Please refer to the section Operation
of Current Device for details.
In the event that the power supply
cord is damaged, it can not be
repaired.It must be replaced with a
cord from the Product Manufacturer.
,
,
Do not , und er any
ci
rcum sta nces, cut,
remove, o r bypas s
the gr oun ding pr ong.
Powe r sup ply cor d
with 3 -pr ong gro unding plu g
and cu rre nt dete cti on devi ce
Operation of Curr ent Dev ice
The power supply cord contains a current device that senses damage to the power cord. To test your power
supply cord as follows:
1. Plug in the Air Conditioner.
2. The power supply cord will have TWO buttons on the plug head. Press the TEST button, you will notice a
click as the RESET button pops out.
3. Press the RESET button, again you will notice a click as the button engages.
4. The power supply cord is now supplying electricity to the unit. (On some products this it also indicated by
a light on the plug head.)
Do not use this device to turn the unit on or off.
Always make sure the RESET button is pushed in for correct operation.
The power supply must be replaced if it fails reset when either the TEST button is pushed, or it can not be
reset. A new one can be obtained from the product manufacturer.
If power supply cord is damaged, it can not be repaired. It MUST be replaced by one
NOTE:
obtained from the
product manufacturer.
4
Meijer.com
Page 8

NORMAL SOUNDS
AIR CONDITIONER FEATURES
Soun d of R ushing Air
At t
he front of the u ni t, y ou m ay
hear the sound of r us hi ng a ir
being moved by th e fa n
High P it ched Chat te r
Hi
gh effi ci en cy c om pr es so rs
may have a high pitch ed c ha tt er
during the cool in g cy cl e.
Gurg le /Hiss
Gu
rgling or hissing n oi se m ay
be heard due to ref ri ge ra nt
passing throu gh e va po ra to r
during normal ope ra ti on .
Ping in g or Switch in g
Dr
oplets of water h it ti ng c on de ns er
during normal ope ra ti on m ay c au se
pinging or swit ch in g so un ds .
Befor e you b egin, thorou ghly familia rize yoursel f wit h the control pa nel and remote a s sho wn below
an
d all its f unc tions, then fo llow the symbo l for t he functions y ou de sire. The unit can be cont rolled
by the unit co ntrol alone or the re mot e.
Vibratio n
Un
it may vibrate an d ma ke n oi se
because of poor w al l or w in do w
constructio n or i nc or re ct i ns ta ll at io n.
EL E CTRO NIC CONT ROL OPE RATING I N STRU C TIONS
ADJ UST
TE
MPE RATURE
OR TI ME
ADJ UST
TEM PERATU RE
OR TI ME
DIS PLAY
TE
MPE RATURE
OR TI ME
ACT IVATE
TIM ER
CHE CK FILTE R
RES ET BUTT ON
SET M ODE
ENE RGY
SAVE R MODE
SLE EP MODE
SET FA N SPEED
TUR N UNIT
ON OR O FF
UNIT CONTR OL
Temp Te
mp
Tim er
Tim er
On
Off
Sle ep
Chec k
Filt er
Time r
Aut o
Coo l
Dry
Fan
Low
Aut o
Med
Hig h
Fan
Mod e
Foll ow
Me
Ener gy
Save r
On/ Off
5
FOL LOW ME IN DICATOR
Meijer.com
Page 9

AIR CONDITIONER FEATURES(CONTINUED)
TO TURN UN IT ON:
NOTE: The followin g instructions re present the Un it Controls, the sa me instructi ons can be used
for the R emo te Control.
TO CHANG E TEMPER ATURE
SE T TING:
Press t he On /Off button .
Aut o
Co
ol
Dry
Fan
Low
Aut o
Med
Hig h
Fan
Mod e
Foll ow
Me
Ener gy
Save r
On/ Off
DO THIS :
Temp Te
mp
Tim er
Tim er
On
Off
Sle ep
Chec k
Filt er
Time r
Aut o
Aut o
Press t o rai se
DO T
HIS:
Press t o low er
Press o r hold either Left( < ) or Right (>) but ton
until t he de sired temper ature is seen on t he
displ ay. This t emperature will b e automatica lly
maint ain ed anywhere be tween 62 F(17 C) a nd
86 F(30 C ). If y ou want the disp lay to read the
actua l roo m temperatur e, see To Op era te on
Fan Onl y sec tion.
NOTE:
TO A
DJ U ST FAN S P EEDS:
Aut o
Co
ol
Dry
Fan
Low
Aut o
Med
Hig h
Fan
Mod e
Foll ow
Me
Ener gy
Save r
On/ Off
Press t o sel ect
ap
propr iate fan
speed
DO THIS :
Used to s ele ct the Fan Speed i n four steps:
Auto, L ow, Me d or High. Each ti me the button
is pres sed, the fan speed mo de is shifted.
NOTE:
6
Meijer.com
Page 10

AIR CONDITIONER FEATURES(CONTINUED)
TO SELEC T THE
OP E RATING M O DE:
Press t he Mo de
butto n.
Aut o
Co
ol
Dry
Fan
Low
Aut o
Med
Hig h
Fan
Mod e
Foll ow
Me
Ener gy
Save r
On/ Off
DO THIS :
To choose o perating mod e, pr ess the Mode but ton.
Ea
ch time y ou pr ess the button , a mode is selected
in a sequ ence that goes from Au to, Cool, Dry to
Fan. The indicator l ight besides w ill b e illuminate d
and rem ained on once the mod e is selected.
NOTE:
To oper ate on Au to feature:
In t
his mod e, th e fan speed can no t be adjusted, i t
start s aut omatically a t a speed accord ing t o the
room te mpe rature. If the r oom does not get t oo
warm, i t wil l stay at Low spee d.
To oper ate on Fan Only:
Use thi s fun ction only whe n cooling is not d esired,
such as f or ro om air circula tion or to exhau st st ale
air(o n some models) . (Re member to open t he vent
durin g thi s function, bu t keep it closed d uri ng
cooli ng fo r maximum cool ing effi cie ncy.) You can
choos e any fan speed you pre fer.
Durin g thi s function, th e display will s how the actual
room te mpe rature, not th e set temperat ure a s in the
cooli ng mode.
TO USE THE E NERG Y
SA
VE R F EATURE :
Press t he bu tton
Aut o
Co
ol
Dry
Fan
Low
Aut o
Med
Hig h
Fan
Mod e
Foll ow
Me
Ener gy
Save r
On/ Off
DO THIS :
In t
his mod e, th e fan will conti nue to run for 3 minute s
after the co mpressor shu ts off. The fan then cycles
on for 2 mi nut es at 10 minute in tervals until the r oom
tempe rat ure is above the s et temperatu re, a t which
time th e com pressor turn s back on and cool ing starts.
NOTE:
Temp Te
mp
Tim er
Tim er
On
Off
Sle ep
Chec k
Filt er
Time r
Aut o
Coo l
Dry
Fan
Low
Aut o
Med
Hig h
SL E EP FEATU R E:
Press S lee p
bu
tton
DO THIS :
NOTE:
7
In this mode t he selected te mperature will in crease
by 2 F
(1 C) 30 mi nutes after the mod e is selected.
The tem per ature will the n increase by an oth er 2 F
(1 C) aft er an a dditional 30 m inutes. Thi s new
tempe rat ure will be main tained for 7 hou rs before it
retur ns to t he originall y selected tem per ature. This
ends th e Sle ep mode and the un it will contin ue to
opera te as o riginally pr ogrammed. The Sleep mo de
progr am ca n be cancelled a t any time durin g operation
by pres sing the Sleep butt on again.
NOTE:
Meijer.com
Page 11

Temp Te
mp
Tim er
Tim er
On
Off
Sle ep
Chec k
Filt er
Time r
Aut o
Coo l
Dry
Fan
Low
Aut o
Med
Hig h
TI M ER: AUTO S TA RT/
ST
OP F E ATURE:
Press Ti mer
bu
tton
DO THIS :
AIR CONDITIONER FEATURES(CONTINUED)
First p res s the Timer butto n, the indicator li ght
besid es word On illumina tes. It indica tes t he Auto
Start p rog ram is initiat ed.
Press o r hold the Left arrow o r Right arrow to c han ge
the Auto t ime b y 0.5 hour incre ments, up to 10 ho urs ,
then at 1 h our i ncrements up t o 24 hours. The c ontrol
will co unt down the time rem aining until s tar t.
The sel ect ed time will reg ister in 5 secon ds and the
syste m wil l automatica lly revert bac k to di splay the
previ ous temperature s etting.
Turning the un it ON o r OFF at any time wi ll cancel the
Auto St art /Stop functi on.
NOTE:
Temp Te
mp
Tim er
Tim er
On
Off
Sle ep
Chec k
Filt er
Time r
Aut o
Coo l
Dry
Fan
Low
Aut o
Med
Hig h
CH E CK FILTER F E ATURE:
Press C heck
Fi
lter bu tto n
DO THIS :
This fe atu re is a reminder t o clean the Air Fil ter f or
more efficient ope ration. The l ight will illu minate
after 2 50 ho urs of operati on. To reset after c leaning
the fil ter, p ress the Check F ilter button and th e light
will go o ff.
NOTE:
8
Meijer.com
Page 12

AIR CONDITIONER FEATURES(CONTINUED)
FO L LOW M E FEATUR E :
Light flashing
Aut o
Co
ol
Dry
Fan
Low
Aut o
Med
Hig h
Fan
Mod e
Fol low
Me
Ene rgy
Sav er
On/ Off
NOTE:
To a
ctiva te th e Follow Me feat ure, point the remo te
contr ol to wards the unit a nd press the Fol low M e
butto n. T
If the un it do es not receive t he Follow Me sig nal
durin g any 7 minutes inter val, the unit wi ll be ep to
indic ate t he Follow Me mod e has ended.
The act ual t emperature c an be displaye d at th e unit
by pres sing the Fan Only mod e. When in the Coo l
mode, t he un it display ind icates the set t emp erature.
he remo te di splay is actua l temperatur e
at its lo cat ion. The r emote control wil l send this
signa l to th e air conditio ner every 3 minu tes i nterval .
This featu re can be activa ted from the remote
contr ol ON LY. The remote cont rol s erves as a
remot e the rmostat allo win g for the precis e
tempe rat ure control at i ts lo cation.
ADD I TIONAL THIN G S YO U S HOULD KNOW
Now tha t you h ave mastered t he operating p roc edure, here ar e more feature s in your control tha t
you sho uld become famili ar with.
The Coo l cir cuit has an auto matic 3 minute s tim e delayed star t if th e unit is turned o ff and on
quick ly. This p revents over hea ting of the comp ressor and pos sible circui t breaker trippin g.
The fan w ill c ontinue to run d uring this tim e.
The con tro l will maintai n any set temper atu re within 1 F, betwe en 62 F(17 C) and 86 F (30 C ) degrees.
The con tro l is capable of di splaying tem per ature in degre es Fahrenhei t or degrees Cel siu s.
To conver t from one to the other, p ress and hold th e Lef t and Right Temp/Ti mer buttons at t he
same ti me fo r 3 seconds.
9
Meijer.com
Page 13

INSTALLATION INSTRUCTIONS
Your air condit ioner is desig ned to install in sta ndard double h ung windows wi th op ening widths o f
23 to 36 in che s(584mm to 914 mm) (See Fig.1 ).
Lower s ash m ust open sufficientl y to al low a clear vert ical
openi ng of 14-1/2 inches ( 368mm). Side l ouvers and the r ear
of the AC mu st ha ve clear air spa ce to allow enou gh airflow
throu gh th e condenser, fo r heat removal . The rear of the u nit
must be o utd oors, not insi de a building or g arage.
NOTE: Carto n Insta lla tion Instructio nsSave and the se
for future r eference. The carton is the b est way to store u nit
durin g winter, or when not in u se.
3 4 Scre ws
(7
)
Lock F ra me
(2
)
Sash L oc k
(1)
Mounting H ardware
TOOL S NEEDED:
CAUTI ON:
Phill ips Screw Driver
Drill (If p ilot holes are n eeded)
When ha ndl ing unit, be car eful to avoid cu ts fr om
sharp m eta l edges and alum inum fins on fro nt and rear coil s.
Top Rai l Hardware
3 8 Scre ws
(4
)
Top Rail
(1
)
Befor e ins talling unit, the t op ra il must be assem ble d
on the unit (F or <1 0000Btu/h mo del s only).
Tool Ne eded: Philli ps Sc rewdriver
A: Remo ve th e air conditio ner from the car ton a nd place
on a flat s urf ace.
B: Remo ve to p rail from the bo ttom of the packagi ng
mater ial a s shown in Fig.A
10
Fig. 1
OFFSET
EX ERIOR
WALL
T
STOOL
SILL
INTERIOR
WALL
23 to 36
584mm to 914mm
14 1 2 min.
/
(368 mm)
NOTE:
mo
re
than 10 000 Btu/h.
The top r ail h ardware and th e following Fi g.A ,
Fig.B a nd Fi g.C are not appl icable to the units
Meijer.com
Page 14

C: Ali gn th e hole in the top ra il with those in t he
to
p of the un it as s hown in Fig.B
Fig. B
Fig. C
D: S
ecure t he to p rail to the unit w ith the 3/8
Screw s as sh own in Fig.C.
For safety r easons, all fo ur( 4) screws
be secu rely fastened.
NOTE:
MUST
,,
HOW TO INSTALL
NOTE: Top rail and Slidi ng Panels at eac h side are offs et to provide th e proper pitch to the r ear of
5/16 (8 mm) . This is
Place u nit on floor, a bench or a t able. Th ere i s a Left and Right W indow Filler Pane l- be sure
to use th e pro per panel for ea ch side. When in sta lled the flang e for securing t he pa nel in place to
the win dow s ill will be faci ng into the room .
neces sary for proper con densed water u tilization a nd dr ainage. If you
are not u sin g the Side Panel s for any reason , thi s pitch to the rea r must be mainta ine d.
,,
1
Fig. 1
A. Hold t he Acc ordion Panel
in o
ne hand a nd gently
pull ba ck th e center to free
the ope n end . See Fig.1.
Fig. 2A
Fi
g.2B
B. Slid e the f ree and (I secti on)
of the pa nel i nto the cabine t
as show n in Fi g. 2A, 2B & 3.
Slide t he pa nel down., Be
sure to l eav e enough space
to slip t he to p and bottom of
the fra me in to the rails on
the cab ine t.
Fig. 3
11
Meijer.com
Page 15

Keep a fi rm gr ip on the air cond itioner, care ful ly
pl
ace the u nit i nto the window o pening so the bo tto m
of the ai r con ditioner fra me is against th e win dow
sill (F ig. 5). Carefull y close the wind ow be hind the top
rail of t he un it.
2
Fig. 5
Fig. 6
Ex
tend th e sid e panels out aga inst the windo w
frame ( Fig .6).
3
Place t he fr ame lock betwe en the frame
ex
tensi ons a nd the window si ll as shown
(Fig. 7). D rive 3 / 4 (19mm) lo cking screws
throu gh th e frame lock and i nto the sill
(Fig. 8).
NOTE: To prevent windo w sill from spli tti ng,
drill 1 / 8 ( 3mm ) pilot holes be fore driving
screw s.
4
,,
,
,
Fig. 7
Fi
g.8
12
Fig. 4
C. O
nce the p ane l has been insta lled on the side o f the
cabin et, m ake sure it sits s ecurely insi de th e frame
chann el by making slight a djustments . Sli de the top
and bot tom e nds of the frame i nto the top and botto m
ends of t he fr ame into the top a nd bottom rails of
the cab ine t. Fig.4.
D. Slid e the p anel all the way i n and repeat on th e oth er
side.
If storm win dow blocks AC, se e Fig. 13.NOTE:
Meijer.com
Page 16

Fig. 9
Fi
g.10
Drive 3 / 4 ( 19m m) locking scr ews through fr ame
holes i nto w indow sash (Fi g.9/10).
5
,,
T
o secur e lower sash in place , attach right a ngl e
sash lo ck with 3 / 4 (19mm) scre w as shown(Fig .11).
6
,,
Fig. 11
Cu
t foam se al an d insert in the sp ace between th e
upper a nd lower sashes (Fi g.12).
7
Fig. 12
If
AC is Blocked by Storm W indow
Add woo d as sh own in Fig.13, o r remove storm
windo w before air condit ioner is insta lled.
If Storm Win dow Frame must r emain, be sure the
drain h oles or slots are not c aulked or pain ted shut.
Accum ulated Rain Water or Conde nsation must b e
allow ed to d rain out.
Storm window
fr
ame or other
obstruction
11/2 M IN
(38 mm)
,,
Sash
Board
thickness
as required,
for proper
pitch to rear,
along entire
sill. Fasten
with nails or
screws.
Fig. 13
Removing AC From W indow
13
Turn AC off , and d isconnect po wer cord.
Remov e sash seal from betw een windows, a nd
unscr ew safety lock.
Remov e screws installe d through fram e and frame
lock.
Close ( slide) side panel s into frame.
Keepi ng a fi rm grip on air con ditioner, rai se sash
and car efu lly rock air con ditioner bac kwa rd to
drain a ny co ndensate wat er in base of unit . Be
caref ull y not to spill any r emaining wat er while
lifti ng un it form window. S tore parts WITH air
condi tio ner.
,
,
,
,
Meijer.com
Page 17

14
Meijer.com
Page 18

Before calling for service, review this list. It may save you time and expenditure. This list includes common
occurrences that are not the result of defective workmanship or materials in this appliance.
Solution
Air conditioner
does not start
Wall plug disconnected. Push plug firmly into wall outlet.
House fuse blown or circuit breaker tripped. Replace fuse with time delay type or
reset circuit breaker.
Plug Current Device Tripped. Press the RESET button.
TROUBLESHOOTING TIPS
Problem
Air from unit does
not feel cold
enough
Reset to a Lower temperature.
Room temperature below 17 C(62 F). Cooling may not occur until room temperature
rises above 17 C(62 F).
Thermostat set too cold for night-time cooling. To defrost the coil, set to FAN ONLY
mode. Then, set temperature to a Higher setting.
Temperature sensing element touching cold coil, located behind air filter. Straighten
tube away from coil.
Air filter may be dirty. Clean filter. Refer to Care and Cleaning section. To defrost,
set to FAN ONLY mode.
Dirty air filter- air restricted. Clean air filter. Refer to Care and Cleaning section.
Unit recently turned on in hot room. Allow additional time to remove Stored heat from
walls, ceiling, floor and furniture.
Control is OFF. Turn Control ON and set to desired setting.
O
O
O
O
Air conditioner
cooling, but room
is too warm- ice
forming on cooling
coil behind
decorative front.
Outdoor temperature below 18 C(64 F). To defrost the coil, set FAN ONLY mode.
O
O
Air conditioner
cooling, but room
is too warm- NO
ice forming on
cooling coil behind
decorative front.
Temperature is set too High, set temperature to a Lower setting.
Air directional louvers positioned improperly. Position louvers for better air distribution.
Front of units is blocked by drapes, blinds, furniture, etc. - restricts air distribution.
Clear blockage in front of unit.
Doors, windows, registers, etc. Open- cold air escapes. Close doors, windows, registers.
Compressor shut-off by changing modes. Wait approximately 3 minutes and listen for
compressor to restart when set in the COOL mode.
Air conditioner turns on
and off rapidly
Noise when unit is
cooling
Water dripping
INSIDE when
unit is cooling.
Improper installation. Tilt air conditioner slightly to the outside to allow water drainage.
Refer to installation instructions - check with installer.
Dirty air filter- air restricted. Clean air filter.
Air movement sound. This is normal . If too loud, set to a slower FAN setting.
Outside temperature extremely hot. Set FAN speed to a Higher setting to bring air past
cooling coils more frequently.
Window vibration - poor installation. Refer to installation instructions or check with installer.
15
Meijer.com
Page 19

Solution
Problem
Water dripping
OUTSIDE when
unit is cooling.
Unit removing large quantity of moisture from humid room. This is normal during
excessively humid days.
Remote Sensing
Deactivating
Prematurely
(some models)
Remote control not located within range. Place remote control within 20 feet & 180 ,
radius of the front of the unit.
Remote control signal obstructed. Remove obstruction.
Room too cold
Set temperature too low. Increase set temperature.
16
Meijer.com
Page 20

Meijer.com
 Loading...