

Arctic Cooling SILENCER 4 ULTRA Installation
Silencer 4 Ultra: Installationsanleitung / Installation Instructions
For further information, please consult our website www.arctic-cooling.com
Schritt 1:
Entfernen sie den Kühler samt Stromstecker
vorsichtig. Sollte der Stromstecker hartnäckig
klemmen, hilft eine Spitzzange.
Schritt 2:
Die GPU muss sorgfältig gereinigt werden.
Pastenrückstände sind mit einem Taschentuch
vorsichtig zu entfernen.
Danach soll eine dünne Schicht der
mitgelieferten Paste auf die GPU aufgetragen
werden.
Schritt 3:
Setzen sie nun den Kühler auf die CPU.
Hängen sie die 4 Clip Haken bei den
zugehörigen Öffnungen des Retention Moduls
ein.
Schritt 5:
Nach Kontrolle des korrekten Sitzes der Clips
ziehen sie gemäss Bild die Bügel an bis sie
beim Kühlkörper einrasten.
Schritt 6:
Nun sollte der Kühler fest im Retention Modul
sitzen, also nicht mehr wackeln oder zu drehen
sein.
Halten sie die Kabel im Computer vom V
fern, indem sie diese mit Kabelbindern
befestigen.
entilator
Step 1:
Remove both the existing cooler and plug
carefully. In some cases pliers may help to
remove the plug.
Step 2:
The GPU surface must be cleaned properly.
Paste residue is to be removed with a paper
tissue cautiously.
Afterwards a thin film of the provided paste
should be applied evenly over the GPU.
Step 3:
Put the cooler onto the CPU.
Now position the 4 clip hooks to face the holes
on the retention module.
Step 5:
While making sure the clips are fixed properly,
fasten the levers as shown in the picture until
they engage the heat sink.
Step 6:
Now the cooler should have been fastened on
the retention module tightly, therefore it is not
possible to jiggle or rotate it anymore.
Keep all cables inside the computer case clear
from the fan by fixing them with cable ties.
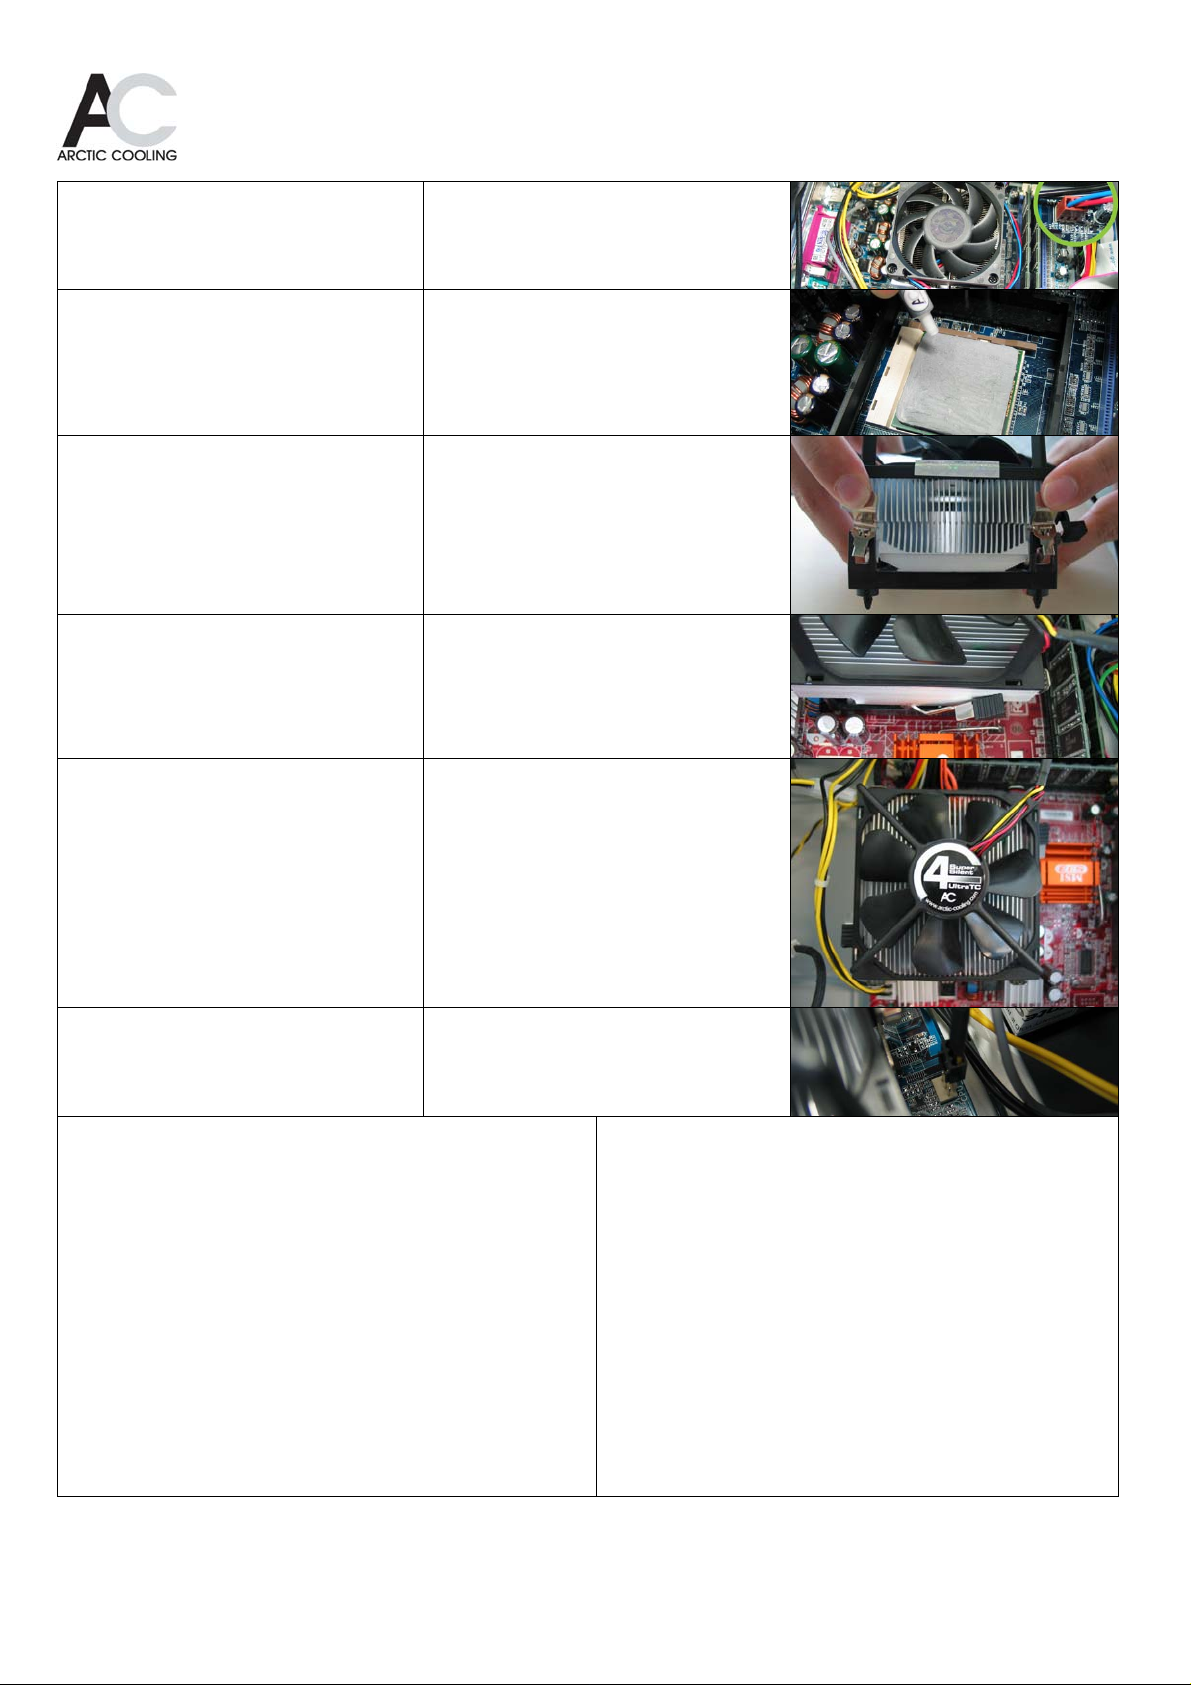
Schritt 7:
Installieren sie den Stromstecker auf dem
entsprechenden Anschluss des Mainboards.
FAQ: Der Computer zeigt eine Ventilatorwarnung an ode r schaltet nach
wenigen Sekunden aus
Das BIOS einiger Boardhersteller vergleicht die Drehzahl des Lüfters mit
einem Referenzwert. Wird dieser nicht erreicht, erfolgt entweder eine
Warnung oder der PC schaltet gleich wieder aus. Im Gegensatz zur Kontrolle
der Temperatur ist die der Drehzahl zwecklos, da je nach Lüfter die
Solldrehzahl stark variiert. Diese Prüfung kann im Bios deaktiviert werden.
Nähere Angaben zu den Einstellungen fordern sie bitte beim Boardhersteller
an.
Stattdessen aktivieren Sie die Temperaturwarnung. Diese schützt ihre
CPU auch im Falle von anderen Kühlproblemen als dem Defekt des
Ventilators.
Im Falle, dass der PC den Bootvorgang gar nicht erst beginnt bzw. gleich
wieder ausschaltet, schliessen Sie den Ventilator des Kühlers an einem
anderen Stromstecker des Mainboards an und installieren beim Stecker 1
einen Ventilator mit höherer Drehzahl. So kann der Computer gestartet und
im Bios die Drehzahlkontrolle ausgeschaltet werden.
Der CPU-Kühler muss bei dieser Prozedur nicht vom Prozessor entfernt
werden.
Step 7:
Attach the power plug onto the according power
socket on the mainboard.
FAQ: The Computer displays a fan warning or switches off after a few
seconds
The BIOS of some mainboar d manufacturers compares the speed of the
fan with a specified value. If the fan speed does not match the specified
value, either the PC emits a warning or switches off. Contrary to the
temperature control, the RPM control is of no importance, since fan spe eds
will be between 500 and 7000 RPM depending on the type of fan. This
RPM control can be deactivated in the BIOS settings. Please consult your
mainboard manufacturer for more information regarding these settings.
Instead activate the temperature warning. This protects your CPU also
from other cooling problems than a failing
In the case of the PC is not booting or immediately switching off, attach the
plug of the cooler to the auxiliary power of the mainboard and attach a
second fan with higher RPM to the primary power socket. Now the PC can
boot allowing the RPM control to be deactivated in the BIOS settings. We
recommend using a temperature control instead of a RPM control . Th e
cooler does not need to be removed from the processo r for this procedure.
fan.
 Loading...