


Table of contents
ENEN
Package Content........................................................................................................
Getting started............................................................................................................
Description of the device........................................................................................
Through the Wizard...................................................................................................
Connecting to a 3G network..................................................................................
Connecting to a WiFi network...............................................................................
The Android
Getting familiar with Android
TM
interface............................................................................................
TM
.............................................................................
Troubleshooting.........................................................................................................
For more information, please consult the FAQs and the User manual of your product on:
www.archos.com. Make sure to read them before considering any product return.
Your deal may be no big deal.
2
3
4
6
7
9
10
14
16
1
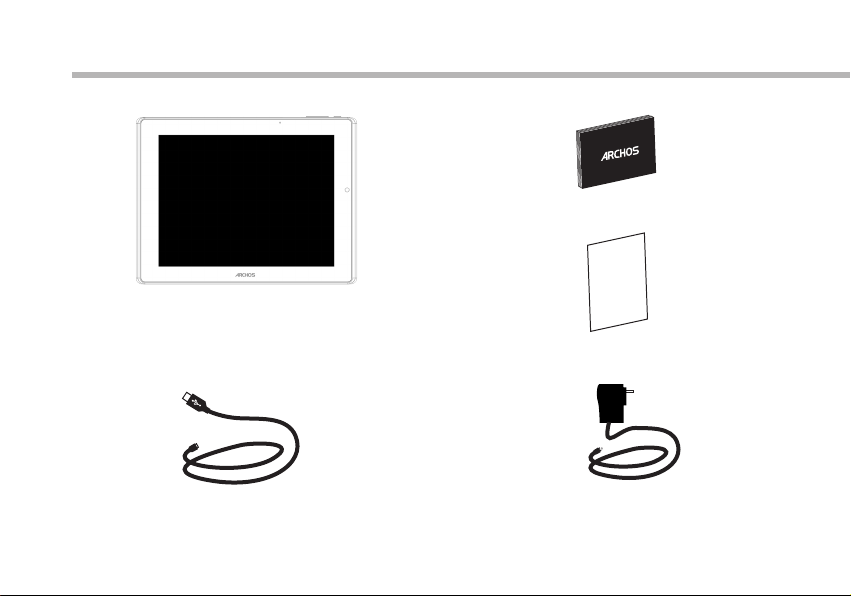
Package Content
ARCHOS 9.7 xenon
USB cable Charger
2
QSG booklet
Warranty,
legal & safety booklet

Getting Started
Charging
Charge your device by plugging your power cable into the power connector.
The device will start charging. The Power indicator light is white while the battery is charging.
Press the ON/OFF button to turn on the device.
You can use your ARCHOS whilst it charges.
Installation Wizard
The rst time you start up your ARCHOS, the installation wizard will help you set up your
device. Simply follow the onscreen instructions.
TIPS:
To receive more complete service, please register your product.
With a computer: go to www.archos.com/register.
EN
3
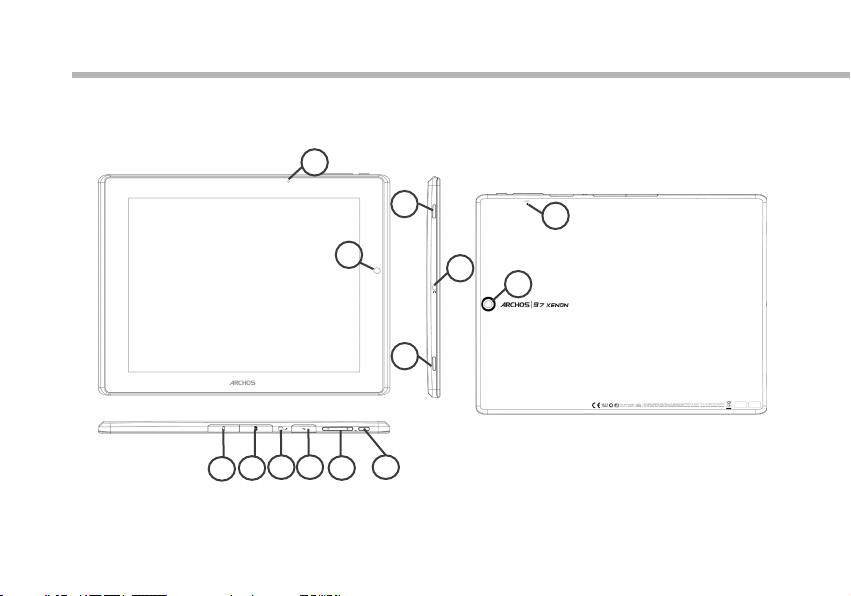
Description of the device
2
12
11
10 9
3
1
7
8
4
3
5
6
4
EN
1
Front camera
2
Charging indicator
3
Loudspeakers
4
Headphone jack
5
Hardware reset
6
Back camera
7
ON/OFF button
Volume buttons
8
9
Micro-USB port
10
Power connector
11
SIM card slot
12
Micro-SD card slot
5

Through the Wizard
The rst time you start up your ARCHOS, the installation wizard will help you
set up your device:
- Language
- Date & time
- Wi network
- My location
- 3rd party apps
TIPS:
We recommend that you set up your device in the WiFi zone of the network that you will regularly
be using.
6

Connecting to a 3G network
Your ARCHOS is equipped with a SIM card slot. Any standard SIM card can be
inserted. There is no provider restriction. The ARCHOS will only have signal if
you are in an area covered by your 3G provider’s 3G.
Inserting your SIM card
Important: Before inserting a SIM card, you must turn o the device.
1. Switch off the device.
2. Insert the SIM card in the SIM card slot.
3. Turn on the device.
4. A Pin number may be requested.
5. Enter the SIM card pin number and tap OK.
Your device will attempt to connect to the 3G network of your provider.
EN
7

Connecting to a 3G network
Tips:
If your device does not connect to your 3G provider’s network
1. Contact your 3G provider to obtain the connection parameters.
2. On your device, tap Settings.
3. Select Wireless & networks > More... > Mobile networks.
- In Network operators, select your operator.
- In Access Point Names, select the correct access point name and enter the
exact connection parameters.
8

Connectivity to a WiFi network
WARNING: Make sure that you are in a WiFi zone.
You can access the WiFi settings quickly from the status bar in the bottom right
corner of the screen:
1. Touch the time in the status bar. The status dashboard is displayed.
2. Touch the time a second time in the status dashboard. The quick settings will display.
3. Touch WiFi to open the WiFi settings menu.
4. If the WiFi is o, slide the WiFi switch to the ON position. Once the WiFi is on, the
ARCHOS will scan for WiFi networks in range.
5. Touch the name of network you want to connect to.
Private networks are shown with a lock icon and will require you to enter your
password.
TIPS:
- When entering a WiFi password, we recommend that you select “Show password” so you can
see the characters you are typing.
- To get the correct WiFi password (or settings) for the network, contact the WiFi network provider.
- If your WiFi is on and you are in range of a network that you previously connected to, your
ARCHOS will automatically attempt to connect to it.
EN
9

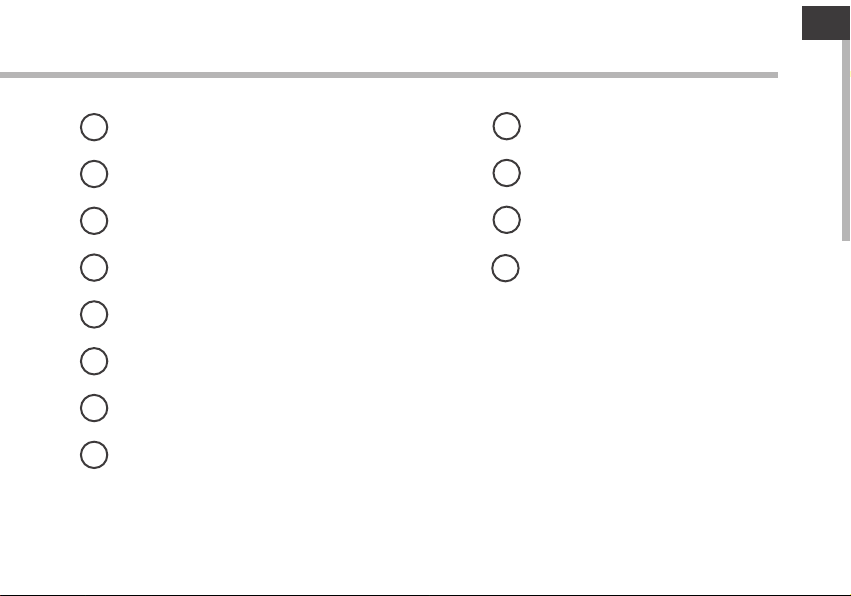
The AndroidTM Interface
10
1
2
3
4
5
6
7
8

GoogleTM Search
1
>Touch for text search or search by voice
Recent apps buttons
2
Home button
3
Back button
4
5
All Apps button
> Touch this icon to show all the applications and widgets installed on your ARCHOS.
All your downloaded applications are here.
6
Widget
AndroidTM apps shortcuts
7
The status bar
8
> Displays notications and quick settings
EN
11

The AndroidTM Interface
12
The Quick settings:
- WiFi:
To turn on/o your WiFi connection.
- Auto-rotate screen:
To activate/deactivate automatic screen orientation as you turn your ARCHOS.
- Brightness:
To adjust the screen brightness.
- Notications:
To activate/deactivate incoming notications.
- Settings:
To access all your settings.

The Recent Apps:
Opens a list of thumbnail images of apps you’ve
worked with recently.
- To open an app, touch it.
- To close an app, swipe it left or right.
EN
13

Getting familiar with Android
TM
The extended home screen:
Navigate between dierent home screen panels by swiping left and right.
Moving a home screen item:
Touch and hold your nger onto it until the positioning gridlines appear, then slide it
to the desired location, and release your nger.
Removing a home screen item:
Touch and hold it, slide your nger towards the top of the screen and drop it over the
Remove icon.
Uninstalling an item:
From the All apps screens, touch and hold it, slide your nger towards the top of the
screen and drop it over Uninstall bin.
14

Creating application folders:
Drop one app icon over another on a home screen and the two icons will be combined.
Widgets:
Touch the All Apps icon on your home screen. Touch Widgets at the top of the screen.
From the main Widgets screen, you can move around widgets just as you do for app
icons.
Changing your wallpaper:
Hold your nger on the screen at an empty location, then choose from the list.
Locking the touchscreen:
From the quick settings dashboard in the status bar, touch settings. Scroll down and
touch security. Touch Screen lock. Touch the type of lock you would like to use. After
you set a lock here, a lock screen is displayed whenever your screen wakes up, requesting the pattern, PIN or other specied key.
EN
15

Troubleshooting
If your device is frozen:
To use the Hardware reset, press the “pinhole reset” button by using a sharp object
such as a toothpick.
If your device doesn’t turn on:
1. Charge your device.
2. To use the Hardware reset, press the “pinhole reset” button by using a sharp object
such as a toothpick.
If you want to extent the life of your battery:
Decrease the screen brightness and turn o the wireless connections if not in use.
If your device functioning is too slow:
Close all apps which are not currently used.
If your WiFi reception is too low:
Make sure you are not far from the WiFi hotspot.
Update the rmware of the device. http://www.archos.com/support
From Settings > Backup & Reset, select Reset Android.
Contact your Wi connection provider.
16

CE
Due to th e used en clo sure ma teria l, th e MID sha ll only b e con necte d to a USB
Inter face of v ers ion 2.0 o r highe r. The c onnectio n to so cal led p ower US B is proh ibi ted.
The ada pter sh all b e insta lled ne ar th e equip ment an d sha ll be eas ily acc ess ible.
When ch argin g, pl ease pl ace the M ID in a n envir onmen t tha t has a nor mal roo m
tempe ratur e and g ood ven tilat ion . It is rec ommen ded t o charg e the phone in a n envir onment
with a te mpera tur e that ra nges fr om 5℃~4 0℃. Pleas e ens ure to us e only the cha rger offer ed
by the ma nufac tur er. Usin g unaut hor ized ch arger m ay ca use dan ger and v iol ate the a uthoriza tion
of the ph one and t he gu arant ee arti cle .
The max imum op era ting am bient t emp eratu re of the e qui pment d eclared by t he manu facturer i s 50℃
RF expo sure in for matio n: Th e Maxim um Permiss ible Ex pos ure (MP E) leve l has b een cal culat ed
based o n a dista nce o f d=20 cm b etwee n the d evice a nd the hu man b ody. To maintai n compl iance
with RF e xposu re re quire ment, u se pr oduct t hat mai nta in a 20cm d istance be tween t he device an d
human b ody.
Exces sive so und p ressu re from e arp hones a nd head pho nes can c ause he ari ng loss .
EU Regu lator y Con forma nce
Hereb y, ARNO VA Tec hnology (H ong Kon g) Co ., Ltd de clare s tha t this de vice is i n com plian ce with
the ess entia l req uirem ents an d oth er rele vant pr ovi sions o f Directiv e 1999/ 5/EC.

RF Expo sur e Informat ion a nd Stateme nt
The SAR l imi t of USA (FCC) is 1 .6 W/ kg average d ove r one gram of ti ssu e. Device ty pes
AC97X E (FC C ID: SOVAC 97XEUS) ha s als o been teste d aga inst this SA R limit. The highest S AR
value r epo rted under t his s tandard du rin g product ce rti fication f or pr operly wor n on the body is
0.971 W/K g (1g). Th is de vice was tes ted f or typical b ody -worn oper ati ons with the b ack o f the
hands et ke pt 0 cm from t he bo dy. To maintain co mpliance with F CC RF exposu re re quiremen ts,
use acc ess ories that m ain tain a 0.5cm s epa ration dis tan ce between t he us er's body an d the back
of the MI D. The use o f bel t clips, hol sters and simil ar accesso rie s should not c ont ain metall ic
compo nen ts in its asse mbl y. The use of a cce ssories th at do n ot satisfy t hes e requirem ent s may
not com ply w ith FCC RF exp osu re require men ts, and shou ld be a voided.
This de vic e complies w ith p art 15 of the FC C rul es. Operat ion i s subject to t he fo llowing tw o
condi tio ns: (1) this d evi ce may not cau se ha rmful inte rfe rence, and ( 2) th is device mu st ac cept
any int erf erence rec eiv ed, includ ing i nterfere nce t hat may caus e und esired ope ration.
NOTE: The manuf act urer is not re sponsibl e for a ny radio or TV interfe rence caused by u nauthori zed
modif ica tions to thi s equ ipment. Su ch mo dificati ons c ould void th e use r's author ity t o operate th e
equip men t.
NOTE: This equi pme nt has been te sted and fou nd to c omply with t he li mits for a Cla ss B di gital
devic e, pu rsuant to pa rt 15 o f the FCC Rule s. These l imits are de sig ned to provi de re asonable
prote cti on against h arm ful interf ere nce in a resid ent ial instal lat ion. This equip men t generate s
uses an d can r adiate rad io fr equency en erg y and, if not in sta lled and use d in ac cordance w ith
the ins tru ctions, ma y cau se harmful i nte rference t o rad io communi cat ions. Howe ver, t here is
no guar ant ee that inte rfe rence will n ot oc cur in a parti cul ar install ati on. If this eq uip ment does
cause h arm ful interf ere nce to radio o r tel evision re cep tion, whic h can b e determin ed by turning
the equ ipm ent off and on, the user i s encourag ed to t ry to correc t the i nterfere nce b y one or more
of the fo llo wing measu res :
- Reori ent o r relocate t he re ceiving an ten na.
- Incre ase t he separat ion b etween the e qui pment and re cei ver.
-Conn ect t he equipme nt in to an outlet o n a cir cuit differen t fro m that to whic h the r eceiver is
conne cte d.
-Cons ult t he dealer or a n exp erienced r adi o/TV techn ici an for help

Bluet ooth
The dev ice sup por ts Blue tooth . You can e stabl ish con nec tions b etwee n the d evice a nd other
devic es (Blu eto oth hea dset, P C or ha ndhel d Bluet oot h devic e etc) to real ize voi ce calls, da ta
excha nge, da ta sy nchro nizat ion e tc. Set tings a re as f ollow s:
-Power : Activa te or d eacti vate Bl uet ooth.
-Visibili ty: Set w hether Blu etoot h of the devic e can be fo und o r not.
-My devi ce: Dis pla y the cur rent or o nce c onnec ted dev ice , and inq uiry new one s.
-Inqui ry BT headse t(Inquiry au dio dev ice): Search f or a Blue too th head set and p air t hem.
-Chang e devic e nam e: Disp lay onl ine B lueto oth dev ice s
-Advan ced: Adv anc ed sett ings of B lue tooth , as foll ows :
Audio p ath: Ch ang e sound o utput d evi ce.
Stora ge: Set t he de fault s torag e pat h of rece ived files .
Shari ng perm iss ion: Se t the sha red d irect ory and l imi ts of aut hority.
My addr ess: Di spl ay Blue tooth a ddr ess of th e devic e.
My loca tion
Use wir eless n etw ork: View th e locat ion in the Appl icati ons via a wire less ne two rk.
Use GPS s atell ite : When po sitio nin g, the ac curac y is se t to stre et level.
 Loading...