

Page 1

Annex No.5
1 of 75
Page
User Manual
(User Manual ARCHOS 605 WiFi – v.0.1)
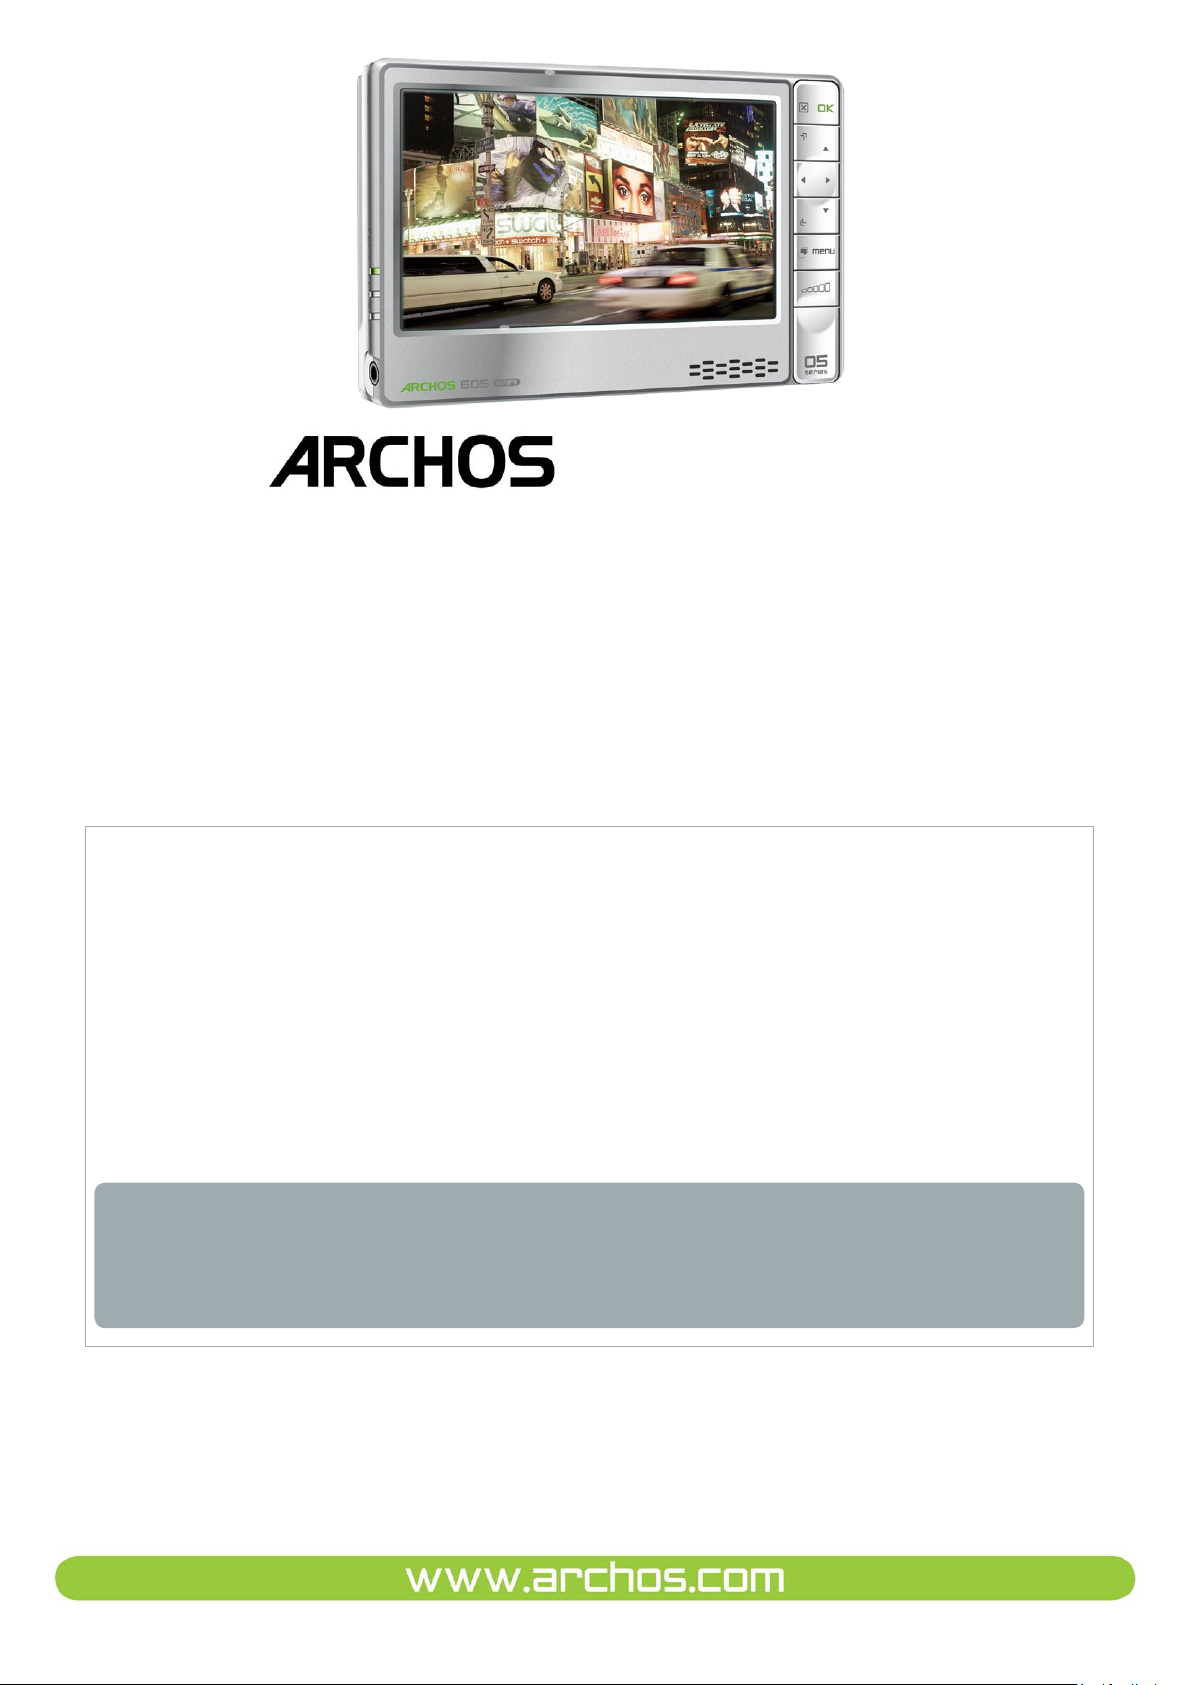
ARCHOS 605 WiFi
Page 2
ENGLISH
605 WIFI
ENGLISH USER MANUAL
Version 1.0
Please visit www.archos.com/manuals to download the latest version of this manual.
Dear Customer,
Thank you for choosing this ARCHOS product. We hope that you will enjoy
using it and that it will give you entire satisfaction for many years to come.
Please do register your product on our website (www.archos.com/register) to
ensure that you get access to our help line and to be informed of free software
updates for your product.
Wishing you the best Multimedia experience,
The ARCHOS Team.
All the information contained in this manual was correct at the time of publication. However, as our engineers are always updating and improving our
products, your device’s software may have a slightly different appearance or
modied functionality than presented in this manual.
Page 3

605 WIFI
MANUAL
V1.0
TABLE OF CONTENTS > p. 2
TABLE OF CONTENTS
ARCHOS DESCRIPTION . . . . . . . . . . . . . . . . . . . . . . . . . . . . . . . . . . . . . . . . . . . . . 4
FIRST TIME USAGE: CHARGING THE BATTERY . . . . . . . . . . . . . . . . . . . . . . . . . . . 5
TURNING THE ARCHOS ON/OFF . . . . . . . . . . . . . . . . . . . . . . . . . . . . . . . . . . . . . . . 6
USING THE ARCHOS INTERFACE . . . . . . . . . . . . . . . . . . . . . . . . . . . . . . . . . . . . . . 6
CHANGING THE LANGUAGE . . . . . . . . . . . . . . . . . . . . . . . . . . . . . . . . . . . . . . . . . . 9
PRODUCT CARE
1. PLAYING VIDEO ........................................................................................................ 12
1.1 BROWSING THROUGH YOUR VIDEOS . . . . . . . . . . . . . . . . . . . . . . . . . . . . . . . 12
1.2 VIDEO PLAYBACK . . . . . . . . . . . . . . . . . . . . . . . . . . . . . . . . . . . . . . . . . . . . . 13
1.3 VIDEO SETTINGS . . . . . . . . . . . . . . . . . . . . . . . . . . . . . . . . . . . . . . . . . . . . . . 15
1.4 PUTTING VIDEOS ONTO YOUR ARCHOS . . . . . . . . . . . . . . . . . . . . . . . . . . . . . 16
1.5 RECORDING VIDEO . . . . . . . . . . . . . . . . . . . . . . . . . . . . . . . . . . . . . . . . . . . . 17
1.6 PLAYING YOUR PC’S SHARED VIDEOS . . . . . . . . . . . . . . . . . . . . . . . . . . . . . 18
. . . . . . . . . . . . . . . . . . . . . . . . . . . . . . . . . . . . . . . . . . . . . . . . . . 10
2. PLAYING MUSIC ...................................................................................................... 19
2.1 BROWSING THROUGH YOUR MUSIC FILES . . . . . . . . . . . . . . . . . . . . . . . . . . 19
2.2 MUSIC PLAYBACK . . . . . . . . . . . . . . . . . . . . . . . . . . . . . . . . . . . . . . . . . . . . . 20
2.3 MUSIC PLAYER SETTINGS . . . . . . . . . . . . . . . . . . . . . . . . . . . . . . . . . . . . . . . 23
2.4 PLAYLISTS . . . . . . . . . . . . . . . . . . . . . . . . . . . . . . . . . . . . . . . . . . . . . . . . . . . 25
2.5 PUTTING MUSIC ONTO YOUR ARCHOS . . . . . . . . . . . . . . . . . . . . . . . . . . . . . 27
2.6 RECORDING AUDIO . . . . . . . . . . . . . . . . . . . . . . . . . . . . . . . . . . . . . . . . . . . . 28
2.7 PLAYING YOUR PC’S SHARED MUSIC . . . . . . . . . . . . . . . . . . . . . . . . . . . . . . 29
3. VIEWING PHOTOS ................................................................................................ 30
3.1 BROWSING THROUGH YOUR PHOTOS . . . . . . . . . . . . . . . . . . . . . . . . . . . . . . 30
3.2 PHOTO VIEWER . . . . . . . . . . . . . . . . . . . . . . . . . . . . . . . . . . . . . . . . . . . . . . . 31
3.3 PHOTO SETTINGS . . . . . . . . . . . . . . . . . . . . . . . . . . . . . . . . . . . . . . . . . . . . . . 33
3.4 PLAYING A SLIDESHOW . . . . . . . . . . . . . . . . . . . . . . . . . . . . . . . . . . . . . . . . . 34
3.5 VIEWING PHOTOS WHILE LISTENING TO MUSIC . . . . . . . . . . . . . . . . . . . . . . 34
3.6 PUTTING PHOTOS ONTO YOUR ARCHOS . . . . . . . . . . . . . . . . . . . . . . . . . . . . 35
3.7 PLAYING YOUR PC’S SHARED PHOTOS . . . . . . . . . . . . . . . . . . . . . . . . . . . . . 35
4. USING THE FILE BROWSER ............................................................................ 36
4.1 NAVIGATION . . . . . . . . . . . . . . . . . . . . . . . . . . . . . . . . . . . . . . . . . . . . . . . . . . 36
4.2 USING THE VIRTUAL KEYBOARD . . . . . . . . . . . . . . . . . . . . . . . . . . . . . . . . . . 38
4.3 BROWSING OTHER COMPUTERS ON THE NETWORK . . . . . . . . . . . . . . . . . . . 40
4.4 USING THE PDF READER . . . . . . . . . . . . . . . . . . . . . . . . . . . . . . . . . . . . . . . . 40
5.
CONNECTING TO A WIFI NETWORK .......................................................................................................43
5.1 WIFI CONNECTION PROCEDURE . . . . . . . . . . . . . . . . . . . . . . . . . . . . . . . . . . 43
5.2 WIFI NETWORK CONFIGURATION . . . . . . . . . . . . . . . . . . . . . . . . . . . . . . . . . 44
6. THE WIFI FEATURES .......................................................................................... 47
6.1 BROWSING THE WEB . . . . . . . . . . . . . . . . . . . . . . . . . . . . . . . . . . . . . . . . . . . 47
TABLE OF CONTENTS CONTINUED ON NEXT PAGE...
Page 4

605 WIFI
6.2 PLAYING YOUR PC’S SHARED MEDIA FILES . . . . . . . . . . . . . . . . . . . . . . . . . 50
6.3 THE ARCHOS CONTENT PORTAL . . . . . . . . . . . . . . . . . . . . . . . . . . . . . . . . . . 52
MANUAL
V1.0
TABLE OF CONTENTS > p. 3
7. TRANSFERRING FILES ....................................................................................... 53
7.1 CONNECTING THE ARCHOS TO A COMPUTER . . . . . . . . . . . . . . . . . . . . . . . . 53
7.2 PUTTING FILES ONTO THE ARCHOS . . . . . . . . . . . . . . . . . . . . . . . . . . . . . . . 54
7.3 DISCONNECTING . . . . . . . . . . . . . . . . . . . . . . . . . . . . . . . . . . . . . . . . . . . . . . 54
8. MAIN SETTINGS .................................................................................................... 57
8.1 SOUND SETTINGS . . . . . . . . . . . . . . . . . . . . . . . . . . . . . . . . . . . . . . . . . . . . . 57
8.2 DISPLAY SETTINGS . . . . . . . . . . . . . . . . . . . . . . . . . . . . . . . . . . . . . . . . . . . . 59
8.3 FILE SERVER SETTINGS . . . . . . . . . . . . . . . . . . . . . . . . . . . . . . . . . . . . . . . . . 61
8.4 APPEARANCE SETTINGS . . . . . . . . . . . . . . . . . . . . . . . . . . . . . . . . . . . . . . . . 62
8.5 LANGUAGE AND REGION SETTINGS . . . . . . . . . . . . . . . . . . . . . . . . . . . . . . . 63
8.6 TV CONTROL SETTINGS . . . . . . . . . . . . . . . . . . . . . . . . . . . . . . . . . . . . . . . . . 63
8.7 CLOCK SETTINGS . . . . . . . . . . . . . . . . . . . . . . . . . . . . . . . . . . . . . . . . . . . . . . 64
8.8 POWER SETTINGS . . . . . . . . . . . . . . . . . . . . . . . . . . . . . . . . . . . . . . . . . . . . . 65
8.9 SYSTEM SETTINGS . . . . . . . . . . . . . . . . . . . . . . . . . . . . . . . . . . . . . . . . . . . . 66
8.10 FIRMWARE AND PLUGINGS SETTINGS . . . . . . . . . . . . . . . . . . . . . . . . . . . . 68
8.11 UPDATING THE FIRMWARE . . . . . . . . . . . . . . . . . . . . . . . . . . . . . . . . . . . . . 69
9. OPTIONAL FUNCTIONALITIES ........................................................................ 70
9.1 ARCHOS ACCESSORIES . . . . . . . . . . . . . . . . . . . . . . . . . . . . . . . . . . . . . . . . . 70
9.2 ARCHOS PLUGINS . . . . . . . . . . . . . . . . . . . . . . . . . . . . . . . . . . . . . . . . . . . . . 71
9.2 SCHEDULING A TV RECORDING . . . . . . . . . . . . . . . . . . . . . . . . . . . . . . . . . . . 72
9.3 RECORDING EXTERNAL VIDEO MANUALLY . . . . . . . . . . . . . . . . . . . . . . . . . . 72
9.4 RECORDING EXTERNAL AUDIO MANUALLY . . . . . . . . . . . . . . . . . . . . . . . . . . 72
9.5 RECORDING EXTERNAL AUDIO MANUALLY . . . . . . . . . . . . . . . . . . . . . . . . . . 72
TECHNICAL SUPPORT INFORMATION ............................................................. 74
Page 5
605 WIFI
MANUAL
V1.0
INTRODUCTION
ARCHOS DESCRIPTION
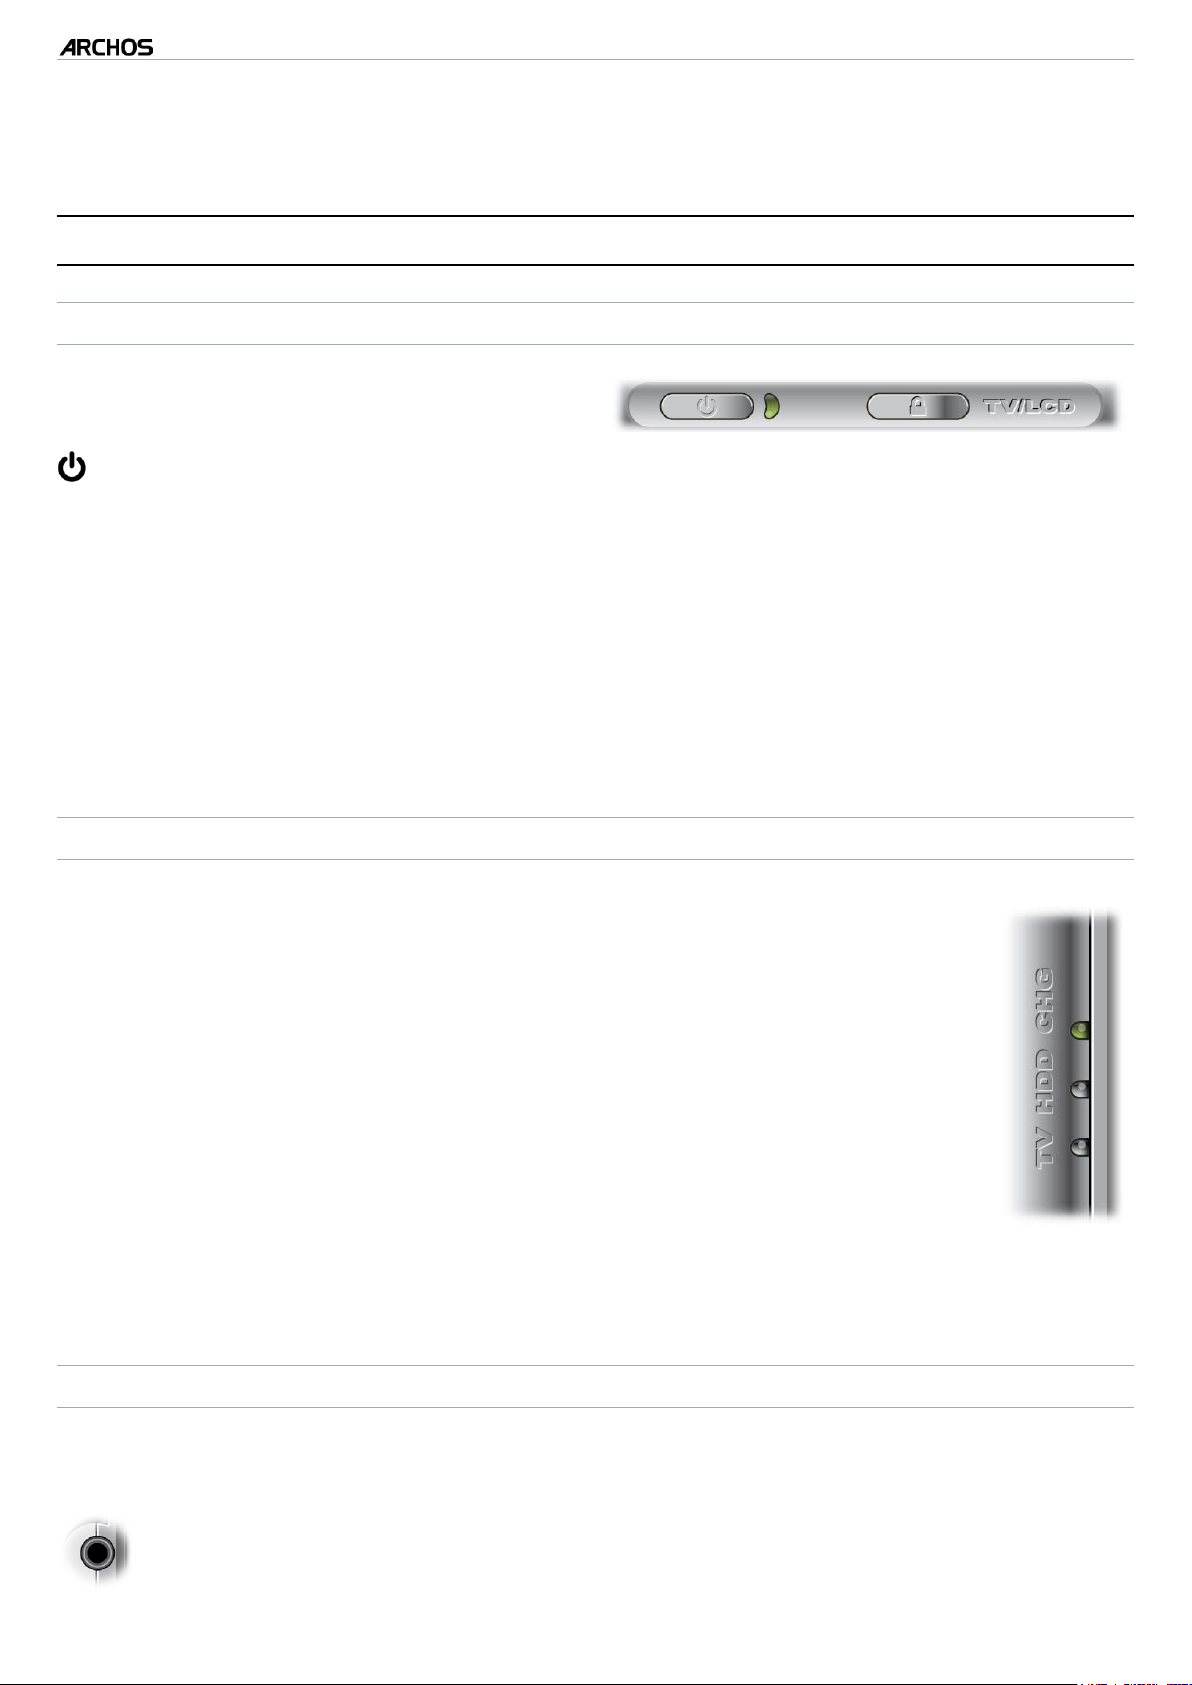
MAIN BUTTONS
On top of the device:
Press and hold to turn your ARCHOS on/off.
•
The LED indicator, next to the button, lights up when the device is on.
•
INTRODUCTION > p. 4
TV/
LCD
Press once to switch the display of the image between the built-in LCD
•
screen and a TV (with the optional DVR Station, Mini Dock or Battery Dock,
available at www.archos.com). See
When the image is displayed on a TV, the TV
•
built-in LCD screen turns off.
Press and hold to lock/unlock the buttons/touchscreen of your ARCHOS.
•
LED INDICATORS
On the left side of the device:
CHG
HDD
Battery charge indicator.
light on: the battery is charging
•
ashing: the battery is fully charged
•
Hard Disk Drive activity indicator:
the light ickers when the hard drive is active (playing/transfer-
•
ring les)
Optional Functionalities
LED indicator lights up and the
.
TV
Video display indicator:
the light is on when the image of the ARCHOS is displayed on a
•
TV (see TV/LCD button).
CONNECTORS
On the left side of the device:
Headphone jack: to connect headphones
Page 6
605 WIFI
Computer
turned on
MANUAL
V1.0
INTRODUCTION > p. 5
Underneath the device:
Connect your ARCHOS to a computer (see
•
Charge the battery of your
•
With optional accessories: (available from www.archos.com)
Connect a compatible USB device to the ARCHOS, with the optional DVR Station,
•
Mini dock or Battery Dock.
Record external audio/video, with the optional DVR Station or DVR Travel Adapter.
•
See Optional Functionalities.
•
BUILT-IN LOUDSPEAKER
On the right side of the device, below the buttons
Docking connectors:
ARCHOS
(see
Connecting the ARCHOS to a Computer
Battery Charge
).
)
LEG STAND
Your ARCHOS is equipped with a leg stand, located on the back of the device.
•
Carefully pull it out, and it will allow your ARCHOS to stand by itself on a at,
•
stable surface.
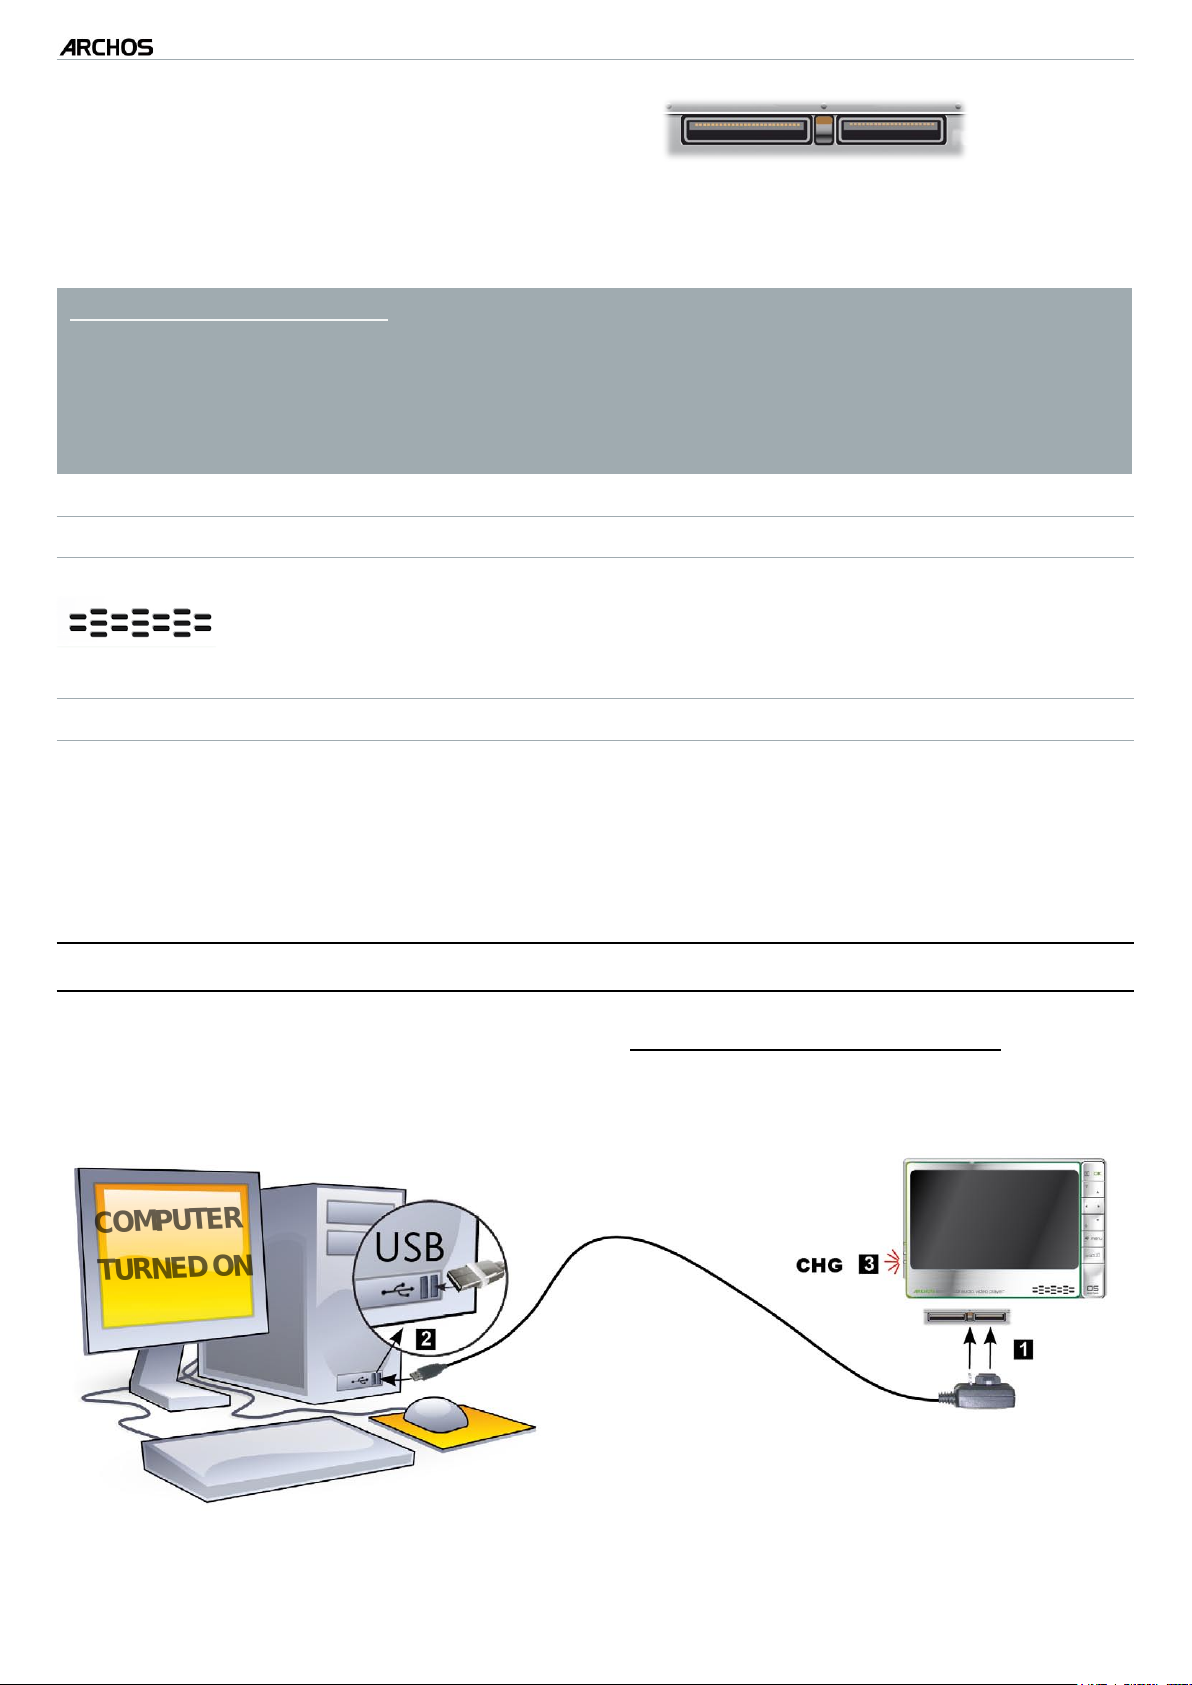
FIRST TIME USAGE: CHARGING THE BATTERY
Before using your ARCHOS for the rst time, completely charge its battery.
The battery of your ARCHOS charges via your computer’s USB port:
Page 7
605 WIFI
Plug the ARCHOS USB cable into your ARCHOS,
1.
Plug the USB end of the cable into your computer (which is turned on),
2.
The ARCHOS will turn on and start charging:
3.
A lightning bolt symbol will ash over the battery icon in the task bar while
-
MANUAL
V1.0
INTRODUCTION > p. 6
the battery is charging: .
The CHG indicator LED is on while the battery is charging; it will blink when
-
the battery is fully charged.
You can also charge your ARCHOS device without a computer, and more rapidly, via
the optional DVR Station, Mini Dock or Battery Dock (available at www.archos.com).
See Optional Functionalities.
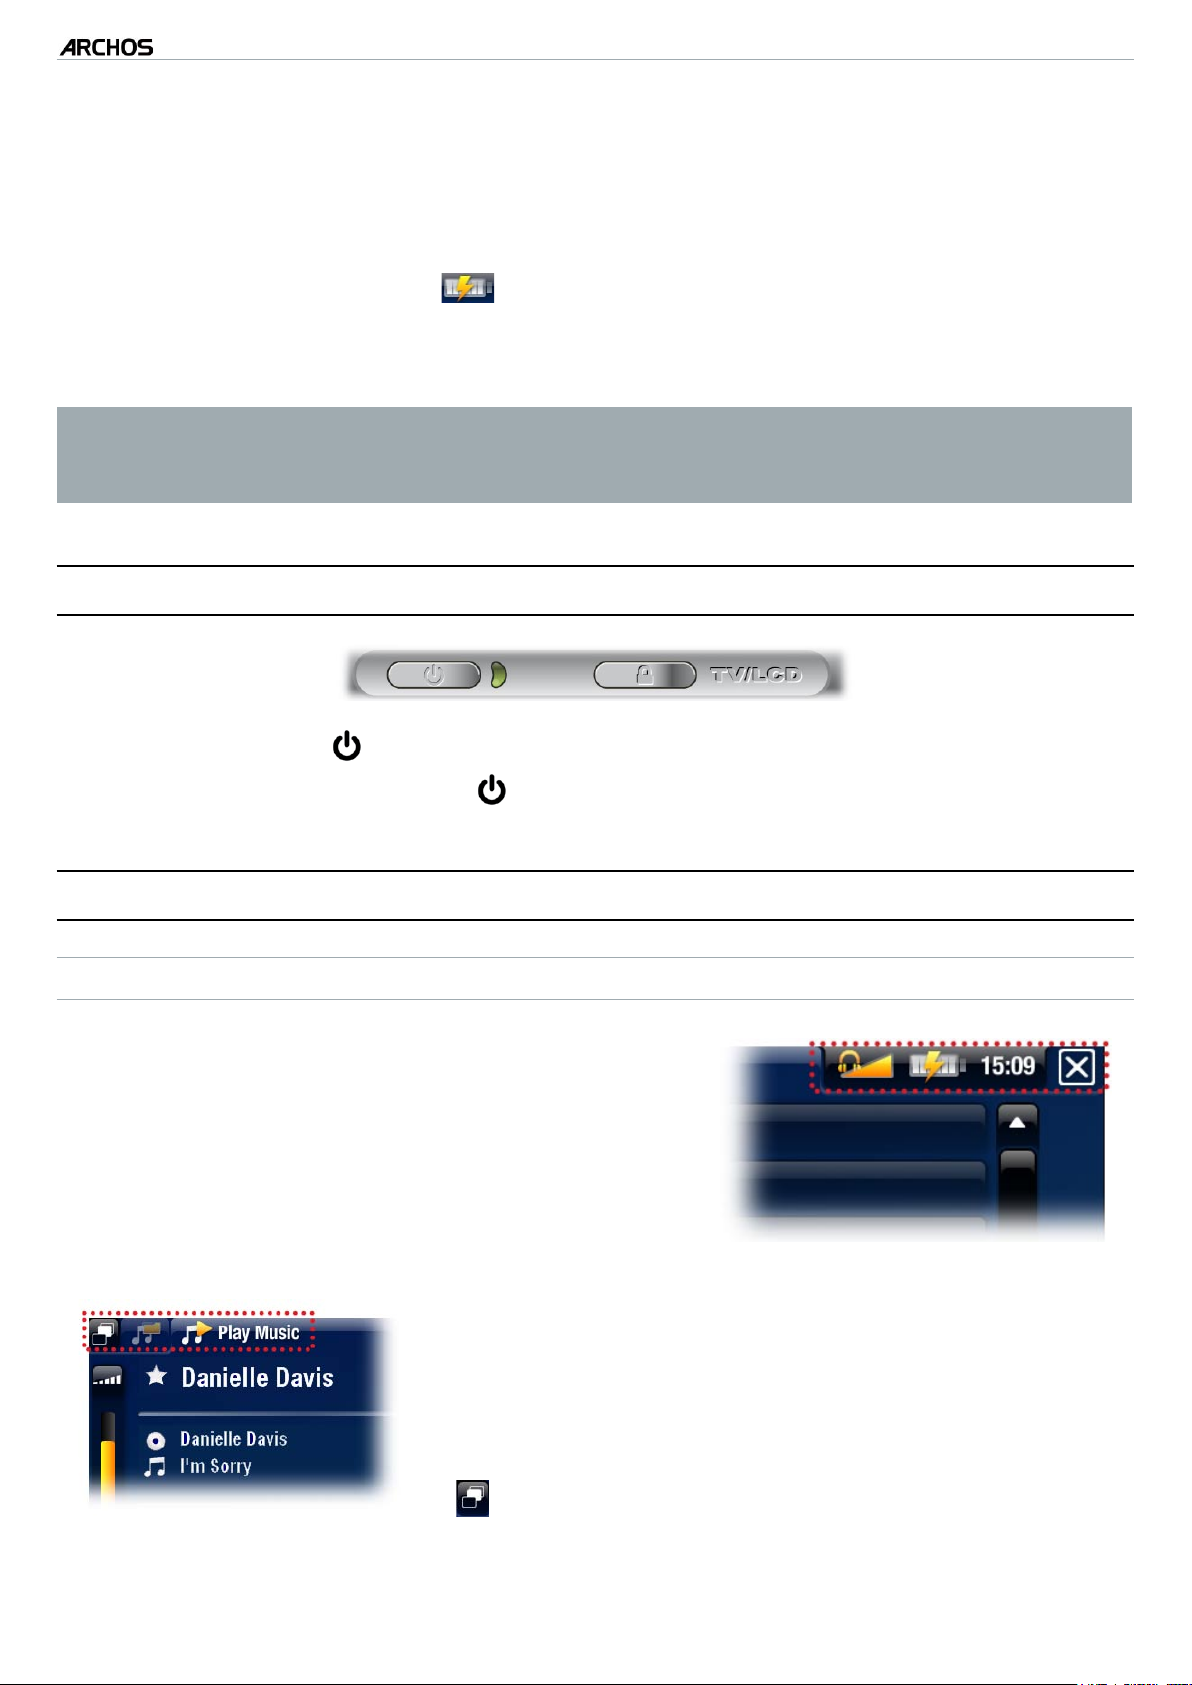
TURNING THE ARCHOS ON/OFF
Press and hold the button to turn your ARCHOS on/off.
•
The LED indicator, next to the button, lights up when the device is on.
•
USING THE ARCHOS INTERFACE
INTERFACE DESCRIPTION
Status Bar
In the top right corner of the screen, the status
•
bar indicates the volume, the battery level, the
current time of your device, etc.
Tabs
In the top left corner of the screen, the tabs area
•
shows other available applications and screens. They
vary, depending on where you are in the interface.
When there is only one tab available, the Tab icon
•
, in the top left corner, is grayed out.
Page 8
605 WIFI
MANUAL
V1.0
Contextual Menu
In the lower right corner of the screen, the contextual menu area
•
shows the menu icons: the available options will vary, depending on
where you are in the interface.
In the Home screen, choose the “Settings” menu item to access
•
the main settings of your ARCHOS.
In the Home screen, the “Resume” menu item allows you to re-
•
sume the last-played music or video le, if it was interrupted before
the end. If the “Resume” menu icon does not appear, it means
that no music or video le playback can be resumed.
Home Screen
This is the main screen of your ARCHOS, showing
•
its main functions.
INTRODUCTION > p. 7
USING THE TOUCHSCREEN
Your ARCHOS is equipped with a touchscreen.
Below is a description of the main tactile screen areas and a few tips on
how to use the touchscreen.
In order to keep your touchscreen in good condition, and to avoid damaging the
screen surface, you should use only the included stylus or your ngernail.
Main Touchscreen Actions
To open an application/screen via its icon or item, tap on the icon/item to high-
•
light it, and tap on it again.
To close a current application/screen, when it is possible, tap on the Escape icon
•
(in the top right corner of the screen).
When several tabs are available, you can switch between them by tapping on the
•
Tab icon (in the top left corner of the screen). You can also tap directly on one
of the tabs to access the corresponding screen.
To execute a menu item’s function, simply tap on its icon. In order to display a
•
text description of the icon, tap on the menu word.
Page 9
605 WIFI
MANUAL
Other Touchscreen Actions
When watching a video or listening to music, you can tap on the progres-
•
sion bar to go directly to a different location in the video or song. You can
also use the stylus to drag the cursor in the progression bar to another location in the video or song.
In the screens where it appears, the volume bar can be dragged in the same
•
way.
In the ARCHOS le browser, you can drag the scroll bar up and down to
•
scroll the le list up and down. You can also scroll faster by tapping above or
below the cursor in the scroll bar.
In the PDF viewer and in the Web browser, you can scroll up and down by
•
tapping on the page and dragging it up or down (be careful not to tap on a
link!).
V1.0
INTRODUCTION > p. 8
USING THE BUTTONS
The navigation buttons are located on the right side of the device:
Exit button
OK button
Up Accelerator button
Navigation buttons
Down Accelerator button
Tab button
(Escape / Back / Stop)
(Enter/Accept or Play/Pause/Resume)
(high-speed fast forward or list scrolling)
(move from an item to another)
(high-speed fast rewind or list scrolling)
(tab between available screens)
Menu button
(display a text description of the available menu icons)
Volume button
(increase/decrease volume)
Page 10
605 WIFI
MANUAL
V1.0
INTRODUCTION > p. 9
Main Button Actions:
To open an application/screen via its icon or item, use the Navigation buttons to
•
highlight the icon/item and press OK.
To close a current application/screen, when it is possible, press the Exit button .
•
When several tabs are available, you can switch between them by pressing the
•
Tab button .
To execute a menu icon’s function, press the menu button, select a menu item
•
with the navigation pad, and press OK.
Other Button Actions
When watching a video or listening to music, you can hold the left/right
•
Navigation buttons to drag the cursor in the progression bar to another
location in the video or song.
To increase/decrease volume, when it is possible, use the Volume button
•
.
In the ARCHOS le browser, you can hold the up/down Navigation but-
•
tons to scroll the le list up and down. You can also scroll faster by using
the Accelerator buttons.
In the PDF viewer and in the Web browser, you can scroll up and down by
•
holding the up/down Navigation buttons.
CHANGING THE LANGUAGE
The interface of your ARCHOS is available in various languages.
•
If your language is not available, go to the ARCHOS website (www.ar-
•
chos.com/rmware) and download and install the latest version. New
languages are included in the rmware as they become available. See
Updating the Firmware
.
To change the system’s language:
In the Home screen, select the “Settings” menu item, and choose “Language
1.
and Region”.
Select a different language using
2.
the left/right arrows (your settings
are saved instantly).
Close the “Language and Region” screen to exit and go back to the Home
3.
screen.
Page 11
605 WIFI
MANUAL
V1.0
INTRODUCTION > p. 10
PRODUCT CARE
CARING FOR YOUR ARCHOS
Your ARCHOS is an electronic product that needs to be treated with care:
Do not subject it to unnecessary shock or vibration.
•
Do not subject it to heat, keep it ventilated (especially when connected to a com-
•
puter).
Keep it away from water and excessively humid areas.
•
Keep it away from high electromagnetic elds.
•
Keep any connected wires neatly arranged: the device could fall if a cable is acci-
•
dentally pulled by a child.
Do not open it up. There are no user-serviceable parts inside. Opening will void
•
your warranty.
RESETTING YOUR ARCHOS
In the event that your ARCHOS freezes operation (due to electrostatic phenom-
•
ena, for example), you can reset it by pressing the button for 15 seconds.
If this does not work, you can also press the “master reset” button as shown be-
•
low.
Underneath the device:
Note: Resetting your ARCHOS will not erase any data from your device.
SYSTEM RECOVERY
If your ARCHOS does not respond correctly, or does not show certain songs or
•
videos that you have copied to it, try using the repair and format tools (see:
System Settings
If once turned on, the ARCHOS does not show the Home screen, you can try a
•
).
system recovery. It allows you to repair the hard drive, format it, etc.
Page 12

605 WIFI
Press the button to turn on your device.
1.
When the built-in LCD screen turns on, immediately press and hold the TV/LCD
2.
MANUAL
V1.0
INTRODUCTION > p. 11
button until the Recovery mode starts (blue screen).
To move from an option to another, use the up/down Navigation buttons.
•
To validate an option, press OK.
•
The system recovery mode gives you four options:
“No”
cancels the system recovery.
-
“Repair Disk”
attempts to repair the le structure on the hard drive.
-
does not erase any data.
-
“Format Disk”
formats the hard drive.
-
all data (music, photos, videos, etc.), licenses and settings are erased.
-
Page 13

605 WIFI
MANUAL
V1.0
PLAYING VIDEO > p. 12
1. PLAYING VIDEO
In the Home screen, select the “Video” icon to enter the Video mode.
1.1 BROWSING THROUGH YOUR VIDEOS
The “Video” browser allows you to navigate the Video folder of the ARCHOS’
•
hard drive.
When browsing in video mode, only subfolders and video les are shown.
•
THE VIDEO BROWSER
The rst screen of the Video mode
•
shows you all the videos and sub-
folders located in the Video folder.
To play a video, highlight it, then
•
open it.
If a video is in a subfolder of the
•
Video folder, open the subfolder, and
you will see your video.
See:
•
•
•
Using the Browser
In the “Video” browser, each video le appear with a thumbnail, displayed on the
left of the le name.
To dene a new thumbnail for a video le, open the video, select the “Set” menu
item, and choose “Thumbnail” (see: “Video Playback Menu Items”).
.
VIDEO BROWSER MENU ITEMS
“Info”
displays a message box with all the available information about the highlight-
-
ed video le.
“File Management”
“Rename”: allows you to change the name of the highlighted video le using
-
the virtual keyboard. See:
“Delete”: allows you to delete the highlighted video le. A conrmation
-
screen will pop up.
Using the Virtual Keyboard
.
Page 14

605 WIFI
MANUAL
V1.0
PLAYING VIDEO > p. 13
“Bookmark”
“Resume”: will resume playing the highlighted video from the bookmark.
-
“Clear”: will remove the bookmark from the highlighted video le.
-
“Bookmark” only appears in the menu when a bookmarked video le is highlighted.
“Settings”
“Video”: will display the “Video” settings screen (see
-
“Sound”: will display the “Sound” settings screen (see:
-
Video Settings
Sound Settings
).
).
1.2 VIDEO PLAYBACK
To play a video, highlight the le and open it. The menu overlay will disappear automatically after a few seconds.
VIDEO PLAYBACK SCREEN
1.
Exit icon
2.
video le name
3.
Tab icon
4.
volume level
5.
play / pause icon
6.
video progression bar
7.
menu items
VIDEO PLAYBACK TOUCHSCREEN CONTROLS
To pause/resume the video, tap on the Pause / Play icon (see n° 5 in the
•
previous screen).
•
To display the menu overlay again, tap once anywhere on the screen. To make it
disappear again, wait for a few seconds or tap on the Tab icon , in the top left
corner (see n° 3).
•
You can tap on the progression bar to go directly to a different location in the video. You can also use the stylus to drag the cursor in the progression bar to another
location in the video (see n° 6).
Page 15

605 WIFI
The volume bar can be dragged in the same way (see n° 4).
•
To execute a menu item’s function, simply tap on its icon. In order to display a
•
MANUAL
V1.0
PLAYING VIDEO > p. 14
text description of the icon, tap on the menu word (see n° 7).
To stop the video and go back to the “Video” browser, tap on the Exit icon
•
(see n° 1).
VIDEO PLAYBACK BUTTON CONTROLS
stop the video and go back to the “Video” browser
pause/resume the video
accelerated fast forward
left/right: fast rewind/forward
VIDEO PLAYBACK MENU ITEMS
“Info”
displays a message box with all the available information about the current
-
video le.
“Track”
allows you to select a different audio track (only if the video le contains sev-
-
eral audio tracks).
allows you to choose subtitles (only if the video le includes subtitles).
-
accelerated fast rewind
display/hide the menu overlay
display available menu items
increase/decrease volume
“Track” only appears in the menu if the video le includes subtitles or several audio tracks.
Page 16

“Format”
allows you to change the way the image is displayed.
-
“Auto”: adjusts the video size to best adapt to the built-in screen (or TV, with the
-
optional DVR Station, Mini Dock or Battery Dock: see
“Full Screen”: enlarges the picture to ll the screen and cuts some of the im-
-
age.
“Maximized”: enlarges the picture to ll the screen, considering the image is
-
encoded in 2.35 format with black bands at the top and bottom.
“Original”: displays the entire picture in its original format.
-
“Speed”
will play the current video in slow motion or high speed.
-
while paused in slow motion, you can advance frame by frame, using the left/
-
right arrows.
605 WIFI
MANUAL
V1.0
PLAYING VIDEO > p. 15
Optional Functionalities
).
“Set”
“Bookmark”: sets a bookmark at the current spot in the video. Only one
-
bookmark per le is allowed. You can bookmark up to 32 les. Bookmarked
videos will appear, in the “Video” browser, with a bookmark symbol and a
progression bar.
to resume playing a video from a bookmark, go to the “Video” browser and
-
highlight the bookmarked video le. Select the “Bookmark” menu item, then
choose “Resume” (“Clear” will remove the bookmark from the video).
“Thumbnail”: saves the current image as a new thumbnail for this le. In the
-
“Video” browser, the video’s thumbnail will be replaced by the new one.
“Wallpaper”: the current image will be dened as your device’s background
-
image.
“Settings”
“Video”: will display the “Video” settings screen (see next section).
-
“Sound”: will display the “Sound” settings screen (see:
-
Sound Settings
).
1.3 VIDEO SETTINGS
In the video mode, you can access the “Video” settings screen by selecting the
•
“Settings” menu item and then “Video”.
Use the left/right arrows to select a different setting for a parameter.
•
Page 17

605 WIFI
MANUAL
V1.0
PLAYING VIDEO > p. 16
“PlayMode”, “Repeat & Shufe”
the following table explains how the video player will work according to the set-
-
tings you chose in “PlayMode” AND “Repeat & Shufe”.
“PlayMode”
What will the video player do?
Shufe”
“Repeat &
“Single”
“Folder”
“Normal”
“Repeat”
“Normal”
“Repeat”
“Shufe”
play the current video le and stop.-
play the current video le repeatedly.-
play all the video les of the current folder one after
-
the other, and stop.
play all the video les of the current folder one after
-
the other. This will be repeated indenitely.
play all the videos of the current folder randomly.-
“LCD Backlight”
adjusts the level of backlight of the built-in screen.
-
1.4 PUTTING VIDEOS ONTO YOUR ARCHOS
There are two main methods to transfer the videos stored on your computer onto the
ARCHOS:
Page 18

605 WIFI
Copy your videos using Windows Media® Player 10 or higher*:
•
MANUAL
V1.0
PLAYING VIDEO > p. 17
Use Windows Media
-
®
Player (Sync tab) to synchronize your computer’s
video les with the ARCHOS.
See
-
Putting Files onto the ARCHOS
to learn more about how to transfer
your computer’s video les with Windows Media® Player.
* For best performance, we recommend that users update to Windows Media®
Player 11 or higher.
Copy and paste your video les from your computer into the Video folder of your
•
ARCHOS.
See
Transferring Files
to learn how to connect/disconnect the ARCHOS from your
computer.
CREATING COMPATIBLE VIDEO FILES WITH YOUR COMPUTER
If some of your videos don’t play on your ARCHOS, you may need to transcode them
to a compatible format:
The easiest way to do this is by using Windows Media® Player 10 or higher to
•
transfer videos to your ARCHOS. Windows Media® Player will automatically convert most formats to the WMV format that your device can play.
See your Windows Media® Player help instructions for more information.
If you don’t want to use Windows Media® Player, a search on the Internet should
•
allow you to nd suitable utility programs to do this job.
If you would like to simply copy and paste DVD video les onto your ARCHOS
•
without converting them to WMV format, you can purchase the Cinema plugin from the ARCHOS website (www.archos.com). The same is also true for video
podcasts in the H-264 format. In this case, purchase the Video Podcast plug-in.
1.5 RECORDING VIDEO
With the optional DVR Station or DVR Travel Adapter (available at
•
www.archos.com), your ARCHOS will be able to record video from
most any standard video source.
•
See:
Optional Functionalities
.
Page 19

605 WIFI
•
MANUAL
With the optional DVR Station, you will have the possibility to
V1.0
schedule TV recordings very easily, via the Electronic Program Guide
(EPG).
See the manual of your DVR Station to learn more about this fea-
•
ture.
DVR TRAVEL ADAPTER DVR STATION
PLAYING VIDEO > p. 18
1.6 PLAYING YOUR PC’S SHARED VIDEOS
Your ARCHOS gives you the possibility to watch, directly on your
•
device, shared videos stored on a PC.
For this to work, you will only need a WiFi connexion and Windows
•
Media® Player 11 or higher installed on your PC.
If you want to learn more about this feature, see:
•
Shared Media Files
.
Playing your PC’s
Page 20

605 WIFI
MANUAL
V1.0
PLAYING MUSIC > p. 19
2. PLAYING MUSIC
In the Home screen, select the “Music” icon to enter the Music mode.
2.1 BROWSING THROUGH YOUR MUSIC FILES
There are two types of views for you to browse through your songs: the Music
•
Library and the Music Browser.
In both views, you can go back one level in the hierarchy by closing the current
•
screen .
When browsing through your music, only music les are shown.
•
THE MUSIC LIBRARY
The Music Library (default view)
•
shows your music sorted by categories (Artist, Album, Genre, etc.) if
your music les contain these tags.
When new music is copied to the
•
ARCHOS, the Music Library will be
updated automatically.
If some of your music les do not
•
contain tags, they will be classied
as (Unknown) in the Music Library.
THE MUSIC BROWSER
The music browser allows you to
•
navigate the Music folder of your
device’s hard drive. It is based on the
ARCHOS File Browser.
To use it, select “Browse Hard
•
Drive” in the initial Music Library
view.
See:
•
Using the Browser
.
Page 21

605 WIFI
MUSIC LIBRARY* AND MUSIC BROWSER MENU ITEMS
MANUAL
V1.0
“Info”
displays a message box with all the available information about the highlight-
-
ed music le.
“File Management”
“Rename”: allows you to change the name of the highlighted music le using
-
the virtual keyboard. See:
“Delete”: allows you to delete the highlighted music le. A conrmation
-
Using the Virtual Keyboard
screen will pop up.
“Show playlist”
PLAYING MUSIC > p. 20
.
opens a playlist edition window on the right (see:
Playlists
).-
“Bookmark”
“Resume”: will resume playing the highlighted song from the bookmark.
-
“Clear”: will remove the bookmark from the highlighted music le.
-
“Bookmark” only appears in the menu when a bookmarked music le is highlighted.
“Settings”
you can choose to display the Music Player settings screen (see:
-
Settings
* in the Music Library, only the “Show playlist” and “Settings” menu items are available.
) or the “Sound” settings screen (see:
Sound Settings
Music Player
).
2.2 MUSIC PLAYBACK
•
Use the scroll bar to browse through the list of audio tracks.
To play a song, highlight the corresponding le and open it.
•
Page 22

605 WIFI
MUSIC PLAYBACK SCREEN
1.
Exit icon
MANUAL
2.
artist name, album
title, song title, playback status icon(s)
and track number
3.
Tab icon and available tabs
4.
volume level
5.
play / pause icon
6.
previous track
7.
next track
8.
progression bar
9.
menu items
V1.0
PLAYING MUSIC > p. 21
MUSIC PLAYBACK TOUCHSCREEN CONTROLS
To pause/resume the song, tap on the Pause / Play icon (see n° 5 in the
•
previous screen).
To play the previous/next song, tap in the corresponding area (n° 6 or 7).
•
To browse through your songs while listening to music, simply tap on the Tab icon
•
. This will take you to the Music Library or browser screen that you launched
the current song from (see n° 3).
You can tap on the progression bar to go directly to a different location in the
•
song. You can also drag the cursor in the progression bar to another location in
the song (see n° 8).
The volume bar can be dragged in the same way (see n° 4).
•
To execute a menu item’s function, simply tap on its icon. In order to display a
•
text description of the icon, tap on the menu word (see n° 9).
To stop the song and go back to the Music Library or browser, tap on the Exit icon
•
(see n° 1).
Page 23

605 WIFI
MUSIC PLAYBACK BUTTON CONTROLS
MANUAL
V1.0
PLAYING MUSIC > p. 22
stop the song
and go back to the
“Music”
Library or
browser
pause/resume the video
accelerated fast forward
left:
press once: back to the beginning of the song, or
-
previous song (in the rst 10 seconds of a track)
hold: fast rewind
-
right:
press once: next song
-
hold: fast forward
-
accelerated fast rewind
tabs back to the Music Library or browser window
that you launched the song from
MUSIC PLAYBACK MENU ITEMS
“Info”
displays a message box with all the available information about the current
-
music le.
“Home”
allows you to go back to the Home screen, and browse your hard drive, play a
-
photo slideshow, read a PDF le (etc.) while listening to music.
“Playlist”
opens the playlist editor (see:
display available menu items
increase/decrease volume
Playlists
).-
Page 24

605 WIFI
“Set bookmark”
sets a bookmark at the current spot in the song. Only one bookmark per le is
-
allowed. You can bookmark up to 32 les.
to resume playing a song from a bookmark, go to the Music Library or the
-
Music Browser, highlight the bookmarked music le. Select the “Bookmark”
menu item, then choose “Resume” (“Clear” will remove the bookmark from
the song).
“Set rating”
allows you to give a rating to the current song (1-5) or to remove the rating
-
(none).
“Settings”
you can choose to display the Music Player settings screen (see next section)
-
or the “Sound” settings screen (see:
MANUAL
V1.0
Sound Settings
PLAYING MUSIC > p. 23
).
2.3 MUSIC PLAYER SETTINGS
In the Music mode, you can access the Music Player settings screen by using the
•
“Settings” menu item .
Use the left/right arrows to select a different setting for a parameter.
•
“PlayMode”, “Repeat & Shufe”
the following table explains how the audio player will work according to the set-
-
tings you chose in “PlayMode” AND “Repeat & Shufe”.
An icon shows the current modes in the Music playback screen.
-
Page 25

605 WIFI
MANUAL
V1.0
PLAYING MUSIC > p. 24
“PlayMode”
“Single”
“Folder”
“Repeat &
Shufe”
“Normal”
“Repeat”
“Normal”
“Repeat”
“Shufe”
“Normal”
What will the audio player do?
play the current song and stop.-
play the current song repeatedly.-
play all the songs of the current folder one after the
-
other, and stop.
play all the songs of the current folder one after the
-
other. This will be repeated indenitely.
play the songs of the current folder randomly.-
play all the songs of your ARCHOS one after the
-
other, and stop.
“All”
“Queue”
“Intro”
“Repeat”
play all the songs of your ARCHOS one after the
-
other. This will be repeated indenitely.
“Shufe”
play all the songs of your ARCHOS randomly.-
allows you to select a track to be played after the current one is n-
-
ished.
while a track is playing, switch to the browser window, select a track to
-
highlight it, then open it. This is your queued track, and the playmode
icon will change.
you can only queue one track at a time, and you need to select the
-
song to queue before the end of the current track.
plays the rst few seconds of each track. You can dene the length to
-
play in “Intro duration”.
“Intro duration”
denes for how long each track will be played when “PlayMode” is set to “Intro”.-
Page 26

605 WIFI
MANUAL
V1.0
PLAYING MUSIC > p. 25
2.4 PLAYLISTS
A playlist is a list of audio tracks that the music player will automatically
•
play one after the other.
On your ARCHOS, you can play, create and edit as many playlists as you
•
want.
In the ARCHOS Browser, playlists are the les with the icon.
•
Note: when you delete a playlist, you are only deleting the list and not the music
itself.
PLAYING A PLAYLIST
In the Music Library, highlight the
•
“Playlist” line and open it.
Highlight a playlist and open it. A
•
panel showing the contents of the
playlist will open on the right.
Open the rst item in the playlist to
•
start playing from the rst track.
PLAYLIST MENU ITEMS
These menu items appear when a music le is highlighted on the left panel:
“Add to playlist”
will add the highlighted track at the end of the current playlist.-
“Insert in playlist”
will insert the highlighted track before the selected item in the current playl-
-
ist.
These menu items appear when the focus is on the right panel (playlist editor):
“Track”
“Remove track”: deletes the highlighted track from the playlist.
-
“Move”: allows you to change the position of the highlighted track within the
-
playlist. Highlight the track you want to move, select the “Track” menu item,
then choose “Move”. Now highlight the position to which you want to move
the track and validate.
Page 27

605 WIFI
“Playlist”
“Clear”: clears the current playlist.
-
“Shufe”: randomly shufes the order of the songs in the current playlist.
-
“Save playlist”
“Save”: saves the current playlist to the Playlists folder.
-
“Save As”: same as “Save”, but it also allows you to give a personalized name
-
to the playlist. See:
“Hide playlist”
closes the playlist editor.-
“Settings”
MANUAL
V1.0
Using the Virtual Keyboard
PLAYING MUSIC > p. 26
.
you can choose to display the Music Player settings screen (see
-
Settings
CREATING A NEW PLAYLIST
While you are in the Music browser, select the “Show playlist” menu item. A
1.
) or the “Sound” settings screen (see:
Sound Settings
Music Player
).
playlist panel will open on the right. By default, the new playlist contains the
same songs, and has the same name as the last opened playlist. You can now start
modifying the playlist:
In the left panel, locate the songs you would like to add to your playlist. Highlight
2.
a song and use the “Add to playlist” or “Insert in playlist” menu items to add the
song to the playlist.
Repeat this operation with all the tracks you want.
3.
When you are satised with your new playlist, select the “Save playlist” menu
4.
item, and then choose “Save as”.
Enter the name of your new playlist with the virtual keyboard (see:
5.
Virtual Keyboard
) and select “OK”.
Using the
Use the tabs to jump back and forth between the left and right panels.
EDITING A PLAYLIST
To edit an existing playlist:
In the Music Library, highlight the “Playlist” line and open it.
1.
Highlight the playlist you want to modify and open it. A panel showing the con-
2.
tents of the playlist will open on the right.
Page 28

605 WIFI
You can now add, shufe, move or remove tracks within the playlist, using the
3.
MANUAL
V1.0
PLAYING MUSIC > p. 27
appropriate menu items. The available menu items will vary according to which
panel you selected (see:
After you have made the changes you want, select the “Save playlist” menu item
4.
Playlist Menu Items
).
and choose “Save” to save the playlist. If you wish to give it a different name,
choose “Save As”.
ADDING SONGS TO A PLAYLIST WHILE LISTENING TO MUSIC
While playing a song, select the “Playlist” menu item.
1.
A new window will open with two panels, the music les on the left and the last-
2.
opened playlist on the right.
While listening to your song, you can edit the last-opened playlist.
3.
Close the playlist editor to return to the playback screen.
4.
Please note: this can only be done if you have entered the Music folder via the
“Music” icon in the Home screen and not via the “Browser” icon.
2.5 PUTTING MUSIC ONTO YOUR ARCHOS
There are two main methods to transfer the music stored on your computer onto the
ARCHOS:
Copy your music using Windows Media® Player 10 or higher*:
•
Use Windows Media
-
music les with the ARCHOS.
See
-
Putting Files onto the ARCHOS
your computer’s music les with Windows Media® Player.
* For best performance, we recommend that users update to Windows Media®
Player 11 or higher.
®
Player (Sync tab) to synchronize your computer’s
to learn more about how to transfer
Copy and paste your music les from your computer into the Music folder of
•
your ARCHOS.
In order for the Music Library to recognize your songs’ tags efciently, it is advised
•
that you keep an orderly structure for your music les, for instance by making a
folder for each artist, containing a folder for each of their albums, inside which are
placed individual songs.
See
Transferring Files
to learn how to connect/disconnect the ARCHOS from your
computer.
Page 29

605 WIFI
TRANSFERRING YOUR CD COLLECTION TO YOUR ARCHOS
MANUAL
V1.0
PLAYING MUSIC > p. 28
You can easily create audio content with your computer by using Windows Media®
Player 10 or higher to convert your own CDs to MP3 or WMA format:
Place a music CD in your computer, and
1.
Windows® will ask you what action you would
like to perform.
Choose Rip music from CD, and Windows
2.
Media® Player will start ripping the CD.
Once this is done, the album will become part
3.
of your Music Library.
See
4.
Transferring Files
to learn how to transfer
the ripped music les onto the ARCHOS.
See your Windows Media® Player help instructions for
more information.
Check the laws and regulations in your country or jurisdiction to know if private copy
•
of your CDs for your own use is authorized.
Some music CDs have a special copy protection system that will not allow Windows
•
Media
®
Player to make music les from them.
2.6 RECORDING AUDIO
With the optional DVR Station or DVR Travel Adapter (available at
•
www.archos.com), your ARCHOS will be able to record audio from
most any standard audio source.
See:
•
Optional Functionalities
.
DVR TRAVEL ADAPTER DVR STATION
Page 30

605 WIFI
MANUAL
V1.0
2.7 PLAYING YOUR PC’S SHARED MUSIC
Your ARCHOS gives you the possibility to listen, directly on your de-
•
vice, to shared music stored on a PC.
For this to work, you will only need a WiFi connexion and Windows
•
Media® Player 11 or higher installed on your PC.
PLAYING MUSIC > p. 29
If you want to learn more about this feature, see:
•
Shared Media Files
.
Playing your PC’s
Page 31

605 WIFI
MANUAL
V1.0
VIEWING PHOTOS > p. 30
3. VIEWING PHOTOS
In the Home screen, select the “Photo” icon to enter the Photo viewer.
3.1 BROWSING THROUGH YOUR PHOTOS
The “Photo” browser allows you to navigate the Pictures folder of the ARCHOS’
•
hard drive.
When browsing in Photo mode, only picture les are shown.
•
THE PHOTO BROWSER
The rst screen of the Photo mode
•
shows all the photos and subfolders
located in the Pictures folder.
•
To view a photo, highlight its thumnail, then open it. If a photo is in
a subfolder of the Pictures folder,
open the subfolder, and you will see
your photo.
The Photo mode also allows you to
•
view your pictures, sorted by date.
See:
•
The “Photo” browser displays thumbnails of the picture les.
Using the Browser
.
PHOTO BROWSER MENU ITEMS
“Info”
displays a message box with all the available information about the highlight-
-
ed picture.
Page 32

605 WIFI
“File Management”
“Rename”: allows you to change the name of the highlighted picture using
-
the virtual keyboard. See:
“Delete”: allows you to delete the highlighted picture. A conrmation screen
-
will pop up.
“Set as wallpaper”: denes the highlighted picture as your ARCHOS’ back-
-
ground image.
“Start slideshow”
starts a slideshow from the highlighted image.
-
the “Pause slideshow” menu item will appear, allowing you to pause the
-
slideshow.
“Settings”
MANUAL
V1.0
Using the Virtual Keyboard
VIEWING PHOTOS > p. 31
.
“Photo”: will display the “Photo” settings screen (see
-
“Sound”: will display the “Sound” settings screen (see:
-
Photo Settings
Sound Settings
).
). You
may want to access these settings if you are listening to music while browsing through your photos.
3.2 PHOTO VIEWER
To view a picture, highlight the corresponding thumbnail and open it. The menu overlay will disappear automatically after a few seconds.
PHOTO VIEWER SCREEN
Page 33

605 WIFI
PHOTO VIEWER TOUCHSCREEN CONTROLS
To display the menu overlay again, tap once anywhere on the screen. To make it
•
MANUAL
V1.0
VIEWING PHOTOS > p. 32
disappear again, wait for a few seconds or tap on the Tab icon , in the top left
corner.
To display the next picture, tap anywhere on the screen and drag the stylus from
•
left to right. Drag from right to left to go back one picture.
To rotate the picture 90° counterclockwise, tap anywhere on the screen and drag
•
the stylus from bottom to top. To rotate the picture 90° clockwise, drag from top
to bottom.
To execute a menu item’s function, simply tap on its icon. In order to display a
•
text description of the icon, tap on the menu word.
To close the picture and go back to the “Photo” browser, tap on .
•
PHOTO VIEWER BUTTON CONTROLS
close the photo viewer and go back to the “Photo”
browser
start/pause a slideshow
zoom in
left/right: previous/next picture
down/up: rotate 90° clockwise/counterclockwise
zoom out
display/hide the menu overlay
display available menu items
increase/decrease volume
PHOTO VIEWER MENU ITEMS
“Info”
displays a message box with all the available information about the current
-
picture.
“Rotate”
choose “Left” to rotate the picture 90° counterclockwise
-
choose “Right” to rotate the picture 90° clockwise
-
Page 34

605 WIFI
“File Management”
“Rename”: allows you to change the name of the current picture using the
-
virtual keyboard. See:
“Delete”: allows you to delete the current picture. A conrmation screen will
-
pop up.
“Set as wallpaper”: denes the current picture as your ARCHOS’ background
-
image.
“Start slideshow”
starts a slideshow from the current image.
-
the “Pause slideshow” menu item will appear, allowing you to pause the
-
slideshow.
“Settings”
“Photo”: will display the “Photo” settings screen (see next section).
-
MANUAL
V1.0
Using the Virtual Keyboard
VIEWING PHOTOS > p. 33
.
“Sound”: will display the “Sound” settings screen (see:
-
Sound Settings
may want to access these settings if you are listening to music while browsing through your photos.
“Zoom”
use the slider to magnify/demagnify the current picture.-
3.3 PHOTO SETTINGS
In the Photo mode, you can access the “Photo” settings screen by selecting the
•
“Settings” menu item and then “Photo”.
Use the left/right arrows to select a different setting for a parameter.
•
). You
Page 35

605 WIFI
MANUAL
V1.0
VIEWING PHOTOS > p. 34
“Picture Pause”
denes the time that each picture will be displayed during a slideshow.
-
“Transition”
denes the transition effect to be used between two pictures. There are several
-
cool effects that you can choose from.
“Shufe”
allows you enable/disable the shufe mode. If this parameter is set to “Yes”, your
-
pictures will be displayed randomly.
“Format”
allows you to change the way the picture is displayed.
-
“Original”: displays the entire picture in its original format.
-
“Full Screen”: enlarges the picture to ll the screen and cuts some of the image.
-
3.4 PLAYING A SLIDESHOW
To view a slideshow, highlight a picture le in the “Photo” browser or while view-
•
ing photos viewing, and choose the “Start Slideshow” menu item.
While a slideshow is playing, you can pause it at any time by selecting the “Pause
•
slideshow” menu item.
You can dene the time that each picture is displayed and the transition effects in
•
the “Photo” settings (see:
Photo Settings
).
3.5 VIEWING PHOTOS WHILE LISTENING TO MUSIC
You can view photos and play slideshows while listening to music:
Choose the “Home” menu item while playing a song.
•
In the Home screen, select the “Photo” icon to enter the Photo mode.
•
Browse through your photos (see:
•
show as normal (see:
Playing a Slideshow
Browsing Through your Photos
).
) or start a slide-
You can go back to the Music playback screen at any time, using the Tab button/
•
icon.
If you go back to the Music playback screen while playing a slideshow, your slideshow will be paused. When you come back to it, simply resume the slideshow.
Page 36

605 WIFI
MANUAL
V1.0
VIEWING PHOTOS > p. 35
3.6 PUTTING PHOTOS ONTO YOUR ARCHOS
There are two main methods to transfer the pictures stored on your computer onto
the ARCHOS:
Synchronize your photos using Windows Media® Player 10 or higher*:
•
Use Windows Media
-
®
Player (Sync tab) to synchronize your computer’s
pictures with the ARCHOS.
See
-
Putting Files onto the ARCHOS
to learn more about how to transfer
your computer’s pictures with Windows Media® Player.
* For best performance, we recommend that users update to Windows Media®
Player 11 or higher.
Copy and paste your picture les from your computer into the Pictures folder of
•
your ARCHOS.
See
Transferring Files
to learn how to connect/disconnect the ARCHOS from your
computer.
3.7 PLAYING YOUR PC’S SHARED PHOTOS
Your ARCHOS gives you the possibility to view, directly on your de-
•
vice, shared photos stored on a PC.
For this to work, you will only need a WiFi connexion and Windows
•
Media® Player 11 or higher installed on your PC.
If you want to learn more this feature, see:
•
Media Files
.
Playing your PC’s Shared
 Loading...