

ARC Audio KS-5006 Owners manual

INTRODUCTION
Thank you for choosing ARC Audio’s KAR Series
line of hi-performance mobile audio products. We
KAR Series
KS 5006 KS 6006
Installation Manual
hope you enjoy your experience with all our products
and we welcome any questions or comments you
may have.
Specifications
KS 5006 KS 6006
Diameter 5 ¼” Diameter 6 ½”
Musical Power 100 watts Musical Power 100 watts
Nor. Power 50 watts Nor. Power 50 watts
Sensitivity 87db Sensitivity 87db
Frequency
response
IMP. 4 Ohm IMP. 4 Ohm
Protection PTC Protection PTC
Most speaker damage occurs as a result of amplifier
distortion also known as “Clipping”. Clipping occurs
when an amp is driven beyond its maximum rated
output. This kind of distortion can be hard to hear
unless you know what to listen for. Any time you hear
a harsh ear piercing sound at hi volume your amp is
probably clipping.
70hz20Khz
Frequency
response
1
60hz20Khz
CAUTION:
Please check the suitability of the installation
location before you begin. Do not cut any of the
car’s structure. Pay attention to the mechanism of
the window and door.
If you do not have experience with automotive
electrical and mechanical systems contact a
professional installer. Paying a qualified installer is
almost always cheaper then paying a dealership to
repair your car.
THE INSTALL
Install the Woofer
After you have found the best location for the
woofer make or enlarge the mounting hole. Make
sure the opening is just large enough for the woofer
to fit tightly with no gaps. Make sure the surface is
flat and that the speaker does not bind up in the
opening. Use an awl or felt pen to mark the panel
and drill the screw holes without the speaker in
place. This will save the costly mistake of punching
a hole in one of your new speakers. Install the
woofer with the grill ring using the 4 screws
provided with this system. Firmly seat the grill into
its ring.
2
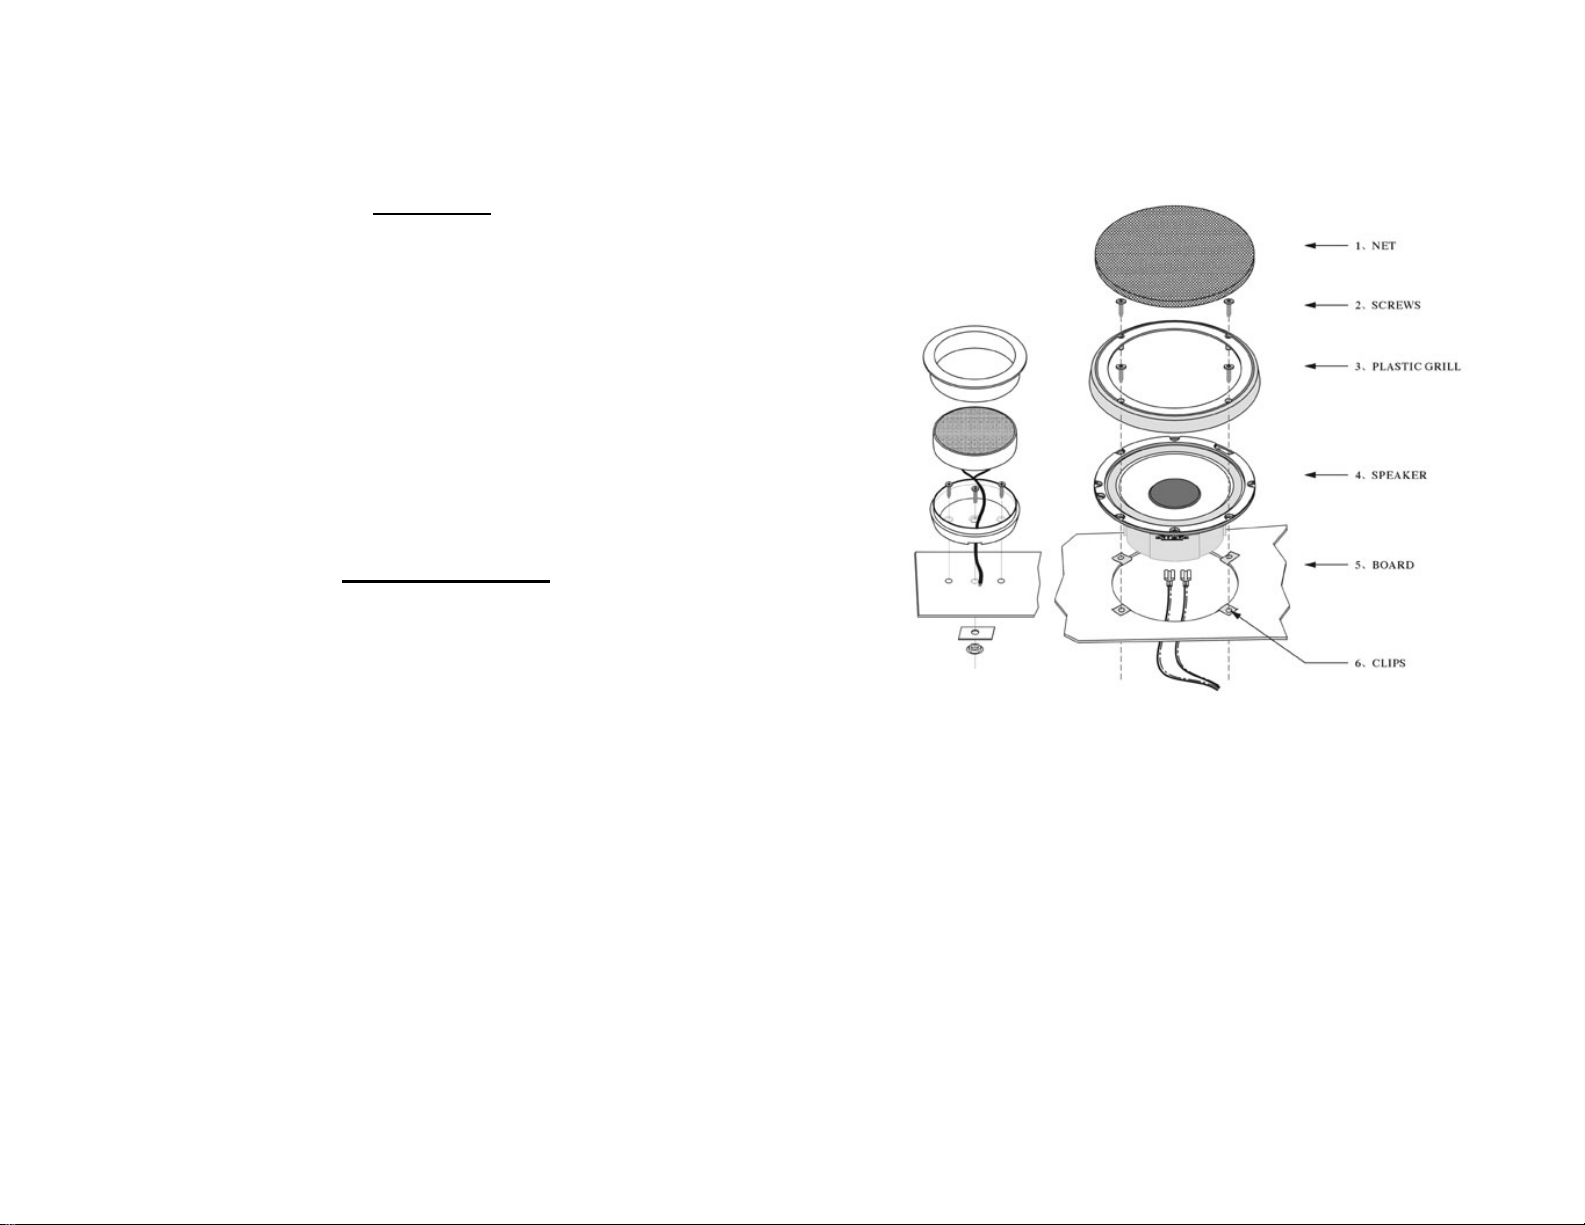
Remove the grill from the trim ring first then follow
the steps below installation.
1. Place the speaker in the opening with the
trim ring over it.
2. Screw the trim ring through the panel with
the clips beneath.
3. Install the grill into the trim ring. Add a few
drops of glue if necessary.
3
 Loading...