

Aqua First NE4480 User Manual
IN-GROUND POOL CLEANER
ASSEMBLY INSTRUCTIONS
MODEL NE4480
Congratulations on purchasing a
Nemo Automatic Pool Cleaner!
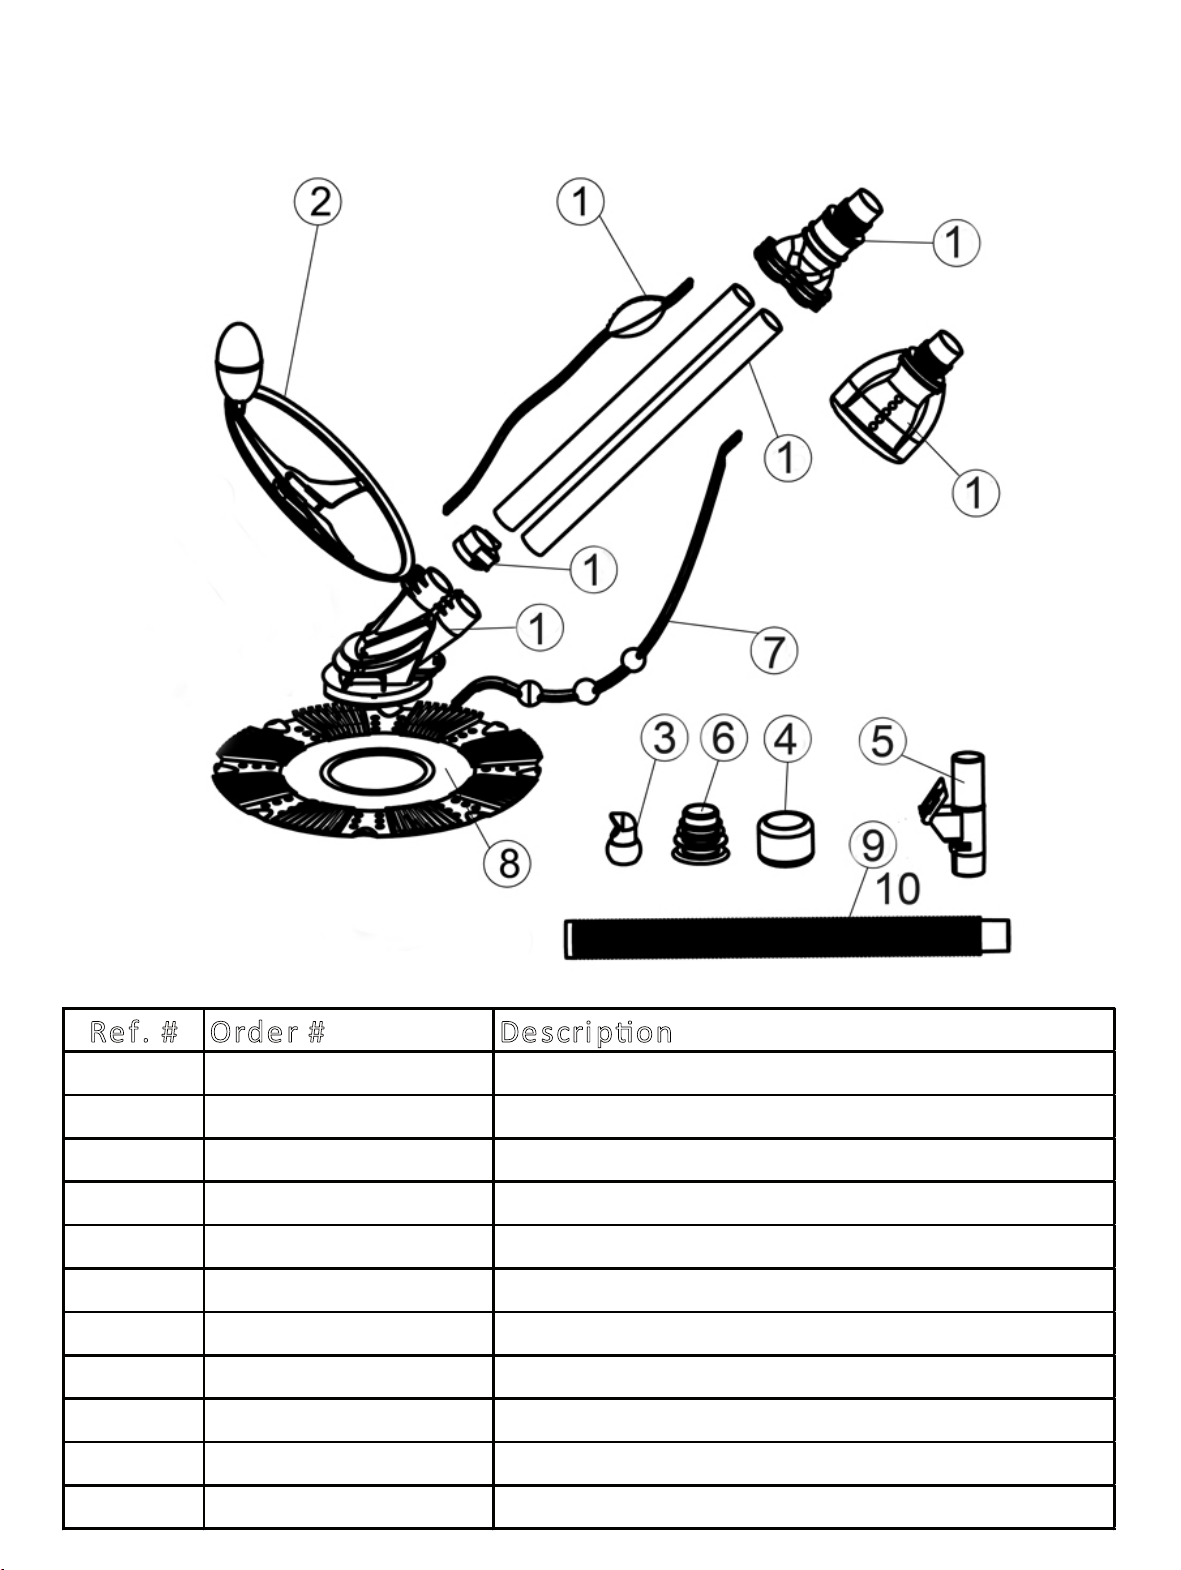
NE4480 PARTS LIST
Ref. # Orde r # Des crip on
1 NEP2276 Body
2 NEP2287 Dive Float Restrictor
3 NEP2278 Eyeball Diverter & Out Ring
4 NEP2279 Hose Weights (3 pack)
5 NEP2280 Auto Regulator Valve
6 NEP2281 Hose Cone
7 NEP2282 Roller Bumper Strap
8 NEP2288 Pleated Seal
9 NEP2284 Hoses (Qty. 9) 3’ x 1.5” Secons
10 NEP2285 Female Hose, 3’ x 1.5” Secon
11 NEP2286 Direconal Wings
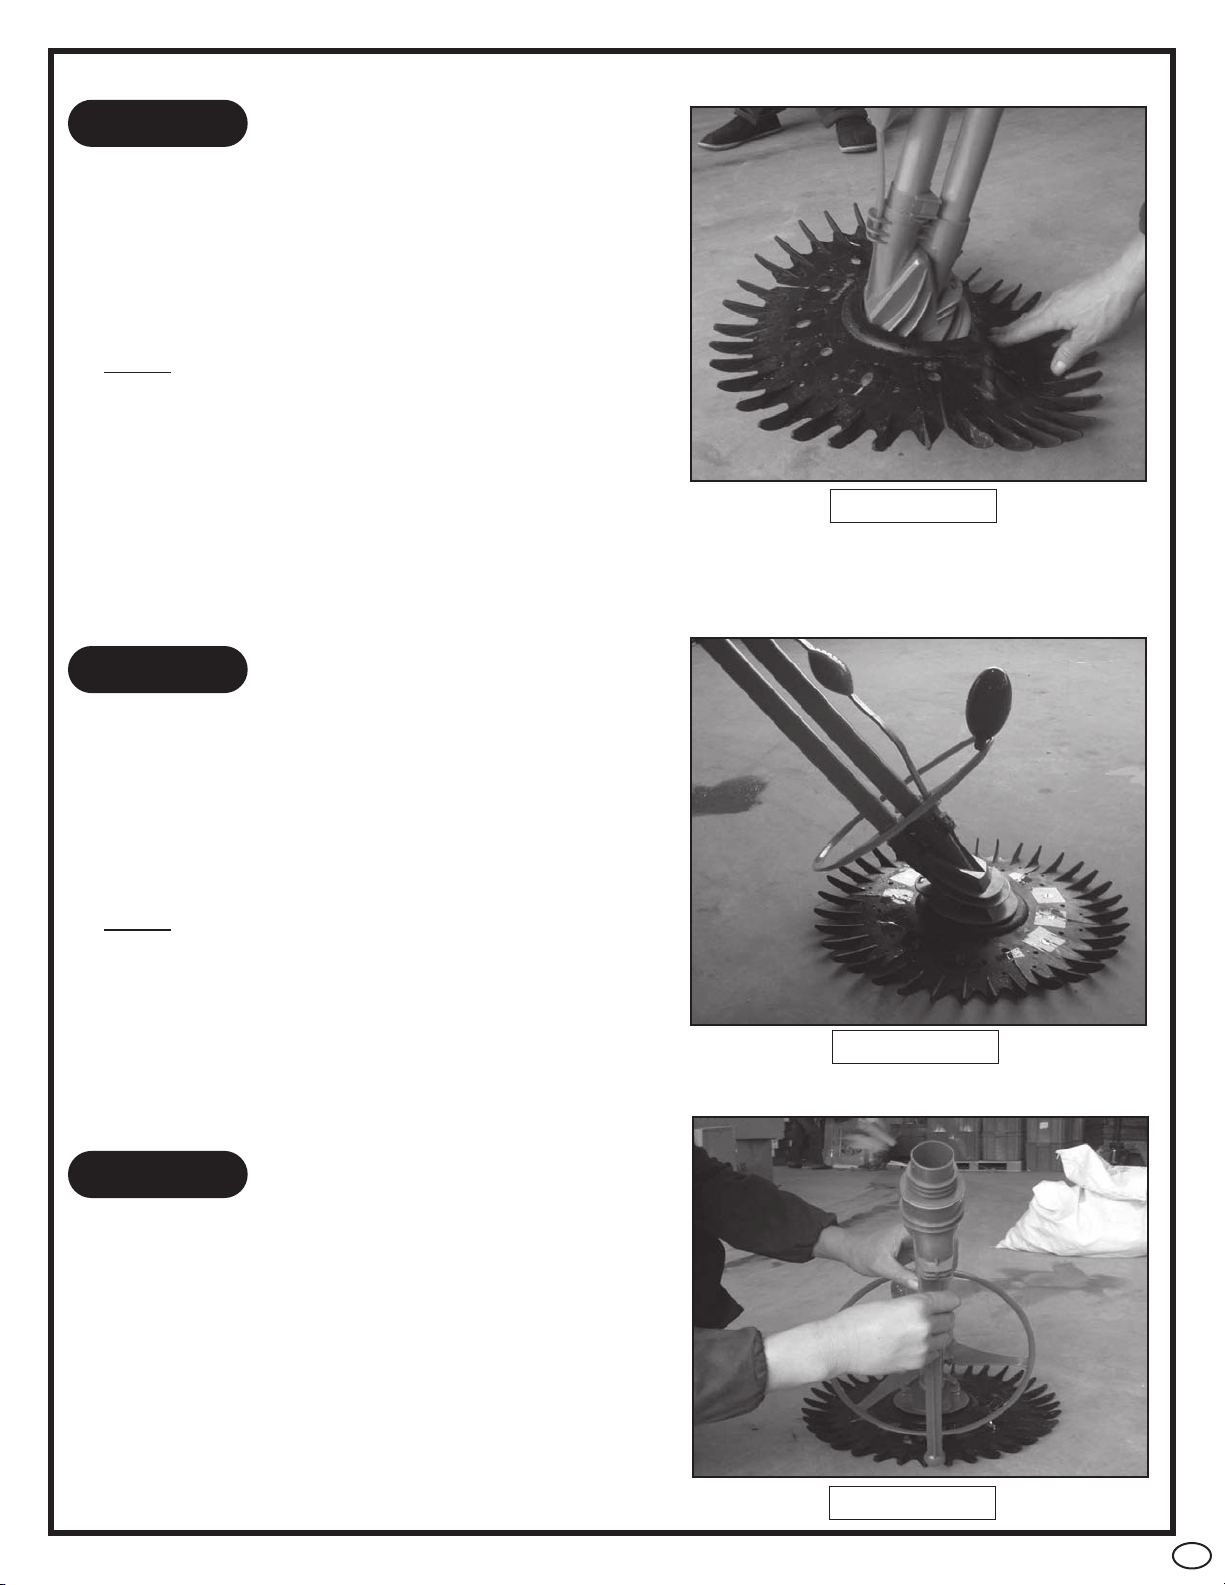
SSTTEEPP 1
To install the seal locate the word “UP”. Face
it up towards the body of the cleaner. Gently
stretch the seal over the foot pad of the cleaner
until it sets itself into the groove as illustrated in
gure 2. Once in place the seal should rotate
and move freely.
NOTE
The seal is not reversible. It must be installed
with the at side facing down towards the pool
liner and the pleated side facing upwards
towards the cleaner.
1
ATTACH THE SEAL
Figure 2
SSTTEEPP 2
2
ATTACH THE DIVE
FLOAT RESTRICTOR
The dive oat r estrictor is attached by sliding it
over the cleaner’s body as shown in gure 3. It is
fastened by sliding it over the “U” shaped locking
clip on the body of the cleaner . Make sur e the
locking tabs on both sides snap secur ely into
place.
NOTE
The dive oat r estrictor should be installed
with the oat facing up.
SSTTEEPP 3
3
ATTACH THE ROLLER
BUMPER STRAP
Figure 3
Insert the bottom end of the strap into the
slots provided on the top and bottom of the
main body. Make sure that both ends snap in
securely.
Figure 4
3
 Loading...