

APW OVERHEAD WARMERS FD User Manual
Model: FD
OVERHEAD WARMERS
INSTALLATION
AND
OPERATING
INSTRUCTIONS
Northern
R
APW WYOTT 54” Food Warmer has been designed for use only on
the Metro route stand. Each MetroR shelf has pre-drill holes to use
with APW WYOTT mounting bracket. Each warmer ships with prewired cord and plug. Remote controls are factory pre-wired and only
have to be field mounted depending on route stand location. Follow
the “Installation Instructions” (in this booklet) to mount controls.
R
INTENDED FOR OTHER THAN HOUSEHOLD USE
R
R
RETAIN THIS MANUAL FOR FUTURE REFERENCE
UNIT MUST BE KEPT CLEAR OF COMBUSTIBLES AT ALL TIMES
FOR YOUR SAFETY: Do not store or use gasoline or other flammable vapors and
liquids in the vicinity of this or any other appliance.
WARNING: Improper installation, adjustment, alteration, service or maintenance can
cause property damage, injury or death. Read the Installation, Operating and
Maintenance Instructions thoroughly before installing or servicing this equipment.
Initial heating of unit may generate smoke or fumes and must be done in a well ventilated area.
Overexposure to smoke or fumes may cause nausea or dizziness.
This equipment has been engineered to provide you with year-round dependable service when used
according to the instructions in this manual and standard commercial kitchen practices.
Phone:
Fax: (214) 565-0976
Toll Free: (800) 527-2100
Website: www.apwwyott.com
E-mail: info@apwwyott.com
(214) 421-7366
ANSI/NSF4
P/N 70402071 5/06
APW / WYOTT
729 Third Avenue
Dallas, TX 75226
!!
!!
1
Notes:
IMPORTANT FOR FUTURE REFERENCE
Please complete this information and retain this manual for the life of the equipment. For
Warranty Service and/or Parts, this information is required.
Model Number Serial Number Date Purchased
2
SECTION
ITEM
TABLE OF CONTENTS
PAGE
1
2
3
4
5
6
7
8
9
Owner’s Information
General Information......................................................................................
Installation Instructions.................................................................................
General Operation Instructions.....................................................................
Warranty Information....................................................................................
Important Safety Information
Specifications
Electrical.......................................................................................................
Dimensions...................................................................................................
Operation
Operating Instructions...................................................................................
Cleaning
General Cleaning Instructions.......................................................................
Dominos Specific Cleaning Instructions.........................................................
Troubleshooting
Parts List & Exploded View
Wiring Diagram
Warranty
.........................................................................................................
.................................................................................................................
...................................................................................................................
...................................................................................................................
..............................................................................................
......................................................................................................
....................................................................................
.......................................................................................................
.................................................................................
3
3
3
6
6
6
6
6
7
8
8
8
8
8
8
9
10
11
1. OWNERS INFORMATION
General Information:
1. Always clean equipment thoroughly before first use. (See general cleaning instructions).
2. Check rating label for your model designation and electrical rating.
3. For best results, use stainless steel countertops.
4. All dimensions in parenthesis in centimeters unless noted.
5. APW Wyott Overhead Foodwarmers are constructed from high quality stainless steel and available
in lengths from 18" to 72". Utilizing a metal sheath-heating element with a specially designed
reflector,these units give uniform heat over the entire holding surface.
6. In Europe, contact anAPW Wyott authorized serviceagency for replacement light bulbs.
Installation Instructions:
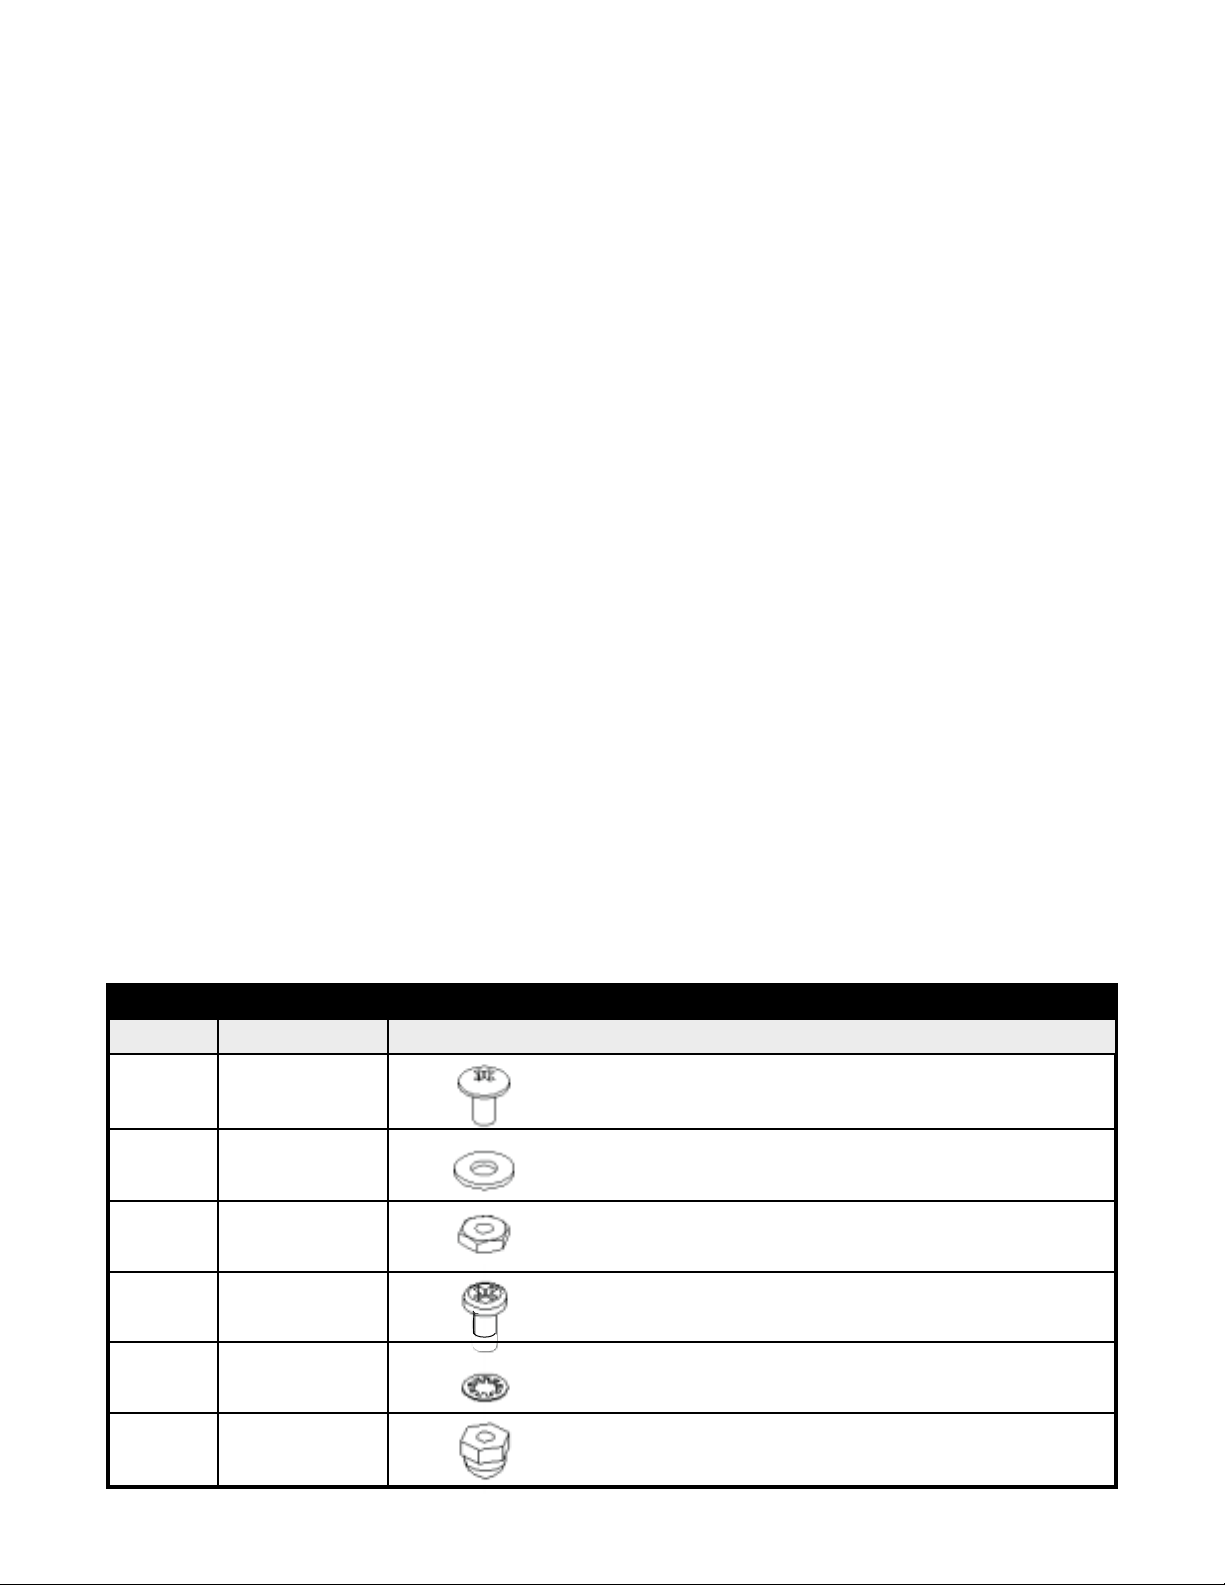
Hardware Provided for Installation of Food Warmer
Quantity Part Number Description
4
4
4
4
4
4
88993
89071
89062
88904
89056
88921
Screw, 10-32x3/8 TRS HD Phillips
Washer, 10 Flat .5 OD x .218 ID
Nut, Hex 10-32
Screw, Rolock 8-32x3/8
Washer, #8 Internal Lock
Nut, 8-32 Acorn Cap
3
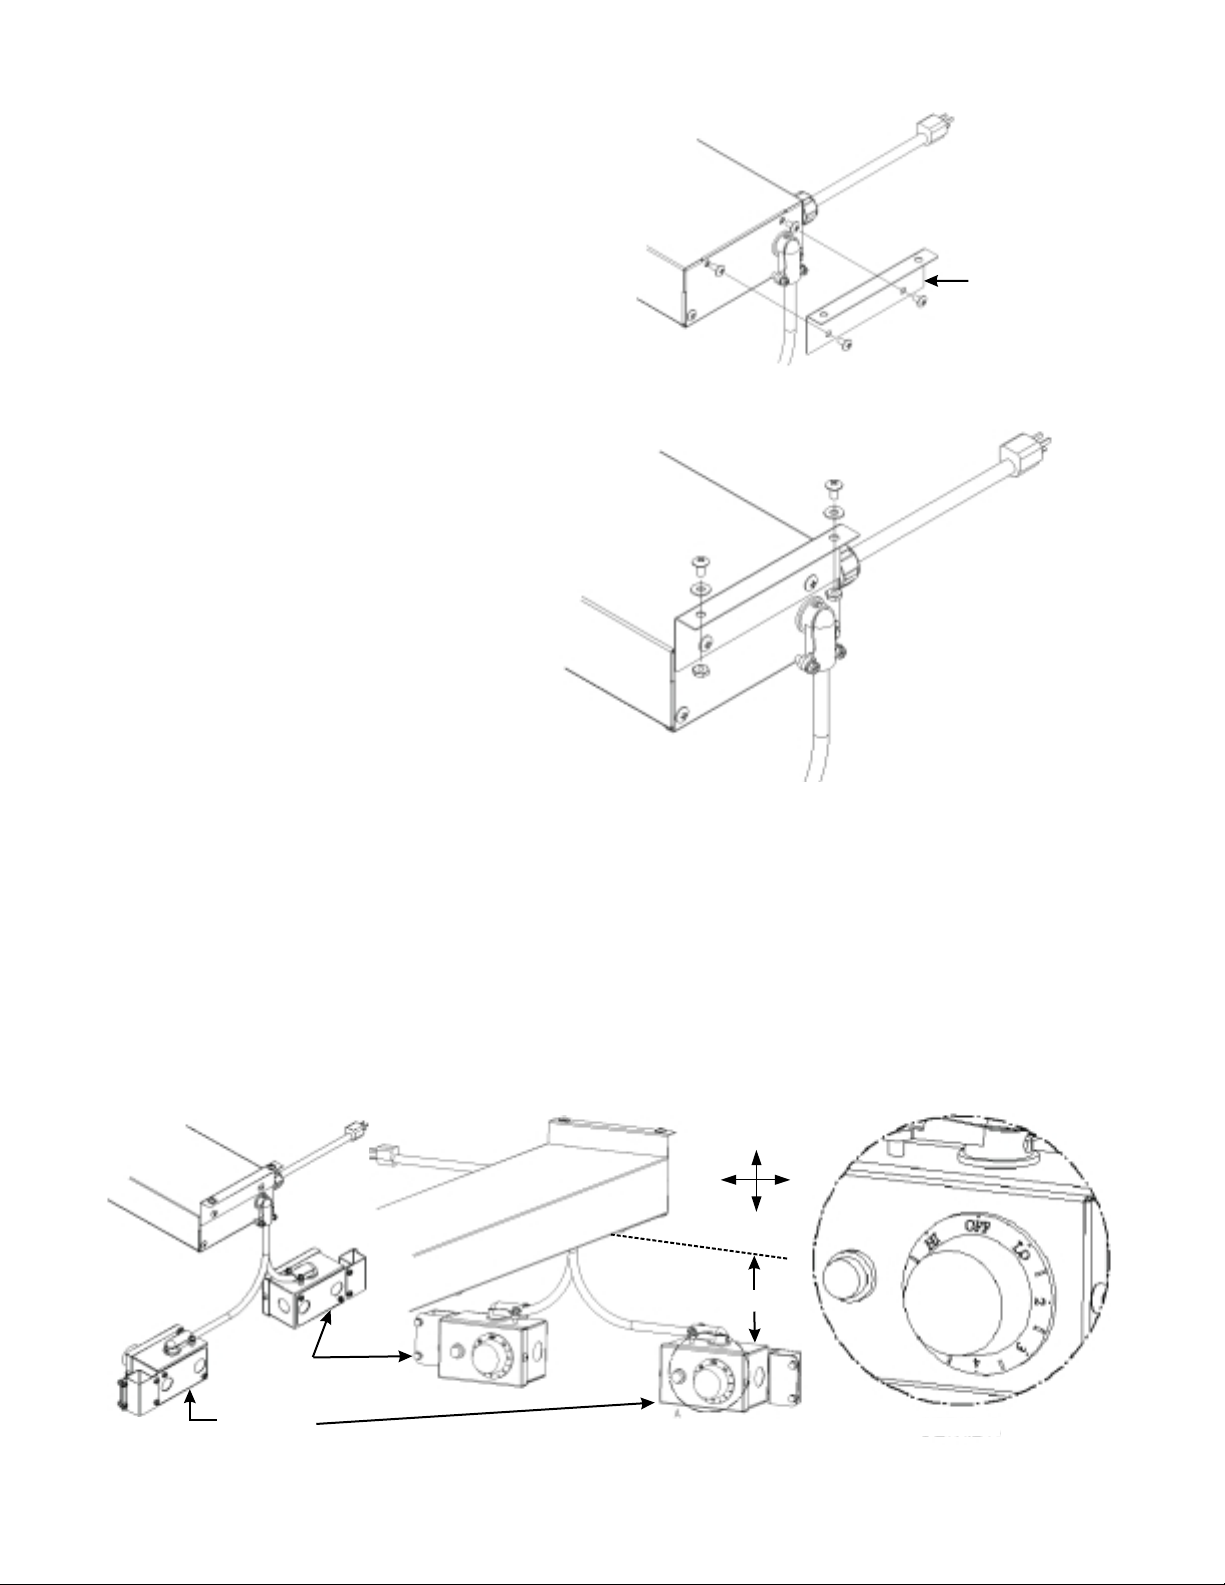
Domino's Specific Installations on Metro® Route Stands:
A. Remove food warmer and
ceiling mounting brackets
from packaging. Remove
screws from ends of
food warmer; attach ceiling
mounting bracket at both ends
of food warmer (as shown).
B. Use 88993 (screw), 89071
(washer), and 89062 (nut) to
attach food warmer to
underside of shelving. Place
foodwarmer under shelf,
aligning the ceiling mounting
bracket holes with that of the
shelf. May require two persons
to hold food warmer in place.
From the top of the shelf, push
through the washer and screw.
From the underside of the
ceiling mounting bracket,
screw the nut on. Repeat for
other hole and holes at
opposite end.
Ceiling
Mounting
Bracket
C Remote kit mounting
. . There are two ways to mount the remote kit, front mounting and rear
mounting. Front mounting is where the remote kit is mounted on the opposite side of the cord
and plug. Rear mounting, the remote kit is mounted on the same side as the cord and plug.
Whatever position chosen, when the food warmer is not operating (OFF), the knob on the remote
box should be oriented where is in the position. The control is designed to
OFF north NOT
operate upside down. (Mount as shown below)
N
W
E
S
4” Minimum
Rear
Mounting
Front
Mounting
Detail A
4
 Loading...