

Page 1
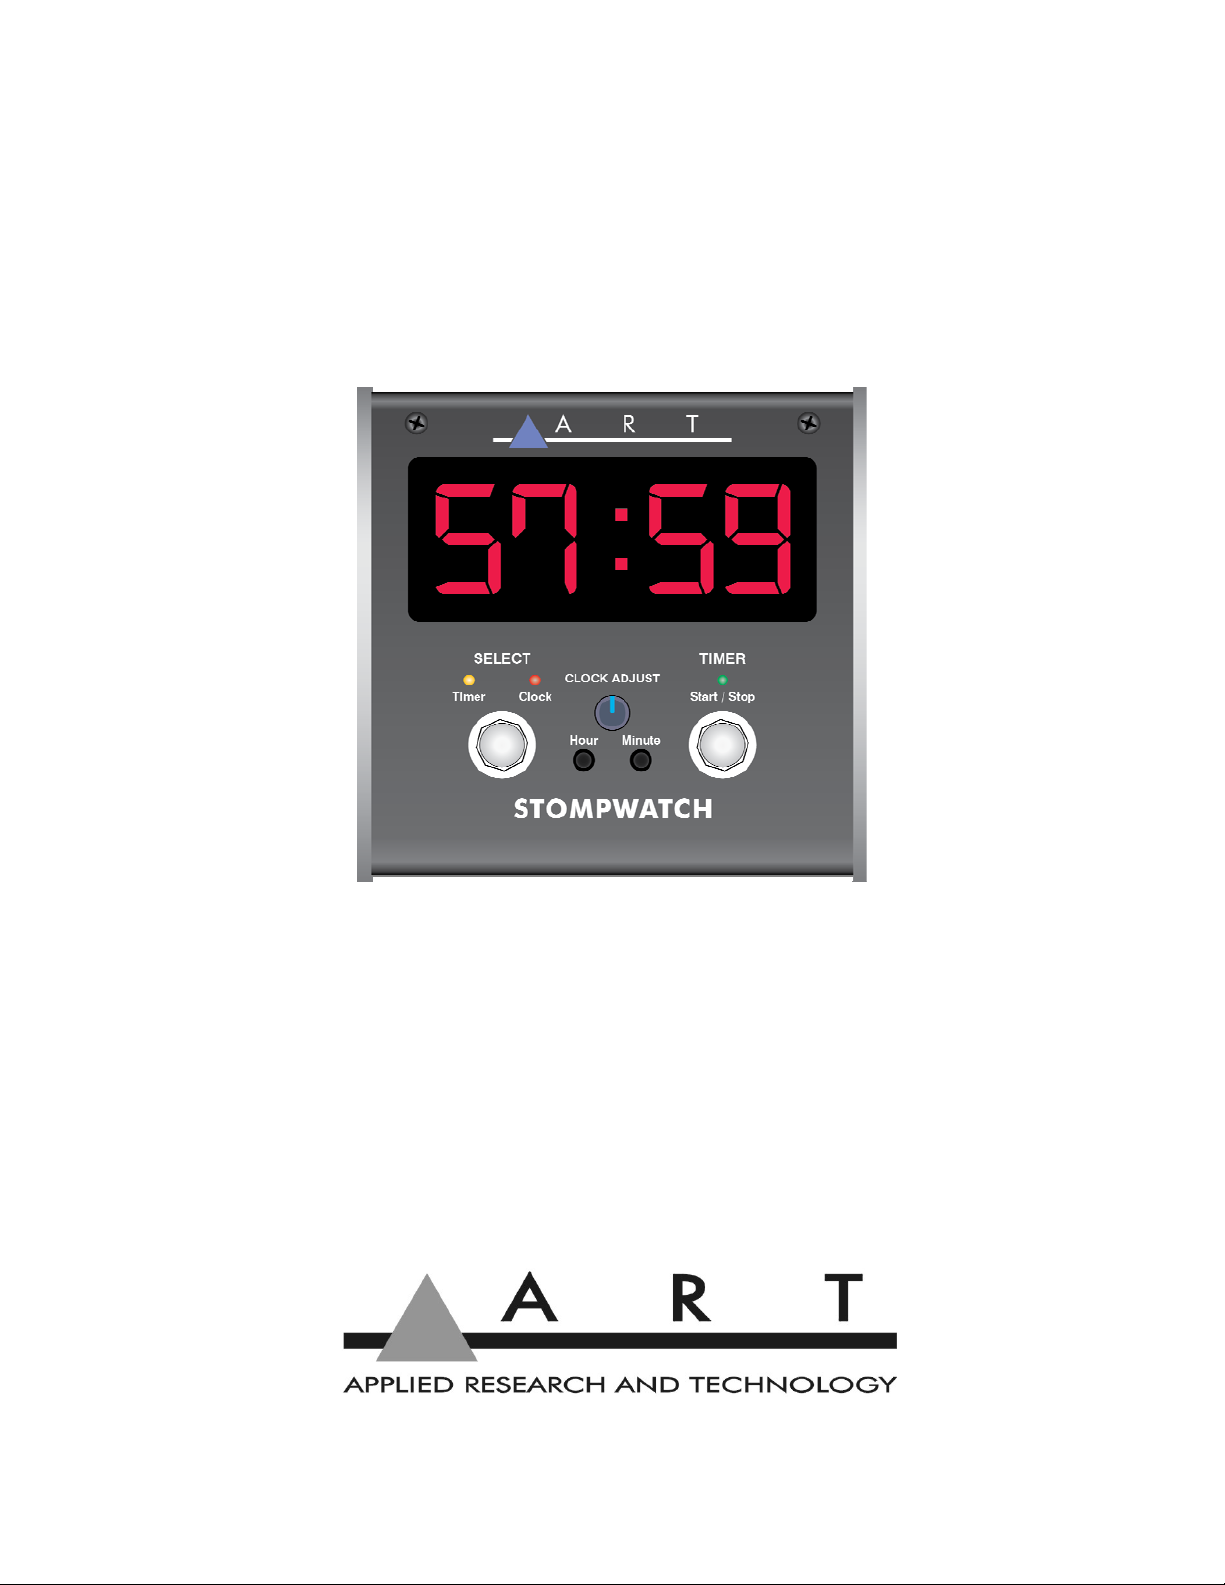
STOMPWATCH
PROFESSIONAL STAGE CLOCK AND TIMER
USER’S GUIDE
Page 2

IMPORTANT SAFETY INSTRUCTION – READ FIRST
This symbol, whenever it appears, This symbol, wherever it appears, alerts you
alerts you to the presence of uninsulated to important operating and maintenance
dangerous voltage inside the enclosure-voltage instructions in the accompanying literature.
that may be sufficient to constitute a risk of shock. Please read the manual.
Read instructions:
Retain these safety and operating instructions for future reference. Heed all warnings printed here and on
the equipment. Follow the operating instructions printed in this user manual.
Do not open:
There are no user serviceable parts inside. Refer any service work to qualified technical personnel only.
Moisture:
To reduce the risk of fire or electrical shock do not expose the unit to moisture or use in damp or wet
conditions. Do not place container of liquid on unit.
Heat:
Do not locate the unit close to excessive heat or direct sunlight, as this could cause a fire hazard. Locate
the unit away from any equipment, which produces heat such as: power supplies, power amplifiers and
heaters.
Environment:
Protect from excessive dirt, dust, heat, and vibration when operating and storing. Avoid tobacco ash, drink
spillage and smoke, especially that associated with smoke machines.
Handling:
Protect the controls from damage during transit. Use adequate padding if you need to ship the unit. To
avoid injury to yourself or damage to the equipment, take care when lifting, moving, or carrying the unit.
Servicing:
Refer servicing to qualified technical personnel only.
Installation:
Install the unit in accordance with the instructions printed in the user manual.
Page 3

INTRODUCTION
Thank you for purchasing Applied Research and Technology’s STOMPWATCH. This stompbox-format
clock and timer will help you keep track of time on stage and during rehearsals.
The STOMPWATCH was designed and constructed with the absolute best components, assuring a
lifetime of reliable performance.
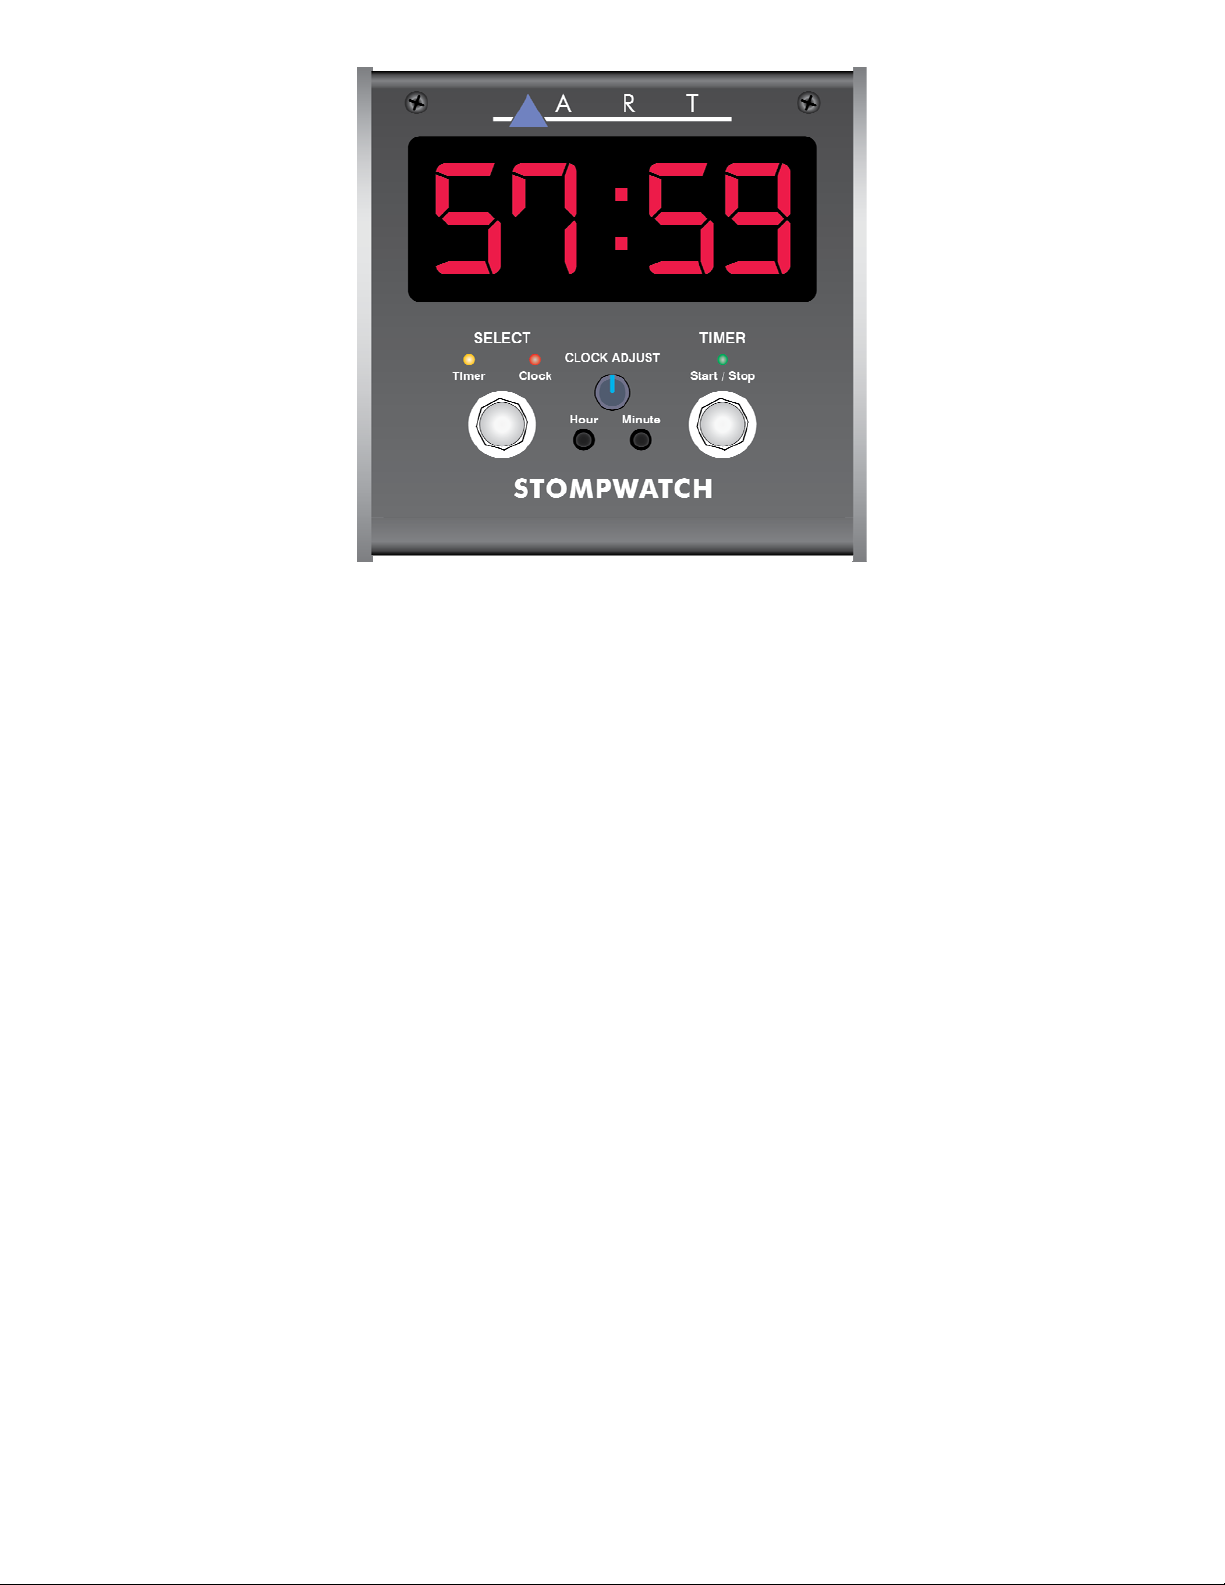
The STOMPWATCH offers
• Large Display: A four-digit seven segment display that can be seen from across the stage.
• Timer Mode Indicator: This yellow LED is on in Timer mode.
• Clock Mode Indicator: This red LED is on in Clock mode.
• Timer Start/Stop Indicator: This green LED is on when the timer is counting.
• Clock Adjust Knob: Use this encoder knob with the Hour and/or Minute buttons to adjust the clock time.
• Hour Button: Pressing this button will allow you to adjust the clock’s hour using the “Clock Adjust” knob.
• Minute button: Pressing this button allows you to adjust the clock’s minutes using the “Clock Adjust” knob.
• Mode Select: Pressing this footswitch will toggle the STOMPWATCH between Timer and Clock mode.
• Timer Start/Stop: Pressing this footswitch will start or stop the timer while in Timer mode.
Rear
• Power switch: Connects/disconnects the battery power.
• Standard 9V battery compartment.
• Adaptor DC input/output: Accepts standard center-pin negative 9V stompbox adaptors. These two power
jacks are connected in parallel to allow for easy daisy-chaining of your stompbox power.
Power Options
The STOMPWATCH is ideally powered from a 9V power adaptor and will powerup as soon as a suitable
DC power adaptor is connected. For convenience, a 9V battery may be installed to act as a backup in case
of external power failure. The power switch connects the battery.
The STOMPWATCH, comes with a factory installed #V CR2032 3V coin cell to keep the real time clock
operational when the unit is powered off, this cell will need replacing every 3 years, or when the accuracy of
the clock is drastically affected.
Power Options
The STOMPWATCH is ideally powered from a 9V power adaptor and will powerup as soon as a suitable
DC power adaptor is connected. For convenience, a 9V battery may be installed to act as a backup in case
of external power failure. The power switch connects the battery.
Warranty
• 3 years parts and labor warranty
INSTALLATION
The ART STOMPWATCH may be used in a wide variety of applications and environments. The all-steel
chassis is designed for continuous professional use. Mounting location is not critical; however for greater
performance reliability we recommend that you not place the unit on top of power amps, or other sources of
heat and/or strong magnetic fields.
UNPACKING
Your STOMPWATCH was packed with care at the factory. The shipping carton was designed to protect it
during initial shipment. Please retain this carton for use in transporting the STOMPWATCH when it is not
installed in a rack, or in the unlikely event that you need to return your STOMPWATCH for servicing. The
shipping carton should contain:
• The STOMPWATCH
• This user's guide
1
Page 4
OPERATION
The STOMPWATCH has two main modes of operation as detailed below.
1. Clock Mode
Upon power up, the STOMPWATCH will be in Clock mode as indicated by the red LED. In this mode, the
STOMPWATCH is a simple clock and displays the time in 12h format. The bottom-left dot on the display is
the PM indicator.
Setting the Time
You may adjust the time using the Hour, Minute and Clock adjusts controls. To change the hours, simply
press on “Hour.” The hours will flash and you will be able to make your adjustment via the encoder. Dial in
the correct hour and let go of the encoder. When the display stops flashing, the new hour is set.
Adjusting the minutes is very similar. Simply press the “Minute” button to start adjusting.
The clock setting is maintained by an internal CR2032, 3V Coin cell, if the time is not retained replace the
factory installed battery with a fresh one
Resetting the seconds to zero
In some situations, you may want to reset the seconds to zero to exactly match the time of another clock.
To do this, press the “Minute” button and hold down the Start/Stop footswitch. The new minutes will be set
and the seconds will be reset to zero when the “Start/Stop” button is released.
2. Timer Mode
To put the STOMPWATCH in Timer mode, simply press the “Select” footswitch. In Timer mode, the yellow
LED is on and the display will show the last count recorded by the timer.
Starting and Stopping the Timer
You may start (or stop) the timer by pressing the Timer start/stop footswitch. The display will
show the time elapsed in MM:SS format, up to 99 minutes and 59 seconds. When the timer is
running (counting up) the green LED is lit. You may go back forth between Timer and Clock mode
while the timer is running. The timer will only stop running if power is removed or if you press the
Timer start/stop footswitch while in Timer mode.
Resetting the Timer Count
To reset the timer count, simply press down on both footswitches at once. You may only reset the timer
count while in Timer mode.
2
Page 5

WARRANTY INFORMATION
Limited Warranty
Applied Research and Technology will provide warranty and service for this unit in accordance
with the following warrants:
Applied Research and Technology, (ART) warrants to the original purchaser that this product and
the components thereof will be free from defects in workmanship and materials for a period of
three
years from the date of purchase. Applied Research and Technology will, without charge,
repair or replace, at its option, defective product or component parts upon prepaid delivery to the
factory service department or authorized service center, accompanied by proof of purchase date in
the form of a valid sales receipt.
Exclusions
This warranty does not apply in the event of misuse or abuse of the product or as a result of
unauthorized alterations or repairs. This warranty is void if the serial number is altered, defaced, or
removed.
ART reserves the right to make changes in design or make additions to or improvements upon this
product without any obligation to install the same on products previously manufactured.
ART shall not be liable for any consequential damages, including without limitation damages resulting
from loss of use. Some states do not allow limitations of incidental or consequential damages, so the above
limitation or exclusion may not apply to you. This warranty gives you specific rights and you may have other
rights, which vary from state to state.
For units purchased outside the United States, an authorized distributor of Applied Research and
Technology will provide service.
3
Page 6

SERVICE
The following information is provided in the unlikely event that your unit requires servic e.
1. Be sure that the unit is the cause of the problem. Check to make sure the unit has power,
all cables are connected correctly, and the cables themselves are in working condition. You
may want to consult with your dealer for assistance in troubleshooting or testing your
particular configuration.
2. If you believe the ART unit is at fault, go to www.artproaudio.com
Customer Service for more assistance, or directly request a Return Authorization for service
in the “resources” area of the website.
3. If you are returning the unit for service, pack the unit in its original carton or a reasonable
substitute. The original packaging may not be suitable as a shipping carton, so consider
putting the packaged unit in another box for shipping. Print the RA number clearly on the
outside of the shipping box.
4. Include, with your unit, a note with the RA number and your contact information including a
daytime phone number, preferably attached to the top of the unit.
. You may contact
4
Page 7

SPECIFICATIONS
Current Consumption 90mA @ 9V
Typical Battery Lifespan 4 hours
DC Input Voltage Range 9V to 12V
Dimensions 3.25” H x 5.75” W x 5.5” D
82.6 mm H x 146 mm W x 140 mm D
Weight 2.0 lbs./ 0. 9 Kg
ART maintains a policy of constant product improvement.
Therefore, specifications are subject to change without notice.
Go to www.artproaudio.com for the latest information and support on the STOMP WATCH.
5
Page 8

STOMPWATCH
www.artproaudio.com
E-mail: [email protected]
© 2016 Applied Research & Technology/ Yorkville Sound
STW-5004-100
6
 Loading...