

Page 1
READ AND SAVE THESE INSTRUCTIONS FOR THE BENEFIT OF THE USER
Important! .
Ø This mixer tap is only to be used in conjunction with the standard “WS7” Water Heater.
It is not suitable for the remote version of this heater.
Ø All installation must be carried out by a qualified Plumbing Engineer.
Ø Installation must conform to current Water Bylaws of Appropriate Local Regulations.
Ø WARNING: THIS PRODUCT MUST BE EARTHED.
Description .
OPERATING DATA Maximum hot water temperature is 80°C
Maximum inlet water pressure (static) is 7 bar.
INLET WATER A tubular plastic pressure regulator is supplied with the Mixer Tap.
PRESSURE This is inserted into the cold inlet pipe of the Mixer Tap
REGULATION in line with the following table:-
STATIC INLET PRESSURE ACTION
UP TO 1.5 bar Omit plastic tube
BETWEEN 1.5 and 4 bar Insert tube cut down to 90mm
BETWEEN 4 and 7 bar Insert the entire plastic tube
The tubular plastic pressure regulator’s function is to minimise the mixing of cold inlet water with the stored hot
water in the heater.
WARNING: THE WS7 IS AN OPEN OUTLET WATER HEATER.
THERE SHOULD BE NO OTHER TAPS OR RESTRICTORS IN THE HOT OUTLET (MARKED RED ON THE
HEATER) SIDE OF THE CIRCUIT.
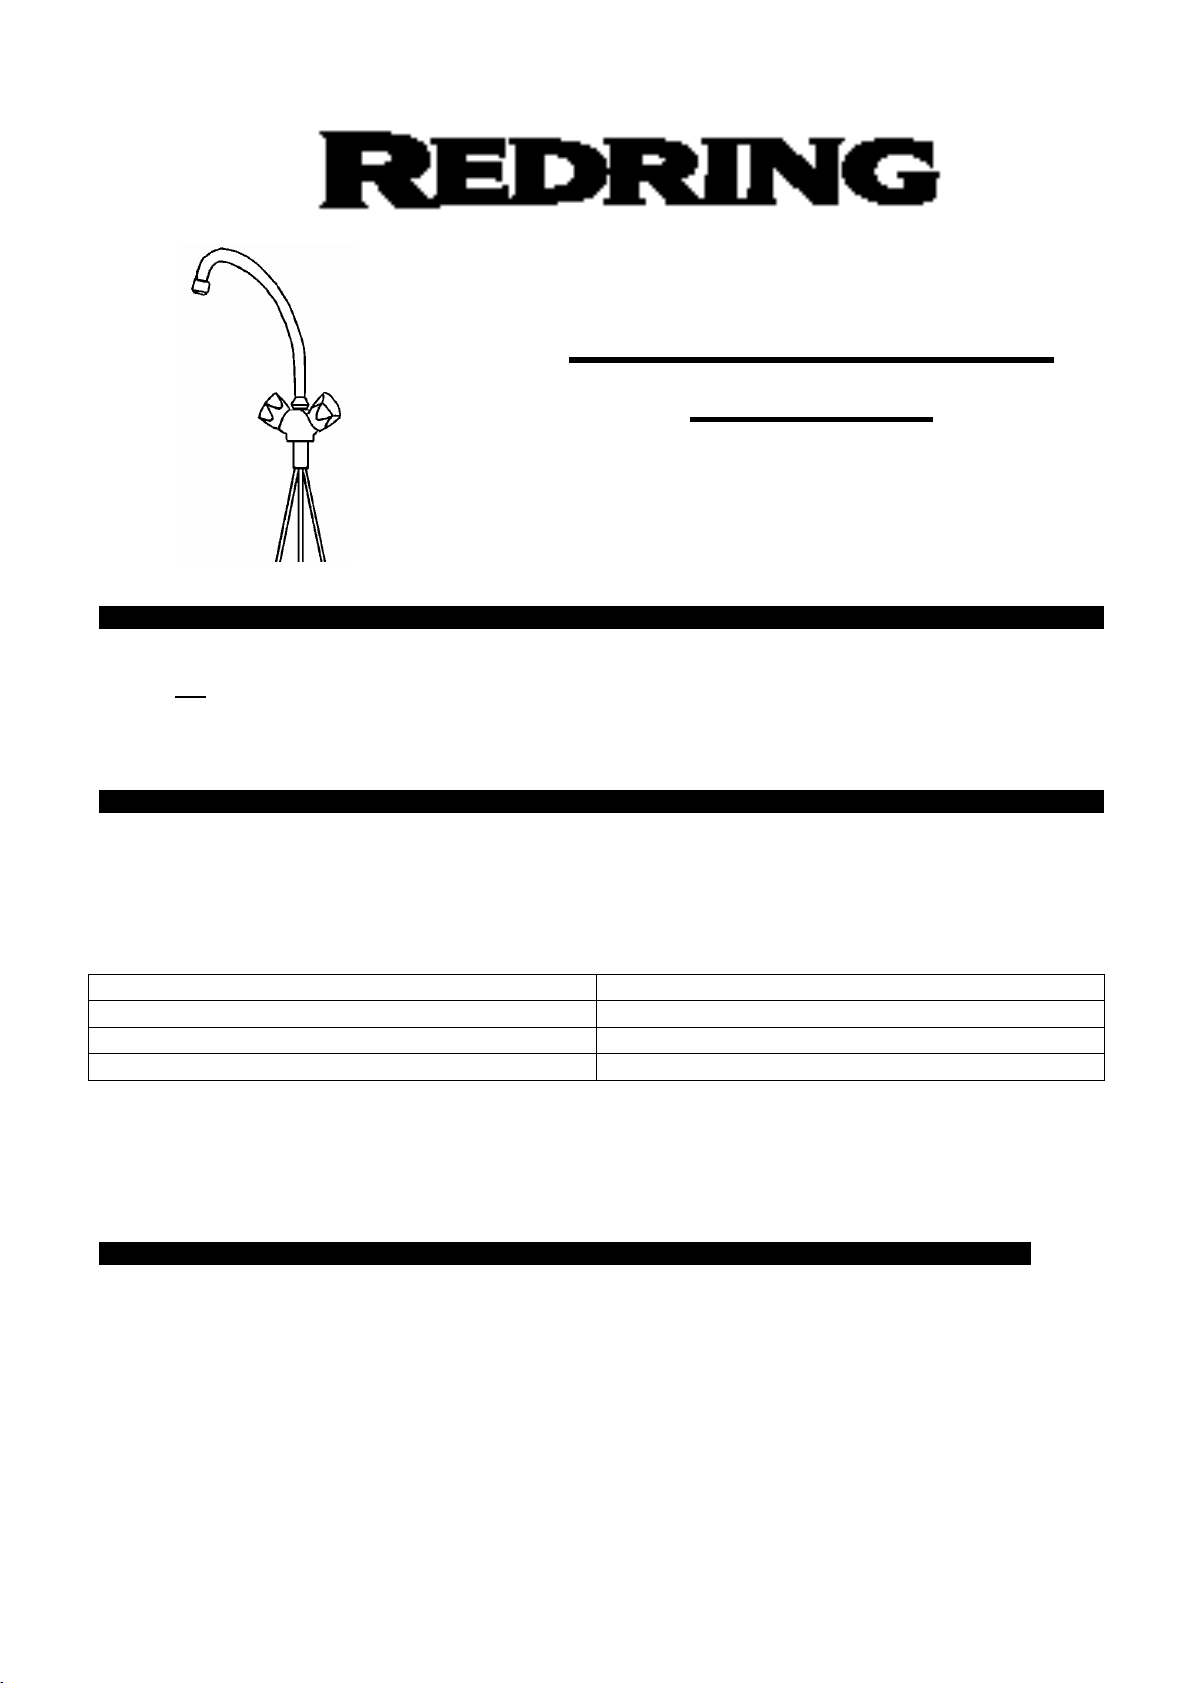
Installing the Chrome Monoblock Mixer Tap .
IMPORTANT: Fit the mixer tap to the sink or worktop before attempting to connect any pipe work.
• The Chrome Monoblock Mixer Tap should be located in a hole of a minimum diameter of 26mm in the
sink/worktop.
• A large rubber “O”-Ring (supplied), should be located directly under the flange on the underside of the mixer
block, between the unit and the sink/worktop.
• A large flat rubber washer (supplied), should be located around the threaded portion of the mixer block
directly under the sink-worktop,
• A large plastic nut (supplied), should be screwed onto the threaded part of the mixer block with the flange
uppermost. Do not over tighten the plastic nut.
Note: - Some extra small parts are included in the kit which are not necessary to complete the installation with the
WS7 water heater.
Monoblock Chrome
Mixer Tap
Installation and User Instructions
(To be left with user after installation)
Page 2
PLUMBING CONNECTIONS .
• The Chrome Monoblock Mixer Tap is supplied with three 8mm diameter annealed copper pipes attached.
Note: - The assembly is chromium plated.
• Connection to the WS7 water heater will be made by use of 15mm copper pipe.
• It is recommended that 8mm – 15mm compression adapters are used.
Alternatively 8mm – 15mm soldered adapter may be used.
Note: - If soldered adapters are selected it is recommended that the chromium finish is removed at the point
where the solder joint is made. The use of flexible pipe or convoluted copper pipe is also recommend.
Inlet Cold Water
• This is connected to the Chrome Monoblock Mixer Tap and not to the water heater.
• Connection is made to the pipe marked with a blue arrow which points up towards the mixer block.
Outlet Cold Water
• Connection is made from the pipe of the mixer block which is marked with a blue arrow which points
down away from the mixer. The pipe is connected to the water heater cold water inlet. WHICH IS MARKED
BLUE.
INLET HOT WATER .
• This is connected from the water heater hot outlet WHICH IS MARKED RED to the pipe going to the mixer
block, which is marked with a red arrow pointing towards the mixer.
WARNING: DO NOT SWITCH ON THE WATER HEATER AT THIS STAGE.
• Turn the temperature regulation knob (marked with a red and a blue arrow) fully in the direction of the red
arrow.
• Turn the other knob fully anti-clockwise. This will allow water to flow into the water heater.
Only when the water heater is full will the water flow out of the heater and out of the mixer tap spout.
• It is possible that air will be expelled in spurts when the water heater is first commissioned. Switch on the
electricity supply to the water heater ONLY AFTER A STEADY STREAM OF WATER IS SEEN ISSUING
FROM THE SPOUT OF THE MIXER TAP.
OPERATING THE CHROME MONOBLOCK MIXER TAP .
There are two knobs on the mixer tap. The knob marked with a red and blue arrow regulates the water
temperature. The other knob allows cold water to flow into the water heater. This displaces the stored hot water,
which flows out from the mixer spout.
NOTE: As the water heats in the water heater it expands. This will cause a few drips to be visible at the mixer
spout during the heating process. This is quite normal and not a fault.
NOTE: The efficiency of the water heater will be impaired if the tubular plastic pressure regulator is not installed in
line with the table detailed.
GUARANTEE .
We, Applied Energy Products Limited, guarantee that should this appliance prove to be defective by reason of
faulty workmanship or material within 12 months of the date of purchase or commencement of hire, we will
replace the defective parts FREE OF CHARGE on the condition that:-
• The appliance has been correctly installed.
• The appliance has been used in accordance with these instructions and has not been tampered with or
other wise subject to misuse, neglect or accident.
• The appliance has not been taken apart, modified or repaired except by an authorised person.
• Evidence of the date of purchase in the form of an invoice, receipt (hire purchase documents) is included with
the appliance of returned under guarantee.
This guarantee does not affect your statuary rights.
Full details of terms and conditions of guarantee are available on request from:-
APPLIED ENERGY PRODUCTS LIMITED
MORLEY WAY, PETERBOROUGH PE2 9JJ
TEL +44 (0) 1733 456789 / FAX: +44 (0) 1733 310606
Website: www.redring.co.uk
(Leaflet No:- 578-2137-01A)
 Loading...