

Page 1
ELECTRIC SANDWICH MAKER (Pages 1-5)
SANDWICHERA (Páginas 6-10)
PRÉPARATEUR DE SANDWICH
ÉLECTRIQUE
(Pages 11-15)
SAVE THIS USE AND CARE BOOK
CONSERVE ESTE INSTRUCTIVO
CONSERVER CE GUIDE D’ENTRETIEN ET D’UTILISATION
SM-1.Pub177740-00 11/9/01 3:21 PM Page 1
Page 2

When using electrical appliances, especially when children are present, basic safety
precautions should always be followed, including the following:
■ READ ALL INSTRUCTIONS BEFORE USING.
■ Do not touch hot surfaces. Use handles or knobs.
■ To protect against electrical hazards, do not immerse cord, plug, or the appliance
in water or other liquid.
■ Close supervision is necessary when any appliance is used by or near children.
■ Unplug from outlet when not in use and before cleaning. Allow to cool before putting
on or taking off parts and before cleaning.
■ Do not operate any appliance with a damaged cord or plug or after the appliance
malfunctions or has been dropped or damaged in any manner. Return appliance
to the nearest authorized service facility for examination, repair or electrical
or mechanical adjustment.
■ The use of attachments not recommended by the manufacturer may cause hazards.
■ Keep the cord away from heated surfaces. Do not let the cord hang over the edge
of table or counter, as it could be pulled off.
■ Do not place on or near a hot gas or electric burner or in a heated oven.
■ Use extreme caution when moving an appliance containing hot oil or other hot
liquids.
■ To use, plug cord into electrical outlet. To disconnect, grasp plug and remove from
outlet. Do not pull on the cord.
■ Do not use the appliance for other than its intended use.
1
IMPORTANT SAFEGUARDS
SAVE THESE INSTRUCTIONS
POLARIZED PLUG
This appliance has a polarized plug (one blade is wider than the other). As a safety feature, this
plug fits in a polarized outlet only one way. If the plug does not fit into the outlet, reverse the
plug and try again. If it still does not fit, contact a qualified electrician. Do not attempt to defeat
this safety feature.
A short power supply cord is provided to reduce the risk resulting from becoming entangled in
or tripping over a longer cord.
Longer detachable power supply cords or extension cords are available and may be used if
care is exercised in their use.
If a longer detachable power supply cord or extension cord is used, (1) the marked electrical
rating of the extension cord should be at least as great as the electrical rating of the appliance,
and (2) the cord should be arranged so that it will not drape over the countertop or tabletop
where it can be pulled on by children or tripped over unintentionally.
SM-1.Pub177740-00 11/9/01 3:21 PM Page 2
Page 3

3
This appliance is for HOUSEHOLD USE ONLY. It may be plugged into any AC electrical
outlet (ordinary household current). Do not use any other type of outlet.
FEATURES:
• Thermostatically controlled fast and even heat distribution.
• The power/temperature light turns on with initial plug-in but will turn off and on as the
thermostat automatically keeps the sandwich maker at the proper baking
temperature.
• Latch to secure the handles.
• Unique plastic handles stay cool during baking.
• Base of the unit allows for the cord to be wrapped around and easily stored.
BEFORE INITIAL USE
After unpacking the sandwich maker, open cover and wipe the top and bottom heating
plates with a damp cloth and towel dry. Brush or wipe the heating plates with a small
amount of vegetable oil or non-stick cooking spray.
TO USE:
1. Insert plug firmly into wall outlet. The power/temperature light will turn on.
2. Lightly glaze both heating plates with a small amount of vegetable oil or a non-stick
spray, and close the casing for the sandwich maker to heat up.
3. After 4-6 minutes, the power/temperature light will turn off, indicating that the
sandwich maker is ready for use.
4. Prepare sandwiches by buttering bread on outer surfaces and placing desired
ingredients within. Lift cover latch and open the sandwich maker; place sandwiches
on the heating plates. CAUTION: Cooking surface is hot; handle with care.
5. Close the casing to ensure that the sandwich is placed evenly; lock the handle.
Normal cooking time will be 3-6 minutes for each sandwich. The power/temperature
light will turn off and on, as the thermostat keeps the sandwich maker at the proper
baking temperature.
6. Remove the sandwiches from the heating plates with a plastic (non-metallic) utensil.
BE CAREFUL with the sandwiches; the fillings will be quite hot. Allow to cool for a few
moments before enjoying.
7. Unplug the power supply cord after cooking, and allow the sandwich maker to cool
down.
Create your favorite sandwiches quickly and easily. Follow your own recipes, or see
below for additional recipes.
2
HOW TO USE
OPERATING INSTRUCTIONS
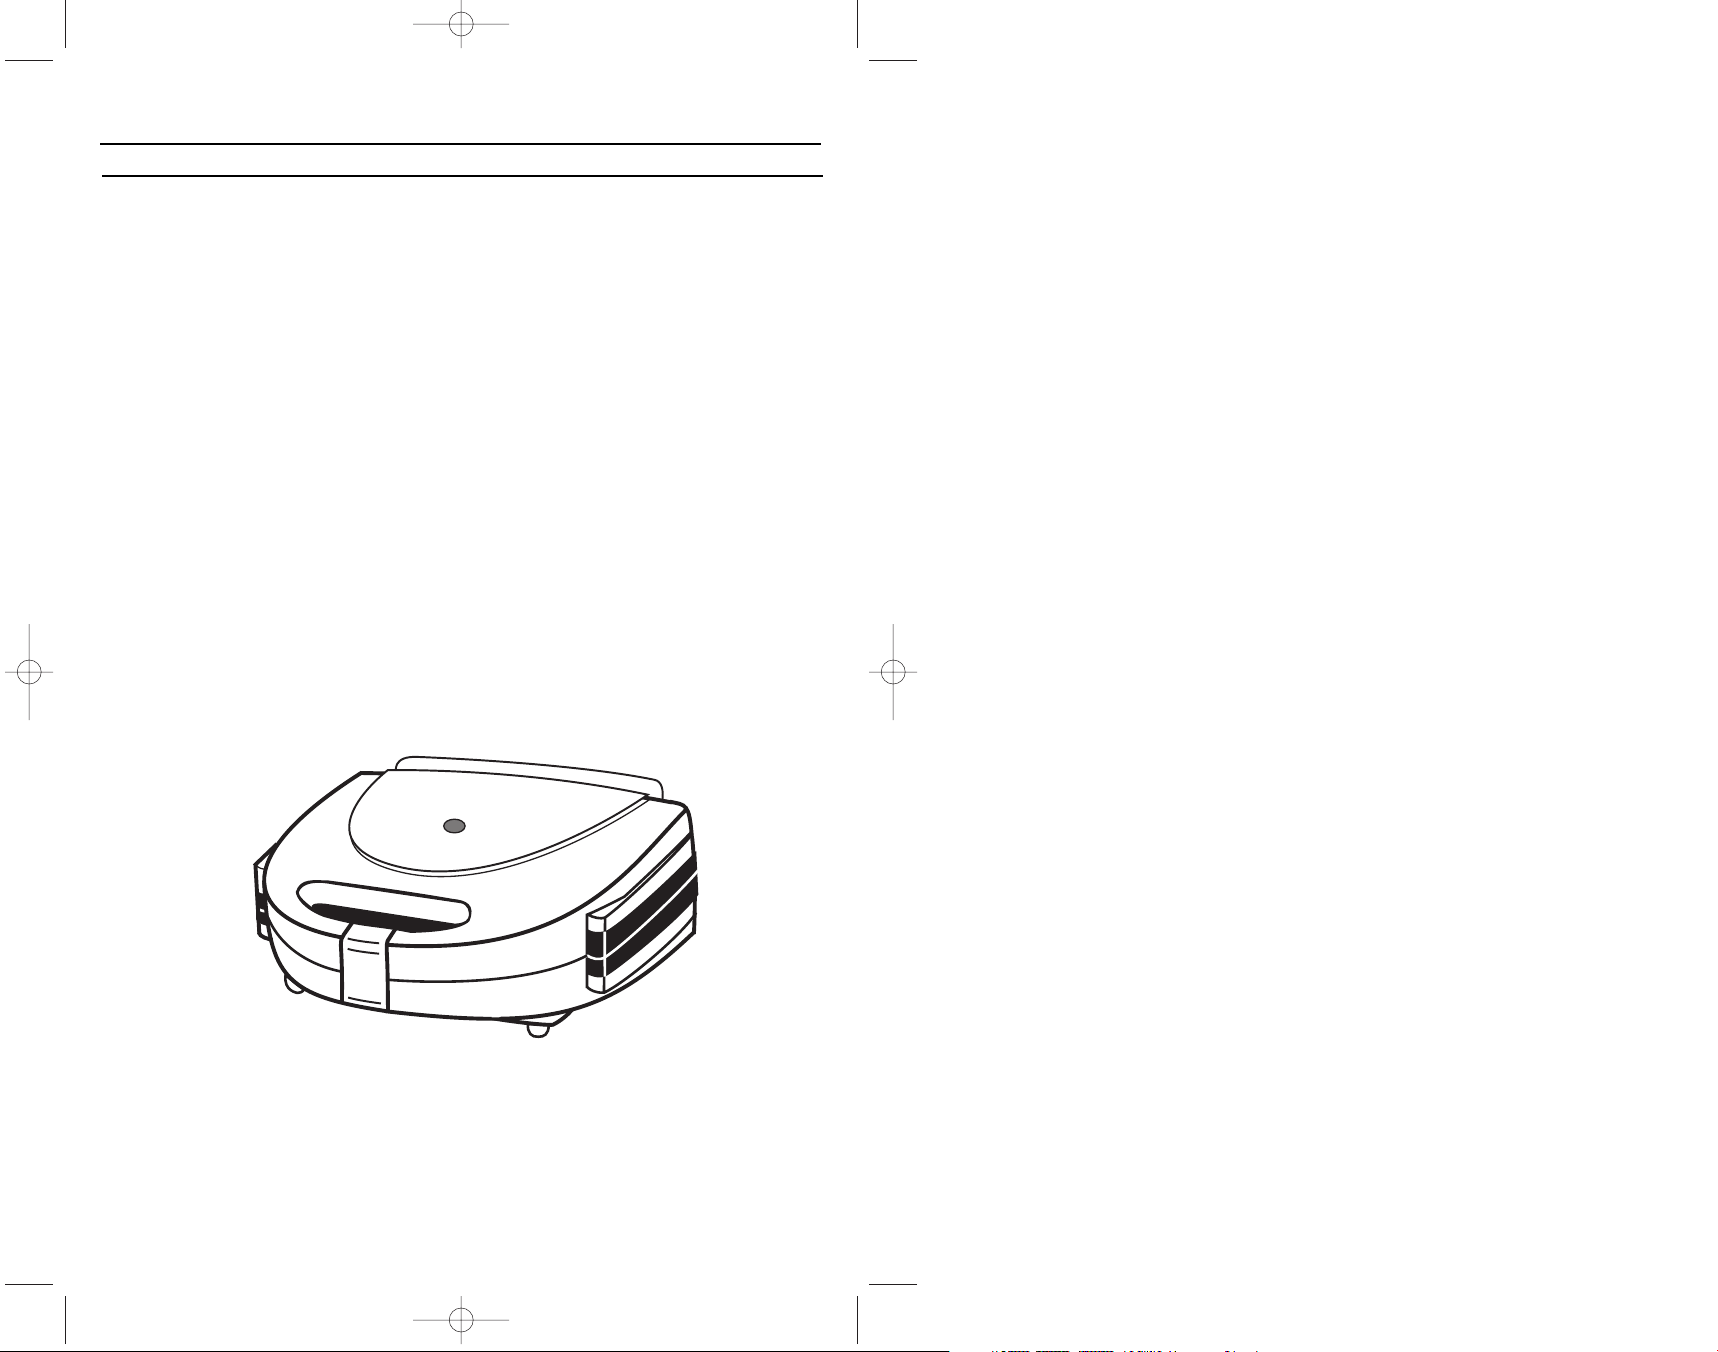
PRODUCT MAY VARY SLIGHTLY FROM ILLUSTRATIONS
쐃
1. Handles
2. Non-Stick Heating Plates
3. Latch
1. Cord Storage Base
2. Power/Temperature Light
LINE CORD SAFETY TIPS
1. Never pull or yank on the cord or the appliance.
2. To insert plug, grasp it firmly and guide it into outlet.
3. To disconnect appliance, grasp plug and remove it from outlet.
4. Before each use, inspect the line cord for cuts and/or abrasion marks. If any are found,
call Consumer Assistance for information at: 1-203-926-3230.
5. Never wrap the cord tightly around the appliance, as this could place undue stress on the
cord where it enters the appliance and cause it to fray and break.
DO NOT OPERATE APPLIANCE IF THE LINE CORD SHOWS ANY DAMAGE
SANDWICH RECIPES
BREAKFAST:
BREAKFAST SANDWICH (Makes 2 sandwiches):
2 eggs (beaten)
2/3 cup grated cheese (cheddar, Monterey jack or Swiss)
1/4 cup cooked meat or vegetables
4 slices bread of choice (butter or margarine optional)
SM-1.Pub177740-00 11/9/01 3:21 PM Page 4
Page 4

5
4
This appliance requires little maintenance. It contains no user serviceable parts. Do not
try to repair it yourself. Refer it to qualified personnel if servicing is needed.
TO CLEAN: Always unplug the sandwich maker from the power source and wait until it
cools down before cleaning. There is no need to take your sandwich maker apart for
cleaning. Wipe with a dry paper towel to absorb excess oils. Brush crumbs from the
grooves, and wipe with a damp cloth and mild soap. Never immerse in water. Avoid
using metal or sharp utensils, as they will scratch the non-stick surface. Do not use
cleansers or oven cleaners on the heating plates.
To clean handles and other parts, use a damp cloth with mild soap and towel dry.
TO STORE: Unplug sandwich maker and let it cool. Wrap the cord loosely coiled - never
tightly - around the cord storage base. Do not put any stress on cord where it enters the
appliance as it may cause the cord to fray and possibly break. Store in its box or in a dry
place.
CARE AND CLEANING
Butter outsides of bread and place two slices of bread, buttered side down, into
sandwich maker. Slice banana, and place half of the banana onto each slice of bread,
sprinkle with sugar. Top with remaining slices of bread, and toast for 1-1/2 - 2 minutes.
APPLE TURNOVERS (Makes 4):
2 tablespoons. apple, or
1 teaspoon castor (icing) sugar
2 tablespoons canned apple-pie filling
3/8 teaspoon cinnamon
**Optional: 1 tablespoon sultanas, raisins, raisin bread.
Place a slice of bread (buttered side down) onto the sandwich maker. Form a hollow and
add apple. Sprinkle with (icing) sugar and cinnamon. Top with a slice of bread (buttered
side up). Lower lid and toast for 1 minute. Serve immediately.
Place two slices of bread, buttered side down, onto heating plates. Place cheese in
centre of each slice. Gently pour the beaten egg over cheese, and add cooked meat
(ham, bacon) or vegetables. Top with remaining bread slices, buttered side up. Close
and latch cover. Cook for 2 minutes.
FRIED EGGS (Makes 2 servings):
4 eggs
Spices (to taste)
3/8 teaspoons butter/margarine
Brush top and bottom well with butter or margarine for flavor. Crack one egg directly
into each well of heating plates (1-4 eggs can be cooked at same time). Close cover but
do not latch. Cook for 1-3 minutes for desired results.
LUNCH OR SNACKS:
BASIC GRILLED CHEESE SANDWICH (Makes 1 sandwich):
2 slices bread, any kind
1/4 cup grated cheese or two slices
Place one slice bread onto one side of heating plates. Add cheese. Top with other slice.
Close cover and latch. Cook for two minutes.
MONTE CRISTO (Makes 2 sandwiches):
2 thin slices Swiss cheese
1 egg
4 slices white bread
1/4 cup milk
4 thin slices cooked ham
Preheat sandwich maker. Place one slice of ham, a slice of Swiss cheese and another
slice of ham (all cut to fit the bread size) on each of two slices of bread. Top with
remaining bread slices. Combine milk and egg; dip sandwiches one side at a time in egg
mixture. Place onto heating plates. Close cover catching latch and cook for 2-3 minutes.
TUNA MELT (Makes 1 sandwich):
2 slices bread
1/2 cup tuna
1 tablespoon chopped celery
1 tablespoon chopped onion
2 teaspoons mayonnaise
3/8 teaspoon mustard
1 tablespoon chopped green pepper
1 slice of cheese
Mix tuna, celery, onion, green pepper, mayonnaise and mustard together — on top of
slice of bread in Sandwich Maker. Put slice of cheese on, and top with remaining slice
of bread. Close cover, latch and cook for 7 minutes.
DESSERTS:
BANANA TREATS (Makes 2):
4 slices bread
1-2 teaspoons sugar
1 banana, peeled
SM-1.Pub177740-00 11/9/01 3:21 PM Page 6
Page 5

7
6
Cuando use aparatos eléctricos, especialmente cuando hayan niños, medidas básicas
de seguridad deben seguirse, incluyendo las siguientes:
■ LEA TODAS LAS INSTRUCCIONES ANTES DE USAR.
■ No toque las superficies que están calientes. Use agarraderas o manecillas.
■ Para protegerse contra peligros eléctricos, no sumerja el cable, enchufe o el
artefacto en agua u otro líquido.
■ Atenta supervisión es necesaria cuando cualquier artefacto está siendo usado por,
en o cerca de niños.
■ Desenchúfe cuando no se esté usando y antes de limpiar. Deje que se enfríe antes
de poner o sacar alguna parte y antes de limpiar.
■ No opere ningún artefacto si tiene el cable o enchufe dañado, después de un mal
funcionamiento o si se ha caído o dañado de alguna manera. Devuelva el artefacto
a un lugar autorizado más cercano para su revisión, reparación o ajuste eléctrico
o mecánico.
■ El uso de aditamentos no recomendados por el fabricante puede ser peligroso.
■ Mantenga el cable lejos de superficies calientes. No deje el cable colgando de la
mesa o del mostrador ya que este podría ser halado.
■ No lo coloque en o cerca de un calentador a gas o eléctrico o en un horno caliente.
■ Tenga mucho cuidado cuando mueva un artefacto conteniendo aceite caliente
u otros líquidos calientes.
■ Para usar, enchúfe en una toma de corriente eléctrica. Para desconectar, empuñe
el enchufe y retírelo de la toma de corriente. No tire del cable.
■ No use este artefacto para otros fines que no sean los especificados.
INSTRUCCIONES DE SEGURIDAD
GUARDE ESTAS INSTRUCCIONES
ENCHUFE POLARIZADO
Este artefacto tiene un enchufe polarizado (una hoja es más ancha que la otra). Como medida
de seguridad, este enchufe sólo debe usarse en una toma de corriente polarizada en un solo
sentido. Si no entrara en la toma de corriente, invierta el enchufe y trate nuevamente. Si aún así
no entrara, busque la ayuda de un electricista calificado. No intente anular este distintivo de
seguridad.
Un cable corto le es provisto para reducir el peligro resultante del enredo o tropiezos que
puede causar una más grande.
Cables separables o de extensión están disponibles y pueden ser usados teniendo mucho
cuidado en su uso.
Si se usara un cable separable o un cable de extensión, (1) la graduación eléctrica que marca
debe ser por lo menos, de la misma graduación del artefacto y (2) el cable debe ser arreglado
de una forma que no cuelgue del mostrador o de la mesa, donde pueda ser halado por un niño
o tropezarse.
INSTRUCCIONES DE FUNCIONAMIENTO
ESTE PRODUCTO PUEDE VARIAR LIGERAMENTE DE LAS ILUSTRACIONES
CONSEJOS DE SEGURIDAD PARA EL CABLE ELECTRICO
1. Nunca hale ni tire del cable ni de la unidad.
2. Para conectar, sujete con firmeza el enchufe y guíelo dentro de la toma de corriente.
3. Para desconectar, sujete el enchufe y retírelo de la toma de corriente.
4. Antes de usar el aparato, verifique que el cable no tenga cortaduras ni abrasiones. Para
información, llame al número 1-203-926-3230, Asistencia al Consumidor.
5. Nunca enrolle el cable de manera apretada en torno a la unidad, ya que el exceso de
presión en las uniones del cable con la unidad o con el enchufe pueden raerlo o romperlo.
NO OPERE LA UNIDAD SI EL CABLE PRESENTA CUALQUIER DAÑO.
쐃
1. Agarraderas
2. Platos cuyas superficies
no permiten adherencias
3. Seguro
1. Compartimiento en la base para
guardar el cable
2. Luz de encendido/temperatura
SM-1.Pub177740-00 11/9/01 3:21 PM Page 8
Page 6

9
8
Este aparato es para uso doméstico y puede ser enchufado en cualquier toma de
corriente alterna (corriente ordinaria doméstica).
CARACTERISTICAS:
• Termostáticamente controlada para una rápida y pareja distribución de temperatura.
• La luz de encendido/temperatura se enciende cuando se enchufa inicialmente pero
se apagará y encenderá mientras el termostato mantiene automáticamente la
plancha a la debida temperatura para hornear.
• Seguro para asegurar las agarraderas.
• Unicas agarraderas de plástico que se mantienen frías durante el horneado.
• La base de la unidad le permite enrollar el cable alrededor para guardarla
fácilmente.
ANTES DE SU USO INICIAL
Antes de desempacar la sandwichera, abra la cubierta y limpie platos de calentamiento
la parte superior y la base con un paño húmedo y séquelos bien. Pásele a los platos una
brocha o un paño con una pequeña cantidad de aceite vegetal o un aceite en aerosol.
PARA USAR:
1. Enchúfela. La luz de encendido se encenderá.
2. Ligeramente engrase los platos de calentamiento con una pequeña cantidad de
aceite vegetal o un aceite en aerosol para que no se peguen y cierre la cubierta para
que se caliente la sandwichera.
3. Después de 4 a 6 minutos, la luz de encendido/temperatura se apagará, indicando
que la sandwichera está lista para ser usada.
4. Prepare los sandwiches enmantequillando las rebanadas de pan por los lados de
afuera y colocando dentro los ingredientes deseados. Levante el seguro de la
cubierta y abra la sandwichera; coloque los sandwiches en los platos de
calentamiento. PRECAUCION: La superficie está caliente; manéjela con cuidado.
5. Cierre la cubierta para asegurarse de que los sandwiches estén colocados en forma
pareja. El tiempo normal de cocción será de 3 a 6 minutos por cada sandwich. La luz
de encendido/temperatura se apagará y encenderá, ya que el termostato mantiene
la sandwichera a una temperatura apropiada.
6. Retire los sandwiches de los platos con un utensilio de plástico. TENGA CUIDADO
con los sandwiches; el relleno está caliente. Deje que se enfríen por un momento
antes de saborearlos.
7. Desenchúfela después de la cocción y déjela que se enfríe. Cree sus sandwiches
favoritos rápido y fácilmente. Siga sus propias recetas o vea abajo unas adicionales.
COMO USAR
RECETAS DE SANDWICHES
DESAYUNO:
SANDWICH PARA EL DESAYUNO (rinde 2 sandwiches):
2 huevos (batidos)
2/3 taza de queso rallado (cheddar, Monterrey jack o Suizo)
1/4 taza carne cocida o vegetales
4 rebanadas de pan de su preferencia (mantequilla o margarina es opcional)
Coloque dos rebanadas de pan, enmantequilladas por la parte de abajo en los platos de
calentamiento. Coloque queso en el centro de cada rebanada. Suavemente vierta los
huevos batidos sobre el queso y añada carne cocida (jamón o tocino) o vegetales.
Cúbralas con las rebanadas de pan restantes, enmantequilladas por la parte de arriba.
Cierre y asegure la cubierta. Cocine por 2 minutos.
HUEVOS FRITOS (rinde dos porciones)
4 huevos
Especias (al gusto)
3/8 cucharadita mantequilla o margarina
Pase una brocha con mantequilla o margarina por la parte de arriba y abajo para darle
sabor. Vierta un huevo en cada cavidad de los platos de calentamiento (de 1 a 4 huevos
pueden ser cocinados a la misma vez). Cierre la cubierta pero no la asegure. Cocine de
1 a 3 minutos para los resultados deseados.
ALMUERZO O REFRIGERIOS:
SANDWICH BASICO DE QUESO A LA PLANCHA (Rinde 1 sandwich):
2 rebanadas de pan de cualquier clase
1/4 taza de queso rallado o dos tajadas
Coloque una rebanada de pan en uno de los platos de calentamiento. Añada queso.
Cúbrala con la otra rebanada. Cierre la cubierta y asegúrela. Cocine por dos minutos.
MONTE CRISTO (Rinde 2 sandwiches)
2 tajadas finas de queso suizo
4 rebanadas de pan blanco
4 tajadas de jamón cocido
1 huevo
1/4 taza de leche
Caliente la sandwichera. Coloque una tajada de jamón, una de queso suizo y otra de
jamón (todas cortadas del tamaño del pan) en cada uno de las dos rebanadas de pan.
Cúbralas con las restantes rebanadas de pan. Combine la leche y huevos; sumerja los
sandwiches por cada lado en esta mezcla. Colóquelos en los platos de calentamiento.
Cierre la cubierta asegurándola y cocine de 2 a 3 minutos.
ATUN (Rinde 1 sandwich)
2 rebanadas de pan
1 cucharada de apio picado
2 cucharaditas de mayonesa
1 cucharada de pimiento verde picado
1 cucharada de atún
1/2 taza cebolla picada
3/8 cucharadita de mostaza
2 tajadas de queso
Mezclar el atún, apio, cebolla, pimiento verde, mayonesa y mostaza y vierta en la
rebanada de pan en la Plancha. Ponga una tajada de queso y cúbrala con la otra
rebanada de pan. Cierre la cubierta, asegúrela y cocine por 7 minutos.
SM-1.Pub177740-00 11/9/01 3:21 PM Page 10
Page 7

11
10
Este artefacto requiere poco mantenimiento y no tiene piezas que puedan ser reparadas
por el usuario. No trate de repararlo usted mismo. Si necesita reparación remítalo a
personas calificadas.
LIMPIEZA: Esta unidad no requiere desarmarse para limpiarla pero antes de hacerlo,
desconéctela de la toma de corriente y permita que se enfríe por completo. Limpie las
superficies de cocina con una toalla de papel para absorber el exceso de grasa. Limpie
las migajas acumuladas en las ranuras y pase un paño humedecido con agua y jabón
suave. Nunca sumerja la unidad en agua. A fin de evitar rayar las superficies
antiadherentes de cocina, evite el uso de utensilios puntiagudos o de metal. No use
agentes de limpieza para hornos ni de ningún otro tipo sobre las placas calefactoras de
la unidad.
Limpie las agarraderas y demás partes con un paño humedecido con agua y jabón
suave. Seque la unidad bien con un paño suave.
ALMACENAJE: Desconecte la sandwichera y permita que se enfríe. Enrolle el cable de
manera holgada (nunca apretada) alrededor de la base para almacenar el cable. No
aplique presión a la unión del cable con la unidad para evitar que éste se debilite y se
rompa. Almacene la unidad en su caja original de empaque o en un lugar seco.
CUIDADO Y LIMPIEZA
POSTRES:
DELICIA DE PLATANO (Rinde 2 porciones)
4 rebanadas de pan
1 plátano, pelado
1 - 2 cucharaditas de azúcar
Enmantequille el pan por los lados de afuera y coloque dos rebanadas de pan, los lados
enmantequillados hacia abajo, en la sandwichera. Rebane el plátano y coloque la mitad
en cada rebanada de pan, espolvoreándolo con azúcar.
Cúbralos con las otras rebanadas de pan y tueste de 1-1/2 a 2 minutos.
PASTELILLO DE MANZANA (Rinde 4 porciones):
2 cucharadas de manzana, o
2 cucharadas de relleno de manzana enlatada
1 cucharadita de baño de azúcar
3/8 cucharadita de canela
** Opcional: 1 cucharada de sultanas, pasas o pan de pasas.
Coloque una rebanada de pan (enmantequillada por el lado de abajo) en la sandwichera.
Forme un hoyo y añada la manzana. Espolvoree con el baño de azúcar y canela. Cúbrala
con una rebanada de pan (enmantequillada por el lado de arriba). Cierre la tapa y
tuéstela por 1 minuto. Sirva inmediatamente.
IMPORTANTES MISES EN GARDE
Lorsqu’on utilise un appareil électrique, surtout si des enfants sont présents, il faut
toujours respecter certaines règles de sécurité fondamentales, notamment les
suivantes.
■ LIRE TOUTES LES INSTRUCTIONS AVANT D’UTILISER.
■ Ne pas toucher les surfaces chaudes. Utiliser les poignées ou les boutons.
■ Pour protéger contre les risques de secousse électrique, ne pas plonger le cordon,
la fiche ou l’appareil dans l’eau ou tout autre liquide.
■ Il est nécessaire de surveiller de près l'utilisation de cet appareil par ou à proximité
d'enfants.
■ Débrancher l’appareil lorsqu’on ne s’en sert pas et avant de le nettoyer. Laisser
refroidir avant de monter ou d’enlever des pièces et avant de nettoyer.
■ Ne pas utiliser un appareil dont la fiche ou le cordon sont abîmés, qui présente un
problème de fonctionnement, qui est tombé ou qui est endommagé. Le rapporter au
centre de service autorisé le plus proche pour le faire examiner, réparer ou régler.
■ Utiliser des accessoires non recommandés par le fabricant peut être dangereux.
■ Éloigner le cordon des surfaces chaudes. Ne pas laisser pendre le fil de la table ou
du comptoir car cela pourrait faire tomber l’appareil.
■ Ne pas placer près d’une plaque électrique chaude, d’un brûleur allumé ou dans
un four chaud.
■ Il faut être extrêmement prudent en déplaçant un appareil contenant de l’huile
chaude ou un autre liquide chaud.
■ Pour utiliser, brancher le cordon dans une prise électrique Pour débrancher, attraper
la fiche et la tirer de la prise. Ne pas tirer sur le cordon.
■ N'utiliser cet appareil que pour les usages prévus.
CONSERVER CES MESURES
FICHE POLARISEE
Cet appareil est muni d'une fiche polarisée (une lame est plus large que l'autre). Comme mesure
de sécurité, cette fiche peut être insérée dans une prise de courant polarisée dans un sens
seulement. Si elle n'entre pas dans la prise de courant, inversez la fiche et essayez de nouveau.
Si elle refuse toujours d'entrer, communiquez avec un électricien compétent. N'essayez pas
d'outrepasser cette mesure de sécurité.
Un cordon d’alimentation court est fourni pour empêcher le cordon de s’emmêler et prévenir de
trébucher sur un cordon trop long.
Des cordon électriques détachables plus longs et des rallonges sont disponibles et peuvent être
utilisés si l’on prend garde.
Si on utilise un cordon électrique ou une rallonge, (1) ses spécifications électriques ne doivent
pas être inférieures à celles de l'appareil, et (2) Il ne faut pas placer le cordon sur le comptoir ni
sur un dessus de table où il peut faire choir ou être tiré par les enfants.
SM-1.Pub177740-00 11/9/01 3:21 PM Page 12
Page 8

12
13
MODE D'OPÉRATION
LE PRODUIT NE PEUT PAS ÊTRE EXACTEMENT TEL QU’ILLUSTRÉS
쐃
1. Poignées
2. Plaques chauffantes
antiadhésives
3. Verrou
1. Socle de rangement
du cordon électrique
2. Témoin lumineux
Courant/Température
CONSEILS DE SÉCURITÉ POUR LE FIL ÉLECTRIQUE
1. Ne jamais tirer sur le fil ou sur l’appareil
2. Pour brancher la fiche : Attraper fermement la fiche et la guider dans la prise.
3. Pour débrancher l’appareil, attraper la fiche et l’enlever de la prise.
4. Avant chaque usage, inspecter le fil électrique pour coupures ou marques d’usure. Pour tous
reseignements, appeler Assistance aux Consommateurs au 1-203-926-3230.
5. Ne jamais enrouler le fil trop étroitement autour de l'appareil car cela pourrait exercer trop
de pression sur le fil à l'endroit ou il entre dans l’appareil et pourrait l'effilocher et le
faire casser.
NE PAS UTILISER L’APPAREIL SI LE FIL ÉLECTRIQUE EST ENDOMMAGÉ, SI L’APPAREIL NE
FONCTIONNE QUE DE FAÇON INTERMITTENTE OU S’IL NE FONCTIONNE PLUS DU TOUT.
Cet appareil est pour USAGE DOMESTIQUE UNIQUEMENT Il peut être branché dans
n’importe quelle prise électrique CA (courant ordinaire) Ne pas utiliser un autre type de
prise électrique.
CARACTÉRISTIQUES :
• Distribution rapide et uniforme de la chaleur contrôlée thermostatiquement.
• Le témoin lumineux de courant/température s’allume quand on branche l’appareil
mais s’éteint et s’allume car le thermostat maintient automatiquement le préparateur
de sandwich à la température correcte.
• Loquet pour fermer les poignées.
• Les poignées en plastique uniques ne chauffent pas pendant la cuisson.
• Le socle de l’appareil permet d’y entourer le cordon électrique et de le ranger
facilement.
AVANT D’UTILISER POUR LA PREMIÈRE FOIS
Après avoir déballé l’appareil, ouvrir le couvercle et essuyer les plaques inférieures et
supérieures avec un chiffon humide puis essuyer. Brosser ou essuyer les plaques avec
une petite quantité d’huile végétale ou d’aérosol de cuisine antiadhésif.
POUR UTILISER
1. Insérer la fiche fermement dans la prise électrique. Le témoin lumineux de
courant/température s’allumera.
2. Mettre une petite quantité d’huile végétale ou d’aérosol antiadhésif sur les deux
plaques et fermer le boîtier pour faire chauffer l’appareil.
3. Le témoin lumineux de courant/température s’éteindra après 4-6 minutes, indiquant
que l’appareil est prêt à être utilisé.
4. Préparer les sandwichs en beurrant la surface extérieure du pain et en plaçant les
ingrédients désirés à l’intérieur. Soulever le verrou du couvercle et ouvrir l’appareil,
placer les sandwichs sur les plaques chauffantes. AVERTISSEMENT : La surface de
cuisson est chaude, manipuler avec précaution.
5. Fermer le boîtier pour que le sandwich soit placé de façon régulière, verrouiller la
poignée. Le temps normal de cuisson est de 3 à 6 minutes pour chaque sandwich.
Le témoin lumineux de courant/température s’éteint et s’allume pendant que le
thermostat maintient automatiquement le préparateur de sandwich à la température
correcte.
6. Enlever les sandwichs des plaques chauffantes avec un ustensile en plastique (non
métallique). ATTENTION AVEC LES SANDWICHS, les garnitures seront très chaudes.
Laisser refroidir pendant quelques instants avant de consommer.
7. Débrancher le cordon d’alimentation après la cuisson et laisser refroidir l’appareil.
On peut créer ses sandwichs préférés rapidement et facilement. Suivre ses propres
recettes ou voir ci-dessous pour d’autres recettes.
UTILISATION
RECETTES DE SANDWICHS
PETIT DÉJEUNER :
SANDWICH DE PETIT-DÉJEUNER (Donne 2 sandwichs) :
2 œufs (battus)
SM-1.Pub177740-00 11/9/01 3:21 PM Page 14
Page 9

2/3 de tasse de fromage râpé (cheddar, Monterey Jack ou Suisse)
1/4 de tasse de viande cuite ou de légumes
4 tranches de son pain favori (beurre ou margarine en option)
Placer deux tranches de pain, côté beurré vers le bas, sur les plaques chauffantes.
Placer le fromage au centre de chaque tranche. Verser doucement l’œuf battu sur le
fromage et ajouter la viande cuite (jambon, bacon) ou les légumes. Surmonter avec les
tranches de pain restantes, côté beurré vers le haut. Fermer et verrouiller le couvercle.
Cuire pendant 2 minutes.
ŒUFS POÊLÉS ( Donne 2 portions) :
4 œufs
Épices (à son goût)
Utiliser 3/8 de cuillerée à thé de beurre/margarine
Bien brosser le dessus et le dessous du beurre ou de la margarine pour donner du goût.
Casser un œuf directement dans chaque creux de plaque chauffante (on peut faire cuire
entre 1 et 4 œufs
à la fois)
Fermer le couvercle mais ne pas verrouiller. Faire cuire pendant 1 à 3 minutes pour
obtenir les résultats désirés.
DÉJEUNER OU EN-CAS
SIMPLE SANDWICH AU FROMAGE FONDANT (Donne 1 sandwichs) :
2 tranches de n’importe quel pain
1/4 de tasse de fromage râpé ou deux tranches
Mettre une tranche de pain sur un côté des plaques chauffantes. Ajouter le fromage.
Surmonter de l’autre tranche. Fermer et verrouiller le couvercle. Cuire pendant
2 minutes.
MONTE-CRISTO (Donne 2 sandwichs) :
2-tranches minces de fromage Suisse
1 œuf
4 tranches de pain blanc
1/4 de tasse de lait
4-tranches minces de jambon cuit
Préchauffer l’appareil. Placer une tranche de jambon, une tranche de fromage Suisse et
une autre tranche de jambon (toutes coupées à la taille du pain) sur chacune des deux
tranches de pain.
Surmonter des tranches de pain restantes. Mélanger le lait et l’œuf, tremper les
sandwichs un côté à la fois dans le mélange. Placer sur les plaques chauffantes. Fermer
le couvercle, verrouiller et faire cuire entre 2 et 3 minutes.
FONDANT THON (Donne 1 sandwich) :
2 tranches de pain
1/2 tasse de thon
1 cuillerée à table de céleri haché
1 cuillerée à table d’oignon haché
2 cuillerées à table de mayonnaise
3/8 de cuillerée à thé de moutarde
1 cuillerée à table de poivron vert haché
1 tranche de fromage
14
15
Cet appareil n’a besoin que de peu d’entretien. Il ne contient pas de pièces réparables
par l’utilisateur. Ne pas essayer de le réparer soi-même. Apporter à un réparateur
qualifié si des réparations sont nécessaires.
POUR NETTOYER : Toujours débrancher l’appareil de la prise et attendre qu’il ait refroidi
avant de nettoyer. Il n’est pas nécessaire de démonter l’appareil pour le nettoyer.
Essuyer avec une serviette en papier sèche pour absorber l’excès d’huile. Brosser les
miettes des rainures et essuyer avec un chiffon humide et un savon doux. Ne jamais
plonger dans l’eau. Éviter d’utiliser des ustensiles en métal ou pointus car ils peuvent
rayer la surface antiadhésive. Ne pas utiliser de produits nettoyants ou de produits pour
four sur les plaques.
Pour nettoyer les poignées et autres pièces utiliser un chiffon humide avec un savon
doux puis sécher.
POUR RANGER : Débrancher l’appareil et le laisser se refroidir. Enrouler le cordon
électrique de façon lâche, jamais de façon serrée, autour du socle de rangement du
cordon. Ne pas créer de tension sur le cordon là où il entre dans l’appareil car cela
pourrait le faire s’effilocher. Ranger l’appareil dans sa boîte ou dans un endroit sec.
ENTRETIEN ET NETTOYAGE
Mélanger le thon, le céleri, l’oignon, le poivron vert et la mayonnaise – sur la tranche de
pain dans l’appareil. Ajouter la tranche de fromage et surmonter de la tranche de pain
restante. Fermer le couvercle, verrouiller et cuire pendant 7 minutes.
DESSERTS:
FRIANDISES À LA BANANE (Donne 2) :
4 tranches de pain
1-2 cuillerées à thé de sucre
1 banane pelée
Beurrer l’extérieur du pain et placer deux tranches de pain, côté beurré dessous, dans
l’appareil. Couper la banane et en placer la moitié sur chaque tranche de pain,
saupoudrer de sucre. Surmonter des tranches restantes de pain et griller pendant
1-1/2-2 minutes
CHAUSSONS AUX POMMES (Donne 4) :
2 cuillerées à table, pomme, ou
1-cuillerée à thé de sucre semoule (glace)
2 cuillerées à table de garniture aux pommes en boîte
3/8 de cuillerée à thé de cannelle
**En Option : 1 cuillerée à table de sultanas, raisins secs, pain au raisin.
Placer une tranche de pain (côté beurré dessous) dans l’appareil. Faire un creux et
ajouter la pomme. Saupoudrer de (glace) sucre et de cannelle. Surmonter d’une tranche
de pain (côté beurré vers le haut). Baisser le couvercle et griller pendant 1 minute.
Servir immédiatement.
SM-1.Pub177740-00 11/9/01 3:21 PM Page 16
Page 10

FULL ONE-YEAR WARRANTY
Applica warrants this product against any defects that are due to faulty material or
workmanship for a one-year period after the original date of consumer purchase. This
warranty does not include damage to the product resulting from accident or misuse. If
the product should become defective within the warranty period, we will repair it or
elect to replace it free of charge.
This warranty gives you specific legal rights and you may also have other rights which
vary from state to state or province to province. Answers to any questions regarding
warranty or service locations may be obtained by calling Consumer Assistance and
Information: 1-203-926-3230.
UN AÑO COMPLETO DE GARANTIA
Applica garantiza este producto contra cualquier defecto originado por fallas en los
materiales o en la mano de obra por un período de un año a partir de la fecha original
de compra. Esta garantía no incluye daños al producto ocasionados por accidentes o
mal uso. Si el producto resulta con defectos dentro del período de garantía, lo
repararemos o reemplazaremos de ser necesario, sin cargo alguno.
Esta garantía le otorga derechos legales específicos, y usted podría tener otros
derechos que pueden variar de estado a estado o de provincia a provincia en su país.
Si tiene alguna pregunta acerca de la garantía o de la localidad de las sucursales de
servicio, diríjase al centro de información y asistencia para el consumidor al número:
1-203-926-3230.
GARANTIE COMPLÈTE DE UN AN
Applica garantit ce produit pour un an à compter de la date d’achat ou de réception en
cadeau, contre tout vice de matière ou de fabrication. La garantie ne couvre pas les
dommages causés par un accident ou une mauvaise utilisation. Advenant le
fonctionnement irrégulier du produit dans les délais prescrits, il sera réparé ou
remplacé, à notre gré, sans frais.
Les modalités de la présente garantie donnent des droits légaux spécifiques.
L’utilisateur peut également se prévaloir d’autres droits selon l’état ou la province qu’il
habite. Adresser toute question relative à la garantie et au service en communiquant
sans frais avec le service à la clientèle au numéro suivant : 1-203-926-3230.
SM-1.Pub177740-00 11/9/01 3:21 PM Page 18
Page 11

Applica Consumer Products, Inc.
Shelton, CT 06484
http://www.applicainc.com
2001/10-12-59E/S/F SM-1
Copyright © 2001 Applica Consumer Products, Inc.
Printed in People’s Republic of China
Impreso en la República Popular de China
Imprimé en Republic populaire de Chine
Pub#177740-00-RV00
SM-1.Pub177740-00 11/9/01 3:21 PM Page 20
 Loading...