

Page 1
APPLICADS
DS manual 081606A
APPLICA USB to PS2 adaptor APCA-U-KVM (USB/PS2)
APPLICADS & PRO Installation
Thank you for selecting Applica solutions for your cost-effective, multi-user computing!
Your APDS-XP and APDSPRO-XP DSpackaging includes:
APS-XP Applica XP SP2 software (CD)
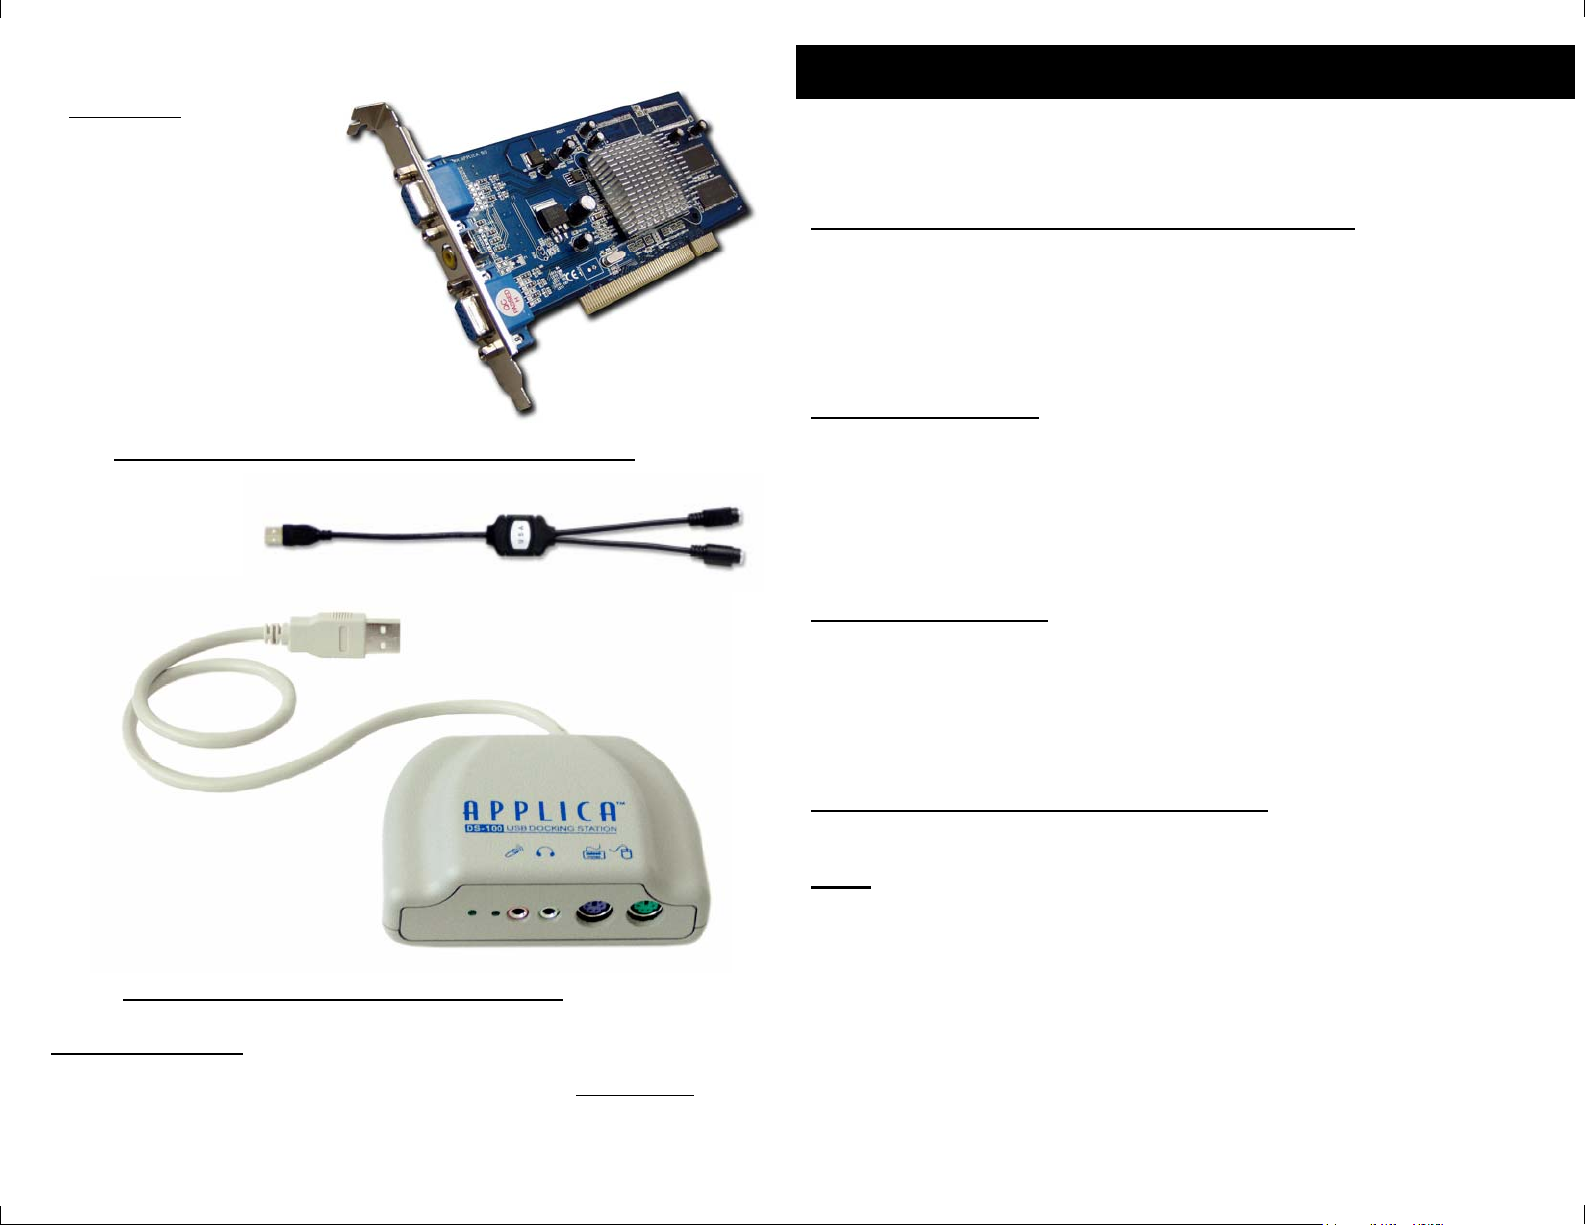
APDS-101 ApplicaDS PCI card
for APDS
APCA-U-KMU Applica USB Keyboard Mouse adapters (2 units)
for APDSPRO
ADS100 Applica Multimedia USB Docking station ( 2units)
Installation Introduction
Applica XP installation is different than the standard installation of most application software you have experienced in the past. Applica software is an addition to the operating
system, and the installation process must be executed correctly to ensure proper operation of the product. Although we have tried to make the installation as simple as possible,
the variations in computer systems could possibly make your installation unique and
therefore you may require assistance. Please follow these step by step instructions to
ensure your device is properly installed.
Preparing for Installation
Please verify the items listed below. This will help ensure proper installation of Applica XP
hardware and software.
♦ Install and register Windows XP and all applications that you will run on this
PC. Make sure Windows XP is running Service Pack 2 . (Start → Control
Panel→ System→ General)
The “System:” section will indicate if Service Pack2 is currently installed.
Also check at the bottom of these statistics that your PC has at least 512MB of
RAM .
Installing the Applica XP hardware and software
The Applica PCI consists of a PCI multi-display adapter and a USB Keyboard Mouse Converter.
APPLICA Docking Station with Sound ADS100
Technical Support
If you encounter any problems that cannot be quickly solved by following the problem
solving checklist and display troubleshooting sections, please call (818)565-0011
between the hours of 8:30 AM to 4:00 PM PST Monday-Friday
or e-mail Applica technical support at support@applica.com
Step 1
Shut down the computer. (Start→Turn Off Computer→Turn Off)
Install the ApplicaDS card in the selected PCI slot by firmly applying pressure along the top of
the board until it slides into place (fully seated and level). Press the latch (or reinstall the setscrew) to secure the PCI card’s chrome bracket into place. Check that all other PCI boards
have not been accidentally lifted out of their slots.
Plug the second monitor, keyboard and mouse into the appropriate connectors on the board.
Turn on your computer. The computer will automatically recognize that the new hardware is
present and will install the appropriate PCI driver. However, the new monitor will not start
completely until the Applica XP software is installed.
Install the USB converter in any USB port. Connect the second ps/2 keyboard and mouse
to the converter.
Page 2
Installing the Applica XP hardware and software
The Applica PCI consists of a PCI multi-display adapter and a USB Keyboard Mouse Converter.
Step 1
Restart your PC so that any pending installations of other products or updates are fully
completed.
(Start→Turn Off Computer→Restart)
Make sure that your system starts up and is running normally
.
Step 2
Shut down the computer (Start→Turn Off Computer→Turn Off). After shutdown, make
sure you also unplug the power cord from the computer or from the electrical outlet.
Remove the computer cover and locate the PCI slots on the large circuit board. Most
computers have several PCI slots. At the end of an unused PCI slot, locate its chrome
filler plate. Lift the latch (or unscrew and save the set-screw) that is retaining the
chrome filler plate.
Note: Some older computers will also have ISA slots (those are the longer slots),
which cannot
be used for Applica.
Step 3
Ground yourself briefly by touching a metal object (such as the computer chassis) with
your fingers, and then remove the ApplicaDS PCI board from its shielded plastic envelope.
Step 4
Install the PCI card in the selected PCI slot by firmly applying pressure along the top of the
board until it slides into place (fully seated and level). Press the latch (or reinstall the setscrew) to secure the PCI card’s chrome bracket into place. Check that all other PCI boards
have not been accidentally lifted out of their slots.
Note: If you are adding more than one user to your PC do not install additional cards
at this point. It is important to have one new user fully operational prior to installing
additional users. This will simplify your installation process and will reduce troubleshooting time if you encounter difficulties.
Step 5
Place the computer cover back to ensure proper airflow within the case.
Step 6
Plug the second monitor, keyboard and mouse into the appropriate connectors on the
board.
Step 7
Turn on your computer. The computer will automatically recognize that new hardware is
present and will install the appropriate PCI driver. However, the new monitor will not start
completely until the Applica XP software is installed.
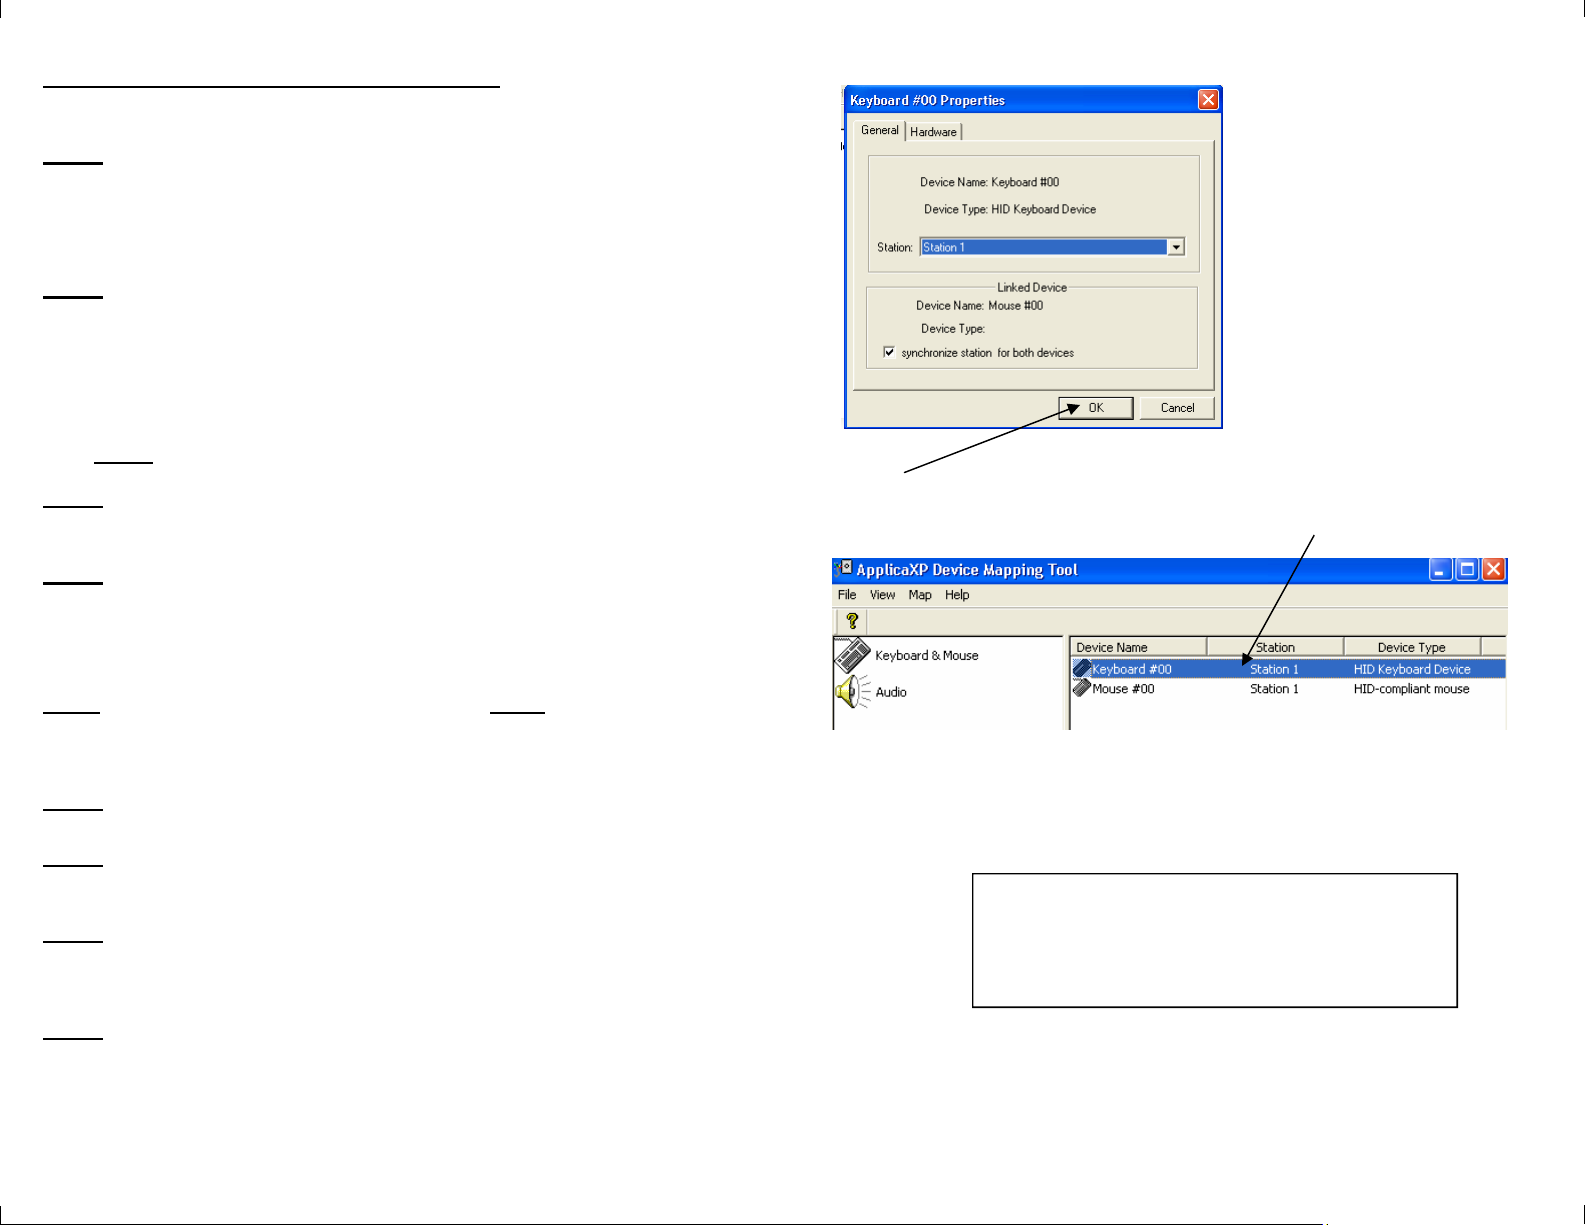
Click OK
The system will map keyboard and mouse to Station 1 (See below)
Repeat the same process for each station.
For sound options you will need to reboot the PC
after mapping, to ensure the sound is mapped to
the proper station.
Sound can be added by ordering ADS100 applica
docking station
Step 8
Install the USB converter in any USB port. Connect the second ps/2 keyboard and
mouse to the converter.
Before you begin please make sure that HT is enabled in your BIOS.
Page 3

Double click on Keyboard #00
Keyboard #00 Properties will be displayed as shown below:
From drop-down menu, select Station 1:
Installing the APPLICADS Drivers
When Windows is started up you will see an information bubble pop-up from the system
tray. The system will automatically detect the new hardware for the Radeon card and the
ACPI Multiprocessor (HT).
If the ACPI Multiprocessor is installed you will be prompted to restart.
When your computer restarts, you will need to go into “Device Manager”. You can do this
by clicking on the Start Task bar -> Settings -> Control Panel -> then the System Icon.
This will bring you to the System properties. Click on the Hardware tab, and then click
on the “Device Manager” button.
In “Device Manager”, check to make sure HT is enabled by scrolling down the list to
“Processors.” click the on the + . If HT was enabled correctly you will see the same
processor appear twice, as shown below.
Next, system will install Radeon drivers, as shown below.
Page 4

Extending Monitors Before Installing ApplicaXP
To ensure that the video cards and the BIOS of the computer are compatible, it is
very important to extend the monitors before installing the multi- user software.
Go to the setting> control panel >display properties
Select < Extend my Windows desktop> for each screen ( 2 and 3)
Connecting the USB to PS2 Applica Adaptors ( Applica supports only
it’s own converters)
Connect all the devices to the USB port of your computer.
All the keyboards and mice should work on the host screen.
Reboot your computer. All the screens attached to the PC should display a the
desktop of the host PC.
Installing ApplicaXP
To install ApplicaXP from the CD, use the serial number provided in the CD
sleeve.
Boot the computer.
Mapping the Keyboard and Mouse
Go to Start > - Programs - ApplicaXP - ApplicaXP Device Mapper
Remember that unless registered, Applica will stop
working 30 days after installation. To avoid this problem,
make registration is completed before it expires.
The computer need to be connected to internet in order
to register.
 Loading...