

Page 1
45350
INSTRUCTION SHEET
CES AND CESD 60 AMPERE FACTORY SEALED
RECEPTACLES: EXPLOSION-PROOF
Grounding thru Extra Pole and Shell, Delayed Action CES- Class I, Groups C and D; CESD- Class 1, Group D
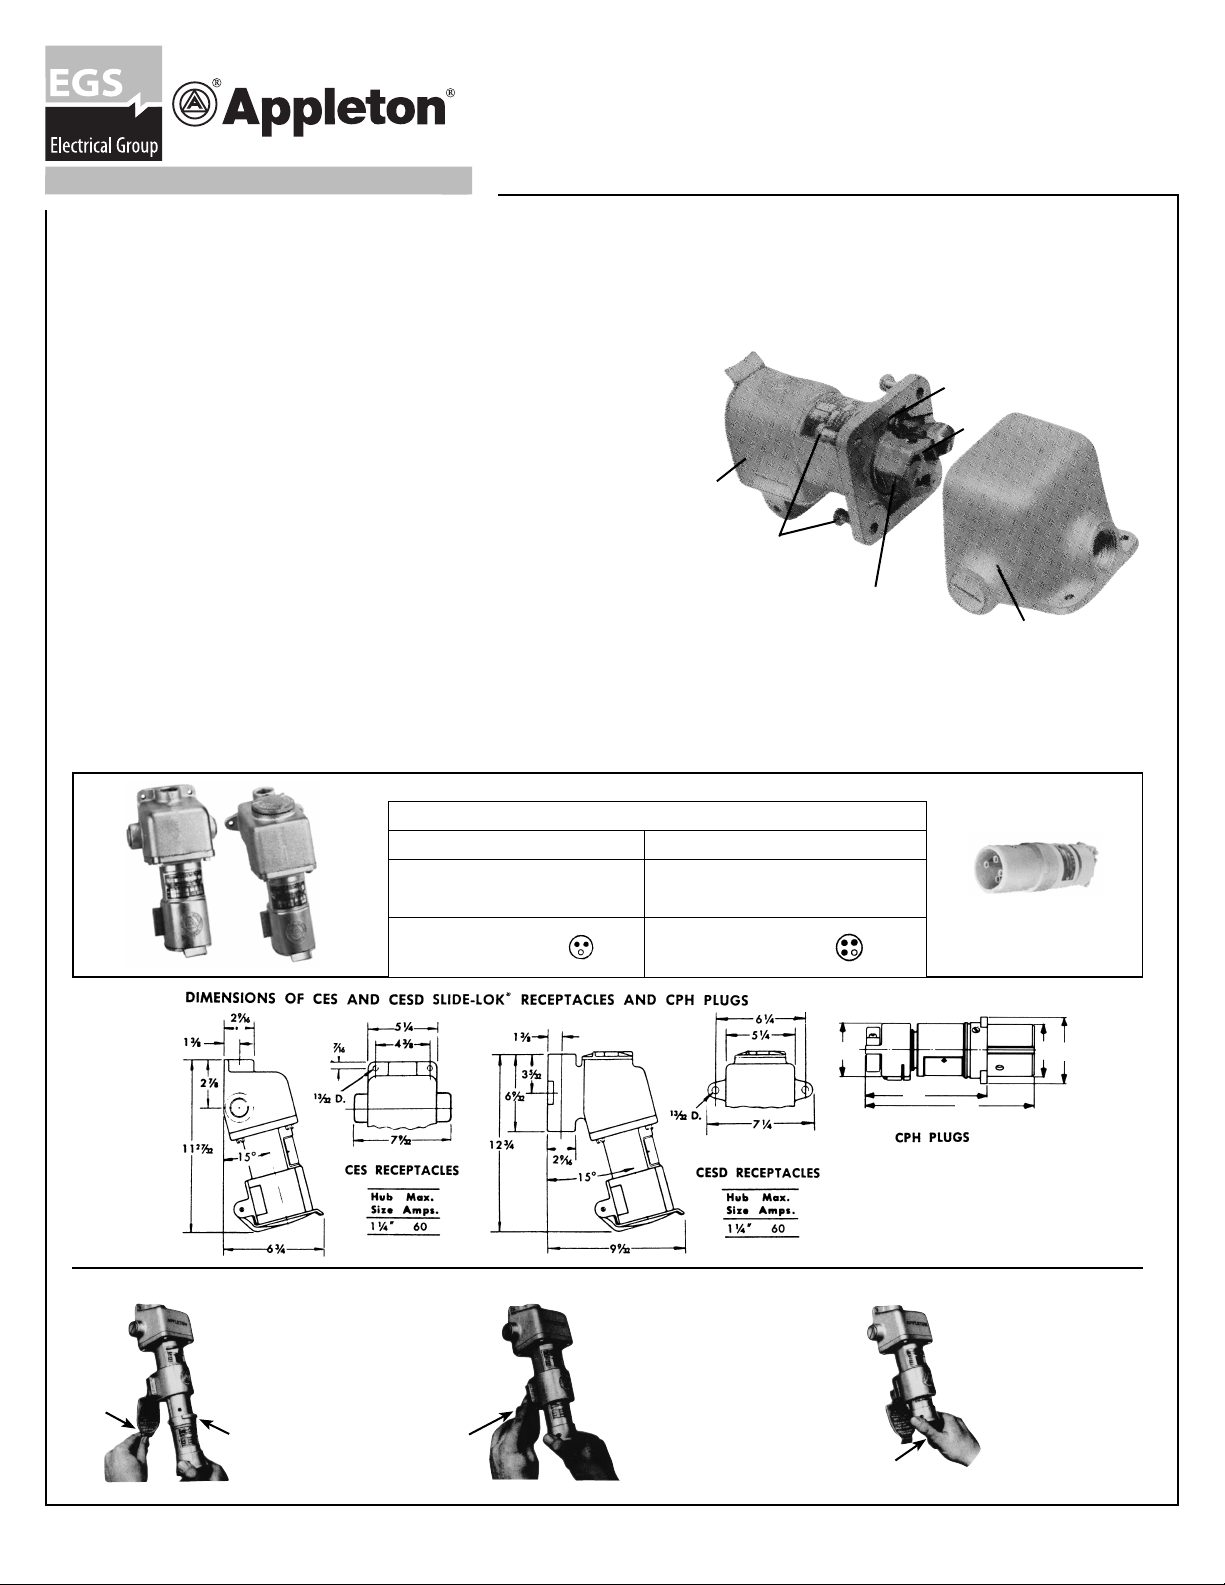
INSTRUCTIONS FOR CES AND CESD SLIDE LOCK RECEPTACLES
TO DISASSEMBLE RECEPTACLE
1. Remove screws (2).
2. Remove screw (4) and washer (5).
3. Rotate terminal holder counter-clockwise.
NOTE: Steps 2 and 3 are not required for making connections with conductors.
TO CONNECT CONDUCTORS TO RECEPTACLES
1. Strip insulation from ends of individual conductors.
2. Loosen screws (3) and slide prepared ends of conductors into contact recesses,
observing proper polarity. Tighten screws .
TO REASSEMBLE RECEPTACLE
1. Replace Receptacle housing (1) on Unilet (6), replace screws (2) and tighten.
POLARITY AND PHASE ROTATION
WARNING: CES/CESD receptacles are polarized so that the plug will enter the receptacle only one way. To reduce the risk of shock
or injury, installer must check and test to ensure that all circuits are according to plan and that there are no unwanted opens, shorts
or grounds. Do not apply power until the following steps are completed:
1. Test to verify correct phasing and ground connections are made between plug and receptacle terminals.
2. Test insulation resistance by meggering, high voltage or hi-pot test, to be sure the system does not have any short
circuits or unwanted grounds.
1
2
3
4
5
6
CPH PLUGS FOR USE WITH CES AND CESD RECEPTACLES
FOR USE WITH
PLUGS RECEPTACLES
CPH-6023 B C CES/CESD-6023
CPH-6034 B C CES/CESD-6034
60 AMP
CES
CESD
60 AMP
2W 3P 3W 4P
Using Appleton SLIDE-LOK CES and CESD Plugs and Receptacles
1.
Pull cover down and insert
plug - with nameplates in
tandem position. Push plug
1.
in until it stops.
1.
2.
2.
With cover fully open, push
cross slide all the way to the
right. Spring cover with instruction is automatically held open.
35/16
CPH (60 Amp.)
26/11
31/16
59/13
84/9
3.
Push plug into receptacle
as far as it will go to
engage terminals.
3.
Rev. C 06/06/2007
 Loading...