

Page 1

Repairing an LCD Display with failed capacitors Failed Capacitors
Repairing an LCD Display with failed capacitors
Failed Capacitors
Tools used in this guide
#00 Phillips Screwdriver (1)
Soldering iron & solder (1)
Bad capacitors can be identified by looking at them. This guide will walk through the steps of opening
the monitor, locating bad capacitors, selecting replacements, and the soldering required.
Most LCD monitors use Phillips screws.
© 2010 iFixit — CC BY-NC-SA www.iFixit.com Page 1 of 5
Page 2

Repairing an LCD Display with failed capacitors Failed Capacitors
© 2010 iFixit — CC BY-NC-SA www.iFixit.com Page 2 of 5
Page 3
Repairing an LCD Display with failed capacitors Failed Capacitors
Step 1 - Failed Capacitors
These steps are as generic as possible, since most LCD displays
use a similar design. However, you will need to think carefully
about how to take the display apart so you can put it back together,
and have it still work!
The images are from Repair ViewSonic VX924 LCD Monitor
Blinking Green power Button (youtube). You should watch it
through once to get an idea for what it's like.
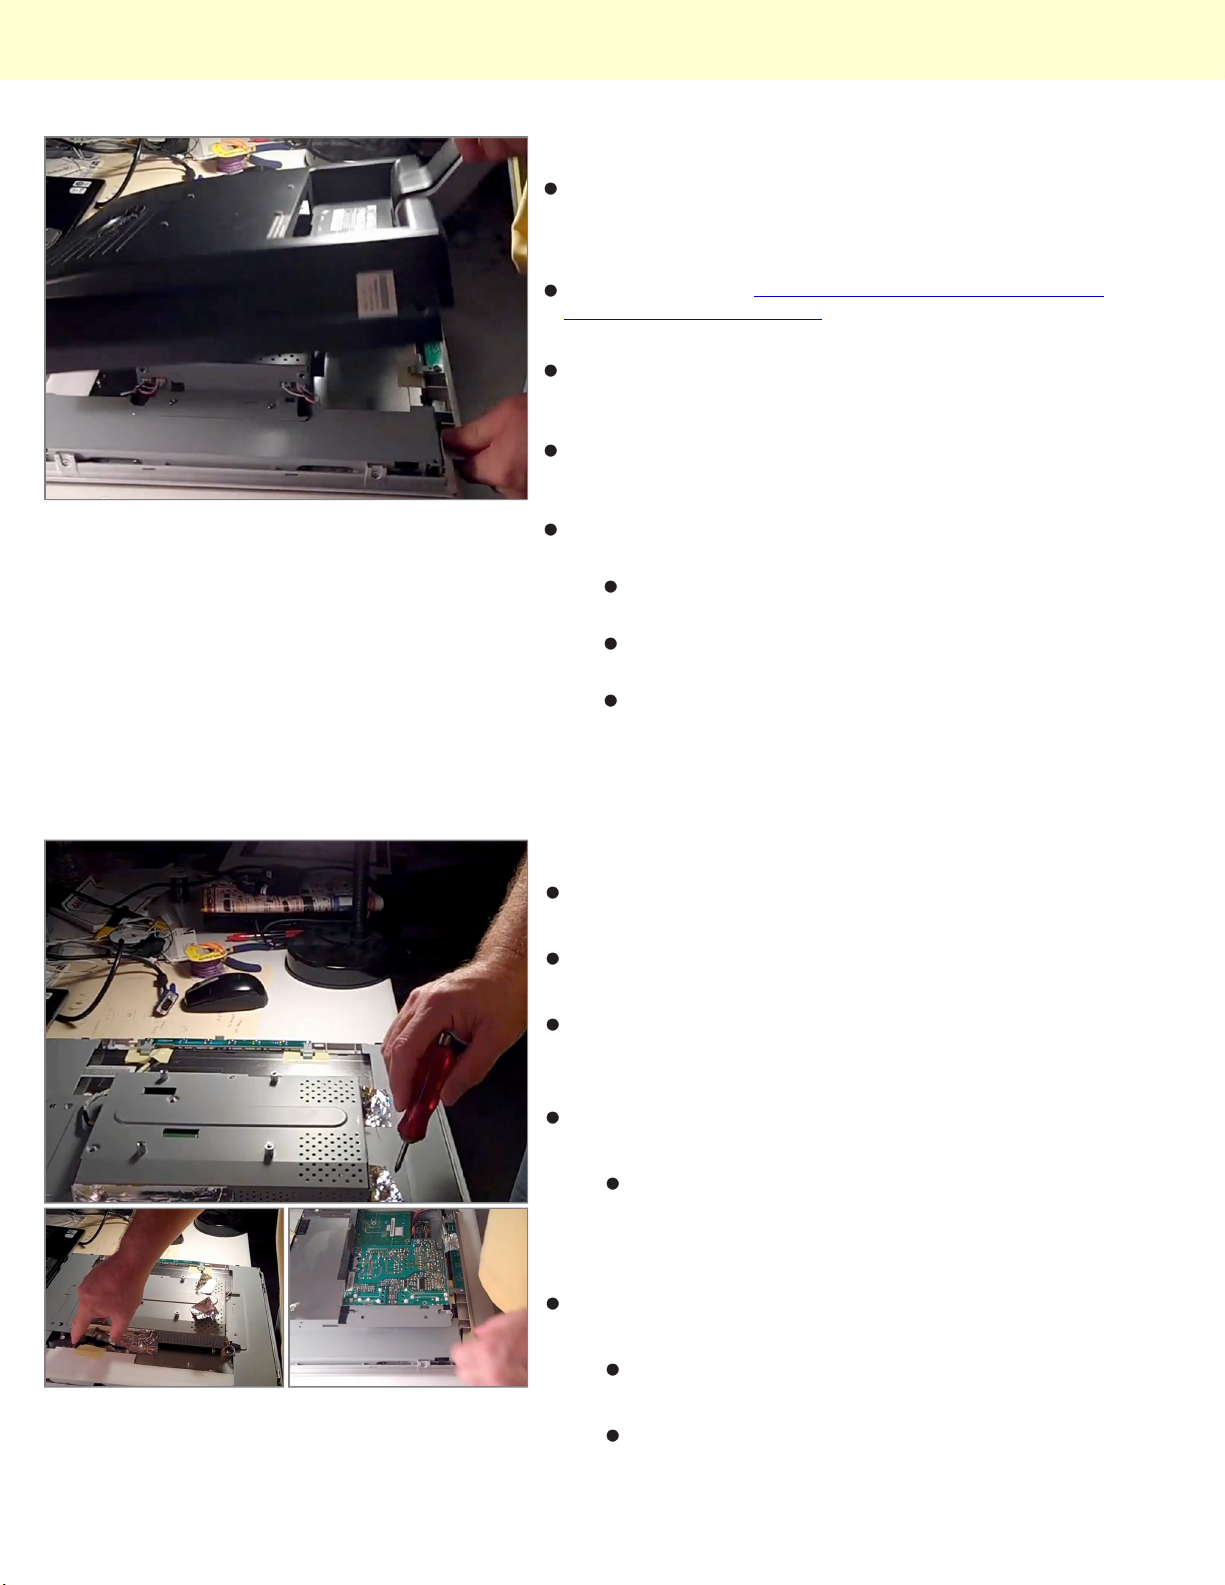
First, remove the plastic back of the monitor. The stand/pedestal
may be attached by screws, or the back and the stand may all be
one unit.
Keep the screws you removed with the plastic back. That way they
won't get mixed up with the screws you take out of the internal
parts.
There is also probably some sort of snap-on device molded into
the plastic back.
In the video, a piece of steel is used. A screwdriver or a
piece of strong, flat plastic can also do the job.
Snapping the back off should take some strength; however,
too much force will permanently damage the plastic.
Start with very little force and poke the edges of the back. If
one corner moves easily but another corner seems solid,
then you may have missed a screw. Gradually increase the
force you are using until the snaps come off.
Step 2
After removing the back, you need to unscrew the
power unit.
Some displays use an external "brick" and have a 12V
DC power plug.
Most displays, especially larger ones, have an AC plug
(wall outlet). This guide shows a display with an AC
plug.
Locate the power unit and remove any screws to
access it.
You may also need to remove protecting tape.
This tape blocks RF noise ("static") from distorting
the display. It is ok to cut the tape carefully, or you
may be able to unpeel it.
Unplug all the cables that come from the power unit
and supply power to the other parts of the display.
Be sure you memorize how they go back
together!
It's usually a good idea to pull out your digital
camera and shoot pictures of the boards before
you take them apart. This will help you put them
together the same way.
© 2010 iFixit — CC BY-NC-SA www.iFixit.com Page 3 of 5
Page 4
Repairing an LCD Display with failed capacitors Failed Capacitors
Step 3
Identifying bad capacitors is fairly simple. Start with a
search for images of bad capacitors to see what they
look like.
If one capacitor has failed, there is a good chance the
ones around it will fail, or may have partially failed.
They were manufactured around the same time. Also,
when a component fails, the rest of the circuit can be
damaged by the electrical stress.
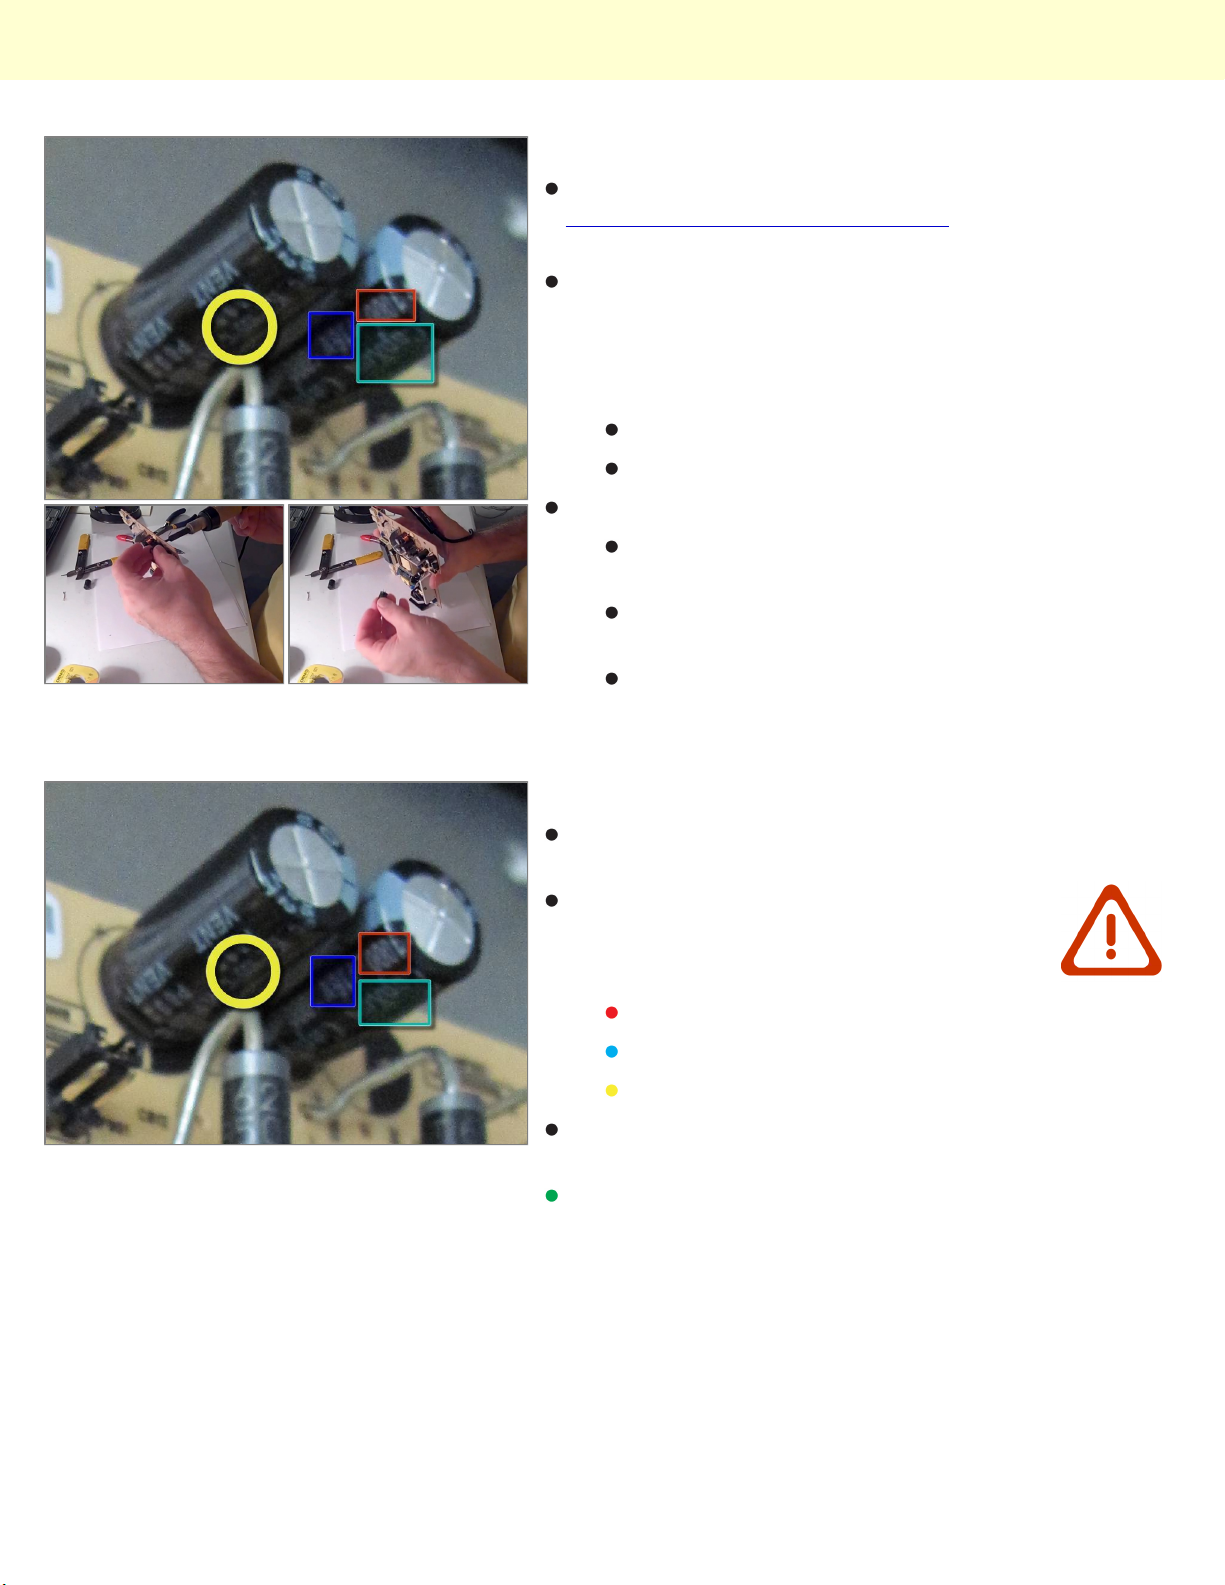
Each capacitor is coded on the side with:
Doing them all at the same time is fairly easy.
New capacitors cost a few cents.
Manufacturer and/or Product (Green box in the
image)
Red box: Capacity (micro Farads); Blue box:
Voltage (V); Yellow circle: Temperature Rating (C)
Notice also how the capacitor on the right has
obviously "blown out".
Step 4
You can get replacement capacitors from Mouser, Digikey, or Arrow, or a local electronics parts store.
Be sure to match all the requirements:
Order replacements for all the "can" shaped capacitors
on the board.
Obviously, the manufacturer is not something you need
to match.
Capacity (micro Farads)
Voltage (V)
Temperature Rating (C)
© 2010 iFixit — CC BY-NC-SA www.iFixit.com Page 4 of 5
Page 5

Repairing an LCD Display with failed capacitors Failed Capacitors
Step 5
Use a screwdriver or piece of metal to short across the
legs of the old capacitors, while they are still in the
board. This will "short out" any remaining power left in
them so they don't spark or shock you while you do the
repair.
Using a soldering iron, remove the old capacitors. Then
solder in the new ones.
Replace the board and screw it into place.
Replace all the cables that you removed.
If you feel brave, you may want to test the display
before putting the plastic back on.
To reassemble your device, follow these instructions in reverse order.
This document was last generated on Dec 14, 2010.
© 2010 iFixit — CC BY-NC-SA www.iFixit.com Page 5 of 5
 Loading...