

Page 1
Repairing Apple Studio Display M2454 CCFL Inverter
Repairing Apple Studio Display M2454 CCFL Inverter
Tools used in this guide
2mm Hex Screwdriver
Phillips #2 Screwdriver
Step 1 - CCFL Inverter
First the back panels must be removed from the
monitor.
First remove the three 2mm hex screws from the top of
the monitors stand.
Then, locate and remove the four 2mm hex screws on
the corners of the back panel and remove them with the
2mm hex screwdriver.
Finally, the back panels can be removed by pulling the
main cable through the opening and sliding the panels
away.
Step 2
Remove the metal backing.
Remove the single screw at the top and the two
screws at the bottom of the monitor with #2 philips
head screwdriver.
With the screws removed, push metal backing toward
back of monitor to release its clips and pull away.
© 2010 iFixit — CC BY-NC-SA www.iFixit.com Page 1 of 3
Page 2
Repairing Apple Studio Display M2454 CCFL Inverter
Step 3
Now, with the circuitry exposed, locate the CCFL
inverter board.
Step 4
Now the connections from the board need to be
removed.
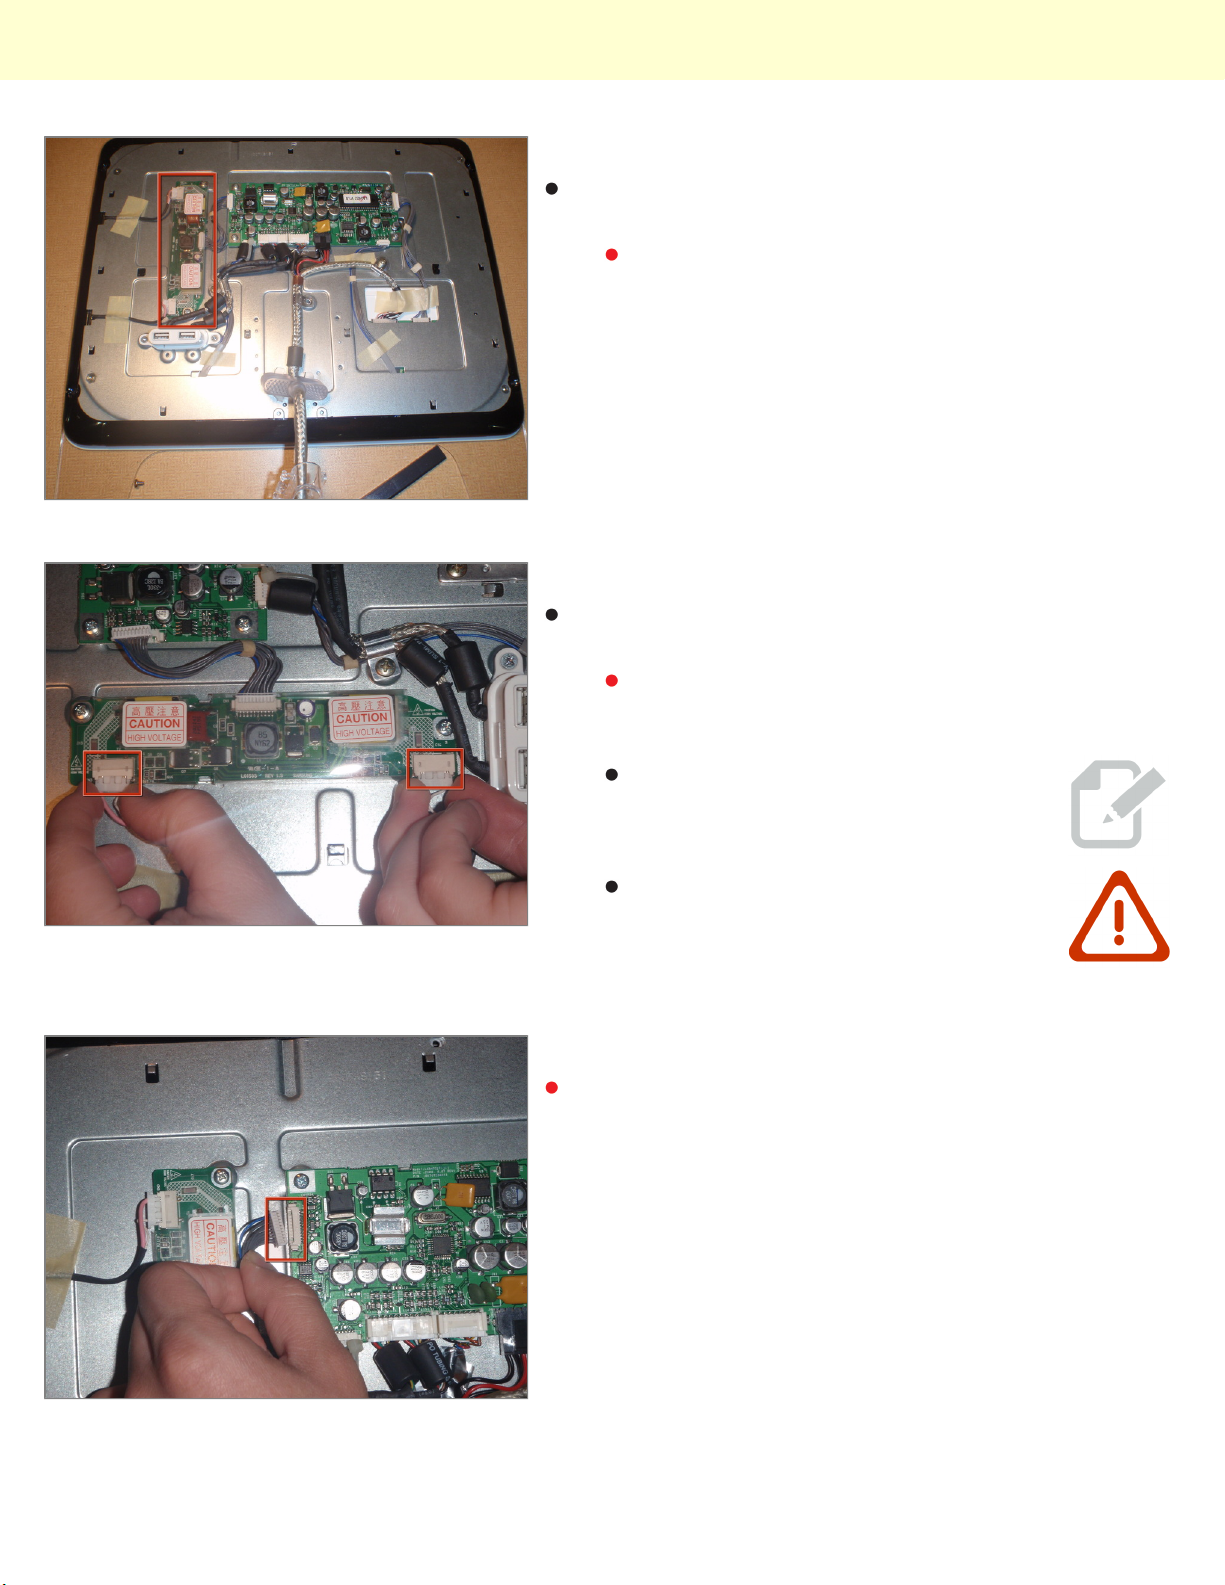
Look for the smaller of the two circuit boards with
two wires and a ribbon cable running out of it.
Remove the two cables on the left side of the
board, using a pin to insert into the two small
holes and then pull out.
This step may be easier with two
people.
Do not insert pin in hole with force or
you risk damaging the connector.
Step 5
Remove the ribbon cable on the right side of board by
pulling it away from the LCD main board with hand.
© 2010 iFixit — CC BY-NC-SA www.iFixit.com Page 2 of 3
Page 3
Repairing Apple Studio Display M2454 CCFL Inverter
Step 6
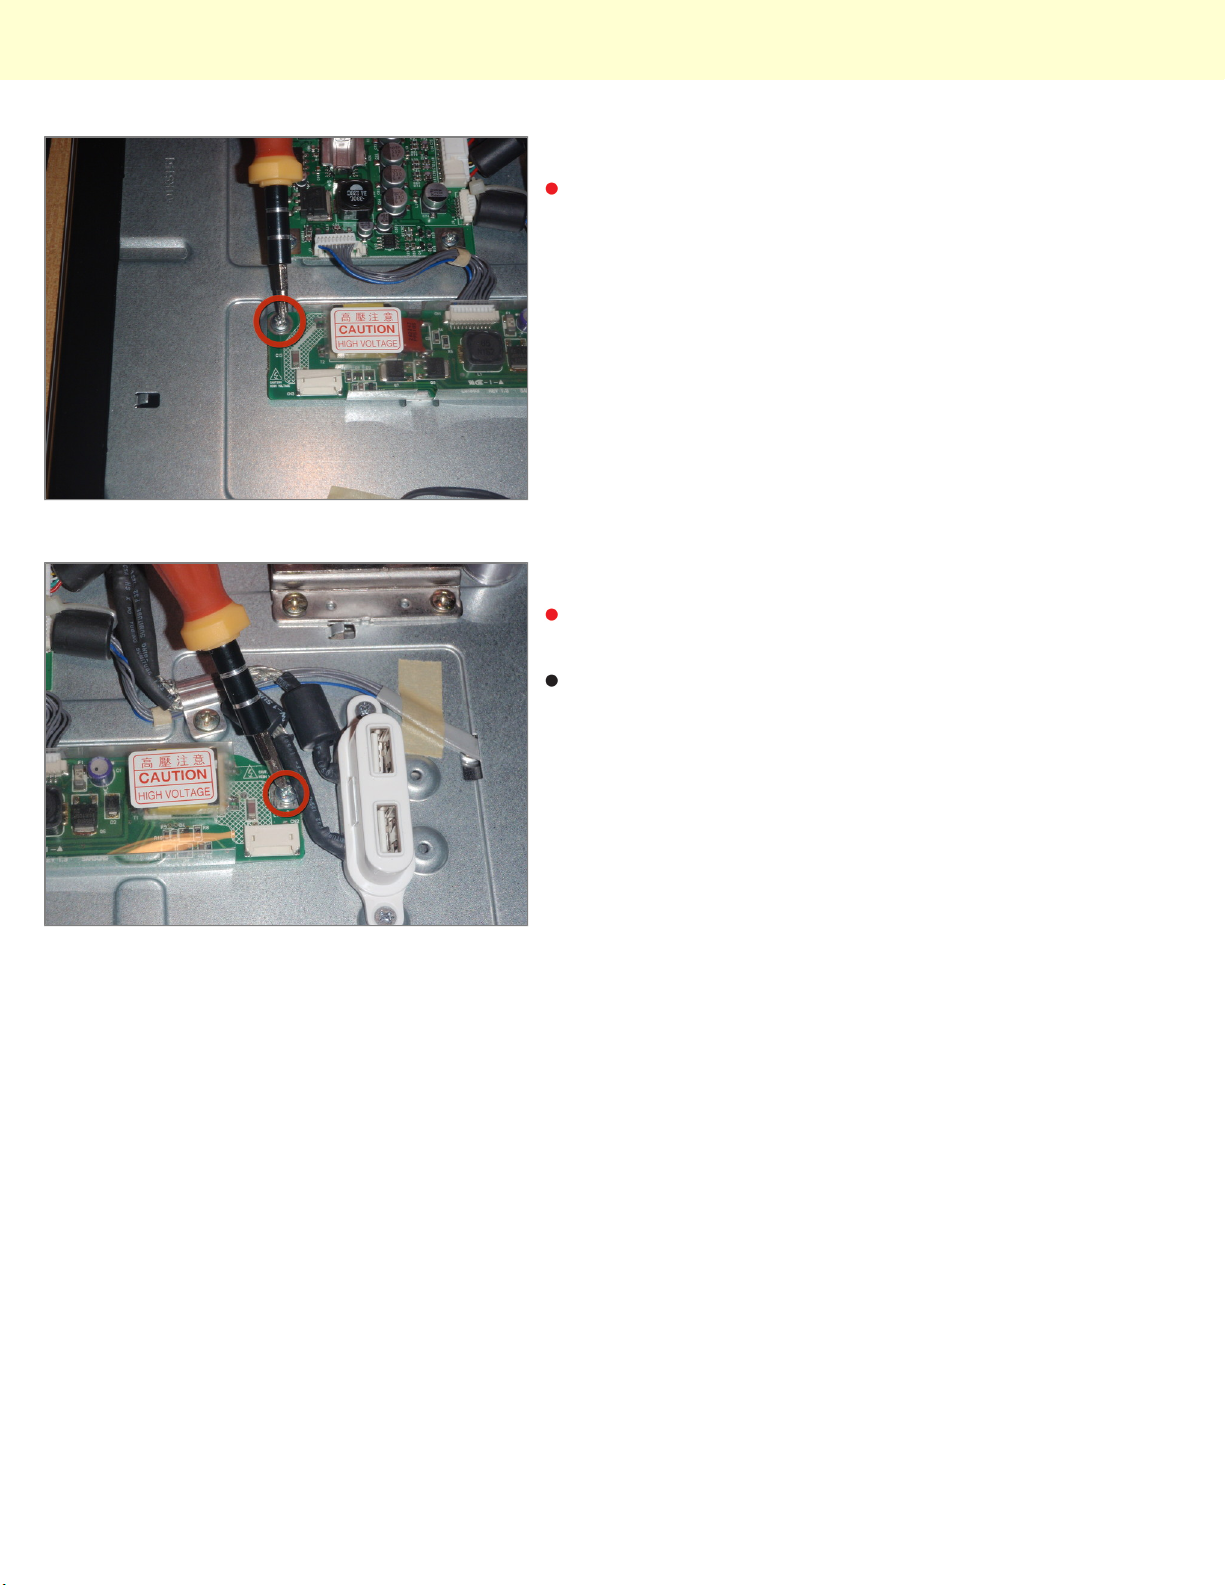
Remove the top philips head screws holding the board
to the monitor with #2 philips head screwdriver.
Step 7
Remove the bottom philips head screw and pull the
CCFL Inverter board away from monitor.
To replace this part with a new one, simply follow these
directions in reverse using the new board.
© 2010 iFixit — CC BY-NC-SA www.iFixit.com Page 3 of 3
 Loading...