

Page 1
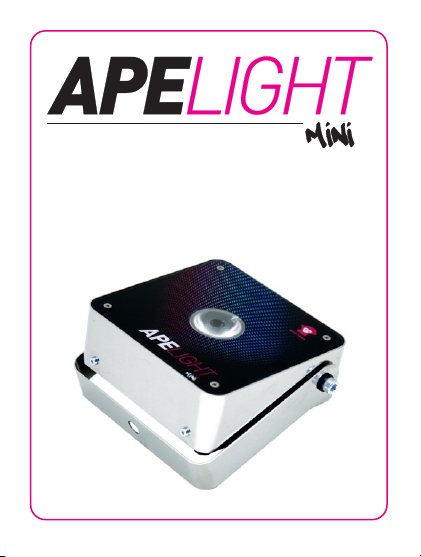
BEDIENUNGSANLEITUNG
INSTRUCTION MANUAL
Page 2

Page 3

Deutsch
Sicherheitshinweise
› Während des Betriebs des ApeLight mini und
während des Ladevorgangs entsteht Wärme. Sorgen
Sie daher für ausreichend Belüftung und decken
das ApeLight mini nicht ab. Falls Sie das ApeLight
mini im Tourcase (optional erhältlich) laden, muss
der Deckel des Tourcases während des
Ladevorgangs geöffnet bleiben.
› Benutzen Sie das ApeLight mini nicht in Bereichen,
in denen der Gebrauch von Funkgeräten verboten
ist.
› Schauen Sie nicht direkt in die LED. Dies kann zu
Schädigungen der Augen führen.
Allgemeines
› Das ApeLight mini besitzt unter der Linse auf der
Oberseite eine Power-LED. Achtung: Diese LED ist
sehr hell. Stellen Sie das Gerät ca. 30cm vor eine
helle Wand, um schöne Lichteffekte zu erzielen.
› Das Gerät besitzt 20 interne Programme mit festen
bzw. wechselnden Farben. Die Geschwindigkeit der
Farbwechsel können Sie einstellen. Die niedrigste
Stufe stoppt den Effekt.
2
Page 4

Deutsch
› Sie können das Gerät mit der dazugehörigen
Fernbedienung steuern. Für den professionellen
Einsatz ist das Gerät zusätzlich per DMX (W-APE)
von einem Lichtpult steuerbar. Hierzu ist ein
separater Funksender (MobiLight4/W-APETransceiver) nötig.
› Das Gerät kann einer von 4 Gruppen zugewiesen
werden. Im Auslieferungszustand befindet sich das
Gerät in Gruppe 1. Die Fernbedienung (bzw. ein WAPE-Transceiver) steuert jeweils alle Geräte der
gleichen Gruppe.
› Im Gerät befindet sich ein Mikrofon. Dieses kann
von der Fernbedienung aktiviert werden, um
passend zur Musik Lichteffekte zu erzeugen (SoundTo-Light).
Betrieb
Anschalten/Ausschalten
› Drücken Sie den Taster an der Rückseite des
ApeLight mini für ca. 1 Sekunde. Das Gerät schaltet
sich ein und zeigt das gleiche Programm und
Helligkeit wie vor dem Ausschalten.
› Zum Ausschalten drücken Sie den Taster erneut für
ca. 1 Sekunde.
3
Page 5

Die Verzögerung beim Ein- und Ausschalten dient als
Deutsch
Sicherung, um nicht ungewollt die Lampe zu bedienen.
Zuweisung einer Gruppe
Sie können ApeLight minis in Gruppen einteilen, um
z.B. Geräte in unterschiedlichen Räumen unabhängig
voneinander zu steuern.
› Direkt nach dem Einschalten des ApeLight mini
blinkt an der Fernbedienungen die LED der aktuelle
Gruppe des ApeLight mini. Im Auslieferungszustand
ist dies die erste Gruppe.
› Wenn Sie die Gruppe wechseln wollen, drücken Sie
sofort nach dem Anschalten des ApeLight mini die
"Group" Taste auf der Fernbedienung mehrfach, bis
die gewünschte Gruppe blinkt. Das ApeLight mini
bestätigt den Wechsel durch blaues Blinken.
Hinweis: Die Fernbedienung wechselt nach einiger Zeit
in den Stromsparmodus und reagiert dann nicht
automatisch auf das Einschalten des ApeLight mini.
Drücken Sie eine beliebige Taste der Fernbedienung,
um den Stromsparmodus zu beenden.
Steuerung per Fernbedienung
› Wählen Sie an der Fernbedienung die richtige
Gruppe aus. Drücken Sie die "Group"-Taste
mehrfach, bis die gewünschte Gruppen-LED kurz
4
Page 6
Deutsch
1 2 3 4
aktuel le
Gruppe
vorheriges
Progr amm
dunkler
Mikr ofon
An/Aus
Gruppe
wechseln
nächstes
Progr amm
schnell er
langsamer
Taschenlampe
Blackout
heller
aufleuchtet. Im Auslieferungszustand ist dies
Gruppe 1.
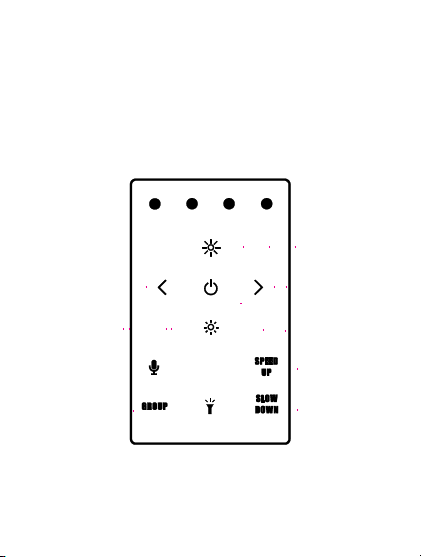
› Programme, Helligkeit, Geschwindigkeit und
Sound-To-Light-Modus können über die jeweiligen
Tasten der Fernbedienung gesteuert werden (siehe
Abbildung).
Tipp: Um alle Gruppen gleichzeitig zu steuern, drücken
und halten Sie die Group-Taste für ca. 2 Sekunden.
5
Page 7

Programm-Liste
Nr
Programm
1
Weiß
2
Rot 3 Orange
4
Gelb
5
Hellgrün
6
Grün 7 Zyan 8 Zyanblau
9
Blau
10
Blau-Magenta
11
Magenta
12
Pastellrot
13
Pastellgrün
14
Pastellblau
15
Blau > Rot
16
Magenta > Weiß
17
Weiß > Blau
18
Pastellrot > Pastellgrün > Pastellblau
19
Gelb > Magenta > Blue
20
Regenbogen
Tipp: Langer Druck auf die Tasten ‹ bzw. › der
Fernbedienung wechselt zum ersten bzw. letzten
Programm. Langer Druck auf "Slow Down" stoppt
einen Blink-Effekt bzw. Farbwechsel.
Deutsch
6
Page 8

Deutsch
Akku-Status/Laden des Akkus
› Wird die Helligkeit des ApeLight mini auf null
reduziert (per "Blackout- Taste" oder "DunklerTaste" der Fernbedienung), zeigt das Gerät mit sehr
niedriger Helligkeit den Ladezustand des Akkus an:
o LED glimmt grün: Ladezustand mehr als 50%
o LED glimmt rot: Ladezustand weniger als 50%
Hinweis: Die Berechnung des Ladezustands ist
erst nach einem vollständigem Lade/Entladezyklus genau.
› Bei vollständig leerem Akku blinkt das Gerät 3 Mal
rot und schaltet sich dann automatisch ab.
› Zum Laden des Akkus schließen Sie das
mitgelieferte externe Netzteil (5V bis 18V
Gleichspannung) bzw. das USB-Ladekabel an der
Rückseite des ApeLight mini an.
› Das ApeLight mini blinkt während der Ladung rot.
Sobald der Akku vollständig geladen ist, blinkt das
ApeLight mini grün.
› Das Gerät kann auch mit angeschlossenem Netzteil
verwendet werden. In diesem Falle wird der Akku
allerdings nicht oder nur sehr langsam geladen.
7
Page 9

Deutsch
Erweiterte Steuerung
Sound-To-Light mit Sound Master
Mit Hilfe eines W-APE-Transceivers können Sie
mehrere ApeLight mini von einem gemeinsamen
Mikrofon per Sound-to-Light steuern.
› Wählen Sie am W-APE-Transceiver als "Control
Mode" den Wert "Sound Master" aus. Sobald dieser
aktiv ist, verwenden alle ApeLight mini der gleichen
Gruppe (Group) den gemeinsamen Sender als
Sound-Quelle.
› Wird der Sender abgeschaltet, verwenden das
ApeLight mini wieder ihr eigenes Mikrofon.
8
Page 10

Deutsch
Steuerung von einem Lichtpult per DMX
Sie können das ApeLight mini auch per DMX von einem
professionellen Lichtpult steuern. Um die Daten per
Funk zu übertragen benötigen Sie einen W-APETransceiver (oder auch ein MobiLight4).
› Verbinden Sie den W-APE-Transceiver (Sender) per
DMX-Kabel mit einem Lichtpult.
› Wählen Sie am W-APE-Transceiver als "Control
Mode" den Wert "DMX" aus. Sobald dieser aktiv ist,
verwenden alle ApeLight mini der gleichen Gruppe
(Group) automatisch die DMX-Daten.
› Empfängt das ApeLight mini für mehr als 10
Sekunden keine DMX-Daten, schaltet sich dieses
wieder automatisch zurück in den
Fernbedienungsmodus.
› Die Gruppe, DMX-Adresse und den DMX-Modus
jedes ApeLight mini können direkt am W-APETransceiver (oder auch MobiLight4) eingestellt
werden. Direkt nach dem Einschalten des ApeLight
mini wechseln alle W-APE-Transceiver im
Empfangsbereich kurzzeitig ihr Menü und zeigen die
Einstellungen des ApeLight mini an: Die
Menüpunkte sind: "Remote Config", "Group", "DMX
Mode", "DMX Address" und "Info"
9
Page 11

› Der Wechsel zwischen den Menüpunkten und die
Deutsch
Änderung von Werten erfolgt wie gewohnt (Menu
up/down). Werte können mit +/- verändert werden
und werden sofort übernommen.
› Drücken Sie einige Sekunden keine Taste, wechselt
das Gerät automatisch wieder zurück ins normale
Menü.
› Verfügbare DMX-Modi (vollständige Tabelle am
Ende dieser Anleitung):
o Off: Kein Wechsel in den W-APE-Modus - das
Gerät lässt sich nur per Fernbedienung
steuern.
o 3C: Dimmer, Programm, Speed
o 4C: Red, Green, Blue, White (je 1 DMX-Kanal/8
Bit)
o 8C: Red, Green, Blue, White (je 2 DMX-
Kanäle/16 Bit: coarse + fine)
› Im "Info" Menü wird angezeigt:
o Batteriestatus in %
o Seriennummer
o Version der Firmware/Software
10
Page 12

Deutsch
Weitere Funktionen und Updates
Deaktivierung der Akku-Status-Anzeige
Das rote/grüne Glühen der LEDs für die Akku-StatusAnzeige kann deaktiviert werden. Eine Anleitung hierzu
finden sie unter www.apelabs.com.
Pairing/Kopplung
Ape Labs Leuchten, Fernbedienungen und W-APE
Transceiver können dauerhaft miteinander gekoppelt
werden, so dass sie sich nicht mehr mit anderen
Geräten synchronisieren. Eine Anleitung hierzu finden
sie unter www.apelabs.com.
Reset bzw. Update der Firmware
Drücken Sie den Taster an der Rückseite des ApeLight
mini und halten ihn für 10 Sekunden. Das Gerät startet
neu und bleibt für ca. 15 Sekunden im Update-Modus
(blinkt rot). Innerhalb dieser 15 Sekunden kann ein
Update gestartet werden. Geschieht dies nicht, startet
die Lampe normal. Firmware-Updates finden Sie unter
www.apelabs.com bzw. bei ihrem Händler.
11
Page 13

Fehlerbehebung
Problem
Mögliche
Ursache
Lösung
ApeLight
mini ist
dunkel und
blinkt ab und
zu auf.
Sound-toLightFunktion
ist aktiv.
Mikrofon-Taste auf der
Fernbedienung drücken,
um Sound-to-Light
auszuschalten.
ApeLight
mini wird
heller und
dunkler.
Normaler
Blinkeffekt
Lange (2s) auf "Slow
Down" auf der
Fernbedienung drücken,
um die
Effektgeschwindigkeit auf
0 zu reduzieren.
ApeLight
mini blinkt 3
Mal rot und
schaltet sich
dann ab.
Akku leer
Netzteil anschließen, um
Akku zu laden
Deutsch
12
Page 14

Deutsch
Problem
Mögliche
Ursache
Lösung
ApeLight
mini lässt
sich nicht
einschalten.
Taster zu
kurz
gedrückt
Taster drücken und 1
Sekunde halten.
Helligkeit
auf null
reduziert.
"Heller" auf
Fernbedienung drücken.
Akku
komplett
leer
18V Netzteil anstecken
oder ApeLight mini im
Tourcase laden. Ladung
beginnt evtl. erst nach
einigen Minuten.
ApeLight
mini leuchtet
immer leicht
rot/grün.
Normale
AkkuStatusAnzeige
Der Akku-Status wird
durch leichtes Glühen der
LED angezeigt. Diese
Funktion kann deaktiviert
werden. Eine Anleitung
hierzu finden sie unter
www.apelabs.com.
13
Page 15
Deutsch
Recycling
Das ApeLight mini sowie alle im
Lieferumfang enthaltenen Elektronikteile
dürfen gemäß europäischen Richtlinien
nicht über den Hausmüll entsorgt werden.
Bringen Sie das ApeLight mini und alle im
Lieferumfang enthaltenen Elektronikteile nach der
Verwendung zu einer Sammelstelle für elektrische und
elektronische Altgeräte.
14
Page 16

English
Safety Instructions
› The ApeLight mini generates heat during operation
and while charging. Therefore, make sure adequate
ventilation and do not cover the light. If you charge
the ApeLight mini in the Tourcase (optional), the
ApeLight mini Tourcase must remain open.
› Do not use the ApeLight mini in areas where the use
of radio equipment is prohibited.
› Do not look directly into the LED. This can cause
damage to the eyes.
General
› The ApeLight mini has a power LED below the lens.
Warning: This LED is very bright! Place the device
about 30cm before a wall to achieve beautiful
lighting effects.
› The device has 20 built-in programs with fixed or
changing colors. The speed of the color chase can
be changed. The lowest level stops the effect.
› You can control the device with the ape labs remote
control. Professional users can control the device
also via DMX (W-APE) by a lighting console. For this
15
Page 17

purpose, a separate wireless DMX radio transmitter
English
(MobiLight4 / W APE transceiver) is needed.
› The unit can be assigned to one of 4 groups. By
default the device belongs to group 1. The remote
control (respectively the W-APE Transceiver) sends
commands to devices of the same group.
› The device has a build-in microphone. It can be
activated by the remote control to create sound to
light effects.
Operation
Turn on and off
› Press the button on the back of the ApeLight mini
for about 1 second. The unit turns on and
remembers the previously selected
program/brightness.
› To turn the device off, press the button again for
about a second.
The ApeLight mini ignores very short presses of the
power button to prevent unintentional operation.
Assignment of a group
You can assign ApeLight minis to groups, e.g. to
independently control them in different rooms.
16
Page 18

English
› Immediately after turning the ApeLight mini on, the
current group setting of the ApeLight mini flashes
on the remote control. (Factory setting is group 1.)
› Within this period (group LED flashing), you can
assign another group by pressing the "Group"
button on the remote control one more times. The
ApeLight mini will flash blue for a short time to
acknowledge that.
Note: The remote control switches to a power-save
mode after some minutes and will not detect the
power-on event of a ApeLight mini. Press any key of
remote control to stop the power-save mode.
Using the Remote Control
› Press the "Group" button multiple times until the
proper group LED is lit up. Factory setting is group
1.
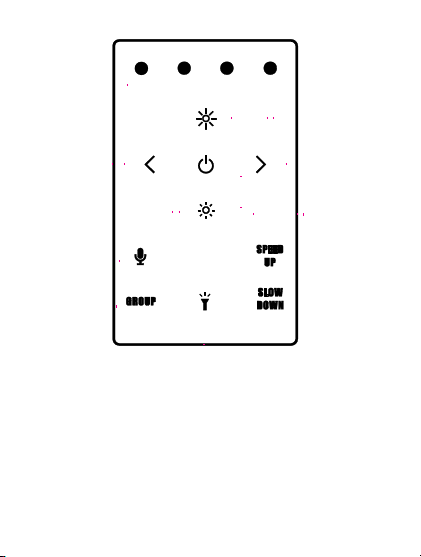
› Programs, brightness, speed and sound-to-light
mode can be controlled by the corresponding keys
(see figure).
17
Page 19
English
1 2 3 4
current
Group
previous
program
next
program
brighter
dimmer
sound to
li ght
select
group
speed up
slow down/
stop
flashli ght
blackout
Hint: To control all groups at the same time, press and
hold the "Group" button for about 2 seconds.
18
Page 20

English
No
Program
1
White 2 Red 3 Orange
4
Yellow
5
Lime 6 Green
7
Cyan 8 Cyan-Blue
9
Blue
10
Blue-Magenta
11
Magenta
12
Red Pastel
13
Green Pastel
14
Blue Pastel
15
Blue > Red
16
Magenta > White
17
White > Blue
18
Red Pastel > Green Pastel > Blue Pastel
19
Yellow > Magenta > Blue
20
Rainbow
List of Programs
Hint: A long press on ‹ respectively › on the remote
control switches to the first respectively the last
program. A long press on "Slow Down" stops a flash
effect respectively a color chase.
19
Page 21

English
Battery State/Charging
› If the brightness of the ApeLight mini is reduced to
zero (by "Blackout" or "Dimmer" button of the
remote control), the device will show the battery
state at low brightness:
o LED glows green: battery level above 50%
o LED glows red: battery level below 50%
Note: The calculation of the battery level needs at
least one full charge/discharge cycle.
› If the battery is completely empty, the device will
blink 3 times red and turn itself off.
› Connect the provided power supply (5V to 18V DC) or
the USB charging cable to the connector in the
bottom of the can.
› The ApeLight mini flashes red while charging. As
soon as the battery is fully charged, the device will
flash green.
› The device can also be used while a power supply is
connected. In that case the battery will not be
charged (or very slowly).
20
Page 22

English
Extended Control
Sound-To-Light with Sound Master
A "W-APE-Transceiver" makes it possible to create
sound to light effects on multiple ApeLight minis with a
single microphone as source.
› Select "Sound Master" as "Control Mode" at the W-
APE-Transceiver. As soon as this mode is active, all
ApeLight minis within the same group will use that
device as common source.
› An ApeLight mini will switch back to its internal
microphone, if the transmitter is turned off.
Control by a light desk with DMX
You can control the ApeLight mini also via DMX from a
professional light desk. To transmit the data wireless,
you need a W-APE Transceiver (or a MobiLight4).
› Connect the W-APE Transceiver via a DMX cable to
the light desk.
› Select "DMX" as "Control Mode" at the W-APE-
Transceiver. As soon as this mode is active, all
ApeLight minis within the same group will use the
DMX data.
› If a ApeLight mini does not receive any DMX data for
more than 10 seconds, it will automatically switch
back to the remote control mode.
21
Page 23

› The group, the DMX address and the DMX mode of
English
each ApeLight mini can be changed at a W-APETransceiver (or MobiLight4). Directly after turning
on a ApeLight mini, all W-APE Transceiver will
change the display menu and show the values of the
ApeLight mini: The menu items are: "Remote
Config", "Group", "DMX Mode", "DMX Address" and
"Info"
› Use Menu up/down as normal, to toggle through the
menu items. Values can be changed by +/- and will
be applied instantly.
› If you do not press any key for some seconds, the W-
APE Transceiver will switch back to the standard
menu.
› There are multiple DMX modes available (see at the
end this manual for a full DMX sheet):
o Off: No switch to W-APE/DMX-Mode - the
device is only controllable by the remote
control)
o 3C: 3 channels: Dimmer, Program, Speed
o 4C: 4 channels: Red, Green, Blue, White (each 1
DMX channel/8 Bit)
o 8C: 8 channels: Red, Green, Blue, White (each 2
DMX channels/16 Bit: coarse + fine)
› In the "Info" menu will be displayed:
o Battery level in %
22
Page 24

English
o Serial number
o Version of the firmware/software
More Functions and Updates
Disabling of the battery status indicator
The red/green glowing indicator of the battery level can
be disabled. Instructions can be found at
www.apelabs.com.
Pairing
Ape Labs lights, Remote Controls and W-APE
Transceiver can be permanently paired to one another
so that they will no longer synchronize with other
devices. Instructions can be found at
www.apelabs.com.
Reset respectively update of firmware
Press and hold the power button of the ApeLight mini
for about 10 seconds. The device will restart and stay
for about 15 seconds in update mode (flashes red).
Within this timespan an update can be started. Without
any update data, the device will continue to run as
normal. You can find firmware updates at
www.apelabs.com respectively at your dealer.
23
Page 25

Troubleshooting
Problem
Possible
Reason
Solution
ApeLight mini
is dimmed
and flashes
sometimes.
Sound to
light mode
is active.
Press the microphone
button on the remote
control, to deactivate
the sound to light
mode.
ApeLight mini
flashes
slowly.
regular
flash effect
Long press (2s) on
"Slow Down" on the
remote control, to
reduce the effect speed
to 0.
ApeLight mini
flashes 3
times red and
turns itself
off.
Battery
empty
Connect the power
supply to charge the
battery.
English
24
Page 26

English
Problem
Possible
Reason
Solution
ApeLight mini
cannot be
turned on.
power
button was
pressed too
short
Press and hold the
button for about 1
second.
Brightness
is at lowest
level.
Press "brighter" on the
remote control.
Battery is
deeply
discharged.
Connect the 18V power
supply or charge the
ApeLight mini in the
Tourcase. It may take
some minutes until the
charge will start.
ApeLight mini
glows
permanently
red/green.
regular
battery
status
indicator
The battery status will
be shown by a glow of
the LED. This feature
can be disabled.
Instructions can be
found at
www.apelabs.com.
25
Page 27
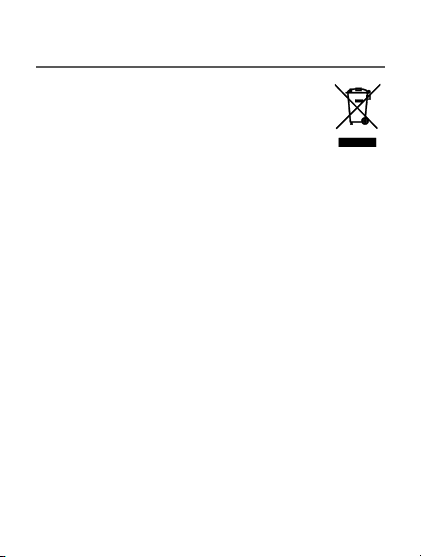
Disposal
If the ApeLight mini is to be put out of
operation definitively, take it to a local
recycling plant for a disposal which is not
harmful to the environment. Never throw
exhausted batteries or defective
rechargeable batteries into the household rubbish:
Always take them to a special waste disposal (e. g.
collecting container at your retailer).
English
26
Page 28

DMX Sheets
Ch
DMX
Function
1
0 .. 255
Dimmer
0 .. 100%
2
0 .. 5
Prog 1
White with fade
steps of 6*
Prog 2 .. 19
... with fade
114 .. 127
Prog 20
Rainbow with fade
128 .. 133
Prog 1
White without fade
steps of 6*
Prog 2 .. 19
... without fade
242 .. 255
Prog 20
Rainbow without fade
3
0 .. 255
Prog Speed
0 .. 100%
DMX Modes/DMX Sheets
3 Channel Mode: Dimmer, Program, Speed
This mode can be used with many Ape Labs products,
e.g. LightCan, MobiLight4, ApeStick4, ApeLight,
ApeLight mini and ApeLight maxi.
The programs 1 to 20 are the same as when operating
by remote control.
* Channel 1: Program 1..20 without fade and 1..20 with fade
start at DMX value 0, 6, 12, 18, 24, 30, 36, 42, 48, 54, 60, 66, 72,
78, 84, 90, 96, 102, 108, 114 / 128, 134, 140, 146, 152, 158, 164,
170, 176, 182, 188, 194, 200, 206, 212, 218, 224, 230, 236, 242
27
Page 29

4 Channel Mode: Red, Green, Blue, White / 8Bit
Channel
DMX
Function
1
0 .. 255
red
0 .. 100%
2
0 .. 255
green
0 .. 100%
3
0 .. 255
blue
0 .. 100%
4
0 .. 255
white
0 .. 100%
DMX Sheets
(Default Mode)
This is the default DMX mode.
This mode can be used with many Ape Labs products,
e.g. LightCan, ApeStick4, ApeLight mini and ApeLight
maxi.
If your lighting desk has no matching profile, use a
"Generic/RGBW LED 8 Bit".
28
Page 30

DMX Sheets
Channel
DMX
Function
1
0 .. 255
red
0 .. 100%
2
0 .. 255
red fine
3
0 .. 255
green
0 .. 100%
4
0 .. 255
green fine 5
0 .. 255
blue
0 .. 100%
6
0 .. 255
blue fine
7
0 .. 255
white
0 .. 100%
8
0 .. 255
white fine
8 Channel Mode: Red, Green, Blue, White / 16Bit
This mode can be used with many Ape Labs products,
e.g. LightCan, ApeStick4, ApeLight mini and ApeLight
maxi.
If your lighting desk has no matching profile, use a
"Generic/RGBW LED 16 Bit".
29
Page 31

Page 32
f35fd8b813
 Loading...