

Page 1

MENUAL
172N LCD MONITOR
ALLINONE DISPLAY INC.
www.aodlcd.com
Page 2

FCC NOTE
:This equipment has been tested and found to comply with the limits for a Class B digital device,
pursuant to Part 15 of the FCC Rules. These limits are designed to provide reasonable
protection against harmful interference in a residential installation. This equipment generates,
uses and can radiate radio frequency energy and, if not installed and used in accordance with
the instructions, may cause harmful interference to radio communications.
However, there is no guarantee that interference will not occur in a particular installation. If this
equipment does cause harmful interference to radio or television reception, which can be
determined by turning the equipment off and on, the user is encouraged to try to correct the
interference by one or more of the following measures:
-- Reorient or relocate the receiving antenna.
-- Increase the separation between the equipment and receiver.
-- Connect the equipment into an outlet on a circuit different from that to which
the receiver is connected.
-- Consult the dealer or an experienced radio/TV technician for help.
THIS DEVICE COMPLIES WITH PART 15 OF THE FCC RULES.
OPERATION IS SUBJECT TO THE FOLLOWING TWO CONDITIONS:
(1) THIS DEVICE MAY NOT CAUSE HARMFUL INTERFERENCE, AND
(2) THIS DEVICE MUST ACCEPT ANY INTERFERENCE RECEIVED,
INCLUDING INTERFERENCE THAT MAY CAUSE UNDESIRED OPERATION
THE MANUFACTURER IS NOT RESPONSIBLE FOR ANY RADIO OR TV INTERFERENCE
CAUSED UNAUTHORIZED MODIFICATIONS TO THIS EQUIPMENT. SUCH
MODIFICATIONS COULD VOID THE USER'S AUTHORITY TO OPERATE THE EQUIPMENT.
Page 3

TABLE OF CONTENTS
0. Connection To the Monitor
1. Installation
2. Features
3. Plug and Play Function
4. Safety Precautions
5. Contents Of the Retail Package
6. OSD (On-Screen-Menu)
7. OSD Controls
7.1 Brightness
7.2 Contrast
7.3 H.Position
7.4 V.Position
7.5 CLOCK
7.6 CLOCK PHASE
7.7 COLOR Control
7.8 Language
7.9 Information
7.10 OSD
7.11 Auto Adjust
8. Troubleshooting
9. Specifications
11. Video Mode
Page 4
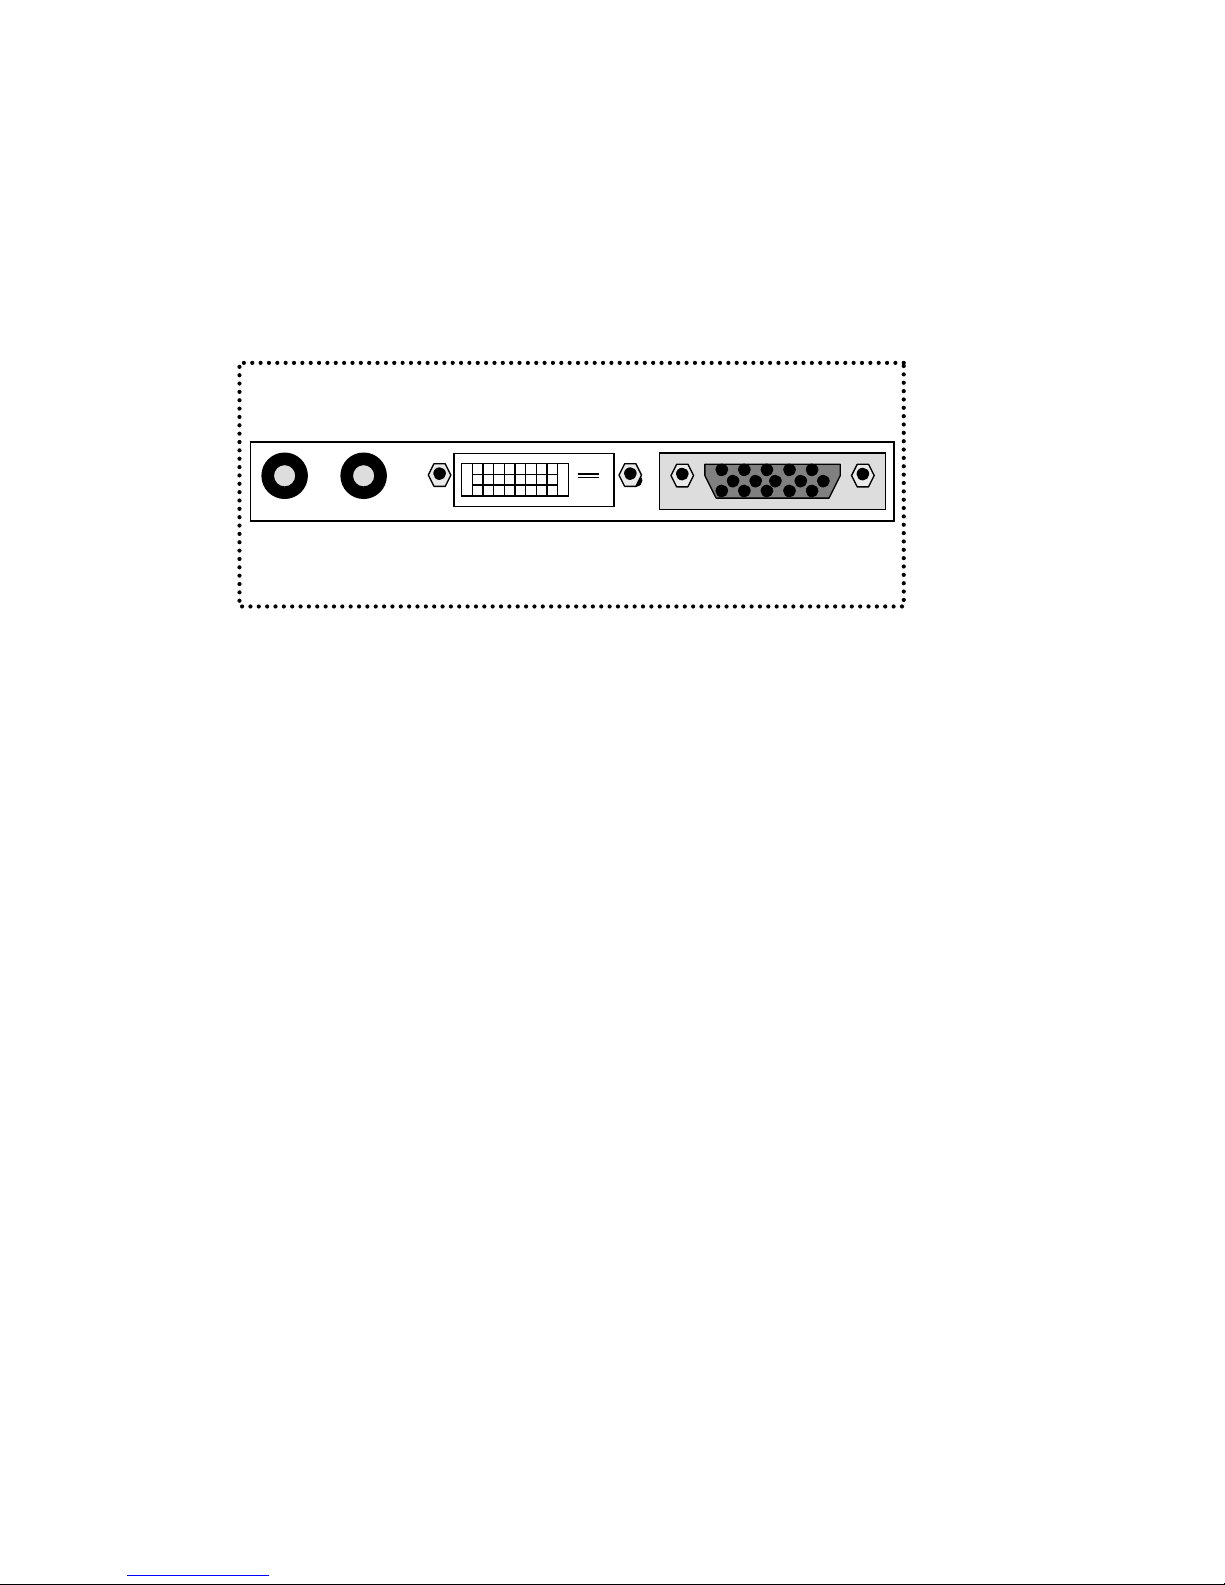
D-SUBDVI DC 12V SPEAKER IN
0. Cable Connection
1. Installation
• Connect the signal(VGA) cable to the VGA port of computer. Tighten the
two thumbscrews by turning clockwise.
• You can adjust the connection for your PC environment.
• Plug the DC cord of the AC adapter to the power connector and the plug
the end of AC adapter to and electrical outlet socket(110V/220V)
• Connect DC cord of adapter (12V DC) to the monitor..
2. Features
• 172N is 17” SXGA LCD monitor and support up to 75Hz.
• You can adjust brightness, contrast, horizontal & vertical positions by OSD
menus and use auto adjust function for instant adjus tment.
• High-qualified LCD Controller inside
• Compact space saving design and power saving mode
• 100% compatible with Windows PC environment without the installation of
driver CD or software program.
Page 5

3. Plug and Play Function
172N can be installed and connected automatically to any computer systems without driver
CD or software programs. Monitor will recognize the optimized value of video mode by
DDC(Display Data Channel) method that makes the graphic card of computer to
communicate with the monitor. 172N supports VESA DDC 1/2B.
4. Safety Precautions
We strongly recommend that you carefully read this User’s Manual before operating your LCD
monitor. FOLLOW INSTRUCTIONS in this manual.
Please read and comprehend all using directives before use this machine.
● Power
— Use the type of power indicated on the marking label.
● Adapter
— Only use an adapter designed of the LCD monitor.
● Plugs
— Do not remove any of the prongs of the monitor's three-pronged power plug.
— Disconnect the power plug from the AC outlet if you will not use it for an indefinite period of time.
● Power and extension cords
— Use the proper power cord with ground conductor
— Do not overload wall outlets or power cords. Ensure that the total of all units plugged into the wall
outlet does not exceed 7 amperes.
— Do not allow anything to rest on the power cord. Do not locate this product where persons will
walk on the cord.
● Care and maintenance
ㅡ Slots and openings in the cabinet are provided for ventilation. Do not block or cover these openings.
ㅡ Do not push objects of any kind into cabinet slots or openings. The screen surface is easily scratched.
ㅡ Do not use paper towels to clean the display. Avoid touching it with your fingers, pens, or pencils.
ㅡ Turn off the AC adapter and the monitor over long periods when not in use.
Page 6
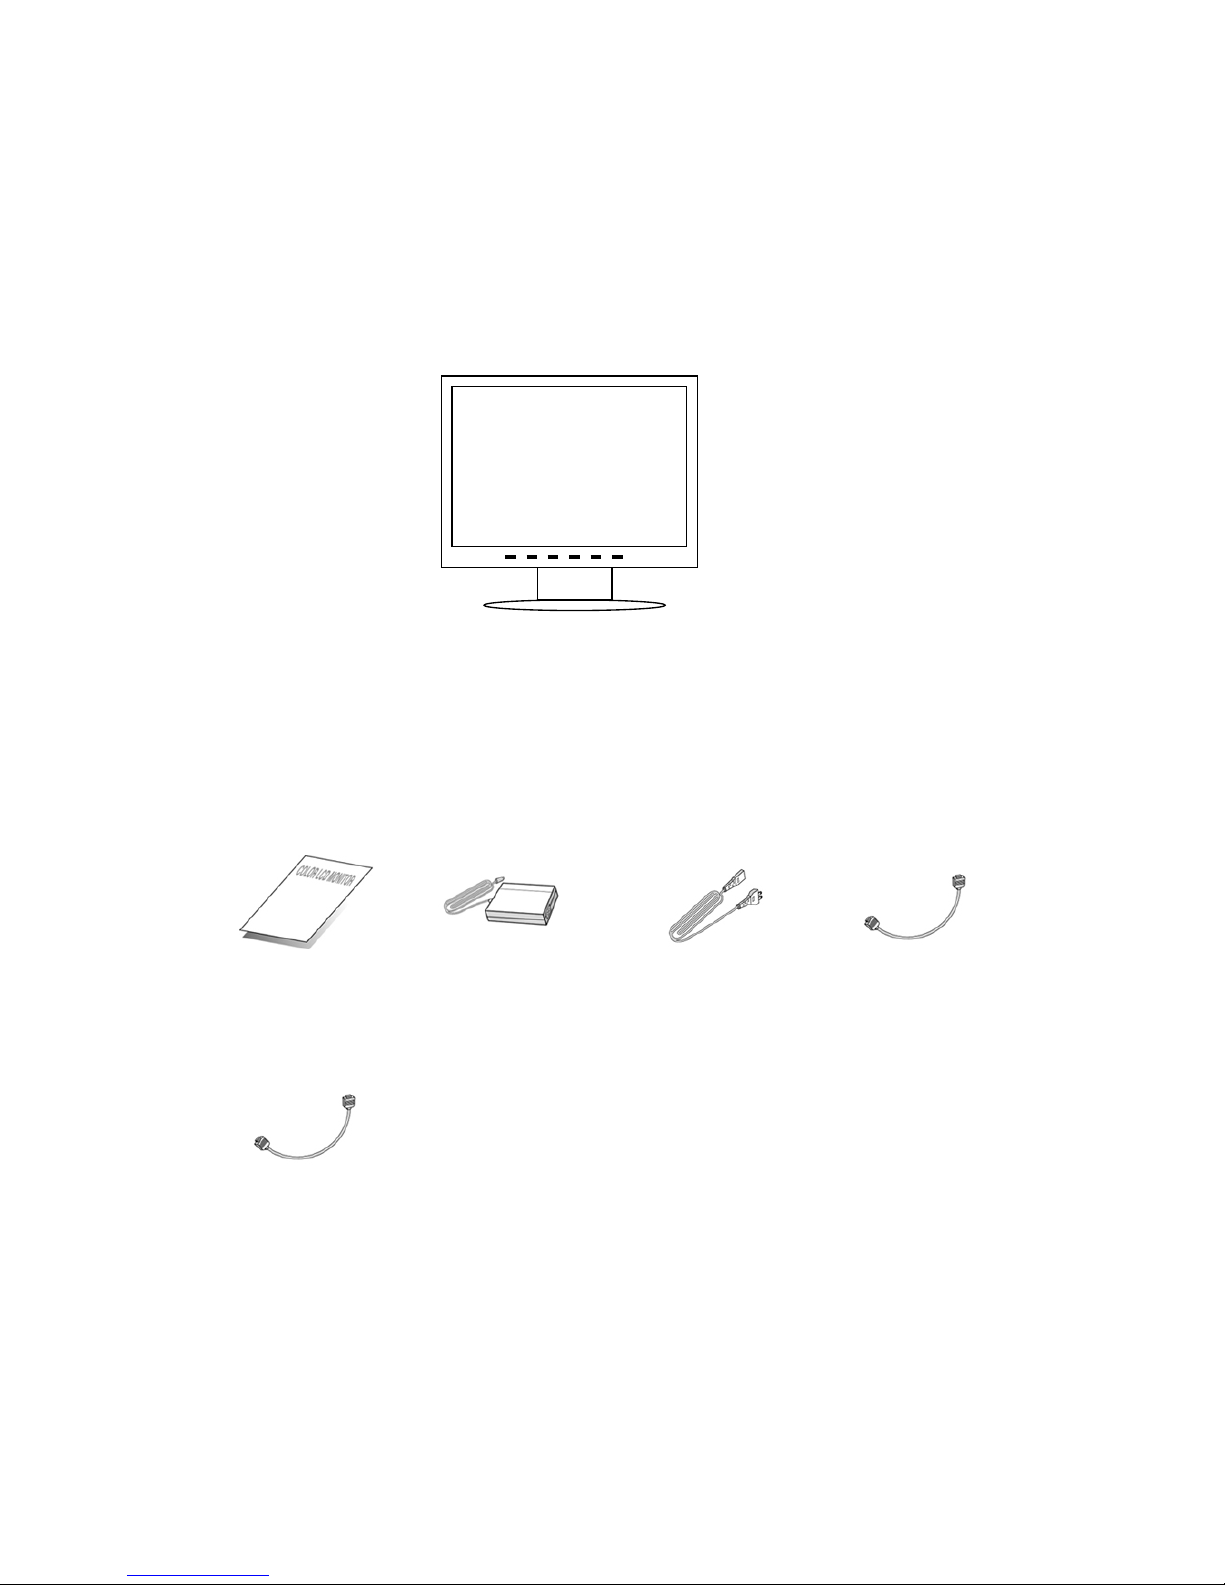
5. Contents Of the Retail Package
Monitor
User’s Manual AC/DC Adaptor Power Cord
VGA Cable
Audio Cable
Page 7
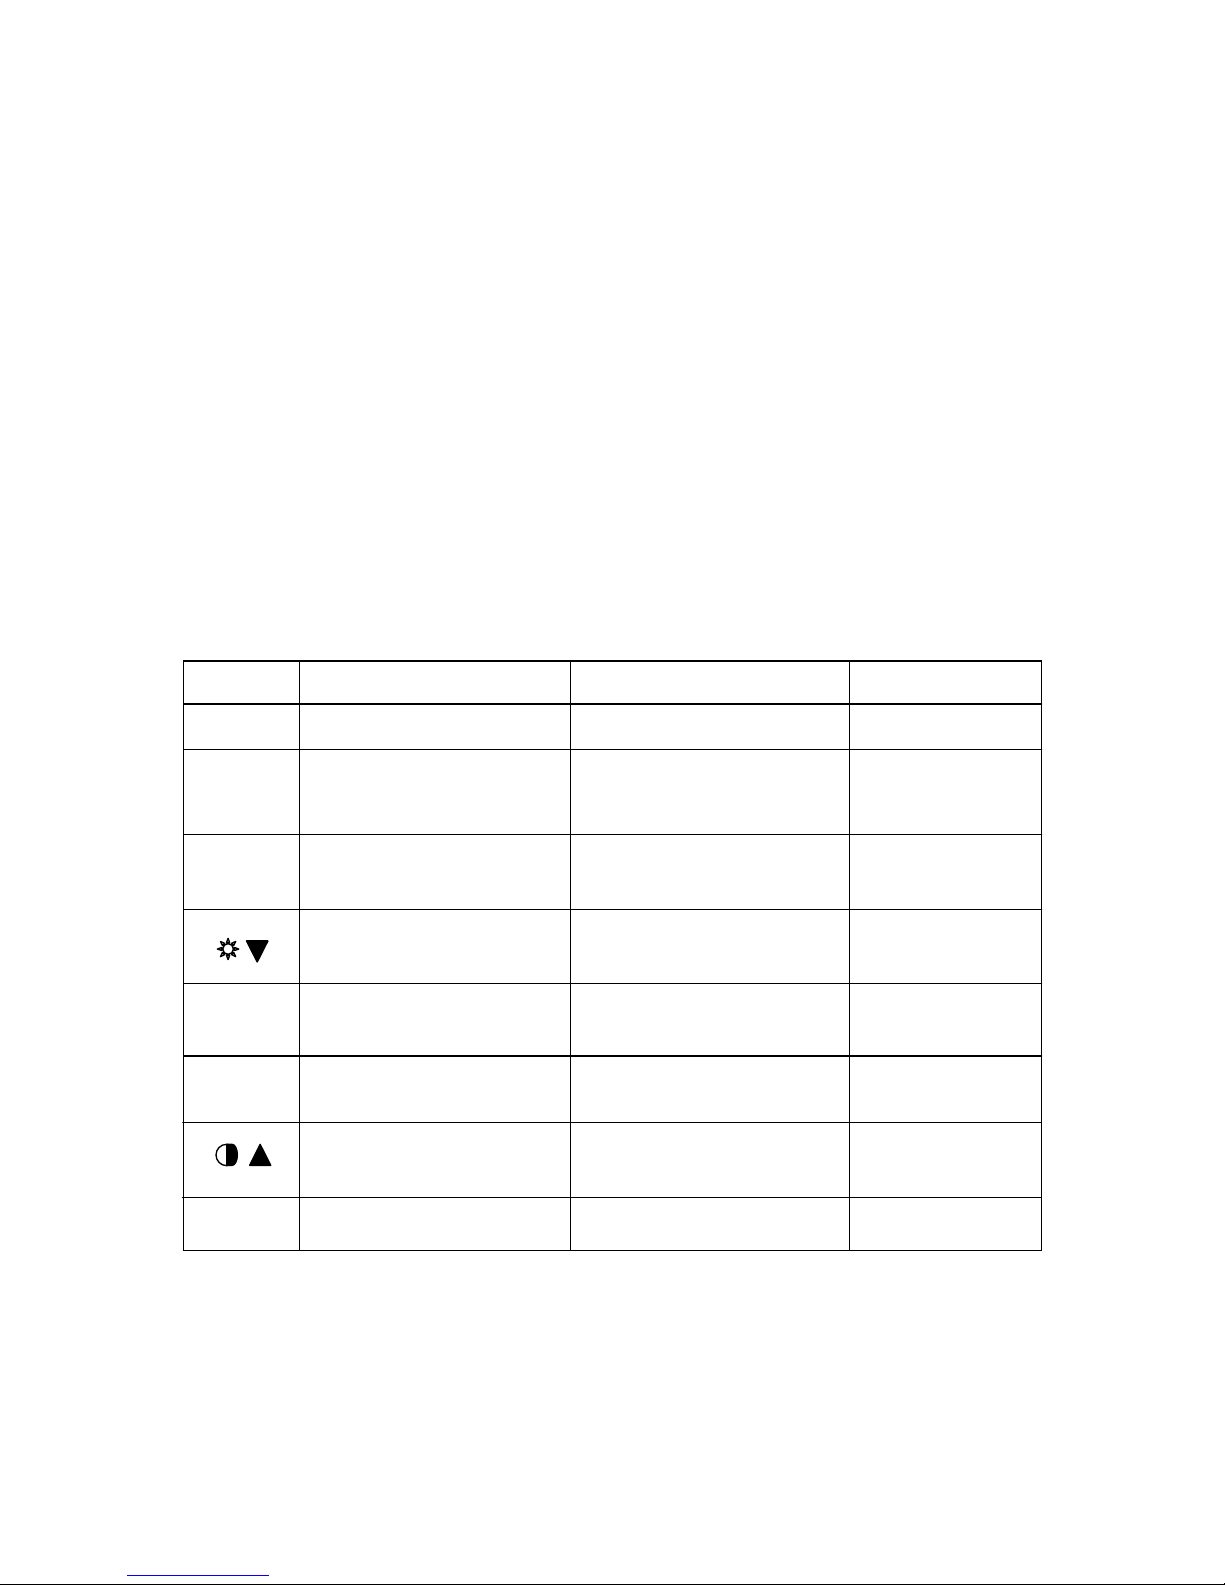
PowerMenu Enter < >
Hot key
ON/OFF
LED
Green(ON) / Red (Stand-by)
Auto/
(exit)
Auto Adjust/
Menu OFF
Menu
Operating condition
Orange : No Signal
Auto Adjust/
Menu OFF
Enter
Launch OSD Menu
( Select )
Buttons
Function Status
Power
Turn the power ON or Off
Select OSD Menu
Move to OSD Menu Adjust Brightness
Launch OSD Menu or
down values
Launch OSD Menu or
Add values
Move to OSD Menu Adjust Brightness
6. OSD (On-Screen-Menu)
Page 8
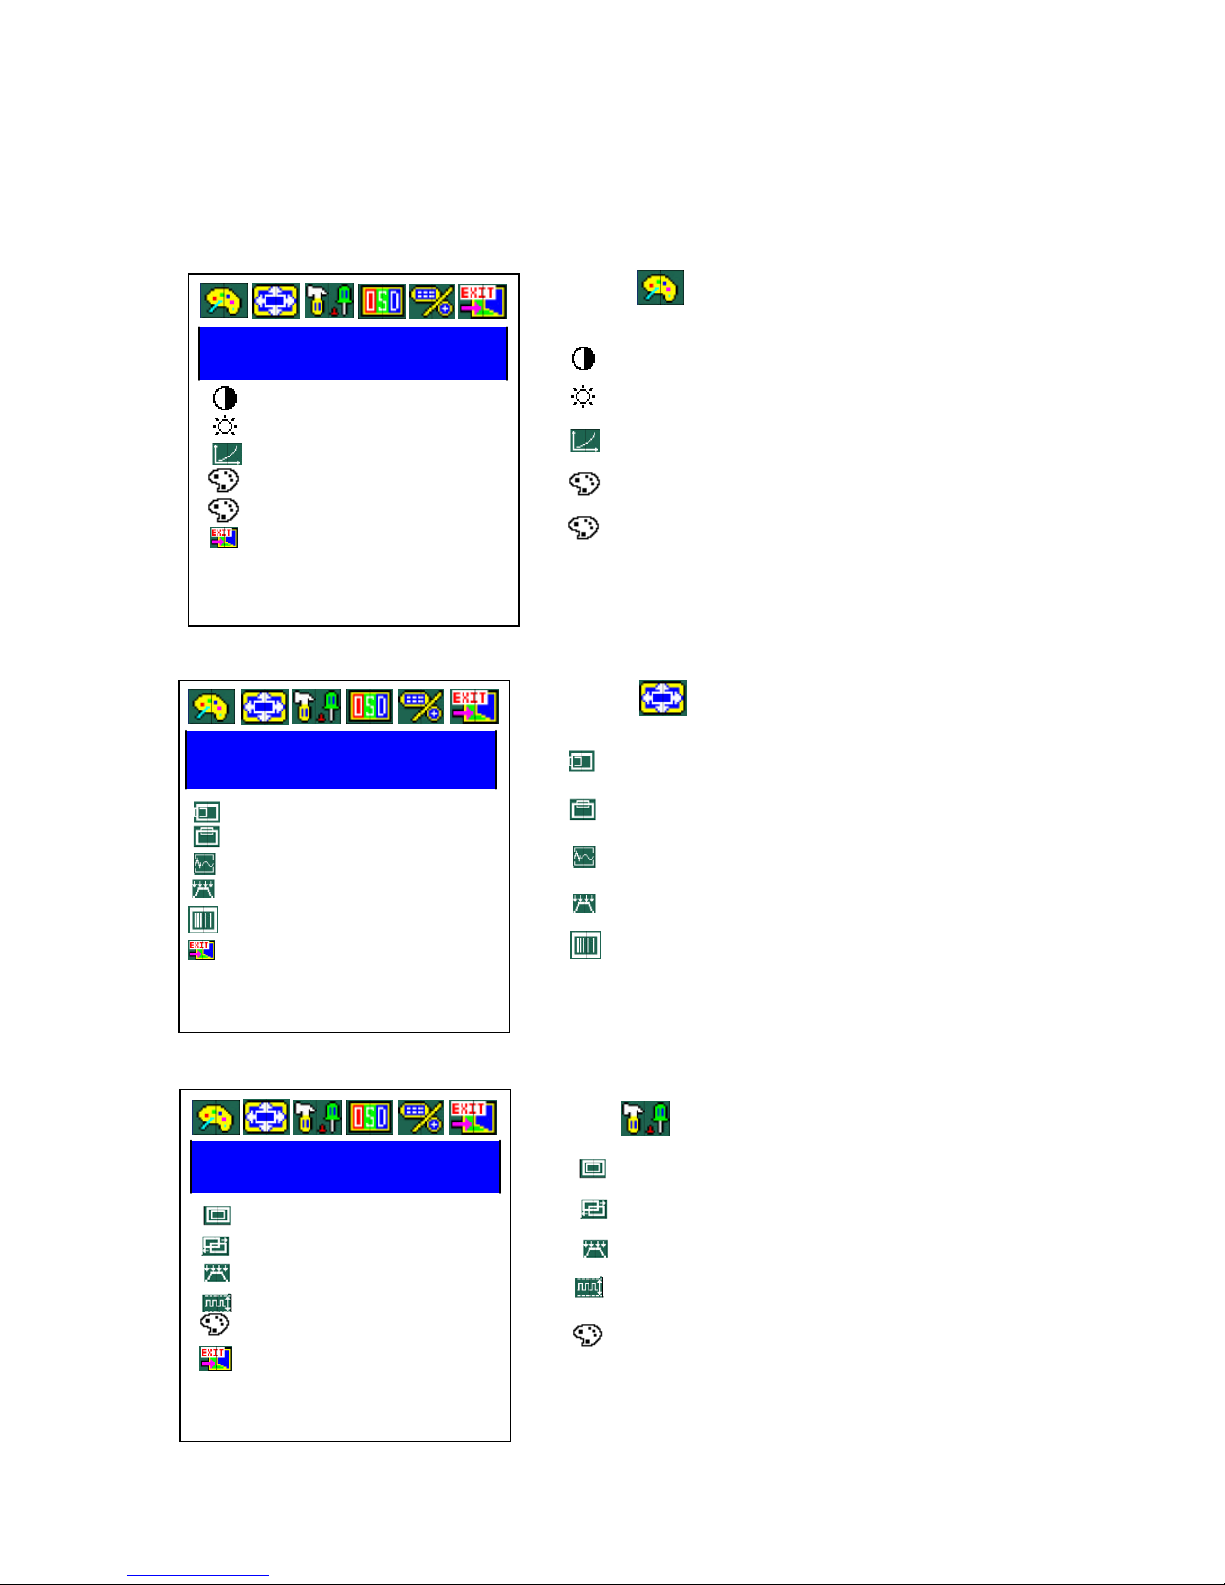
OSD Controls
1. Color
COLOR
1024 x 768
MENU Æ Select COLOR Æ UP / DOWN KEY
1) Adjust Contrast
3) Adjust Color
4) Adjust Color Temp
5) Adjust R.G.B value
2) Adjust Brightness
1) Adjust Horizontal Position
3) Adjust Sharpness
4) Adjust Phase
5) Optimize Image and eliminate Noise
2) Adjust Vertical Position
MENU Æ Select PICTURE Æ UP / DOWN KEY
2. PICTURE
PICTURE
Contrast
Brightness
Gamma Correct
Color Temp
Color Adjust
Exit
1024 x 768
3. FUNCTION
FUNCTION
Auto Adjust
Auto Position
Auto Phase
Auto Clock
Auto Color
Exit
1) Run Auto-Adjust Function for optimization
3) Automatically adjust phase
5) Automatically adjust color status
2) Automatically adjust screen position
MENU Æ Select FUNCTION Æ UP / DOWN KEY
4) Automatically adjust image and eliminate noise
H.Position
V.Position
Sharpness
Phase
Clock
Exit
Page 9
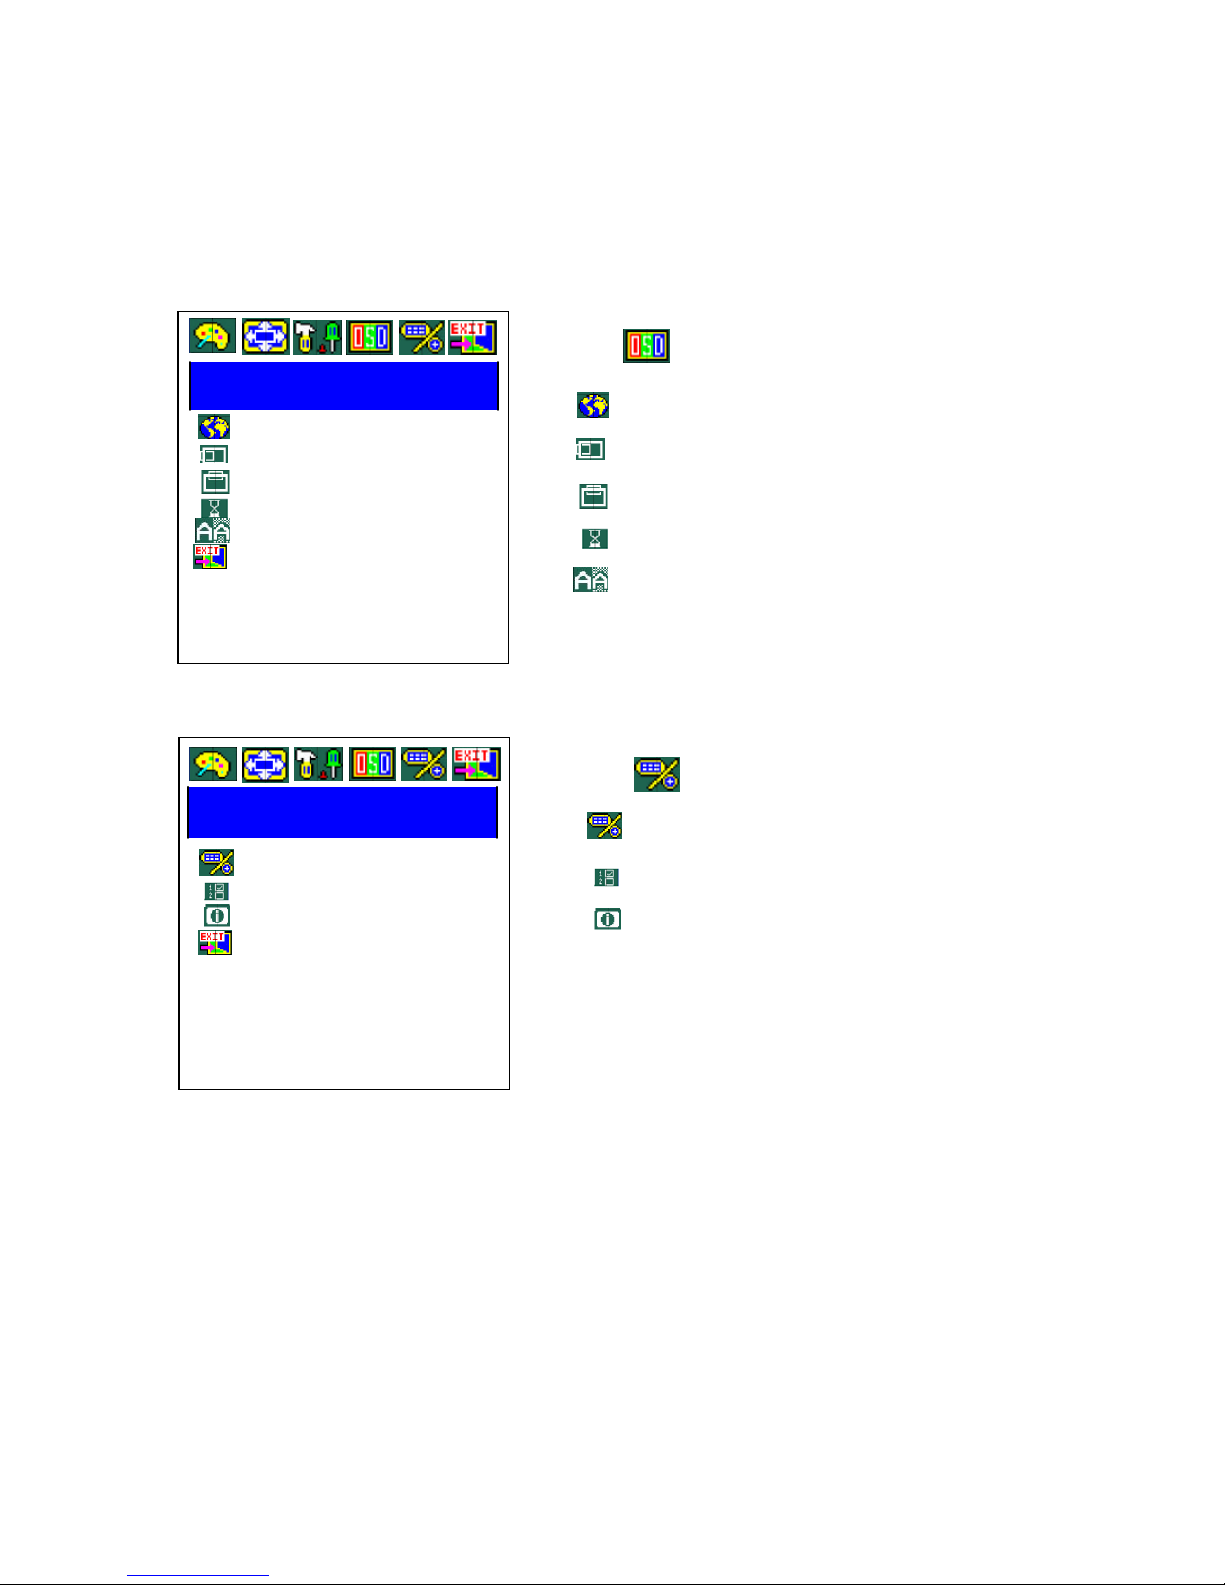
4. OSD MENU
5. MISCELLANEOUS
OSD MENU
1024 x 768
Language
OSD H.Position
OSD V.Position
OSD Timer
Translucent
Exit
1) Select Language
3) Adjust OSD Vertical Position
4) Select OSD Auto Timer
5) Select transparent status of OSD menu
2) Adjust OSD Horizontal Po sition
MISCELLANEOUS
1024 x 768
Signal Source
Mode Select
Reset
Exit
MENU Æ Select MISCELLANEOUS Æ UP / DOWN KEY
1) Select Signal Source
3) Go to Factory Setting
2) Select Mode
MENU Æ Select OSD MENU Æ UP / DOWN KEY
Page 10

8. Troubleshooting
TO REDUCE THE RISK OF ELECTRIC SHOCK, DO NOT REMOVE COVER.
NO USER-SERVICEAB LE PARTS INSIDE. REFER SERVICING TO QUALIFIED
SERVICE PERSONNEL.
The monitor does not respond after you turn on the system.
Make sure that the monitor is turned on. Turn off the power and check the monitor’s
power cord, AC adapter, and signal cable for proper connection.
Appear the “ No Input the Signal"
Check the connecting of the audio cable between the monitor and the computer.
Appear the “ Input Not the Supported"
Input signal are insuperable, refer the “Video Modes”
The appearance is not at the screen center.
Use “AUTO ADJUST” or manually adjust “PHASE” and “CLOCK”,
refer the Controls section.
The characters on the screen are too dim or too bright
Choose fit color temperature, use “AUTO COLOUR ADJUST or manually adjust
“RGB ADJUSTMENT, refer the Controls section.
Page 11

9. Specifications
Model 17 inch SXGA LCD Monitor
Display
Type 17” Color Active Matrix LCD
Color 16M(8 bit/color)
Pixel 0.264 x 0.264 mm
Screen Size 337.92 (H) x 270.336 (V) mm
Resolution (Max) 1280 x 1024 at 60 to 75Hz
Contrast Ratio 500:1
Brightness 250 cd/m
2
Video
Frequency Horizontal: 56 ~ 75Hz
Vertical: 31.5 ~ 80KHz
Input signal Analog RGB, 15 Pin
Compatibility
Plug and Play VESA DDC 1/2B
Compatibility VESA / IBM / MAC
Power VESA Standard, DPMS
Operation Environment
Power Consumption Operation Mode: 35 watt max.
Stand-by: 4 watt max.
Temperature Operation Mode : 0 ºC ~ 40 ºC
Stand-by: -20 ºC ~ 60 ºC
Humidity Operation Mode: 10% ~ 85% R.H.
Stand-by: 90% R.H. Max.
User’s Mode
OSD Key Auto(exit)/Down/Menu / Enter/Up/Power
Page 12
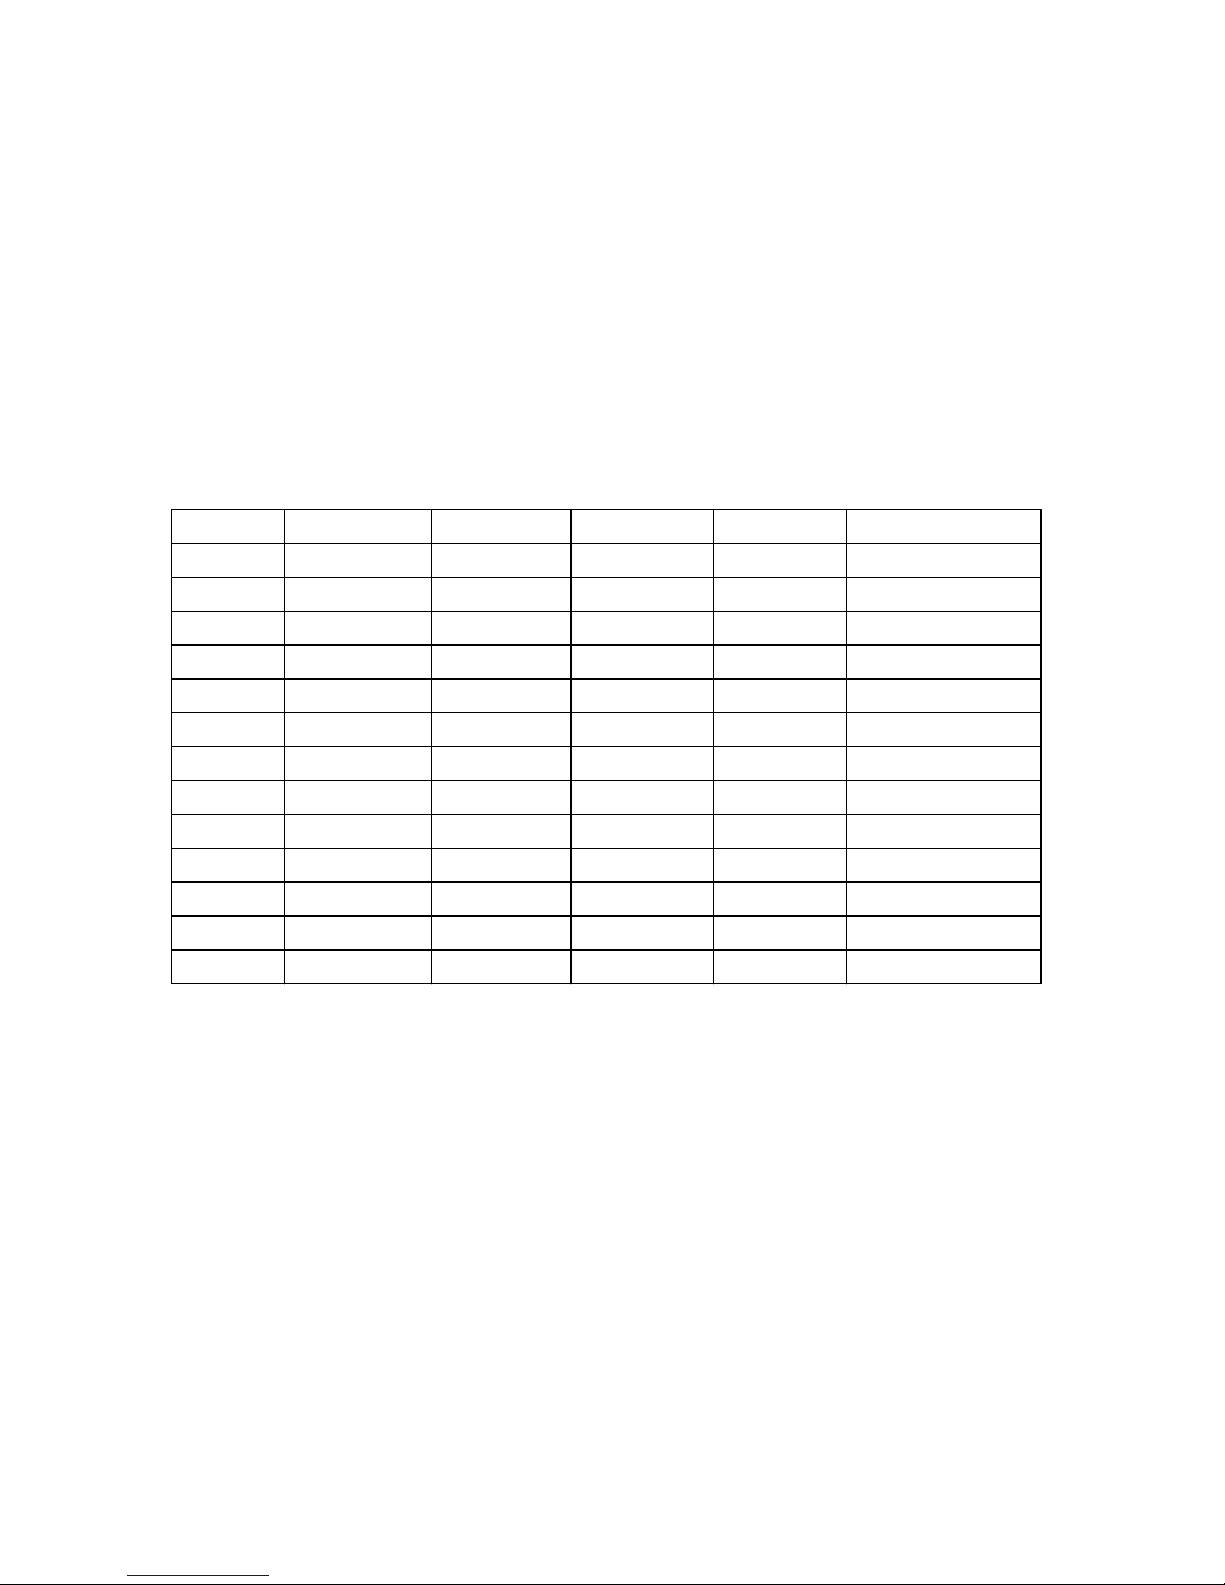
VESA Standard
Mode
*1
Pixel freq.Resolution
640 x 350
Industry Standard
VESA Standard
IBM VGA 3H720 x 400
640 x 480
640 x 480
VESA Standard
VESA Guidelines
640 x 480
800 x 600
VESA Standard
VESA Standard800 x 600
800 x 600
Refresh rate H-freq.
VESA Guidelines1024 x 768
VESA Standard
VESA Standard1024 x 768
1024 x 768 60KHZ
56.5KHz
VGA
VGA
VGA
VGA
VGA
SVGA
SVGA
SVGA
XGA
XGA
XGA
48.4KHz
46.9KHZ
48.1KHz
37.9KHz
37.5KHZ
37.9KHz
31.5KHz
31.469KHZ
31.47KHz
75HZ
70Hz
60Hz
75HZ
72Hz
60Hz
75HZ
72Hz
60Hz
59.940HZ
70Hz
78.750MHZ
75.000MHz
65.000MHz
49.500MHZ
50.000MHz
40.000MHz
31.500MHZ
31.500MHz
25.175MHz
25.175MHZ
25.175MHz
Remarks
*1
SXGA
SXGA
1280 x1024
1280 x1024 75HZ
60Hz
64KHZ
80KHZ
108MHZ
135MHZ
VESA Standard
VESA Standard
11. Video Mode
♦ Below values are set by Manufacturer
 Loading...