

Page 1

LED LCD TV User Manual
LE42K09D/
LE42H09P
ww w.aoc.com
2010 AOC. All Rights Reserved.
Page 2

This manual is provided as an operational guide to user. All statements, technical information, and
recommendations in this manual and in any guides or related documents are believed reliable, but
the accuracy and completeness thereof are not guaranteed or warranted, and they are not intended
to be, nor should they be understood to be,representations or warranties concerning the products
described.
1
Page 3

Contents
Important information. . . . . . . . . . . . . . . . . . . . . . . . . . . . . 3
Warning . . . . . . . . . . . . . . . . . . . . . . . . . . . . . . . . . . . . . . . . . . . . . . . . . 3
Caution. . . . . . . . . . . . . . . . . . . . . . . . . . . . . . . . . . . . . . . . . . . . . . . . . . 3
Waste disposal instructions . . . . . . . . . . . . . . . . . . . . . . . . . . . . . . . . . . 3
Important safety information . . . . . . . . . . . . . . . . . . . . . . 3
Usage instructions . . . . . . . . .. . . . . . . . . . . . . . . . . . . . . . .4
Packing list . . . . . . . . . . . . . . . . . . . . . . . . . . . . . . . . . . . . . 9
Control and connection . . . . . . . . . . . . . . . . . . . . . . . . . . 10
Remote control. . . . . . . . . . . . . . . . . . . . . . . . . . . . . . . . . 11
Battery installation for the remote control . . . . . . . . . . 12
Operating AOC TV . . . . . . . . . . . . . . . . . . . . . . . . . . . . . . 17
Power on/off the TV set. . . . . . . . . . . . . . . . . . . . . . . . . . . . . . . . . . . 17
irst time setting. . . . . . .
F
Switching between input sources. . . . . . . . . . . . . . . . . . . . . . . . . . . . . 19
How to select on screen menu items. . . . . . . . . . . . . . . . . . . . . . . . . 19
Picture settings . . . . . . . . . . . . . . . . . . . . . . . . . . . . . . . . . . . . . . . . . . 2
Picture Setting (For Computer source only) . . . . . . . . . . . . . . . . . . . . 21
Sound setting . . . . . . . . . . . . . . . . . . . . . . . . . . . . . . . . . . . . . . . . . . . . 22
Features settings . . . . . . . . . . . . . . . . . . . . . . . . . . . . . . . . . . . . . . . . . 23
TV settings . . . . . . . . . . . . . . . . . . . . . . . . . . . . . . . . . . . . . . . . . . . . . . 24
Multimedia functions (USB) . . . . . . . . . . . . . . . . . . . . . . . . . . . . . . . . 25
Multimedia format supported . . . . . . . . . . . . . . . . . . . . . . . . . . . . . . . 28
. . . . . . . . . . . .. . . . . . . . . . . . . . . . . . . . . . . 18
0
Dimensions and specifications . . . . . . . . . . . . . . . . . . . . 29
Tr ou b l es h o o ti n g . . . . . . . . . . . . . . . . . . . . . . . . . . . . . . . . 30
Installation. . . . . . . . . . . . . . . . . . . . . . . . . . . . . . . . . . . . . 12
Stand base installation . . . . . . . . . . . . . . . . . . . . . . . . . . . . . . . . . . . 12
Wall-mounted. . . . . . . . . . . . . . . . . . . . . . . . . . . . . . . . . . . . . . . . . . 13
Connections to TV . . . . . . . . . . . . . . . . . . . . . . . . . . . . . . 14
Cable system or VHF/UHF antenna system . . . . . . . . . . . . . . . . . . . . 14
HDMI connection . . . . . . . . . . . . . . . . . . . . . . . . . . . . . . . . . . . . . . . . 14
YPbPr connection . . . . . . . . . . . . . . . . . . . . . . . . . . . . . . . . . . . . . . . . 15
AV signal connection . . . . . . . . . . . . . . . . . . . . . . . . . . . . . . . . . . . . . . 15
Computer connection . . . . . . . . . . . . . . . . . . . . . . . . . . . . . . . . . . . . . 15
Reference sheet of computer input signals . . . . . . . . . . 16
Reference sheet of computer HDMI input signals . . . . . 16
Reference sheet of audio input signals . . . . . . . . . . . . . . 16
AV sy stem supported by TV and AV modes: . . . . . . . . . 17
2
Page 4
Important information
Warning
CAUTION
RISK OF ELECTRIC SHOCK
DO NOT OPEN
ATTENTION
RISQUE DE CHOC ELECTRIQUE,
NE PAS OUVRIR
PRECAUCION
RIESGO DE CHOQUE ELECTRICO
NO ABRIR
This sign is intended to warn the user that
uninsulated, dangerous voltage inside the TV
may result in electric shock.
This sign is intended to remind the user to
follow the important operation and maintenance (service) instructions contained in
this brochure supplied with the TV set.
To reduce the risk of fire or electric shock, keep the TV
set away from rain or moisture and never place an object
filled with liquid such as a vase on a TV set.
Important safety information
1. Read and keep these instructions.
2. Pay attention to all warnings.
3. Follow all operation instructions.
4. Make sure that only proper power supply is used
5. Do not install the TV set in high temperature areas or
in damp places or dusty places or places affected by
mechanical shock.
6. Do not block any ventilation vent to prevent high
temperature from forming inside. Carry out
installation in accordance with the manufacturer‘s instructions.
7. Do not install the TV set in places close to the following
heat sources such as a radiator, a collector, an oven or
other equipment generating heat, including an amplifier.
Caution
To prevent electric shock, do not insert the power cord of
the TV set into the socket of an extension line. Insert the
pins of the plug into the outlet completely rather than
leaving them exposed.
Use a wall-mounted bracket or a TV stand recommended
by our company and consult the distributor for details.
Use of other wall-mounted brackets or TV stands may
result in unstable installation and result in personal injury.
Waste disposal instructions
We attach special importance to environment protection.
The TV set contains materials which can be recycled for
reuse.
After the TV set is no longer being used, pr of essional
companies may dismantle it to produce reusable materials
and minimize materials to be disposed. The luminous tube
of the product contains mercury. Dispose of it in strict
accordance with the local regulations. Be sure to dispose
of a used TV set in accordance with local regulations.
8. Do not use the equipment near water.
9. If the supplied plug fails to insert into the socket, ask
an electrician to replace the old socket.
10. Prevent the power cord from being stepped on or
squeezed, especially at the plug, the outlet and the
power cord outlet of the equipment.
11. Do not use parts/accessories not designated by the
manufacturer.
12. Only use a cart, a stand base, a tripod or table
designated by the manufacturer or sold with the
equipment. Be sure to be cautious when moving the
equipment with a cart to avoid it being overturned,
thus resulting in personal injury.
13. Unplug the power cord of the equipment
during thunderstorms or when it will be
idle for a long time.
14. Entrust professional service personnel to carry out
maintenance. Maintenance is required in case of the
following damage: the power cord or plug is damaged,
liquid is splashed into the equipment or foreign matters enters into the equipment, the equipment
is showered by rain or gets damp, the equipment
operation becomes abnormal or the equipment has
fallen from a high position.
15. Unplug the power cord immediately when any liquid
or solid items enter into the case. Use it again after
asking professional service personnel to check it.
16. Avoid using the TV set when the ambient room
temperature is below 0℃.
17. If carrying the TV set from a cold room into a warm
room directly or the room temperature changes
abruptly, the TV set picture may become unclear or
the picture color may become abnormal owing to
steam condensation. Wait for several hours until all
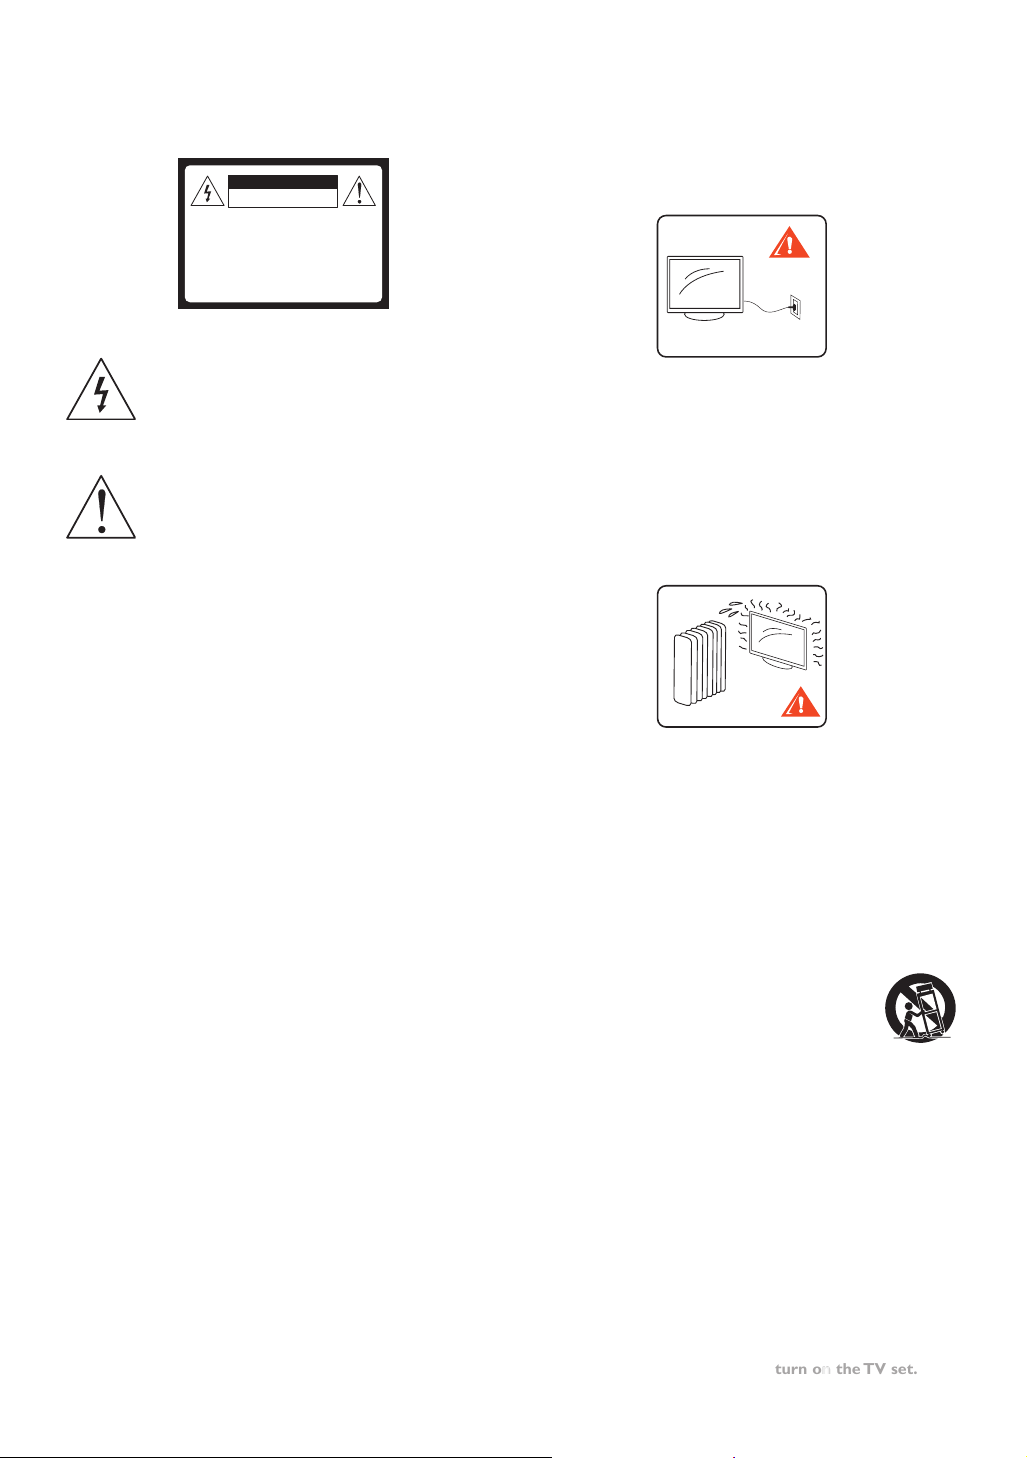
steam is fully evaporated and turn on the TV set.
3
Page 5
Usage Instructions
Installation
Placement
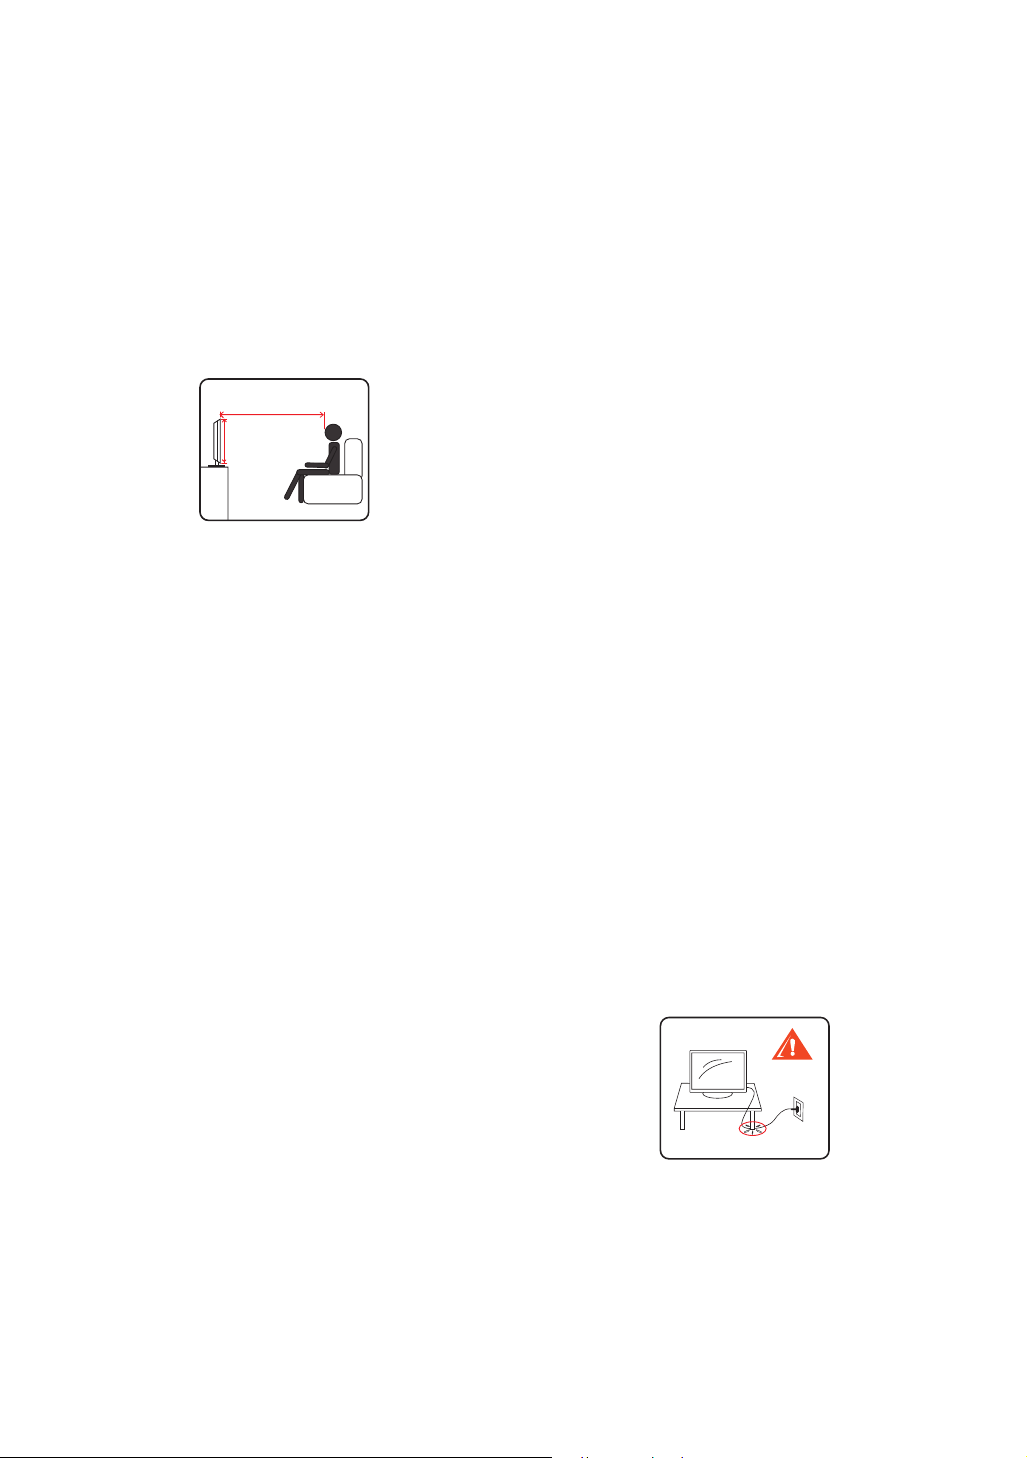
It is recommended to keep a distance 3-7 times more
than the screen height from the TV set when watching
TV programs and set the TV brightness to a proper level.
Watching TV for a long time or in a dark environment
may result in eyestrain. Keep direct light from the screen
to keep the TV set picture clear. Spot lights radiating
directly from the top are recommended for use. Cover
the window facing the screen with an opaque cloth. Install
the TV set in a room in which non-reflective materials are
used on the floor and the walls.
3h~7h
h
Take proper measures and mount the TV set on the wall
or the base to prevent it from turning sideways.
Install the TV set close to the AC outlet.
Pay attention to the following when placing the TV set,
or the TV set may fall from the stand base or the wallmounted bracket, resulting in equipment damage or
severe personal injury.
• Place the TV set on a stable level table.
• Do not hang any item on the TV set. Keep children
away from the TV set.
• Positions for TV set installation shall not be exposed
to extreme temperature, such as direct sunlight,
radiators, radiation ports or air conditioners.
• Do not place the TV set in high temperature, sooty,
damp or dusty environments.
• Do not install the TV set in positions where insects
may appear.
• Do not install the TV set in positions affected by
mechanical shock.
• Do not install the TV set in projecting positions such
as on or behind the bottom stand or places where
heads may touch. Otherwise, it may result in personal
injury.
Outdoor use
Do not install the TV set outdoors. Keep the TV set
from the rain, otherwise it may result in a fire or an
electric shock. Do not expose the TV set to direct
sunlight to prevent it from being damaged by high
temperature.
Mobile use
• Do not install the TV set on a vehicle.
• A jolt from the vehicle may make the TV set fall,
resulting in personal injury.
• Do not install the TV set on a ship. If seawater
is splashed into the TV set, it may result in a fire
or cause TV set damage.
Medical institutions
• Do not place the TV set in a place where medical
equipment is working.
• Electromagnetic interference may result in
abnormality of functions of the TV and medical
equipment.
Accessories
Do not use accessories not recommended by the
product manufacturer in order to avoid risks.
Wall-mount
Wall-mount brackets need to be used for
wall-mount TV sets. Be sure to ask qualified contractors to
carry out installation when using wall-mount brackets to
install or remove a TV set. Improper installation or removal of wall-mount brackets may result in TV sets falling and
severe personal injury.
Pay attention to the following issues when using wallmount brackets to install a TV set:
• Be sure to carry out operations according to the
operation instructions of wall-mount brackets when
installing a TV set.
• Be sure to install the wall-mount brackets supplied
with the operation instructions of wall-mount brackets.
• Do not hang the TV set on the ceiling to avoid the TV
set falling and resulting in severe personal injury.
AC power supply
• Use the AC power cord designated by our company,
which is fit for local voltage.
• Contact the distributor if you cannot insert the plug
into the socket completely.
• Unplug the power supply if you will not be watching
TV for the upcoming days. Never pull the power cord
when unplugging the power supply.
• The plug of the AC power cord should be used and
pulled out gently.
• Do not place the TV set into a position where its
power cord may easily be worn or damaged.
• Do not squeeze, bend or twist the power cord
excessively. If the power cord is squeezed, bent or
twisted excessively, the cord core may be exposed or
broken, making it short-circuit, thus resulting in a fire
or an electric shock.
• Do not modify or damage the power cord.
• Do not place any item on or around the power cord.
• Do not move the TV set when the power cord is
powered on.
• Keep the power cord away from heat sources.
• Unplug the power cord from the outlet on the wall.
• Be sure to hold the plug when unplugging the power
cord.
• Do not pull the power cord.
• Do not use the AC power cord supplied on other
equipments.
• Only use the original AC power cord of our company
rather than those of other brands.
Install the TV set in a position close to the AC power
socket. Do not use a socket with poor contacts. Insert the
plug into the outlet. Incomplete insertion may generate an
electric arc and result in a fire. Ask an electrician to replace
the socket.
Pay attention to the following issues to prevent the
power cord from being damaged. If the AC power cord is
damaged, it may result in a fire or an electric shock. Please
stop using it and request the distributor or the service
center of our company to replace it.
4
Page 6
LED screen
• Although the LED screen is manufactured by state-ofthe-art technologies, with effective pixels reaching up
to 99.99% or even higher, black spots or bright spots
such as red, blue and green may appear on the LED
screen continuously. This is the structure nature of the
LED panel rather than a failure.
• As the LED screen is manufactured by state-of-theart technologies, it can attain high performance and
picture display quality. The backlight setting of the
TV is set as the maximal brightness of the TV set.
However, when no source is available under dark environments or when watching the LED TV on blank
screens, you will find that the TV brightness is uneven.
It is a normal condition rather than a failure.
• Keep the LED screen surface from sunlight, or it will
damage the LED panel.
• Do not push or shake the LED screen or place an
article on the TV set, as it may make the image
become uneven or the LED panel will be damaged.
• The TV set picture may have spots or the picture
may become dark when the TV set is used in a cold
environment. This does not indicate that the machine
has failed. These conditions may be improved as the
temperature rises.
• The screen may have shades when a still (non-moving)
image remains on the screen for a long time. It will
disappear automatically after some time.
• The TV screen and the case become hot when the TV
set is turned on. This is normal.
• Avoid spraying insect repellent containing volatile
substances on the screen.
• Avoid long term contact with rubber or plastic
materials against the TV set.
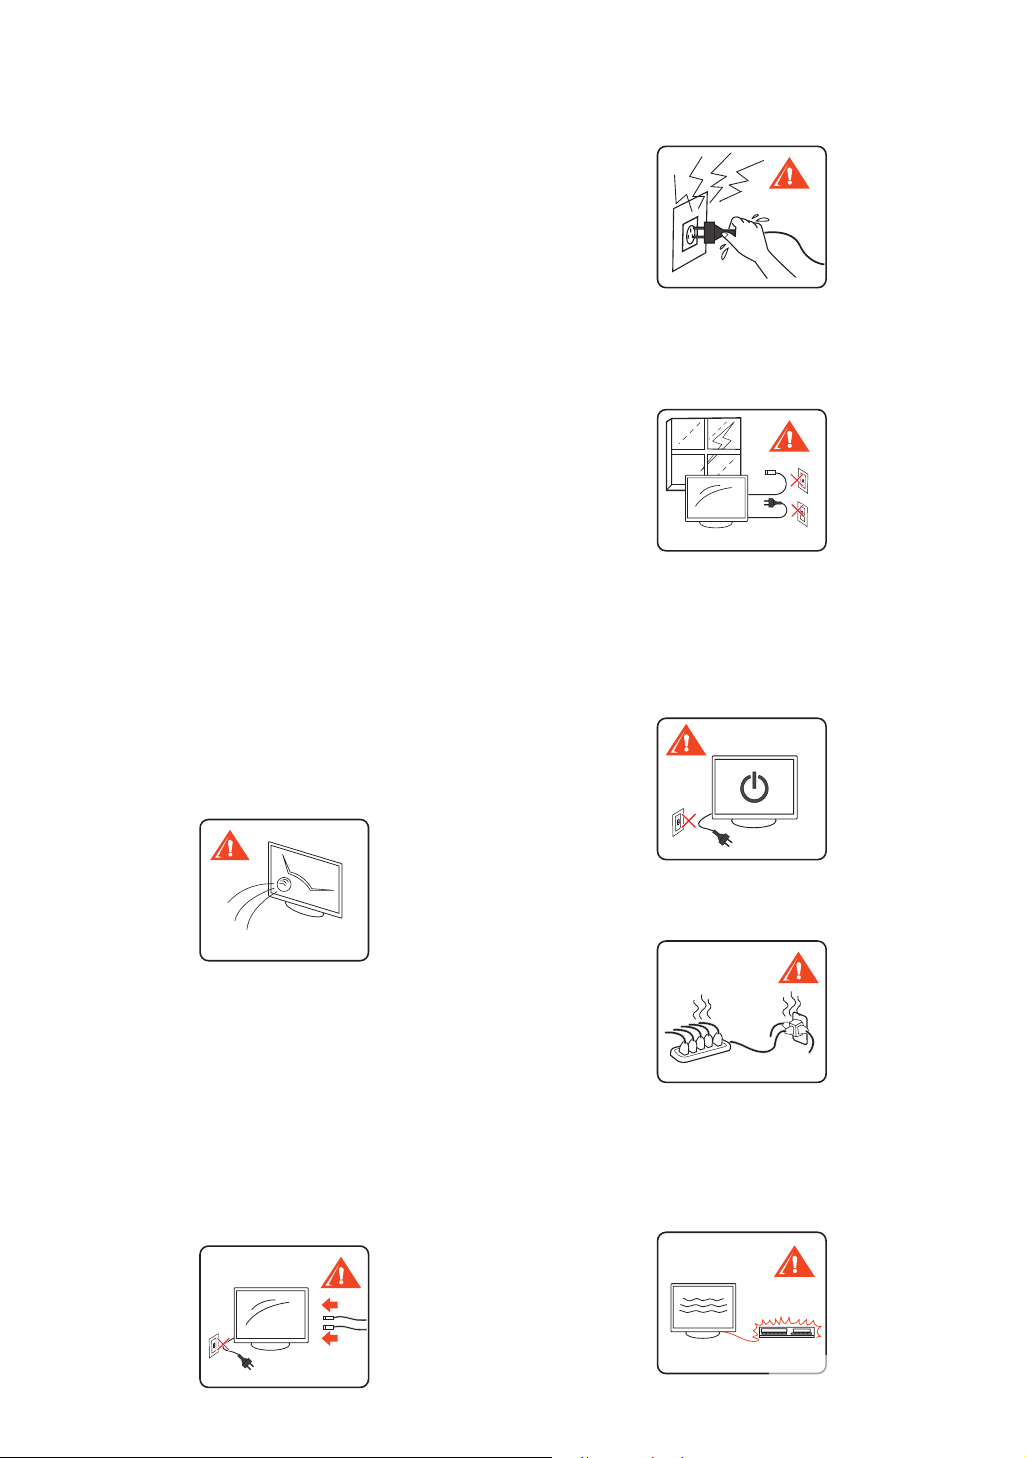
Fragments
Do not throw any thing towards the TV set, as the screen
glass may be broken, resulting in severe personal injury.
Do not touch the TV before unplugging the AC power
cord if the TV screen surface is broken, or it may result in
electric shock.
Electric shock
Do not touch the AC power cord or the TV set with
a wet hand. Plugging in or unplugging the AC power
cord with a wet hand may result in electric shock.
Thunderstorm
Unplug the power cord from the outlet on the wall
and disconnect the antenna to better protect the
TV set during thunderstorms or when it will be idle
for a long time. This may prevent an electric surge
brought by lightning or power lines from damaging
the TV set.
When it is not used
If you won’t be watching TV for the upcoming
days, you should disconnect the TV set from
the AC outlet out of environmental and safety
considerations. When the TV set is turned off,
its connection to the AC power supply is not
disconnected. Unplug the power cord from the AC
outlet to disconnect the TV set from the AC power
supply completely.
Disposal of glass fragments and leaked liquid crystal
If the LED panel is broken, it may result in a liquid crystal
leak and glass fragments may fall scattered. Do not touch
glass fragments and hazardous liquid crystal so as not to
result in incised wounds, dermal toxicity or infection. In
addition, do not let glass fragments or leaked liquid crystal
touch the eyes or the mouth. Rinse them thoroughly with
running water and consult a doctor if glass fragments or
leaked liquid crystal touch the eyes or the mouth.
Cable connection
Be sure to unplug the AC power cord when connecting
cables to secure personal safety. Be careful so that feet will
not stumble on cables, as this may damage the TV set.
Overload
The designed operation voltage of the TV set is AC
220V. Do not connect too many electric devices to
the same AC outlet so as not to cause a fire or an
electric shock.
Optional equipments
Do not keep too near to the TV set when installing
optional equipments, which shall be kept at least 30
cm (1 ft.) away from the TV set. If a VCR is installed
in front of or beside the TV set, the TV set picture
may become distorted. If the TV set is near to a
device with electromagnetic radiation, picture
distortion and/or noise may occur.
5
Page 7
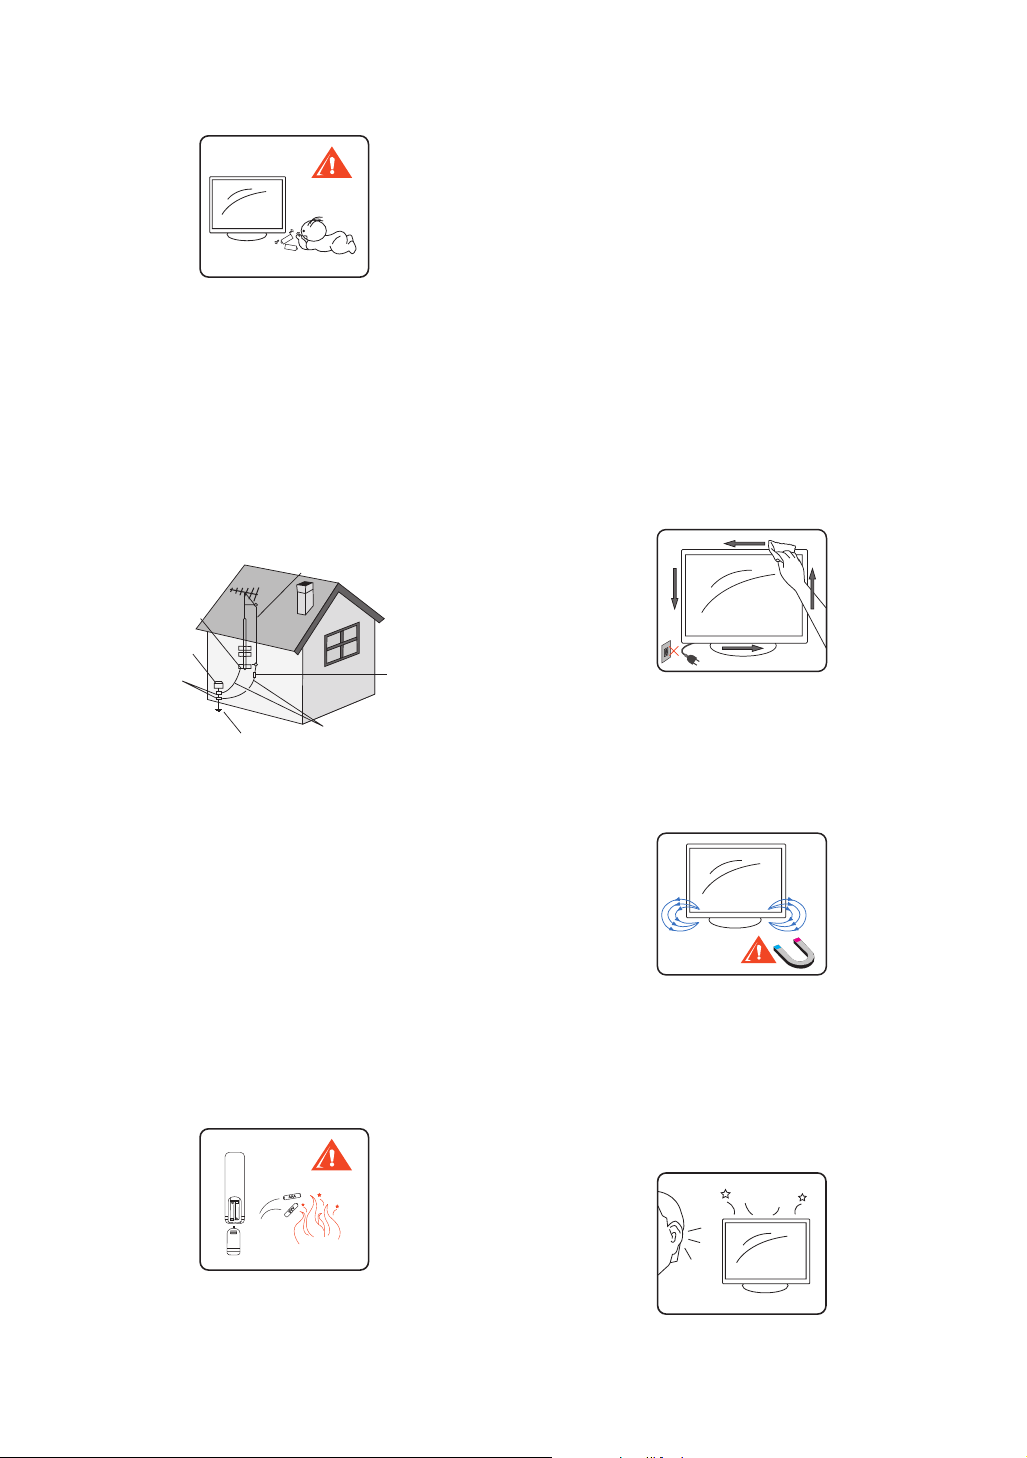
Small accessories
Place small accessories out of children’s reach.
Antenna
Pay attention to the following issues when installing an
outdoor antenna, which shall be away from a high voltage
power line or other electric lamp or a circuit or positions
which may contact these power lines or circuits.
Be extremely careful not to touch this kind of power line
or circuit when installing the outdoor antenna system,
otherwise the consequence may be fatal.
Be sure to have the antenna system grounded to
prevent electric surges and static electricity from being
accumulated.
Antenna
Grounding
terminal
Power service
equipment
Grounding
terminal
Ground conductor
Power supply maintenance
Carried out with reference to the antenna grounding
procedures of the national power regulations
Antenna
separation
device
Cleaning
Clean the plug of the AC power supply.
Pull out the AC power supply plug and clean it regularly. If
there is too much dirt on the plug, it will absorb moisture
and its insulation property will decline, thus resulting in a
fire.
Clean the TV set screen/casing
• Unplug the AC power cord to avoid electric shock
during cleaning.
• Clean the TV set with a soft dry cloth gently to
remove dust on the screen. Use a soft cloth dipped
with soap suds and warm water to remove stubborn
stains. Ne ver use strong solvent such as thinners or
benzene to clean it.
• Follow the instructions as indicated on the package if
a chemically treated cloth is used.
• Dust will be accumulated at the ventilation hole
as time goes by. To ensure good ventilation, it is
recommended to use a vacuum cleaner to remove
dust regularly (once a month).
Electromagnetic induction
As the loudspeaker of the TV set contains a strong magnet
generating a magnetic field, a rticles easily affected by the
magnetic field should be kept away from the loudspeaker.
Batteries
• Do not throw batteries into the fire.
• Disassembly of batteries or exposing them to high
temperature may result in short circuit of batteries.
• Improper replacement of batteries may result in an
explosion hazard. Only use batteries of the same or
identical type.
Disposal of waste batteries
To protect the environment, dispose waste batteries
according to the local regulations.
Sound
Unplug the power supply of the TV set if the TV set
often gives out “cracking” sounds when it is turned on.
Consult with the distributor or the service personnel.
Occasional “cracking” sounds given out by some TV sets
are normal, especially when turning on/off the TV set.
ding~
?
6
Pong~
Page 8
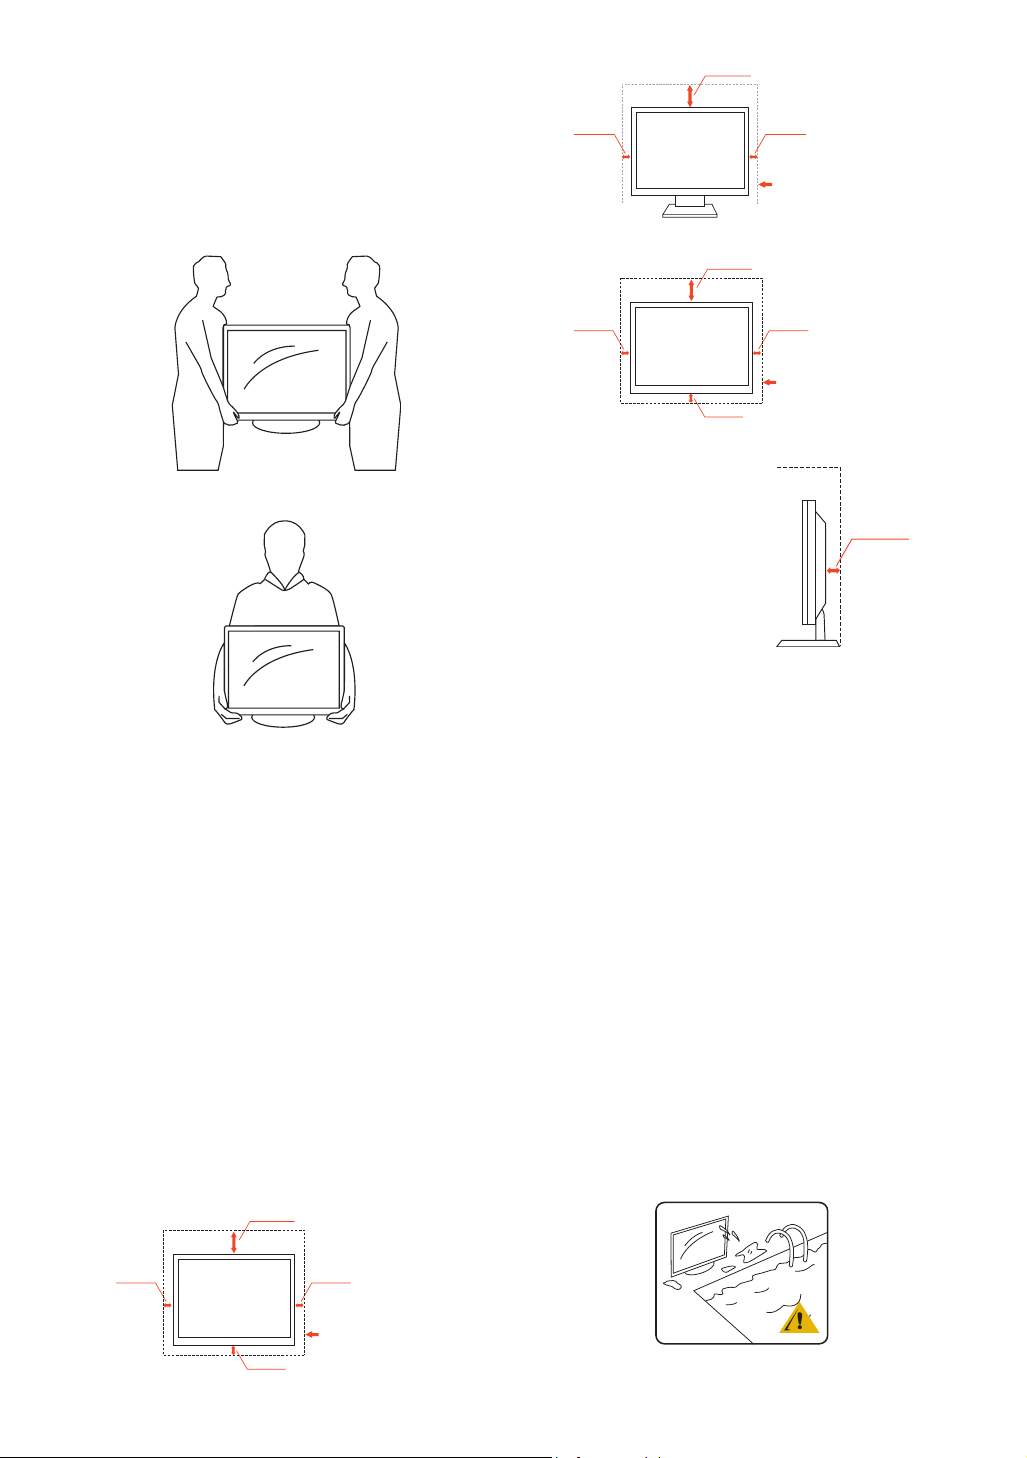
Moving the TV set
Move the TV set as per the specified below
Be sure to follow the following instructions to avoid
the TV set from falling and severe personal injury:
• Disconnect all cables before moving the TV set.
• Moving a large-size TV set needs two or more persons.
• Hold the position as indicated in the figure below
when moving the TV set. Do not press the LED panel.
Hold the bottom of the TV set firmly when moving it.
Place the palm exactly under the panel.
30 cm
4 inches
10 cm
10 cm 10 cm
Install the TV set
with a stand base.
30 cm
10 cm
10 cm
Such a space shall be provided
at least around the TV set.
Such a space shall be provided
at least around the TV set.
10 cm
Keep the TV set from collision, vibration or brute force
when moving it.
Ventilation
Slots on the TV set are used for ventilation. To ensure
reliable operation of the TV set and prevent it from
getting overheated, be sure not to block these slots.
Dust will accumulate on the TV set if improper ventilation
is provided. P ay attention to the following issues to ensure
proper ventilation:
• Do not install the TV set with the panel facing
upwards, do wnwards or inclined.
• Do not install the TV set inverted.
• Never cover slots with cloth or other materials.
• Do not place the TV set on the bed, sofa, carpet or
other similar surfaces to block slots.
• Do not place the TV set inside a narrow space such
as a bookstand or a built-in cabinet, unless sufficient
ventilation is provided.
Proper space shall be provided around the TV set according to the diagram as shown below. Otherwise, air
ventilation may be insufficient and result in overheating,
thus causing a fire or damaging the TV set.
30 cm
Never install the TV set at a place with poor
ventilation.
Items and ventilation holes
Do not push any type of item into the TV set via the casing
slots, otherwise such items may cause a short circuit, resulting in a fire or electric shock. Do not place any item on
the TV set.
Moisture
Moisture and combustibles
• Avoid liquid from splashing onto the TV set. Ne ver
place an object filled with liquid such as a vase on a
TV set.
• Do not operate the TV set with an electric wire at a
place close to a water source, such as bathtub, kitchen
sink, laundry tub, swimming pool or wet basement etc
so as not to cause a fire or an electric shock.
• Keep the TV set dry. Never splash any kind of liquid
on the TV set. Do not operate the TV set if any liquid
or solid item enters the casing so as not to cause an
electric shock or TV set damage. Ask professional
service personnel to inspect the TV set.
• Keep combustibles or open flame such as candle away
from the TV set to prevent a fire.
10 cm 10 cm
10 cm
Such a space shall be provided
at least around the TV set.
7
Page 9
Volume adjustment
Adjust the TV set volume so as not to affect neighbors
as sound seems to be transmitted easily at night. It is
recommended to close the window or use a pair of
earphones.
Adjust the volume to an appropriate level when using
earphones to prevent overly loud sounds from impairing
your hearing.
Maintenance
Do not attempt to service the TV set on your own. Only
professional service personnel can service the TV set as
opening the case may result in high voltage electric shock
or other injury.
Replacement of parts
Be sure to request the maintenance technician to
identify in writing that the parts used by him or her are
manufacturer-designated parts identical to the original
ones if replacement of parts is required.
Replacement of unauthorized parts may result in a fire,
or electric shock or other hazards.
is a trademark of SRS Labs, Inc. TruSurround HD
technology is incorporated under license from SRS Labs,
Inc.
SRS TruSurround HD™ creates an immersive, feature-rich
surround sound experience from two speakers, complete
with rich bass, high frequency detail and clear dialog.
Through close cooperation, AOC and SRS have developed
a kind of excellent audio technology DSS Dream Surround
with independent intellectual property rights.
Functions
Simulate and create a lifelike surround stereo sound
effect.
Increase the width and depth of the sound field which has
an extremely wide optimum listening position.
Optimize the low frequency output effect of the low
power loudspeaker.
Smart zone contains voice and other contents and adjusts
the dialogue volume dynamically to ensure it is clear and
easily understood.
Optimize the bass effect of the bass loudspeaker or midloudspeaker.
Safety inspection
Ask the maintenance technician to carry out a routine
safety inspection as per the requirements of the manufacturer after TV set maintenance is completed to
confirm that the TV set is under a safe operational state
and confirm it. Ask qualified maintenance technician to
maintain the TV set.
Thank you for purchasing this AOC high definition TV set.
The image quality you watch on the AOC TV set depends
on the signal quality you will receive. To experience the
super fine picture effects of the AOC TV set, you need to
receive high definition programs. This AOC high definition
TV set may receive and display high definition programs
according to the following means.
• High definition wireless TV broadcasting
• High definition cable services
• High definition satellites services
• Blue-ray player or other peripheral devices
Please contact the cable or satellite TV supplier to acknowledge how to upgrade to high definition programs.
Motion Boost provides the clear picture reducing motion
judder commonly found in fast-paced action scenes in movie
based content by displaying 120 images per second.
8
Page 10
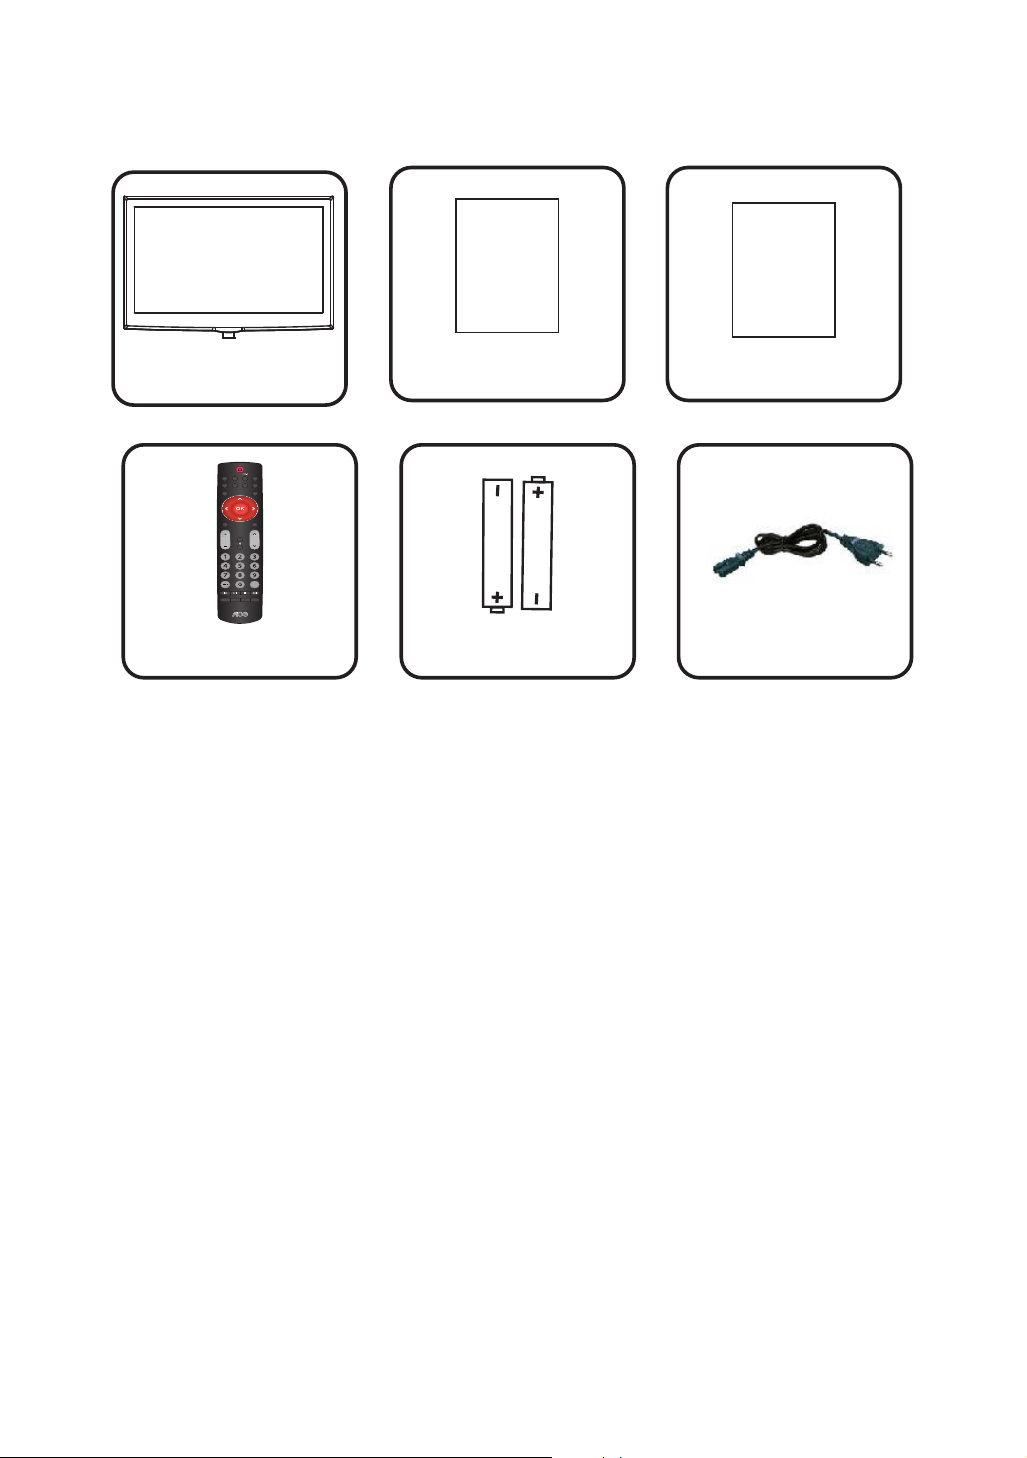
Packing list
Check the TV set and all accessories for their intactness after the packing case is opened.
AOC LED TV Set
AV
YPbPr
TV
PC USB
Freeze
Audio
Picture
I/II
Sleep
Dispaly
MenuZoom
Source
CH
VOL
Back
User manual
User manual
Batteries for remote control
Warranty card
Warranty card
Power cordRemote control
9
Page 11

Control and connection
e
f
g
h
i
Touch type
a
Item Description
a YPbPr input
b SPDIF
c Antenna input
Used to connect the YPbPr jack and L/R jack input from other device. The YPbPr will provide
better picture quality than S terminal or composite video.
Output a digital audio to the external loudspeaker or other digital audio equipment
RF input used to connect the cable or VHF/UHF antenna.
Connect video output port of personal computer with an 15 pin D-sub cable. Connect separate
audio cable between PC and TV to get sound. Please refer to Reference Table for computer
signal for supported display resolution.
d Computer signal
input
For some Apple Macintosh computers, adapters may be required (not provided). Connect
adapters to computers before connecting HD15-HD15 cables in case of this circumstance.
Adjust the clock and phase settings in the menu if the picture becomes noisy, flickers or is
unclear.
Connect a HDMI signal to HDMI port. The HDMI (High definition Multimedia Input)
connector provides No-compressed and fully digital audio/video data transmission between
TV set and any HDMI audio/video devices, including the set top box, DVD player, Blue-ray
e HDMI input
player, A/V receiver and computer.
HDMI connection is required for 480i, 480p, 576i, 576p, 720p, 1080i and 1080p modes. Be sure
to use HDMI cables marked with HDMI symbols only.
b
c d
Channel
Volume
Source Menu
Power
supply
f USB interface
g AV signal output
h AV signal input
i Jack for
earphone
Connect USB storage device to play multimedia data
Connect Video/Audio (L/R) signal of TV to other display devices as their source signal. The function is
available under TV and AV mode.
Used to connect the COMPOSITE VIDEO output jack on the AV equipments with
COMPOSITE VIDEO functions. The audio source may be connected to the TV set via the L/R
jack.
Used to connect earphones. If the earphone does not match the jack, use proper jack adapter
(not supplied). The loudspeaker of the TV set will mute after the earphone is connected.
10
Page 12

Remote control
Ê Ê Ê Ê
Ê Ê Ê
AV
YPbPr
TV
Freeze
n
o
q
p
r
s
Keys Description
a Power
switch
b TV/
AV(YPbPr)/
HDMI(PC)/
Multimedia
c 0-9
d Back
e Source
Picture
Dispaly
Source
VOL
Press the key to turn on/off the TV set.
Turning off the TV set, will turn TV to the
energy saving mode rather than be power
off, unless the AC power switch is off or the
TV set is unplugged.
Press TV/AV( YPbPr)/HDMI(PC)/ Multimedia
keys to select input directly.
Press number keys 0-9 to select desired
channels.
Press the key to go back to the previous TV
channel viewed or to the menu of the upper
level (Display menu items and settings)
Go back to the upper level under the
multimedia mode.
Press the key to display the source list.
Pressing the key repeatedly can switch
inputs
PC USB
Audio
Sleep
MenuZoom
CH
Back
Keys Description
f Program
+/-
a
b
I/II
l
g Mute
h Sleep
k
h
oœpπ
i
j
e
f
i
OK
j Menu
g
c
k Audio
l I/II
d
m
m
n Freeze
o Picture
p Zoom
q Display
r Volume +/-
s - / --
Press the key to change channels. P ress either
of +/- keys and hold to switch channels rapidly.
the key to mute or unmute the TV sound.
Press
Press the key to set the time after which TV
should turn off and enter standby state. Auto
power-off may also be achieved in the OSD
function option.
Press oœpπ keys to select the desired
option or adjust the OSD menu settings.
Press oœpπ keys to select Picture/Music/
AV under the multimedia thumbnail option.
Press pπ keys to achieve REW/FF when
playing a music file.
Press pπ keys to achieve REW/FF
when playing a AV (Optional speed 2X,
4X,8X,16X,32X)
Press the key to confirm the item and
settings selected.
Select a file and press the OK key to play
under the multimedia thumbnail option.
Press the key to display the main menu of
the TV set. Options of the main menu vary
with the input and contents.
Press it repeatedly to select the desired
smart sound:
[Personal settings], [Music], [Speech],
[Standard], [DSS]. Smart sound may also be
found in sound settings. Refer to the sound
setting part of the TV set for details.
Switch the stereo and I/II stereo to
monophonic sound. Select the first language
(I) or the second language (II) in the
bilingual program. Note: Decision can be
made only when related sound system is
provided.
Press keys to switch over
between Previous and Next when playing
pictures.
Press
between Previous and Next when playing a
keys to switch over
music file or an AV file.
: Press the key to start/pause picture
slide/music/AV playing.
: Press the key to stop picture slide/
music/AV playing.
Back
* Press
: to return to the upper menu.
Freeze or unfreeze the picture.
Press the key repeatedly to select
available smart images: [Personal Setting],
[Standard], [Bright-colored], [Movie] and
[Power Saving]. Smart images may also be
found in the Picture Settings. Refer to the
Picture Setting part for details.
Press the key repeatedly to browse the
image scale mode settings: [Auto Format],
[Normal], [Zoom1], [Zoom 2], [Wide
screen] available for general source.
[4:3] and [Full screen] are available under
computer mode.
Click to display information related to
channels and/ or programs (if any). OSD
(on-screen display) will disappear within
several seconds and click again to close the
display.
Press the key to adjust the volume.
To switch to a channel above 100 rapidly,
enter three figures after pressing key.
11
Page 13

Battery installation for the remote control
Put two AAA batteries (supplied) into the position indicated in the battery case of the remote control.
Installation
Refer to the above schematic diagram for important operation instructions.
Stand base installation
Install the stand base (sold separately) before installing the TV set.
Carry out the installation pursuant to the following simple procedures:
42”:
1. Disconnect all cables from the TV set.
2. Place the LCD TV set on a stable table covered with a piece of thick soft cloth with LCD panel faced down.
3. Remove Screw A (1 no.) and take down the bottom cover .
4. Put on the bottom cover attached to the stand base and fasten Screw A to the original position. Place
the stand base assembly to the original position of the TV set and fasten Screw B to the position
indicated (four screws in total) (Note that the types of Screw A (1 no.) and Screw B (4 no.) are different)
12
Page 14

Wall-mount
• Use wall-mount brackets (sold separately) to install the TV set on the wall. Be sure to remove the stand base of
the TV set before installing it.
• Do not remove the stand base unless the TV set is mount on the wall.
• First remove four M6(42”) screws before installing wall-mounted brackets.
• Be sure to keep the screws and the removed stand base properly for future use. Place screws out of children’s
reach.
• For wall-mount installation, re fer to the operation instructions provided for wall-mount brackets. Experience is
required for TV set installation, especially regarding the wall strength to support TV set weight.
• It is strongly recommended that wall-mount brackets specially designed for your TV set be used and wallmount TV set installation shall be done by the distributor or the authorized contractor of our company.
13
Page 15
Connections to TV
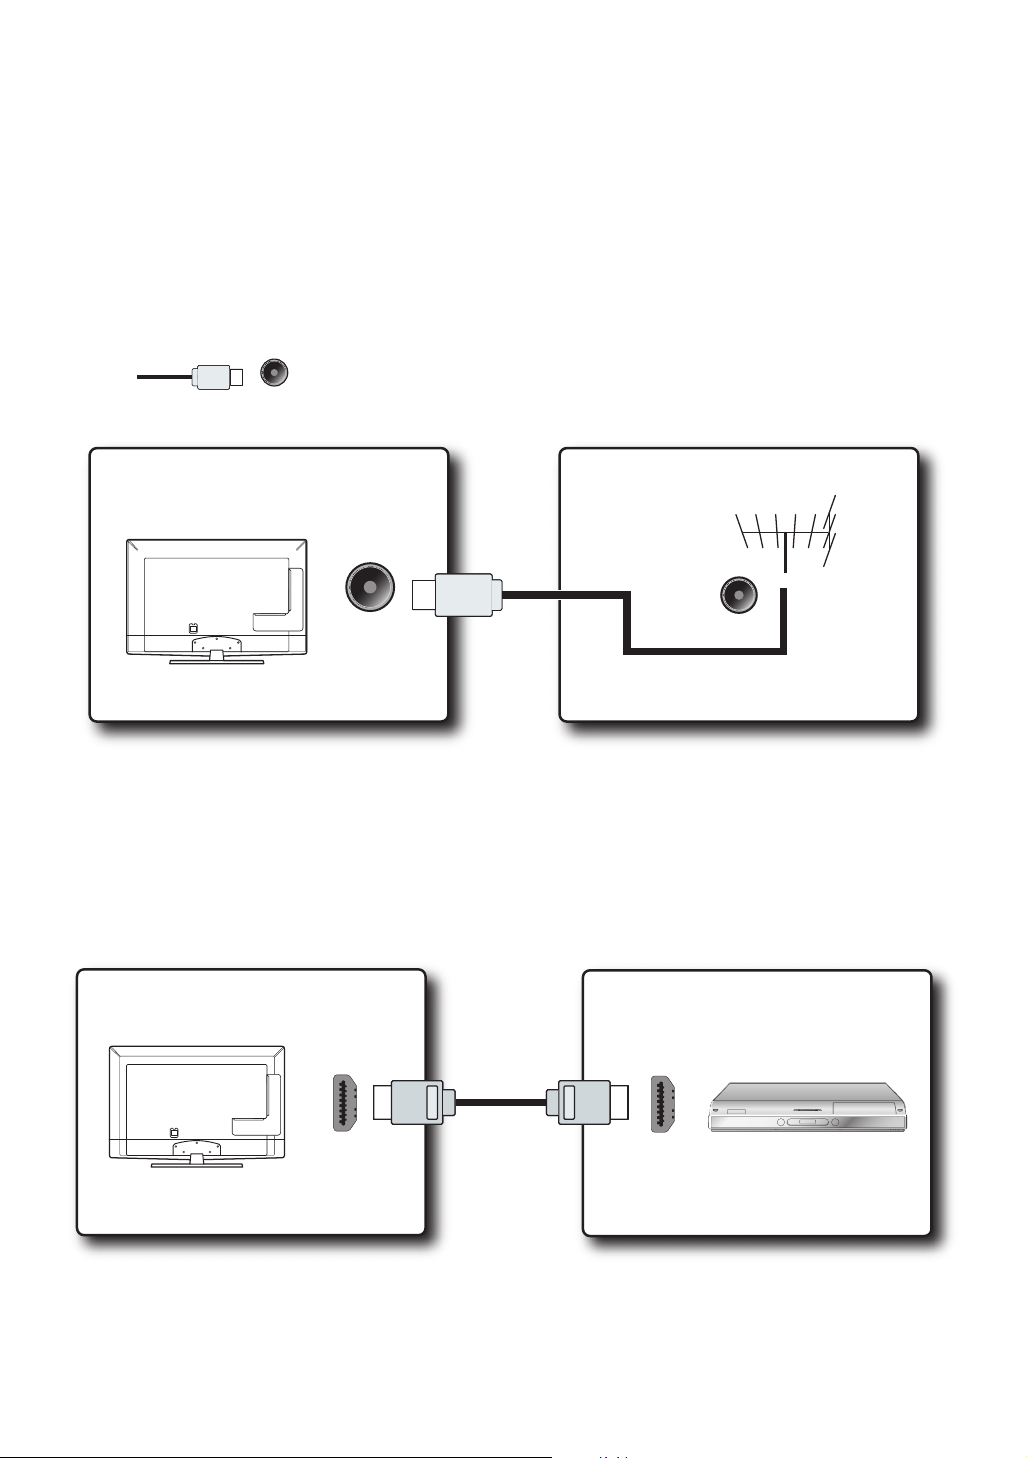
Cable system or VHF/UHF antenna system
Besides standard definition analog programs, you may also watch standard definition or high definition digital programs
(if such programs are available in your region).
The TV set can receive cable and VHF/UHF antenna analog signal TV programs.
AOC strongly recommend to use 75Ω coaxial cable connected antenna/cable input to receive optimum picture
quality. 300 Ω twin-core cable may be easily affected by RF interference, thus resulting in signal degradation.
Cable or VHF/UHF (or VHF only)
75Ω coaxial
cable
Tuner input
Tuner input of TV
ANTENNA
input
Tuner
Tuner input
High definition interface
You can watch high definition programs by subscribing to high definition cable services or high definition satellite
services. To get optimum picture, be sure to connect the interface of the TV set via the HDMI or YPbPr input at the back
of the TV set.
HDMI connection
HDMI input
HDMI
If the equipment is equipped with the DVI jack rather than the HDMI jack, connect the DVI jack to the HDMI input jack
(via the DVI-to-HDMI cable or adapter) and connect the audio jack to the computer audio input jack.
14
Page 16

YPbPr connection
YPbPr input
AV signal connection
AV signal input
Computer connection
TV set can be used as a computer monitor by connecting TV to computer with a VGA cable. The TV set may also be
connected to a computer with HDMI output.
Computer signal input
• Use the VGA cable and an audio cable with ferrite core to connect the TV set to the computer.
• If a PC is connected to the TV set and no computer signal has been input for more than 30 seconds, the TV set
will enter the standby mode automatically.
15
Page 17

Reference sheet of computer input signals
Set output signals in the computer according to the table below after connecting the computer to the TV set properly.
Definition Horizontal frequency (kHz) Vertical frequency (Hz)
640 x 480 31.469 59.940
800 x 600 37.879 60.317
1024 x 768 48.363 60.004
1360 x 768 47.720 59.799
1280 X 1024 63.981 60.000
1920 X 1080 66.587 59.934
Reference sheet of computer HDMI input signals
1. When using the DVI port: Connect the DVI port of the AV equipment to the back of the TV set panel via the DVITo-HDMI cable and set the output signal of the AV equipment according to the table below.
2. When using the computer HDMI port: Connect the computer HDMI port to the back of the TV set panel via the
HDMI cable and set the output signal of the computer according to the table below.
Definition
640 x 480 31.469 59.940
800 x 600 37.879 60.317
1024 x 768 48.363 60.004
1360 x 768 47.720 59.799
1280 X 1024 63.981 60.000
1920 X 1080 66.587 59.934
Horizontal frequency (kHz) Vertical frequency (Hz)
Reference sheet of audio input signals
1. Connect the YPbPr port or the HDMI port of the AV equipment to the back of the TV set and set the output signal
of the AV equipment according to the table below.
2. If the computer display adapter may support AV format signals, output signals indicated in the following table may
be set.
Definition
720 x 480i 15.734 60
720 x 480p 31.500 60
720 x 576i 15.625 50
720 x 576p 31.250 50
1280 x 720p 37.500 50
1280 x 720p 45.000 60
1920 x 1080i 28.125 50
1920 x 1080i 33.750 60
1920 x 1080p 56.300 50
1920 x 1080p 67.500 60
Horizontal frequency (kHz) Vertical frequency (Hz)
16
Page 18

AV system supported by TV:
PAL D/K B/G I ; NTSC M/N。
Standard definition interface
You may watch conventional programs by DVD player or VCR player. Connect the equipment to the TV set via AV input
at the side of the TV set panel.
Operating AOC TV set
Power on/off the TV set
You may turn on the TV set via the power button on the TV set or the remote control.
AV
YPbPr
Picture
PC USB
• ••• ••• •
Audio
I/II
TV
Freeze
Dispaly
Sleep
Channel Volume
Source Menu
Power
supply
Touch type
Tips
1. Although the TV set consumes little electric power under the standby mode, it will continue to consume electric
power. Unplug the power cord of the TV set if the TV set will not be used for a long time.
2. If you can not find the remote control but still wants to turn on the TV set from the standby mode, press
oChannelœ, pVolumeπor B power supply key on the front of the TV set.
First time settings
While turning on your TV for the first time or when TV is reset to default settings, TV displays Welcome
window as in Figure below Follow the steps below start Initial setup wizard.
Step1 : Press OK key or πarrow key on the remote
17
Page 19

Step2 : TV pops-up window shown below prompting to select Menu Language.
By default English will be selected as Menu language to continue wizard press OK key or
oœ
on remote control or to select languages other then English press
arrow key and press Ok key.
To exit from initial setup wizard press Menu key.
Step3 : TV pops-up window shown below prompting for Auto scan of channel.
If RF input is connected to TV select [Scan] and press OK key or
π
arrow key to scan for VHF/UHF
channels automatically.
If RF input is not available to skip channel scan select [Skip Scan] and press OK key or
π
arrow key
arrow key..
π
Step4 : Finally TV will prompt Congratulation window, press OK key on remote to complete initial setup
and to exit the wizard.
18
Page 20

Switch between input sources
You can select signal sources to your AOC TV set directly with your remote controller. You can also press the
Source key in the display menu to select signal source.
1. When selecting a source with a remote control directly: Press the following keys to switch input sources directly.
HDMI/
AV
TV
Freeze
Dispaly
2. When selecting a source with the source key:
VOL
PC
YPbPr
Picture
USB
Audio
I/II
Sleep
Source List
TV
Source
CH
YPbPr signal
AV terminal
PC
HDMI 1
HDMI 2
HDMI 3
USB
Source
1. Press the
2. Press the key or the
key to display the source menu.
Source
to select a source: [TV], []YPbPr], [AV Terminal], [Computer], [HDMI 1],
[HDMI 2], [HDMI 3] and [USB]. Press the OK key to enter.
How to select on screen Menu items
Menu
1. Press the
2. Press the key to select required menu icon for picture setup, icon for sound setup,
icon for feature setup, and icon for Installation setup.
3. Press the key to select the desired menu item and then press the OK for entering into the sub
menus
to return to the upper menu.
4. Follow sub-menu operations and the detailed description refer to the table under each settings description.
5. Press the key to return to the previous menu or to exit from OSD window.
key to display the OSD menu.
Menu
19
Page 21

Picture settings
Item Description
Personal settings User can set their favorite setting.
Picture
Auto picture Standard
Brightness
Contrast
Color
Tint
Sharpness
50
50
50
0
5
Smart image
Vivid Enhanced picture contrast and sharpness.
Movie Used to watch movie based content. Most suitable for cinema environment.
Energy saving Reduce the backlight intensity to save electricity.
Brightness Adjust the picture brightness.
Contrast Adjust the picture contrast.
Color Adjust the color.
Tint Adjust the color balance between red and green.
Standard Standard picture setting. Recommended for family entertainment.
Sharpness
Adjust the picture sharpness with improved details.
Cold color Display Bluish white picture.
Color
temperature
Warm color Display Reddish white picture.
Normal Display picture with balance color temperature.
Noise reduction Reduce the noise interference of the picture.
Flesh Tone Adjust the picture to display more natural skin tone color.
Adjust the brightness of the backlight from 0 to 100. It can be adjusted only when [DCR] is set to be off.
Adjust the backlight brightness automatically to increase DCR.
Reduces motion judder
commonly found in fastpaced action scenes in
movie based content.
Advanced
settings
Backlight
DCR
(Dynamic Contrast Ratio)
MJC
(Motion Judder
Compensation)
Effect: to reduce the dynamic blur settings.
Separation display: Set the position of MJC displayed on the screen.
Show: Display MJC demo on screen.
20
Page 22

Picture settings (For computer source only)
Advanced Video
Auto Config
Horizontal
Vertical
Phase
Clock
Resolution
Item Description
Auto adjustment Adjust the picture to optimum position of the screen automatically.
Horizontal
position
Vertical position Adjust the vertical position of the picture.
Phase Adjust the phase of the computer output signal.
Clock Adjust the clock frequency of computer signals.
Resolution
Adjust the horizontal position of the picture.
Set the screen resolution to the optimum resolution suitable for Computer application.
* The function is available under specific PC screen resolution only.
64
48
4
127
21
Page 23

Sound setting
Sound
Auto sound Personal
Equalizer 120Hz
Equalizer 500 Hz
Equalizer 1.5 KHz
Equalizer 5 kHz
Equalizer 10 kHz
AOC co-works with SRS Labs to create unique and exclusive sound technology- DSS Dream Surround. DSS effect
creates a truly immersive surround sound experience with rich bass and clear dialog from only two speakers.
0
0
0
0
0
Item Description
Smart sound
• Smart sound
may also be
adjusted by
pressing the
Audio key on the
remote control.
Balancer 120Hz
Balancer 500Hz
Balancer 1.5kHz
Balancer 5kHz
Balancer 10kHz
Balance Adjust the balance between the left and right loudspeakers.
Digital audio
output
Auto volume
• Some sound settings are not available according to different input source.
Person setting: Provide the sound mode set by the user.
Music: Used to watch vocal music.
Speech: Used to watch a speech.
Standard: Suitable for dialogue.
DSS: Create a lifelike and rich surround sound via two loudspeakers while providing rich sound,
clear dialogue and loud sound.
According to user preferences, user can adjust the different center frequency, changing the low,
middle, treble, volume
Set the digital audio output to PCM when audio is connected through SPDIF.
Automatically reduces sudden volume changes, for example, when switching between the channels.
* Workable only under [TV] source.
22
Page 24

Features settings
Features
Menu Language Simplified Chinese
Picture Format
Time
Parental
Reset
SW Ver.
Item Description
Menu language
Picture format
Time
Parental
Reset All settings are reset to default values.
Software version Display the software version.
• Some function settings are not available according to different picture source formats.
Press the pπ key to select the required language and press the OK key to confirm it.
To select the available picture format.
Sleep timer can be set to 5, 10, 15, 30, 45, 60, 90, 120 minutes.
Tips:
1. The TV switches to standby after the specified time.
2. This can also be set by using the SLEEP button on the remote control.
Parental feature allows you to lock the
channels and connected devices, to prevent children from viewing inappropriate
content on TV.
Auto
V1.000A
Wide screen, Auto, Normal, Zoom1 and Zoom2
Channel Block: Lock the unwanted channels, so that
you can restrict the children to watch unsuitable TV
programs.
Input Block: Allows you to block individual video
inputs like TV, YPbPr, AV, PC, HDMI inputs.
•
USB input cannot be blocked.
Set Password: The initial password is 1234. You can
change the password to any 4-digit number of your
choice.
Clear All: Reset all parental Menu selection except
Password.
23
Page 25

TV settings
The setting is available only in TV mode.
TV
Channel Scan
Manual Scan
Channel Skip
Channel Sort
Channel Edit
Channel Fine Tune
Item Description
TV automatically searches for the channel in the available frequency band and stores
Channel scan
sequentially
Press the OK key to enter the interface. Press the pπ to select [Yes] and press the OK key to
start scanning channels.
Scan the wireless channels or cable channels the TV set can receive in your area automatically.
Manual channel
scan
Channel skipping
Channel sort
Channel edit
Channel fine
tune
Search for the channels manually and store it to the desired channel number.
Enter the required channel frequency using remote number key in [Start Frequency] window.
Press the pπ key to select [Scan Upward] or [Scan downward] and start scanning from the initial
frequency.
To skip the unwanted channel while changing the channels.
Select channels to be skipped by pressing OK key.
Tips:
1. The selected channel is skipped when you press CH +/- on your remote control.
2. Press the Numeric buttons on the remote control to access the skipped channel.
3. To un-skip the channel, enter into Channel skip sub menu and un-select the channels not
to be skipped from the channel list.
It is used to interchange the channels. So that you can arrange tuned channels as per your
requirements.
Select the channels to be interchanged by pressing OK.
Channel swap can be done only between two channels.
Used to edit the channel parameters like Channel number, Channel name, Frequency, Color
systerm and Sound system.
Press the oœ key to select the channel and then press the OK key to enter into the sub menu.
Press π key to edit the channel information.
Fine tune the analog channel manually when the quality of reception is poor.
Press the oœ key to select channels and press the OK key to enter into sub menu. Pr ess the
pπ key to fine tune the channel.
24
Page 26

Multimedia functions (USB)
TV USB port can be used to view JPEG photos, play mp3 music and Video files present in USB devices.
Selecting USB Media Center:
Press the Direct USB key on remote to enter into the [USB] source
USB
OR
Source
1. Press the
2. Press the key
key to display the source menu.
to select [USB] source. and press the OK key to enter into USB source.
USB menu settings
When USB drive is detected by the TV, USB drive is displayed as a folder on the screen as shown below. If more then
one USB is pluged to the TV two folders will be displayed. Select the required drive and press OK key to view subfolder
or files in theUSB drive.
Press the Menu Key to get the following Menu options
1. [SORT] : Used to arrange the folder and files as per Date or File Name
2. [Media Type] : Select the type of files to be viewed is eighter Photo or Music or Video.
3. [Thumbnail size] : Select the thumbnail size of the folder and files as Small, Medium or Large.
* Press the key to return to the upper menu.
* To Quit the USB source : Press the key and select other source or press key
to select other source.
Viewing Photos
1. Press
2. Thumbnail of the available images will be displayed on the screen. If no images are displayed then select the
folder containing the Photos .
3. To select a perticular image and to display it in fullscreen press key and press OK key.
4. Press key to play/pause slideshow. Press to veiw next or previous image. Press key to stop
slideshow
Menu
key and select [
Slide show starts automatically when image is viewed in full screen.
Photo]
under [
Media Type]
25
menu and press OK key.
Page 27

USB menu settings for JPEG
Press the Menu key to get the following menu settings:
1. [Pause/Play] : Use to pause or play the slide show.
2. [Repeat] : Use to select the following repeat options:
a. Repeat one : show same image repeatedly.
b. Repeat all : show all the images in the folder repeatedly.
3. [ Shauffle On/Off] : When shauffle is on slideshow will display images randomly and if shauffle is off slideshow displays
imagesone after the other according to sort order
4. [Rotate] : When the slideshow is paused the image can be rotated by 90 degree in clockwise direction.
5. [ Zoom] : When the slideshow is paused the image can be Zoomed to scale of 1X, 2X and 4X.
6. [Show info] : Used to view the details of image like Name, Date, Size..
Playing mp3 music files.
1. Press
2. Thumbnail of the available Music files will be displayed on the screen. If no files are displayed then select the folder
containing mp3 music files and press OK key.
3. To select a required music file press key and press OK key to play music.
4. Press key on remote to play or pause the music playback. Press key on remote to select next or previous
music track present in the folder. Press key to stop music playback. Press key to Fast forward or Rewind the
Music playback at rate of 2X, 4X, 8X, 16X and 32X.
Menu
key and select [
Music]
under [
Media Type]
menu and press OK key.
USB menu settings for Music playback
Press the Menu key to get the following menu settings:
1. [Pause/Play ]: Use to pause or play the Music playback.
2. [Repeat] : Use to select the following repeat options:
3. [Shauffle On/Off] : When shauffle is on random music files will be played and if shauffle is off music files will be played
one after the other according to sort order.
4. [Show info] : Used to view the details of the music file like Title, Artist, Album, Year, Duration.
5. [Show Spectrum] : Displays a Equalizer bars at the bottom of the screen.
6. [Audio only] : Play TV sound only and TV LED backlight will be turned off.
(Note : To turn on the display Press any key on remote control)
a. Repeat one : play the same music file repeatedly.
b. Repeat all : play all the music files in the folder repeatedly.
Playing Video files.
1. Press
2. Thumbnail of the available Video files will be displayed on the screen. If no files are displayed then select the folder
containing Video files and press OK key.
3. To select a required video file press key and press OK key to play the Video.
4. Press key on remote to play or pause the Video. Press key on remote to select next or previous
Menu
key and select [
Video files present in the folder. Press key to stop video. Press key to Fast forward or Rewind the video
at rate of 2X, 4X, 8X, 16X and 32X.
Video]
under [
Media Type]
menu and press OK key.
USB menu settings for Video
1. [Pause/Play ]: Use to pause or play the the video play.
2. [Repeat] : Use to select the following repeat options:
3. [Show info] : Used to view the details of the Video file like Title, Director, Genre, Duration, Next file.
4. [Auto Picture] : Used to change the picture settings eighter to Personal, Standard, Vivid, Movie and Eco
5. [Picture format] : To select the display format as eigther Auto, Normal(4:3), Zoom1, Zoom2, Wide Screen.
a. Repeat one : play the same music file repeatedly.
b. Repeat all : play all the music files in the folder repeatedly.
26
Page 28

Tips:
1. The USB interface to the digital multimedia player is not universal.
interface, it is normal and related to the equipment drive.
2. The period needed for the player to read information varies with the equipment and its memory capacity and
information reading speed may slow down temporarily. This is a normal phenomenon.
3. The USB interface of the equipment provides 5V voltage and 500Ma maximal current. Owing to different interface
specification rather than the standard USB protocol adopted by some memory equipments, it will affect correct
identification by the digital multimedia player, which is normal.
4. USB may act as the software upgrade interface.
5. Not all files of the following formats are supported. Specific parameters of some multimedia source go beyond the
decoding range, resulting in play failure. It does not belong to the machine failure.
6. Support the storage medium of FAT16/FAT32 file format only in the system.
7. Support multimedia format, as shown in the table below.
If a file fails to be identified by the USB
Multimedia format supported
USB 2.0 USB
Storage
medium
Picture JPEG (*.JPG), PNG, GIF, BMP
Music • MPEG1 (*.MP3)
AV • MPEG1/2 (*.AVI, *.MPG, *.MPEG, *.TS)
FAT16 / FAT32
• Sampling rate: 32k, 44.1k, 48kHz
• Data rate: 32k, 64k, 96k, 128k, 196k, 256k, 320kbps
• MPEG4 (*.AVI, *.MP4, *.MOV, *.MKV)
• H.264 (*.AVI, *.MP4, *.MOV, *.MKV, *.TS)
• RM/RMVB
27
Page 29

Dimensions and specifications
Model LE42K09D LE42H09P
Panel display size 930.24(H) x 523.26(V)
Resolution 1920 x 1080P Full HD 1920 x 1080P Full HD
Panel spec Horizontal 178˚ (TYP)
Brightness TYP: 450 cd/m2 TYP: 450 cd/m2
Contrast 4000:1 (TYP) 4000:1 (TYP)
Loudspeaker 8W x 2 + 10W 8W x 2 + 10W
AV system PAL PAL
Audio system D/K, B/G, M, I D/K, B/G, M, I
Antenna impedance 75Ω 75Ω
Input voltage 180~240W, 50/60Hz 180~240W, 50/60Hz
Energy consumption 120W 120W
Standby energy consumption ≤ 0.5W ≤ 0.5W
Dimension (W×H×D)
With stand base and brackets (mm)
Wall-mounted accessories Options Options
Wall-mounted dimension 200 X 200 mm
Operation temperature 0℃~35℃ 0℃~35℃
Operation humidity 10~90% 10~90%
Storage temperature -20℃~50℃ -20℃~50℃
Storage humidity 10~90% 10~90%
(42.02”diagonal)
Vertical 178˚ (TYP)
1035.2 X 706 X 242.2 1035.2 X 706 X 242.2
M6 (Screw)
930.24(H) x 523.26(V)
(42.02”diagonal)
Horizontal 178˚ (TYP)
Vertical 178˚ (TYP)
200 X 200 mm
M6 (Screw)
28
Page 30

Troubleshooting
Symptoms Explanation/solution
No picture is available
No picture is available. Check the energy saving settings.
Fail to receive any
channel.
The TV set is locked in
a certain channel.
Fail to receive or select
channels.
The TV set is turned off
automatically.
Some AV files can not
be displayed.
Image quality is inferior
to that as viewed in the
seller shop.
Ghost. Check antenna/cable connection. Check the antenna position and direction.
The TV screen only
displays snowflakes and
noise.
Dotted line or fringe.
No color/dark/
improper color/too
bright
Picture noise
Fail to play photos,
music files or AV files
or the playing quality
is poor.
MP3/MP4 player
failed to be identified
normally by the USB
interface of the TV set.
The user forgets the
password already set.
Normal picture
without sound.
Noise
Ensure proper power cord connection. Turn on the TV set. Check antenna/cable
connection.
Ensure your TV source cable settings are correct.
Execute auto program searching and add available channels not saved in the TV channel
memory.
Execute auto channel scanning and add available channels not saved in the TV channel
memory.
Check the antenna connection at the back of the TV set to confirm whether it is
connected to the TV set correctly. The symptom in the left may be caused by the
broadcasting station. Try other channels and adjust the contrast and brightness settings.
Check whether the sleep timer is enabled or identify the auto turn-off time settings.
Check the computer power management in general settings.
Check connection between optional AV equipment and the TV source. Press the Source
(input) key on the remote control.
Select the input you desire from the external input list.
Poor picture quality
Picture quality depends on the source quality.
Check whether the antenna has been broken or bent.
Check whether eth antenna has reached its service life (3-5years under normal use
conditions and 1-2 years if used by seaside).
Keep the TV set far away from noise source such as automobile, motorcycle or blower.
If 300 Ω dual-core cable is used, keep noise far away from the TV set or try to use 75 Ω
coaxial cable.
Select the intended mode according to the picture settings.
Adjust the picture mode option in the picture settings.
Ensure the antenna is connected by a 75 Ω coaxial cable and keep the antenna cable far
away from other connection cables.
To avoid TV set interference, be sure to use unworn antenna cables.
Check whether the source is proper for the supported mode.
Whether the USB cable is good.
Whether the USB connection cable of the TV set side is inserted properly.
Whether the power supply for the MP3/MP4 player is turned on.
Tr y to connect the USB cable properly and switch on the MP3/MP4 player for normal
identification of the TV set side.
Tr y to enter the general password-5363.
No sound/noise
Check the volume control. P ress the Mute key on the remote control or the VOL ∧ key to
make the symbol on the screen. Disconnect the earphones.
For the HDMI equipment, identify the output settings of equipments connected are set as
PCM. The HDMI input of the TV set supports PCM 32, PCM 44.1 and 48kHz.
Ensure the antenna is connected with a 75Ω coaxial cable and keep the antenna cable
away from other connection cables.
To avoid TV set interference, ensure to use unworn antenna cables.
29
Page 31

Symptoms Explanation/solution
Computer input
Identify that the computer has been connected to the TV set properly via computer
output (with the HD cable) or the HDMI output.
Ensure that the output signal in the computer is a format listed in the signal reference
No picture/no signal.
Poor picture quality. Adjust the resolution. Adjust the dot pitch and phase.
The picture becomes
smaller suddenly.
Black stripe at the edge
of the screen.
Some DVD or other
digital source programs
display detail loss,
especially in rapid
actions and dark scene.
sheet.
Turn off the computer. Identify that the computer is connected properly and restart the
computer. The plug-and-play equipment will detect the TV set automatically and set the
computer resolution properly.
Check whether the power management of the computer is enabled.
The picture becomes smaller when receiving commercial TV programs, this is caused by
the broadcasting method the supplier adopts. When high definition channel is switched to
a standard definition channel (commercial TV program), the picture will become smaller,
with a black stripe at the edge of the screen.
The aspect ratio of some wide-screen program exceeds 16:9 when they are shot (especially
cinema versions). Black stripes will appear at the upper and lower edge of the screen when
the TV set plays these programs while black stripes will appear at the left and right edge of
the screen when the TV set plays programs with their aspect ratio of 4:3.
This is caused by digital compression of source contents used by digital broadcasting and
DVD files, making less details displayed on the TV screen or resulting in blemish on the
screen (mosaic or dot). Compression of these signals is clear, subject to the definition and
resolution of the TV set.
Remote control
Check whether the batteries are placed properly or replace the batteries of the remote
control.
The remote control
does not work.
Point the remote control to the remote sensor in the front of the TV set.
Fluorescent lamps may interfere with the remote control operations; therefore, attempt
to turn off the fluorescent lamp.
Ensure signals from the remote control can reach the remote sensor directly.
30
Page 32

 Loading...