


Contents
CONTENTS
Contents....................................................................................................................1
Warning.....................................................................................................................2
Safety Instructions ........ ................
Introduction
FRONT SIDE CONNECTIONS OF LCD ................................
Front View..........................................................................................................7
Connection options ................................
Remote control.......... ...............................................9
Power Cord Connection..... ........................................11
AV INPUT Connection..... ..................................12
PC Connection...................... ...................................................13
Headphone Connection
TV Operation ......
SELECT INPUT SOURCE
PICTURE MENU ............ ................ ..... ...
SOUND MENU................................ .... .... ....................................19
CHANNEL MENU
PARENTAL CONTROL
SETUP MENU
OTHERS MENU
DVD Operation.........................................................................................................32
Using built-in DVD Player
Playback of media files in disc
SYSTEM SETUP 33
LANGUAGE SETUP..........................................................................................35
AUDIO SETUP...................................................................................................36
DIGITAL SETUP
...........................................................................................6
,,
........................................................................ ..............................15
Dimensions & Specifications.......................................................................37
Trouble Shooting......................................................................................................38
.................. .. .............................................4
............................ .........7
................... .......................................8
.........................................
.......................................
................................................
........................
.......................................... .......... .....14
.......... .... ...... ..................................15
.................... ...... ..
................... . ... ...................................16
............. ...... ..
........................................... ...................................21
......................................................................................25
.... ................. ....................... .....................28
... ............................. ..
.... ...... .............................31
....................................................... ..
..................................................................................32
...........................................................................32
...............................................................................................
................................................................................................36
...................... ......
................
1
Warning
WARNING
CAUTION
RISK OF ELECTRIC SHOCK
RISK OF ELECTRIC SHOCK
DO NOTOPEN
DO NOTOPEN
WARNING:
TO REDUCE THE RISK OF ELECTRIC SHOCK DO NOT REMOVE COVER(OR
BACK). NO USER SERVICEABLE PARTS INSIDE. REFER TO QUALIFIED
SERVICE PERSONNEL.
The lightning flash with arrowhead symbol, within an equilateral triangle,
is intended to alert the user to the presence of uninsulated”dangerous
voltage”within the products enclosure that may be of sufficient
magnitude to constitute a risk of electric shock to persons.
The exclamation point within an equilateral triangle is intended to alert
the user to the presence of important operating and
maintenance(servicing)instructions in the literature accompanying the
appliance.
REGULATORY INFORMATION
This equipment generates, uses and can radiate radio frequency energy and, if
not installed and used in accordance with the instructions, may cause harmful
interference to radio communication. However, there is no guarantee that
interference will not occur in a particular installation. If this equipment does cause
harmful interference to radio or television reception, which can be determined by
turning the equipment off and on, the user encouraged to try to correct the
interference by one or more of the following measures:
- Relocate the receiving antenna.
- Increase the separation between the equipment and receiver.
- Connect the equipment into an outlet on a circuit different from that to which the
receiver is connected.
- Consult the dealer or experienced radio/TV technician for help.
Any changes or modifications not expressly approved by the party
responsible for compliance could void the user’s authority to operate the
equipment.
2

Warning
CAUTION:
DO not attempt to modify this product in any way without written authorization
from supplier. Unauthorized modification could void the user’s authority to
operate this product.
NOTIFICATION
FCC Class B radio frequency Interference Statement
Warning: ( )
This equipment has been tested and found to comply with the limits for a Class B
digital device pursuant to Part 15 of the FCC Rules
These limits are designed to provide reasonable protection against harmful
interference in a residential installation This equipment generates uses and can
radiate radio frequency energy and if not installed and used in accordance with
the instructions may cause harmful interference to radio communications
However there is no guarantee that interference will not occur in a particular
installation If this equipment does cause harmful interference to radio or
television reception which can be determined by turning the equipment off and
on the user is encouraged to try to correct the interference by one or more of the
,
following measures
Reorient or relocate the receiving antenna
-
Increase the separation between the equipment and receiver
-
Connect the equipment into an outlet on a circuit different from that to which
-
the receiver is connected
Consult the dealer or an experienced radio TV technician for help
-
for FCC CERTIFIED MODELS
,.
.
,
,.
,
.
,
:
.
.
.
/.
Pursuant to FCC regulations, you are cautioned that any changes or
modifications not expressly approved in this manual could void your
authority to operate this equipment.
3
Safety instructions
SAFETY INSTRUCTIONS
WARNING:
TO Reduce The Risk Of Fire Or Electric Shock, Do Not Expose ThisApparatus To Rain
Or Moisture.
Apparatus shall not be exposed to dripping or splashing and no objects filled with
liquids, such as vases, shall be placed on the apparatus.
IMPORTANT SAFETY INSTRUCTIONS
1. Read these instructions.
2. Keep these instructions.
3. Heed all warnings.
4. Follow all instructions.
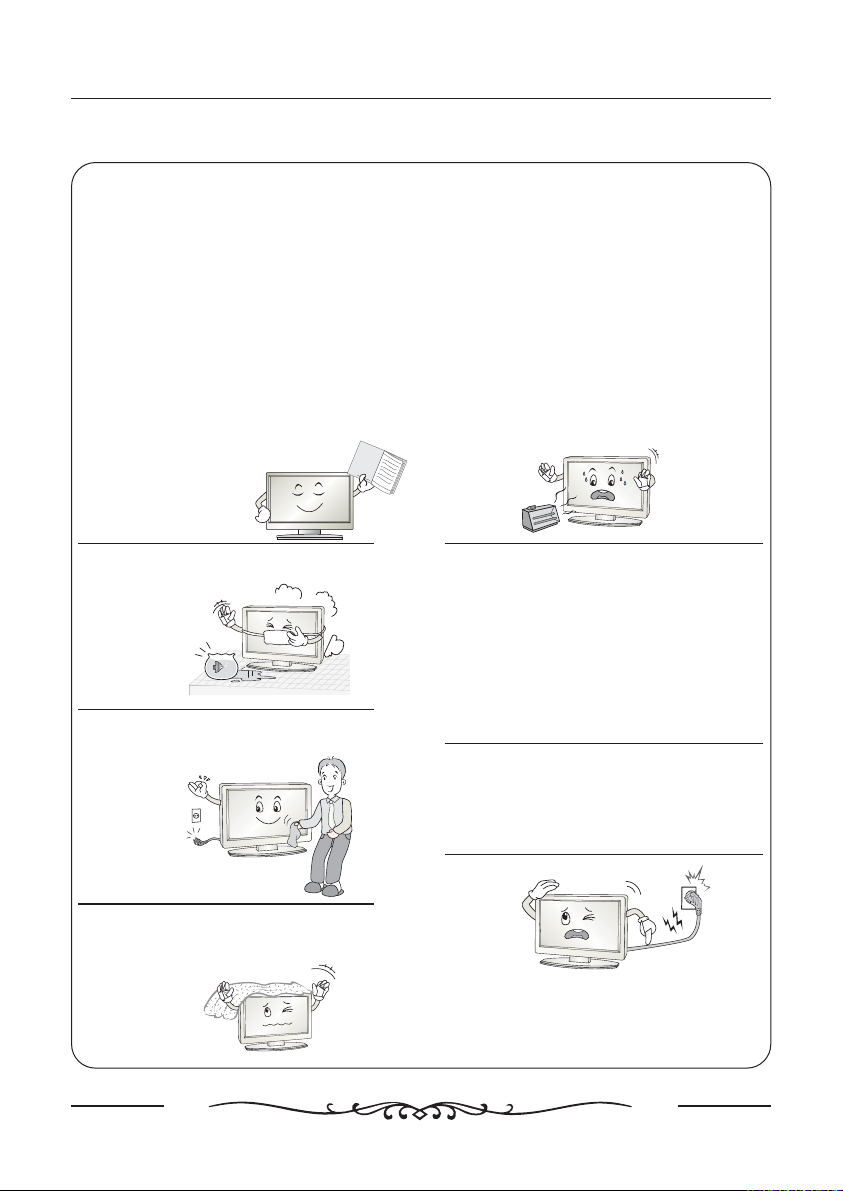
5. Do not use this apparatus near water.
6. Clean only with a dry cloth.
7. Do not block any of the ventilation
openings. Install in accordance with the
manufacturer’s instructions.
8. Do not install near any heat source such as
radiators, heat registers, stoves, or other
Apparatus(including amplifiers)that produce
O
w
n
er'
sM
a
heat.
nu
al
9. Do not defeat the safety purpose of the
polarized or grounding type plug. A polarized
plug has two blades with one wider than
other.A grounding type plug has two blades
and a third grounding prong. The wide blade
or the third prong is provided for your safety
When the provided plug does not fit into
your outlet, consult an electrician for
replacement of the obsolete outlet.
10. Protect the power cord from being walked
on or pinched particularly at plugs,
convenience receptacles, and the point
where they exit from the apparatus.
11. Only u se t he attach me nts / acces so ries
specified by the manufacturer.
4
SAFETY INSTRUCTIONS CONTINUED
Safety instructions
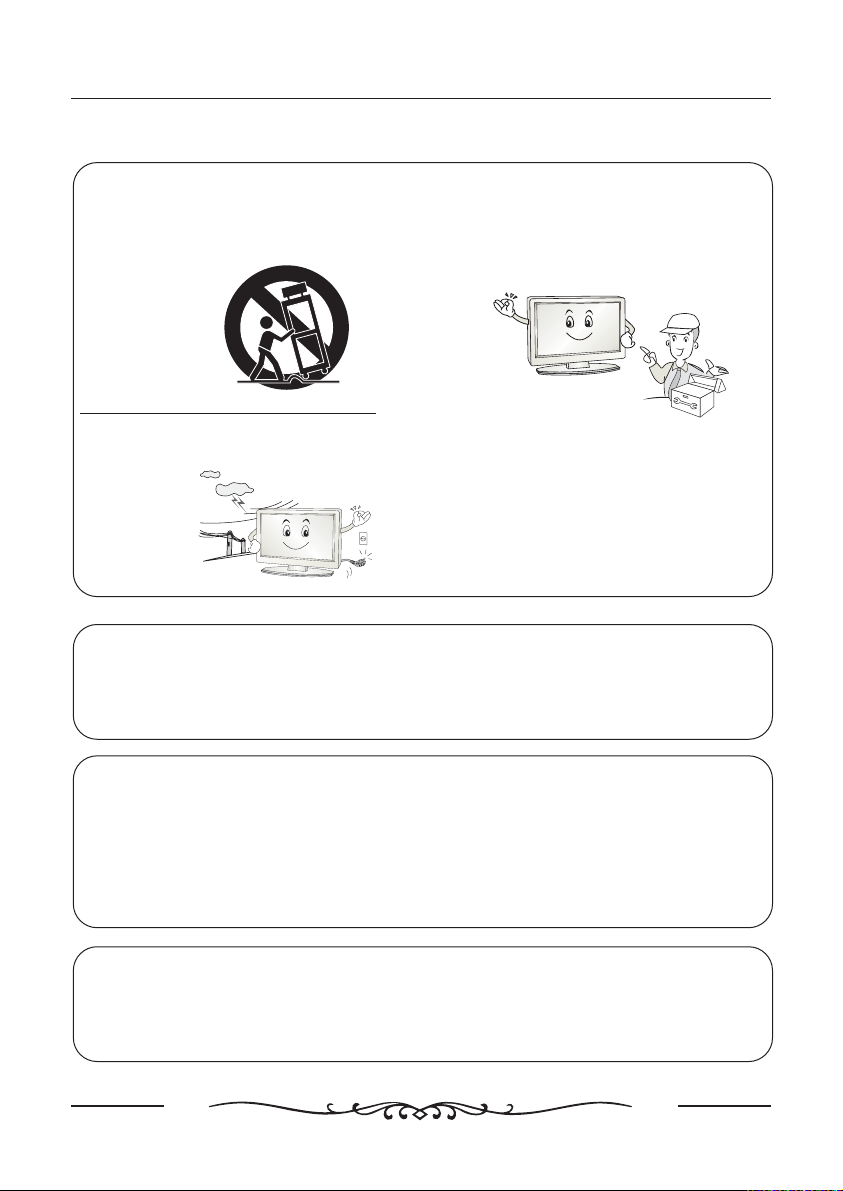
12. Use only cart, stand, tripod,
bracket, or table specified by the
manufacturer or sold with the
apparatus
.
14. Refer all servicing to qualified
service personnel.
Servicing is required when the
apparatus has been damaged in any
way.
13. Unplug this apparatus during
lightning storms or when unused for
a long time.
Note
- If the TV is cold, there may be a small “flicker” when you turn it on.
- Avoid touching the LCD screen or holding your finger(s) against it.
CAUTION connecting the Power Cord
Do not overload wall outlets. Overloaded wall outlets could damage the TV and could
result to electric shock or fire. Periodically examine the cord of your appliance; if its
appearance indicates damage or deterioration, unplug it. Stop using it until you have it
replaced with a cord authorized by your dealer. Protect the power cord from physical or
mechanical abuse, such as being twisted, kinked or pinched.
On Disposal
- The fluorescent lamp used in this product contains a small amount of mercury
- Disposal of this product must be carried out in accordance to the regulations of your
local authority.
5
Introduction
ACCESSORIES
Ensure that the following accessories are included with your TV. If any
accessory is missing, please contact the dealer from where you purchased the
product.
Accessories List
Power Cable x 1
Remote Control
x 1
AAA Batte ry x 2
User Manual
x 1
Quick Start Guide x 1
War ranty Card x 1
Video cable x 1
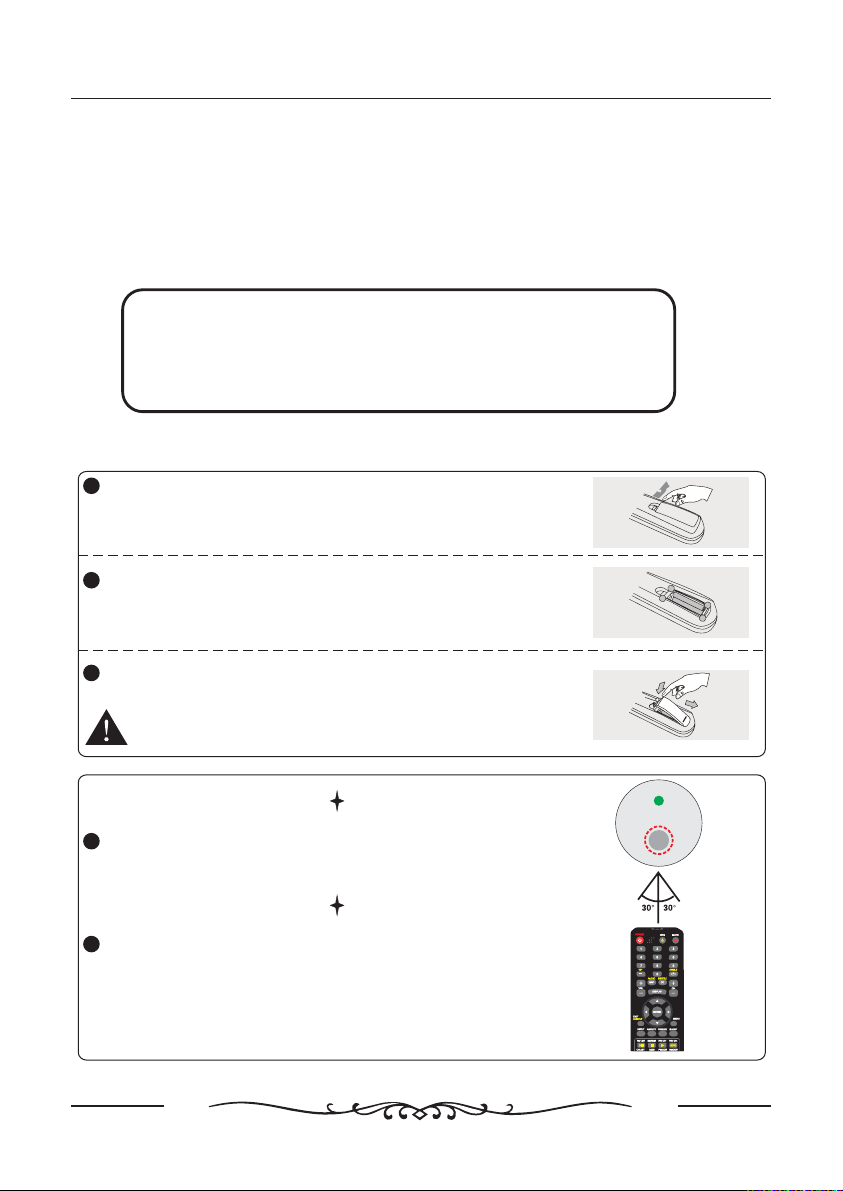
Installing Batteries
1
Open the battery compartment cover on the back
side.
Insert two 1.5V AAA size batteries in correct polarity.
2
Don’t mix old or used batteries with new ones.
Close the cover.
3
Batteries (battery pack or batteries installed) shall not
be exposed to excessive heat such as sunshine, fire
or the like.
Point the remote towards the remote control sensor
1
of the wireless TV and use it within 7 meters.
+
-
-
+
Put the used batteries into the recycling bin since it
2
can negatively affect the environment.
6
FRONT , SIDE , CONNECTIONS OF LCD
NOTE:In this manual, the colour of the TV may be different from your
TV, because this is just a kind of colour in the TV series.
Introduction
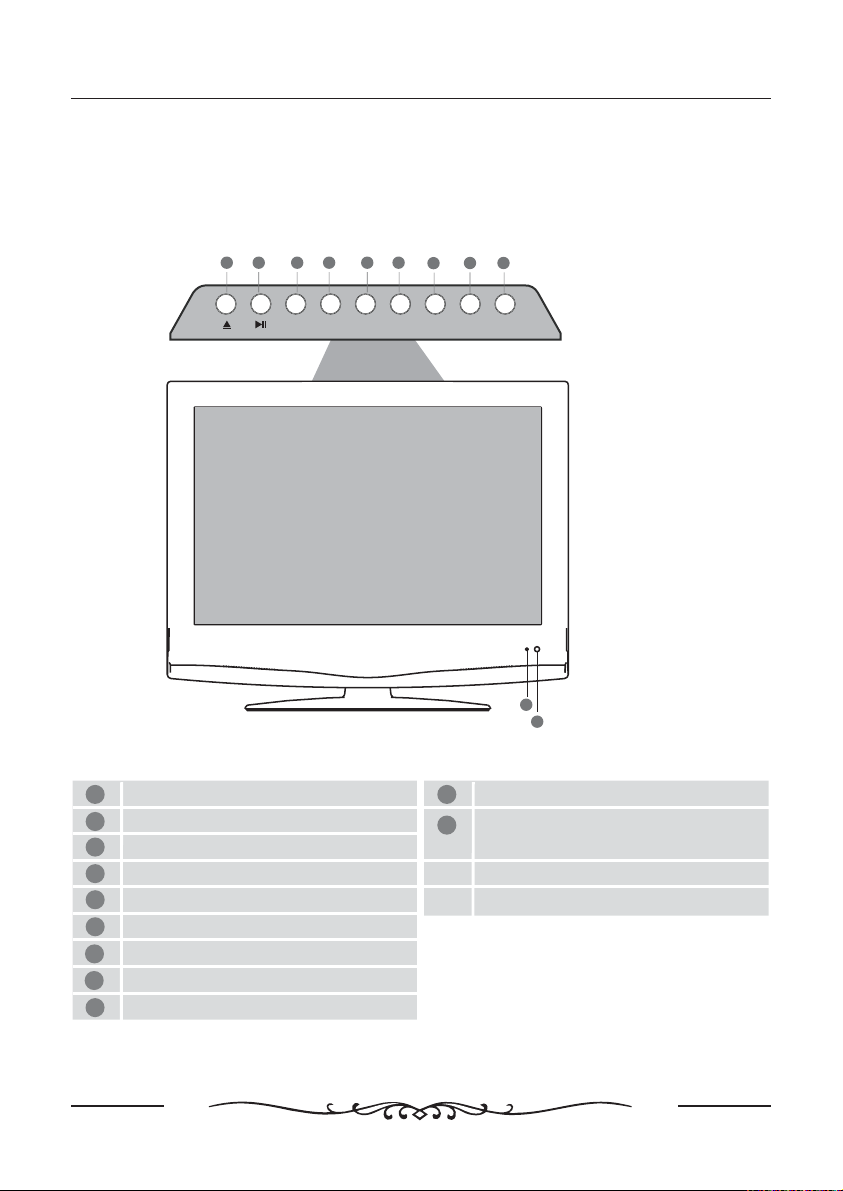
Front View
Eject
1
Play Pause/
2
Select the input source
3
Displays Menu OSD/
4
Volume down and menu down
5
Volume up and menu up
6
7
Program Channel down and menu down/
Program Channel up and menu up/
8
9
Standby ON OFF/
12 34 56
MENU V V-+
SOURCE
89
7
CH CH STANDBY-+
10
Infrared sensor for the remote control.
Switch ON the LCD TV when at standby
11
mode or vice versa.
10
11
7

CONNECTION OPTIONS
Introduction
1 2 3 4 5 6 7 8 9 10
TV SIGNAL IN
Connect the antenna
HEADPHONE
Connect the headphone
AUDIO INPUT
Connect the Audio output jack of DVD
or VCR for CVBS/S-VIDEO
VIDEO INPUT
Connect the Video output jack of DVD or
VCR
S-VIDEO INPUT
Connect the S-VIDEO output jack of DVD
or VCR
YPbPr INPUT
Connect YPbPr output jack of DVD or VCR
PC-RGB INPUT
Connect the PC-RGB output jack of PC
PC AUDIO INPUT
Connect the Audio output jack of PC
HDMI INPUT
Connect the HDMI output jack of DVD
USB SLOT
Can be used for software updating.
DVD
Insert and exit the DVD disc
POWER
The Power on/off
AC IN
Connect the Power supply cable
8
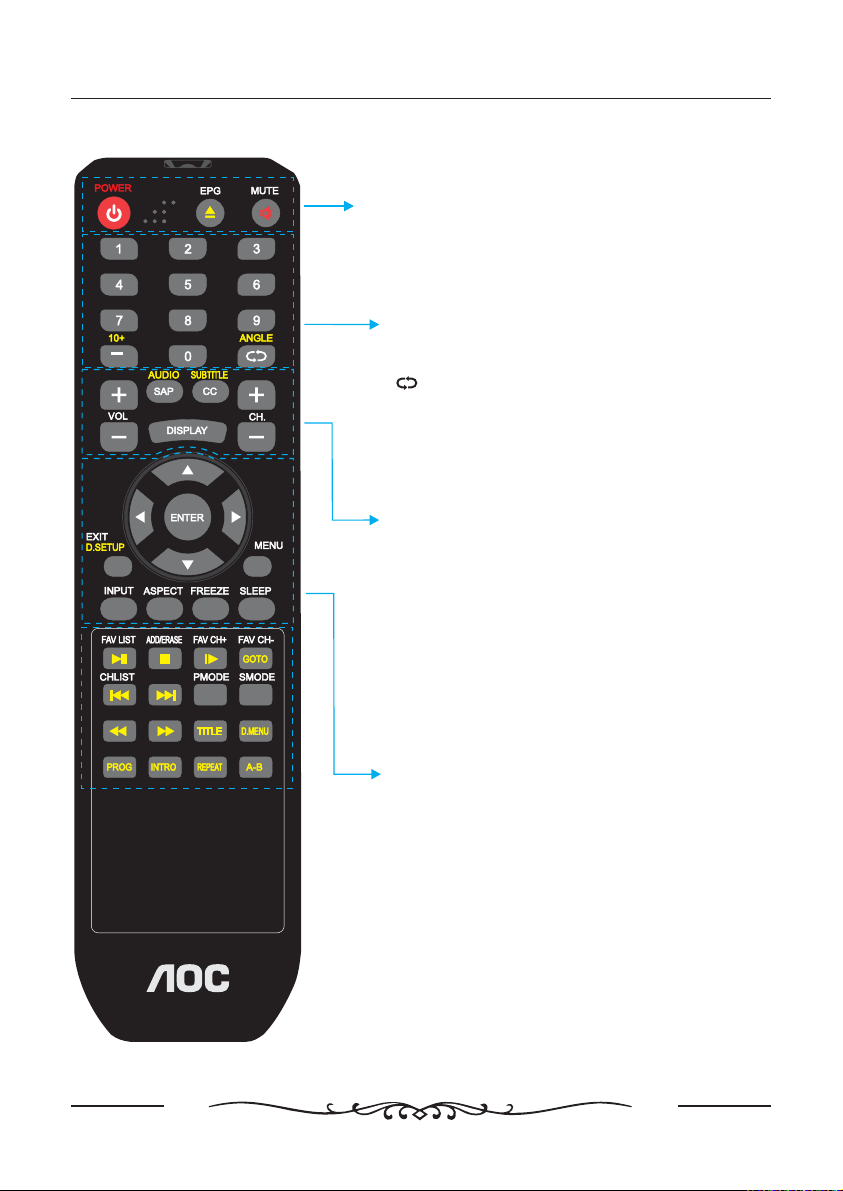
REMOTE CONTROL KEY FUNCTIONS
POWER
Turn the LCD TV ONor OFF.
EJECT/EPG
DVD mode: Press to eject the disc.
EPG:To show the Electronic Program
Guide during no menu state only
MUTE
Press to mute the sound. Press again or press
V+ to recover the volume.
NUMBER BUTTONS
Press 0-9 toselect aTV channel directly whenyou are
watching TV.The channelchange after 2 seconds.
Press to return tothe previouschannel that was viewed.
ANGLE
DVD mode: Press to select different angle of
DVD when available on disc
VOL+/-
Press to increase/decrease the sound level.
SAP/AUDIO
Press SAP to show the list of audio languages
available for current in TV mode.
DISPLAY
Press to display the source or DVD program
information.
SUB-T/CC
DVD mode:Press to switch between the
different subtitle languages.
AUTO
TV mode: Press to display close caption cc
function needs support of the broadcast system
CH+/CH-
Press to select the next/previous channel.
Introduction
-.
the
.(
)
EXIT/D.SETUP
Press to exit the menu on the screen.
Main menu for DVD
THUMBSTICK( ◄ / ►/ OK ENTER )
Allows you to navigate the on-screen menus and
adjust the system settings to your preference.
MENU
Access
INPUT
Press to access the source menu
ASPECT
Press to change aspect ratio of the picture.
FREEZE
To make pictures static
SLEEP
Allows you to select the amount of time before
your TV turn itself off automatically.
▲
/▼/
the main TV menu to the screen.
9
AUTO
Introduction
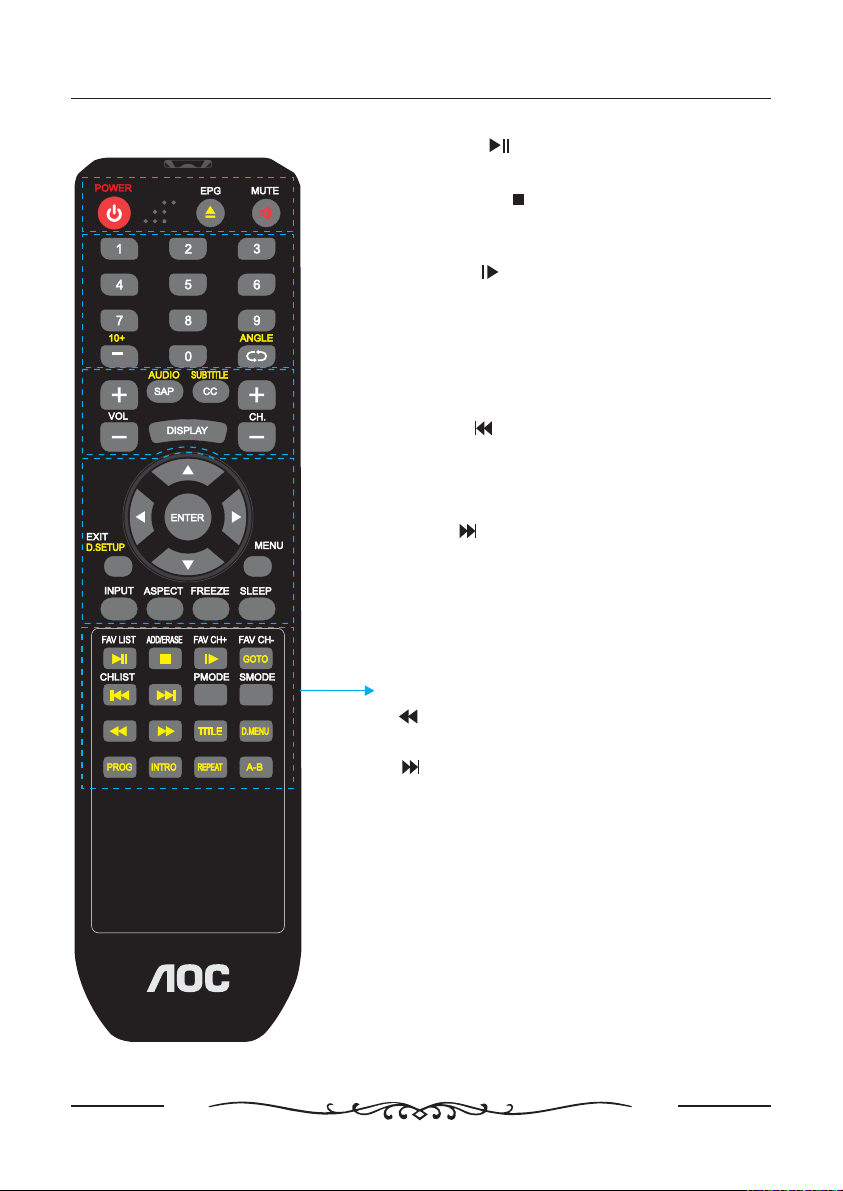
FAV LIST/
Press FAVLISTto display aFAVmenu in TV mode”
DVD mode: Press to play or pause the DVD.
ADD/ERASE/
Press ADD ERASE to add or delete Favorite
channel
DVD mode:
FAV CH+/
Digital mode: Press to increase favourite
channel.
DVD mode:
FAV CH-/GOTO
Digital mode: Press to decrease favourite
channel.
DVD mode: Press to Go To a specific chapter
on a DVD.
CHLIST/
Press CH LIST to display channel list
DVD/mode:
beginning of current playing track and twice to
the previous track.
chapter/track.
AUTO/
Press to automatically set up the screen in PC
mode
DVD/mode: Press to advance forward to the
next chapter/track
PMODE
Press repeatedly to cycle through the available
video picture modes.
SMODE
Press to cycle through the different sound
settings.
/
Press to stop playing
to slow/step the speed of DVD playing
Press once to jump to the
from the previous
DVD mode: Press to play a
program track in fast rewind mode
multimedia format
.
DVD mode: Press to advance forward to the
next chapter/track .
TITLE
Press to display DVD title
D.MENU
DVD mode: Press to display the disc menu (if
available on DVD disc)
PROG
To select the DVD program playback.
INTRO
Press to play a short introduction to each
chapter when available on disc
REPEAT
DVD Mode: Press to set repeat
A-B
DVD Mode: Press toA-B playback
10
TV Operation
INPUT &CONNECTIONS
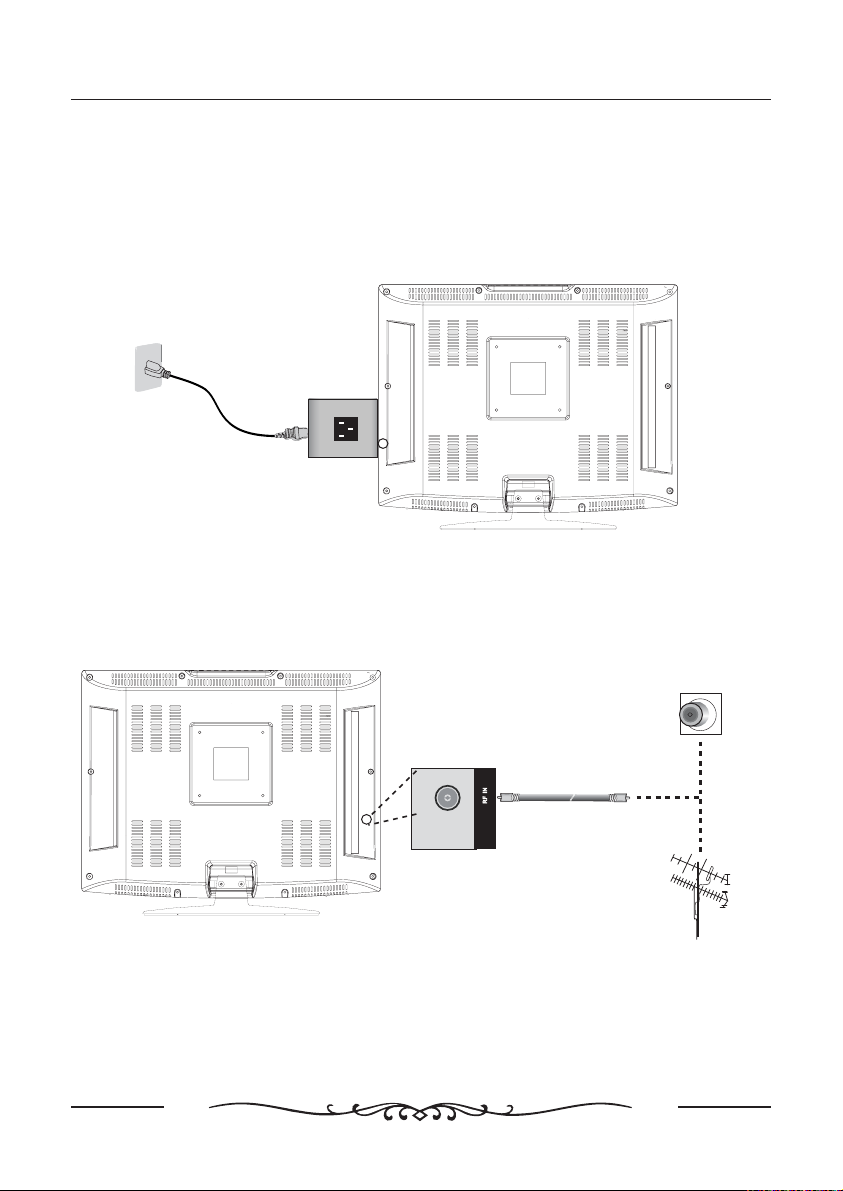
Power Cord Connection
- Connect the power cord correctly as shown.
- Press the switch of your LCD to switch ON.The power indicator on
the front panel lights up in green.
Antenna Connection
- Antenna or Cable Service without a Cable Box Connections.
- For optimum picture quality, adjust antenna direction if needed.
STANDBY
AC
AC
Wall Antenna Socket
RF Coaxial Wire(75ohm)
VHF Antenna
UHF Antenna
NOTE: Before connecting any external equipment, turn OFF all main power for
NOTE:
safety.
11
TV Operation
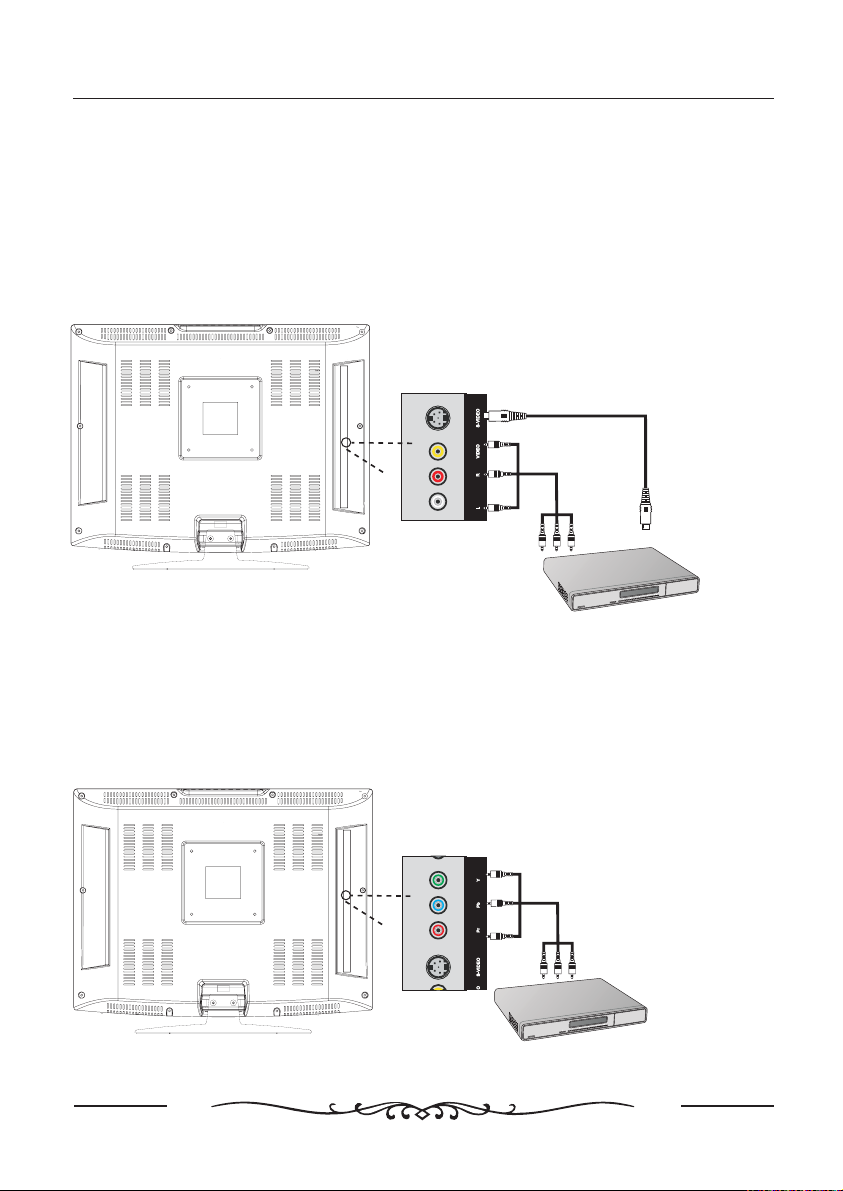
AV INPUT Connection
NOTE: All cables shown are not included with the TV.
- Connect the VIDEO /S-VIDEO and AUDIO output jack of the DVD or VCR to
the AV IN jacks on the set with RCA cable.
- Match the jacks colors: Video=yellow,
Audio left=white, and Audio right=red.
- Select the AV/S-VIDEO input source with INPUT button.
S-VIDEO Cable
VIDEO Cable
YPbPr INPUT ConnectionYPbPr INPUT Connection
DVD or VCR
1. Connect the YPbPr connector on the external video device to the scart connector
on the LCD TV using a scart cable.
- YPbPr connector supports YPbPr functions ( CVBS, RGB input / output,TV out ).
2. Press INPUT button on the remote control to select YPbPr which corresponds with
your connection.
YPbPr Cable
DVD or VCR
12

TV Operation
PC Connection
This TV has got Plug and Play capability.The TV sends configuration information
(EDID) to the PC using theVideo
Electronics Standard Association (VESA) Display Data Channel (DDC) protocol.
2
PC INPUT1
- Connect the RGB output of the PC to the VGAIN jack on the set.
- Connect the PC AUDIO output of the PC to the PC AUDIO IN jack on the set.
- Turn on the PC and set.
- Select the VGA input source with INPUT button.
HDMI INPUT Connection
1. Connect theHDMI connector onthe external video deviceto the scartconnector
on the LCDTV using ascart cable.
- HDMI connector supports HDMI functions ( CVBS, RGB input/ output, TVout ).
2. Press INPUTbutton on theremote control toselect HDMI which corresponds
with your connection.
HDMI Cable
DVD or VCR
PC
13
TV Operation
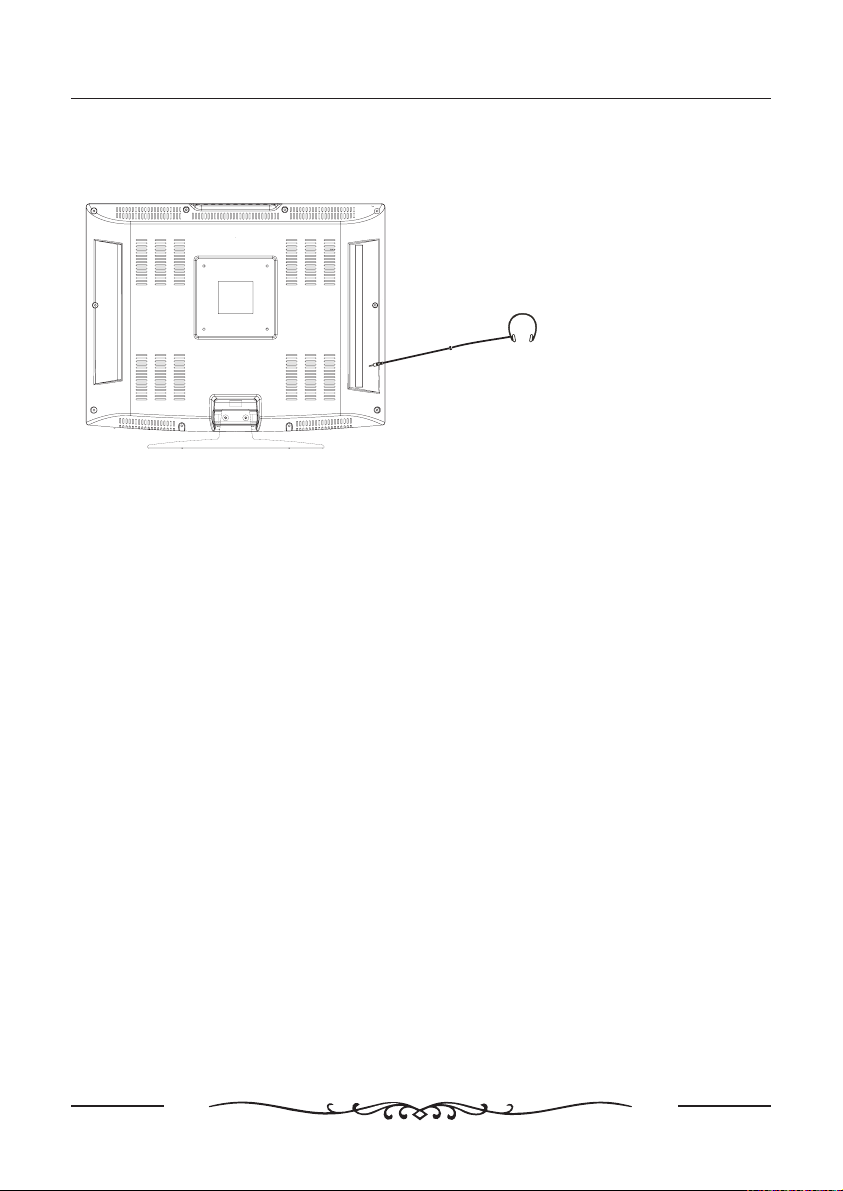
Headphone Connection
Earphone
- You can connect a headphone to your TV if you wish to watch a TV program
without disturbing people around you.
- Insert a headphone into the 3.5mm mini-jack on the set.
NOTE: 1. Prolonged used of headphones at a high volume may damage your
hearing.
2. You will not receive the sound from speaker when you connect
headphones to the system.
14
This OSD instructions might not be exactly the same as the actual OSD you see on
the TV. If there is any query please contact the local after service provider for help.
SELECT INPUT SOURCE
Source Select
TV
AV
S Video-
YPbPr
HDMI
PC
DVD
●
Press INPUT button to display the Source Select list
●
Pess button to select the input source you want to watch;
▼/▲
●
Press ENTER or ►button to enter the input source;
TV Operation
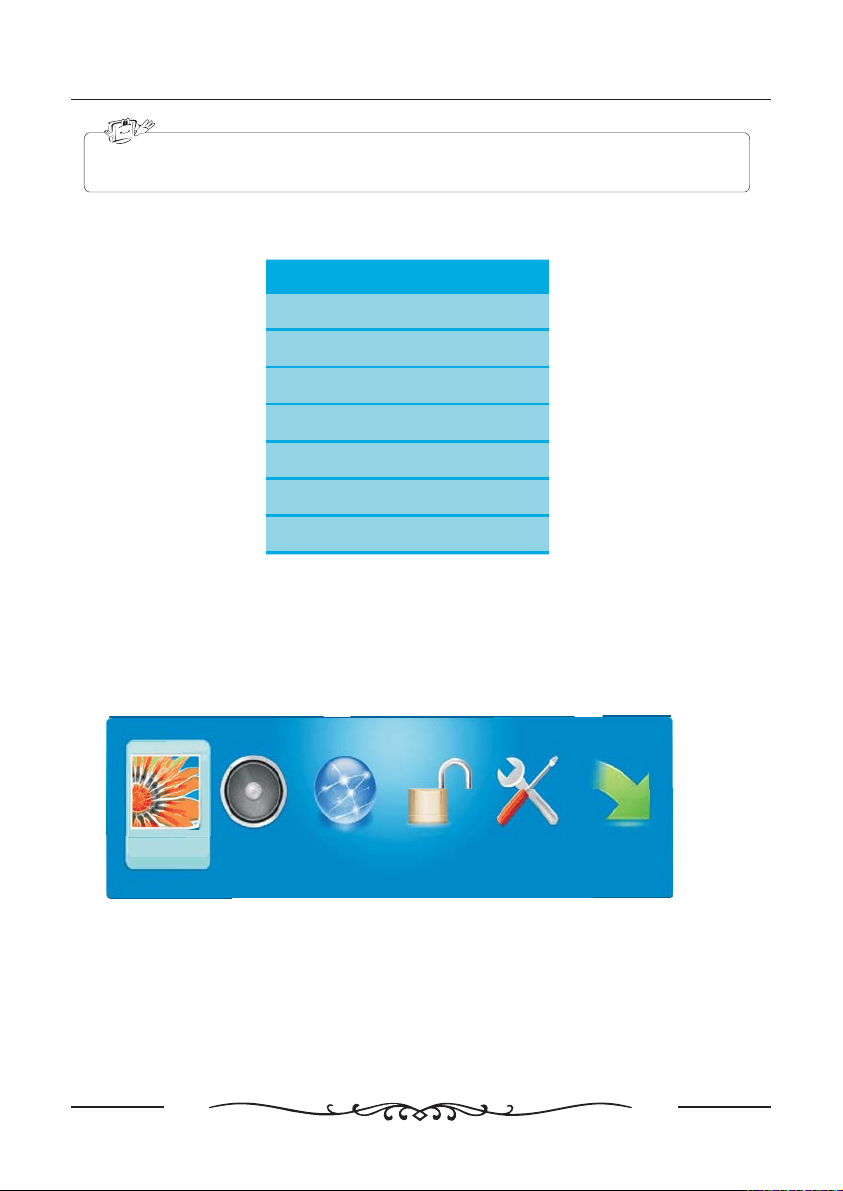
BASIC OPERATION
PICTU RE
●;
Press button to display the
●;
Press button to select the MENU you want
●;
Press EN TER button to enter the s ub menu
You can press button to go back to the upper menu or button to close the
OSD.
O
SOUND C
HANN EL PA RE NTAL SETU P OTH E RS
15
TV Operation
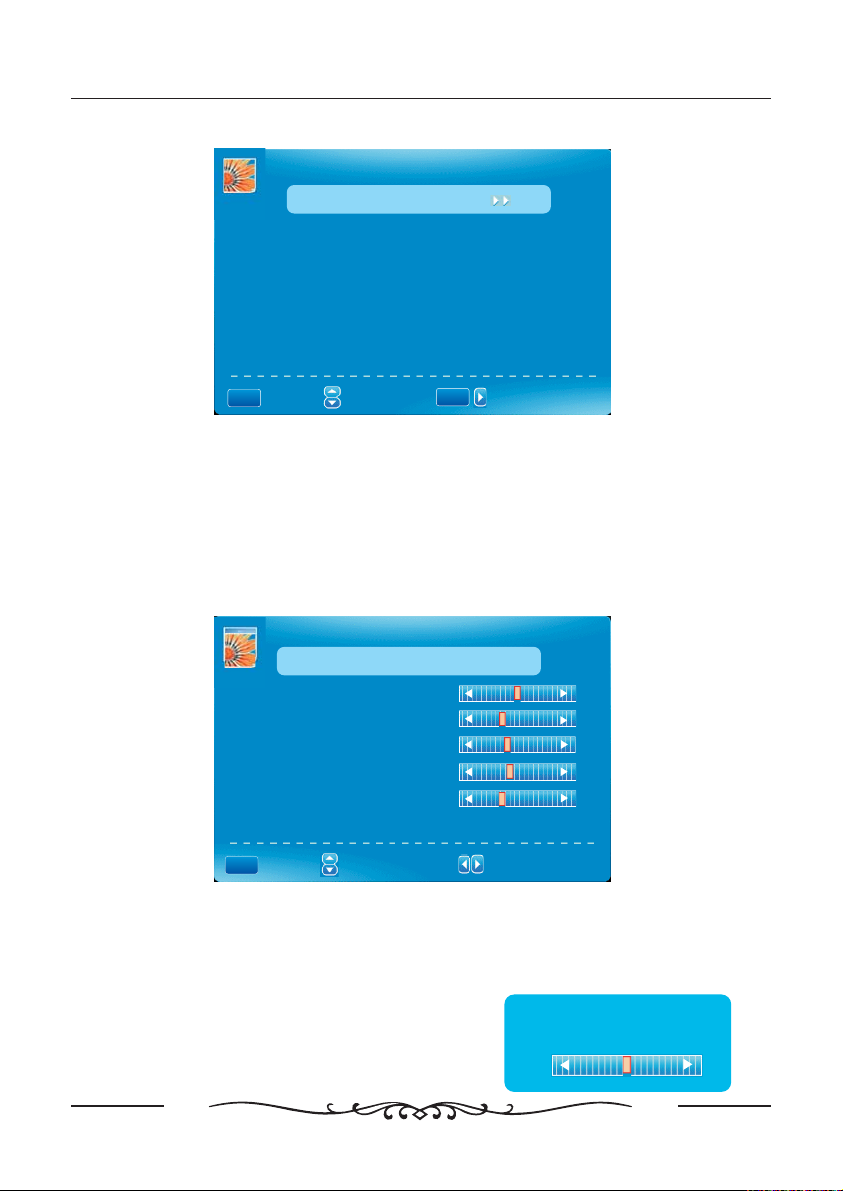
PICTURE MENU
PICTURE
PICTURE
Picture Settings
Picture Settings
Screen Settings
Screen Settings
PC Settings
PC Settings
Color Temperature Normal
Color Temperature Normal
Advanced Picture Settings
ENTER
:Go to Next Menu
:Select Menu
MENU
:Return
:Select Menu
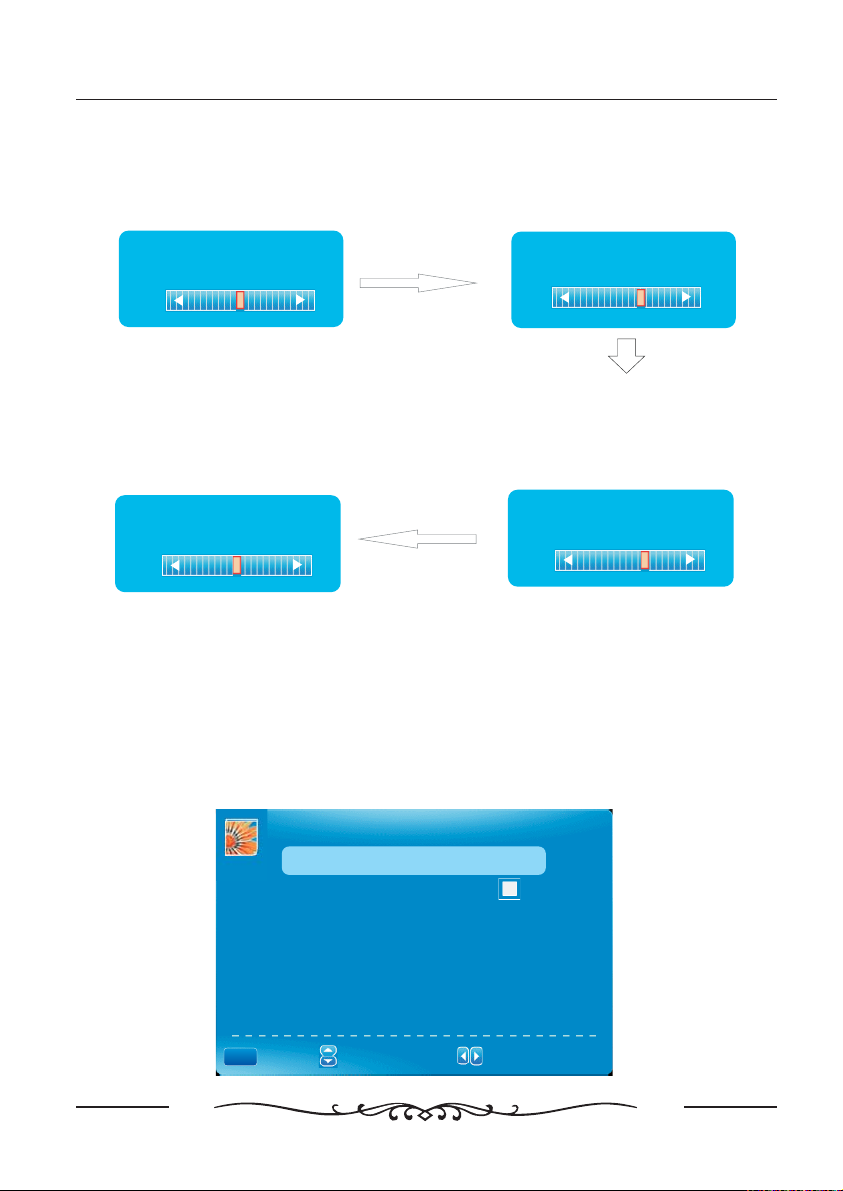
Picture Settings
1 Press ENTER when the Picture Settings item is highlighted Then you will
..
go the sub menu as following
necessary
pressing MENU
-.
2 Press to select the desired menu item Press ENTER to proceed if
..
▼/▲
.
3 Press to◄ / ► adjust the item to the desired level
..
4 When you have changed the settings you can exit from the menu by
.,
.
PICTURE SETTINGS
Picture Mode Movie
Brightness
Contrast
Color
Tint
Sharpness
O
:Go to Next Menu
/
:
MENU
:Return
:Select Menu
:Change Setting
Picture Mode
Press button to select Picture Mode then press◄ / ► button to adjust
▼▲/
(:,,,.)
Available picture mode Movie User Dynamic Standard
,.
Brightness
Press button to select
▼▲
/
Brightness,
then press button to adjust.
◄/►
Brightness
25
16
TV Operation
Contrast
Press button to select
▼▲
/
Contrast ,
adjust.
Tint
Press button to select
then press button to adjust.
,
()This option can not be adjusted.
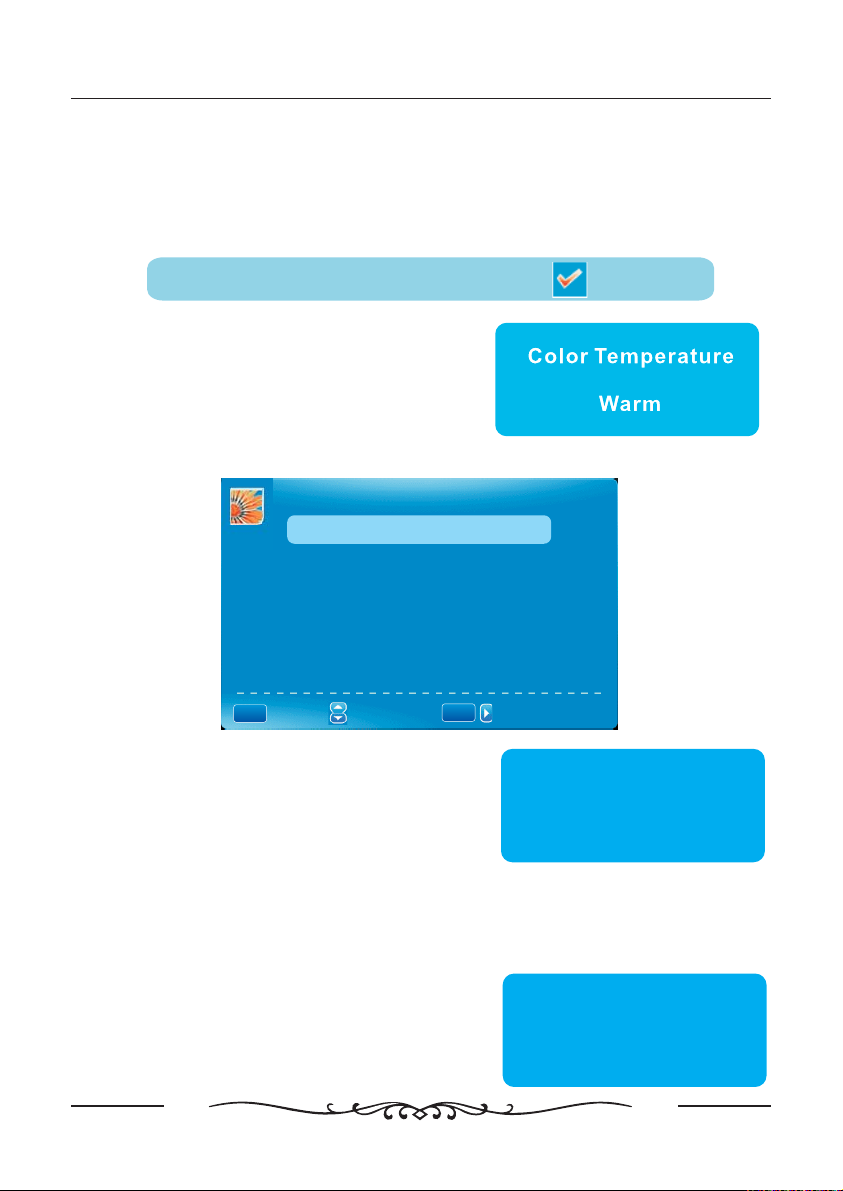
Screen Settings
..
1 Press ENTER when the Screen Settings item is highlighted Then you will
go the sub menu as following
..
2 Press to select the desired menu item Press ENTER to proceed / if
necessary
..
3 Press ◄ / ► to adjust the item to the desired level
.,
4 When you have changed the settings you can exit from the menu by
pressing MENU
then press button to
◄/►
Contrast
25
▼▲ Tint
/
◄/►
Tint
25
-.
.
.
SCREEN SETTINGS
Screen Size Normal
Auto Wide
Color
Press button to select
Color,
adjust.
/
▼▲
then press button to
◄/►
Color
27
Sharpness
Press button to select
▼▲
/
Sharpness ,
to adjust.
then press button
Sharpness
27
◄/►
▼▲
MENU
:Return
O
:Select Menu
:Change Setting
17
TV Operation
Screen Size
Press button to select Screen Size then press button to adjust
(:,,,)
Available Screen Size WaterGlass Cinema Full Normal
/◄/►
,.▼▲
Auto Wide
Press button to select the item Auto Wide then press ENTER button to
▼▲
/
., :
adjust When the Auto Wide is selected the symbol will show as following
,
Auto Wide
Color Temperature
Press ENTER when the Color Temperature
item is highlighted Then press button to
adjust Available color temperature Cool
. ( : ,
Normal Warm
,)
Advanced Picture Settings
.
ADVANCED PICTURE SETTINGS
◄/►
Dynamic Contrast Off
Film Mode Off
Noise Reduction Off
MPEG Noise Reduction Off
ENTER
:Change Setting
MENU
:Return
:Select Menu
:Select Menu
:
/
Dynamic Contrast
Press button to select the item Dynamic
Contrast then press button to adjust it can
adjust the contrast corresponding to the input
signal in order to improve the picture quality
displayed
Available Mode Off Low Medium High
(:,,,)
/▼▲
,/ .
◄►
Dynamic Contrast
.
Off
Film Mode
Press button to select the item Film Mode then press button to
adjust Available Film Mode On Off
Noise Reduction
Press button to select the item Noise
Reduction then press button to adjust
(:,,
Off High
//,
.( : / )
/
▼▲
/,.
◄►
Available Noise Reduction Low Medium
,)
18
◄►▼▲
Noise Reduction
Medium
TV Operation
MPEG Noise Reduction
Press button to select the item MPEG Noise
Reduction then press button to adjust
It can improve the quality of the pictures by
reducing the block noise
Available MPEG Noise Reduction Low Medium
(:,,
Off High
,)
/▼▲
,/ .
◄►
.
MPEG Noise Reduction
Medium
SOUND MENU
SOUND
Sound Settings
Surround Mode
Analog Sound SAP
Digital Sound English
Other Settings
Equalizer Settings
ENTER
:Go to Next Menu
:Select Menu
MENU
:Return
:Select Menu
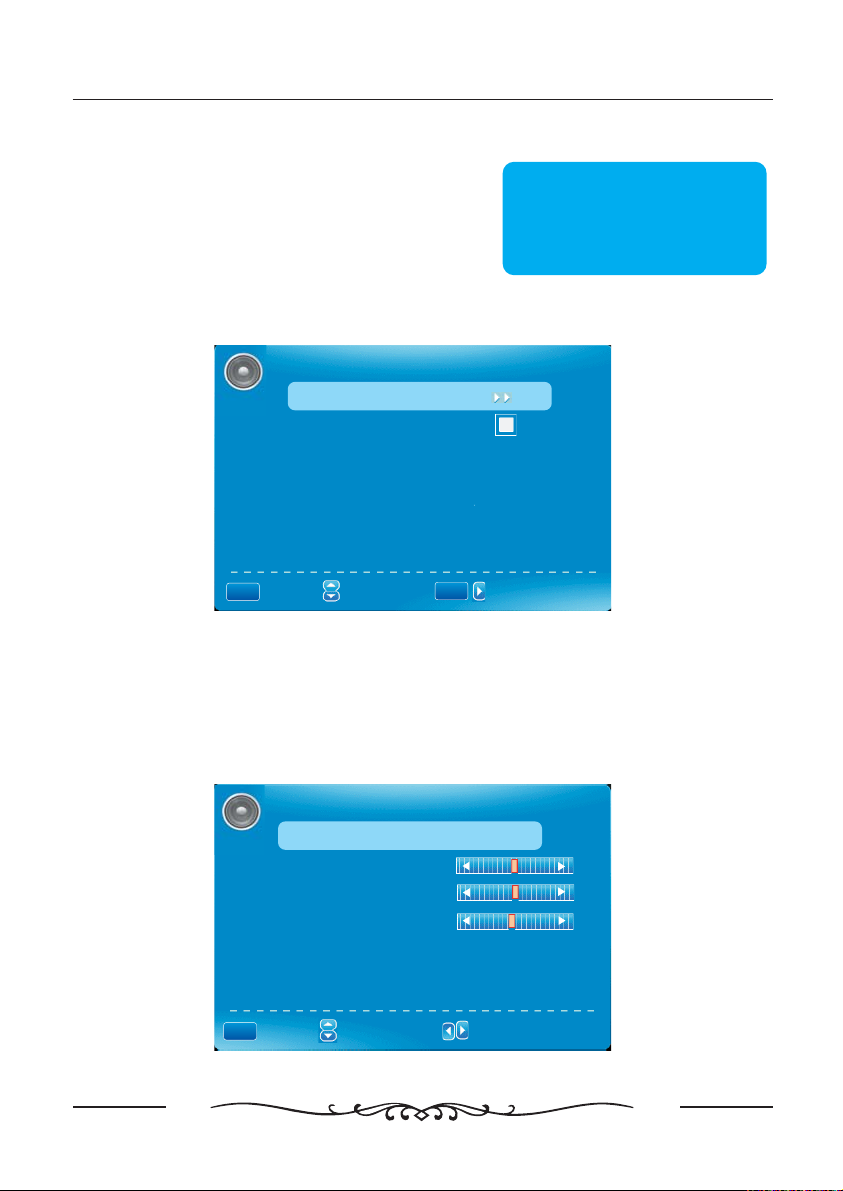
Sound Settings
..
1 Press ENTER when the Sound Settings item is highlighted Then you will go the
-.
sub menu as following
...▼▲
2 Press to select the desired menu item Press ENTER to proceed if necessary
..◄►
3 Press to adjust the item to the desired level
.,
4 When you have changed the settings you can exit from the menu by pressing
M
ENU
/
/
.
SOUND SETTING
Sound Mode User
Bass
Treble
Balance
:Go to Next Menu
/
MENU
:Return
O
:Select Menu
:Select Menu
19
:Change Setting
:
TV Operation
Sound Mode
Press button to select the item Sound Mode then press button to
adjust
.
Available Sound Mode Standard Soft User Dynamic
(:,,,)
,
◄►▼▲//
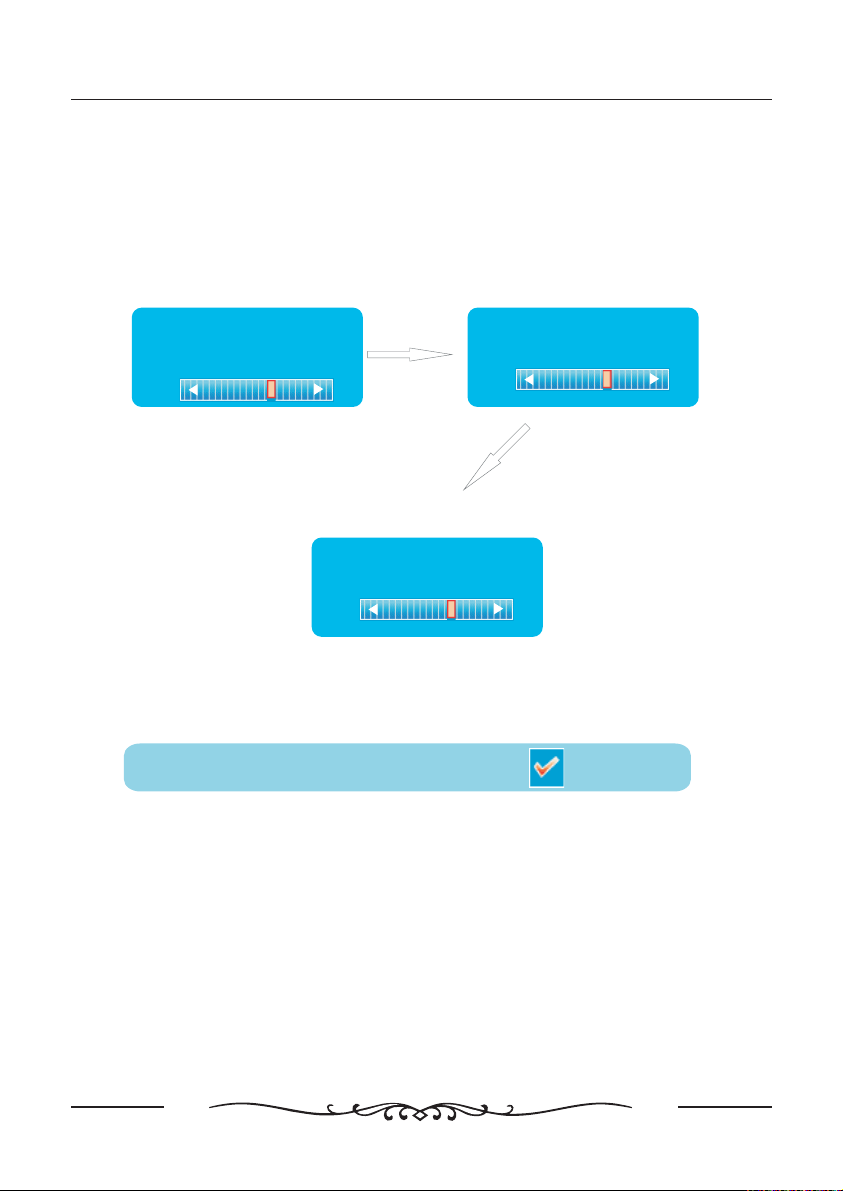
Bass
Press button to select the item
▼▲/
Bass then press button to adjust,.◄►
/
Bass
7
Balance
▼▲/
Press button to select the item
Balance then press button to
adjust
,
.
◄►
/
Treble
Press button to select the item
▼▲/
Treble then press button to adjust,/ .◄►
Treble
7
Balance
7
Surround Mode
Surround Mode
Press button to select the item Surround Mode then press ENTER button to
▼▲/
select,.
Surround Mode
Analog Sound
Analog Sound
Press button to select the item Analog Sound then press button to
select Available Analog Sound SAP Stereo Mono
. ( : , , )
,
◄►▼▲//
Digital Sound
Digital Sound
Press button to select the item Digital Sound then press button to
select Available Digital Sound English French Spanish
. ( : , , )
20
,
◄►▼▲//
Other Settings
TV Operation
OTHER SETTINGS
AVL Off
Speaker On
MENU
:Return
:Select Menu:Select Menu
:Enable/ Disable:
AVL
Press button to select the item AVL then press button to select ON or OFF
▼▲
//
,.
◄►
SPEAKER
Press button to select the item SPEAKER then press button to select ON or
▼▲
//
OFF
.
,
◄►
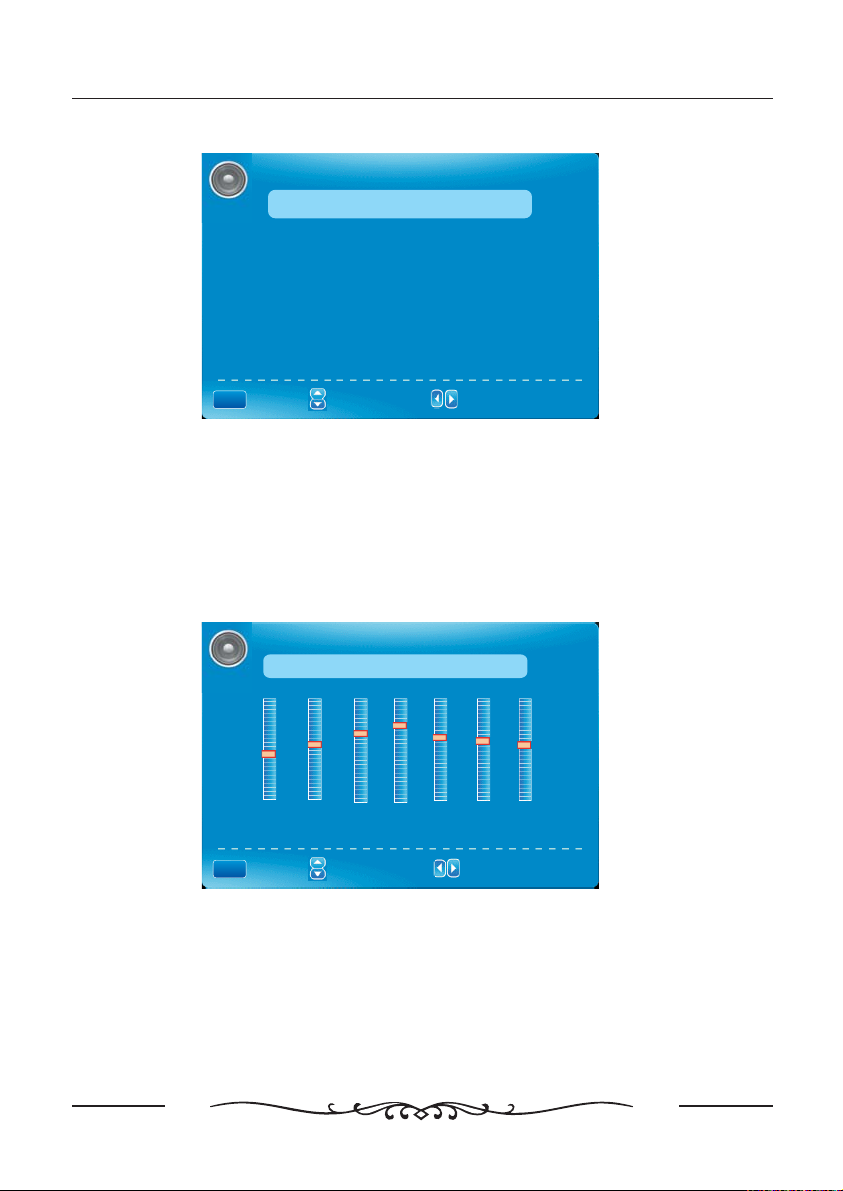
Equalizer Settings
EQUALIZER SETTINGS
Mode POP
-2 -1 2 3 1 0 - 1
O
100 250 500 1k 2k 4k 10k
MENU
:Return
:Select Menu:Select Menu
Equalizer Mode
Press button to select the item Equalizer Mode then press button to select
the desired mode Available Equalizer Mode POP USER OFF ROCK JAZZ
.:,,,,.
:Change Setting:
,
◄►▼▲//
CHANNEL MENU
Note This menu is only shown in TV source:.
21
TV Operation
CHANNEL
Channel List
Favorite List
Channel Setting
Signal Type Air
MENU
Auto Channel Search
:Return
:Select Menu
:Select Menu
ENTER
/
Execute
:Go to Next Menu
:Go to Next Menu
Channel List
Press button to select Channel List then press ENTER button to scan the
▼▲/
Channel List
.
Channel List
2
3
6
7
9
,
Page 1/1
FUNNY
ENTER
MENU
:Return
:Select Menu:Select Menu
:Page
:Select Channel
Favorite List
Press button to select Favorite List then press ENTER button to scan the
▼▲/
Favorite Channel List
.
FAVORITE LIST
2
3
6
8
12
MENU
:Return
:Select Menu:Select Menu
,
FUNNY
:Page
ENTER
:Select Channel
Page 1/1
22
TV Operation
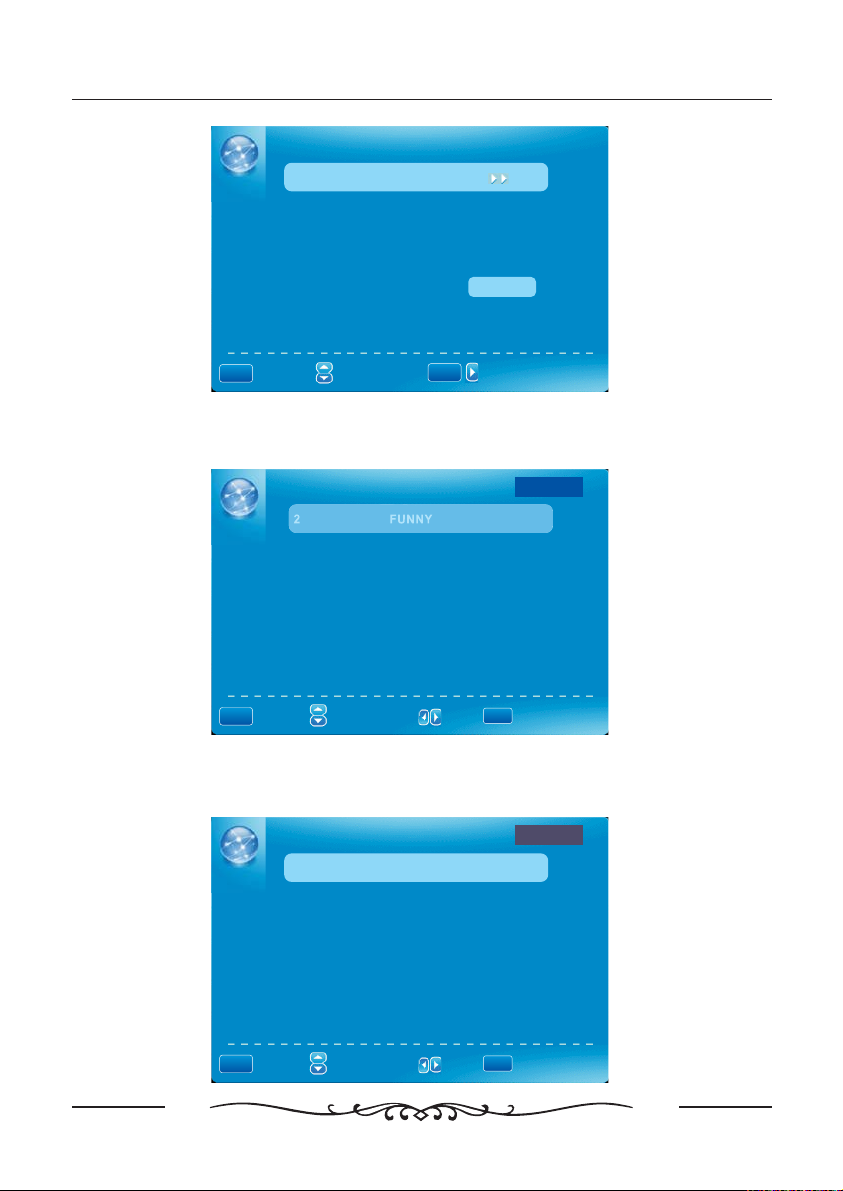
Channel Setting
▼▲
Press button to select Manual Channel Setting then press ENTER button
to set the value in the sub menu
.
,
Channel Number
▼▲//
Press button to select Channel Number then press button to select the
,
Channel Number or press the number buttons to select the channel you want to
set
.
CHANNEL SETTING
MENU
Channel Number
In Channel List
Channel Label _ _ _ _ _ _ _
Favorite Channel
O
:Select Menu
:Return
:Select Menu
2
:Select Channel
In Channel List
Press button to select In Channel List then press ENTER button to Add or
▼▲/
Delete the current channel in the channel list,.
CHANNEL SETTING
MENU
Channel Number
In Channel List
Channel Label _ _ _ _ _ _ _
Favorite Channel
:Return
:Select Menu:Select Menu
ENTER
2
:Add/ Delete
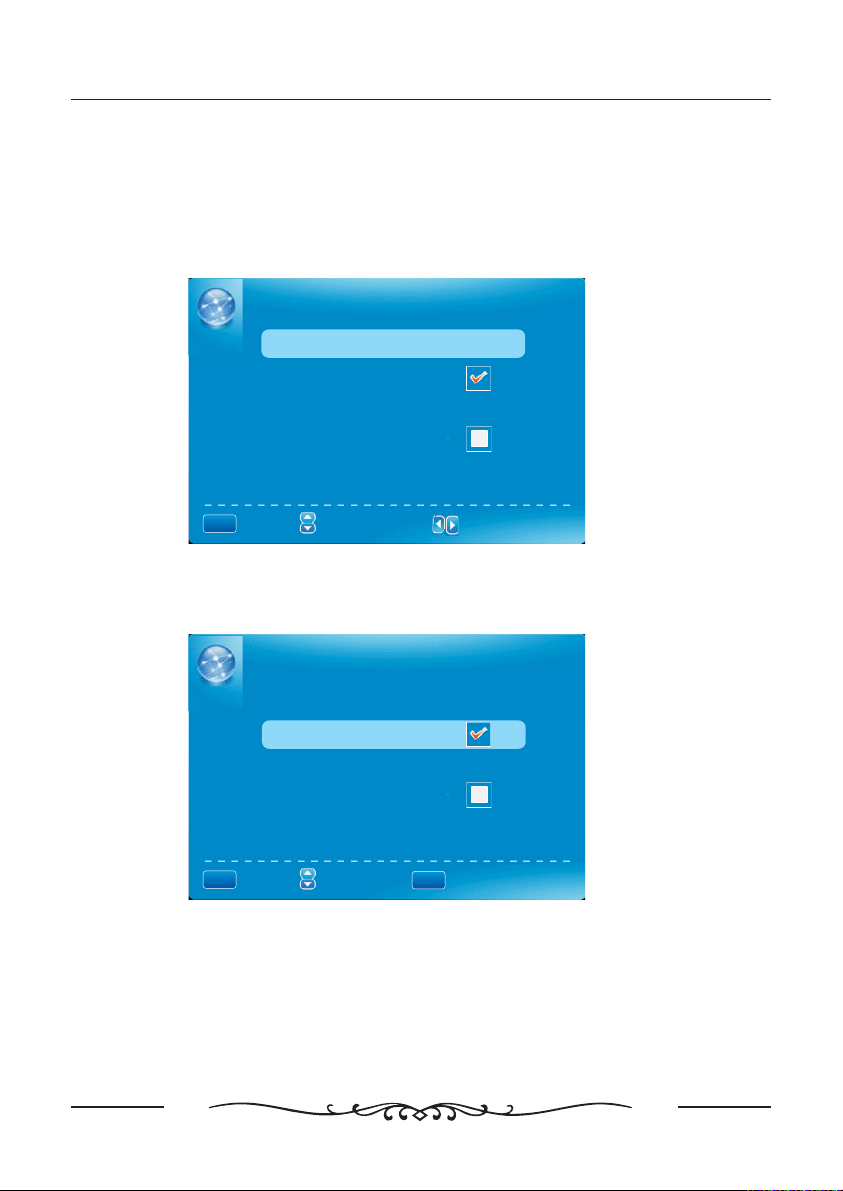
Channel Label
Press / button to select Channel Label, then press ◄ / ► button to set the
▼▲
channel lable.After finishing the setting,
Press ENTER button to save the channel lable.
23
CHANNEL SETTING
TV Operation
MENU
Channel Number
In Channel List
Channel Label _ _ _ _ _ _ _
Favorite Channel
:Return
O
:Select Menu
:Select Menu
:Name Entry
2
ENTER
:Cursor
Favorite Channel
Press button to select Favorite Channel then press ENTER button to Add
▼▲/
or Delete the current channel in Favorite Channel list,.
Channel Number
In Channel List
Channel Label _ _ _ _ _ _ _
Favorite Channel
MENU
:Return
:Select Menu:Select Menu
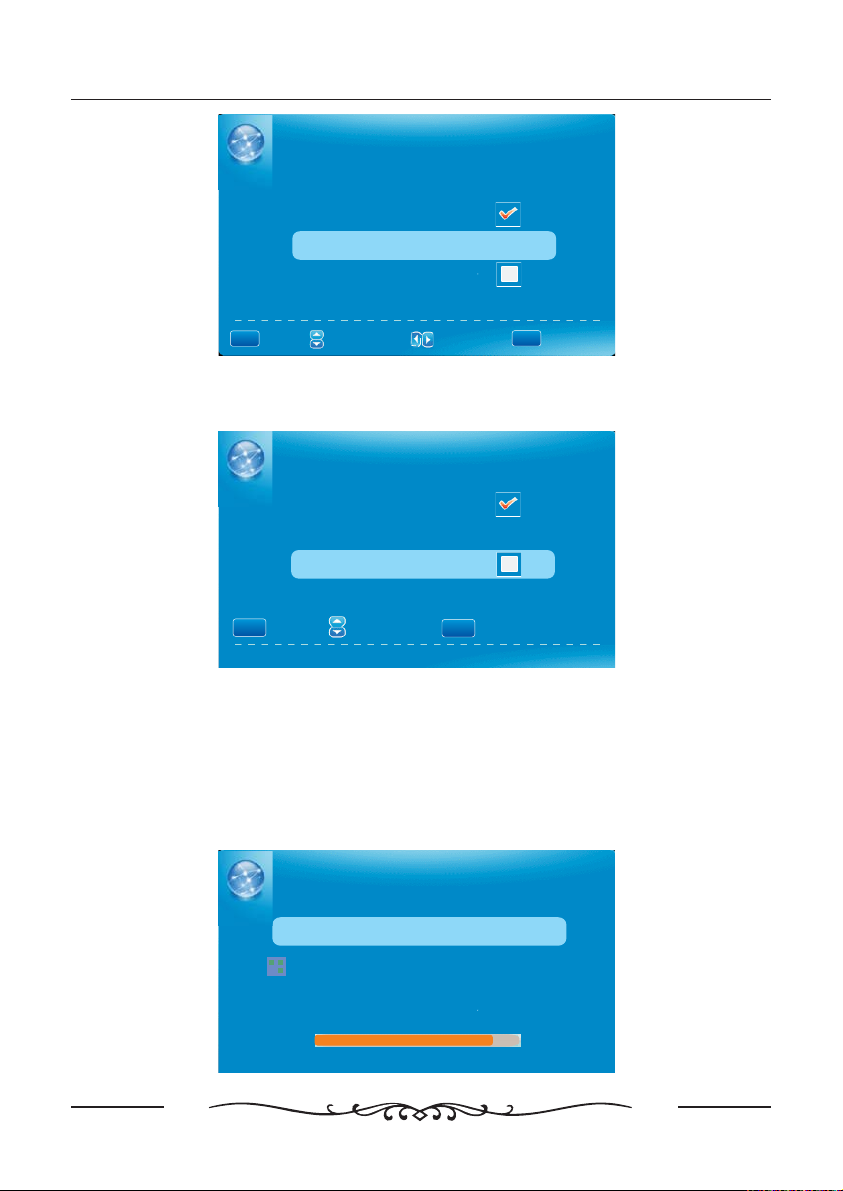
Signal Type
Press button to select Signal Type then press button to select the type you
▼▲/
want to set
There are two selections Air and Cable
.
:.
,
ENTER
2
:Add/ Delete
E
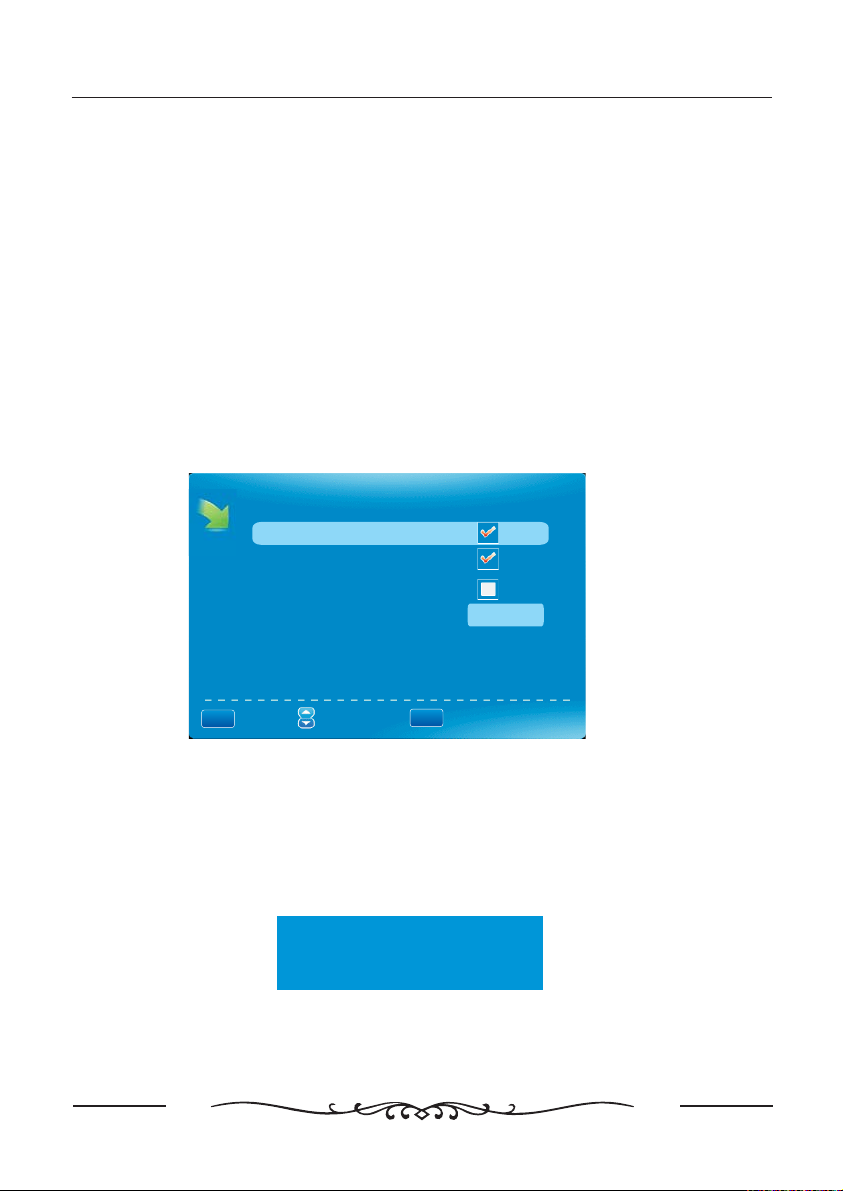
AUTO CHANNEL SEARCH
Press button to select AUTO CHANNEL SEARCH then press ENTER
▼▲/
button to search channel
A Channel Search Menu will appear as below
.
.
,
AUTO CHANNEL SEARCH Air-
Now Searching...Please Wait...
O
Enter Password:
Return
Analog Channels Found: 0
Digital Channels Found: 0
24
92%

PARENTAL CONTROL
PARENTAL CONTROL
Lock Parental Control
V-CHIP
Change Password
Front Panel Lock
Source Lock
TV Operation
MENU
Input password to enter default password is 0000
-
V CHIP
Press button to select V CHIP then press ENTER button to adjust A Sub
▼▲/
Menu Will appear as below
DIGITAL
:Return
:Enter password
,“”.
-, .
.
V-CHIP
US V-Chip
Canada V-Chip
Block UnRated Show
Downloadable Rating
Clear Downloadable Data
O
ENTER
:Go to Next Menu
:Select Menu
MENU
:Return
:Select Menu
US V CHIP
Press button to select US V CHIP then press ENTER button to adjust A
▼▲/
Sub Menu Will appear as below
.
USA
Movie Rating
TV Rating
:Go to Next Menu
/
,.
:Select Menu:Select Menu
MENU
:Return
25
ENTER
/
:Go to Next Menu
:Go to Next Menu

TV Operation
Movie Rating
Press button to select Movie Rating then press ENTER button to adjust
▼/▲ , .
A Sub Menu Will appear as below
.
Movie Rating
G
PG
PG-13
R
NC-17
X
:Select
▼▲ ENTER
Press / button to select Rating, then press button to lock
ENTER
:Lock/Unlock
ONLY REFE
TV Rating
Press / button to select TV Rating then press ENTER button to adjust A Sub
▼▲ , .
Menu Will appear as below
.
TV Rating
TV-Y
TV-Y7
TV-G
TV-PG
TV-14
TV-MA
:Select
D L S V FV
ENTER
:Lock/Unlock
Press button to select Rating then press OK button to lock▼/▲/ / , .◄►
CANADA V CHIP
Press button to select US V CHIP then press ENTER button to adjust A
Sub Menu Will appear as below
-
▼/▲ - , .
.
26

CANADA
English Rating
French Rating
TV Operation
O
:Select Menu:Select Menu
MENU
:Return
ENTER
/
:Go to Next Menu
:Go to Next Menu
The operation of CANADA V CHIP is the same as the operation of US V CHIP--.
Block UnRated Show
Press button to select Block UnRated Show then press ENTER button to
▼▲
/
set the rating locked
.
,
Downloadable Rating
Press button to select Downloadable Rating then press ENTER button to
▼▲
/
set the rating If the DTV program
doesn’t have this rating information this option will be in gray
.
,.
,
Clear Downloadable Data
Press button to select Clear Downloadable Data then press ENTER
▼▲
/
button to set the rating
:
Note The above two operation only valid when playing the downloadable data
.-.
stream The operations are the same as US V CHIP
.
,
CHANGE PASSWORD
Press button to select CHANGE PASSWORD then press ENTER button to
▼▲/
adjust the value
A Sub Menu Will appear as below
.
.
,
Change Password
Old Pin
New Pin
Confirm
ENTER
:Return
DIGITAL
: Password
27

TV Operation
FRONT PANEL LOCK
Press button to select FRONT PANEL LOCK then press ENTER button to
▼▲/
adjust,.
Front Panel Lock
Source Lock
Press button to select Source Lock then press Enter button to enter the
▼▲
sub menu
Press button to select Source then press Enter button to set the Source
▼▲//
Lock.
can’t
You enter the locked source if you set the Source lock
,
,
.
MENU
SETUP MENU
MENU
Source Lock
TV
AV
S-Video
YPbPr1
HDMI1
PC
DVD
:Return
SETUP
Closed Caption
Menu Language
Clock
:Return
:Select Menu:Select Menu
:Select Menu
:Select Menu
ENTER
:Page
/
Page 1/1
ENTER
:On/Off
English
:Go to Next Menu
:Go to Next Menu
R
Closed Caption
28

TV Operation
Press button to select the item Closed Caption then press button to
◄►▼▲//
adjus,.
CLOSED CAPTION
Caption Display Off
Analog Caption Type TEXT3
Digital Caption Type Service1
Digital CC Preset Default
Digital CC Style
O
MENU
:Return
:Select Menu
Caption Display
Press button to select Caption Display then press button to select ON
▼▲
//
or OFF
.
Analog Caption Type
Press button to select Analog Caption Type then press button to select
▼▲
//
the type
( : , , , ,,,,)
Available type TEXT1 TEXT2 TEXT3 TEXT4 CC1 CC2 CC3 CC4
.
Digital Caption Type
Press button to select Digital Caption Type then press button to
▼▲
//
select the type Available type Service1 6
. ( : ~ )
Digital CC Preset
Press button to select Digital CC Preset then press button to select
▼▲
//
Default or Custom
.
:On/Off
,
,
,
◄►
◄►
,
◄►
◄►
Digital CC Style
This menu is only shown when the Digital CC Preset is selected Custom
DIGITAL CC STYLE
CC Size Small
CC Font Style4
CC Opacity Solid
Text Color Yellow
CC Background Opacity Transparent
CC Background Color Green
CLOSE CAPTION
MENU
:Return
:Select Menu
:Change Setting
29
.

TV Operation
CC Size
Press button to select then press button to set Available CC Size
▼▲
//
:, ,, )
Size Small Standard Large Default
CC Font
Press button to select CC Font then press button to select the Font
▼▲
//
(:~)
Available type Style1 7
CC Opacity
Press button to select CC Opacity then press button to select the
▼▲
//
Opacity Available Opacity Flashing Default Solid Translucent Transparent
TEXT Color
Press button to select then press button to select the
color
(:,,,,,,,,)
CC Background Opacity
Press button to select CC Background Opacity then press button to select
the Opacity
(: ),,,,
CC Background Color
Press button to select CC Background Color then press button to
select the Color
(:,,,,,,,,)
.( : , , , , )
▼▲
//
.
Available Color Blue Yellow Red Black White Green Magenta Cyan Default
/,
.
Available Opacity Flashing Default Solid Translucent Transparent
.
Available Color Blue Yellow Red Black White Green Magenta Cyan Default
,.(
TEXT color
◄►
,.
,
,
◄►
◄►
◄►
,
◄►
/
◄►▼▲//
Menu Language
Press button to select the item Menu Language then press button to
adjust Available Language English French Spanish
. ( : , , )
,
◄►▼▲//
CLOCK
Press button to select the CLOCK then press ENTER to edit,.▼▲/
CLOCK
Time Zone Alaska
Auto Clock Off
Setup Time 2009-10-21 20:00:00
Day Of Week Wed
:Select Menu
:Change Setting
30
RE
TV Operation
Time Zone
Press button to select Timer Zone then press button to set Available
▼▲
/
:,, ,
Size Hawaii Alaska Eastern
Central Mountain Pacific Samoa Newfoundland Atlantic
,,,, ,)
,/ .(
◄►
Auto Clock
Press button to select Auto Clock then press button to set it On or
▼▲
/
.,
Off If you set it On it will adjust
the time corresponding the DTV time automatically
,/
◄►
.
Setup Time
Press button to select Setup Time then press button to adjust the
▼▲
/
,/
◄►
time and use the ENTER button
to go to the next option
.
Day Of Week
This option displays the Day Of Week corresponding to the setup time
.
OTHERS MENU
OTHERS
Blue Back
No Signal Power Off
No Operation Power Off
All Reset
Audio Only
Execute
ENTER
MENU
:Return
:Select Menu
:On/ Off
Blue Back
Press button to select Blue Back then press ENTER button to select
▼▲
/
,.
No Signal Power Off
▼▲
/
,.Press button to select No Signal Power Off then press ENTER button to select
No Operation Power Off
Press button to select No Operation Power Off then press button to select
▼▲
//
,.
◄►
All Reset
Press button to select All Reset then press ENTER button to execute
▼▲
/
,.
Attention!
If [All Reset] was executed
TV system is reset.
Audio Only
Press button to select Audio Only then press ENTER button to execute
▼▲
/
,.
(Hold on power key 3 sec. to restore video.Then there will be only audio
output.To wake up video,please press Power button for 3 sec.)
31
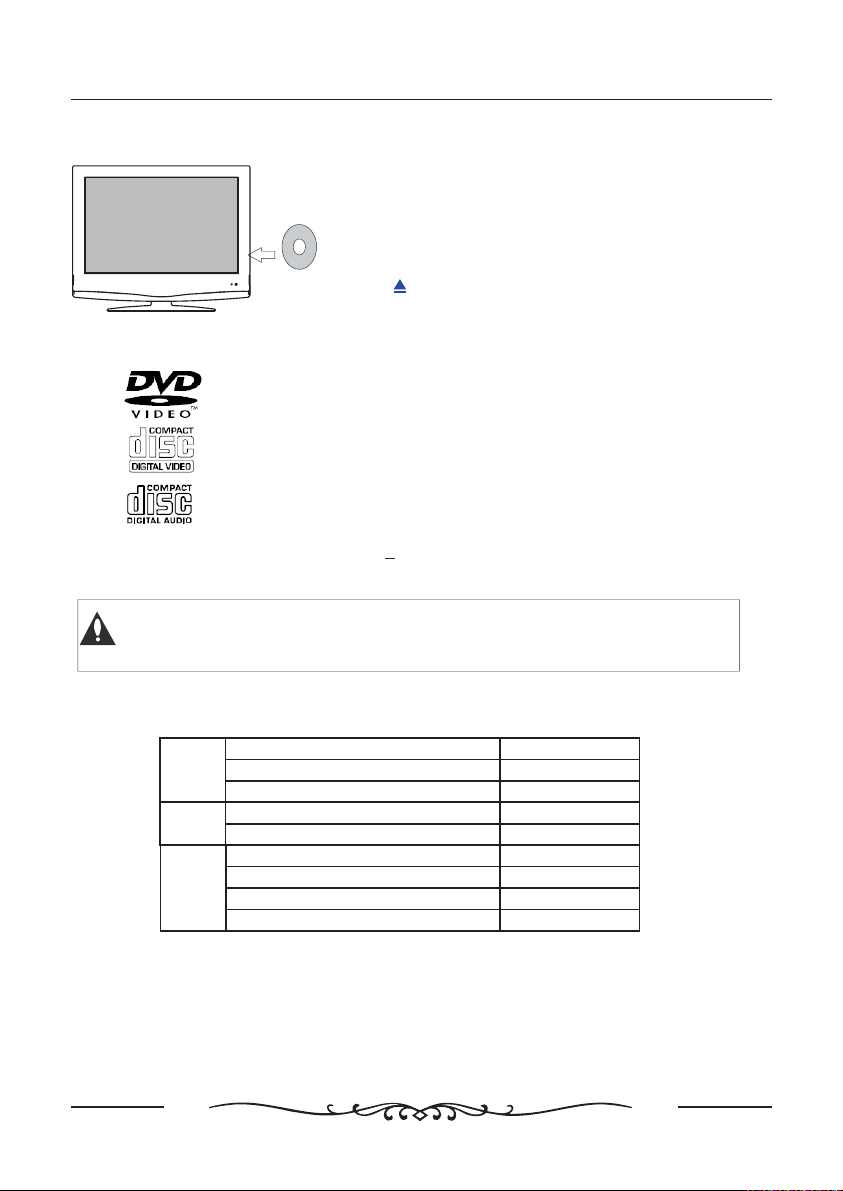
Using built-in DVD Player
Insert the disc with mirror side facing you.
The driver will read the disc automatically when the it is
inserted If the player cannot play the disc, please check.
Mirror Side
Eject the disc
Press on the remote control or on the top
of the TV to eject the disc.
Compatible Disc Types
12cm DVD disc
12cm VCD SVCD disc/
12cm CD HDCD disc/
DVD Operation
whether the disc inserted correctly.
MP3
JPEG
12 cm DVD RW CD R RW discs that contain MP3,-/
and JPEG files
+
Warning Do not insert any 8 cm disc to the DVD driver!,
or it may get stuck.
Using DVD disc to play back media files.
This TV incorporates DVD . Supported DVD disc are shown as below:
PHOTO
MUSIC
VIDEO
JPEG
BMP
GIF
Mp3
WMA
MPEG1
MPEG2
MPEG4I
AIVX3.11,DIVX5.0,DIVX5 11
.
*.JPG,*.JPEG
*.BMP
*.GIF
*.Mp3
*.WMA
*.MPG,*.DAT
*.VOB
*.MP4,*.AVI
*.AVI
Playback of media files in disc
When you insert a disc that is DVD,VCD or CD,the media Player will
automatically scan the content and create a list of media files on the screen.
▲▼// /◄► ENTER
Use to navigate. Select a file and press to play.
32
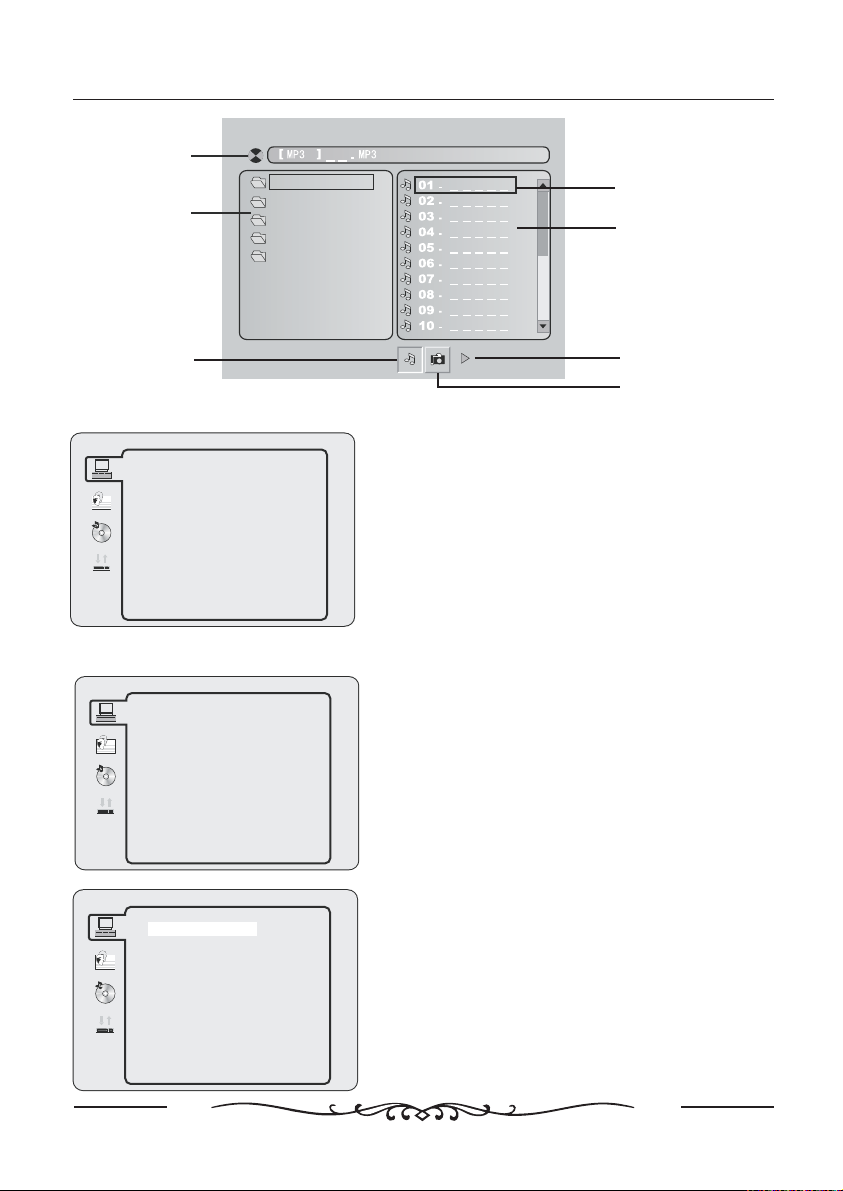
Active Directory
Directories List
Music001
Photo001
music002
Photo002
Photo003
DVD Operation
Highlighted item:
Current playing track
Music Play list
Music Category
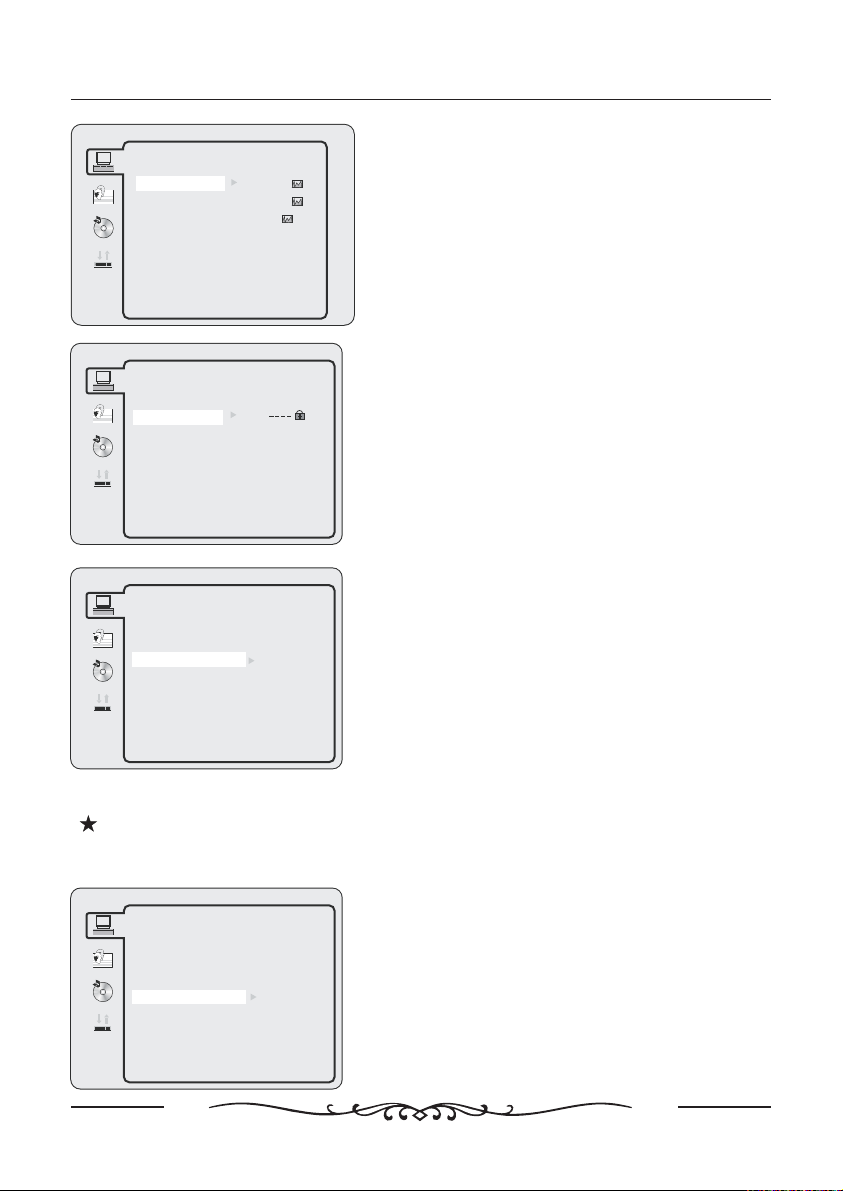
DVD Setup
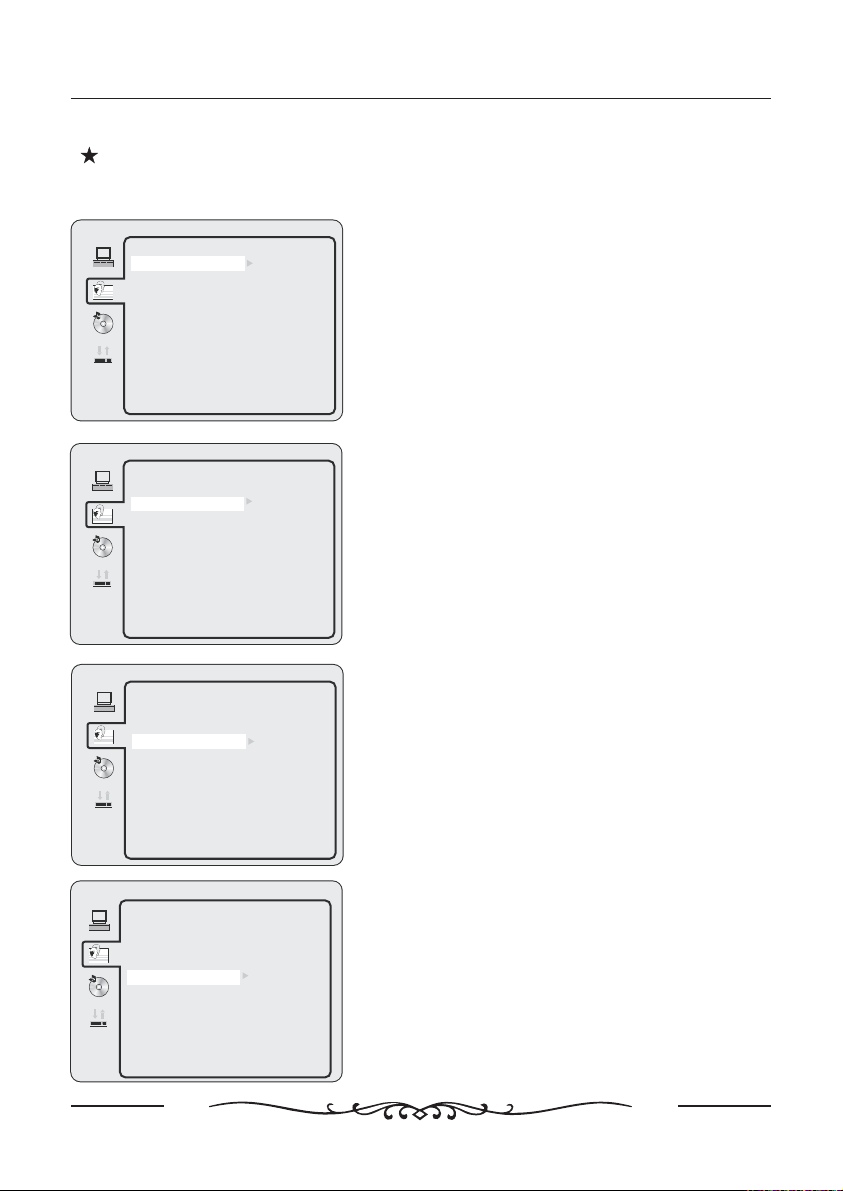
SYSTEM SETUP
TV SYSTEM
TV TYPE
PASSWORD
RATING
DEFAULT
EXIT SETUP
SYSTEM SETUP
SYSTEM SETUP
TV SYSTEM
TV TYPE
PASSWORD
RATING
DEFAULT
EXIT SETUP
SYSTEM SETUP
TV SYSTEM
TV TYPE
PASSWORD
RATING
DEFAULT
EXIT SETUP
POWER MUTE DISPLAY
Press D. SETUP bu tton to access the DV D
Setup MENU.
▲▼/ ◄►//
Press buttons to navigate through
the DVD Setup.
Press ENTER button to confirm setting.
Press D.SETUP button again to exit seup.
- Press DVD SETUP button to activate the
DVD player OSD menu ;
- Press ◄ / ► button to move and highlight
between different sub-menu. Press
ENTER button to enter the highlighted submenu;
- Press DV D SETUP bu tton to exit the OSD
menu, or move the highlight to EXIT SETUP
then press ENTER button to exit or move the
highlight to EXIT SETUP then press ENTER
buttontoexit
NTSC
PAL
AUTO
POWER MUTE DISPLAY
TV SYSTEM
Select the video system of the DVD so as to
conform to the TV system.
Generally for this TV, it is OK to selectAUTO.
.
Videos Category
Photos Category
▲/▼
33
DVD Operation
SYSTEM SETUP
TV SYSTEM
TV TYPE
PASSWORD
RATING
DEFAULT
EXIT SETUP
SYSTEM SETUP
TV SYSTEM
TV TYPE
PASSWORD
RATING
DEFAULT
EXIT SETUP
SYSTEM SETUP
TV SYSTEM
TV TYPE
PASSWORD
RATING
DEFAULT
EXIT SETUP
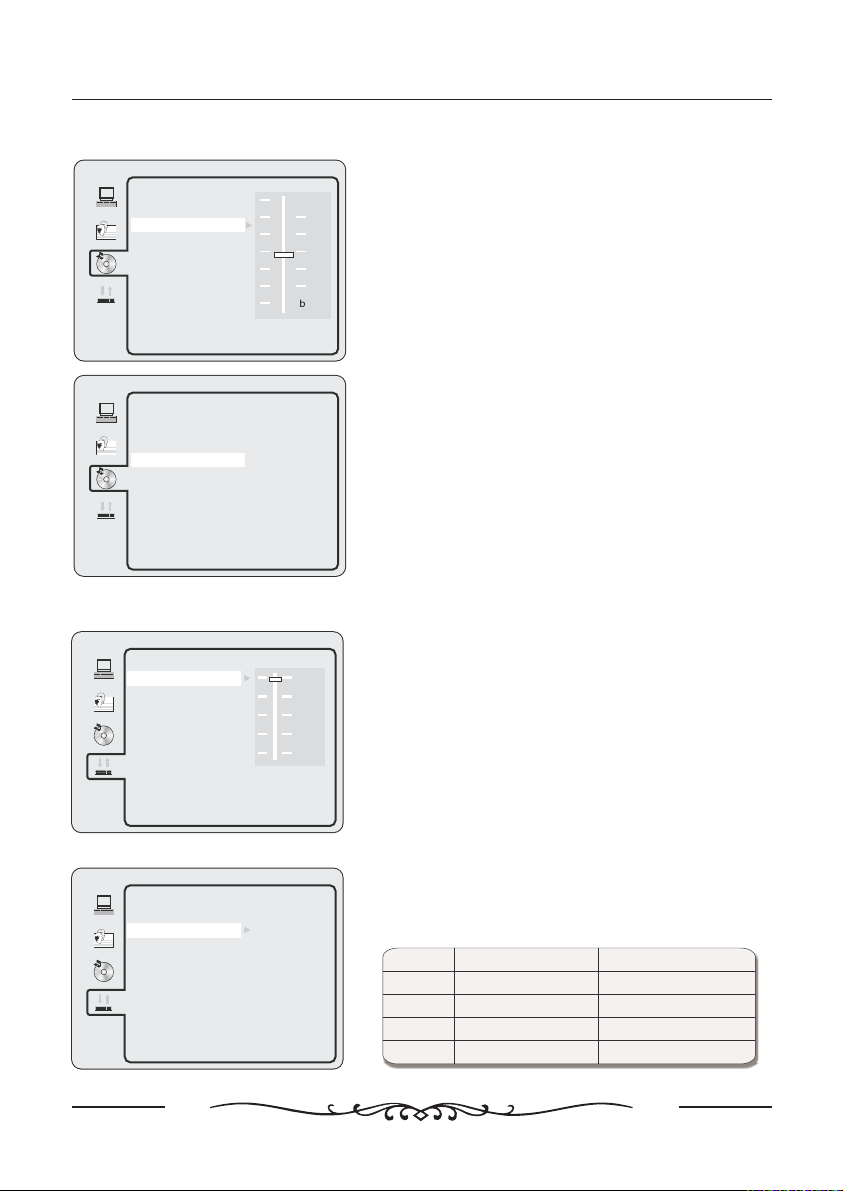
43PS:
4 3LB:
16 9:
1 KID SAFE
2G
3PG
4PG13
5PGR-
6R
7NC17-
8 ADULT
TV TYPE
Select the video output size of DVD.
4:3PS: 4:3 PanScan.
4:3LB: 4:3 LetterBox.
16:9:
PassWord
-The default setting is locked. No Rating selection
or change password could be done. To edit the
Rating setting, please enter default password
“0000” by number buttons, then press ENTER
button to confirm.
-To change password, input any 4 digit number
when the lock is unlocked.Once the 4 digit number
is entered, that will be your new password.
RATING
-For discs that are rated by MPAA, this
function can restrict the playback of the disc
according to MPAA rating.
If ADULT is selected, there will be no limit of
all discs playing back.
Note:
To change the setting of rarting, you must disable the password before hand.
Correspondingly, to enable the setting of rating, you must enable the password
afterwards.
SYSTEM SETUP
TV SYSTEM
TV TYPE
PASSWORD
RATING
DEFAULT
EXIT SETUP
RESTORE
DEFAULT
Restore the factory default settings.
34
Note:
Password and rating cannot be restored with this operation.
LANGUAGE SETUP
DVD Operation
LANGUAGE SETUP
OSD LANGUAGE
AUDIO LANG
SUBTITLE LANG
MENU LANG
EXIT SETUP
LANGUAGE SETUP
OSD LANGUAGE
AUDIO LANG
SUBTITLE LANG
MENU LANG
EXIT SETUP
LANGUAGE SETUP
OSD LANGUAGE
AUDIO LANG
SUBTITLE LANG
MENU LANG
EXIT SETUP
ENGLISH
GERMAN
SPANISH
FRENCH
PORTUGUESE
ITALIAN
ENGLISH
GERMAN
SPANISH
FRENCH
PORTUGUESE
ITALIAN
ENGLISH
GERMAN
SPANISH
FRENCH
PORTUGUESE
ITALIAN
OSD LANGUAGE
Select the DVD OSD language.
The default OSD language is English
AUDIO LANGUAGE
POWER MUTE DISPLAY
Select the default audio language while playing
back the DVD disc.
The default audio language is English
SUBTITLE LANGUAGE
POWER MUTE DISPLAY
Select the default subtitle language while playing
back the DVD disc.
The default subtitle language is English
LANGUAGE SETUP
OSD LANGUAGE
AUDIO LANG
SUBTITLE LANG
MENU LANG
EXIT SETUP
ENGLISH
GERMAN
SPANISH
FRENCH
PORTUGUESE
ITALIAN
MENU LANGUAGE
POWER MUTE DISPLAY
Select the default menu language while playing
back the DVD disc.
The default menu language is English
35
AUDIO SETUP
DVD Operation
AUDIO SETUP
TONE
EXIT SETUP
AUDIO SETUP
TONE
EXIT SETUP
DIGITAL SETUP
DIGITAL SETUP
DYNAMIC RANGE
DUAL MONO
EXIT SETUP
#
FULL
68/
4 8/
2 8/
OFF
TONE
Adjust the tone of the audio
+4
+2
0
-2
-4
EXIT SETUP
Exit DVD OSD menu.
DYNAMIC RANGE
Allows you to control the difference between the
softess and loudest sound in adisc in order to
view a movie at a lower volume without losing
clarity of sound.
Select “OFF” to disable the control of dynamic
range, and “FULL” to get the lowest dynamic
range(least difference between the softess and
loudest sound)
DIGITAL SETUP
DYNAMIC RANGE
DUAL MONO
EXIT SETUP
STEREO
MONO L
MONO R
MIX MONO
DUAL MONO
Selects the type that converting multi-channel
audio into stereo audio.
MODE LEFT SPEAKER RIGHT SPEAKER
STEREO STEREO L STEREO R--
MONO L
MONO R
MIX MONO L MONO R MONO L MONO R MONO--+- -+-
Left channel audio
Right channel audio
Left channel audio
Right channel audio
36

Dimensions & Specifications
Dimensions & Specifications
Model LC19W060C
Panel size 19"
Resolution
TV System
Channel coverage
Speaker 3Wx2
Antenna impedance 75Ω
Input Voltage 120VAC 60Hz,
Standby power consumption <1W
Video audio Terminals/
S Video Input-*
Video audio Input/
Component Input
HDMI Terminals
VGA Terminals
Headphone Audio Output Mini jack for stereo 3 5Ø:- (.)
Size W x h x d()
() ()with base and stand mm
Weight
Wall mount size 100 x100mm Wall mount kit is not included()
Wall mount accessory- Optional accessory and not included in standard package
Equipment:
Operation Temperature
Storage Temperature
1440 x 900
NTSC standard
ATSC standard (8-VSB, Clear-QAM)
VHF : 2 throu gh 13
UHF: 14 through 69
Cable TV:
Mild band (A- 8 throughA - 1,A through I)
Super band (J through W)
Hyper band (AAthrough ZZ, AAA, BBB)
Ultra band (65 through 94, 100 through 125)
Rear AV x1 S Video Video Audio Input:-//
Y 1 V p p 75 ohm negative sync: (-), , .
C 0 286 V p p burst signal 75 ohm: . (-) ( ),
VIDEO 1 V p p 75 ohm negative sync: (-), , .
AUDIO 500mv rms:()
Rear Component x1:
Y 1V p p 75 ohm including sync: (-), , .
Pr Cr 0 35V p p 75 ohm/ : . (-),
Pb Cb 0 35V p p 75 ohm/ : . (-),
AUDIO 500mv rms:()
HDMI INPUT Rear HDMI x1:
HDCP compliant
E EDID compliant-
VGA INPUT:
Rear VGA D SUB 15 Pin Input x1(- )
E EDID compliantAudio Input Mini jack for stereo 3 5Ø:- (.)
474 x 389 x 170
4.95Kg with stand()
4.70Kg ()w/o stand and base
35 ºCfor moderate climates and 45ºC for tropic climates (Maximumambient temperature)
-20 ºC~50ºC
S Video Input
*-
Youcan connect your TV set to a high resolution video source such as Super VHS videocassette recorder
Laser Disc player and DVD Home Theater Set in orderto provide maximum consumer viewing satisfaction
Note
:
• - Designs and specifications are subject tochange without notice.
• - This model may not be compatible with features and/or specifications that maybe added inthe future.
,) .
-( ,
37
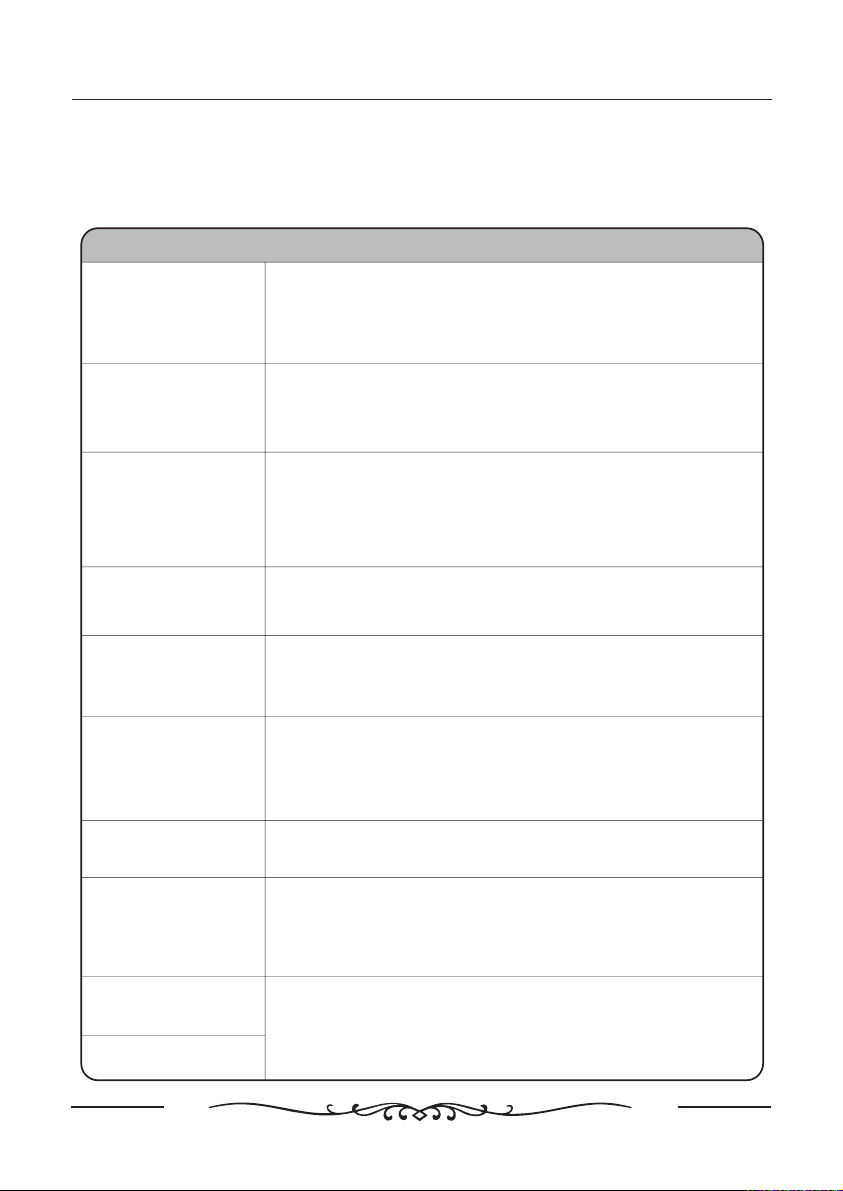
Trouble Shooting
Trouble shooting
Before contrast the service technician, perform the following simple checks. If any program
still persists, unplug the LCD TV and calling for serving.
PROBLEM POSSIBLE SOLUTION
- Check that the main plug has been connected to a wall let.
No sound and picture
Normal picture but no
sound
- Check that you have pressed the POWER button on the front of
TV set.
- Check the picture contrast and brightness settings.
- Check the volume.
- Sound muted? Press the MUTE button.
- Try another channel the problem may be with the broadcast.
- Are the audio cables installed properly.
The remote control
does not work
Power is suddenly
turned off
Picture appears slowly
after switching on
No or poor color or
poor picture
Horizontal/vertical
bars or picture shaking
Poor reception on
some channels
Lines or streaks in
pictures
No output from one of
the speakes
- Check to see if there any object between the product and remote
control Causing obstruction.
- Are batteries installed with correct polarity(+ to +,- to -).
- Correct remote operating mode set: TV, VCR etc.?
- Install new batteries
- Is the sleep timer set.
- Check the power control settings. Power interrupted
- No broadcast on station tuned with auto activated.
- This is normal, the image is muted during the product startup
process. Please contact your service center, if thepicture has not
appeared after five minutes.
- Adjust the color in menu option.
- Keep a sufficient distance between the product and the VCR.
- Try another channel, the problem may be with the broadcast.
- Are the VIDEO cables installed properly?
- Activate the any function to restore the brightness of the picture.
- Check for local interference such as an electrical appliance or
power tool.
- Station or cable product experiencing problems. Tune to another
station.
- Station signal is weak, reorient antenna to receive weaker station.
- Check for sources of possible interference.
- Check the antenna (Change the direction of the antenna).
- Adjust balance in menu option.
.
38
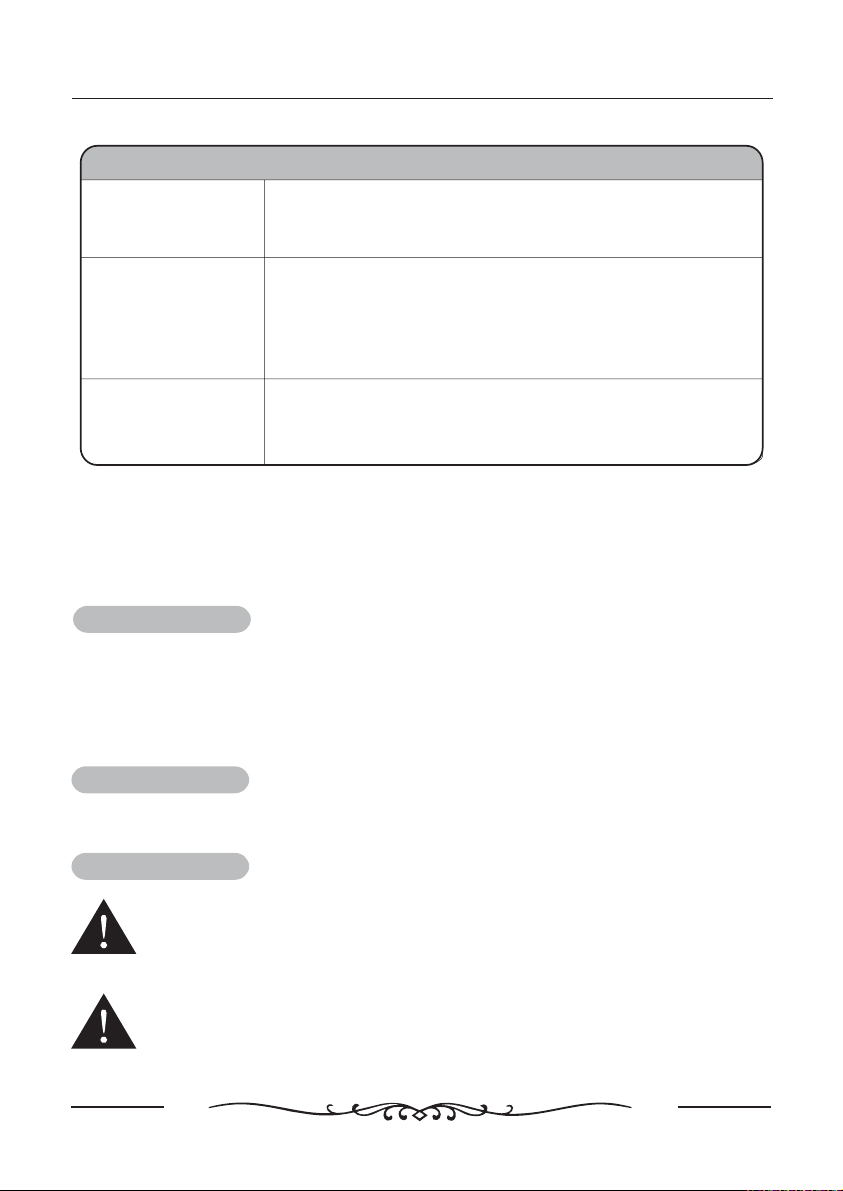
Trouble Shooting
PROBLEM POSSIBLE SOLUTION
The signal is out of
range.
Vertical bar or stripe
on back
ground&Horizontal
Noise&Incorrect
position.
Screen color is
unstable or single
color.
- Adjust resolution, horizontal frequency, or vertical frequency.
- Adjust resolution, horizontal frequency, or vertical frequency.
- Check the input source.
- Work the auto configure or adjust clock, phase, or H/V
position.
- Check the signal cable.
- Reinstall the PC video card.
Maintenance
Early malfunctions can be prevented. Careful and regular cleaning can extend the
amount of time you will have your new TV. Be sure to turn the power off and unplug the
power cord before you begin any cleaning.
Cleaning the screen
1. Here’ s a great way to keep the dust off your screen for a while. Wet a soft cloth in a
mixture of lukewarm water and a little fabric softener or dish washing detergent. Wring the
cloth until it’s almost dry, and then used it to wipe the screen.
2. Make sure the excess water is off the screen, and then let it air-dry before you turn on
your TV.
Cleaning the cabinet
To remove dirt or dust, wipe the cabinet with a soft, dry, lint-free cloth. Please be
sure not to use a wet cloth.
Extended Absence
If you expect to leave your TV dormant for a long time(such as a vacation), it’s a
good idea to unplug the power cord to protect against possible damage from
lightning or power surges.
If you expect to leave your TV dormant for a long time (such as a vacation), it’s a
good idea to unplug the power cord to protect against possible damage from
lightning or power surges.
39

 Loading...