

Page 1
Per fection is our Tradition
MT
L-AZ026
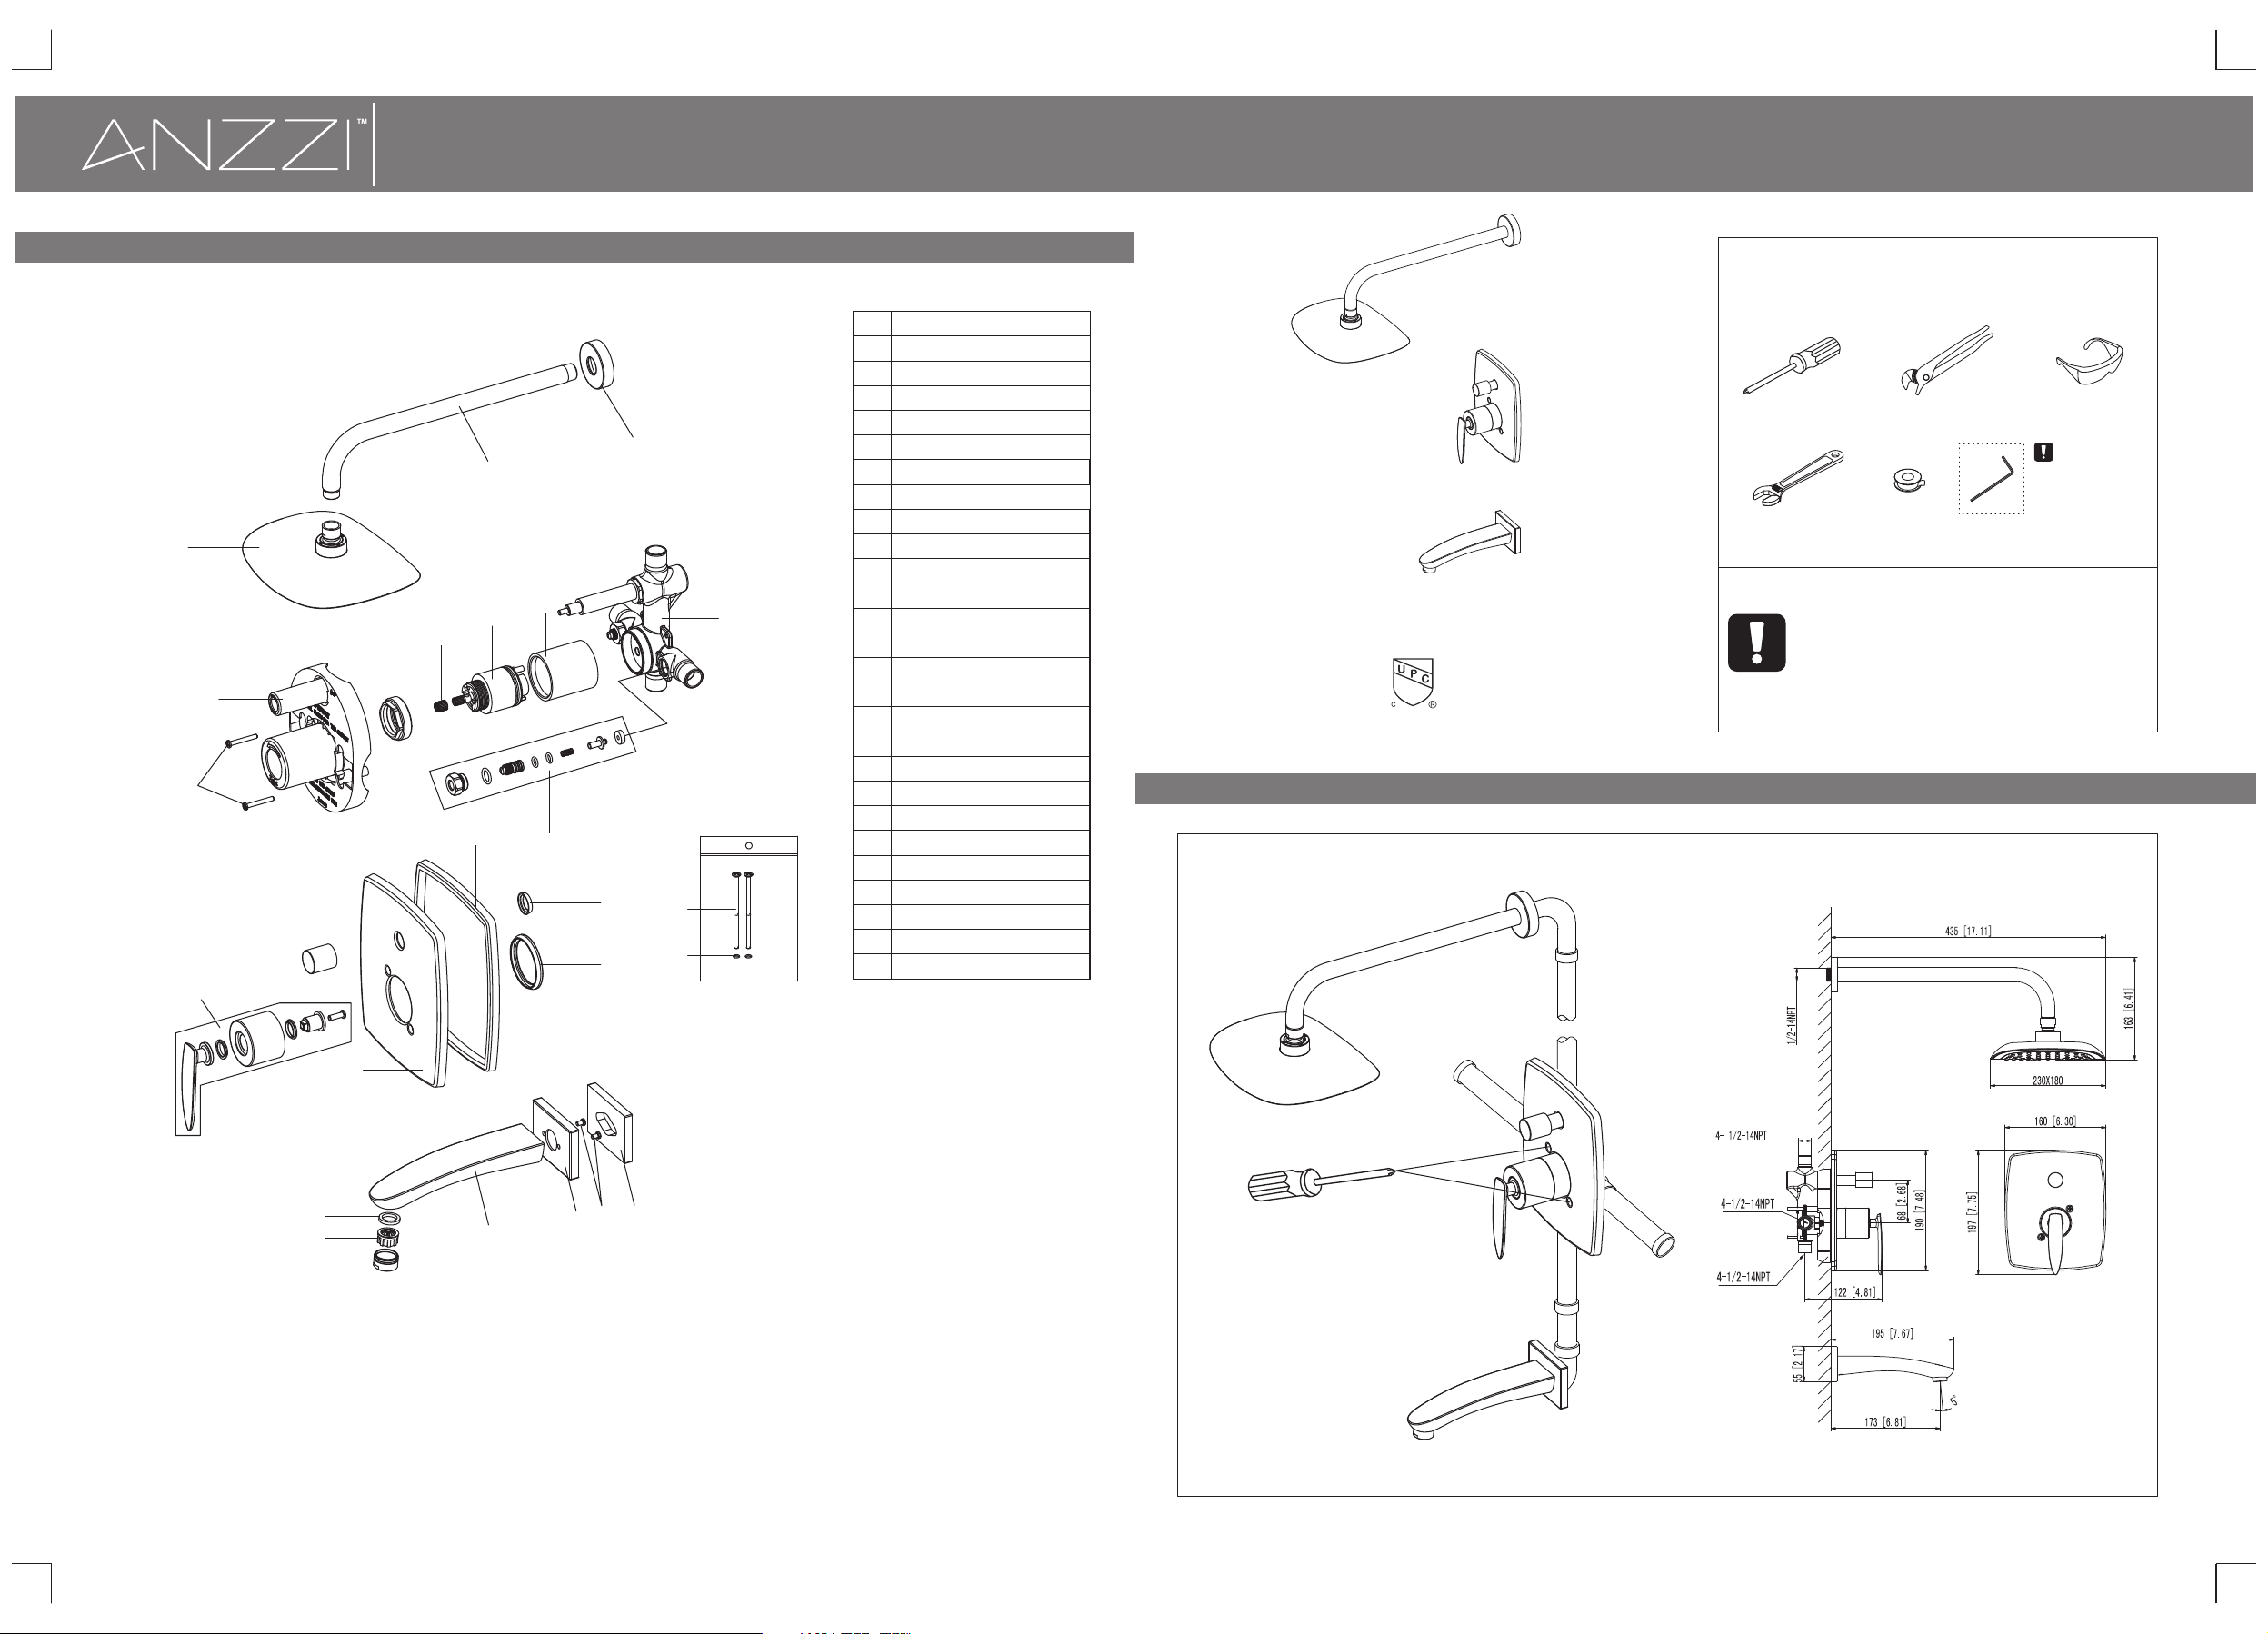
Step 4 Parts list
3
5
4
12
13
1-844-44-AN ZZ I or visit www.A NZZI.com
1
2
8
7
6
15
9
11
16
17
10
18
19
PA RT NA MENO .
Flang e
1
Showe r arm
2
3
Showe r head
4
Screw
5
Prote ct co ver
Cartr idg e locknut
6
Handle adapter
7
Cartr idg e
8
9
Sleev e
Body
10
11
Check v alve
12
Knob
13
Handl e
Ttrim p lat e
14
15
Joint
16
Joint
17
Joint
18
Screw
O-rin g
19
Aerat or wa sher
20
Aerat or
21
Aerat or co llar
22
Spout
23
24
Flang e
25
Screw
26
Joint
SINGLE HANDLE PRESSURE
BALANCED TUB & SHOWER SET
ASME A112.18.1/ CSA B125. 1
The tools might be applied to the following places:
INSTALLATION MAN UAL
RECOMMENDED TOOLS
Screwdri ver Channel Locks
Adjustable Wr ench
Attention:
for easy installation, you will need:
1.To read all the installation instruction completely before
beginning.
2.To read all the warning, attention and maitenance
information.
Teflon tape
Allen key
Gog gles
WAR NING :
Please keep the
tool for future
use!
20
21
22
14
23
24
25
26
Page 2
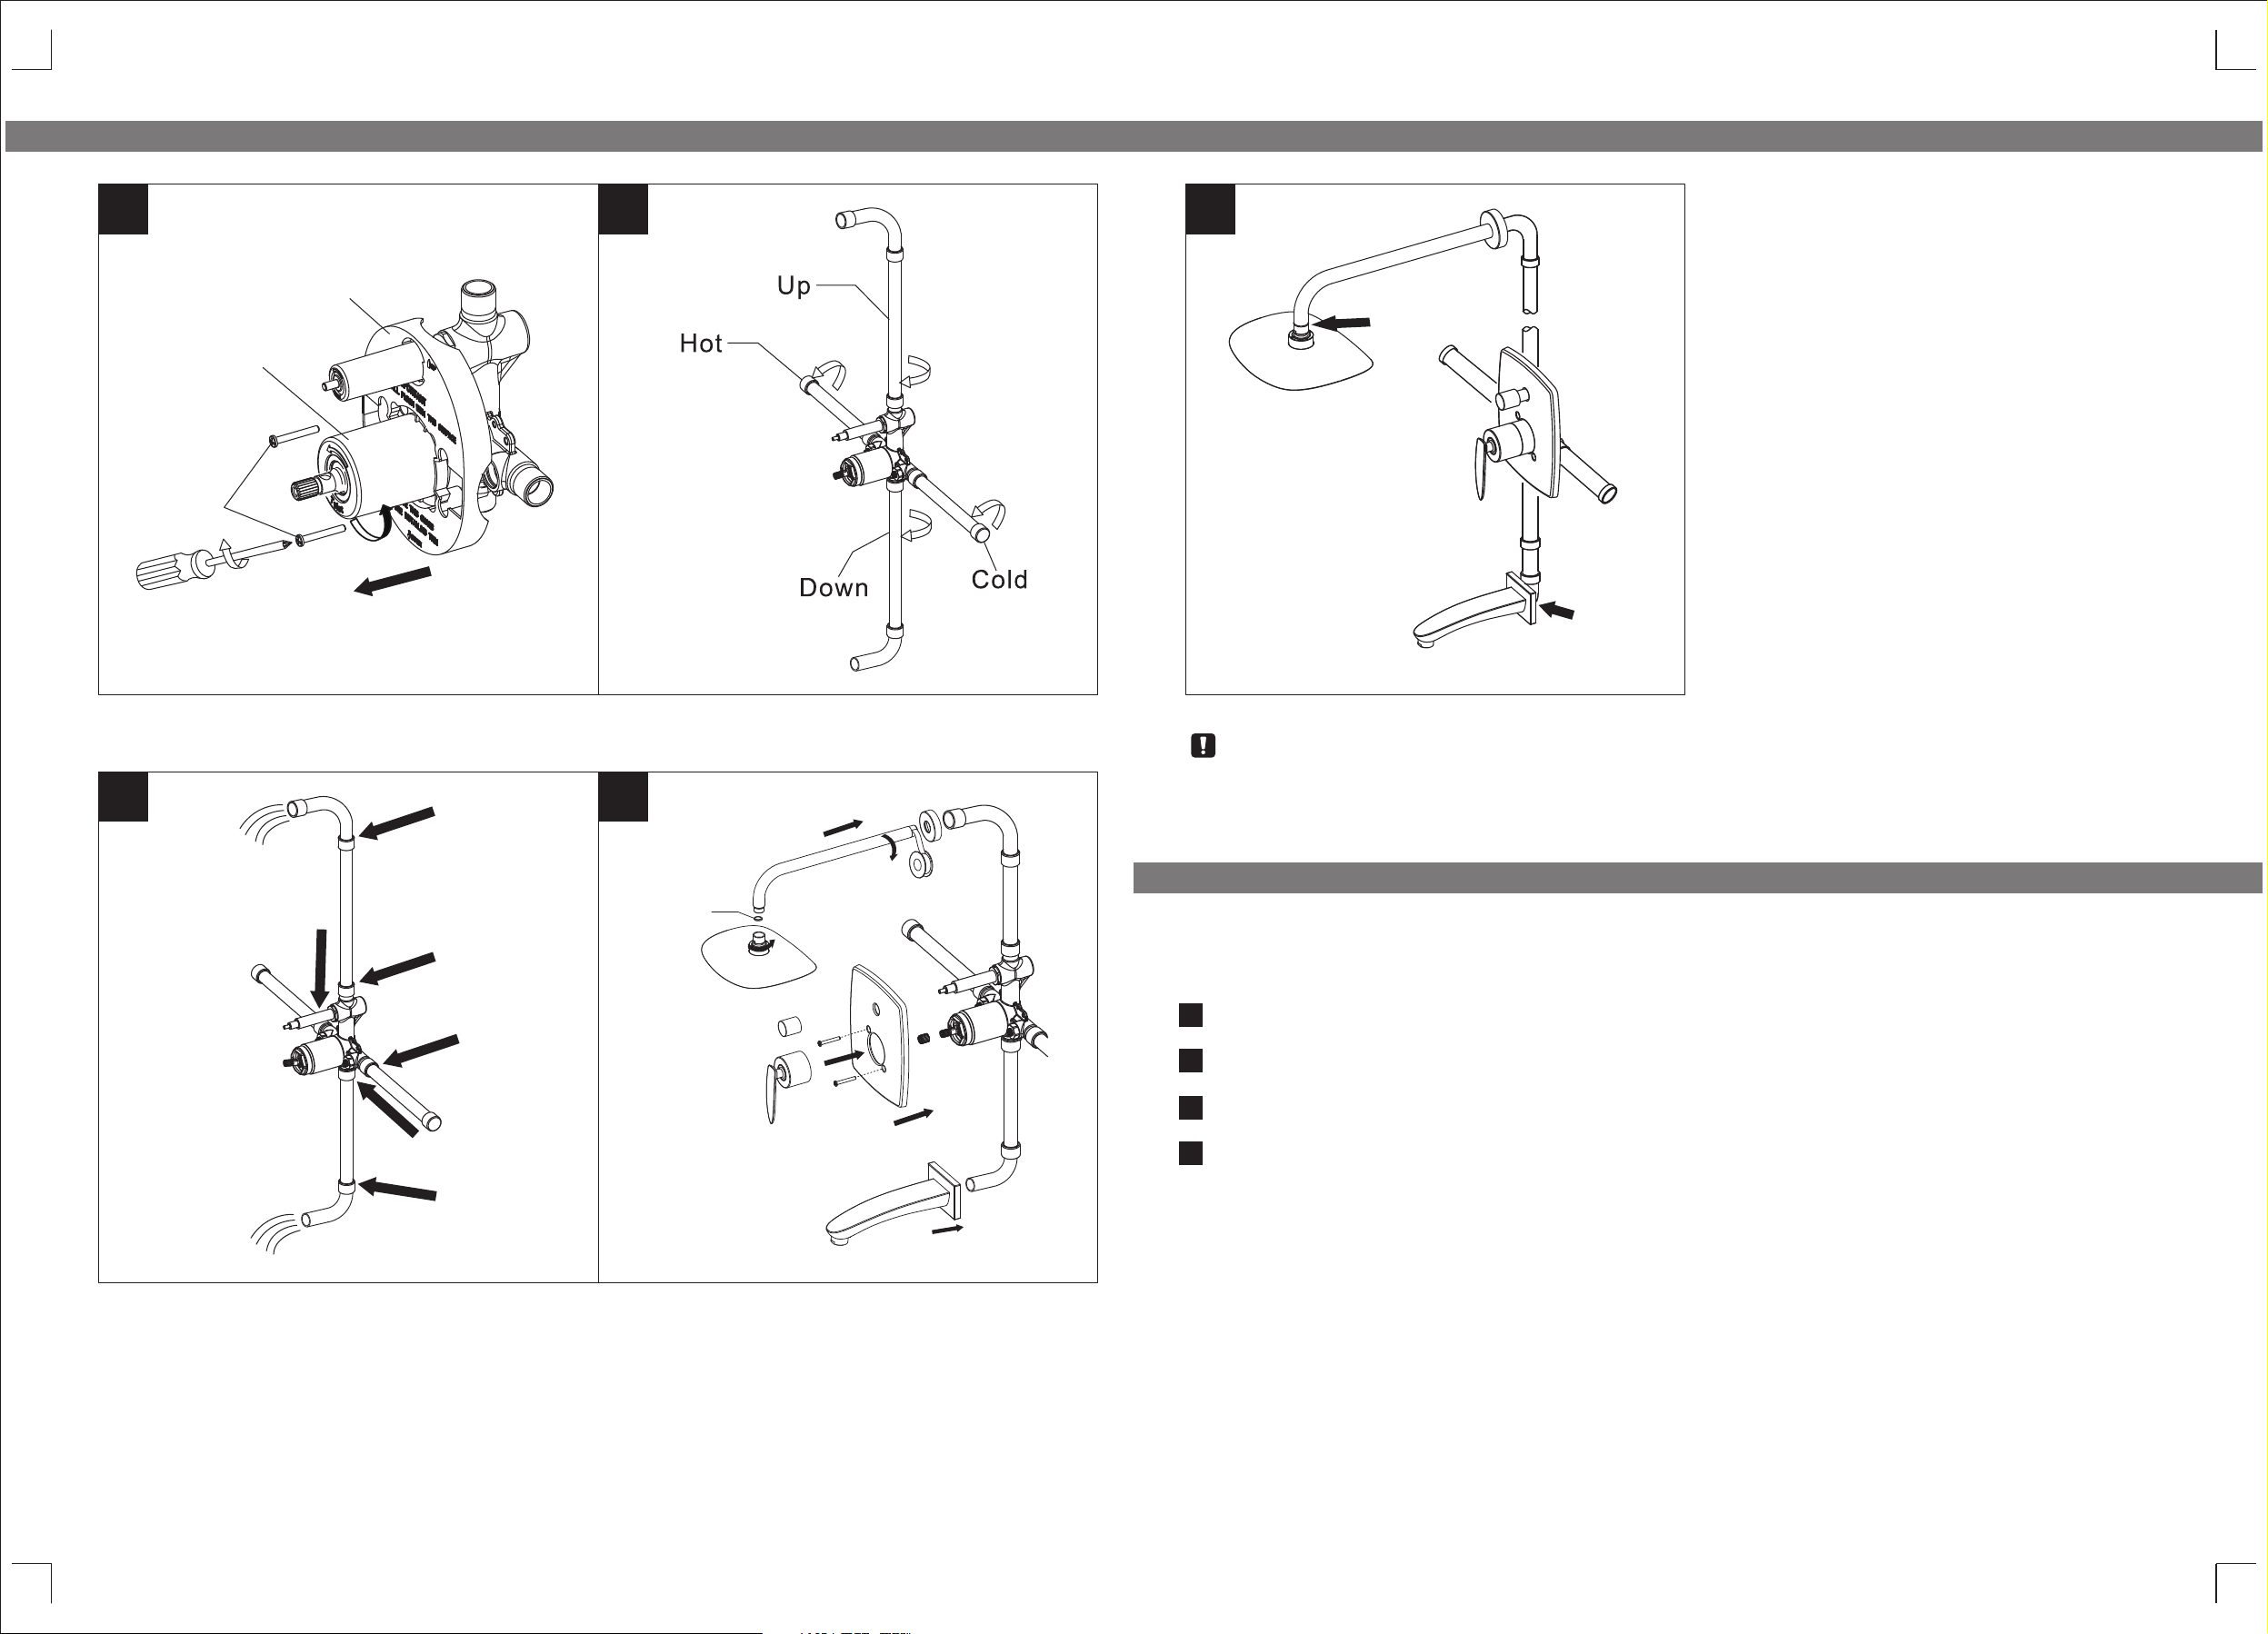
Step 1 Faucet installation
Step 2 Checking and testing
1
5b
5a
4
1.Remove the protect cover #5a and take out the screw #4 with the screwdriver, then remove the pr otect cover #5b.
2.Connect pipes with faucet as photo, pay attention to the connection of hot and cold water su pply pipe.
2
1
Check all connections at arrows for leaks, re-tighten it if necessary.
3
4
O-ring
BUT DON'T OVERTIGHTEN
Step 3 Cleaning and care
Daily cleaning and care are required in order to keep the product shining and
properly working.
1
Clean it with water and dry it with soft cloth.
2
Clean the product with gentle liquid or glass cleaner.
Don't use acid cleaner.
3
Don't clean with abrasive material, abrasive paper or knife.
4
3.Let the water run for one minute. Check all connections for leakage.
4.Apply teflon tap to the shower arm, put flange and connect it to water supply pipe, after fixi ng the shower arm,
screw the shower head to the shower arm. ATTENTION: don' t forget the o-rin g between the show er arm and the
shower head. Put the handle adapter on the cartridge. Put the trim plate, fix it with screws, tighten them with
screw driver. Put the knob, and fix the handle to cartridge locknut. Install spout, see diagr am for visual.
 Loading...