

Page 1
Per fection is our Tradition
MT
SH-AZ041
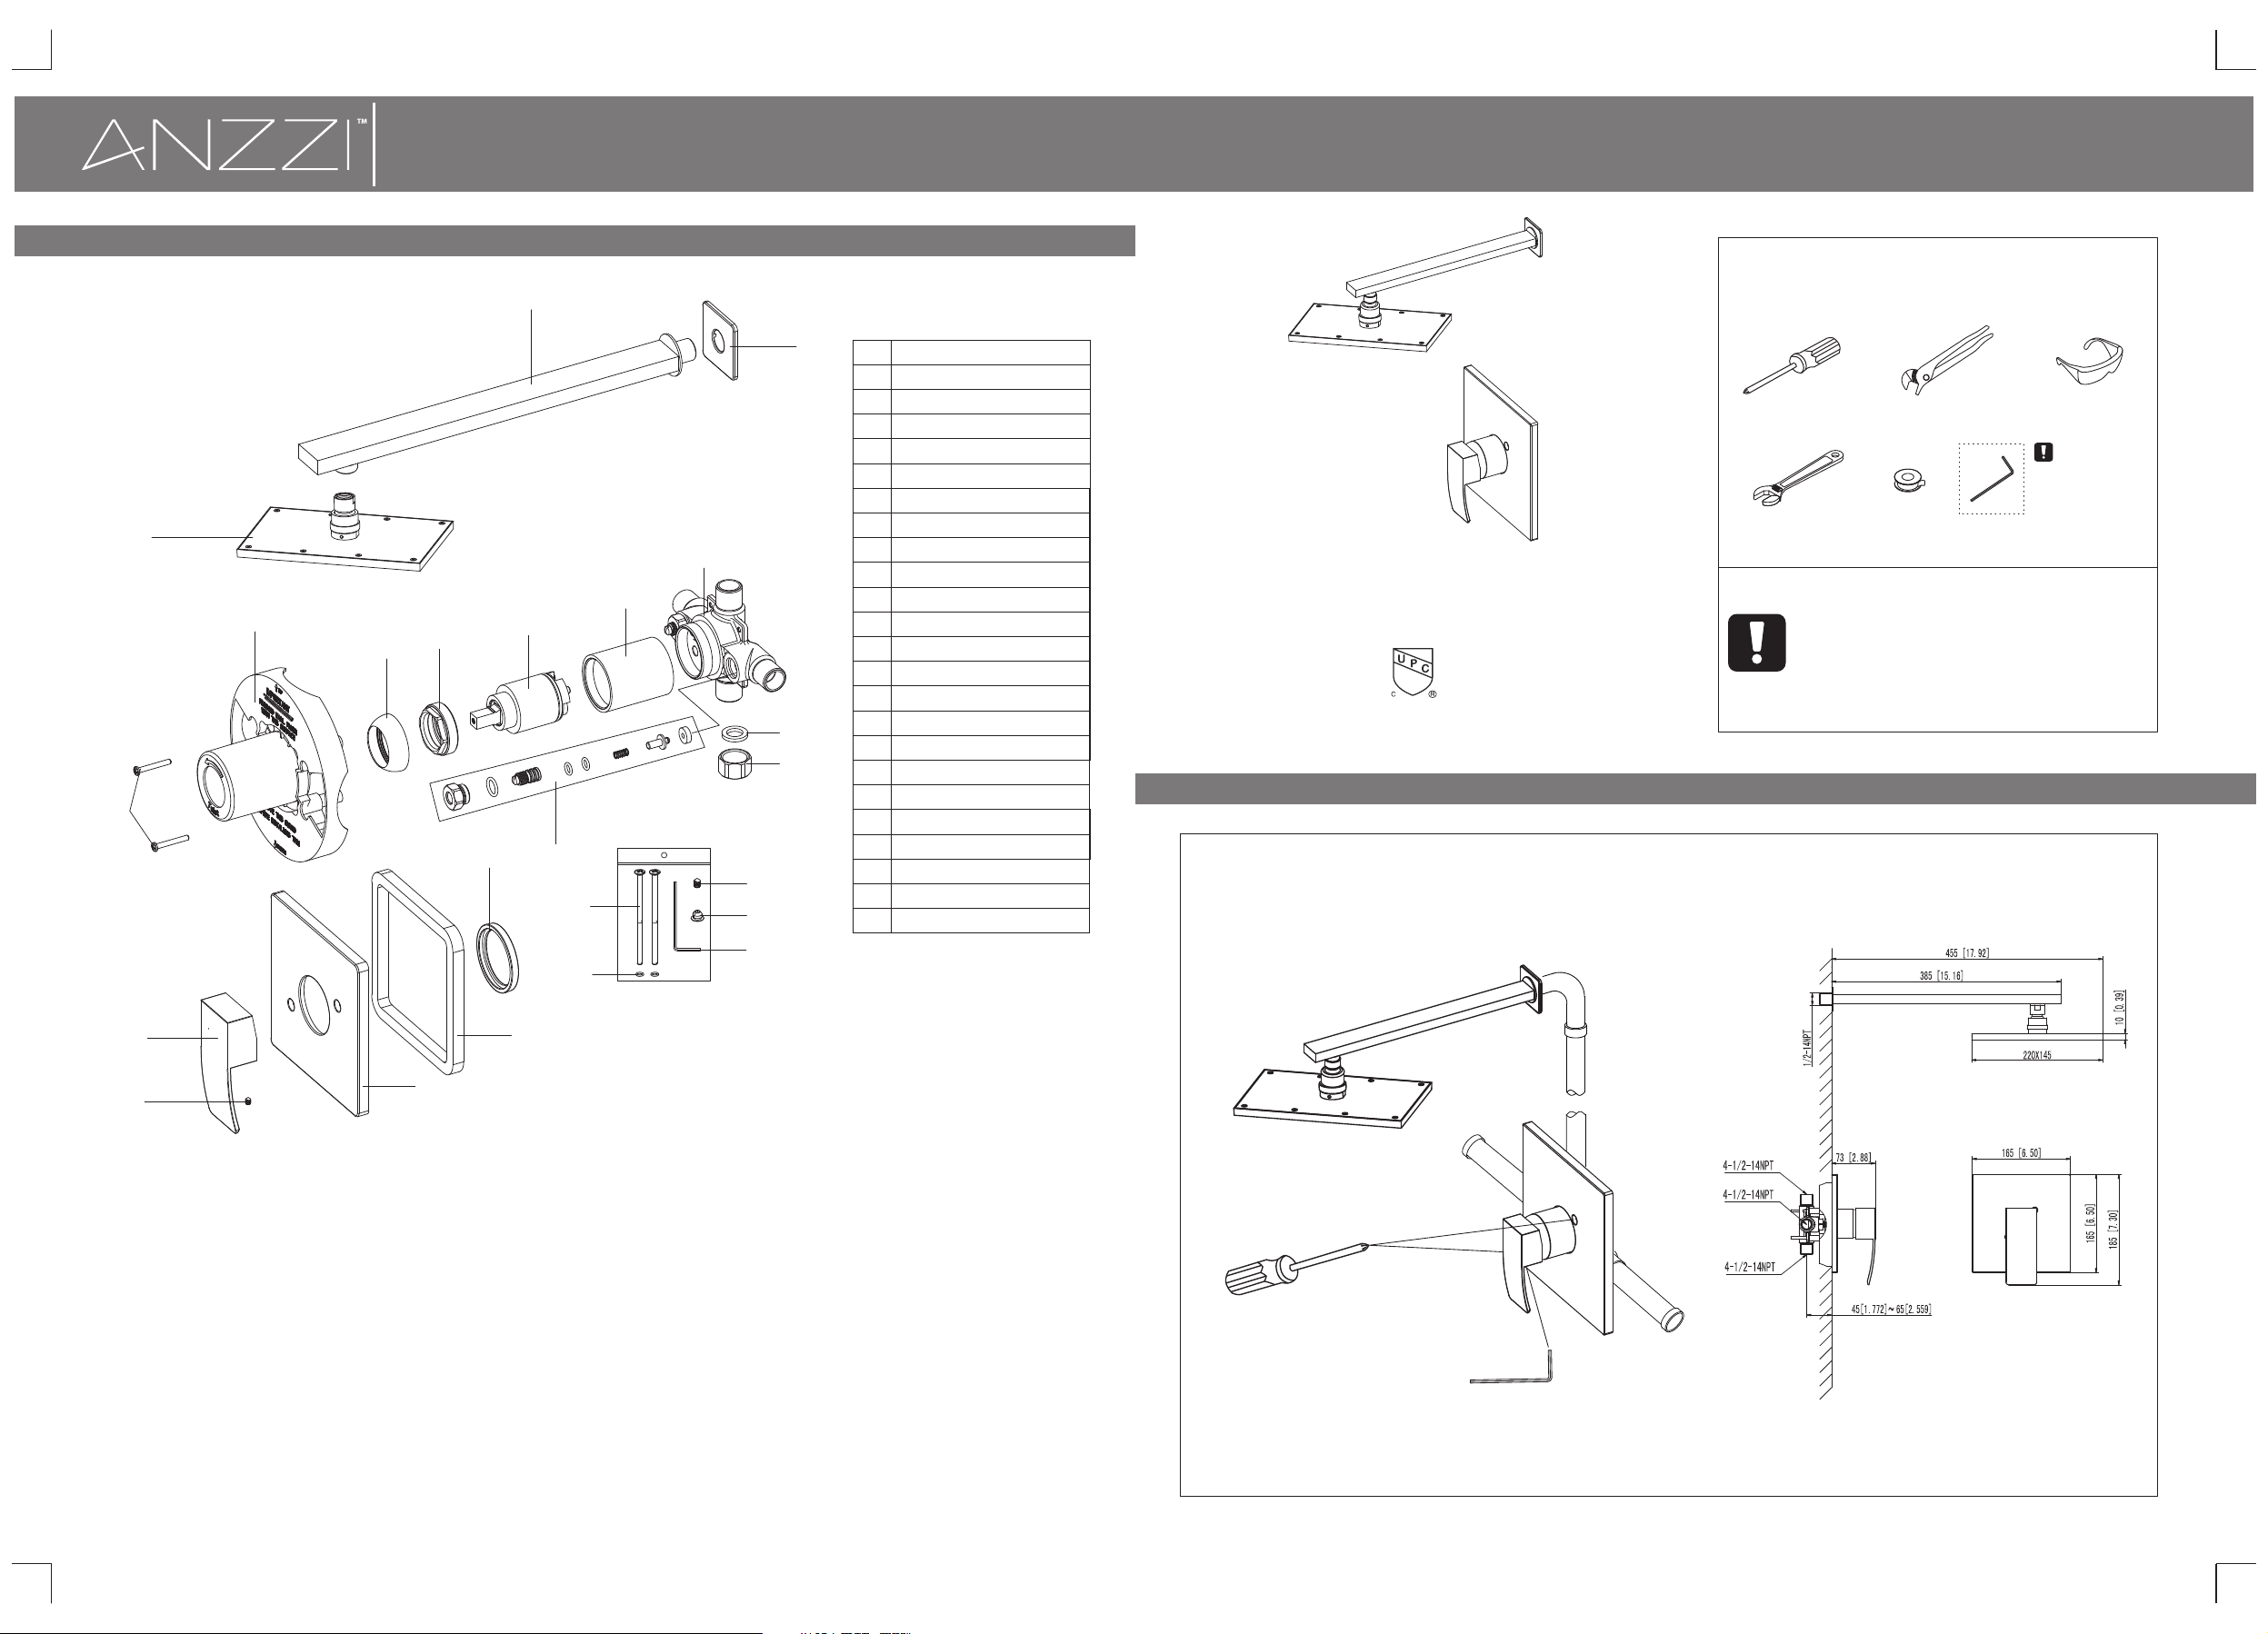
Step 4 Parts list
3
5
4
1-844-44-AN ZZ I or visit www.A NZZI.com
2
1
10
9
16
8
22
23
11
19
17
18
20
21
7
6
PA RT NA MENO .
Flang e
1
Showe r arm
2
3
Showe r head
4
Screw
5
Prote ct co ver
Tri m cap
6
Cartr idg e locknut
7
Cartr idg e
8
9
Sleev e
Body
10
11
Check v alve
12
Screw
13
Handl e
Ttrim p lat e
14
15
Joint
16
Joint
17
Screw
O-rin g
18
19
Screw
20
Index
Allen k ey
21
Was her
22
End cap
23
SINGLE HANDLE PRESSURE
BALANCED SHOWER SET
ASME A112.18.1/ CSA B125. 1
The tools might be applied to the following places:
INSTALLATION MAN UAL
RECOMMENDED TOOLS
Screwdri ver Channel Locks
Adjustable Wr ench
Attention:
for easy installation, you will need:
1.To read all the installation instruction completely before
beginning.
2.To read all the warning, attention and maitenance
information.
Teflon tape
Allen key
Gog gles
WAR NING :
Please keep the
tool for future
use!
12
13
15
14
Page 2
Step 1 Faucet installation
Step 2 Checking and testing
1
5b
5a
4
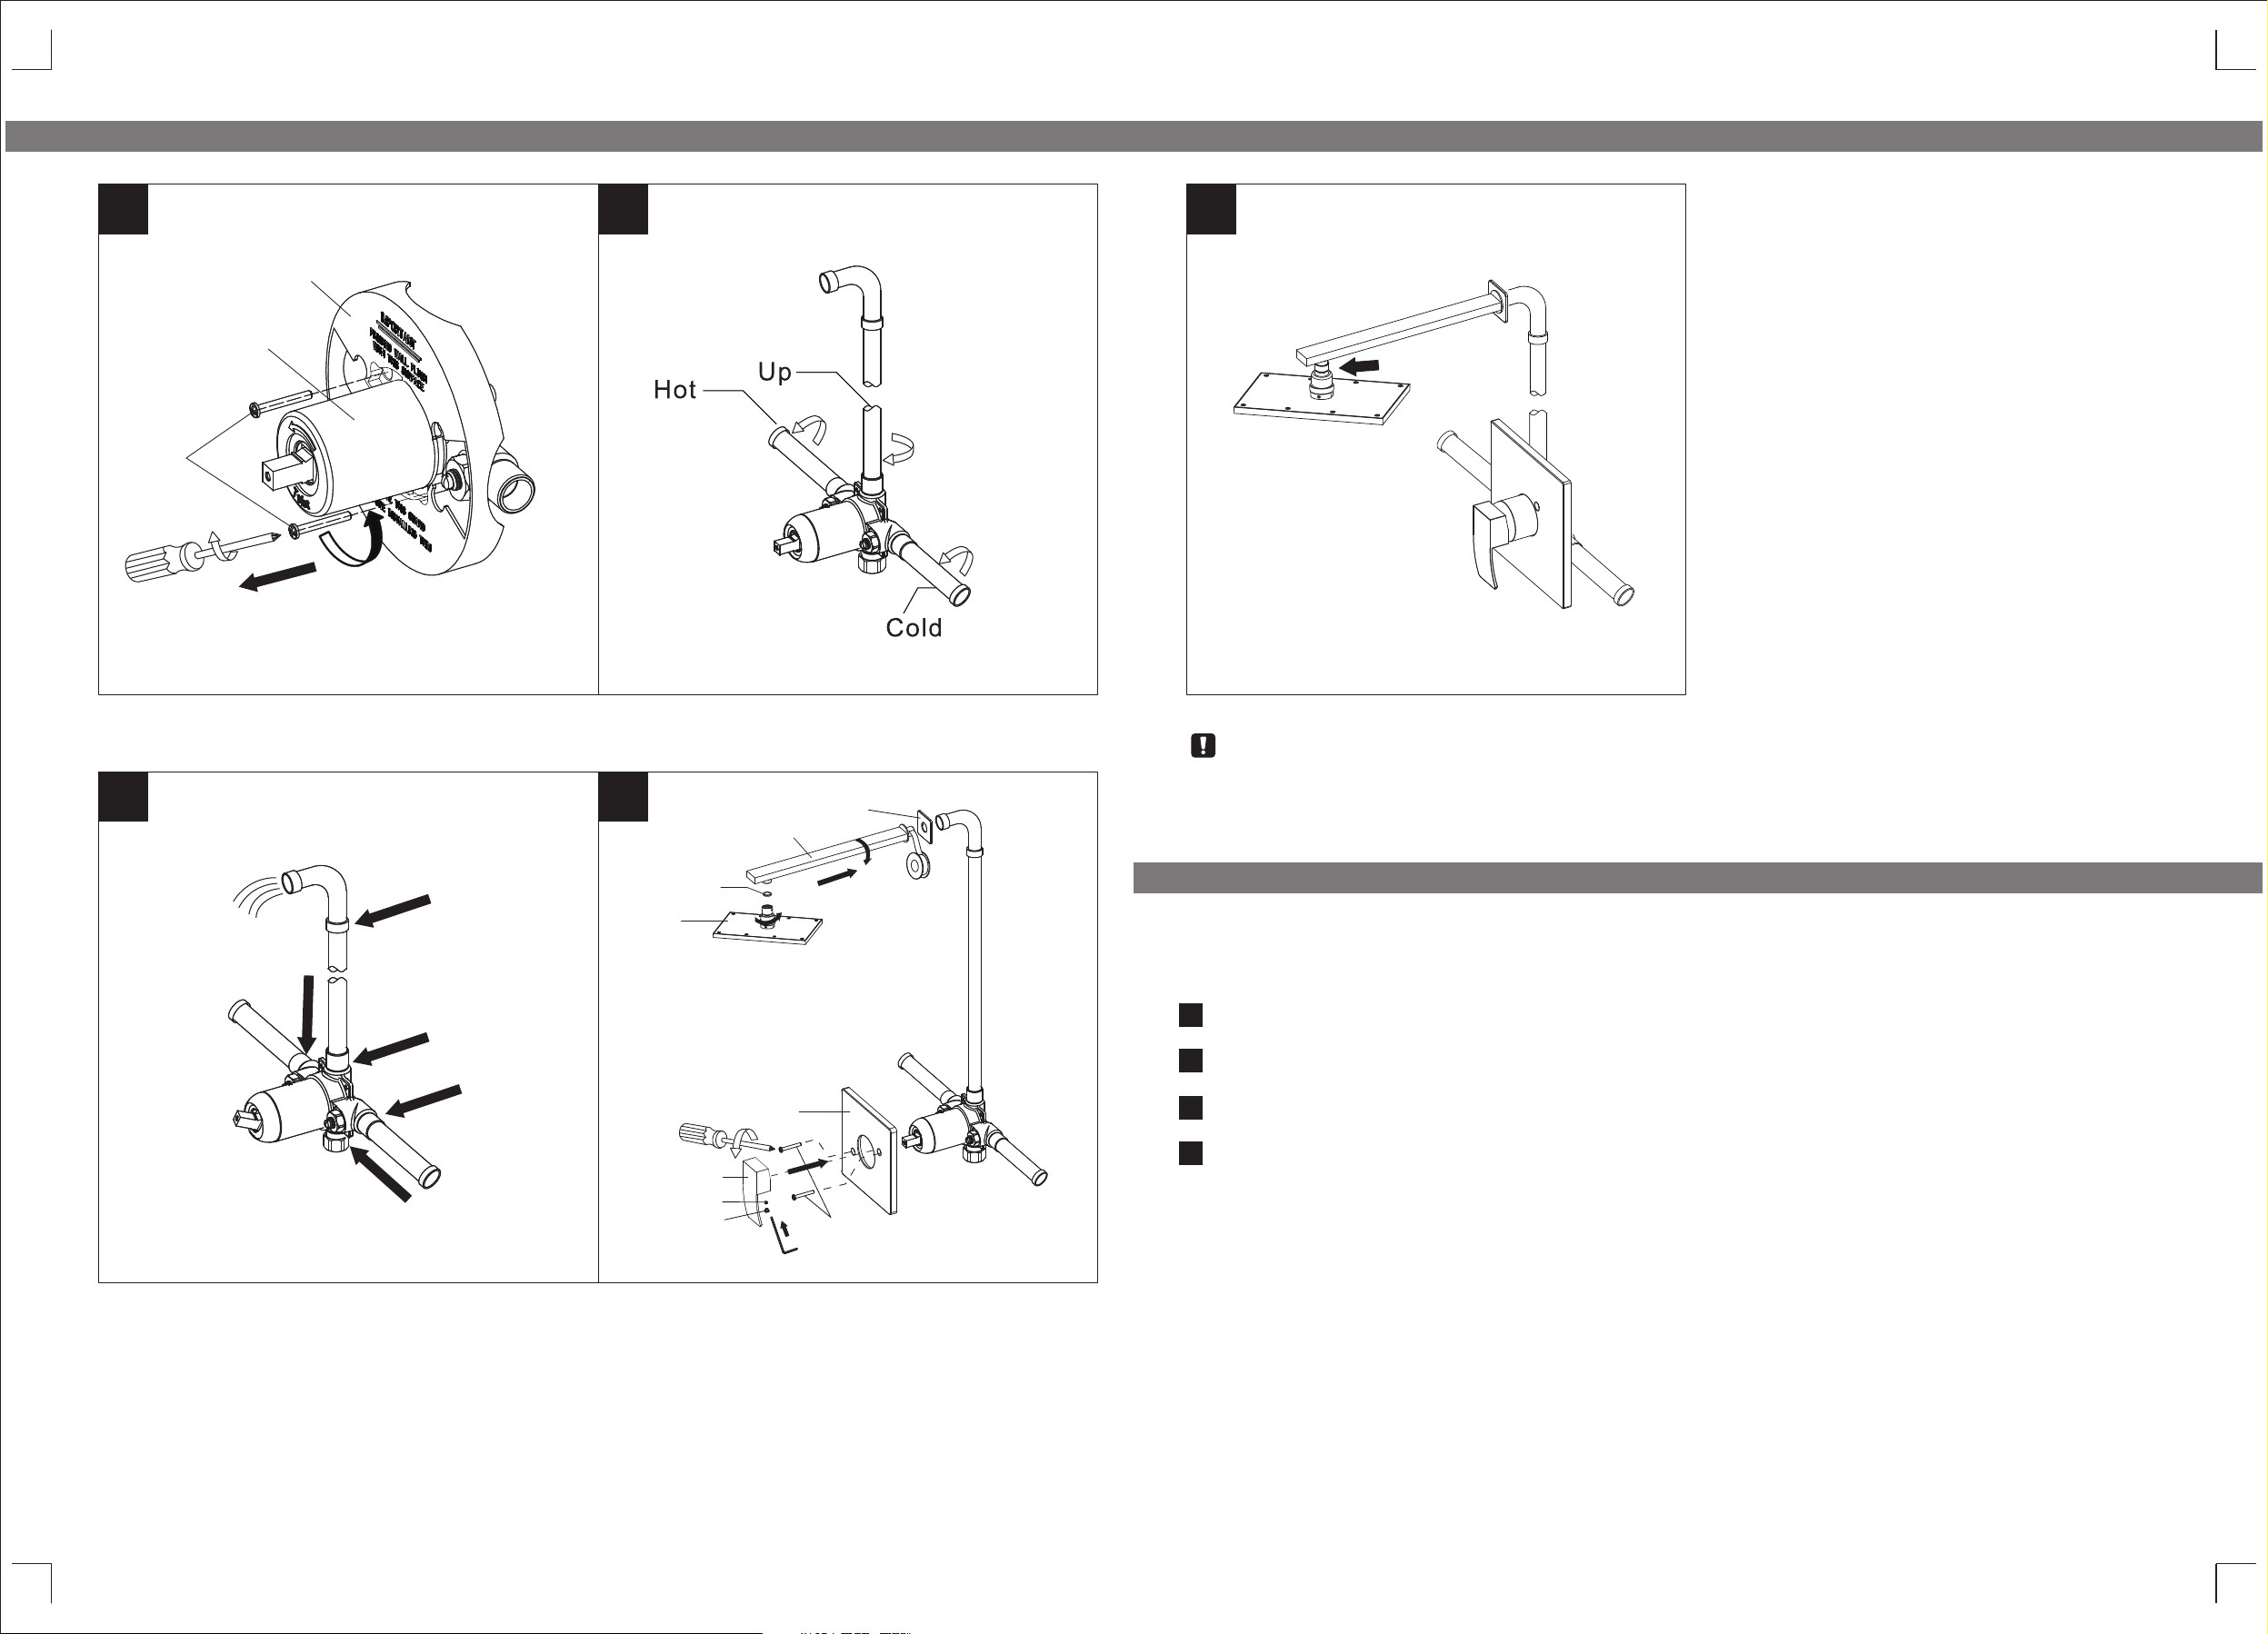
1.Remove the protect cover #5a and take out the screw #4 with the screwdrive r, then remove the pr otect cover #5b.
2.Connect pipes with faucet as photo, pay attention to the connection of hot and cold water su pply pipe.
2
1
Check all connections at arrows for leaks, re-tighten it if necessary.
3
4
O-ring
3
13
12
20
2
14
17
BUT DON'T OVERTIGHTEN
1
Step 3 Cleaning and care
Daily cleaning and care are required in order to keep the product shining and
properly working.
1
Clean it with water and dry it with soft cloth.
2
Clean the product with gentle liquid or glass cleaner.
Don't use acid cleaner.
3
Don't clean with abrasive material, abrasive paper or knife.
4
3.Let the water run for one minute. Check all connections for leakage.
4.Apply teflon tap to the shower arm #2, put flange #1 and connect it to water supply pipe, after fi xing the shower
arm, scre w the shower head to the shower arm. ATTENTION : don't forget the o-ring between th e shower
arm #2 and th e shower head #3. Put the trim plate #14, fix it with screws #17, tighten them with screw driver,
and fix the h andle #13 with screw #12, finally put the index #20.
 Loading...