

Page 1
Per fection is our Tradition
MT
L-AZ0 21
1-8 44-4 4-AN ZZI or v isit w ww.ANZ ZI.c om
Step 3 Cleaning and care
Daily cleaning and care are required in order to keep the product shining and
properly working.
1
Clean it with water and dry it with soft cloth.
2
Clean the product with gentle liquid or glass cleaner.
Don't use acid cleaner.
3
Don't clean with abrasive material, abrasive paper or knife.
4
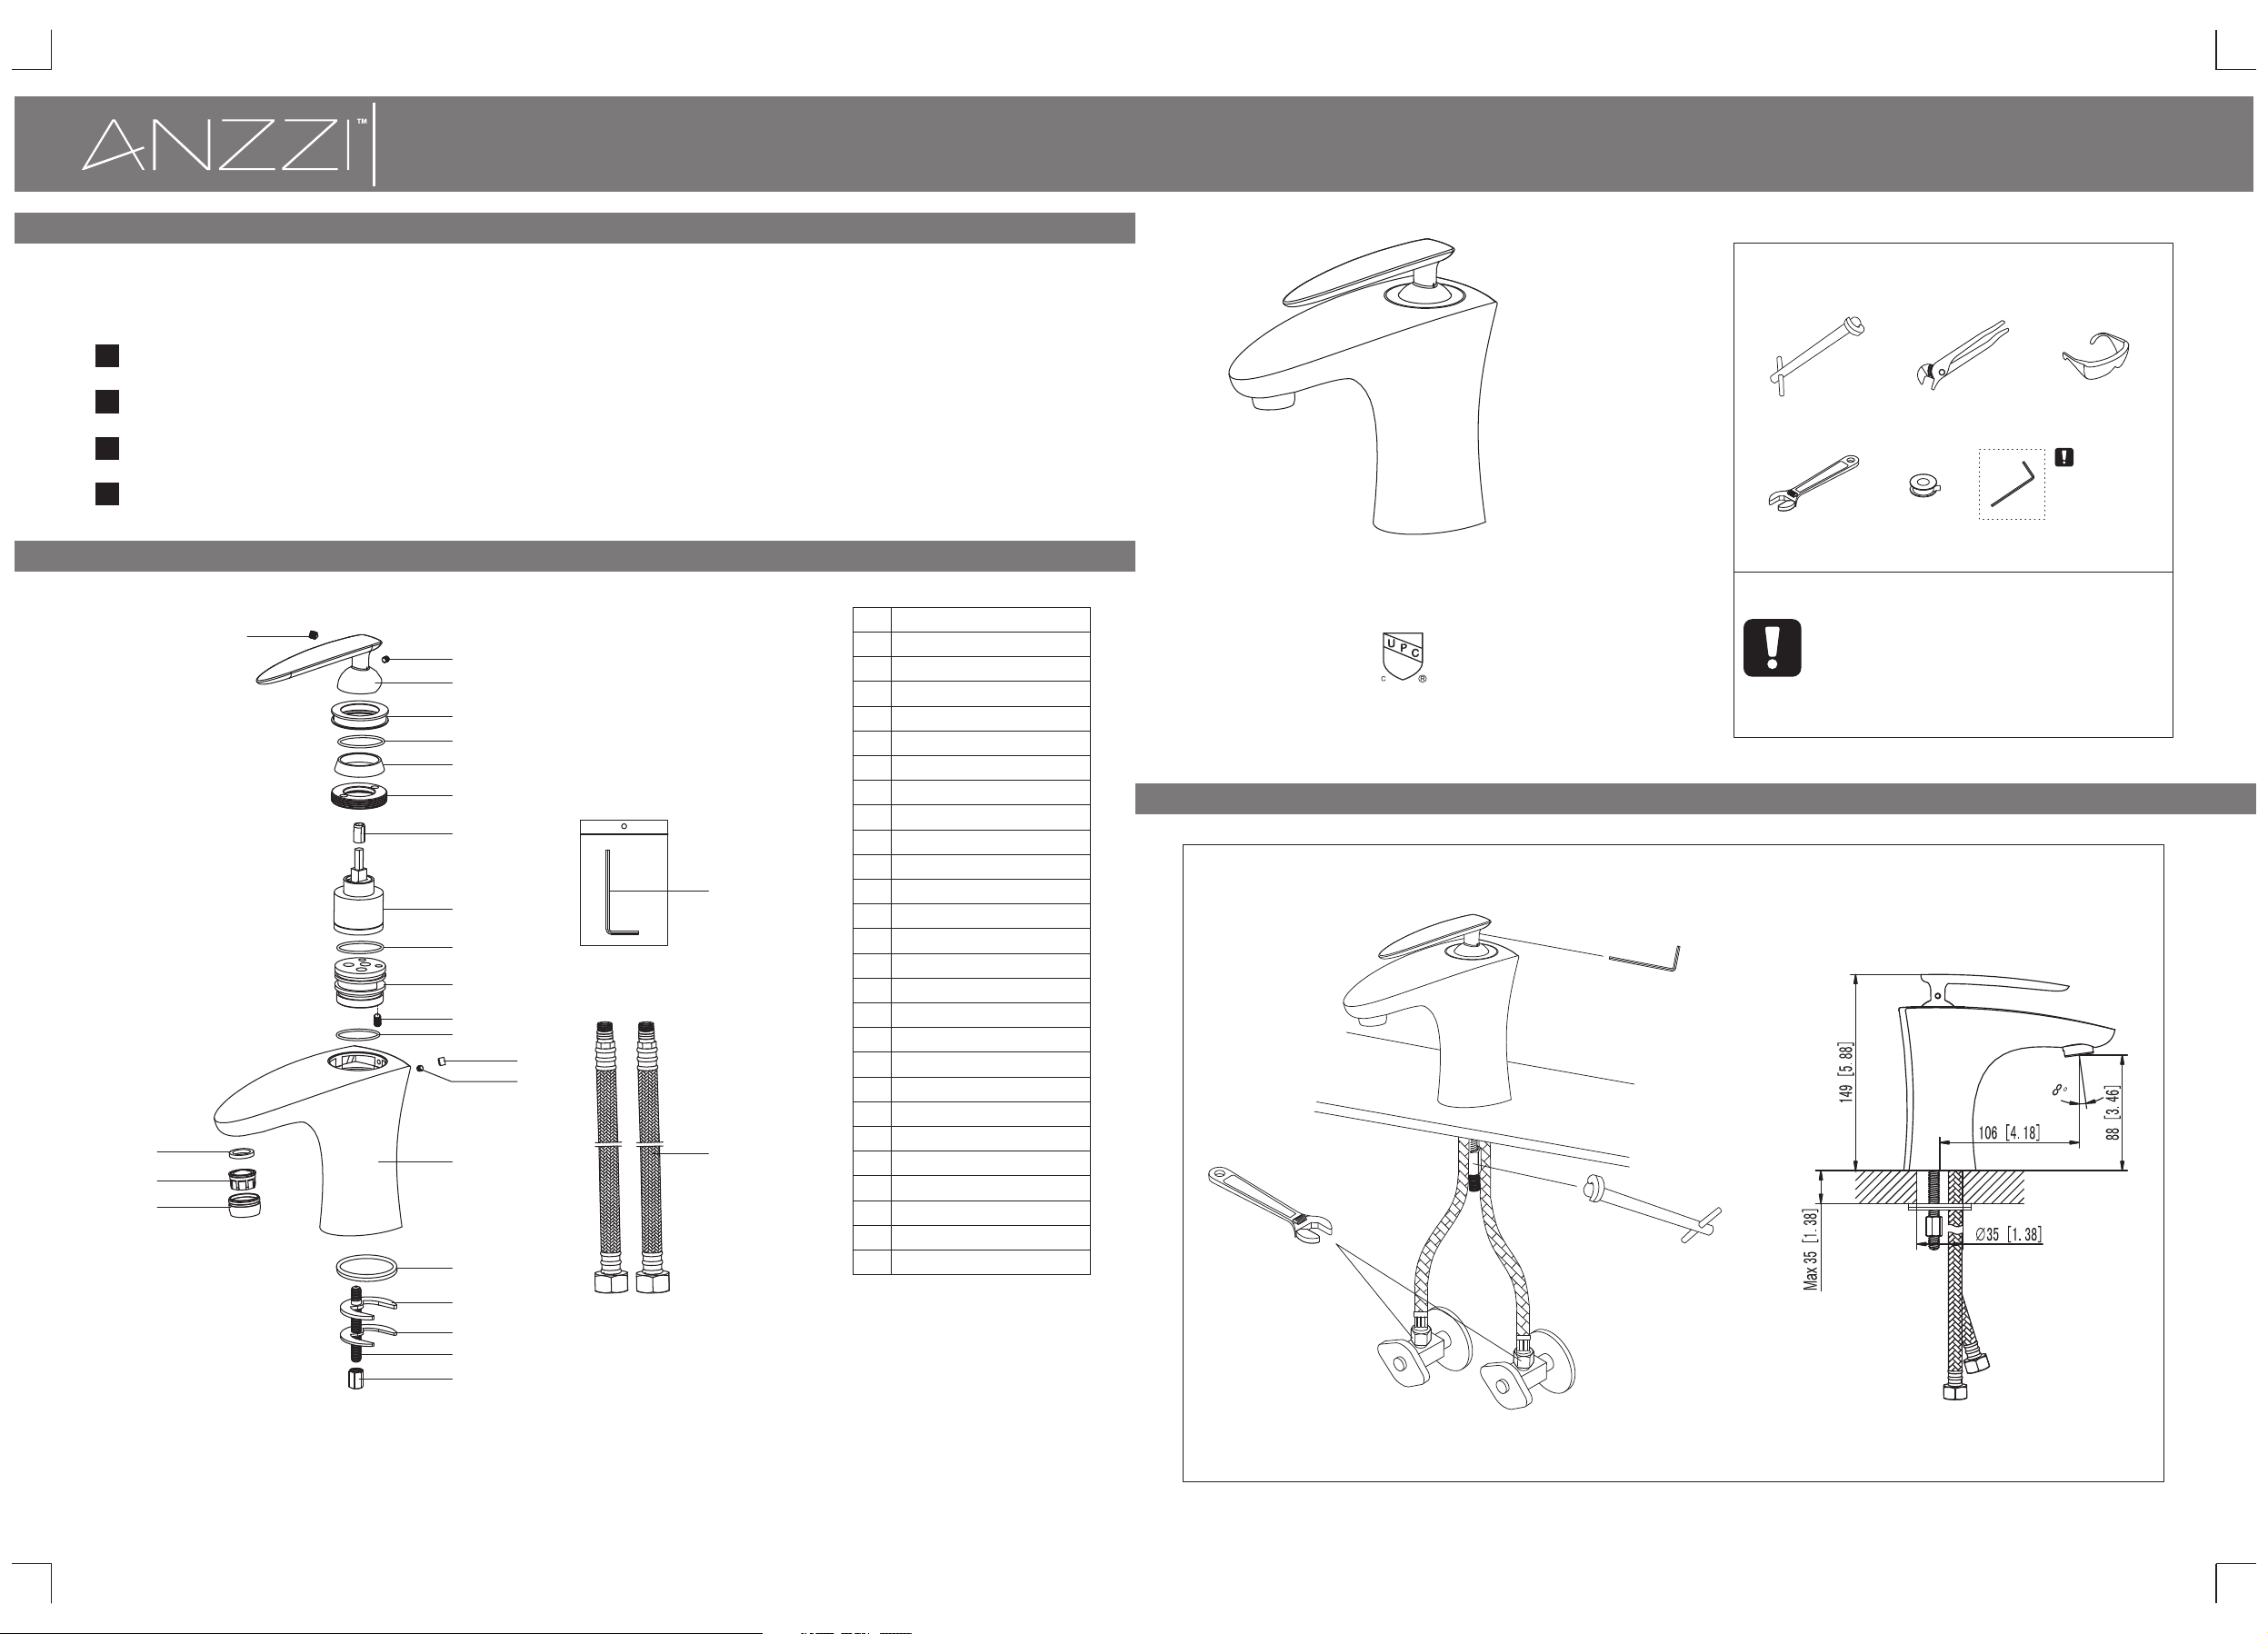
Step 4 Parts list
PA RT N AM ENO .
Screw
1
2
Screw
3
Handle
4
Cover
O-ring
5
Tri m ca p
6
Cartridge loc k nu t
7
Cartridge ada pt er
8
Cartridge
9
O-ring
10
11
Core
12
Screw
O-ring
13
14
Index
15
Screw
Body
16
Was he r
17
Aerator core
18
Aerator colla r
19
O-ring
20
Rubber washer
21
Clamp
22
Screw
23
Lock nut
24
Allen key
25
Flexible hose
26
17
18
19
1
2
3
4
5
6
7
8
25
9
10
11
12
13
14
15
16
20
26
SINGLE HANDLE LAVATORY FAUCET
ASME A112.18.1/CSA B125.1
The tools might be applied to the following places:
INSTALLATIO N MANUAL
RECOMMEND ED TOOLS
Basin w ren ch
Adjus tab le Wr enc h
Attention:
for easy installation, you will need:
1.To read all the installation instruction completely before
beginning.
2.To read all the warning, attention and maitenance
information.
3.To purchase the proper supply lines.
Chann el Lo cks
Teflon ta pe
Allen k ey
WAR NIN G:
Pleas e kee p the
tool fo r fut ure
use!
Gog gl es
21
22
23
24
Page 2
Step 1 Faucet installation
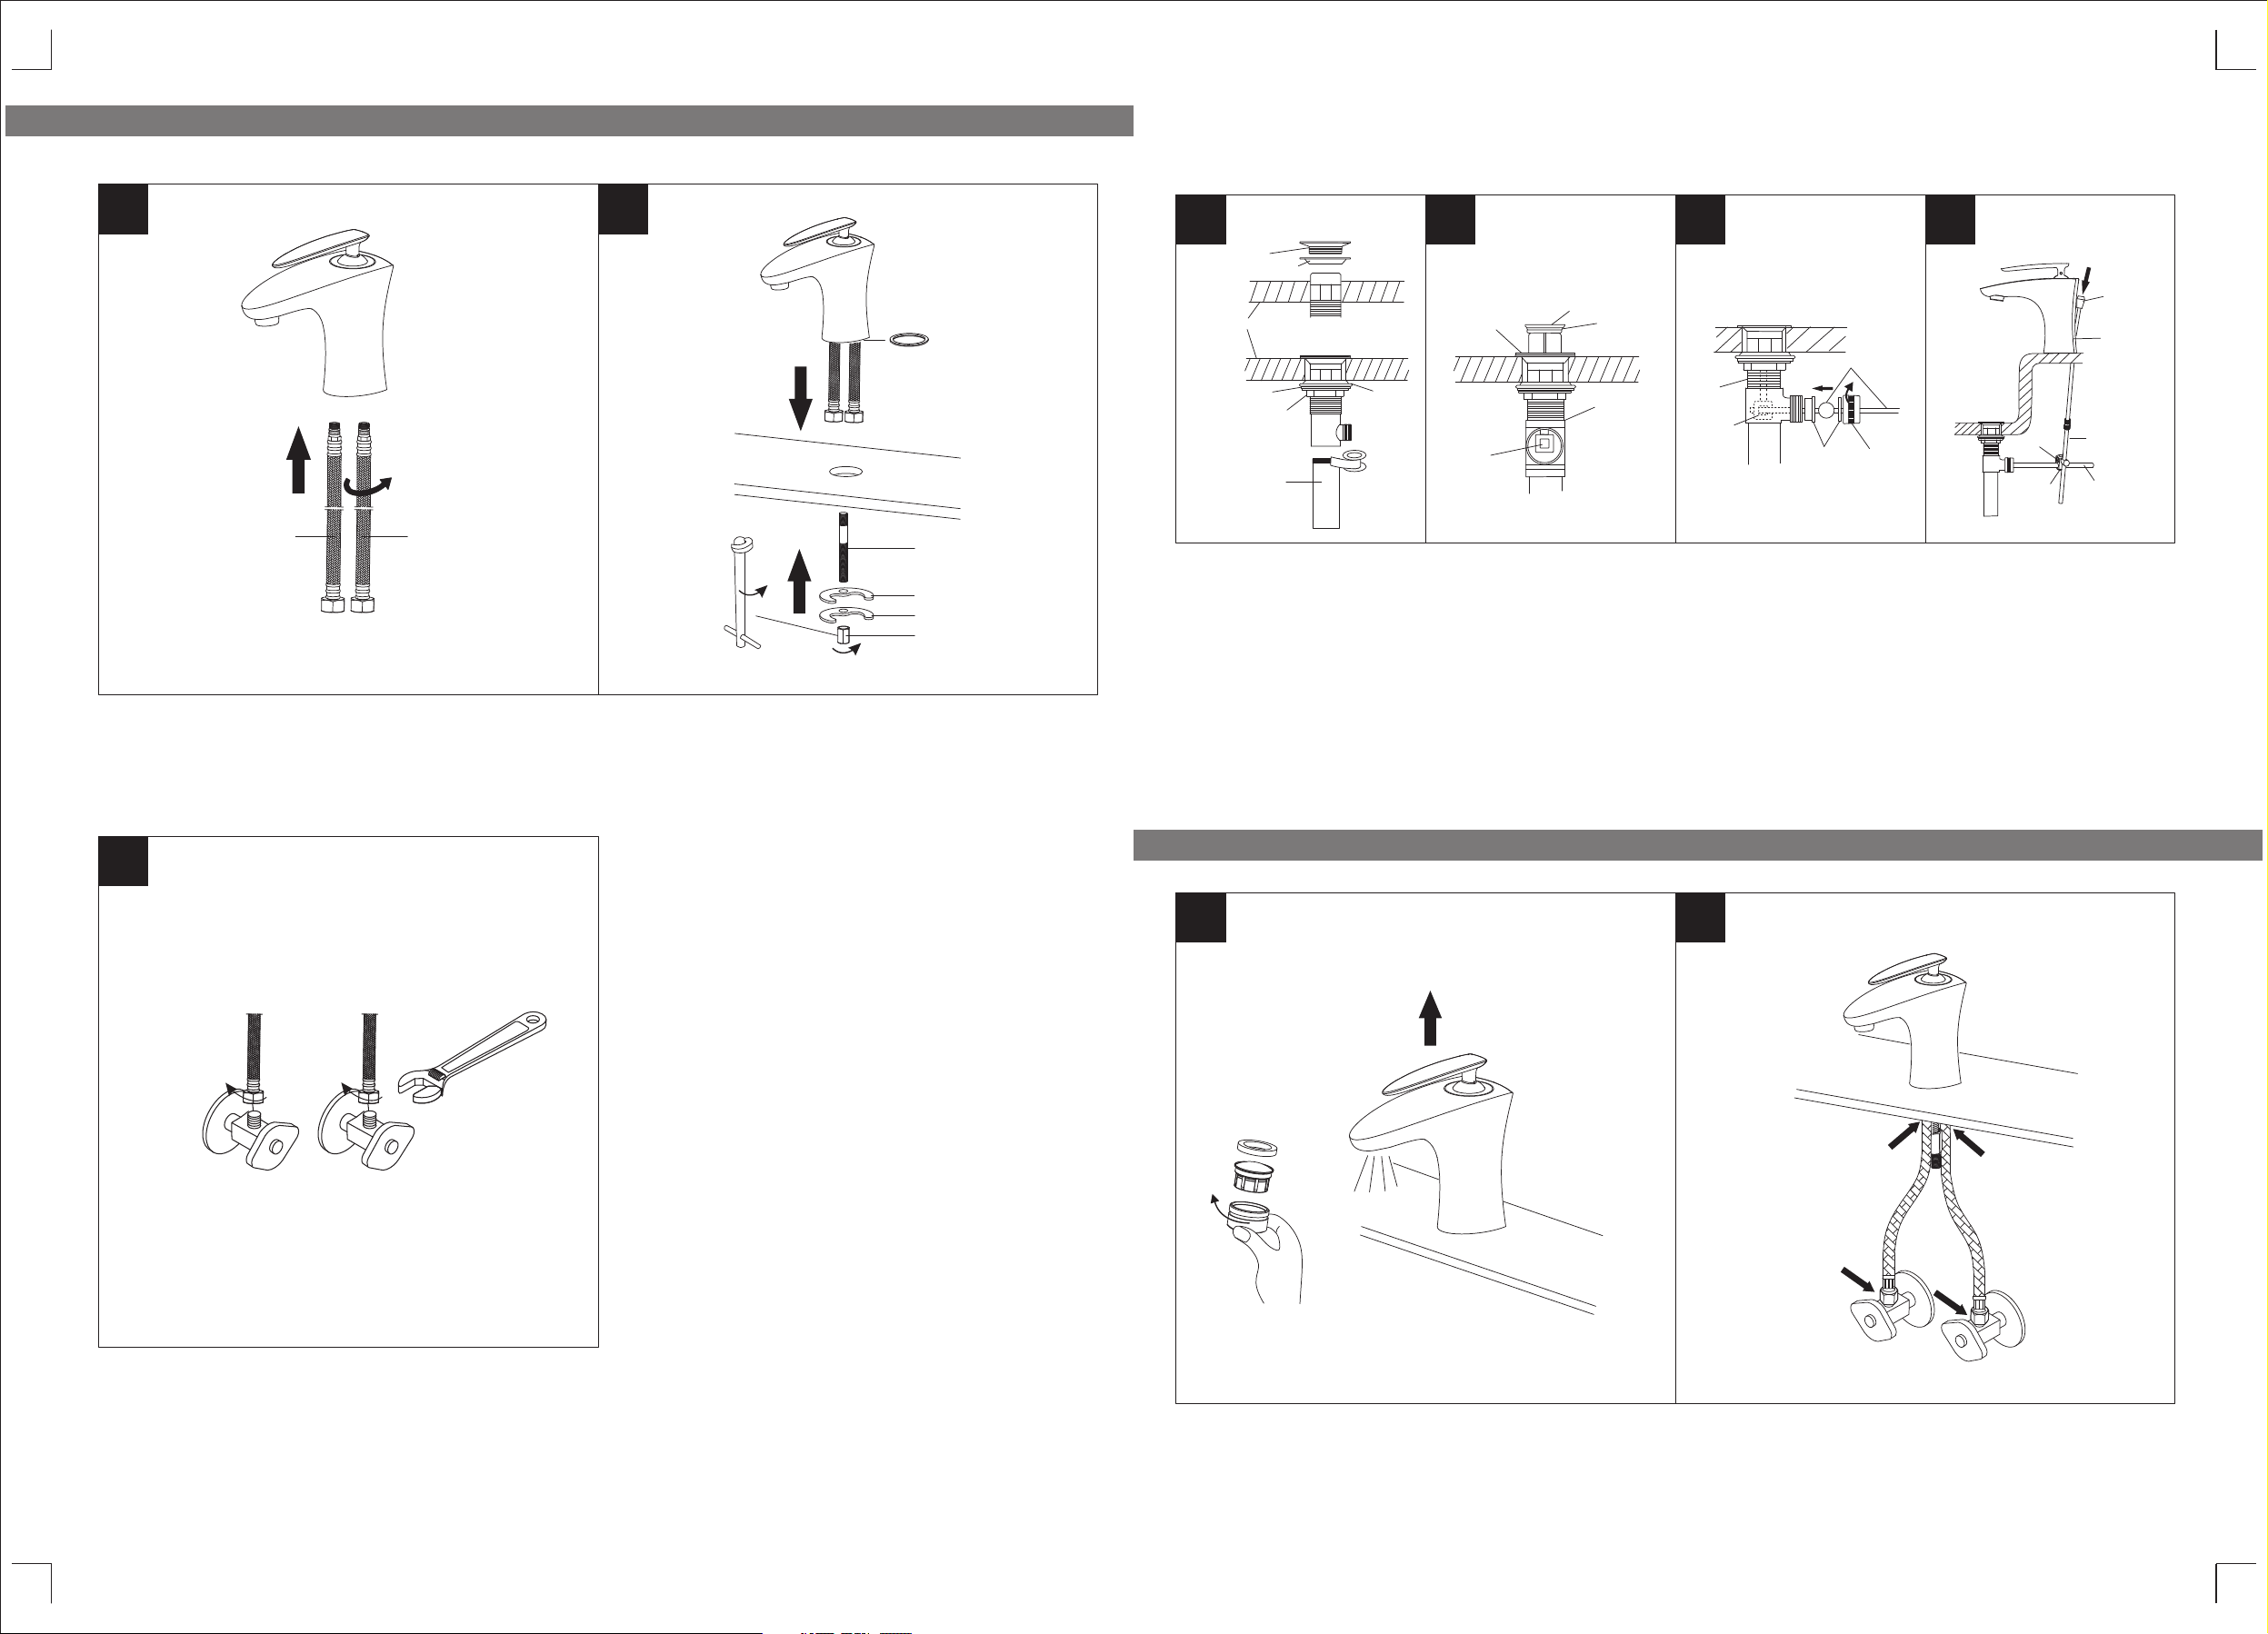
Faucet installation
1
HOT COLD
1.Assemble the 2 flexible hose to the faucet by hand.
2.Put the faucet into the installation hole of the basin. Make sure o-ring be on the base of faucet. Assemble screw #23
to the base of faucet, and assemble rubber washer #21 and clamp #22 to screw #23. Then assemble lock nut #24 by
basin wrench to screw #23 to fix the faucet.
2
O-ring
23
21
22
24
Pop-up installation
1
fla ng e
top r ub ber w ash er
sink ba se
washe r
lockn ut
tai lp iec e
drain b ody
botto m
rubbe r
washe r
2
fla ng e
align h ole i n
drain s top per
with gu ide r od
openi ng
(poin ted t owa rd
back wa ll)
drain s top per
o-rin g
sink
drain b ody
1.Remove pop-up drain stopper, and flange with top rubber washer for pop-up assembly. Insert drain body from
underneath of sink drain hole. Replace flange and top rubber washer back to drain body. Tighten flange as far as
possible. Remove and put silicone along bottom of. (Optional) Slide bottom rubber washer on drain body up against
bottom of sink. Tighten washer and locknut firmly against base for tight seal. Remove tailpiece from drain body, add
Teflon tape, replace tailpiece.
2.Replace pop-up drain stopper to drain body with o-ring in place, and align stopper hole with guide rod opening.
3.Remove rod guide nut and rod ball plastic gasket. Insert horizontal rod into drain body and through hole in drain
stopper. Replace rod guide nut with rod ball plastic gasket and tighten it.
4.Insert lift rod through hole on faucet body. Connect extend rod to lift rod. Attach horizontal rod to extend rod using
fittings, tighten screw.
3 4
horiz ont al ro d
drain b ody
drain
sto pp er
hole
plast ic
gaske t
rod gui de nu t rod bal l
scr ew
fit ti ngs
lift ro d
fau ce t
body
exten d rod
horiz ont al ro d
3
HOT
3.Connect the to water supply valve (not included), and tighten it with adjustable wrench.
flexible hose
DON'T OVER TIGHTEN!
Caution: make sure connect the hot and cold flexible hoses to supply valves correctly.
Warning:
The supply va lves are not inclu ded, please purc hase them in plumb s hop.
COLD
Step 2 Checking and testing
1
1.Remove the aerator by . Turn the faucet handle all the way on, turn on hot and cold water supply and flush
water lines for one minute. Reinstall aerator by hand.
2.Check all connections at arrows for leaks, re-tighten it if necessary. BUT DON'T OVERTIGHTEN!
hand
2
 Loading...