

Page 1
Owner's Manual for
Anthro Yes Cart with
Wired Sync for Tablets
Part #YESTSYGMPW4
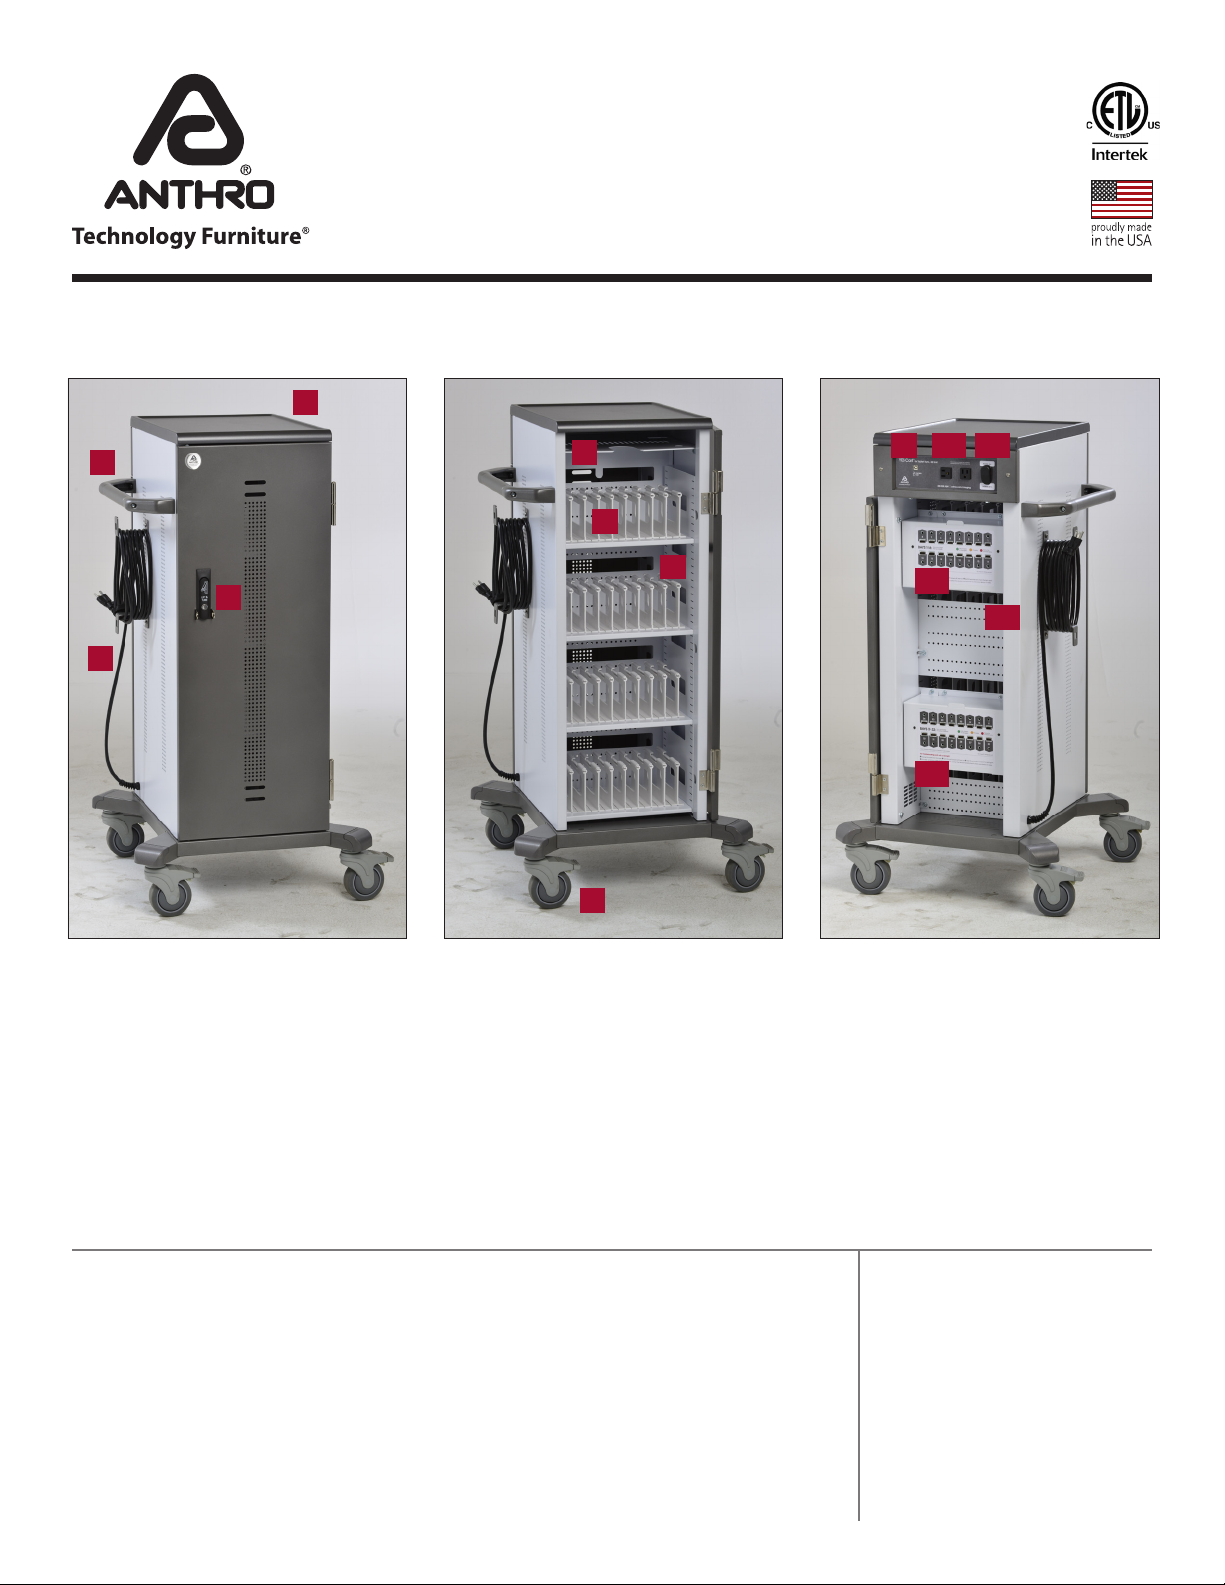
Components at a Glance
1
2
3
4
Front of Cart (closed)
1. Top shelf with 1/4"h lip
2. Handle
3. Locking door latch w/ padlock
bracket and two-point locking
system
4. Cord wrap w/power cord
5
6
7
8
Front of Cart (open)
5. Laptop storage cubby
6. Removable bay dividers w/
Cable Channels
7. Removable shelf
8. 4” total-lock casters
9 10 11
12
13
12
Back of Cart (open)
9. USB port for host computer
10. Power outlets (2)
11. Power switch w/ power
indicator light
12. Charge/sync USB ports with
indicator lights
13. Cord pass-through slots
Hello! Thank you for choosing Anthro.
Anthro's Yes Cart for Tablets with Wired Sync is designed to charge, sync, and store 32 of your iPad®
mobile digital device. Please review this manual before installing your equipment to learn how to use
the cart safely.
The cart is listed to UL Information Technology Equipment 60950-1 safety standard.
AC input: 120VAC 60 Hz. Max amps: 12A.
Technology Furniture® is a registered trademark of Anthro Corporation. Anthro reserves the right to modify the design and specificatons without prior notice.
Table of Contents
Getting Started ........................ 2
Safety Notices .......................... 2
Loading Devices ....................... 3
Troubleshooting Guide .......... 4
Warranty ................................... 4
Page 2
Getting Started
Craftsman Label scaled up
the artwork to match the
quoted size of 2.875” x 3.625”,
3/12/10
Important Safeguards - We want you to be safe!
These carts are electrical devices. Use care with them and follow
these important safeguards:
• Electrical devices are not toys. Children are often unaware
of the hazards associated with electrical devices, so this unit
must always be used by adults or with adult supervision.
• Do not use this unit outdoors.
• Liquids should not be stored in, set on or placed inside this
unit.
• Never unplug this product from the outlet when your hands
are wet.
• Set the power switch to the down OFF position before you
unplug the unit from the wall, plug the unit into the wall, or
plug in devices.
• Be careful with the power cord. Do not jam the power cord
against sharp edges. Do not use the unit if the cord appears to
be damaged or if the ground prong is missing. When the unit
is not plugged in, wrap the power cord around cord wraps.
• Do not use an extension cord with this unit.
• Inadequate repair can create significant hazards to users
and is not covered by the warranty. Repairs should always be
performed by a qualified electrician.
• Special alerts for carts:
Electrical Testing
• Before using your new charging cart, have a qualified
electrician verify the current draw does not exceed the rating
of the unit when all the devices are installed.
• Test the contact integrity of the wall outlet using a receptacle
tension tester such as a Woodhead 1760 or a Safeplug 1700.
• Test the branch circuit for ground integrity and branch circuit
protection.
• Do not plug in the unit if the switch, receptacles, or power
cord have been damaged or if the ground prong is missing
from the plug. If repairs are ever needed, they should be
performed by a qualified electrician.
External Power
Charging Cart comes with two power receptacles on the back of the
cart. Use these receptacles to power peripherals like document camera
or laptop when using the cart as a teaching station.
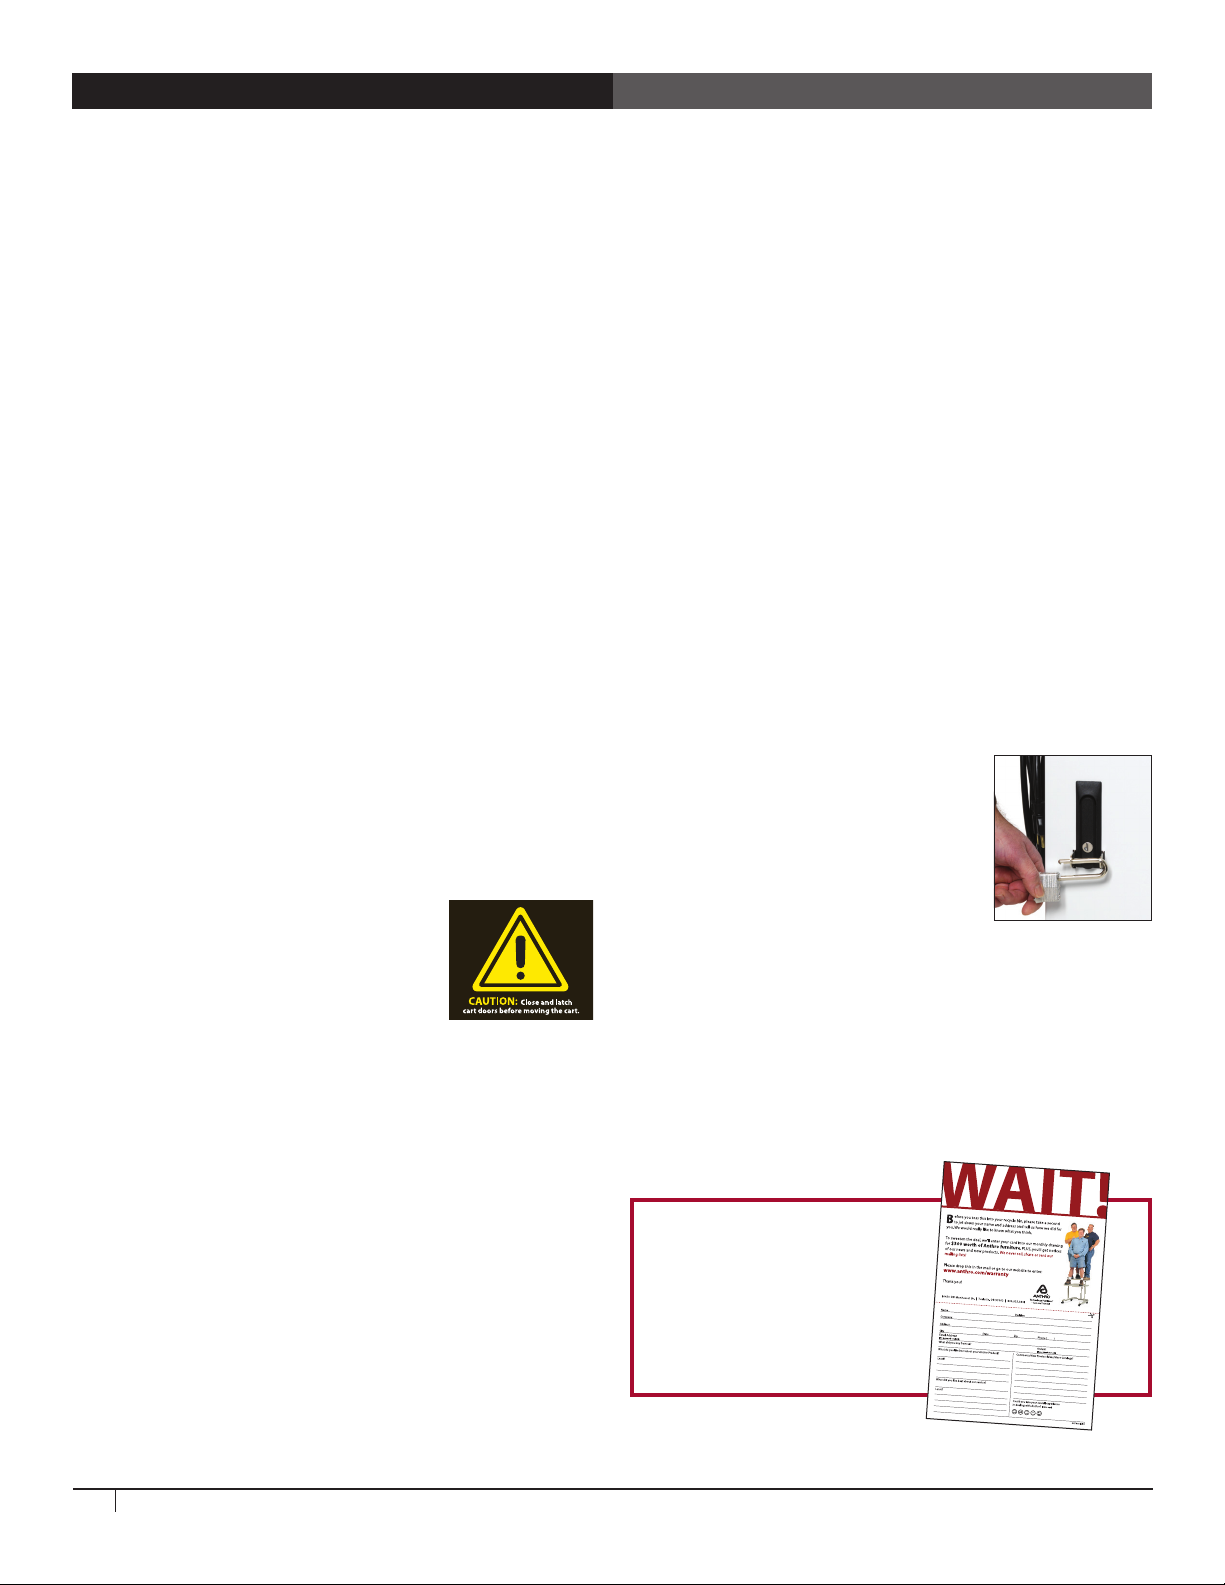
Doors and Locks
The doors on each cart feature a two-point
keyed locking system to protect your devices.
To open a door, lift the bottom of the handle
and rotate it to the inside of the unit. Your
unit shipped with 2 keys. Contact Anthro,
800.325.3841, for replacements.
º To protect the carts’ contents and
structural integrity, make sure the doors
are closed and latched before moving
the cart.
º Do not use the power cord to pull the cart.
º Do not roll the cart over the power cord.
º Anthro does not accept any liability for damage if the unit is
misused, incorrectly operated or inadequately repaired. Under
these circumstances the warranty will be void.
2
Questions? Call us at 800.325.3841 or visit anthro.com.
For added security, each front door features hasps to hold your
own padlock (maximum shackle dia 7mm; minimum shackle height
51mm). When installed, your padlock restricts access to the handle so
the unit can’t be opened.
To protect each carts’ contents and structural integrety, latch cart
doors before moving the cart.
Please return the enclosed
Registration Card to receive
our product updates, new
catalogs, sale flyers, and the
chance to win $300 worth
of Anthro furniture.
Page 3
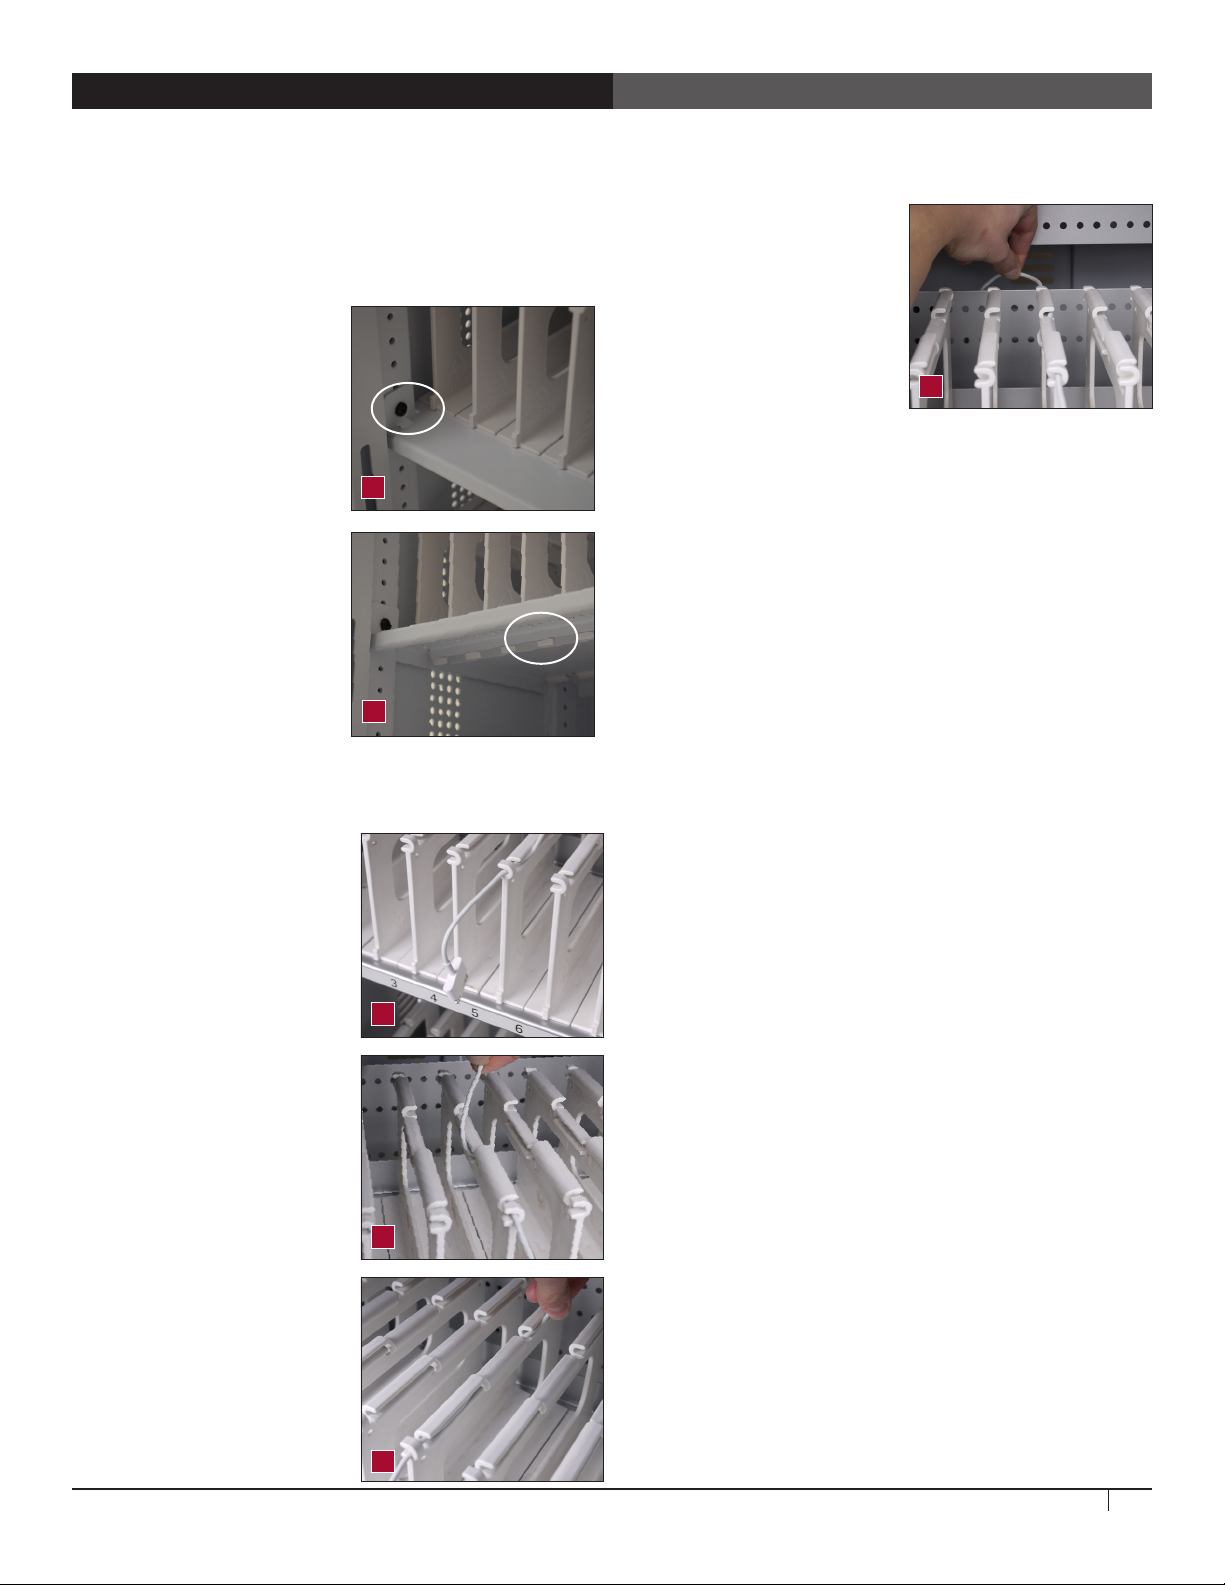
Loading Devices, Cable Management
In the front User area of the cart
• Check that the vertical spacing of the shelves fits your devices.
To adjust shelf height, use a Phillips screwdriver to loosen (not
remove) the 2 screws that attach the left side of the shelf. Lift
the left side off the screws
and pull the shelf to the left
to free the tabs on the right.
Set aside the shelf. Remove
and reinstall the screws and
shelf at the desired height.
[Image A]
• Check that the horizontal
spacing of the bay dividers
fits your devices and cases.
To move the dividers and
adjust the bay width,
press back on the divider
tab under the shelf that
connects the divider to the
shelf until the divider pops
free. If your fingers don't fit,
try a flat-head screwdriver.
To install the divider, angle the divider into a slot at the back
of the shelf, then tilt the divider into place at the front of the
shelf. [Image B] Number each bay with the provided labels.
A
B
• Feed the rest of the cord
into the IT area. [Image F]
• Slide devices into bays
so the power inlet is
convenient to the front of
the bay.
F
• Use the adhesive bay label
stickers to number each bay.
In the back IT area of the cart - READ QUICK GUIDE FIRST!
• In the back IT area, USB ports are numbered to correspond
with the bays up front. Route cords from the User area into
the IT area so the cord from each bay reaches its USB port.
• For initial deployment, check the Quick Guide or your own
deployment plan before connecting tablets to the cart.
• To route the cords, route one
charging cord along the top
of each divider. Make sure
that the cord end that goes
into the device is at the front
of the bay and the power
end goes through the center
panel and into the IT area.
• Leave enough slack in front
(approximately 4.5”; use the
height of the divider as a
measuring stick) so users can
plug in the device without
straining the cord. [Image C]
• Weave the cord around the
short hook at the front of
the divider, then back and
forth through the three long
channels along the top of the
divider, including the center
channel that’s lower than the
others, and finally through
the short hook at the back of
the divider. [Image D and E]
C
D
E
Owner's Manual for Anthro Tablet Charging Carts
3
Page 4

SYNCING WITH ANTHRO’S WIRED SYNC CART: QUICK-START GUIDE
Need to deploy your devices quickly? Our test team (a small group of
educators, administrators, and IT professionals) shared their "Quick and Dirty
Tips" for syncing iPads using Anthro's Tablet Charging Cart with Wired Sync.
Every district manages their devices differently. Find the method that works
right for you.
For a more in-depth guide, see the Step-by-Step Guide on page 5.
Create a "Master" iPad
• Customize one iPad with the settings, apps, restrictions, and content you want to transfer to your entire fleet of devices.
• Using the sync cable included with your iPad, connect the iPad to your host computer.
• Open iTunes on the host computer. Follow the prompts to "Set up as a new iPad".
• On the "Apps" tab of the Device Summary, check "Automatically Install New Apps".
• Rename your device "Master" and click "Back up now".
Restore from Backup
• Place each iPad in a bay and route cords but do NOT connect the cables to the iPad or the cart.
• Turn the cart ON. Connect your host computer to the cart with two USB cords. The indicator lights will change from CHARGE mode to
SYNC mode.
• Plug in one device at a time, completing prompts on iTunes to "Restore from backup".
• Choose your "Master" backup.
• Once the restore is complete, rename the device by bay number (i.e. Anthro1).
• Repeat with remaining iPads.
• Congratulations! Your iPads are synced!
Syncing Content and iTunes settings
• Download new apps and app updates through iTunes. All changes will carry over during the next sync.
• Within iTunes Preferences (found on the menu bar) uncheck "Check for new software updates automatically." This will increase the speed
of syncing devices.
4
Questions? Call us at 800.325.3841 or visit anthro.com.
Page 5

SYNCING WITH ANTHRO’S WIRED SYNC CART: A STEP-BY-STEP GUIDE
We asked a small group of our testers how they manage their devices, and here's what they said. They start by creating a Master
iPad and using the cart to copy onto their fleet of devices. Every district manages their devices differently. Find the method that
works right for you.
Create a “Master” iPad which you will later copy to your other devices.
Update your iPad to the most current operating system.
Establish Restriction Settings. Within Settings>General>Restrictions, choose content,
app, and hardware restrictions that will be carried over to all your iPads. Choose a
4-digit passcode for this process.
Add apps. There are hundreds of thousands of apps in the App Store. Find the content
that meets your needs, but limit the final selection to as few core apps as possible. You
can always add more later.
Arrange the apps so they’re easy to find and use.
Verify that all your apps are updated.
Purchase App Licenses for paid apps. You must purchase an app license for every iPad
that gets the app. Do this through Apple’s Volume Purchase Program on their website.
Copy "Master" iPad settings to your host computer using iTunes.
On your Host Computer, update iTunes to the current version.
Within iTunes Preferences (found on the menu bar) uncheck "Check for new software
updates automatically." This will increase the speed of syncing devices.
On the iTunes Menu Bar, select VIEW and click on SHOW SIDEBAR. This gives you a
better view of your connected devices. If your host computer runs WINDOWS, restore
the iTunes pull-down menus by clicking on the tiny arrow in the top-left corner of the
window, then choose SHOW SIDEBAR.
On the iTunes Menu Bar, select STORE to authorize your computer using your Apple ID.
Using a single USB sync cable provided with your iPad, connect the Master iPad to your
host computer.
Follow prompts in iTunes to set up as a New iPad. Do not choose "Restore from
Backup".
• If the apps on your iPad have not been downloaded to your comptuer, iTunes will prompt
you to transfer purchased items. Select "Transfer".
• Rename your iPad to "Master" by single-clicking on its current name.
• On the "Apps" tab of your device summary, check "Automatically Install New Apps." This will transfer any new apps purchased through
iTunes to your iPads during future syncing.
• Click "Back Up Now" on the iPad Summary Screen to create a backup of your iPad in iTunes.
• Unplug the iPad from the host computer.
Owner's Manual for Anthro Tablet Charging Carts
5
Page 6

Copy "Master" iPad settings from your host computer onto your
devices using iTunes
• Plug in and power on your Anthro Tablet Charging Cart with Wired Sync.
• If you plan to mark/label each iPad, do it now.
• Place each iPad in a bay but do NOT connect the cables.
• Connect your host computer to the cart using a USB cable. Note that the indicator lights on the Interface Panel will change from CHARGE
mode to SYNC mode.
• Plug in a sync cable to the first device, in bay 1, and into the first USB port in the IT Area.
• Follow iTunes prompts and choose "Restore from this backup." Once complete, rename the iPad in iTunes by to its bay number.
• Repeat for remaining iPads. Doing this process one device at a time ensures that the device numbers correspond to the bay number.
• Congratulations! Your iPads are synced!
Ongoing Management with iTunes
• Always make sure that iTunes is updated on your host computer before you sync.
• Update apps through iTunes rather than through the device itself.
• Devices will update and sync each time they are connected to the host computer through the cart in SYNC mode.
6
Questions? Call us at 800.325.3841 or visit anthro.com.
Page 7

SYNCING WITH ANTHRO'S WIRED SYNC CART: FAQ
Helpful hints from our test team, in Q and A format:
The cart is plugged into the host computer, but the iPads aren't showing up in iTunes. What do I do?
• Start by double-checking that both the iPads and iTunes are updated to the newest version. If an iPad has a dead battery, it will charge
first for several minutes before it switches to sync mode and shows up in iTunes. Sometimes it works to close out of iTunes and reopen.
Finally, restart your host computer.
The devices show in iTunes but the apps aren't copying over during sync. Why?
• One possibility: your computer must be authorized with the same Apple ID used to purchase the apps you're trying to sync. Also, check
the iPad summary screen in iTunes to ensure the devices have adequate space to hold the new material. And check that the operating
system version is compatible with the apps.
Can I use Microsoft Windows to sync my devices?
• iTunes for Windows is available as a download from Apple. When syncing multiple devices, an Apple computer is recommended.
I got an error message. What does it mean?
• For explanation of software errors found within iTunes, contact Apple support.
After syncing, one of the iPads is displaying the iTunes logo with a USB cable. What does that mean?
• Use a spare USB cable to connect the iPad directly to the host computer. iTunes will display a message that it has detected an iPad in
Recovery Mode and you must restore it. Click "Restore iPad" and allow several minutes for it to complete. Do NOT disconnect the iPad
during this process. Once the restore process is complete, the iPad will reappear in the iTunes window. Restore the iPad from Master
using the steps described in the Step by Step Guide.
Owner's Manual for Anthro Tablet Charging Carts
7
Page 8

Troubleshooting Guide
Anthro Corporation Limited Warranty
Does it sync?
Yes, Anthro's carts sync. This cart provides a USB port for each device
to provide charge and data connection.
How do I know if my devices will draw more than the
allowed current?
Have a qualified electrician verify the unit’s current draw. Perform
this test with devices installed and batteries discharged.
The devices are all plugged in, but they won’t charge.
What do I do?
First, check the cart: With the switch in the down OFF position,
inspect the main power cord and plug to make sure that they’re
undamaged. Plug the cord into a working power outlet. Next, check
the devices: Verify that each device is connected to its port in the
cart's IT area. Unplug your host computer from the USB port on the
interface panel to be sure that the cart isn't in Sync Mode. Move the
switch to the up ON position to direct power to the devices. Still need
some help? Call Anthro at 800-325-3841 for assistance.
Someone tried to break into the unit and damaged a door.
Can it be replaced?
Yes, you can order a replacement. Call Anthro at 800-325-3841. We’ll
ask you for the model number of your unit and whether it’s for the
front or back of the unit.
My power cord/plug is damaged. Is it covered under
warranty?
No, it is not covered under warranty. If the plug is damaged, have a
qualified electrician replace it. If you need a replacement cord, contact
Anthro at 800-325-3841.
When I plug in the unit it trips the circuit breaker. What is
wrong?
The carts are designed to run on a 15 amp circuit. If you have other
equipment or appliances plugged into the same circuit you may be
overloading it. Have a qualified electrician check that adequate power
is available in the circuit.
What Does This Warranty Cover?
This warranty covers any defects in material or workmanship in
Anthro Charging Carts for Tablets and Smart Phone/Handheld Devices.
Who is Covered By This Warranty?
This warranty extends to the original consumer of the product only.
How Long Does This Warranty Last?
The warranty lasts for two years from date of purchase for the
electrical components (excluding the data cables, power cord and
plug) and lifetime for the enclosure.
What Will Anthro Do?
Anthro will send replacement parts only. Labor is not included.
What Is Not Covered By This Warranty?
This warranty does not cover the power cord. This warranty does not
cover product that has been damaged by accident, unreasonable use,
neglect, inadequate repair, tampering or other causes not arising from
defects in material or workmanship FOR AS LONG AS THE WARRANTY
PERIODS LISTED ABOVE. Labor costs are not included. This includes
but is not limited to the implied warranties or merchantability and
fitness. Some states do not allow limitations on how long an implied
warranty lasts, so this limitation may not apply to you.
ANTHRO’S RESPONSIBILITY IS LIMITED TO THE ACTIONS
LISTED UNDER “What Will Anthro Do?” AS LISTED ABOVE
AND NOTHING ELSE.
This warranty does not cover, and Anthro will not be responsible for,
any damages you may have due to loss of use of the product, or any
other costs or expenses incurred by you or anyone else who uses the
product, whether due to defects, breach of contract, negligence, strict
liability or otherwise. ANTHRO IS NOT LIABLE FOR ANY INDIRECT,
SPECIAL, INCIDENTAL, OR CONSEQUENTIAL DAMAGES RELATED TO
THE PRODUCT OR THIS WARRANTY. Some states do not allow the
exclusion or limitations or consequential or incidental damages, so
these limitations or exclusions may not apply to you.
My unit was damaged during shipment. What should I do?
Anthro has a program established with our freight carriers to address
ship damage. Please contact Anthro at 800.325.3841 and we’ll work
with you.
How do I find the unit’s serial number?
The serial number label is located inside the IT compartment near the
base.
Can I remove a bay divider?
Yes! To move the dividers and adjust the bay width, press back on the
flat tab under the shelf that connects the divider to the shelf until the
divider pops free. If your fingers don't fit, try a flat-head screwdriver.
To install the divider, angle the divider into a slot at the back of the
shelf, then tilt the divider into place at the front of the shelf.
How Do I Get Service?
Call Anthro at 1-800-325-3841.
How Does State Law Apply To This Warranty?
This warranty gives you specific legal rights and you may also have
other rights that vary from state to state. This warranty is governed
by the laws of Oregon, excluding its conflict of laws principles, unless
your state requires that its law be used.
*300-5607-00*
300-5607-00
March 2014
800.325.3841
 Loading...