

Page 1
CS1100
WARNING: Installation of this
product near powerlines is
DANGEROUS. For your safety ,
follow the installation directions.
CS900
HDTV-Compatible
CS SERIES
VHF/FM Antenna
BEFORE YOU BEGIN
Read this manual and Consumer Product Safety Commission
information. For your safety and convenience, plan each step of
the installation and purchase the necessary hardware in advance.
The order in which you perform the steps and the hardware required depends on the mounting and connection methods you
choose.
We recommend two people assemble the entire antenna on the
ground, then mount the assembled antenna on the mast. The
following steps are required to assemble your antenna depending on which model you have. Look at your antenna to see which
steps you will need to follow.
Warning: When you install your antenna, use extreme caution.
If the antenna starts to fall, let it go! It could contact overhead
power lines. If the antenna touches the power line, contact with
the antenna, mast, cable, or guy wires can cause electrocution
and death. Call the power company to remove the antenna.
Do
not attempt to remove it yourself.
CS600
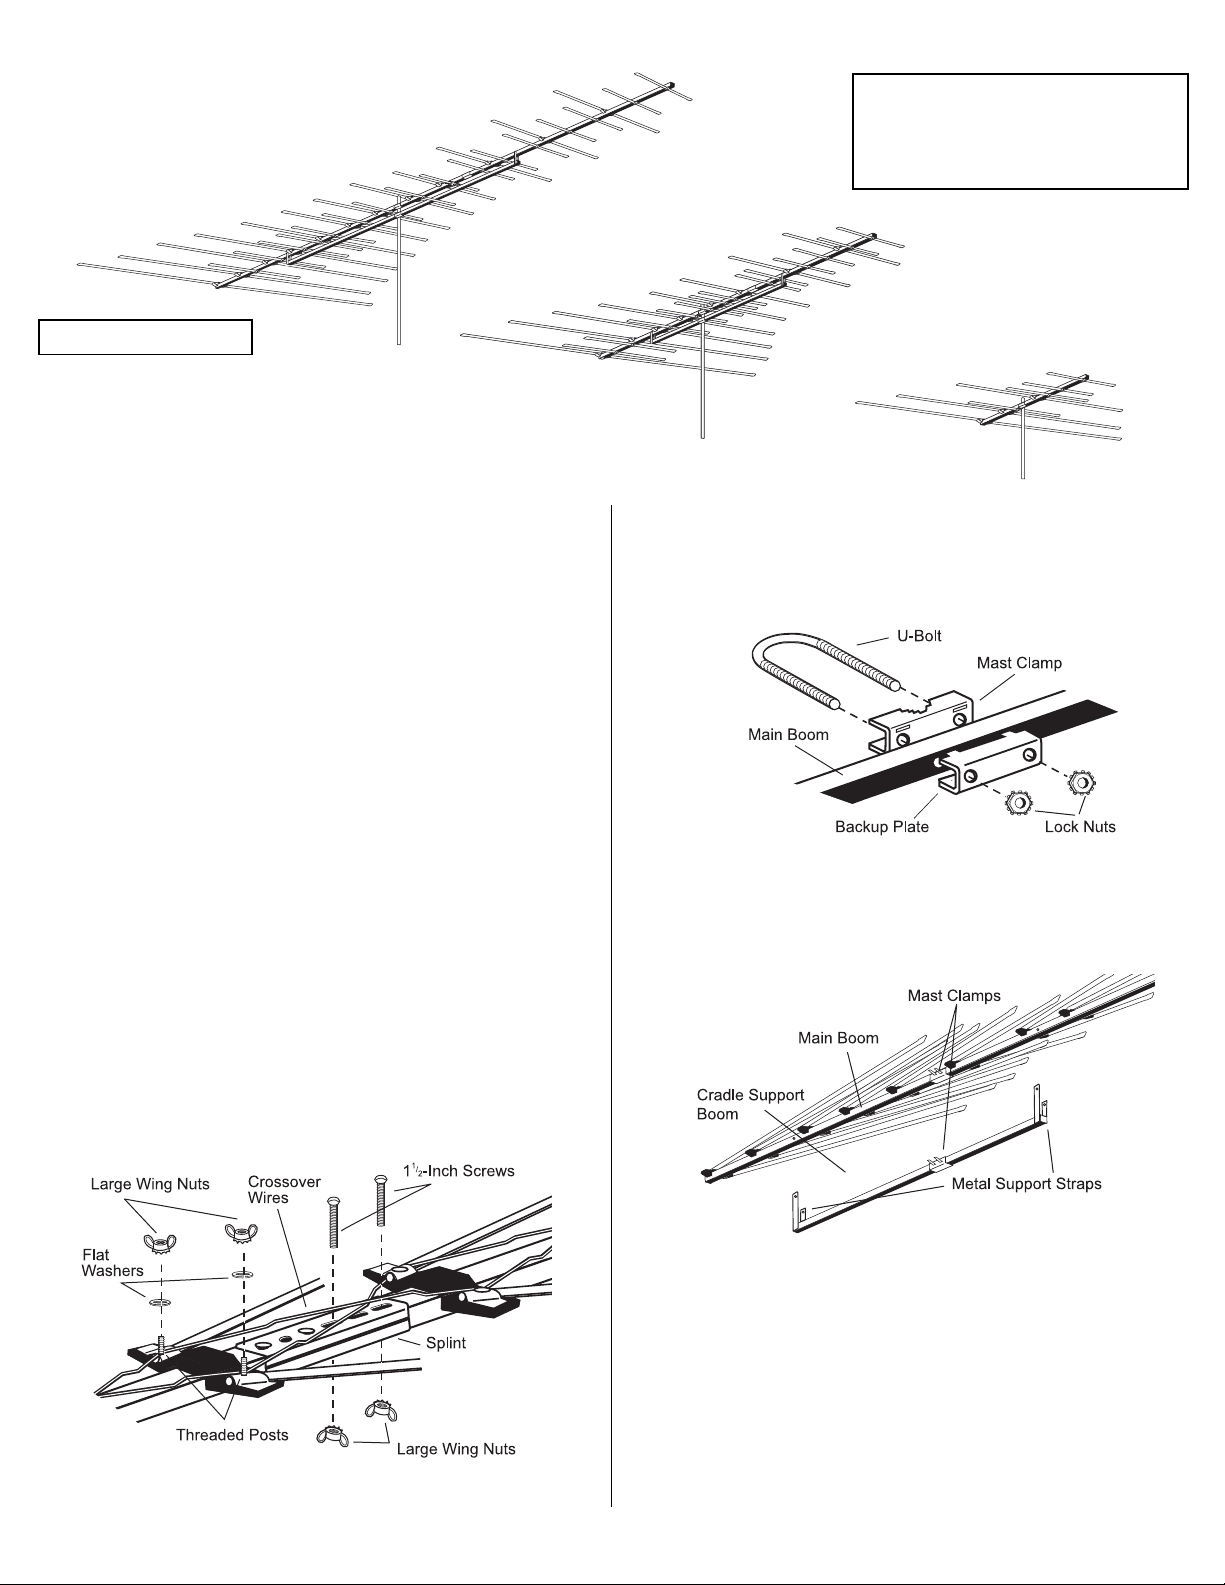
2. Use the supplied hardware to loosely attach the supplied
mast clamp assembly to the main boom as shown. If your
antenna has a cradle support boom, attach its mast clamp
assembly, facing it the same direction as the main boom’s
mast clamp assembly .
3. If your antenna has a cradle support boom, align its cradle
straps and mast clamp holes with the main boom holes. Attach it to the main boom using the two supplied 11/2-inch
screws and large wing nuts.
ASSEMBLING THE ANTENNA
1.
If your antenna has more than one main boom section, use
the supplied hardware to assemble the sections as shown. If
necessary, lift one end of the main boom so the wires reach
the threaded posts of the next section.
4. Press the supplied large end plugs into the main boom and
cradle boom.
Page 2
CONNECTING LEAD-IN CABLE TO THE ANTENNA
We recommend RG-6 cable, and if you prepare your own cable,
a quality F-connector. You can also use 300-ohm flat, twin-lead
cable. Note: If you prepare your own cable, slide a matching
transformer’s weather boot onto the cable before you attach the
F-connector.
put up the mast or attach your antenna to it. How you set up your
mast depends on your specific installation. Refer to the Consumer Product Safety Commission information on pages 3 and
4 of this manual for recommended methods.
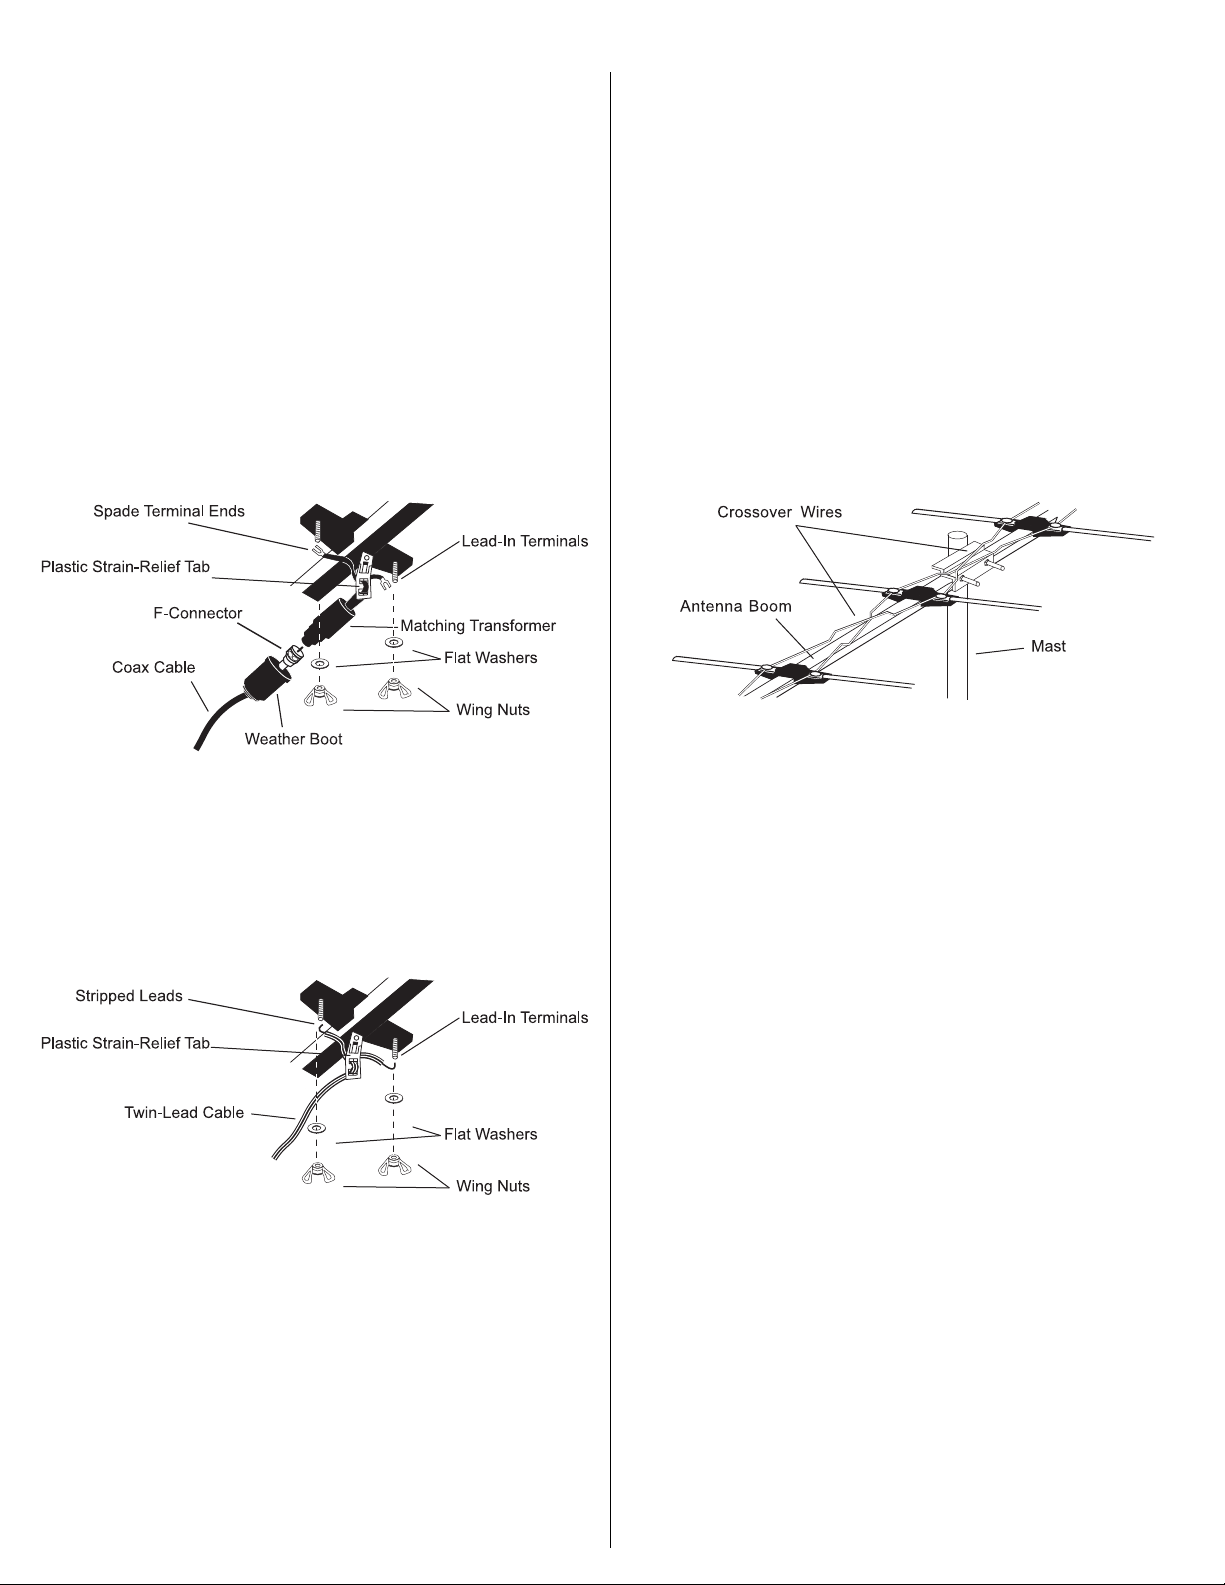
Using Coaxial Cable
1. Thread a matching transformer’s spade terminal ends
through the antenna’s strain-relief tab.
2. Slide the spade terminal ends around the antenna’s lead-in
terminals marked CONNECT LEAD-IN HERE. Secure them
with the supplied flat washers and large wing nuts.
3. Screw the cable’s F-connector onto the matching transformer.
Then slip the weatherboot over the connection. Note: If you
use a cable without a weatherboot, cover the connection with
weatherproof tape.
Using Twin-Lead Cable
1. Split the twin-lead cable for a length of about 3 inches. Then
strip about 1/2 inch of insulation from both leads.
2. Thread the stripped leads through the antenna’s plastic strainrelief tab. Wrap each lead around one of the antenna’s leadin terminals marked CONNECT LEAD-IN HERE, and secure them with the supplied flat washers and large wing nuts.
1. Slide the antenna’s mast clamp assembly or assemblies over
the end of the mast. If your antenna has a cradle boom make
sure the main boom is on top.
2.
Tighten the mast clamp assembly’s lock nuts to hold the antenna in place. Do not overtighten the lock nuts. Caution: The
crossover wires must not touch the antenna boom, the mast,
or each other. If necessary , carefully bend the crossover wires
to provide at least 1/2 inch of clearance.
3. Set up the mast, then rotate it so the antenna’s shortest ele-
ments point toward the stations you want to receive.
ROUTING THE CABLE TO YOUR TV/VCR/FM RECEIVER
If you use coaxial cable:
l Use plastic tape to secure the coaxial cable to the mast at
about 3-foot intervals.
l Use coaxial nail clips every few feet to secure the cable be-
tween the mast and where the cable enters the house.
l Use a 75-ohm grounding block at the point where the co-
axial cable enters the house. Read the Consumer Product
Safety Commission information for grounding instructions.
l Use a wall-through tube to nearly route the coaxial cable
through the walls.
UNFOLDING THE ANTENNA ELEMENTS
Hold the main boom’s elements near the pivot points and pull
them away from the boom until they snap into the locking plastic
support insulators. Note: You may wait to unfold the elements
until you get the antenna up on the roof.
Caution: Do not pull the elements near their outer ends or you
could damage them. Once the elements are locked into positions, do not attempt to unlock them.
A TTACHING T O THE MAST
We recommend you get the help of another person before you
If you use twin-lead cable:
l Be sure the twin-lead cable remains at least 4 inches away
from all metal surfaces.
l Use standoff insulators about every 4 feet. Twist the twin-
lead cable about three turns between standoff insulators.
l
Use a 300-ohm static discharge unit at the point where the
twin-lead cable enters the house. Read the Consumer Product Safety Commission information for grounding instructions.
 Loading...