

Description – 3W LED Eagle 3 in 1 Emergency
Bulkhead Maintained / Non Maintained
® Installation Instructions
Luminaire Code(s) –
AE3LED/3M
General Installation Instructions
These instructions should be read carefully prior to any installation and retained after completion for further
reference and maintenance. Please give these instructions to the building owner/occupier after installation.
Important Safety
1. Before installation, maintenance or lamp replacement, ensure that the mains supply to the luminaire is switched off and the circuit supply fuses are removed or
the circuit breaker is turned off.
2. It is recommended that only a qualified electrical contractor carries out the installation of this luminaire and that the luminaire is installed in compliance with the
current edition of the IEE Wiring Regulations.
3. The person carrying out the installation is to check and verify that the total load on the circuit, including that of this luminaire does not exceed the rating of the
circuit cable, fuse or circuit breaker.
4. Where a luminaire incorporates discharge control gear (inductive load), the circuit capacity and ratings require careful sizing to avoid nuisance tripping of the
protective device used in the installation.
5. Where applicable, careful consideration should be taken during installation to ensure that all fixings and/or suspensions are of a suitable size for the luminaire
Ratings
1. All luminaires are manufactured & tested in compliance with the requirement contained within BS EN 60598 and are CE marked.
2. All luminaires that are of Class 1 construction and that are marked accordingly, MUST be earthed.
3. All luminaires are designed to operate at 230Volts AC -6%/+10% = 216Volts to 252Volts. Do not operate outside these voltages.
4. All luminaires are only suitable for applications within their rated Ingress Protection limits as stated.
Exclusions to Warranty
Please Note - The limited warranty shall be null and void in the following circumstances:-
Failure by the installer, end user or any third party to exercise caution to protect any covered product or part from outside damage, adverse temperature (normal operating
ambient temperature 0 - 25°C), humidity conditions, fluctuations in the electrical system or physical abuse as well as failure related to workmanship in the installation of
the products or parts.
-------------------------------------------------------------------------------------------------------------------------------------------------------------------------------
INSTALLATION
This luminaire can be installed using three methods – Recessed, Surface / Suspended and Wall mounted. Please see below instruction for
each method.
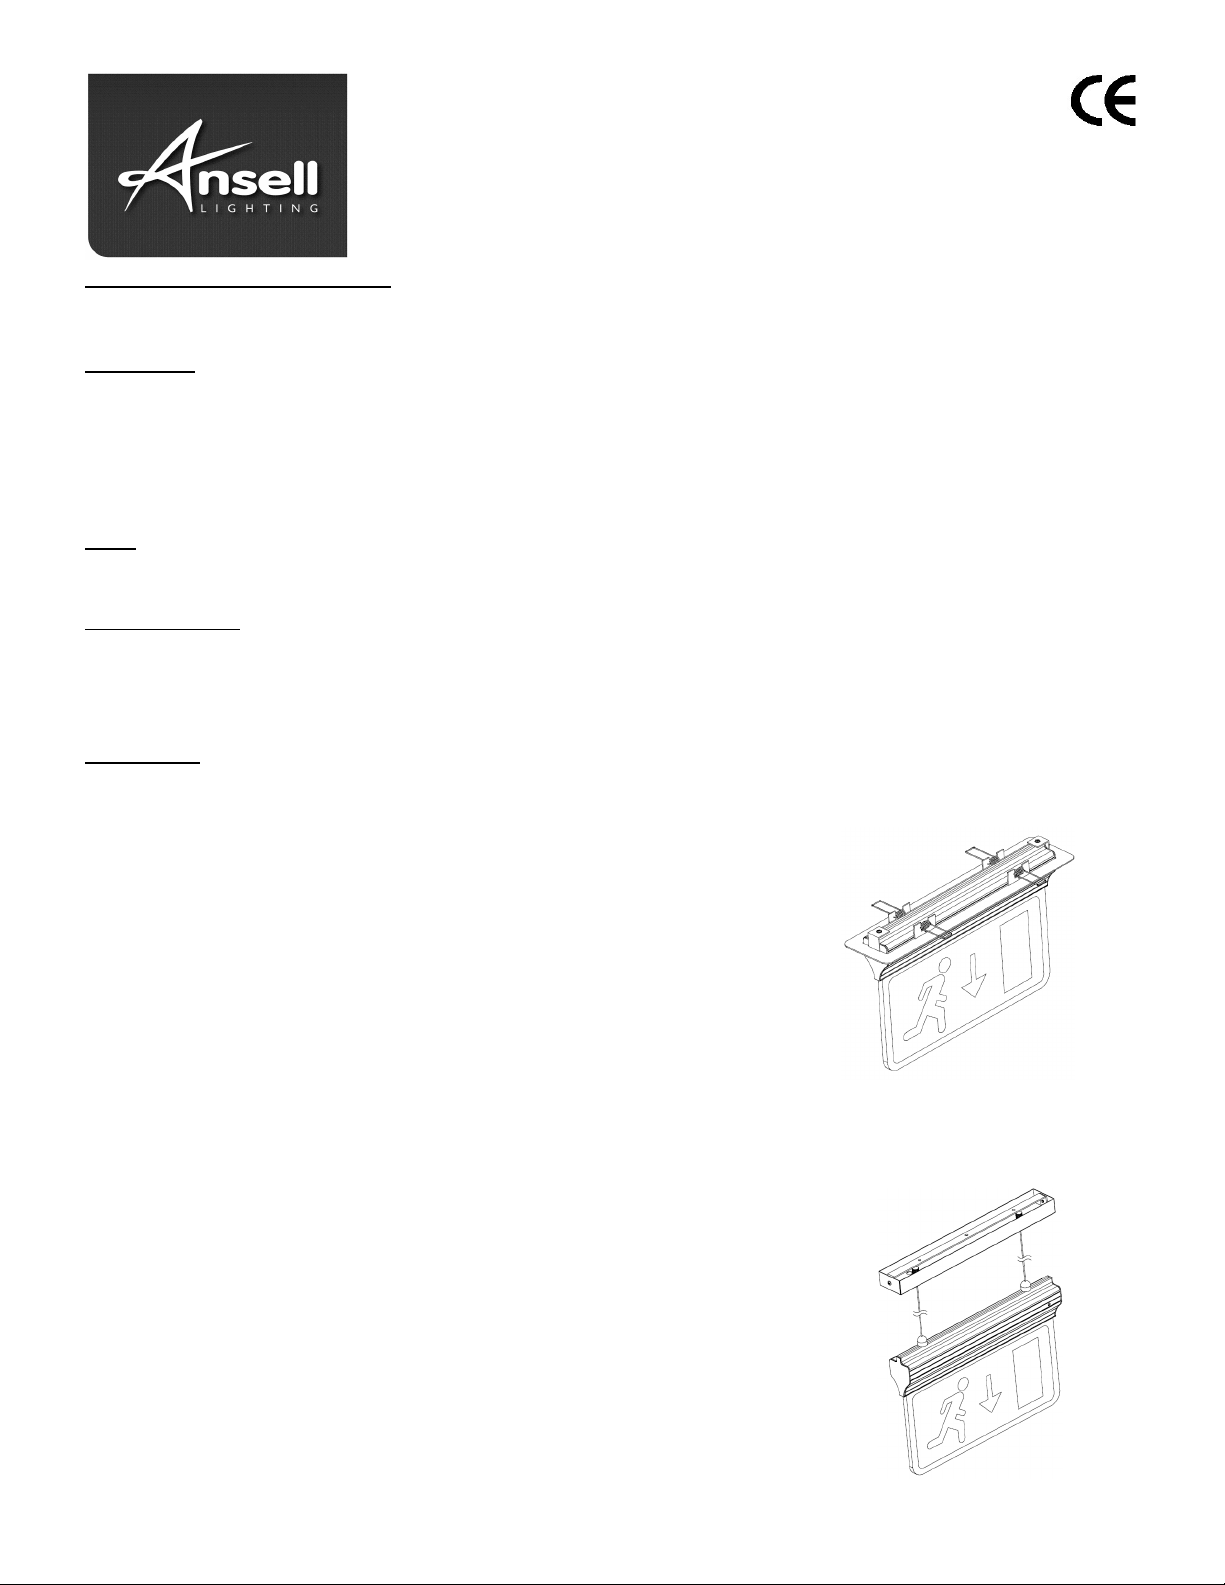
Semi-Recessed
Surface / Suspended
------------------------------------------------------------------------------------------------------------------------------------------------------------------------------Page No. 1
being installed.
• Remove one end cap of the luminaire and insert the required legend.
• Cut the ceiling in the desired location (Cut Out 330mm x 60mm). Ensure the location
provides adequate distance from water pipes, electrical cables, ceiling joists or any other
structural obstacles.
• Attach the semi-recessed kit to the luminaire the two fixing screws (supplied).
• Bring the incoming supply cable through the cut out and connect to the luminaire supply
cable via a junction / connection box (not supplied). Ensuring correct polarity is observed
(please see below for electrical connections).
• Carefully remove the end cap next to the emergency LED indicator and re-connect the
emergency battery male and female connectors.
• Offer the luminaire into the aperture, bend back the springs and push gently into the ceiling.
Do not install onto new plaster or wet paint.
• Remove one end cap of the luminaire and insert the required legend.
• Secure the steel bracket to the desired suitable ceiling surface (fixings supplied).
• Connect the incoming supply cable to the terminations on the steel bracket ensuring correct
polarity is observed (please see below for electrical connections).
• Carefully remove the end cap next to the emergency LED indicator and re-connect the
emergency battery male and female connectors.
• Attached the suspension kit from the back of the luminaire housing (each suspension point
110mm from centre) to the surface mounting plate, altering the luminaire supply cable and
suspension wire to the desired length.
• Connect the luminaire supply cable to the terminations on the steel bracket again checking correct
polarity is observed.
• Fix the surface mounting plate to the steel bracket using the fixing screws.
www.anselluk.com
Issue Date: td 20140617
Disposal of Electronic Equipment WEEE Directive 2002/96/EC
2002/95
/EC compliant
.
®
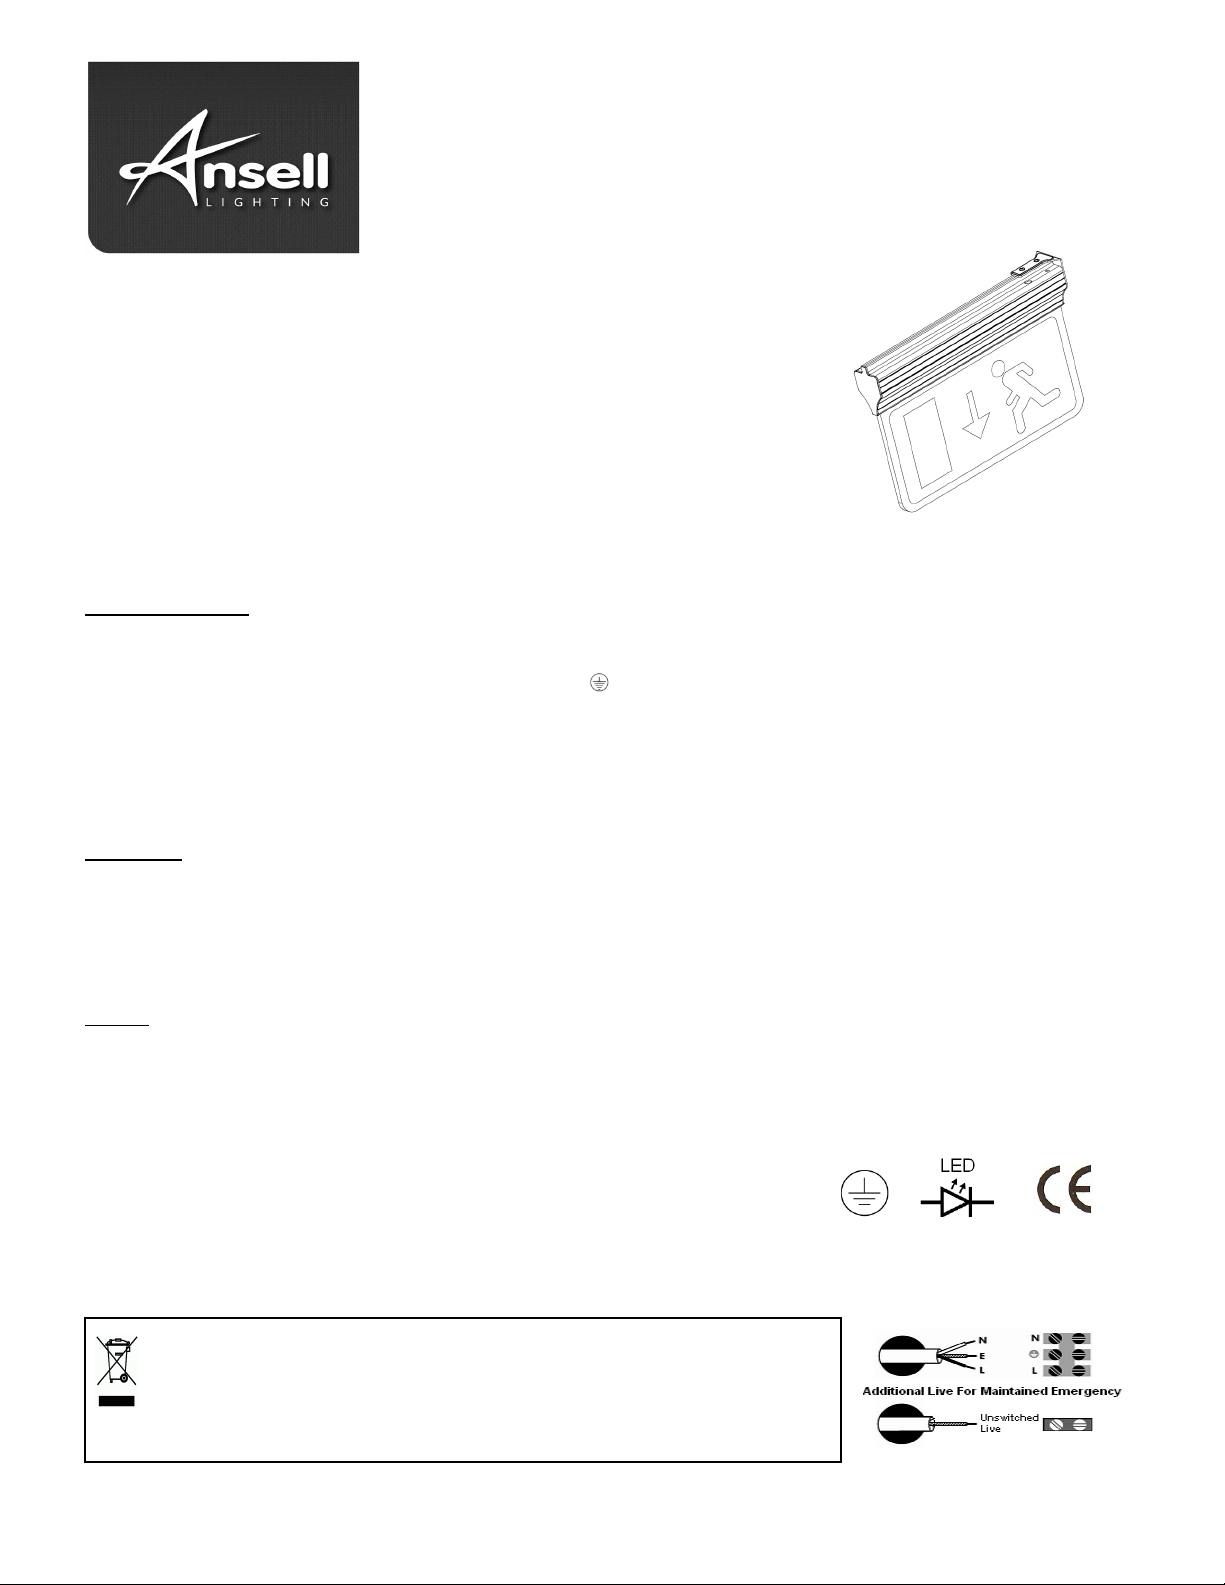
Wall Mounted
Electrical Connection
Maintenance
Warning
• Remove one end cap of the luminaire and insert the required legend.
• Access to the mains terminal is achieved by removing one end cap.
• Secure the wall bracket to the desired suitable surface (fixings supplied). Bring supply
cable through the centre hole in the wall bracket.
• Connect the incoming supply cable to the terminations inside the luminaire ensuring
correct polarity is observed (please see below for electrical connections).
• Carefully remove the end cap next to the emergency LED indicator and re-connect the
emergency battery male and female connectors.
• Fix the luminaire to the wall bracket from the back of the luminaire housing using the two
fixing screws (supplied).
Connect as follows:- PERMANENT LIVE (Lch) BROWN (continuous)
SWITCHED LIVE (Lsw) BLACK (switched)
NEUTRAL (N) BLUE
EARTH GREEN / YELLOW
• Make sure the male and female emergency leads are connected.
• Switch on the mains supply. Check the unit operates correctly.
• Check the LED indicator is ON.
• Leave the unit on charge for one hour, then remove the supply to simulate mains failure and check the lamp operates in emergency
mode.
• The unit requires 24 hours to fully charge the battery and achieve 3 hours emergency operation.
Daily : Check LED indicator is illuminated. If the product is maintained check the lamps operate.
Monthly : Check the unit operates in emergency mode for ¼ of the rated duration.
Bi-Annually: Check the unit operates of 1 hour for the 3 hour duration.
Annually: Check the unit operates for the full 3 hour duration.
Annually thereafter Check the unit operates for the full 3 hour duration.
If the unit fails to provide the required duration, replace the battery with one that meets the same specification.
• Disconnect the mains supply and unplug the battery leads before working on the unit.
• Failure to comply with these instructions may result in irreparable damage to the emergency control gear.
• This product must not be modified in any way as this will negate any Safety approvals, and may render the product inoperable or
unsafe. The product must be installed in accordance with the instructions.
-------------------------------------------------------------------------------------------------------------------------------------------------------------------------------
This product falls within the scope of the Waste Electrical & Electronic Equipment Directive
(WEEE), which means the product should not be disposed of as normal household waste.
Ensure that this luminaire and lamp is disposed of in accordance with the WEEE Directive.
Contact a local Council Waste Dept. Local Amenity Site, or the Environment Agency for
further information. RoHS - All components and materials used in this product are RoHS
------------------------------------------------------------------------------------------------------------------------------------------------------------------------------Page No. 2
www.anselluk.com
IP20
Issue Date: td 20140617
 Loading...