


®
OneTouch
™
Symphony
Insulin Delivery and
Blood Glucose Monitoring
System
Owner’s Booklet
Draft. 410-106-00 Rev.A

Draft. 410-106-00 Rev. A
Welcome
Congratulations. You have chosen one of the most advanced diabetes management systems available
®
today. Your OneTouch
Symphony™Insulin Delivery and Blood Glucose Monitoring System will play an
integral part in the blood glucose management and continuous insulin delivery regimen that you have
established with your health care professional.
®
Your OneTouch
OneTouch
Symphony™System combines the functionality of an Animas®Insulin Pump and a
®
Meter Remote through radio frequency (RF) communication. Both devices will work
independently of one another, but using them together can provide you with options to help make insulin
delivery more discreet and flexible.
®
Your Animas
Insulin Pump uses the latest advanced technology, providing continuous insulin delivery to
help maintain your blood glucose targets as recommended by your health care professional. It delivers
insulin in two ways: 1) continuous “basal” insulin delivery and 2) “bolus” insulin delivery to cover foods
eaten and/or reduce a high blood glucose level.
®
Your OneTouch
Meter Remote combines the accuracy expected from OneTouch®products with features
designed to make testing and tracking more convenient. These include a meter remote memory that serves
as an electronic logbook for storing all your glucose test results along with other diabetes-related health
records. Another new feature is a Food Database which can be easily accessed on your meter remote. The
Food Database helps take the guesswork out of carb counting.
®
When the devices are used together, your OneTouch
to insulin delivery functions available with the Animas
also allows your most recent blood glucose results from the OneTouch
Meter Remote gives you convenient remote access
®
Insulin Pump. Your OneTouch®Symphony™System
®
Meter Remote to be automatically
entered into bolus insulin calculations to cover carbohydrates in food or to correct for a high blood
glucose level.
This Owner’s Booklet is designed to provide the information that you are looking for, when you need it.
We hope you keep it handy.
Of course you may still have questions. If you do, our customer service representatives will be happy to
answer your call. You can reach them at Customer Service at 999-999-9999. You can also obtain
information at www.animascorp.com.

Draft. 410-106-00 Rev. A
TABLE OF CONTENTS
BEFORE YOU BEGIN I
®
SECTION I : ANIMAS
CHAPTER 1 - Important Information 3
CHAPTER 2 - Explanation of symbols 9
CHAPTER 3 - Introduction to your Animas
CHAPTER 4 - Getting your pump ready 15
CHAPTER 5 - Using the Normal Bolus feature 27
CHAPTER 6 - Using Basal Program features 29
INSULIN PUMP
®
Insulin Pump 11
CHAPTER 7 - Suspend/Resume feature 37
CHAPTER 8 - History feature 39
CHAPTER 9 - Status feature 45
CHAPTER 10 - Advanced features/Setup and activation 49
CHAPTER 11 - Using Advanced features 59
CHAPTER 12 - Care and maintenance 73
CHAPTER 13 - Safety system and alarms 75
CHAPTER 14 - Troubleshooting guidelines 85
CHAPTER 15 - Sick day guidelines 91
CHAPTER 16 - Lifestyle issues 93
CHAPTER 17 - My information 95
CHAPTER 18 - Warranty and other technical information 99

Draft. 410-106-00 Rev. A
SECTION II : ONETOUCH®METER REMOTE
CHAPTER 1 - Setting up your OneTouch
CHAPTER 2 - Setting up and using the Food Database 121
CHAPTER 3 - Estimating bolus insulin amounts with the bolus calculator 123
CHAPTER 4 - Testing your blood glucose 125
CHAPTER 5 - Adding comments to glucose test results 139
CHAPTER 6 - Making logbook entries 143
®
CHAPTER 7 - FastFacts
/ Using your meter remote logbook 149
CHAPTER 8 - Control solution testing 159
CHAPTER 9 - Caring for your meter remote and test strips 163
®
Meter Remote 105
CHAPTER 10 - Understanding meter remote error and other messages 167
CHAPTER 11 - Detailed information about your meter remote and test strips 171
SECTION III: ONETOUCH
AND ANIMAS
CHAPTER 1 - Overview of your OneTouch
CHAPTER 2 - Establishing communication between your
meter remote and your insulin pump 175
CHAPTER 3 - Pump Home and Meter Home screens on your meter remote 185
CHAPTER 4 - Insulin delivery functions on your meter remote 187
CHAPTER 5 - Checking the status of your OneTouch
CHAPTER 6 - Troubleshooting your OneTouch
CHAPTER 7 - OneTouch
®
SYMPHONY™SYSTEM/USING YOUR ONETOUCH®METER REMOTE
®
INSULIN PUMP TOGETHER
®
Symphony™System 173
®
Symphony™System 203
®
Symphony™System 207
®
Symphony™System Communication Technical Specifications 217
Appendix A: Glossary 219
Index 223

BEFORE YOU BEGIN
EFORE YOU BEG I N
B
Draft. 410-106-00 Rev. A
Before using your OneTouch®Symphony™System to deliver insulin, you must complete training with a
®
certified Animas
Insulin Pump trainer on the insulin pump and on the meter remote.
As part of your training, your health care professional will assist you in making the appropriate
selections for your insulin pump and meter remote settings. Your insulin pump must be programmed
for your own personal use. Your insulin pump settings impact the calculations for insulin delivery using
either your meter remote or insulin pump. Be comfortable with using your insulin pump before you
activate the RF feature on your insulin pump and meter remote. See the appropriate chapters in
Section I, pages 1–104 for the steps on setting up and using your insulin pump.
Many people also find it helpful to practice the blood glucose test process with control solution before
testing with blood for the first time. See Chapter 8 in Section II, pages 159–162.
For best results the use of your insulin pump, or your meter remote to access pump functions, is
recommended for people with diabetes who are willing to:
Test their blood glucose levels four to six times per day or as recommended by their health care team.
•
Demonstrate adequate carbohydrate counting skills.
•
Maintain good diabetes self-care skills.
•
See their health care professional regularly.
•
Have adequate vision and hearing to recognize the pump alerts.
•
You should carefully read this Owner’s Booklet and any inserts that come with your OneTouch
®
Symphony™System. These include inserts for:
OneTouch®Ultra®Test Strips
•
Food Database Reference Guide
•
OneTouch®Ultra®Control Solution
•
and Instructions for Use for:
Animas®2000 Series Insulin Pump Cartridges
•
Infusion Sets
•
ezManager®Software
•
While reading this Owner’s Booklet, please note the following:
Display screens throughout the Owner’s Booklet are examples only. They should not be considered
•
suggestions for individual programming and may not be representative of current health states.
“Blood Glucose” is often abbreviated as BG in both instructional copy as well as in example display
•
screens.
Your Animas®Insulin Pump will often be referred to as simply “your pump”. Similarly, your
•
OneTouch
be used when referring to both the Animas
®
Meter Remote will often be referred to as “your meter remote”. “The devices” will often
®
Insulin Pump and OneTouch®Meter Remote.
Take special note of Warnings and Cautions throughout this Owner’s Booklet, which are identified
with
.
I

Draft. 410-106-00 Rev. A
EFORE YOU BEG I N
B
Intended use
Your OneTouch®Symphony Insulin Delivery and Blood Glucose Monitoring System is indicated for the
treatment of insulin-requiring diabetes and for the quantitative measurement of glucose in fresh
capillary whole blood.
®
Your Animas
treatment of insulin-requiring diabetes.
Your OneTouch
quantitative measurement of glucose in fresh capillary whole blood. When used together with the
Animas
pump. Your OneTouch
self-testing outside the body (in vitro diagnostic use) by people with diabetes at home and by health
care professionals in a clinical setting as an aid to monitor the effectiveness of diabetes control. Your
OneTouch
finger, forearm or palm. It should not be used for the diagnosis of diabetes or testing of newborns.
Insulin Pump is indicated for continuous subcutaneous infusion of insulin for the
®
Meter Remote Blood Glucose Monitoring System is intended to be used for the
®
Insulin Pump, it also functions as a wireless (RF) remote control to deliver insulin from the
®
Meter Remote Blood Glucose Monitoring System is specifically indicated for use on the
®
Meter Remote Blood Glucose Monitoring System is intended for use for
About radio frequency (RF) communication
Your meter remote and pump have built-in RF capability. RF is a type of wireless communication. Cell
phones use RF technology, as do many other devices. RF is how your meter remote and pump
communicate and share data.
The RF feature on your meter remote and pump will be deactivated when you first receive them. In
order to begin using your meter remote and pump together as a system, RF must be activated on both
devices and they must be paired (synchronized). Activating RF opens a line of communication on both
devices and pairing ensures communication will take place only between one meter remote and one
pump.
RF communication between your meter remote and pump will work up to a distance of about 10 feet
and will transmit through clothing. Direct line of sight is not required for RF communication. As long as
you have a good RF signal and are within range, you can use your meter remote to access pump
functions.
When conditions or distance cause RF communication to be lost or interrupted, you will not be able to
use your meter remote to access pump functions. This also means that data transfer between the two
devices will stop temporarily. As soon as the problem is resolved, RF communication will resume. Any
status records stored in your pump during the RF interruption will then be sent to your meter remote.
Your meter remote and pump are subject to and comply with U.S. Federal regulations, Part 15 of the
Federal Communications Commission (FCC) Rules regarding devices with RF capability. From these
regulations, the two conditions of operation specific to your device are given in the following FCC
required statement:
This device complies with Part 15 of the FCC Rules. Operation is subject to the following two
conditions: 1) this device may not cause harmful interference, and 2) this device must accept any
interference received, including interference that may cause undesired operation.
II

BEFORE YOU BEGIN
Draft. 410-106-00 Rev. A
Compliance with these guidelines means that under normal day-to-day circumstances your OneTouch
Symphony™System should not affect the operation of other devices. Additionally, your OneTouch
®
Symphony™System should operate normally in the presence of other devices in a normal household
environment. In the event there is interference from another device, it is recommended that you
increase distance between your system and that device, or turn off the interfering device.
Alternatively, you may turn off RF communication between the meter remote and pump and perform
insulin delivery functions directly from your pump (see Chapter 2 in Section III, pages 180-182).
Changes or modifications not expressly approved by the manufacturer (Animas Corporation) could
void the user’s authority to operate the equipment.
There are environments where it is recommended that you not use the RF communication feature
linking your meter remote and pump. When you are in radiology and MRI departments and around
radiology equipment, it is recommended you first deactivate the RF communication feature on both
your meter remote and your pump. Then you must remove both devices and leave them outside the
MRI room. Any metal needle infusion sets should also be removed and left outside the MRI room.
Likewise, during air travel your airline may have specific restrictions about using your System with RF
communication activated. It is recommended that you deactivate the RF feature on your pump and
meter remote during flights, or check with your airline’s RF restrictions when making your travel plans.
To learn more about deactivating the RF feature on your pump and meter remote, see Chapter 2 in
Section III, pages 175–184.
®
Your pump has additional environmental restrictions. See Chapter 1 in Section I, pages 3–8 for
recommendations regarding the use of pumps in the presence of radiology equipment.
Using your meter remote and pump together as a system
Once you have established communication between your meter remote and pump, you can access
certain pump functions directly from your meter remote. These include delivering a bolus, monitoring
pump status, and confirming many pump alarms and warnings.
Your pump has its own set of display screens and buttons to provide stand-alone insulin delivery
without the use of your meter remote. Some of the buttons work the same way as the buttons on your
meter remote. One example is the button on your pump. Like the button on your meter remote,
the button on your pump is used to confirm entries. Be sure you know how the buttons workon both
your pump and meter remote before you begin using the devices together as a system.
When you use your meter remote to access pump functions, your meter remote display screens will
closely resemble your pump display screens.
III

Draft. 410-106-00 Rev. A
EFORE YOU BEG I N
B
OneTouch®Symphony™System Carton Contents
Your OneTouch®Symphony™System carton includes your insulin pump, your meter remote, and other
accessories you will need to begin using both devices. Your meter remote and BG testing supplies are
included within a separate kit within the carton. Check the contents of your carton to make sure all
items are included. If any items are missing call Customer Service at 999-999-9999.
®
Your OneTouch
The Animas®Insulin Pump and pump accessories:
•
Symphony™System carton includes:
a
e
b
j
k
a. Animas®Insulin Pump
b. One Energizer Lithium L91 AA battery (1.5V) for your pump
h
i
f
c. Owner’s Booklet
d. Envelope that includes Instructions for Use for IR 1200/2000 series cartridges
®
e. Sample Animas
IR 1200/2000 series (200 U/2ml) cartridge
f. Sample infusion sets
g. Sample skin prep
h. Leather Case
i. Low Profile Clip
j. Extra Battery Cap
k. Battery Cap Tool
®
l. ezManager
Software and download/upload cable
IV

EFORE YOU BEG I N
B
The OneTouch®Meter Remote kit which includes:
•
Draft. 410-106-00 Rev. A
f
a. OneTouch®Meter Remote
b. OneTouch
®
Ultra®Control Solution
c
d
e
h
b
g
a
i
c. OneTouch
®
Lancing Device
If another type of lancing device is included, see the separate instructions for that lancing device.
d. OneTouch®AST™Clear Cap
e. OneTouch
®
UltraSoft®Sterile Lancets
f. Carrying Case
g. Two 1.5V AAA Alkaline Batteries* (batteries included but not installed)
®
h. OneTouch
Ultra®Test Strips
i. USB Cable
A warranty card for your meter remote is also included.
* See Chapter 9 in Section II, pages 163–166, for important information on the correct way to install
the batteries in your meter remote.
WARNING: Keep the pump, meter remote, and accessories away from young children. Small
items such as the battery door, batteries, battery cap, clip, test strips, lancets, protective disks
on the lancets, and control solution vial cap are choking hazards.
V

Draft. 410-106-00 Rev. A
EFORE YOU BEG I N
B
Supply Reordering
You can place orders for cartridges, infusion sets, skin prep, test strips, batteries and many meter
remote and pump accessories by calling our Reorder Department or by visiting our eStore at
https://estore.animascorp.com/. In the United States, Canada and Puerto Rico, you may also call
1-999-999-9999.
Emergency Kit
Keep an emergency kit with you at all times to make sure you always have necessary supplies.
This kit should include but is not limited to:
Quick-acting glucose tablets or gel
•
BG monitoring supplies including meter, strips, lancing device, lancets, meter remote batteries
•
(2 AAA alkaline)
Blood or urine ketone testing supplies
•
Rapid-acting and other insulin as recommended by your health care team
•
Extra infusion sets and IR 1200/2000 series cartridges
•
Dressing and adhesive, if used
•
An extra Energizer Lithium L91 AA battery for your pump
•
An extra pump battery cap
•
An extra pump cartridge cap (In the U.S., Canada and Puerto Rico, call 1-999-999-9999 to order
•
an extra cartridge cap. All other customers contact your local Animas
Glucagon Emergency Kit
•
Emergency contact phone numbers
•
Be sure to inform a family member, co-worker and/or friend where this emergency kit is kept.
®
®
distributor.)
VI

Draft. 410-106-00 Rev. A
I
Animas®Insulin Pump

Draft. 410-106-00 Rev. A

Draft. 410-106-00 Rev. A
Welcome and Congratulations
You have begun a new way of life with your Animas®Insulin Pump.
Your choice of pump therapy is a sign that you are committed to taking excellent care of yourself. Your
pump has been specially designed to help you manage your diabetes, using advanced technology and
sophisticated safety systems.
Your pump is used for insulin therapy to help maintain your blood glucose (BG) targets as
recommended by your health care team. You program it to deliver two ways: a continuous, 24-hour
“basal” rate and “bolus” insulin deliveries to accommodate for immediate doses to cover foods eaten
and high BG. It is important to remember that successful pump therapy is a partnership of advanced
technology and responsible self-care.
Please take a moment to look at the back of your pump and write down the serial number.
My pump serial number is: ______________________________________
I
Animas
®
Insulin Pump
Serial Number (S/N)
Technical and Clinical Help
If there is anything you do not understand in the Owner’s Booklet or if you have a question or need
assistance with your pump, our Customer Service Department is available to you every minute of every
day.
In the United States, Canada and Puerto Rico, call 1-999-999-9999 for assistance every minute of
every day. For non-urgent technical questions, please email pumpsupport@anmus.jnj.com.
We understand that you may have questions and concerns when using a new product. Please do not
hesitate to call for assistance!
Important Note
Your pump comes with a transparent plastic film covering the display lens for protection during
shipping. Be sure to remove this protective covering before using your pump.
1

Draft. 410-106-00 Rev. A
I
Insulin Pump
®
Animas
2

Draft. 410-106-00 Rev. A
CHAPTER 1 - IMPORTANT INFORMATION
This section of the Owner’s Booklet contains information about how to use, program and maintain your
new pump. It is important to read it carefully. Even if you are an experienced pumper, keep your Owner’s
Booklet handy for reference. Warnings, cautions and safety tips are found throughout this Owner’s
Booklet, indicated by a
WARNING:
Do Not attempt to connect to your pump before you have been trained on your pump or unless
•
your certified Animas
Incorrect use of your pump, failure to follow the instructions in this Owner’s Booklet or
•
improper/inadequate self-care and troubleshooting techniques can lead to death or serious
injury. If you do not understand something or have questions, ask your health care team or
call our Customer Service representatives at 1-999-999-9999.
Your pump is designed to deliver insulin reliably but because your pump uses only rapid-
•
acting insulin, you will not have long-acting insulin in your body. To avoid the risk of diabetic
ketoacidosis (DKA) or very high BG, you must be prepared to give yourself an injection of
insulin if delivery is interrupted for any reason.
symbol.
®
Insulin Pump trainer is present.
1
I
Animas
®
Insulin Pump
Your pump is designed and calibrated to deliver U100 insulin. Use of any insulin with lesser
•
or greater concentration can result in serious injury or death.
Never prime tubing or tighten the cartridge cap while the infusion set is connected to your
•
body. Doing so while the infusion set is connected to your body can result in unintended
delivery of insulin, which can result in serious injury or death.
Warnings and Precautions
Radiology Equipment
Your pump has been designed to operate in the presence of common sources of electrostatic and
electromagnetic interference, including airport and store security systems. However, like all portable
electronic devices, your pump should not be exposed to very strong electromagnetic fields, such as in
MRI’s, RF welders or magnets used to lift automobiles. Very strong magnetic fields, such as in an MRI,
can re-magnetize the portion of the motor that regulates insulin delivery. If you plan to undergo an
MRI, remove your pump beforehand and keep it outside the room during the procedure.
3

Draft. 410-106-00 Rev. A
CHAPTER 1 - I M P O R TANT INFORMAT I O N
Medical Procedures and Equipment
Procedure
Patient is Pumper
Health Care
Professional/Technician
is Pumper
I
Pacemaker/
Automatic Implantable
Cardioverter-
Defibrillator (AICD)
EKG No need to disconnect. No need to disconnect.
Insulin Pump
®
Cardiac
Animas
Catheterization
Nuclear Stress Test
Colonoscopy No need to disconnect. No need to disconnect.
Laser Surgery
Disconnect pump and leave outside
room during insertion of device and
reprogramming. Infusion set can
remain in place.
Disconnect pump and leave outside
room during procedure.
Disconnect pump and leave outside
room during scan. Can remain
connected during injection of
radioisotope.
Pump and infusion set can be worn;
however some lasers can create
interference and cause pump to alarm.
Follow normal safety practices and
proceed to the designated safe
area while each X-ray is taken and
during reprogramming.
Follow normal safety practices and
proceed to the designated safe
area while each X-ray is taken.
Follow normal safety practices and
proceed to the designated safe
area while each X-ray is taken.
Pump and infusion set can be
worn; however some lasers can
create interference and cause
pump to alarm.
General Anesthesia
Determination based on what medical
equipment is being used in the
procedure.
Determination based on what
medical equipment is being used
in the procedure.
For procedures not included above or on the chart on the following page, call (in advance of your
procedure) 1-999-999-9999 in the U.S., Canada and Puerto Rico.
4

HAPTER 1 - I M P O R TANT INFORMAT I O N
C
Medical Procedures and Equipment
Draft. 410-106-00 Rev. A
Procedure
Dental X-Rays
Ultrasound
Mammogram
and Bone
Density Test
Body X-Rays,
Flouroscopy
(chest,neck,
abdomen,
torso, etc.)
Patient is Pumper
No need to disconnect.
•
Pump should remain covered by lead apron
•
placed on the patient by the dentist or
technician.
No need to disconnect.
•
Transducer should not be pointed directly
•
at pump or site. If site is directly in range of
transducer, site should be removed.
Do Not expose pump to test.
•
Disconnect pump prior to test and leave pump
•
in locked dressing room.
Infusion set can remain in place during test.
•
Do Not expose pump to X-ray beam.
•
Disconnect pump prior to exam and leave
•
pump in locked dressing room.
Infusion set can remain in place during X-ray.
•
Health Care Professional/Technician
is Pumper
No need to disconnect.
•
Follow normal X-ray safety practices and
•
proceed to the designated safe area
when each X-ray is taken.
No need to disconnect.
•
Transducer should not be pointed
•
directly at pump or site.
No need to disconnect.
•
Follow normal safety practices and
•
proceed to the designated safe area
while each test is being performed.
No need to disconnect.
•
Follow normal X-ray safety practices
•
and proceed to the designated safe area
when each X-ray is taken.
I
Animas
®
Insulin Pump
Therapeutic
Radiation/
Oncology
(cancer
treatment
radiation)
CT Scans and
MRI’s (Magnetic
Resonance
imaging)
Electro-cautery
surgery
Do Not expose pump to radiation treatment.
•
Disconnect pump prior to radiation treatment
•
and leave pump in locked dressing room.
If the infusion set doesn’t interfere with the
•
area being treated, the set can remain in
place during radiation.
Do Not bring pump into the exam
•
room at any time.
Disconnect pump and metal needle
•
infusion set prior to exam and leave in a
locked dressing room.
Soft cannula infusion sets can remain in place.
•
If pump is accidently allowed in the exam
•
room disconnect pump immediately and
contact Customer Service for instructions.
Disconnect from pump during surgery.
•
Disconnect prior to surgery and leave pump
•
in locked dressing room.
If the infusion set doesn’t interfere with the
•
area being treated, the set can remain in place
during surgery.
No need to disconnect.
•
Follow normal radio-protection practices
•
and proceed to the designated safe area
while the patient is undergoing
treatment.
MRI: Do Not bring pump into the
•
same room as the MRI machine at any
time.
If pump is accidently allowed in
•
the MRI room disconnect pump
immediately and contact Customer
Service for instructions.
CT Scan: No need to disconnect.
•
Follow normal CT Scan safety practices
•
and proceed to the designated safe area
when each Scan is performed.
No need to disconnect.
•
When in doubt, disconnect and leave pump in locked dressing room.
Follow usual instructions for bolusing to cover any missed basal insulin when you reconnect.
5

Draft. 410-106-00 Rev. A
CHAPTER 1 - I M P O R TANT INFORMAT I O N
Amusement Parks
Very powerful electromagnets are sometimes used on “free-fall” amusement park rides. Pumps should
be removed and not taken on these “free-fall” types of rides.
High gravity forces can be experienced when riding on some roller-coasters. It is recommended that
you disconnect (NOT suspend) your pump while on roller-coaster rides.
I
Aircraft without Cabin Pressurization
If flying in aircraft without cabin pressurization or flying in aircraft used for aerobatics or combat
simulation (pressurized or not), it is recommended that you disconnect (NOT suspend) pump.
Precautions
Your pump is a sealed device that should be opened ONLY by the manufacturer. If your pump seal
Insulin Pump
®
Animas
•
®
is broken by anyone other than an authorized Animas
your pump is no longer waterproof. If the back label on your pump is removed or damaged, the
warranty is voided and your pump is no longer waterproof.
When using your pump, if the pump is placed at a vertically higher position than the infusion site, a
•
very small amount of additional insulin infusion may occur. To minimize this condition and maintain
pump delivery accuracy, the vertical distance between your pump and the infusion site should be no
more than 12 inches (30 cm). If your pump is placed at a vertically lower position than the infusion
site, this condition is eliminated.
factory technician, the warranty is voided and
Occasionally check the infusion site for proper placement and leaks. Improperly placed infusion sites
•
or leaks around the infusion site can result in under infusion.
Occasionally check the infusion set tubing for any damage, leaks or kinks while using your pump.
•
Damaged, leaking or kinked tubing may restrict or stop insulin delivery and result in under infusion.
Only use Animas®1200/2000 series (200 unit/2ml) cartridges and infusion sets with a standard
•
™
connector. Efficacy of pump cannot be guaranteed if cartridges other than those manufactured
Luer
by Animas
Always dispose of used cartridges and infusion sets following the regulations in your community.
•
Failure to follow these guidelines may pose health hazards.
Prior to replacing the battery cap, make sure the o-ring fits securely and is not damaged. A damaged
•
o-ring may impact the battery contact and/or the waterproof feature of your pump. See Chapter 4 in
Section I, pages 15–26.
Prior to inserting a cartridge into your pump, check the o-rings on the cartridge to be sure they are not
•
damaged. Damaged cartridge o-rings can result in under or over delivery of insulin.
Occasionally check the vents to be sure they are clear of debris. See Chapter 12 in Section I, pages
•
73–74.
Occasionally check that your pump personal settings are correct.
•
®
Corporation are used or if cartridges are used more than once.
Occasionally check to make sure your pump emits audible tones that are easily detectable and that
•
the vibrate feature is working correctly. For example, audible tones should be heard and the vibration
pulse felt every time you replace the battery.
6

Draft. 410-106-00 Rev. A
HAPTER 1 - I M P O R TANT INFORMAT I O N
C
If using the upload or download feature, keep the communication window free of obstructions and
•
refer to the Instructions for Use included with the IR (infra-red) Accessory Kit. Contact your local
Animas
NOTE: Your pump uses battery power to notify you of alerts, warnings, and alarms. If you do not
confirm the notification, your pump will continue to use battery power as the notifications repeat and
progress. This will result in reduced battery life and the Replace Battery Alarm screen appearing sooner
than expected.
®
distributor for information on ezManager®Software and IR Accessory Kit.
I
Additionally, certain warnings (e.g., Low Cartridge Warning, Occlusion Alarm) take precedence over
less critical ones (e.g., Low Battery Warning). This means if you do not confirm the more critical
warning, battery life will be reduced and your pump may skip the Low Battery Warning and go directly
to the Replace Battery Alarm, or battery life will end before a Replace Battery Alarm is displayed.
Safety Information
Your pump is designed only for Continuous Subcutaneous Insulin Infusion (CSII). It is not intended
•
for use with any other delivery substance.
This section of the Owner’s Booklet gives instruction on how to program and operate your pump.
•
Animas
diabetes care program. Consult your health care team for instructions specific to your treatment plan.
˚
˚
®
Corporation does not make any recommendations on specific programming related to your
Consult your health care team before using your pump to determine which programming features
are appropriate for you. Some features require a greater knowledge of insulin pumping and
advanced self-care skills. Additionally, some advanced programming features require that testing
and fine-tuning of basic settings be completed in order to achieve the best possible results. Your
health care team will give you specific training on programming and using your pump.
Use of Extended Bolus, Combo Bolus, ezCarb (carb calculator), Insulin on Board (IOB) and ezBG
(BG correction calculator) all require input from your health care team. Do Not attempt to use these
features until you have specific information for your treatment plan and have had specific training
on each programming feature.
Animas
®
Insulin Pump
Only your health care team can determine your Insulin to Carbohydrate (I:C) ratios, Insulin
˚
Sensitivity Factors (ISFs), BG Target ranges and duration of Insulin on Board (IOB).
Basal rates that are too high or too low can adversely affect BG levels. Work with your health care
˚
team to fine-tune basal rates.
The way your body uses insulin can be affected by many things. Contact your health care team
˚
about lifestyle changes such as starting/stopping your exercise program or significant weight
loss/gain. Your basal rates may need to be modified.
Do Not stop using your pump if you are ill. Even when you’re sick, your body still needs insulin. See
•
Chapter 15 in Section I, pages 91–92.
When you begin using the Audio Bolus feature, always look at the screen as you program so that you
•
are completely comfortable with the feature before delivering a bolus via audio prompts only.
Animas®Corporation recommends that you have someone around you (family, friends, etc.) who
•
understands diabetes and pump therapy, so in the event of an emergency, they can help you. Be
sure they are familiar with any information given to you by your health care team.
7

Draft. 410-106-00 Rev. A
CHAPTER 1 - I M P O R TANT INFORMAT I O N
Before Bedtime
•
Try to arrange infusion set changes at meals or one to two hours before bedtime. If a change
˚
is needed at bedtime, then check BG in one to two hours. Always check BG one to two hours after
infusion set change.
Always check that your cartridge has enough insulin to last through the night before going to bed.
˚
I
Insulin Pump
®
Unless otherwise recommended by your health care team, Do Not use the vibrate feature during
sleep. It is recommended that you set the volume to high for all warnings and alarms before going
to sleep.
Always remove all air bubbles from cartridge and tubing before beginning insulin delivery. Air
•
bubbles can compromise accuracy of delivery. Refer to the Instructions for Use included with your
cartridge packaging.
Interference with your pump electronics by cell phones can occur if worn in close proximity. It is
•
recommended that you wear your pump and cell phone at least 6 inches apart. When RF is turned
on and you are using your pump and meter remote together as a system, RF interference is possible.
See Chapter 7 in Section III, pages 217–218.
Animas
If you return your pump for service and a replacement pump is sent, Do Not use the replacement
•
pump until all the settings specific to your treatment plan have been programmed.
If you drop your pump or it has been hit against something hard, inspect it to be sure it is still
•
working properly. Check that the display screen is working and clear, that the cartridge cap, battery
cap and infusion set are properly in place. Check for leaks around the cartridge by wrapping a piece
of tissue around the connection area. Cracks, chips or damage to your pump may impact the battery
contact and/or the waterproof feature of your pump. Call our Customer Service representatives at
1-999-999-9999 if you identify or suspect your pump has been damaged. They will help determine
if your pump should be replaced.
Your pump is designed to operate in conditions where temperatures are between 40˚F and 104˚F.
•
If your pump is exposed to temperatures outside these parameters, extra care should be taken to
protect it from extreme temperatures.
Your pump and pump cartridges are latex free.
•
To avoid risk of explosion, Do Not use your pump in the presence of explosive gases.
•
Your pump is designed to achieve optimum performance and battery life with an Energizer Lithium
•
L91 AA battery (1.5V). Rechargeable batteries and Carbon-Zinc batteries do not have the necessary
characteristics to power your pump and should not be used. Some AA lithium batteries are available
with other voltages such as 3.6V or 4.0V. Do Not use these batteries. Use of anything other than a
1.5V battery could permanently damage your pump and voids its warranty.
Do Not use household cleaners, chemicals, solvents, bleach, scouring pads or sharp instruments to
•
clean your pump. Never put your pump in the dishwasher or use very hot water to clean it.
Never use a hair dryer, microwave oven or baking oven to dry your pump. Use a soft towel.
•
WARNING: Your pump and pump accessories include small component pieces that could
pose a choking hazard for small children.
8
Draft. 410-106-00 Rev. A
i
MRI
HAPTER 2 - E X P L A N ATION O F SYMBOLS
C
CH A PT ER 2 - EX P LAN AT IO N OF SY MB O LS
Shown below are symbols you will find on your Animas®Insulin Pump and its packaging.
On the front of your pump:
2
Up Arrow button
Down Arrow button
OK button
On the top of your pump:
Contrast button
On the back of your pump:
S/N Serial Number
IPX8 Water-Tight Equipment (protected against the effects of submersion; tested to 12 feet/3.6 meters
Important Information (See Owner’s Booklet for Instructions for Use)
Date of Manufacture
for 24 hours)
I
Animas
®
Insulin Pump
Type BF Medical Equipment (patient isolated, not defibrillator protected)
Rx Only CAUTION: Federal (U.S.) law restricts this device to sale by, or on the order of a physician.
Consult Owner’s Booklet
Do Not wear or operate around MRI devices. Remove and leave outside MRI room before entering.
9

Draft. 410-106-00 Rev. A
CHAPTER 2 - E X P L A N ATION O F SYMBOLS
I
Insulin Pump
®
Animas
10

Draft. 410-106-00 Rev. A
CH A PT ER 3 - IN T ROD U CT I ON TO YO UR A NIM A S®IN S UL I N PU M P
An insulin pump is a tool to allow you to better manage your diabetes by mimicking the way a healthy
pancreas delivers insulin. When connected to a properly inserted infusion set, your pump delivers
insulin at a continuous level (basal rate), 24 hours a day. You program delivery of an immediate dose
(bolus) of insulin to cover food eaten or to correct high BG.
Your pump is engineered and manufactured to the highest standards of quality. Although it is a highly
sophisticated medical device, it has been carefully designed to be easy to use.
3
I
Get to Know Your Animas®Insulin Pump
Contrast button
Up button
Down button
Audio bolus/ezBolus
button
Display
Screen
OK button
Main Programming Buttons
There are 3 buttons for main programming functions. The and buttons allow you to move through
screen selections and to scroll up and down to enter values such as a bolus amount. The button
allows you to select an item or activate a function.
Animas
®
Insulin Pump
Programming Basics
Use the / buttons to scroll to the desired selection and then press the button to select.
•
If the cursor is flashing, it means your pump is in Edit Mode and by scrolling with the / buttons,
you can edit the flashing field.
Once you have finished editing, press the button to confirm your entry and to exit the Edit Mode.
•
Display Screen
All programming, operations, warnings and alarms are shown on the display screen.
11

Draft. 410-106-00 Rev. A
CHAPTER 3 - I N T R O D U C T I O N T O YOUR A N I M A S®INSULIN P U M P
Contrast Button
Pressing this button adjusts the contrast of your display. There are three contrast levels: Dim, Default
and Bright. To preserve battery life, your pump display will Auto-dim when a button is not pressed for
half the time your display time-out is set. While in Auto-dim mode, you can restore the default contrast
level you have set by pressing the button on top of your pump. Pressing a function button while in
I
Auto-dim mode will restore the default contrast level as well as perform the function of the key. To
adjust contrast during a Call Service alarm, you must use the button. See Chapter 10 in Section I,
pages 49–58.
NOTE: When viewing your pump display in bright sunlight, it is recommended you shade the screen or
move to a shady area for best visibility.
Insulin Pump
®
Animas
Audio Bolus/ezBolus
This button allows you to program a bolus without looking at your pump, by using audible tones to
confirm programming and delivery. If you choose not to activate the Audio Bolus feature, this button
provides a shortcut to the Normal Bolus screen.
NOTE: When you first use the Audio Bolus feature, you should always look at the screen to confirm
correct programming until you are comfortable with using audio feedback to program a bolus. See
Chapter 10 in Section I, pages 49–58.
Battery Cap/Vent
This cap unscrews easily with a coin or the battery cap tool to replace and secure your battery. There is
an o-ring around the cap, which prevents water from entering. The battery cap also is equipped with a
built-in vent to allow air to enter your pump to maintain pressurization but prevent water from entering.
Be careful not to over tighten the battery cap. See Chapter 4 in Section I, pages 15–26.
Primary Vent
This vent is part of the redundant vent safety
system, which allows air inside your pump
to maintain equalized pressure but prevents
water from getting inside.
Cartridge Cap
Primary Vent
Battery Cap/Vent
WARNING: Under no circumstances should you introduce any kind of sharp object into the
vent openings to clean them. Doing so will compromise your pump’s waterproof capabilities. If
at any time you suspect the vent openings are clogged, replace the battery cap or call Animas
Customer Service for questions about the Primary Vent.
12
®

VERIFY
Confirm
Mode
Month
Day
Year
ENGLISH
Battery = Lith
2:27PM
12 Hr
2007
Jan
7
2 : 27
PM
Status
Basal Rate
0.025U/Hr
Insulin: 105U
Menu
Draft. 410-106-00 Rev. A
HAPTER 3 - I N T R O D U C T I O N T O YOUR A N I M A S
C
®
NSULIN P U M P
I
Cartridge Compartment Cap
This cap secures your cartridge and infusion set in your pump.
WARNING: Never tighten the cartridge cap when your infusion set is attached to your body.
Tightening the cartridge cap while your infusion set is attached to your body may result in
unwanted insulin delivery, which can result in serious injury or death.
IR Window for Download
The IR window is framed in blue. This is the infrared communication
window used for downloading your pump data.
IR Window
Sounds
Your pump allows you to customize the volume level or use the vibrate function to notify you of
warnings and alarms and to confirm certain deliveries. With ezManager
tunes to play as your initial audible notification for some Alerts, Reminders, Warnings and Alarms.
Refer to your ezManager
®
User Guide included with the software.
®
Software, you can also add
I
Animas
®
Insulin Pump
Tamper Resistant (Locked) Feature
You can use the tamper resistant feature to prevent accidental button pressing. Simply wake up your
pump and press and hold the and buttons at the same time until the screen reads “(LOCKED)”.
This locks your pump buttons. To unlock your pump, wake up your pump so the screen reads “(LOCKED)”
and press and hold the and buttons at the same time until the screen display wakes up.
Basic Display Screens
Verify Screen
When you insert a battery, an all-black screen with an hourglass symbol
will appear followed by the VERIFY screen. From here you should verify the
settings for time, date, language and battery type. With “Confirm” highlighted,
press to confirm the settings and go to the Home screen.
NOTE: If you do not confirm the settings on the VERIFY screen, you will be notified with an alarm beep
sequence on your pump. If not confirmed after 1 hour, the sequence will progress to 3 chirps/vib and
then 4 long tones/vib within an hour.
Home Screen
Once you have your pump set up, the Home screen is the first screen that is
displayed when you “wake up” your pump. Press any button to wake up your
pump. The Home screen shows the time of day, a battery life indicator, if you
have an extended bolus or temp basal currently active, current basal rate, and
how much insulin remains in your cartridge. You access the Main Menu from
here or you can take a shortcut to the Status menu. The battery life indicator
is shaded to show approximate battery life remaining.
13

MAIN MENU
Home
Bolus
Suspend/Resum
History
Basal
Setup
Prime/Rewind
Status
2 : 27
PM
Status
Basal Rate
0.025U/Hr
Insulin: 105U
Menu
Draft. 410-106-00 Rev. A
CHAPTER 3 - I N T R O D U C T I O N T O YOUR A N I M A S®INSULIN P U M P
OTE: When the RF feature is activated on your pump, an RF ( ) symbol will
N
appear on the top left of your pump Home screen.
After a set amount of time with no button presses, your pump display screen
will “time out” to conserve battery life. When your pump times out, the screen
display is blank.
I
Main Menu Screen
This screen shows all Main Menu options.
Insulin Pump
®
Animas
Bolus
This selection takes you to the Normal Bolus screen. If you have activated
Advanced Bolus features, the Bolus Menu will be displayed. From the Bolus
Menu you can select the bolus type, program and deliver the bolus dose.
Suspend/Resume
The Suspend function stops all insulin deliveries and Resume restarts basal delivery.
History
This option allows you to review history of boluses, total daily dose (TDD), alarms, primes, suspend
and basal information.
Basal
The Basal Menu allows you to access and program your basal rate. This continuous rate maintains your
blood glucose between meals. This rate will be determined by your health care team. The default Basal
Menu will display one basal program and the Temp Basal option. You can activate additional basal
program options with the Setup Advanced menu.
Setup
This menu allows you to personalize the settings and features of your pump, as well as add advanced
features to the menu. Your health care team will advise you on which features are best suited for your
plan of treatment, as well as train you to achieve the best results.
Prime/Rewind
This function enables you to properly align the cartridge and piston rod as well as prime your infusion
set tubing and fill your cannula or needle before connecting to your pump.
14

Draft. 410-106-00 Rev. A
CH A PT ER 4 - GE T TI N G YOU R PU M P RE A DY
Status
This feature allows you to quickly see your current/most recent settings and pump deliveries.
WARNING: Before proceeding with this chapter, you should have completed your pump
training and/or watched your training video.
4
I
To complete this section, you will need the following items:
Animas®Insulin Pump
•
Energizer Lithium L91 AA battery (1.5V)
•
Battery cap tool or coin
•
Infusion set with standard Luer connector
•
Animas®IR 1200/2000 series (200/2ml unit) cartridge
•
Alcohol wipe (to clean top of insulin vial)
•
Vial of U100 insulin (rapid-acting) at room temperature
•
Skin prep such as IV Prep™(to clean and prepare site for infusion set insertion)
•
CAUTION: Under no circumstances should you use an alcohol wipe or skin prep to clean your
pump. See Chapter 12 in Section I, pages 73–74.
Battery Type
Your pump is designed to achieve optimum performance and battery longevity with an Energizer
Lithium L91 AA battery (1.5V).
Animas
®
Insulin Pump
CAUTION: It is possible to safely power your pump with a conventional AA Alkaline battery
(1.5V), but battery life is significantly reduced. Be sure you select the correct Battery Type on the
VERIFY screen when you change the battery to ensure accuracy of battery life indicator.
If you must use an AA Alkaline battery, the following is recommended:
Energizer E91 (labeled as Energizer MAX)
•
WARNING:
Rechargeable batteries and Carbon-Zinc batteries do not have the necessary characteristics
•
to power your pump and must not be used. Use of these batteries voids your pump warranty.
Under no circumstances should you attempt to power your pump with a high-energy 3.6V AA
•
Lithium battery. Use of these batteries could permanently damage your pump and voids its
warranty.
15

Draft. 410-106-00 Rev. A
CHAPTER 4 - G E T T I N G Y O U R P U M P R E A D Y
NOTE: Your pump uses battery power to notify you of alerts, warnings, and alarms. If you do not confirm
the notification, your pump will continue to use battery power as the notifications repeat and progress.
This will result in reduced battery life and the Replace Battery Alarm screen appearing sooner than
expected.
Additionally, certain warnings (e.g., Low Cartridge Warning, Occlusion Alarm) take precedence over
less critical ones (e.g., Low Battery Warning). This means if you do not confirm the more critical warning,
I
battery life will be reduced and your pump may skip the Low Battery Warning and go directly to the
Replace Battery Alarm, or battery life will end before a Replace Battery Alarm is displayed.
Changing the Battery
Each time you change the battery
A full rewind and prime sequence is required. See Priming your Pump and Infusion Set, pages 22–24
•
Insulin Pump
®
Animas
in this chapter.
The Insulin on Board (IOB) calculation starts over at zero.
•
The Combo bolus returns to the factory set default duration and split.
•
You should review your basal program settings.
•
WARNING: Low Battery Warning means battery life will only last a minimum of 30 minutes.
1. Use a coin or the battery cap tool to unscrew the battery cap with a counter-clockwise motion.
2. Check your battery cap for damage such as cracks or missing threads, and be sure the colored
o-ring fits securely and is not torn or damaged.
3. Check the vent hole on the top of the battery cap to
be sure it is clear of debris. This vent maintains
pressurization while preventing water from entering the
compartment.
NOTE: The battery cap should be replaced once
each year or sooner if the o-ring or cap is
damaged or the vent is clogged. See Chapter 12
in Section I, pages 73–74.
4. Insert the Energizer Lithium L91 AA (1.5V)
battery into the battery compartment with the
positive (+) end going in first.
Battery Cap Vent HoleO-ring
Energizer Lithium L91 AA battery
5. Replace the cap by turning clockwise until you cannot see
the o-ring but Do Not over tighten.
NOTE: Over tightening the battery cap can cause your pump case to crack. Cracks, chips, or damage to
your pump may impact the battery contact and/or the waterproof feature of your pump.
6. Each time you change the battery, your pump will run a series of self-tests which will last a few
seconds. An all black screen with an hourglass symbol will appear followed by the VERIFY screen. Your
pump will give a beep to alert you to verify (or change) the time/date, language and battery type.
16

Alert
Confirm
Basal Menu
Your active
basal
program
is empty.
0.000U/Hr
2 : 27
PM
Status
Basal Rate
0.025U/Hr
Insulin: 105U
Menu
MAIN MENU
Home
Bolus
Suspend/Resum
History
Basal
Setup
Prime/Rewind
Status
SETUP
Main Menu
Time/Date
Sound
Advanced
SETUP
Time/Date
Main Menu
Mode
Month
Day
Year
2: 27PM
Hour: Minute
12 Hr
Jan
7
2007
2 : 27
PM
Status
B
asal Rate
0.025U/Hr
Insulin: 105U
Menu
HAPTER 4 - G E T T I N G Y O U R P U M P R E A D Y
C
7. Check the displayed time/date, battery type and language. If correct, scroll
down to highlight “Confirm” and press the button. The Home screen will be
displayed. For more details on changing the time and date, see Setup - Basics,
Setting/Changing Time and Date, pages 17–18 in this chapter.
NOTE: The time and date must be programmed to confirm the VERIFY screen.
Draft. 410-106-00 Rev. A
8. To change the battery type, highlight the “Battery” field and press to
activate Edit mode (indicated by flashing cursor).
9. Use the / buttons to change battery type and press to confirm and exit Edit Mode.
NOTE: The correct battery type must be selected in order for your battery life indicator to be accurate.
“Lith” = Lithium, “Alkl” = Alkaline.
10. Scroll to “Confirm” and press . The Home screen is displayed.
NOTE: Until you have programmed a basal rate, the Alert screen shown here
will appear when your pump is awakened. Simply scroll to “Confirm” and
press to move past this Alert screen.
Setup – Basics
You can use your computer, with ezManager®, to upload Time/Date and Sound settings. For
instructions on uploading Time/Date Sound settings, refer to your ezManager
Setting/Changing the Time and Date
®
User Guide.
I
Animas
®
Insulin Pump
When you change your battery, the VERIFY screen allows you to edit the time and date.
You can also access the Time/Date SETUP screen by selecting “Setup” from the MAIN MENU.
1. From the Home screen,
press to select “Menu”.
Scroll to “Setup” on the
MAIN MENU. Press .
2. Scroll to Time/Date on
the SETUP menu. Press .
3. Press the button to activate Edit Mode (indicated by flashing cursor).
4. Use the / buttons to change to your desired settings. Press the
button to confirm your setting and exit Edit mode.
17

Draft. 410-106-00 Rev. A
CHAPTER 4 - G E T T I N G Y O U R P U M P R E A D Y
5. Use the / buttons to select the next field. Repeat the above process. Scroll to highlight
“Main Menu” and press button when finished. The MAIN MENU screen will be displayed.
NOTE:
• If you select the 12-hour time format, the AM/PM indicators will change as you scroll to set the time.
Be sure the desired AM or PM selection is correctly displayed when setting the time.
I
• If you select the 24-hour time format, the time will be shown in military time.
Daylight Saving Time (certain states and countries only)
“Spring Forward”
Insulin Pump
®
If you advance the hour on your pump clock after 11pm but before midnight, you must also manually
forward the date by one day. If you change your pump clock after midnight, your pump date will have
changed automatically to the appropriate date.
Animas
“Fall Back”
It is recommended that you set your clock back before midnight on Saturday or after 1am on Sunday.
This keeps your pump set to the correct date. Your pump will register an additional hour in the Daily
Totals History because the day has essentially been altered to consist of 25 hours. If you change the
clock between midnight and 1am, you must also change the date. This will result in a duplicate date
entry in your history. (This duplicate entry will contain up to one hour’s worth of insulin delivered.)
Sounds - Setting/Changing
Note that this menu only adjusts sounds. It does not activate the feature. For example, Audio Bolus
Sound is adjusted in this menu, but to turn the Audio Bolus feature on, go to the Setup Advanced
menu. See Chapter 10 in Section I, pages 49–58.
Your pump comes pre-loaded with a tune for most Alerts, Reminders and Alarms on medium and high
volume settings. This tune plays only for the initial audible notification. If you do not confirm the initial
notification, the next sound will be the factory default. If not confirmed, Warnings and Alarms will
automatically progress to high volume and vibrate within one hour. With ezManager
can change or add tunes to play as your initial notification for some Alerts, Reminders, Warnings and
Alarms. Refer to your ezManager
The options from the first SETUP SOUND menu are listed below. The first three can be set to one of the
following: Vibrate (Vib), Low volume (L) , Medium volume (M) , High volume (H) or can be shut off (OFF)
completely. For safety reasons, some sounds cannot be turned off.
Normal Bolus Sound
Audio Bolus Sound (OFF is not an option for this sound setting)
Temp Basal Sound
Remote Bolus Sound (Vibrate and OFF are the only options for this sound)
®
User Guide included with the software.
®
Software, you
18

SETUP
Main Menu
Time/Date
Sound
Advanced
SETUP SOUND
Next Menu
Main Menu
N-Bolus
A-Bolus
R-Bolus
T-Basal
H
L
Vib
OFF
SETUP SOUND
Main Menu
Alert
Reminder
Warning
Alarm
L
Vib
M
H
MAIN MENU
Home
Bolus
Suspend/Resum
History
Basal
Setup
Prime/Rewind
Status
Draft. 410-106-00 Rev. A
HAPTER 4 - G E T T I N G Y O U R P U M P R E A D Y
C
The Remote Bolus Sound on your pump signals you when you use your meter remote to deliver a bolus
from your pump. This setting applies only when you begin using your meter remote and pump together
as a system (see Section III). Vibrate (Vib) is the default setting and OFF is the only other option for this
sound setting.
The options from the second Setup Sound Menu are listed below. They can be set to one of the
following: Vibrate (Vib), Low volume (L), Medium volume (M) or High volume (H). For safety reasons,
some sounds cannot be turned off.
I
Alert Sound
Reminder Sound
Warning Sound (OFF is not an option for this sound setting)
Alarm Sound (OFF is not an option for this sound setting)
®
NOTE: If you download tunes from ezManager
Software to play on your initial audible notification,
they will not play for any sound set at the Low volume (L) level.
CAUTION: Unless otherwise recommended by your health care professional, vibrate mode
should not be used during sleep. If you are a very sound sleeper, set the alarm volume to high
before going to bed.
1. From the MAIN MENU, scroll to “Setup”. Press the button.
2. Scroll to “Sound”. Press the button to go to the SETUP SOUND screen.
3. Use the / buttons to scroll to your selection. Press the button.
4. The cursor will flash to indicate you can edit the selection. Use / buttons to change to desired
setting. Press the button to confirm.
Animas
®
Insulin Pump
5. Repeat for remaining selections.
6. Scroll to “Next Menu” to access second SETUP SOUND menu or scroll to “Main Menu” when
finished to return to the MAIN MENU.
19

Draft. 410-106-00 Rev. A
CHAPTER 4 - G E T T I N G Y O U R P U M P R E A D Y
The Cartridge
Filling the Cartridge
Refer to the Instructions for Use included with your cartridges.
I
Connecting the Tubing to the Cartridge
To complete this section, you will need the following:
Filled Animas®IR 1200/2000 series cartridge
•
Infusion set compatible with your Animas®Insulin Pump
•
Skin prep such as IV Prep
•
™
Insulin Pump
®
WARNING: The efficacy of your pump cannot be guaranteed if cartridges other than those
®
manufactured by Animas
Corporation are used.
Animas
Only infusion sets marketed for use with insulin infusion pumps using insulin-compatible
tubing and with a standard Luer lock can be used with your Animas
of your pump cannot be guaranteed if infusion sets other than those specified are used.
Do Not connect infusion set to your body until after you have completed the Prime process.
1. Clean the workspace where you will be connecting the infusion set to the cartridge. Wash your
hands thoroughly with soap and water.
®
Insulin Pump. The efficacy
2. Open sterile infusion set package carefully. If the package is damaged or opened, use another set
and contact your supplier.
3. Unscrew the cartridge compartment
cap from your pump, using a counterclockwise motion.
Luer connector of infusion set
4. Remove infusion set tubing cap from
the Luer connector. (Not all infusion sets
have these caps.)
Top of cartridge compartment cap
5. After removing protective cap, thread the Luer
connector of the infusion set through the top
(smaller) opening of the cartridge compartment
cap, being careful not to touch Luer tip with hands
or work surface.
Correctly threaded through cap
20

Draft. 410-106-00 Rev. A
HAPTER 4 - G E T T I N G Y O U R P U M P R E A D Y
C
emove cap from the filled cartridge tip. To avoid
6. R
insulin spillage and introduction of air in the
cartridge, it should never be filled beyond the 2.0
mL mark. The plunger is properly positioned for
maximum fill when the black o-ring nearest the
plunger tip is centered on the 2.0 mL mark. Attach
infusion set Luer connector to cartridge tip using
clockwise motion until finger tight and then twist
another quarter of a turn.
Connect infusion set to
cartridge here
WARNING: Be sure to twist the Luer connector an extra quarter of a turn to ensure a secure
connection. If the connection is not secure, insulin may leak around the cartridge, resulting in
under delivery of insulin.
7. Put cartridge/tubing assembly aside.
I
Animas
®
Insulin Pump
NOTE:
• Check for leaks, cracks or damage each time you change your cartridge and infusion set. To avoid
leakage, be sure to tighten the Luer connection securely. You can check for moisture periodically by
wrapping a tissue around the Luer connection between the cartridge and infusion set.
• When handling the cartridge, take care not to twist or turn the plunger in the cartridge body.
Maintaining straight alignment of the plunger keeps the o-rings properly seated, which minimizes
the possibility of introducing air into the cartridge and will prevent insulin spillage.
Changing the Cartridge
1. Disconnect infusion set from your body.
2. Unscrew the cartridge cap, leaving tubing connected to the cartridge.
3. With the tubing connected to the cartridge, pull cartridge straight out of your pump.
4. Disconnect tubing from cartridge and discard. Proceed with filling the new cartridge as outlined
above.
21

MAIN MENU
Home
Bolus
Suspend/Resum
History
Basal
Setup
Prime/Rewind
Status
ezPrime
Main Menu
Rewind
Load Cart
Prime
Fill Cannula
o
o
o
o
REWIND MOTOR
Cancel
Disconnect
infusion set
from your body!
Go Rewind
REWIND MOTOR
Cancel
Disconnect
infusion set
from your body!
Go Rewind
REWIND
ACTIVE
Position:
160U
Stop
<<------<<------<<------
REWIND
ACTIVE
Please wait.
Full rewind
required.
<<------<<------<<------
Draft. 410-106-00 Rev. A
CHAPTER 4 - G E T T I N G Y O U R P U M P R E A D Y
Priming your Pump and Infusion Set
NOTE: As each step is completed, the check box on the ezPrime menu will be shaded.
WARNING: Never prime the tubing or tighten the cartridge cap while infusion set is
I
connected to your body. Priming the tubing or tightening the cartridge cap while the infusion
set is connected to your body can result in serious injury or death.
1. Make sure you are disconnected from your pump.
Insulin Pump
®
2. From the MAIN MENU, select “Prime/Rewind”.
Animas
3. On the ezPrime menu, “Rewind” is highlighted.
Press . The REWIND MOTOR screen is displayed.
4. Scroll up to “Go Rewind”. Press . Your pump
will rewind the piston rod.
NOTE: Before starting the rewind, your pump will
vibrate as it performs a self test.
5. When the rewind action is complete, the REWIND COMPLETE screen is displayed. Your pump will
beep once to let you know the rewind is complete.
NOTE: If using a partially filled cartridge, you can select Stop during the Rewind
Active function to stop the rewind at the position desired. After every third
rewind, your pump is required to do a Full Rewind and will not offer the option
of selecting the “Stop” position. A Full Rewind is always required when a
battery is inserted.
22

ezPrime
Main Menu
Rewind
Load Cart
Prime
Fill Cannula
nn
o
o
o
REWIND
COMPLETE
Cancel
Load U100
cartridge.
Attach cap
Select Continue.
Continue
PRIME
Cancel
Be sure set is
disconnected
from your body.
Then select
Continue.
Continue
Insulin: 200U
LOAD
CARTRIDGE
ACTIVE
>>------>>------>>------
Please wait.
DELIVER
PRIME
Cancel
Press AND HOLD
OK button
while priming
tubing.
Go Prime
Insulin: 200U
Draft. 410-106-00 Rev. A
HAPTER 4 - G E T T I N G Y O U R P U M P R E A D Y
C
nsert your filled cartridge.
6. I
7. Secure cartridge compartment cap to pump by turning in a clockwise motion until finger tight but
Do Not over tighten.
WARNING: Never tighten the cartridge cap while the infusion set is connected to your body.
Tightening the cartridge cap while the infusion set is connected to your body can result in
serious injury or death.
NOTE: If screen display has timed out while loading your cartridge, select
Prime/Rewind from the MAIN MENU and highlight “Load Cart” from the ezPrime
menu. Press to display the REWIND COMPLETE screen. Continue with Step 8.
I
Animas
®
Insulin Pump
8. On the REWIND COMPLETE screen, “Continue” is
highlighted. Press . Your pump will align the piston
rod with the cartridge. The LOAD CARTRIDGE ACTIVE
screen is displayed, followed by the PRIME screen.
Your pump will beep once to let you know the
cartridge is aligned with the piston rod.
9. On the PRIME screen, “Continue” is highlighted. Press .
10. The DELIVER PRIME screen is displayed. Be sure the infusion set is not
connected to your body until the prime is complete.
WARNING: Never prime while the infusion set is connected to your body. Priming while the
infusion set is connected to your body can result in serious injury or death.
23

ezPrime
Main Menu
Rewind
Load Cart
Prime
Fill Cannula
nn
nn
nn
o
PRIMING
ACTIVE
Press AND HOLD
OK button
while priming
tubing.
>>------>>------>>------
Insulin: 177U
PRIMING
DONE
23U
177U
Primed
Remaining
FILL CANNULA
Main Menu
Amount
Go
0.00
U
ezPRIME
Home
Pump
suspended.
Priming
is
disabled.
Rewind
Draft. 410-106-00 Rev. A
CHAPTER 4 - G E T T I N G Y O U R P U M P R E A D Y
11. M
ake sure “Go Prime” is highlighted. Press
and hold the button until you see 5 drops of
insulin come out the end of your infusion set. This
means your tubing is primed. The PRIMING ACTIVE
screen is displayed, followed by the PRIMING DONE
screen.
I
Refer to the Instructions for Use included with your infusion set for proper insertion guidelines. See
Selecting the Infusion Site and Inserting the Infusion Set, page 25 in this chapter.
Insulin Pump
®
Animas
12. From the ezPrime menu, “Fill Cannula” is
highlighted. Press the button. The FILL CANNULA
screen is displayed.
NOTE: This step is not necessary for needle sets.
13. Use the / buttons to enter the amount of insulin needed to fill the cannula. Refer to the
Instructions for Use included with your infusion set for details on how much insulin is required to fill
the cannula.
NOTE: The maximum Fill Cannula amount is 1U at a time.
If your pump is suspended, the screen will alert you with the ezPrime “Pump
suspended” screen. You must resume delivery of your pump in order to
complete the Priming function.
NOTE: The Fill Cannula step is not required for your pump to operate. For example, when you prime
your pump after a battery change and you are not inserting a new infusion set, this step is not
necessary. Filling the cannula when not necessary can result in unwanted delivery of insulin.
24

Draft. 410-106-00 Rev. A
HAPTER 4 - G E T T I N G Y O U R P U M P R E A D Y
C
Selecting the Infusion Site and Inserting the Infusion Set
Your health care team will review appropriate site selections and techniques for insertion based on
your body type. Refer to the Instructions For Use included with your infusion set for proper insertion
guidelines.
WARNING: Do Not attempt to insert the infusion set into your body until you have been
trained by your health care team. Improper insertion of your infusion set can lead to death or
serious injury.
Changing the Cartridge and Infusion Set
Cartridges and infusion sets require replacement and are not to be reused. Infusion sets should be
replaced approximately every 2–3 days or as directed by your health care team. Refer to the insulin
labeling and follow the direction of your health care team for frequency of replacing the cartridge.
CAUTION: Occasionally check the infusion set tubing for any damage, air bubbles, leaks or
kinking, which may restrict or stop insulin delivery and result in under infusion.
I
Animas
®
Insulin Pump
25

Draft. 410-106-00 Rev. A
CHAPTER 4 - G E T T I N G Y O U R P U M P R E A D Y
I
Insulin Pump
®
Animas
26
MAIN MENU
Home
Bolus
Suspend/Resum
History
Basal
Setup
Prime/Rewind
Status
NORMAL BOLUS
Main Menu
Amount
Go
0.00
U
NORMAL BOLUS
Main Menu
Amount
Go
2.35
U
NORMAL BOLUS
Main Menu
Amount
Go
2.35
U
DELIVERING
2.00
U
Press any
function button
to Cancel
Warning
Confirm
Bolus
delivery
canceled by
user button
press.
Delivered:
2.00U of 2.35U
Draft. 410-106-00 Rev. A
CH A PT ER 5 - US I NG THE NOR M AL BO LU S F E ATUR E
This chapter covers the basics of a Normal bolus, which is used to cover food you have eaten and
high BG.
Your pump also offers advanced bolus features. See Chapter 10 in Section I, pages 49–58.
5
1. From the MAIN MENU, select “Bolus”.
2. The cursor will flash over the amount field to
indicate that it can be edited. Use the /
buttons to enter desired bolus amount. Press .
3. Go is highlighted. Press to deliver the bolus.
I
Animas
®
Insulin Pump
4. The DELIVERING bolus screen is displayed. If you have activated the Normal
Bolus sound in the SETUP SOUND menu, your pump will beep to confirm start
of delivery, as well as when delivery is complete.
NOTE: During a bolus delivery, you can stop delivery at any time by pressing
any button on the front panel of your pump. The Warning screen shown here
will be displayed. Confirm the Warning by pressing and check your Bolus
History for the amount delivered.
NOTE: You can check when you last gave a bolus by looking in History or Status. These features are
covered later. See Chapter 8, pages 39–44, and Chapter 9, pages 45–48, in Section I.
27

BOLUS MENU
Main Menu
Normal
ezCarb
ezBG
Combo Bolus
Reminders
Draft. 410-106-00 Rev. A
CHAPTER 5 - U S I N G T H E N O R M A L B O L U S F E ATURE
NOTE: If you have Advanced Bolus and Reminders features turned on, the
BOLUS MENU at right will be displayed when you select “Bolus” from the
MAIN MENU. Select Normal and press . Follow steps 2 through 4 in this
chapter.
I
Insulin Pump
®
Animas
28

MAIN MENU
Home
Bolus
Suspend/Resum
History
Basal
Setup
Prime/Rewind
Status
BASAL MENU
Main Menu
Total 0.00U
Temp
A1-WEEKDAY
BASAL MENU
Main Menu
Total 0.00U
Temp
A1-WEEKDAY
2-other
3-weekend
4-exercise
Draft. 410-106-00 Rev. A
CH A PT ER 6 - US I NG B ASAL PRO G RA M FEAT URE S
You can program your pump to display either 1 or 4 basal program options. Basal insulin is delivered
continuously to help keep your BG in target between meals. Having more than one pre-set basal
program makes it easy for you to switch based on your needs including weekends, weekdays,
shiftwork, and menstruation. If you are new to pumping, your health care team may suggest you first
become comfortable with one program before using multiple basal programs. The factory default
displays one basal program and the temporary basal program. To display multiple basal options, see
Chapter 10 in Section I, pages 49–58.
®
You can use your computer and ezManager
rates. For instructions on uploading basal program information, refer to the ezManager
included with the software.
Software to upload basal program names as well as basal
®
User Guide
Setting a Basal Program
Each basal program can be set with up to 12 different basal rates (doses) in a 24-hour period. These
12 start times can be set to accommodate your changing basal needs throughout the day. For
example, your body may need more insulin in the early morning to compensate for the “dawn
phenomenon.” You can program time segments to begin at any hour or half hour.
6
I
Animas
®
Insulin Pump
NOTE: The / buttons will move the cursor through fields when not in Edit mode. When in Edit
mode, the / buttons will change the value of the field. If the cursor is flashing, that means you
can edit the entry. Use the button to start/stop Edit mode.
Use the My Information chart in Chapter 17 in Section I, pages 95–98 to record and enter your basal
program times and doses as recommended by your health care team.
1. From the MAIN MENU, select “Basal”.
The BASAL MENU displays the following:
Total basal insulin programmed for the 24-hour
•
period
Temp (if you wish to program a Temporary Basal rate)
•
The active basal program, designated by number
•
and by name, as well as an “A” to indicate the
active program. (If you have activated multiple basal
programs in the Setup Advanced menu, all 4 basal
program options will be displayed as shown below,
right.)
29

BASAL OPTIONS
Main Menu
A1-WEEKDAY
Total 0.00U
Clear
Edit
Review
Go
EDIT BASAL
Save/Review
Total 0.60U
12:00A
--:--
Start
U/Hr
0.025
--.---
E
EDIT BASAL
Save/Review
Total 13.60U
12:00A
4:00A
--:--
Start
U/Hr
0.025
0.675
--.---
E
EDIT BASAL
Save/Review
Total 0.60U
12:00A
4:00A
Start
U/Hr
E
0.025
--.---
EDIT BASAL
Save/Review
Total 0.00U
12:00A
--:--
Start
U/Hr
E
0.000
--.---
BASAL MENU
Main Menu
Total 0.00U
Temp
A1-WEEKDAY
Draft. 410-106-00 Rev. A
CHAPTER 6 - U S I N G B A S A L P R O G R A M F E ATURES
2. Scroll to select the program “1-WEEKDAY” and press .
NOTE: You do not have to Suspend your pump to edit an active program.
When you select “Edit” from the BASAL MENU, your pump automatically
suspends delivery. When you exit the Edit mode, the active program
I
delivery automatically resumes.
3. The BASAL OPTIONS screen is displayed. “Edit” is highlighted. Press
the button. From the EDIT BASAL screen, you can edit the basal segments
of the selected program.
Insulin Pump
®
Animas
activate Edit mode (indicated by flashing cursor).
5. Use / buttons to set desired basal rate. Press to confirm
4. Scroll to the desired “U/Hr” field. Press to
and exit Edit mode for this field.
6. Scroll down to select the next “Start” time field. Press the button
to activate Edit mode (indicated by flashing cursor).
NOTE: The next available empty basal segment will appear automatically as
you program the previous segment. If the next empty basal segment does not
appear, you have programmed all 12 possible segments.
7. Change next “Start” time field as desired, press the button to exit Edit
mode. Segments can start on the hour or half hour.
NOTE: The 24-hour Total changes automatically as you change U/Hr settings.
30
BASAL OPTIONS
Main Menu
A1-WEEKDAY
Total 13.60U
Clear
Edit
Review
Go
BASAL OPTIONS
Main Menu
A1-WEEKDAY
Total 13.60U
Clear
Edit
Review
Go
Warning
Edit Basal
Basal edit
not saved.
Basal
delivery
suspended.
Draft. 410-106-00 Rev. A
HAPTER 6 - U S I N G B A S A L P R O G R A M F E ATURES
C
ontinue until basal segments have been set as recommended by your health care team.
8. C
9. When finished, scroll to “Save/Review” and press . If you have edited the active program, it is
now resumed automatically. The BASAL OPTIONS screen is displayed.
I
NOTE: If your screen display has timed out (gone to sleep) before you have
selected Save/Review while editing, a Warning screen will remind you the
basal edit has not been saved. See Chapter 13 in Section I, pages 75–84.
10. “Review” is highlighted. Press to review your entries for accuracy.
Your basal segment settings are shown (5 on first screen, 5 on second screen
and 2 on last screen). If you have more than 5 segments programmed, scroll
to “Next” to see second and third screens as desired.
11. “Options” is highlighted. Press . The BASAL OPTIONS screen is displayed.
a. If you’ve edited and saved/reviewed the active program, it is resumed
automatically. You can also select “Go” and the Home screen is displayed,
which shows the current rate of delivery for the program that is active.
b. If you’ve edited an inactive program and wish to activate it, select “Go”
from the BASAL OPTIONS screen. When you select “Go”, the Home screen is
displayed, which shows the current rate of delivery for the program that is
active.
Animas
®
Insulin Pump
Adding/Changing Segments in an Existing Basal Program
1. From the BASAL MENU, select desired program.
2. “Edit” is highlighted. Press .
3. Scroll up to highlight the field you wish to change or to next available blank line to add a segment.
Press to activate Edit mode. (The cursor will flash to indicate Edit mode.)
4. Use / buttons to set Start times and U/Hr amounts.
5. Check that the AM/PM settings are correct.
31

BASAL OPTIONS
Main Menu
A1-WEEKDAY
Total 13.60U
Clear
Edit
Review
Go
A1-WEEKDAY
Options
Total 13.60U
12:00A
4:00A
--:--
Start
U/Hr
Next
0.025
0.675
--.---
Draft. 410-106-00 Rev. A
CHAPTER 6 - U S I N G B A S A L P R O G R A M F E ATURES
NOTE:
• If you program a segment to start at the same time as an existing segment, the previously entered
segment is deleted.
• If you program a segment to start at a time that precedes an existing segment, the new segment is
automatically inserted in the correct place. You must then scroll to the new segment, highlight the
I
corresponding U/Hr field and enter or change amount, if desired.
6. When finished, scroll to “Save/Review” and press . If you have edited the active program, it is
now resumed automatically. The BASAL OPTIONS screen is displayed.
a. Select “Review” from the BASAL OPTIONS screen to review your entries for accuracy. Your basal
segment settings are shown (5 on first screen, 5 on second screen and 2 on last screen). If you have
Insulin Pump
®
more than 5 segments programmed, scroll to “Next” to see second and third screens as desired.
b. If you’ve edited an inactive program, select the program from the BASAL MENU. Press . Select
“Go” from the BASAL OPTIONS screen to activate the program you’ve selected.
Animas
When you select “Go”, the Home screen is displayed, which shows the current rate of delivery for the
program that is active. (Or you can simply wait for your pump display to time out. When you press any
button, your active basal program rate information is displayed on the Home screen.)
CAUTION: Always review changes to your basal program to be sure they are correct. Incorrect
basal rates can result in under or over delivery of insulin. See Reviewing Basal Programs, page
32 in this chapter.
Reviewing Basal Programs
1. From the BASAL MENU, scroll to highlight desired
program. Press .
2. Scroll to “Review” from the BASAL OPTIONS
screen. Press . Your basal segment settings are
shown (5 on first screen, 5 on second screen and 2
on last screen). If you have more than 5 segments
programmed, scroll to “Next” to see second and third
screens as desired.
3. When finished, “Options” is highlighted. Press .
4. Scroll to “Main Menu” and press . The MAIN MENU screen is displayed. The active basal program
continues.
5. If reviewing an inactive program and you wish to activate it, select the program you wish to activate
from the BASAL MENU screen. Press .
6. Select “Go” from the BASAL OPTIONS screen to activate the program. The Home screen is displayed
to show the current rate per hour of the program you have activated.
32
Alert
Clear Program
Basal Options
Clear Program
deletes all
basal segments
in this program.
BASAL OPTIONS
Main Menu
A1-WEEKDAY
Total 13.60U
Clear
Edit
Review
Go
Alert
Confirm
Basal Menu
Your active
basal
program
is empty
0.000U/Hr
BASAL MENU
Main Menu
Total 0.00U
Temp
A1-WEEKDAY
BASAL MENU
Main Menu
Total 0.00U
Temp
A1-WEEKDAY
2-other
3-weekend
4-exercise
HAPTER 6 - U S I N G B A S A L P R O G R A M F E ATURES
C
Clearing Basal Programs
This feature allows you to clear all information from a basal program.
1. From the BASAL MENU, scroll to desired program.
2. From the BASAL OPTIONS screen, scroll to “Clear”. Press .
If you press to select “Clear”, your pump will check to be sure you want to
clear all the segments of the basal program selected. The Alert screen shown
here is displayed. If you do wish to clear all the basal segments of the selected
program, scroll to “Clear Program” and press .
If you do not wish to clear all the basal segments, scroll to “Basal Options” and
press . The BASAL OPTIONS screen will be displayed.
Draft. 410-106-00 Rev. A
I
Animas
®
Insulin Pump
If all segments of your active basal program are set to 0.000U/Hr your pump
will not deliver any basal insulin. Each time you wake up your pump, the Alert
screen shown here is displayed. If you have turned on the sound for Alerts, you
will also be notified by a beep or vibrate. This Alert screen does not progress
to higher audible alarms. You have the option to either select “Confirm” to
quickly go to the MAIN MENU screen or select “Basal Menu” to reset rates in
your active program. For more information see Chapter 13 in Section I, pages
75–84.
Temporary Basal Feature
This feature allows you to increase your active basal delivery rate for events such as sick days or
decrease for events such as exercise. You can decrease your basal rate by 90% (in 10% decrements) or
increase your basal rate by 200% (in 10% increments). You can also set to OFF. You can set the
duration up to 24 hours in half-hour increments. (If you have activated multiple basal programs in the
Setup Advanced menu, all 4 basal program options will be displayed as shown on screen example
below, right.)
CAUTION: The lowest basal delivery amount possible is 0.025U/Hr. The highest basal
delivery amount possible is 25U/Hr or the Max Basal amount you set in the Setup Advanced
menu in chapter 11.
1. From the BASAL MENU, scroll to “Temp”.
Press .
33

A1-WEEKDAY
Main Menu
TEMP BASAL
Go
-40%
4.0Hr
Change:
Duration:
A1-WEEKDAY
Main Menu
TEMP BASAL
Go
-40%
2.0Hr
Change:
Duration:
2 : 27
PM
Status
TEMP BASAL
-40% 4.0 Hr
Time Left 1.2 Hr
Insulin: 105U
Menu
A1-WEEKDAY
Main Menu
TEMP BASAL
Go
0%
4.0Hr
Change:
Duration:
Alert
Temp Active
Minimum
Basal rate
limited to
0.025U/Hr
Draft. 410-106-00 Rev. A
CHAPTER 6 - U S I N G B A S A L P R O G R A M F E ATURES
he “Change” % field will flash to indicate Edit
2. T
mode. Use the / buttons to enter the
percentage change desired. Press the button to
exit Edit mode.
I
3. The “Duration” field is highlighted. Press to activate Edit mode.
Insulin Pump
®
Animas
4. Use the / buttons to enter the duration desired. Press to exit Edit mode.
5. “Go” is highlighted. Press to activate Temp Basal.
CAUTION: The lowest basal delivery amount possible is 0.025U/Hr.
When you set a negative temporary basal rate, your pump will beep
and display an Alert screen to remind you of the minimum delivery
limit. This screen will display once for 5 seconds and give one audible
alert (if you turned on Alert sounds in Setup).
6. The Home screen is displayed and shows your Temp Basal is active, the
percentage change, the duration and how much time is left. When the duration
of time is complete, your pump will automatically resume the active basal
program.
NOTE: If you turned on the Temp Basal sound in Setup, your pump will beep
once every 30 minutes to remind you of Temp Basal status.
34

A1-WEEKDAY
Main Menu
TEMP ACTIVE
CANCEL
0.675 U/Hr
-40%
= 0.405 U/Hr
Time left
1.2 Hr
Alert
Pump Suspended
If active,
Temp Basal &
Combo Bolus
have been
canceled.
HAPTER 6 - U S I N G B A S A L P R O G R A M F E ATURES
C
Canceling a Temporary Basal Program
1. From the BASAL MENU, select “TEMP BASAL”. Press .
2. Details of the current active Temp Basal program will be displayed. Scroll up
to “CANCEL” and press .
Draft. 410-106-00 Rev. A
Your previously active basal program will be activated and the Home screen
will be displayed to show the current rate per hour of the active basal program.
NOTE: If you Suspend your pump while a Temp Basal program is active, the
Temp Basal program will be canceled and an Alert screen will notify you that
the Temp Basal program has been canceled. This Alert is displayed once and
gives an audible tone once (if you turned on Alert sounds in Setup). Temp
Basal is also canceled when you change the battery and/or prime.
CAUTION: When you switch to another basal program or set a Temp Basal, you will most
likely be changing the total insulin units delivered over a period of time. Be sure to review the
total insulin units before you switch basal programs or set a Temp Basal. Units that are too high
or too low may result in a hypoglycemic or hyperglycemic event.
I
Animas
®
Insulin Pump
35

Draft. 410-106-00 Rev. A
CHAPTER 6 - U S I N G B A S A L P R O G R A M F E ATURES
I
Insulin Pump
®
Animas
36

2 : 27
PM
Status
SUSPENDED
Basal Rate
0.675U/Hr
Insulin: 105U
Menu
MAIN MENU
Home
Bolus
Suspend/Resum
History
Basal
Setup
Prime/Rewind
Status
Pump
Delivery
Suspend
Main Menu
Alert
Pump Suspended
If active,
Temp Basal &
Combo Bolus
have been
canceled.
Warning
Confirm
No delivery.
Pump is
suspended.
Draft. 410-106-00 Rev. A
CH A PT ER 7 - S U SP E ND / RES UM E FE AT UR E
This feature allows you to stop and restart delivery quickly and easily.
It also cancels delivery of any Temp Basal or Bolus, including Combo Bolus that may be currently
active. The Combo Bolus feature is covered in Chapter 10 in Section I, pages 49–58.
7
Suspending Delivery
1. From the MAIN MENU, scroll to “Suspnd/Resum” and press .
2. “Suspend” is highlighted. Press .
The screen will display a message reminding you that this mode not only
suspends your active basal delivery but also cancels any Temp Basal or
Combo Bolus that may be active.
I
Animas
®
Insulin Pump
NOTE: Periodically, your pump will beep (or vibrate if that is the setting you
selected) to remind you of the Suspend status. If not confirmed, the beeps will
progress to high volume in one hour. You can confirm the Warning to reset the
audible sequence. See Chapter 13 in Section I, pages 75–84.
3. The Home screen is then displayed, showing that pump deliveries are
suspended.
37

MAIN MENU
Home
Bolus
Suspend/Resum
History
Basal
Setup
Prime/Rewind
Status
Pump
Suspended
at 1:13PM
Oct 2, 2007
Resume
Main Menu
2 : 27
PM
Status
Basal Rate
0.025U/Hr
Insulin: 105U
Menu
Draft. 410-106-00 Rev. A
CHAPTER 7 - S U SPEND/RESUME FEATURE
Resuming Delivery
1. From the MAIN MENU, scroll down to “Suspnd/Resum” and press .
I
Insulin Pump
®
2.
Resume” is highlighted. Press .
“
Animas
3. The Home screen is displayed to show you that your pump is no longer in
Suspend mode. Your previously active basal program is automatically resumed.
38

MAIN MENU
Home
Bolus
Suspend/Resum
History
Basal
Setup
Prime/Rewind
Status
HISTORY
Main Menu
Bolus
Total Daily
Dose (TDD)
Alarm
Prime
Suspend
Basal
BOLUS
History Menu
Record 1
NORMAL (P)
ezCarb
Mar 23, 2007
1:13PM
2.80U of 2.80U
COMPLETED
CH A PT ER 8 - HI S TO RY F EAT U RE
Draft. 410-106-00 Rev. A
8
Your pump stores important records for your review. You can access your pump’s history and view it
directly on your pump screen or download it onto your computer using ezManager
to the User Guide included with the software. Certain information on your pump history screens will
include a “(P)” or “(M)”. This indicates if the action was initiated from your pump (P) or your meter
remote (M) when you begin using the devices together as a system (see Chapter 1 in Section III, pages
173–174).
Your pump stores basal rates, boluses, alarms and settings. Your pump stores these records
indefinitely, even when batteries are removed.
From the MAIN MENU, select “History”. The HISTORY menu is displayed.
®
Software. Refer
Bolus History
Your pump displays the last 500 Bolus records.
I
Animas
®
Insulin Pump
NOTE: BG values and carb values are not displayed on your pump. However, when you download your
pump history with ezManager
ezManager
1. From the HISTORY menu, select “Bolus”. This screen displays the following:
Bolus Record number
•
Date of bolus
•
Time of bolus
•
Type of bolus delivered and whether it was
•
initiated from your pump (P) or meter remote (M)
˚
˚
˚
Amount of bolus programmed and delivered
•
Status of bolus
•
˚
˚
˚
If the bolus was initiated from your pump(P) or meter remote(M)
•
If ezBG or ezCarb was used
•
®
Software reports.
Normal
Combo
Audio
ACTIVE
COMPLETED
CANCELED
®
Software, the BG and carb values (500 total) will be displayed on the
39

TDD
History Menu
Record 1
Temp
Suspend
Bolus
Basal
TOTAL
=
Mar 23, 2007
No
No
6.200U
0.700U
6.900U
HISTORY
Main Menu
Bolus
Total Daily
Dose (TDD)
Alarm
Prime
Suspend
Basal
BOLUS
History Menu
Record 2
NORMAL (P)
ezBG
Mar 23, 2007
1
2:13PM
0.80U of 3.80U
CANCELED (M)
Draft. 410-106-00 Rev. A
CHAPTER 8 - H I S TORY F E ATURE
2. Scroll up to highlight the record field. Press to activate Review Mode (indicated by flashing cursor).
3. Record 1 indicates the most recent record. Use the / buttons to scroll
to other records.
I
4. When finished reviewing, press to exit Review Mode.
Insulin Pump
®
5.
History Menu” is highlighted. Press to return to the HISTORY menu.
“
Animas
Total Daily Dose (TDD) History
Your pump displays the last 120 TDD records.
1. From the HISTORY menu, select “TDD”. This
screen displays the following:
Record number
•
Date of record
•
If Temp Basal was active on that date
•
If Suspend was activated on that date
•
Total Bolus for the date
•
Total Basal for the date
•
Total dose for the date
•
NOTE: Each daily total is the total delivered since midnight.
2. Scroll up to highlight the record field. Press to activate Review Mode (indicated by flashing
cursor).
3. Record 1 indicates the most recent record. Use the / buttons to scroll to other records.
4. When finished reviewing, press to exit Review Mode.
5. “History Menu” is highlighted. Press to return to the HISTORY menu.
40
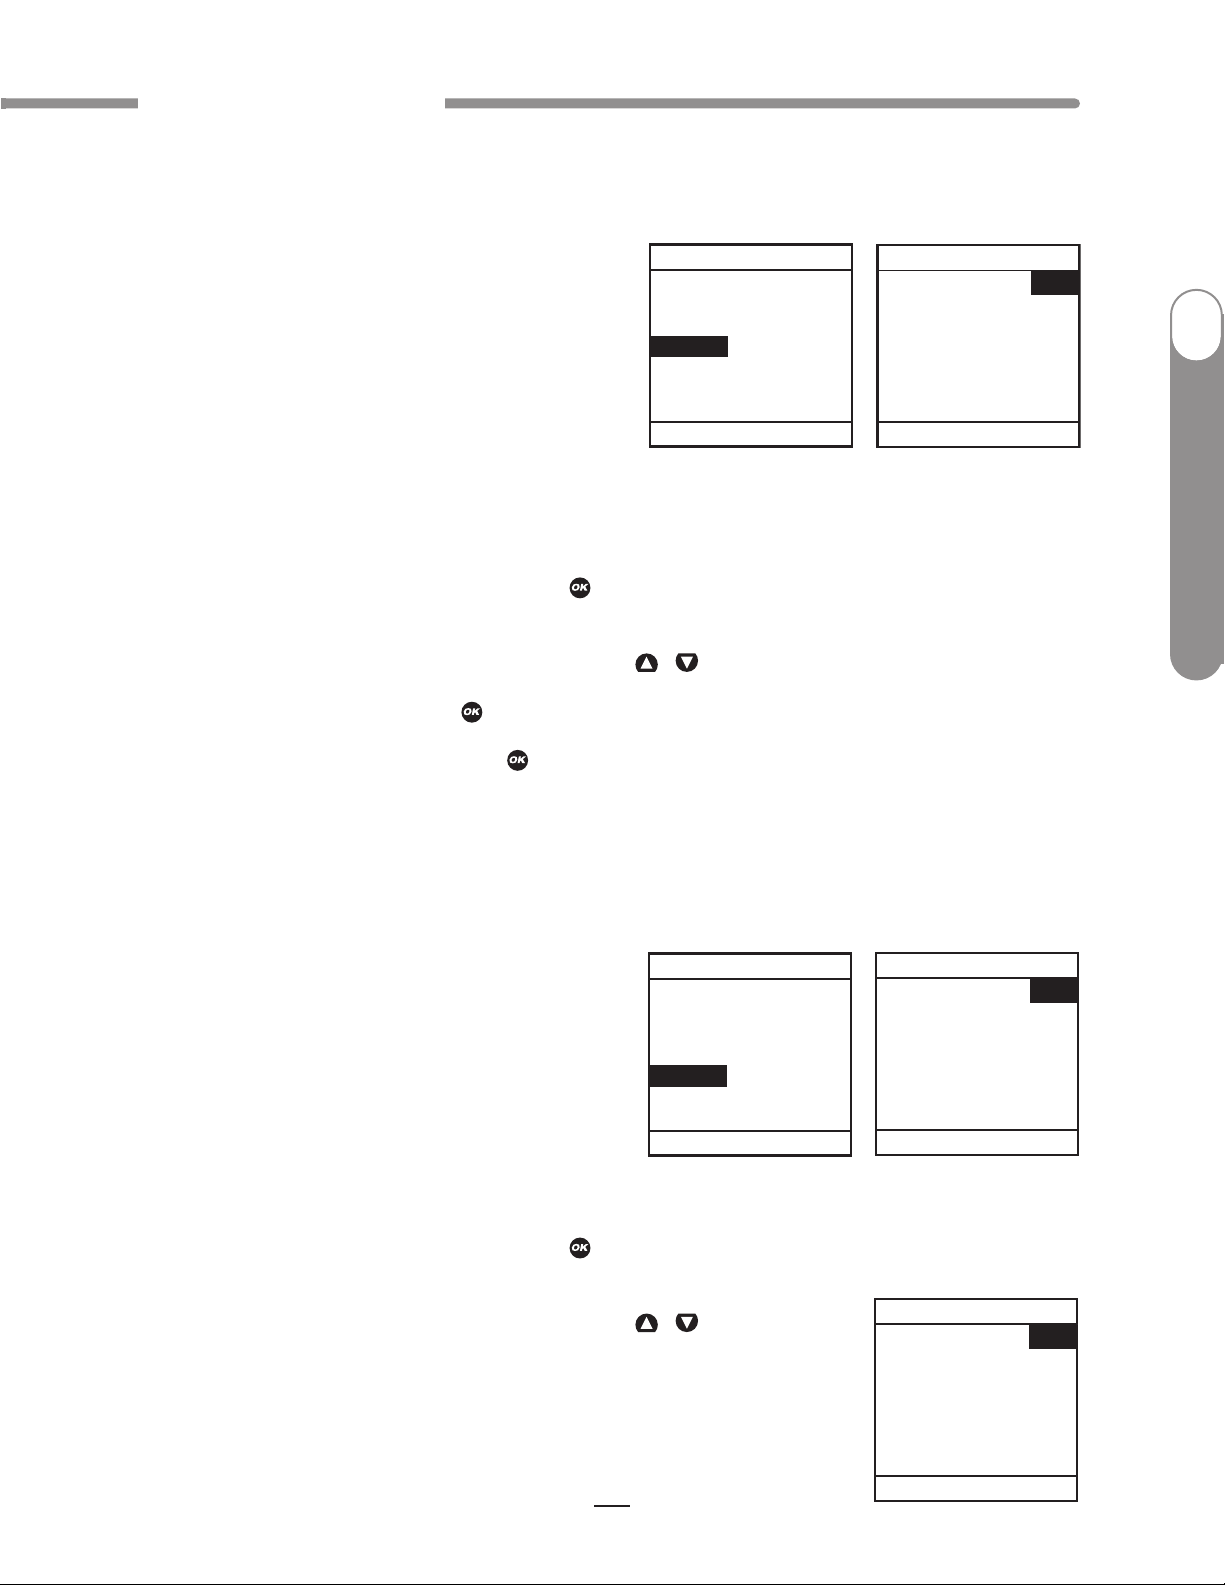
HISTORY
Main Menu
Bolus
Total Daily
Dose (TDD)
Alarm
Prime
Suspend
Basal
ALARM
History Menu
Record 1
Code
XXX-XXX
Mar 23, 2007
0
1:13PM
EMPTY
CARTRIDGE
HISTORY
Main Menu
Bolus
Total Daily
Dose (TDD)
Alarm
Prime
Suspend
Basal
PRIME
History Menu
Record 1
Fill Cannula
Total 1.0U
Mar 23, 2007
01:15PM
PRIME
History Menu
Record 2
Primed
Total 23.7U
Mar 23, 2007
01:13PM
HAPTER 8 - H I S TORY F E ATURE
C
Alarm History
Your pump displays the last 30 Alarm records.
1. From the HISTORY menu, select “Alarm”. The
screen displays the following:
Draft. 410-106-00 Rev. A
Record number
•
Date of alarm
•
Time of alarm
•
Alarm Code
•
Alarm Type
•
2. Scroll up to highlight the record field. Press to activate Review Mode (indicated by flashing
cursor).
3. Record 1 indicates the most recent record. Use the / buttons to scroll to other records.
4. When finished reviewing, press to exit Review Mode.
5. “History Menu” is highlighted. Press to return to the HISTORY menu.
Prime History
Your pump displays the last 60 Prime and Fill Cannula records. Prime and Fill Cannula records are
stored as separate records.
I
Animas
®
Insulin Pump
1. From the HISTORY menu, select “Prime”.
The screen displays the following:
Record number
•
Date of prime
•
Time of prime
•
Amount of prime
•
2. Scroll up to highlight the record field. Press to activate Review Mode (indicated by flashing
cursor).
3. Record 1 indicates the most recent record. Use the / buttons to scroll
to other records.
41

HISTORY
Main Menu
Bolus
Total Daily
Dose (TDD)
Alarm
Prime
Suspend
Basal
SUSPEND
History Menu
Record 1
Resumed
Mar 23, 2007
01:13PM
Mar 23, 2007
01:13PM
Suspended
HISTORY
Main Menu
Bolus
Total Daily
Dose (TDD)
Alarm
Prime
Suspend
Basal
BASAL
History Menu
Record 1
Rate = 0.670
Mar 23, 2007
01:13PM
Draft. 410-106-00 Rev. A
CHAPTER 8 - H I S TORY F E ATURE
4. When finished reviewing, press to exit Review Mode.
5.
History Menu” is highlighted. Press to return to the HISTORY menu.
“
Suspend History
I
Your pump displays the last 30 Suspend records.
1. From the HISTORY menu, select “Suspend”. The
screen displays the following:
Record number
•
Date and time pump delivery was suspended
•
Insulin Pump
®
Animas
Date and time pump delivery was resumed
•
2. Scroll up to highlight the record field. Press to activate Review Mode (indicated by flashing
cursor).
3. Record 1 indicates the most recent record. Use the / buttons to scroll to other records.
4. When finished reviewing, press to exit Review Mode.
5.
History Menu” is highlighted. Press to return to the HISTORY menu.
“
Basal History
Your pump displays the last 270 Basal delivery records.
1. From the HISTORY menu, select “Basal”. The
screen displays the following:
Record number
•
Date and time basal rate was adjusted
•
Basal rate adjustment
•
2. Scroll up to highlight the record field. Press to activate Review Mode (indicated by flashing
cursor).
3. Record 1 indicates the most recent record. Use the / buttons to scroll to other records.
4. When finished reviewing, press to exit Review Mode.
5.
“
History Menu” is highlighted. Press to return to the HISTORY menu.
42

Draft. 410-106-00 Rev. A
HAPTER 8 - H I S TORY F E ATURE
C
NOTE: The History records each basal rate change. When no basal is being delivered, the Basal History
Record will show 0 units delivered. This can happen for the following reasons:
Cartridge change
•
Battery change
•
Suspend
•
Alarm
•
Basal segment set to 0
•
Basal edit screen accessed
•
Prime menu accessed
•
Loss of prime
•
I
Animas
®
Insulin Pump
43

Draft. 410-106-00 Rev. A
CHAPTER 8 - H I S TORY F E ATURE
I
Insulin Pump
®
Animas
44

MAIN MENU
Home
Bolus
Suspend/Resum
History
Basal
Setup
Prime/Rewind
Status
2 : 27
P
M
Status
Basal Rate
0.025U/Hr
Insulin: 105U
Menu
STATUS 1
Main Menu
ACTIVE BASAL
24-Hr Total
13.60U
0.675U/Hr
Insulin: 105U
A1-WEEKDAY
STATUS 2
Main Menu
IOB=1.70U
N 3.30U
9:55AM
Jul 8, 2007
LAST BOLUS
Draft. 410-106-00 Rev. A
CH A PT ER 9 - S TATU S F E ATU R E
This feature gives you easy access to a summary of information about your pump’s current
programming and performance. There are six Status screens.
1. From the MAIN MENU or from the Home screen, scroll to “Status” and press .
Status Screen 1 – Active Basal
9
I
Animas
®
Insulin Pump
The screen displays the following information:
Which basal program is currently active
•
The 24-hour total for the active basal program
•
Units per hour currently being delivered
•
Insulin currently remaining in cartridge
•
The cursor is flashing on the STATUS 1 screen. Press the button to move to the STATUS 2 screen or
press to highlight “Main Menu” and exit Status screens.
Status Screen 2 – IOB, Last Bolus
The screen displays the following information:
Amount of insulin currently “on board” (IOB). For more information on this feature, see Chapter 10 in
•
Section I, pages 49–58.
Type and amount of last completed bolus
•
N = Normal
˚
C = Combo (normal portion only)
˚
A = Audio
˚
Time and date of last bolus
•
The cursor is flashing on the STATUS 2 screen. Press the button to move to the STATUS 3 screen or
press to highlight “Main Menu” and exit Status screens.
45

STATUS 3
Main Menu
DELIVERY TODAY
Temp
Suspend
Bolus
Basal
TOTAL =
No
No
9.400U
0
.200U
9
.600U
U100
STATUS 4
Main Menu
COMBO BOLUS
Start
End
Delivered:
3.28/9.00U
CANCELLED
7:23AM
7:31AM
Mar 23, 2007
STATUS 5
Main Menu
TEMP BASAL
Start
End
Change:
ACTIVE
4:00PM
6:00PM
-50%
Mar 23, 2007
Draft. 410-106-00 Rev. A
CHAPTER 9 - STAT U S F E ATURE
Status Screen 3 – Delivery Today
The screen displays the following information since midnight and up to the
current time:
Insulin type
•
If Temp Basal has been active
I
•
If Suspend has been active
•
Total bolus amount delivered
•
Total basal amount delivered
•
Total insulin delivered (excluding prime amounts)
•
Insulin Pump
®
Animas
The cursor is flashing on the STATUS 3 screen. Press the button to move to the STATUS 4 screen or
press to highlight “Main Menu” and exit Status screens.
Status Screen 4 – Combo Bolus
The screen displays the following information:
Most recent Combo Bolus status
•
Active or Completed or Canceled
˚
Start date
˚
Start time
˚
End time
˚
Amount delivered (if active, shows amount delivered as of current time)
˚
For more information on Combo Bolus, see Chapter 10 in Section I, pages 49–58.
The cursor is flashing on the STATUS 4 screen. Press the button to move to the STATUS 5 screen or
press to highlight “Main Menu” and exit Status screens.
Status Screen 5 – Temp Basal
The screen displays the following information:
•
The cursor is flashing on the STATUS 5 screen. Press the button to move to the STATUS 6 screen or
press to highlight “Main Menu” and exit Status screens.
Most recent Temp Basal status
Active/Inactive
˚
Start date
˚
Start time
˚
End time
˚
% adjustment
˚
46

STATUS 6
Main Menu
CODES
REV M=XXX.XX.XX
D=XXX P=XXX
S/N# 76543-21
HAPTER 9 - STAT U S F E ATURE
C
Status Screen 6 – Codes
The screen displays the following information:
Software revision
•
Last seven digits of the serial number of your pump
•
Draft. 410-106-00 Rev. A
Codes for manufacturer’s use
•
The cursor is flashing on the STATUS 6 screen. Press to highlight
“Main Menu” and exit Status screens.
I
Animas
®
Insulin Pump
47

Draft. 410-106-00 Rev. A
CHAPTER 9 - STAT U S F E ATURE
I
Insulin Pump
®
Animas
48
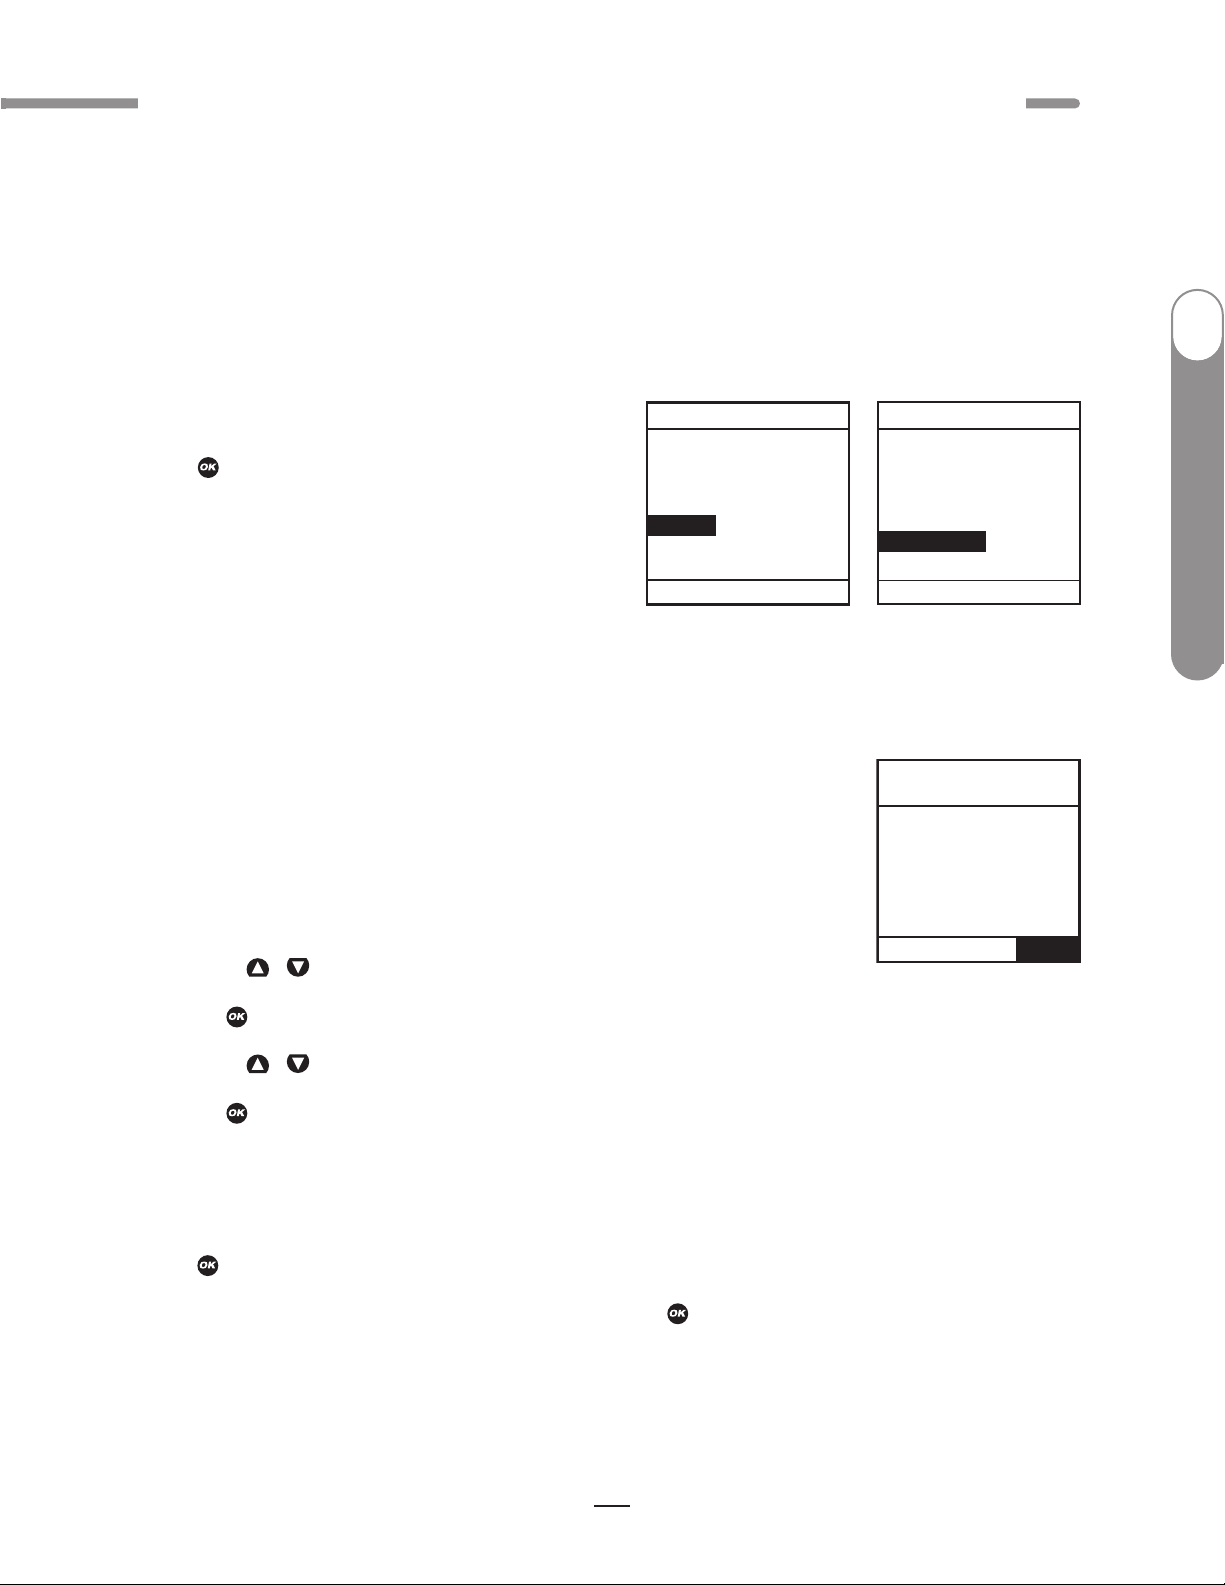
MAIN MENU
Home
Bolus
Suspend/Resum
History
Basal
Setup
Prime/Rewind
Status
SETUP
Main Menu
Time/Date
Sound
Advanced
SETUP ADV 1
Home
AUDIO BOLUS
Enable OFF
Next
Delivery
Step 0.1U
Draft. 410-106-00 Rev. A
CH A PT ER 10 - AD VA NC ED F E ATU R ES / SE T UP A ND A CTI VAT IO N
Now you’ve made it through the basics! Your pump offers many advanced features that you may find
helpful in managing your diabetes. Consult with your health care team to determine which advanced
features are appropriate for you.
This chapter tells you how to set up and turn on the advanced features. Chapter 11 in Section I, pages
59–72, covers how to use each advanced feature.
10
®
You can also use your computer and ezManager
Refer to the ezManager
From the MAIN MENU screen, select “Setup”. Then
select “Advanced” from the SETUP screen and
press .
®
User Guide included with the software.
Software to upload settings for Advanced Setup.
Setup Advanced Screen 1 – Audio Bolus Feature
This screen allows you to:
Turn Audio Bolus on or off
•
Select the Audio Bolus delivery step size
•
I
Animas
®
Insulin Pump
0.1, 0.5, 1.0, 5.0 Units
˚
1. Use the / buttons to scroll to the desired field.
2. Press to change to flashing cursor for Edit mode.
3. Use the / buttons to change to desired setting.
4. Press when setting is made.
NOTE: If Audio Bolus is activated, you cannot use the side button as a shortcut to Normal Bolus. You
can still give a Normal Bolus via the MAIN MENU.
To move to the next Setup Advanced screen, scroll to the bottom of the screen and highlight “Next”.
Press .
To return to the Home screen, scroll to “Home” and press . For more information, see Chapter 11 in
Section I, pages 59–72.
49

SETUP ADV 2
Home
BOLUS
Adv. Bolus
Reminders
Delivery
Next
Programs 4
OFF
OFF
NRML
BASAL
Alert
1-weekday
must be the
active program
to change the
basal display
setting.
Confirm
SETUP ADV 3
Home
Max LIMITS
Basal
Bolus
Daily
2Hr
Next
25.00U/Hr
35.00U
600.00U
100.00U
Draft. 410-106-00 Rev. A
CHAPTER 10 - A D VANCED FEAT U R E S / S E T U P A N D ACTIVAT I O N
Setup Advanced Screen 2 – Advanced Bolus Features and Multiple Basal
Programs
This screen allows you to:
Turn Advanced Bolus Features (ezCarb, ezBG, Combo Bolus) on or off
•
I
Turn personal Reminders feature on or off
•
Select bolus delivery speed (NRML (normal): 1U every second
•
or SLOW: 1U every 4 seconds)
NOTE: Users may experience a slight stinging sensation with normal bolus delivery. If this occurs
changing the bolus delivery speed to “SLOW” may reduce the stinging sensation.
Select either 1 basal program or 4 basal programs to be displayed in the BASAL MENU
Insulin Pump
®
•
NOTE: If a program other than 1-Weekday is active, you cannot change this
setting to display 1 basal program. The Alert screen shown here will be
Animas
displayed to remind you.
1. Scroll to the desired field.
2. Press to change to flashing cursor for Edit mode.
3. Use the / buttons to change to desired setting.
4. Press when setting is made.
To move to the next Setup Advanced screen, scroll to the bottom of the screen and highlight “Next”.
Press .
To return to the Home screen, scroll to “Home” and press .
Setup Advanced Screen 3 – Insulin Limits
This screen allows you to:
Set maximum basal delivery per hour
•
Set maximum bolus amount
•
Set maximum daily (24-hour) delivery amount. Your pump checks that total
•
insulin delivery each 24-hour period (running from midnight of the previous
day to midnight of the current day) does not exceed this limit.
Set maximum 2-hour delivery amount. Your pump checks that total insulin
•
delivery over each rolling 2-hour period does not exceed this limit.
1. Scroll to the desired field.
2. Press to change to flashing cursor for Edit mode.
3. Use the / buttons to change to desired setting.
4. Press when setting is made.
50
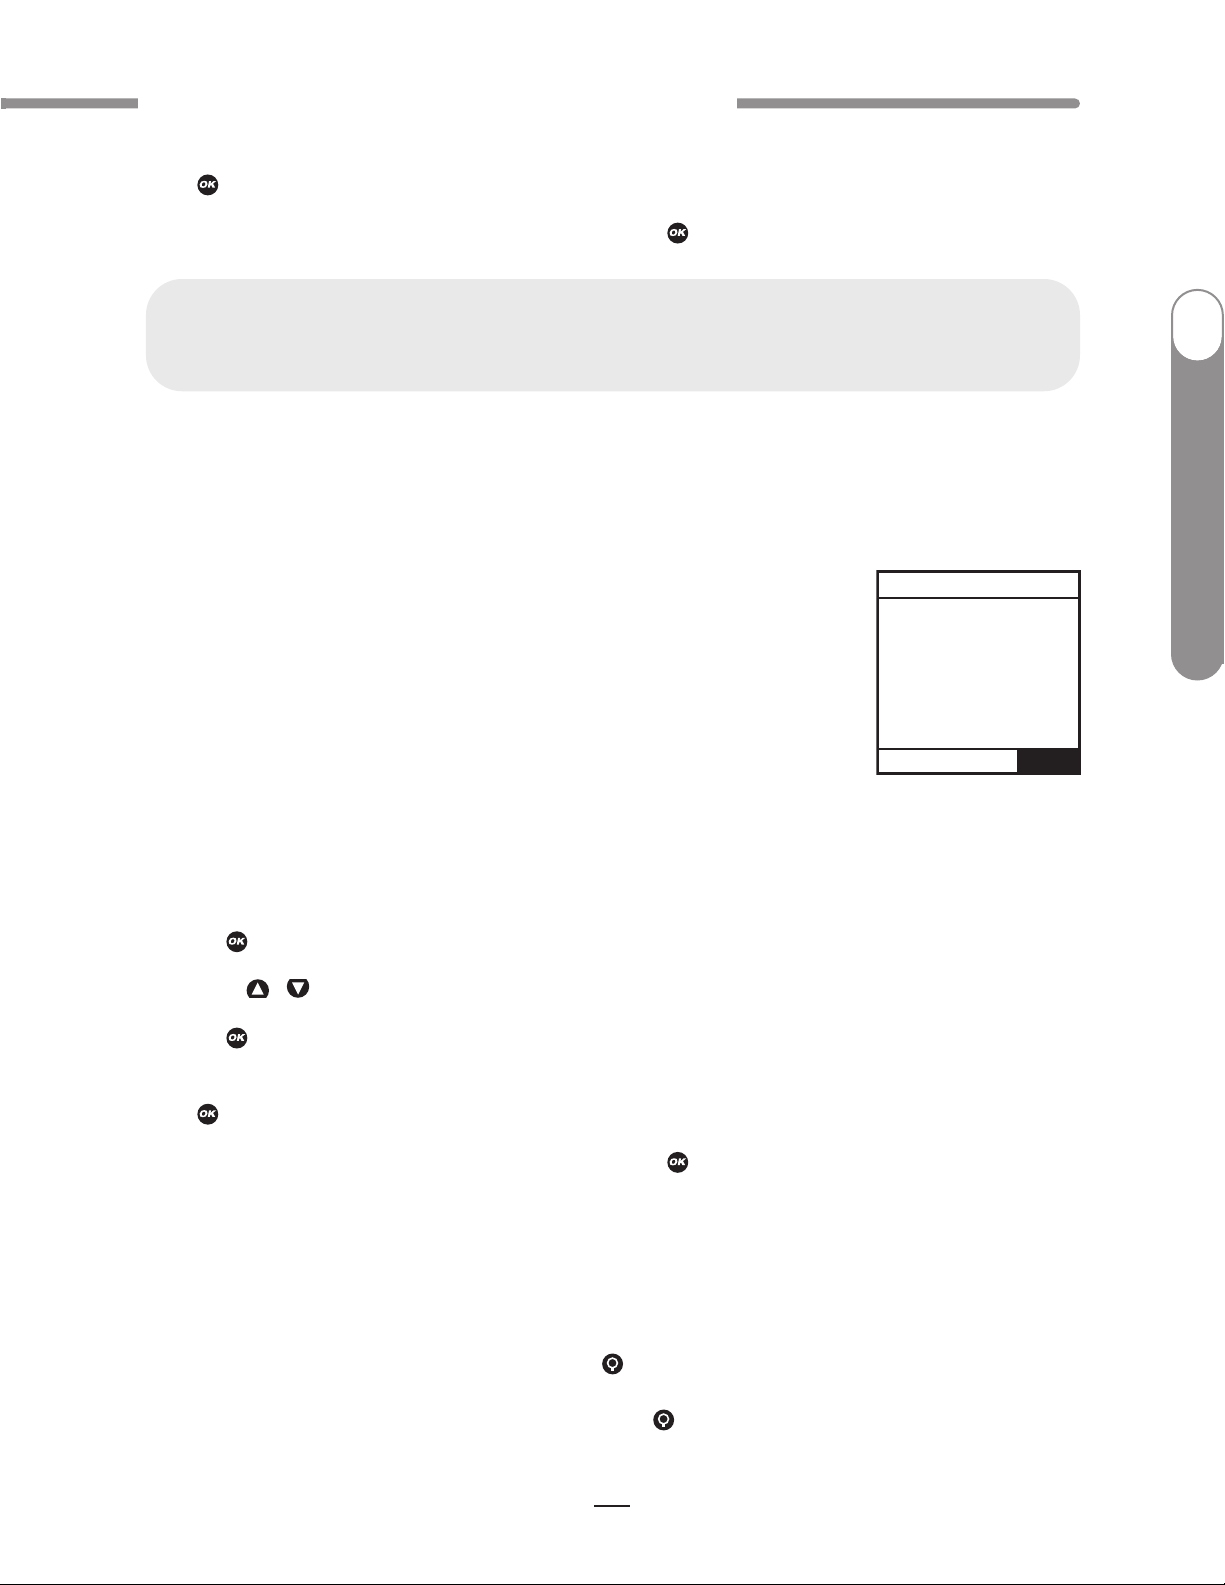
SETUP ADV 4
Home
Language
ENGLISH
Display Timeout
in 60 secs
Contrast
8
Battery Lith
Next
Draft. 410-106-00 Rev. A
HAPTER 10 - A D VANCED FEATUR E S / S E T U P A N D ACTIVAT I O N
C
To move to the next Setup Advanced screen, scroll to the bottom of the screen and highlight “Next”.
Press .
To return to the Home screen, scroll to “Home” and press .
CAUTION: Should you attempt a delivery that exceeds the limits you have set, your pump will
alert you and display a text message. See Chapter 13 in Section I, pages 75–84 for additional
information.
Setup Advanced Screen 4 – Language Setup, Display Timeout, Contrast and
Battery Type
This screen allows you to:
Select a different language
•
Set the length of time your display stays on before timing out to save
•
battery life
15, 30, 45 or 60 seconds
˚
Select a contrast setting
•
Select Lithium (recommended) or Alkaline battery type. You can also change the battery type on the
•
VERIFY screen when you insert a new battery.
I
Animas
®
Insulin Pump
1. Scroll to the desired field.
2. Press to change to flashing cursor for Edit mode.
3. Use the / buttons to change to desired setting.
4. Press when setting is made.
To move to the next Setup Advanced screen, scroll to the bottom of the screen and highlight “Next”.
Press .
To return to the Home screen, scroll to “Home” and press .
Contrast Button
Pressing the button on the top of your pump adjusts the contrast. There are three contrast levels: Dim,
Default and Bright. To preserve battery life, your pump display will Auto-dim when a button is not
pressed for half the time your display time out is set. While in Auto-dim mode, you can restore the
default contrast level you have set by pressing the button on top of your pump. Pressing a function
button while in Auto-dim mode will restore the default contrast level as well as perform the function of
the key. If in Call Service Alarm mode, you must use the button to restore the default contrast level.
51

SETUP ADV 5
Home
AUTO OFF
Enable
Next
OFF
W
hen enabled,
suspend in 12 Hr
if no buttons
are pressed.
SETUP ADV 6
Home
Low Cartridge
Warning 20U
Next
Occlusion
Sensitivity L
Draft. 410-106-00 Rev. A
CHAPTER 10 - A D VANCED FEAT U R E S / S E T U P A N D ACTIVAT I O N
o return contrast setting to original factory default, press the button and button at the same
T
time. When the word “Contrast” is displayed on the screen, press any button to return to the default
contrast setting.
NOTE: When viewing your pump display in bright sunlight, it is recommended you shade the screen or
move to a shady area for best visibility.
I
Setup Advanced Screen 5 – Auto-OFF Feature
This screen allows you to set your pump to automatically suspend basal delivery and sound an alarm if
no buttons are pressed in a user-selected number of hours. This feature can be used as a safeguard in
case the user is unconscious.
Insulin Pump
1. Scroll to the desired field.
®
2. Press to change to flashing cursor for Edit mode.
3. Use the / buttons to change to desired setting.
Animas
4. Press when setting is made.
To move to the next Setup Advanced screen, scroll to the bottom of the screen
and highlight Next. Press .
To return to the Home screen, scroll to “Home” and press .
Setup Advanced Screen 6 – Low Cartridge Warning Setting and
Occlusion Sensitivity Setting
This screen allows you to:
Set your low cartridge warning to alert you at 10, 20, 30, 40 or 50 units remaining
•
Set your occlusion detection sensitivity to High (more sensitive) or Low (less sensitive)
•
1. Use the / buttons to scroll to the desired field.
2. Press to change to flashing cursor for Edit mode.
3. Use the / buttons to change to desired setting.
4. Press when setting is made.
To move to the next Setup Advanced screen, scroll to the bottom of the
screen and highlight “Next”. Press .
To return to the Home screen, scroll to “Home” and press .
52

I:C Ratio
2 of 12
Done
Time:
6:00A
1U: 15g
Home
<<---- ---->>
Warning
Confirm
Low
cartridge.
10U or
l
ess left.
SETUP ADV 7
Home
I:C Ratio
ISF
BG Target
Next
I:C Ratio
1 of 12
Done
Time:
12:00A
1U: 13 g
Home
<<---- ---->>
HAPTER 10 - A D VANCED FEATUR E S / S E T U P A N D ACTIVAT I O N
C
NOTE:
The Low Cartridge Warning only alerts you one time. For example, if you
•
have it set to 30U and receive an alert, and then change the setting to
20U, it will not alert at 20U until after the next cartridge has been primed.
If a bolus is delivered which causes a Low Cartridge Warning, your
•
remaining insulin may be less than the Warning screen displays.
Draft. 410-106-00 Rev. A
I
Animas
Setup Advanced Screen 7 – Personal Settings - Insulin to Carb (I:C) Ratios
Your health care team may recommend you use different Insulin to Carb (I:C) ratios for different times
of day. When you use the ezCarb feature, your pump will automatically select the I:C ratio for the
current time of day.
WARNING: Your health care team will determine your personal settings for the bolus calculator
feature. Use of incorrect personal settings can result in over or under delivery of insulin.
This screen allows you to:
Set different I:C ratios for 12 different time slots
•
NOTE: If you set only one ratio, it will be used for the entire 24-hour period.
From the SETUP ADV 7 screen, scroll up to “I:C Ratio”. Press .
1. The first segment always starts at midnight. The last time slot available
is 11:30pm. Use the / buttons to scroll to the “1U:” (grams) field.
®
Insulin Pump
2. Press to change to flashing cursor for Edit Mode.
3. Use the / buttons to change to desired setting.
4. Press when setting is made.
5. To move to the next I:C Ratio screen, scroll to “
6. Scroll up to the “Time” field and press to change to flashing cursor
for Edit Mode.
7. Use the / buttons to change the segment start time. Press .
--->>
53
”
and press .

SETUP ADV 7
Home
I:C Ratio
ISF
BG Target
Next
ISF
1 of 12
Done
Time:
12:00A
1U: 40
Home
<<---- ---->>
mg/dL
ISF
2 of 12
Done
Time:
6:00A
1U: 50
Home
<<---- ---->>
mg/dL
Draft. 410-106-00 Rev. A
CHAPTER 10 - A D VANCED FEAT U R E S / S E T U P A N D ACTIVAT I O N
8. Scroll to the “1U:” (grams) field and press to change to flashing cursor for Edit mode.
9. Use the / buttons to change the “1U:” (grams) field as desired. Press . Repeat to set
remaining segments per your health care team’s recommendations.
”
To review your settings, highlight “
I
times and setting values are correct.
and press to scroll through each segment. Confirm the
--->>
When finished, scroll to “Done” and press to return to the SETUP ADV 7 screen.
To return to the Home screen, scroll to “Home” and press .
Setup Advanced Screen 7 – Personal Settings - Insulin Sensitivity Factor (ISF)
Insulin Pump
®
Your health care team may recommend you use different Insulin Sensitivity Factors (ISFs) for different
times of day. When you use the ezCarb or ezBG feature, your pump will automatically select the ISF for
the current time of day.
Animas
This screen allows you to:
Set different ISFs for 12 different time slots
•
NOTE: If you set only one ratio, it will be used for the entire 24-hour period.
From the SETUP ADV 7 screen, scroll up to “ISF”. Press .
1. The first segment always starts at midnight. The last time slot available is
11:30pm. Use the / buttons to scroll to the “1U:” (mg/dL) field.
2. Press to change to flashing cursor for Edit mode.
3. Use the / buttons to change to desired setting.
4. Press when setting is made.
5. To move to the next ISF screen, scroll to “
6. Scroll up to the “Time” field and press to change to flashing cursor for
Edit mode.
--->>
”
54
and press .

SETUP ADV 7
Home
I:C Ratio
ISF
BG Target
Next
BG Target
1 of 12
Done
Time:
12:00A
120
+/- 10
Home
<<---- ---->>
mg/dL
mg/dL
Draft. 410-106-00 Rev. A
BG Target
1 of 12
Done
Time:
12:00A
120
+/- 5
Home
<<---- ---->>
mg/dL
mg/dL
HAPTER 10 - A D VANCED FEATUR E S / S E T U P A N D ACTIVAT I O N
C
7. Use the / buttons to change the segment start time. Press .
8. Scroll to the “1U:” (mg/dL units) field and press to change to flashing cursor for Edit Mode.
9. Use the / buttons to change the “1U:” (mg/dL units) field as desired. Press . Repeat to set
remaining segments per your health care team’s recommendations.
”
To review your settings, highlight “
and press to scroll through each segment. Confirm the
--->>
times and setting values are correct.
When finished, scroll to “Done” and press to return to the SETUP ADV 7 screen.
To return to the Home screen, scroll to “Home” and press .
Setup Advanced Screen 7 – Personal Settings - BG Target Ranges
Your health care team may recommend you use different BG Target ranges for different times of day.
When you use the ezCarb or ezBG feature, your pump will automatically select the BG Target range for
the current time of day.
This screen allows you to:
Set different BG Targets and ranges for 12 different time slots
•
NOTE: If you set only one ratio, it will be used for the entire 24-hour period.
From the SETUP ADV 7 screen, scroll up to “BG Target”. Press .
I
Animas
®
Insulin Pump
1. The first segment always starts at midnight. The last time slot available is
11:30pm. Use the / buttons to scroll to the BG Target field.
2. Press to change to flashing cursor for Edit mode.
3. Use the / buttons to change to desired setting.
4. Press when setting is made.
5. Scroll to the “+/-”(range) field. Press to change to flashing cursor for
Edit mode.
55

BG Target
2 of 12
Done
Time:
6:00A
120
+/- 10
Home
<<---- ---->>
mg/dL
m
g/dL
Draft. 410-106-00 Rev. A
CHAPTER 10 - A D VANCED FEAT U R E S / S E T U P A N D ACTIVAT I O N
NOTE: By setting a range (+/-) your pump will not calculate a BG correction dose if your actual BG is
within that range. If you prefer to correct to one target number rather than a range, simply set your
range to +/- 0. This screen allows you to:
6. Use the / buttons to change the range as desired. Press .
I
7. To move to the next BG Target screen, scroll to “
--->>
”
and press .
8. Scroll up to the “Time” field and press to change to flashing cursor for
Edit mode.
9. Use the / buttons to change the segment start time. Press .
10. Scroll to the BG Target field. Press to change to flashing cursor for
Insulin Pump
Edit mode.
®
11. Use the / buttons to change to desired setting.
12. Press when setting is made.
Animas
13. Scroll to the “+/-”(range) field. Press to change to flashing cursor for Edit mode.
14. Use the / buttons to change the range as desired. Press . Repeat to set remaining
segments per your health care team’s recommendations.
”
To review your settings, highlight “
times and setting values are correct.
When finished, scroll to “Done” and press to return to the SETUP ADV 7 screen.
and press to scroll through each segment. Confirm the
--->>
To return to the Home screen, scroll to “Home” and press .
Setup Advanced Screen 8 – Insulin on Board (IOB) Setting
This feature allows you to program the rate at which your body uses your bolus. Even with rapid-acting
insulin, your body takes some time to use your entire bolus insulin. When this feature is activated and
you give a bolus, your pump will tell you how much Insulin on Board (IOB) is currently remaining and
will calculate a decreased bolus dose as an option. This helps to prevent “stacking” insulin and can
help reduce your risk of hypoglycemia*. The duration of insulin action varies from person to person
and can vary based on the infusion site you have selected and your activity level, among other factors.
Your health care team will give you a recommended duration to program into your pump.
*Recommended reading for pump users includes:
Pumping Insulin, by John Walsh, PA, CDE and Ruth Roberts, MA
•
Smart Pumping, by Howard Wolpert, MD
•
WARNING: This feature is intended for use only with U100 rapid-acting insulin analogs such
as Novolog
Apidra
result in serious injury or death.
®
, Humalog®or Apidra®. If you use an insulin other than Novolog®, Humalog®or
®
, Do Not use this feature. Use of any insulin with lesser or greater concentration can
56

SETUP ADV 8
Home
Insulin on Board
IOB-2
Next
OFF
Duration
4.0 Hr
HAPTER 10 - A D VANCED FEATUR E S / S E T U P A N D ACTIVAT I O N
C
This screen allows you to:
Turn the IOB feature on or off
•
Select the duration
•
1. Use the / buttons to scroll to the desired field.
Draft. 410-106-00 Rev. A
2. Press to change to flashing cursor for Edit mode.
3. Use the / buttons to change to desired setting.
4. Press when setting is made.
To move to the next Setup Advanced screen, scroll to the bottom of the screen and highlight “Next”.
Press .
To return to the Home screen, scroll to “Home” and press .
NOTE: Your pump is constantly tracking IOB, so when you turn on the feature, your pump will
immediately take into account the current amount remaining from previous bolus doses within the
time frame you’ve selected during set up of the feature.
Points to remember about the IOB feature on your pump
A curvilinear algorithm is used, which more closely mimics the way drugs decay in the body versus a
•
straight line decay.
With BG below target, IOB amount is displayed and is subtracted from the carb portion of the bolus.
•
With BG within target, IOB amount is displayed for reference but not subtracted from bolus total.
•
I
Animas
®
Insulin Pump
With BG above target, IOB amount is displayed and is subtracted from BG bolus.
•
57

S
ETUP ADV 9
Home
Sick days
BG over
Next
240
Check ketones
every
4 Hrs
Check BG
every
2 Hrs
m
g/dL
Draft. 410-106-00 Rev. A
CHAPTER 10 - A D VANCED FEAT U R E S / S E T U P A N D ACTIVAT I O N
Setup Advanced Screen 9 – Sick Day Guidelines
During your pump training, your health care team will discuss guidelines to use when you’re sick. This
is a convenient way to store your basic sick day guidelines as recommended by your health care team.
For more information on sick day guidelines, refer to Chapter 16 in Section I, pages 93–94, and contact
your health care team.
I
Insulin Pump
®
Animas
This screen allows you to:
Set a BG limit as a reminder for testing when sick
•
Set the frequency of checking for ketones when sick
•
Set the frequency of checking your BG when sick
•
To move to the next Setup Advanced screen, scroll to the bottom of the screen
and highlight “Next”. Press .
To return to the Home screen, scroll to “Home” and press .
NOTE: This screen is intended as a reference only. Alerts are NOT triggered based on values displayed
on this screen.
Setup Advanced Screen 10 – Establishing Communication with
Your Meter Remote
This screen allows you to activate the RF and pairing features on your pump. When you are ready to
begin using your pump and meter remote together as a system, you will need to activate RF
communication and pair the devices. See Chapter 2 in Section III, pages 175–184.
58

Audio bolus
Step size=
1.0U/Press
0.00
U
Enter
bolus amount
Press any other
key to CANCEL
Draft. 410-106-00 Rev. A
CH A PT ER 11 - US I NG A DVA N CE D FEAT URE S
CAUTION: Using the features in this chapter requires an advanced understanding of insulin
pump therapy and should not be used without training and advice from your health care team.
In order to achieve optimal results, some of these features should only be used once you have
tested and fine-tuned your basal rates and your health care team has determined your
individual targets and ratios.
11
NOTE:
Before using these features, you must turn them on in the Setup Advanced menu.
See Chapter 10 in Section I, pages 49–58.
Audio Bolus and ezBolus
The Audio Bolus feature of the Animas®Insulin Pump allows you to bolus without looking at the screen
display. This is convenient if you wear your pump under your clothing. When first using the audio bolus
feature, also check the display screen until you are comfortable with the programming steps. If you do
not wish to use the Audio Bolus feature, this button serves as a shortcut to the Normal Bolus screen.
See ezBolus, page 61 in this chapter.
CAUTION: When you first use the Audio Bolus feature, you should always look at the screen
to confirm correct programming until you are comfortable with the feature.
1. Turn on Audio Bolus in the Setup Advanced menu and select your preferred step size. See Chapter
10 in Section I, pages 49–58.
2. The Audio Bolus button is the soft rubber button on the end of your pump. Press it once. Your pump
will beep (or vibrate) to indicate you’ve accessed Audio Bolus mode as well as indicate the step size
you’ve set up.
I
Animas
®
Insulin Pump
The number of beeps (or vibrate pulses) reminds you of the step size you’ve set.
1 indicates 0.1U step size
•
2 indicates 0.5U step size
•
3 indicates 1.0U step size
•
4 indicates 5.0U step size
•
3. Press the Audio Bolus button once for each step size you’ve programmed to
reach the desired total amount. For example, if you are using 1.0U step size and
you wish to bolus 4 units, press the button 4 times. You will hear a beep tone or
vibrate for each button press. If you are using 0.5U step size and you wish to
bolus 4 units, press the button 8 times.
4. Within 5 seconds, your pump will respond with a number of confirmation beeps equal to the
number of times you pressed the Audio Bolus button.
NOTE: Do Not press any of the function buttons at this time unless you wish to cancel delivery.
59

Audio bolus
Confirm
3.00
U
Press any other
key to CANCEL
DELIVERING
3.00
U
Press any
function button
to Cancel
Warning
Confirm
Bolus
delivery
canceled by
user button
press.
Delivered:
2.00U of 3.00U
Draft. 410-106-00 Rev. A
CHAPTER 11 - U S I N G A D VANCED FEATURES
ithin 5 seconds, your pump will beep twice to “ask” you to confirm that
5. W
you wish to activate delivery and “Confirm” is displayed on the Audio Bolus
screen.
I
6. Within 5 seconds, press the button again to activate delivery. Your pump
will beep twice to confirm your delivery command. The DELIVERING bolus
Insulin Pump
®
screen is displayed and your pump will beep once to signal the start of
delivery and once to signal end of delivery (if you turned on Normal Bolus
Sounds in Setup).
Animas
If you wish to cancel the Audio Bolus, press any function button (not the contrast button).
If you cancel a bolus delivery after you’ve activated it, the screen at right
will be displayed. See Chapter 13 in Section I, pages 75–84.
NOTE: If during a bolus delivery your low cartridge level is reached, your pump will not display the
warning until after the bolus is completed. So you could possibly have less insulin available than your
low cartridge setting.
Example: Your low cartridge warning is set to 10 (units). You have 20 units of insulin remaining and
you deliver a 15 unit bolus. The Low cartridge warning appears after bolus is completed and you have
only 5 units left – not 10 units. The Wake up screen will show the remaining insulin amount.
The maximum number of Audio Bolus button presses is 20. Therefore, if you’ve set the step size to
0.1U, the maximum audio bolus amount is 2U. If you’ve set the step size at 0.5U, the maximum audio
bolus amount is 10U and if your step size is 1.0U, the maximum audio bolus amount is 20U. With a
5.0U step size, the maximum cannot be greater than 35U, which is the maximum amount for any type
of bolus.
60

BOLUS MENU
Main Menu
Normal
ezCarb
ezBG
Combo Bolus
Reminders
NORMAL BOLUS
Main Menu
Amount
Go
0.00
U
HAPTER 11 - U S I N G A D VANCED FEATURES
C
ezBolus
If you do not have your Audio Bolus feature turned on, the button on the end
of your pump will function as a short cut to the Normal Bolus screen.
1. Press the button on the end once. The Normal Bolus screen is displayed.
Program a Normal Bolus as usual.
Draft. 410-106-00 Rev. A
I
Advanced Bolus Features
ezCarb
•
ezBG
•
Combo Bolus
•
Reminders
•
All Advanced Bolus features are activated in the Setup Advanced Menu. See
Chapter 10 in Section I, pages 49–58. When the Advanced Bolus features and
Reminders are activated, the full BOLUS MENU is displayed.
WARNING: Be sure to review all the values used in bolus calculations to make sure they
are correct. You may always adjust the insulin units up or down before you decide to administer
your bolus. If you dose an insulin amount that is too high or too low, this may result in a
hypoglycemic or hyperglycemic event. Please discuss the bolus calculator feature and all
relevant personal settings with your health care professional before using the calculator for
the first time.
Animas
®
Insulin Pump
ezCarb
This feature allows you to manually enter the number of carbs eaten, and your pump will automatically
calculate your bolus dose, based on the I:C ratio, ISF and BG Target range you have entered for the
current time of day. Consult your health care team for your personal I:C ratios, ISFs and BG Target
ranges. See Chapter 10 in Section I, pages 49–58.
If the IOB feature is activated, your pump will calculate a reduced amount for high BG correction
boluses and for Carb Boluses if you entered a below-target BG value.
When you use your meter remote to deliver an ezCarb Bolus, you may also select the number of carbs
eaten directly from a Food Database stored in your meter remote, see Chapter 4 in Section III, pages
187–202. The Food Database is available through an upload to your meter remote from ezManager
Software. For instructions on uploading the Food Database, refer to the ezManager®User Guide
included with the software.
®
61

ezCarb Home
Main Menu
Carbs: 34g
I:C 1U: 15g
Add BG
Show Result
Bolus Total
Main Menu
Carb
BG +
IOB
Total =
2.26U
0.00U
--.--U
2.25U
0.00 U
Go
Type Normal
Bolus Total
Main Menu
Carb
BG +
IOB
Total =
2.26U
0.00U
--.--U
2.25U
2.25 U
Go
Type Normal
ezCarb Home
Main Menu
Carbs: 34g
I:C 1U: 15g
Add BG
Show Result
BOLUS MENU
Main Menu
Normal
ezCarb
ezBG
Combo Bolus
Reminders
Draft. 410-106-00 Rev. A
CHAPTER 11 - U S I N G A D VANCED FEATURES
Entering Carbs Manually
1. From the BOLUS MENU, scroll to “ezCarb”. Press . The ezCarb Home
screen is displayed.
I
2. The cursor will flash on the “Carbs” field to indicate that you can edit the
Insulin Pump
®
total number of carbs eaten. Use the / buttons to enter the number of
carbs. Press . “Add BG” is highlighted. (See Adding a BG Bolus to ezCarb,
pages 63–64 in this chapter.)
Animas
NOTE: The max limit for ezCarb Total is 999g.
3. Check that the grams of carb entered and your I:C ratio at the top of the screen are correct.
a. If the entries are correct, scroll to “Show Result”. Press and go to Step 5.
b. If not correct, scroll up to highlight the field and press to activate Edit
Mode. Use / buttons to enter your I:C ratio and/or change the carb entry.
Press .
4. Scroll down to “Show Result”. Press .
5. The Bolus Total screen is displayed. The bolus
amount field is highlighted and flashing to indicate
you can enter the total amount as shown or adjust
as needed. Enter your bolus amount. Press .
NOTE: Calculated total units will be rounded to the
nearest .05 units.
62

Bolus Total
Main Menu
Carb
B
G +
IOB
Total =
2.26U
0.00U
--.--U
2.25U
2.25U
Go
Type Normal
DELIVERING
2.25
U
Press any
f
unction button
t
o Cancel
Bolus Total
Main Menu
Carb
BG +
IOB
Total =
2.26U
0.00U
--.--U
2.25U
2.25U
Go
Type Combo
ezCarb Home
Main Menu
Carbs: 34g
I:C 1U: 15g
Add BG
Show Result
Draft. 410-106-00 Rev. A
HAPTER 11 - U S I N G A D VANCED FEATURES
C
6. “Go” is highlighted. If you wish to give a Normal
Bolus, press to deliver.
7. If you wish to give a Combo Bolus, scroll to the “Type” field and press
to edit.
8. Use the / buttons to select bolus type: “Normal” (default) or “Combo”. Press .
9. “Go” is highlighted. Press .
I
Animas
®
Insulin Pump
NOTE: If you select the Combo Bolus option, the Combo Bolus screen will be displayed. See Combo
Bolus, pages 67–68 in this chapter for instructions on delivering the Combo Bolus.
Entering Carbs Using the Food Database
This feature is only available on your meter remote, and can be accessed when delivering an ezCarb
Bolus from your meter remote. See Chapter 4 in Section III, pages 187–202.
Adding a BG Bolus to ezCarb
1. On the ezCarb Home screen, enter the number of carbs. Press .
2. “Add BG” is highlighted. Press . The BG CORRECT screen is displayed.
63
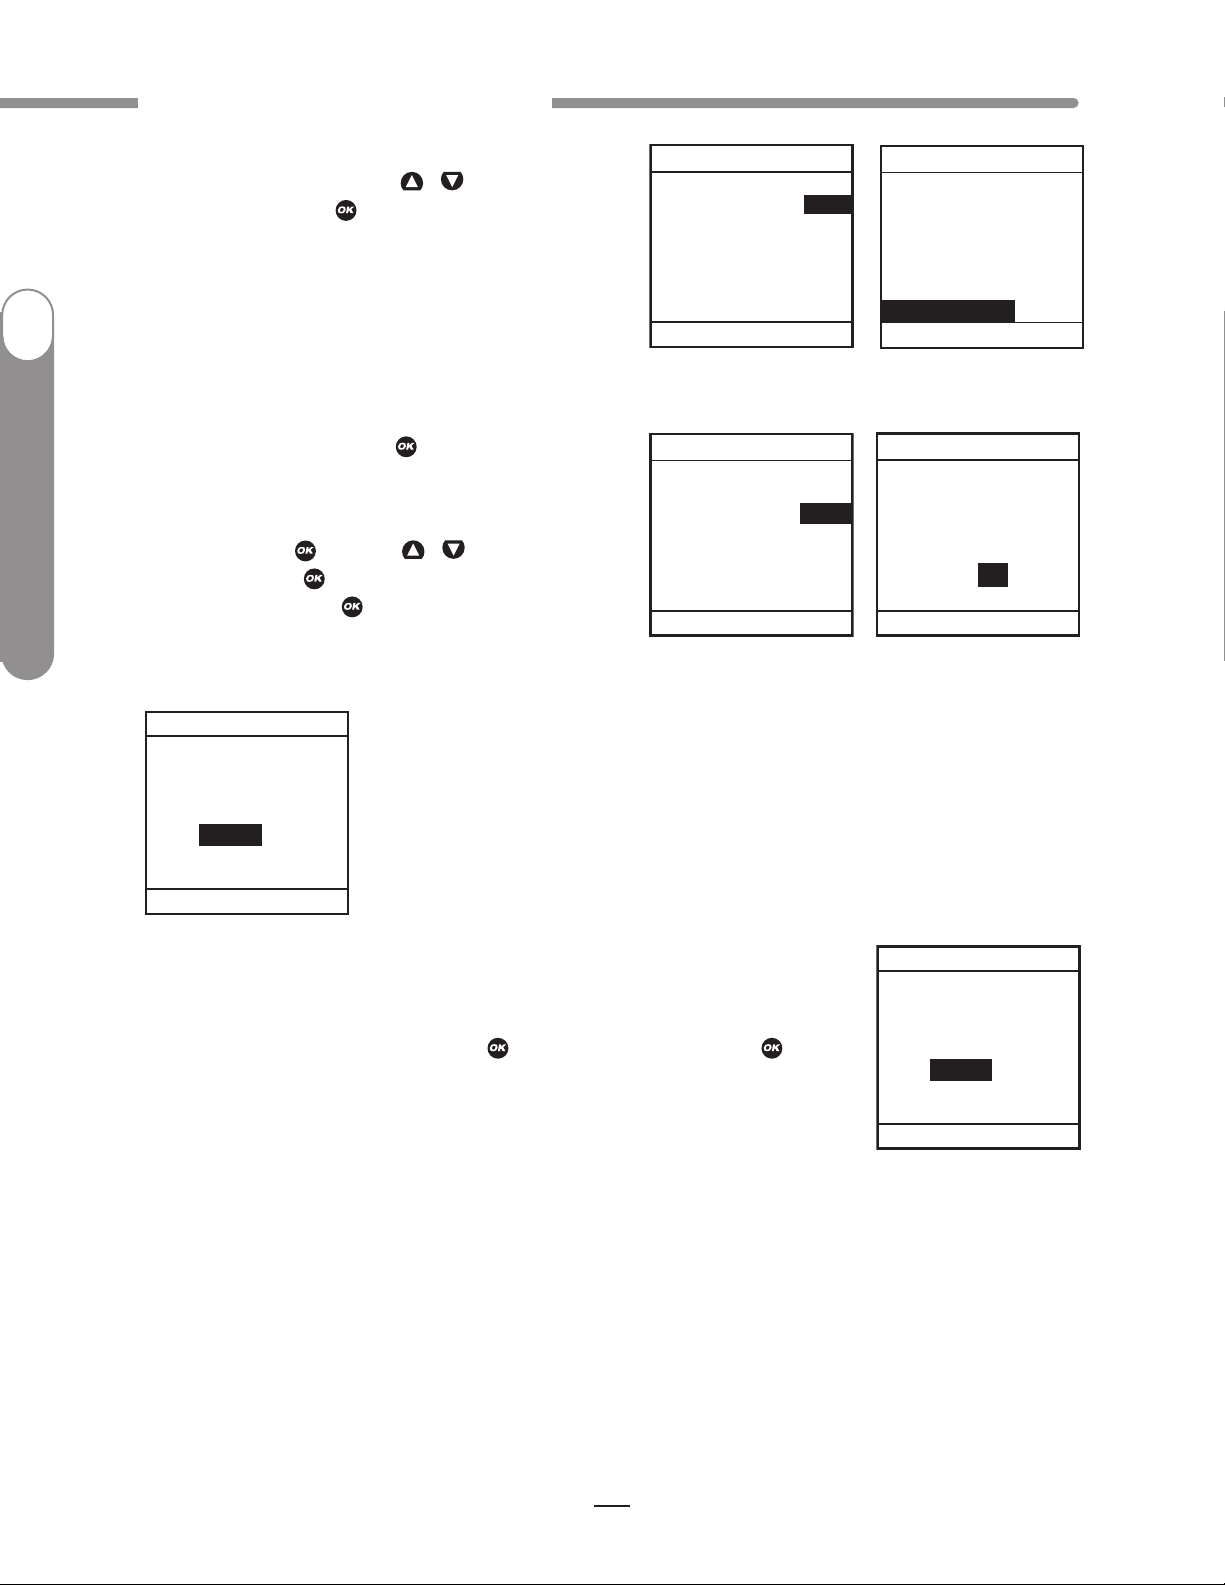
BG CORRECT
Main Menu
Actual
Target -
= +
ISF 37 mg/dL
Show Result
mg/dL
220
120
100
BG CORRECT
Main Menu
Actual
Target -
= +
ISF 37 mg/dL
Show Result
mg/dL
220
120
100
Bolus Total
Main Menu
Carb
BG +
IOB
Total =
2.26U
2.70U
--.--U
4.95U
4.95 U
Go
Type Normal
Bolus Total
Main Menu
Carb
BG +
IOB
Total =
2.26U
2.70U
--.--U
4.95U
Go
Type Normal
0.00 U
Draft. 410-106-00 Rev. A
BG CORRECT
Main Menu
Actual
Target -
= +
ISF 37 mg/dL
Show Result
m
g/dL
220
120
100
BG CORRECT
Main Menu
Actual
Target -
= +
I
SF 37 mg/dL
Show Result
mg/dL
220
120
100
CHAPTER 11 - U S I N G A D VANCED FEATURES
3. The “Actual” field is highlighted and flashing to
indicate Edit mode. Use the / buttons to enter
your BG value. Press . “Show Result” is
highlighted.
I
4. Check that the BG Target range and ISF are correct.
a. If they are correct, press with “Show Result”
highlighted.
Insulin Pump
®
b. If they are not correct, scroll up to highlight the
fields and press . Use the / buttons to adjust
the values. Press to exit Edit mode. Scroll down to
“Show Result”. Press .
Animas
5. The Bolus Total screen is displayed and shows the calculated bolus units
from your ezCarb Bolus. The bolus amount field is highlighted and flashing,
and displays 0.00 units.
6. Enter the Bolus amount and press
deliver as a Normal Bolus or scroll to the “Type” field to select Combo Bolus,
then select “Go”.
.
“Go” is highlighted. Press to
If you selected the Combo Bolus option, you will begin the steps for delivering the ezCarb units as a
Combo Bolus (see Combo Bolus, pages 66–67 in this chapter). The bolus amount you entered on the
Bolus Total screen in step 6 will appear in the “Total” field on the first Combo Bolus screen.
64

BOLUS MENU
Main Menu
Normal
ezCarb
ezBG
Combo Bolus
Reminders
Draft. 410-106-00 Rev. A
ezBG
Main Menu
Actual
Target -
= +
ISF 37 mg/dL
mg/dL
224
120
104
Show Result
ezBG
Main Menu
Actual
Target -
= +
ISF 37 mg/dL
mg/dL
224
120
104
Show Result
ezBG
Main Menu
Actual
Target -
= +
ISF 37 mg/dL
mg/dL
224
120
104
Show Result
ezBG
Main Menu
Actual
Target -
= +
ISF 37 mg/dL
mg/dL
224
120
104
Show Result
HAPTER 11 - U S I N G A D VANCED FEATURES
C
ezBG
This feature allows you to enter your BG reading and your pump will automatically calculate a BG
correction bolus based on the ISF and BG Target range for the current time of day. If the IOB feature
is activated, your pump will calculate a reduced dose for high BG correction boluses.
1. From the BOLUS MENU, select “ezBG”. Press the button.
I
Animas
®
Insulin Pump
2. The “Actual” field will be highlighted and flashing
to indicate Edit mode. Use the / buttons to enter
your actual BG reading. Press the button to confirm
the entry and exit Edit mode.
3. Check to be sure the BG Target and Insulin Sensitivity Factor (ISF) are
correct. Your health care team will give you these values. If you need to edit
these fields, scroll up to highlight the field and press to activate Edit mode.
Use / buttons to change target. Press to confirm and to exit Edit mode.
4. “Show Result” is highlighted. Press .
65

Alert
LOW BG
Confirm
Treat low BG.
No bolus
recommended.
Monitor BG.
Alert
HIGH BG
Confirm
Treat high
BG.
Check site.
Check
ketones.
Monitor BG.
ezBG Total
Main Menu
Go
BG +
IOB
Total =
2.81U
--.--U
2.80U
0.00U
0.00 U
ezBG Total
Main Menu
Go
BG +
IOB
Total =
2.81U
--.--U
2.80U
2.80U
DELIVERING
2.80
U
Press any
function button
to Cancel
ezBG Total
Main Menu
Go
BG +
IOB -
Total =
2.81U
1.00U
1.80U
1.80U
Draft. 410-106-00 Rev. A
CHAPTER 11 - U S I N G A D VANCED FEATURES
5. The ezBG Total screen is displayed with a suggested bolus amount. The bolus amount field is
highlighted and flashing to indicate you can enter the total amount as shown or adjust as needed.
Enter your bolus amount. Press to deliver.
I
Insulin Pump
®
NOTE: If the IOB feature is activated, your pump will calculate a reduced
Animas
BG Bolus amount for your review.
NOTE: If you enter a BG amount below 70 mg/dL or above 250 mg/dL, your pump will alert you that
you’ve entered an out of range BG. To confirm the Alert, press . Treat the out of range BG as
recommended by your health care team.
66

BOLUS MENU
Main Menu
Normal
ezCarb
ezBG
Combo Bolus
Reminders
Combo Bolus
Main Menu
Go
Total
Duration
8.50U
0.5Hr
Extend
100%
0.00U
Normal:
0:
0.00:
Combo Bolus
Main Menu
Go
Total
Duration
8.50U
4.0Hr
Extend
70%
5.95U
Normal:
30:
2.55:
Combo Bolus
Main Menu
Go
Total
Duration
8.50U
0.5Hr
Extend
70%
5.95U
Normal:
30:
2.55:
Draft. 410-106-00 Rev. A
HAPTER 11 - U S I N G A D VANCED FEATURES
C
Combo Bolus
The Combo Bolus feature is used to give both a Normal and Extended Bolus. This feature is useful for
consumption of high fat meals such as pizza, if you will be “grazing” over a few hours or if you have
gastroparesis. You can program part of your bolus amount to be delivered immediately and part of it to
be delivered slowly over the course of up to 12 hours. Your health care team can help you determine
the “split” of Normal to Extended insulin amounts, as well as the duration that is most appropriate for
you.
1. From the BOLUS MENU, select “Combo Bolus”. If you used the ezCarb
Bolus option to calculate a bolus and chose to deliver it as a Combo Bolus,
you will begin at the Combo Bolus screen in step 2.
I
Animas
®
Insulin Pump
2. Use the / buttons to enter the Total bolus amount. Press . “Go” is
highlighted. The factory default setting for Duration is 30 minutes, and the
Ratio is 0% Normal and 100% Extended. If these settings are appropriate,
press to deliver.
3. To change either the Duration or Ratio, scroll up to the desired field and
press to activate Edit mode.
4. Use the / buttons to change settings. As you change the Ratio by
percentage, the amount in units is automatically changed. You cannot change
the ratio by units, only by percentage.
5. When settings are correct, press to confirm and exit Edit Mode.
NOTE: Your pump is “smart”; it will remember your last duration and the ratio (as percentages) you
programmed. So if you use the same duration and ratio for certain types of meals, you need only
change the total bolus amount the next time you use this feature. However, the last programmed
Combo Bolus settings will be cleared each time you change the battery.
67

Combo Bolus
Main Menu
Go
Total
Duration
8.50U
4.0Hr
Extend
70%
5.95U
Normal:
30:
2.55:
2 : 27
PM
Status
Basal Rate
0.675U/Hr
Insulin: 105U
Menu
BOLUS ACTIVE
Combo Bolus
Main Menu
CANCEL
Duration
Delivered
0.0 : 4.0Hrs
2.55U : 8.50U
ACTIVE
BOLUS MENU
Main Menu
Normal
ezCarb
ezBG
Combo Bolus
Reminders
REMINDERS
Main Menu
Reminder-1
Time =
Reminder-2
Time =
OFF
12:00PM
OFF
12:00PM
BG Check
After Bolus =
OFF
1 Hr
Draft. 410-106-00 Rev. A
CHAPTER 11 - U S I N G A D VANCED FEATURES
6. Scroll to “Go” and press to activate. The Home
screen shows Combo Bolus active.
I
To cancel an active Combo Bolus from the BOLUS MENU, select “Combo
Bolus”. Details of the active Combo Bolus will be displayed.
Insulin Pump
®
Scroll to “CANCEL” and press to cancel the Combo Bolus.
NOTE: If you Suspend your pump, any active Combo Bolus will also be
canceled and the screen display will alert you. Combo Bolus is also canceled
Animas
when you change the battery and/or prime your pump.
Reminders
This feature allows you to set personal reminders. You can set two bolus reminders for times of day,
and one reminder to check BG at a certain time after a bolus. Confirm the Reminder by pressing .
Once you’ve confirmed the Reminder, you will not be alerted again.
Bolus Reminders for Time of Day
1. From the BOLUS MENU, select “Reminders”. Press .
2. The “Reminder-1” field will be highlighted with a flashing cursor to indicate
Edit mode. Use the / buttons to turn on or off. Press to confirm and exit
Edit mode.
68
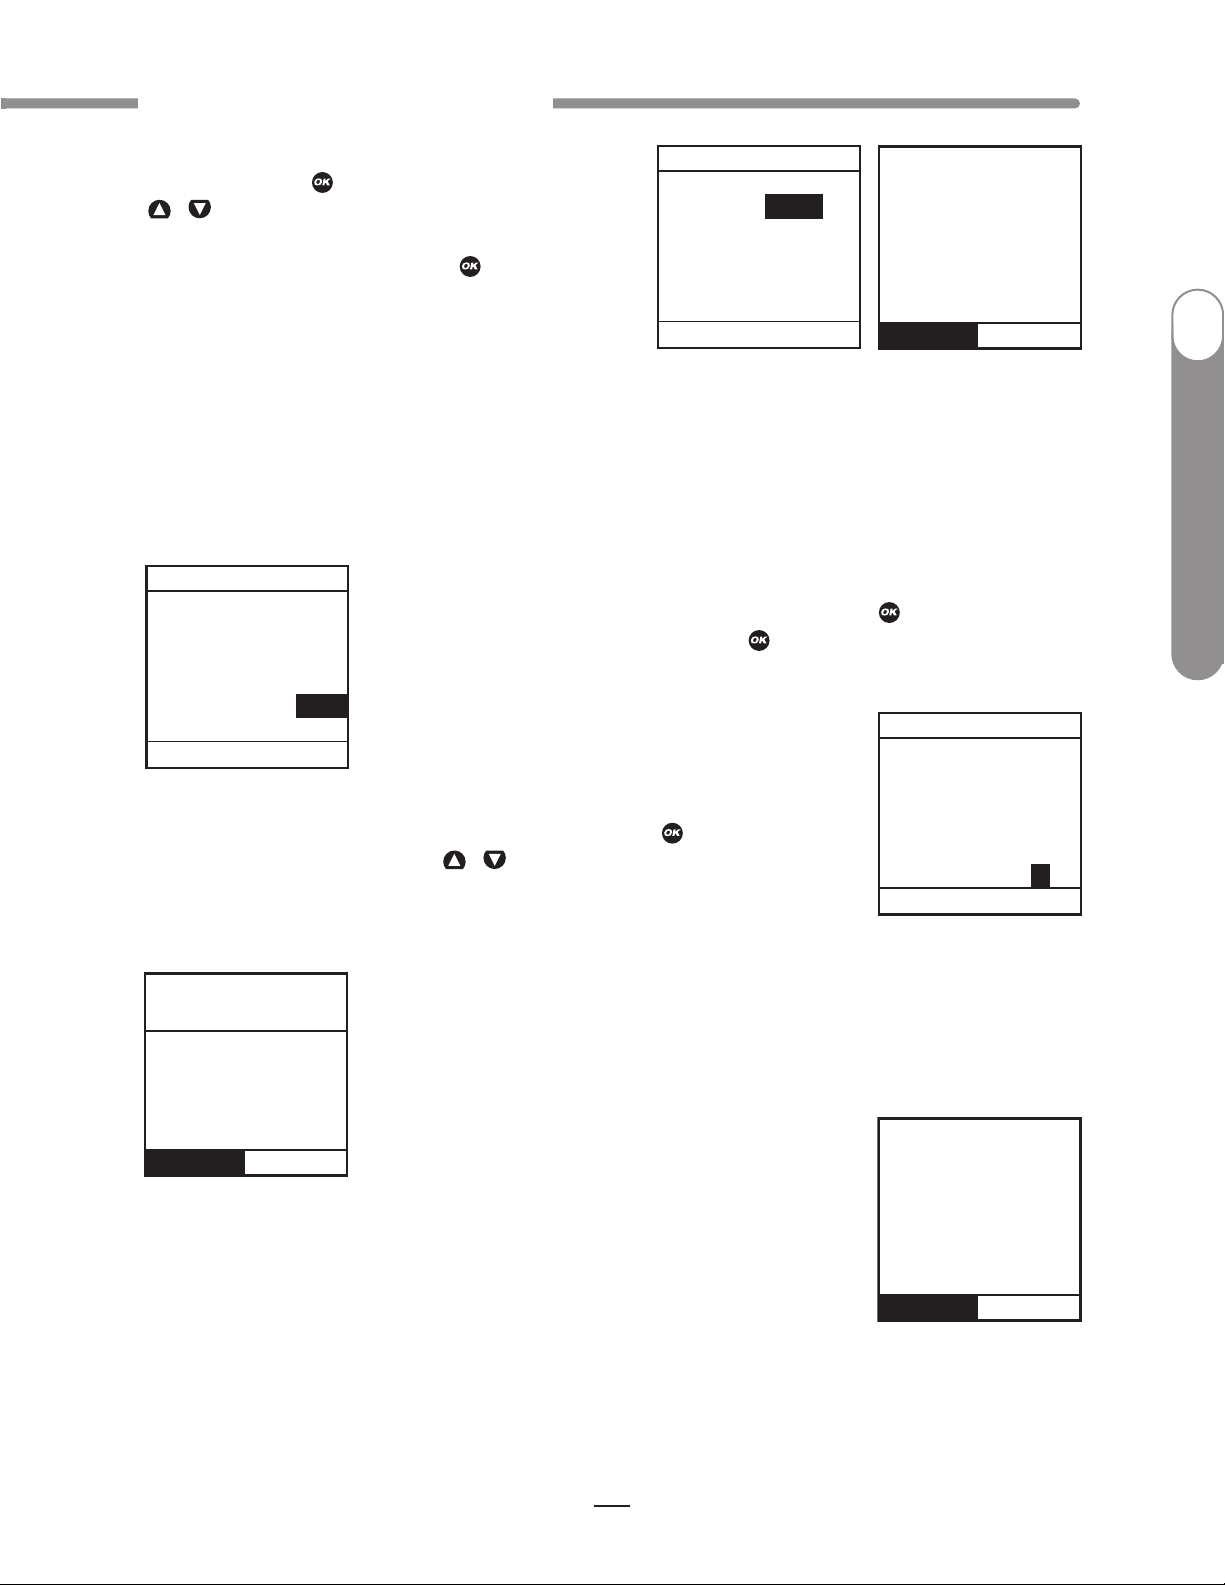
REMINDERS
Main Menu
Reminder-1
Time =
Reminder-2
Time =
OFF
12:00PM
OFF
12:00PM
BG Check
After Bolus =
OFF
1 Hr
REMINDERS
Main Menu
Reminder-1
Time =
Reminder-2
Time =
OFF
12:00PM
OFF
12:00PM
BG Check
After Bolus =
ON
1 Hr
Confirm
BG
Reminder
Check BG
in
1 Hr
Confirm
Check
BG
Last bolus
12:15PM
Reminder
REMINDERS
Main Menu
R
eminder-1
Time =
Reminder-2
Time =
OFF
12:00PM
OFF
12:00PM
BG Check
After Bolus =
OFF
1 Hr
Confirm
Reminder
12:00PM
HAPTER 11 - U S I N G A D VANCED FEATURES
C
he “Time” field for this reminder will be
3. T
highlighted. Press to activate Edit mode. Use the
/ buttons to enter the time you wish a reminder
to sound (or vibrate, if that is the setting you selected
in the SETUP SOUND menu). Press to confirm your
setting and exit Edit mode. When the feature is turned
on, your pump will display the “Reminder” screen on
the right at the selected time of day.
Draft. 410-106-00 Rev. A
I
4. Repeat for the Reminder 2.
BG Check Reminder
1. From the REMINDERS menu, select “BG Check”. Press to activate Edit
mode to turn this reminder on or off. Press to confirm and exit Edit mode.
2. Scroll down to highlight the “After Bolus” field. Press to select the field
and activate Edit mode. Use the / buttons to enter how long after a
Normal Bolus you wish your pump to sound (or vibrate) to remind you to check
your BG. You can select a reminder time of 1, 2, 3 or 4 hours.
Animas
®
Insulin Pump
When this feature is turned on, your pump will display the “Check BG” screen
at the reminder time you set. On this screen you can select a different
reminder time (1,2,3, or 4 hours), or opt not to be reminded by entering 0.
NOTE: When you enter a time, your pump will sound a reminder and display
this screen at that time after any Normal Bolus is programmed, including the
Normal portion of a Combo Bolus. If you program an Extended Bolus only, the
reminder will not sound.
3. When finished setting reminders, scroll to “Main Menu” to display the MAIN MENU.
69

BASAL MENU
Main Menu
Total 13.60U
Temp
A1-WEEKDAY
2-other
3-weekend
4-exercise
Alert
1-weekday
must be the
active program
to change the
basal display
setting.
Confirm
Bolus Total
Main Menu
Carb
BG +
IOB –
Total =
2.25U
2.70U
1.00U
3.95U
3.95U
Go
Type Normal
Draft. 410-106-00 Rev. A
CHAPTER 11 - U S I N G A D VANCED FEATURES
Delivery Speed - Bolus
On rare occasions, usually with very large boluses, users may experience a slight stinging sensation
with rapid bolus delivery. If this is a concern, you can set the bolus delivery speed to slow to
accommodate your needs. If you use the slow setting, your pump will pause approximately 4 seconds
in between delivery of each unit of insulin programmed.
I
Multiple Basal Programs
This feature allows 4 different Basal programs to show on your “Basal Menu”
screen. Users find this feature beneficial if their activity level is different during
the week than on weekends. Switching work shifts at work is another reason to
use multiple basal programs. Some use a different basal program during
Insulin Pump
®
menstruation. An “A” will appear to the left of the basal program that is
currently active.
Animas
NOTE: If a program other than 1-Weekday is active, you cannot change this
setting to display 1 basal program. The Alert screen shown here will pop up
to remind you.
IOB
Even with rapid-acting insulin, your body takes some time to use the entire
bolus amount. If you have activated this feature, your pump will track the bolus
insulin remaining in your system - IOB - and calculate a suggested lower BG
correction bolus dose. The lower dose is only recommended if you use the
ezBG feature or if you add a BG bolus to an ezCarb bolus. For this feature to
give optimal results, you should always use either ezBG or the Add BG feature
during ezCarb programming when entering a BG correction bolus.
CAUTION: Your health care team will give you recommendations specific to your plan of
treatment.
70

ezBG Total
Main Menu
Go
BG +
IOB -
Total =
2.81U
1.00U
1.80U
1.80U
SETUP ADV 9
Home
Sick days
BG over
Next
240
Check ketones
every
4 Hrs
Check BG
every
2 Hrs
mg/dL
Draft. 410-106-00 Rev. A
HAPTER 11 - U S I N G A D VANCED FEATURES
C
In the examples shown here, the IOB amount is subtracted from the BOLUS
TOTAL screen and the ezBG Total screen.
NOTE:
• When you replace the battery, the IOB amount is cleared.
• Your pump constantly tracks IOB. If you’ve given a bolus before turning on the feature, your pump
will show the remaining amount from that bolus as IOB immediately.
Sick Day Guidelines
I
Animas
®
Insulin Pump
To review your basic sick day guidelines, refer to this screen. For more information on sick day
guidelines, refer to Chapter 15 in Section I, pages 91–92, and contact your health care team.
1. From the SETUP menu, select “Advanced”.
2. Scroll to the Setup Advanced Screen 9.
3. Enter or review the guidelines as recommended by your health care team.
Establishing Communication with your Meter Remote
When you are ready to begin using your pump and meter remote together as a system, you will need to
activate RF communication and pair the devices. See Chapter 2 in Section III, pages 175–184.
71

Draft. 410-106-00 Rev. A
CHAPTER 11 - U S I N G A D VANCED FEATURES
I
Insulin Pump
®
Animas
72

Draft. 410-106-00 Rev. A
CH A PT ER 12 - CA R E A N D M A INT E NA N CE
The Vents
Your pump features a redundant Vent Safety System. Vents serve two purposes. First, they allow air to
enter and exit your pump so that pressure is equalized under a variety of environmental
circumstances, such as changes in altitude. Second, the vents are backed by a special membrane,
which keeps water from entering your pump.
Battery Cap with O-ring and Vent
Your battery cap contains an o-ring and vent. There is a tiny hole backed by a membrane, which allows
air to pass through but prevents water from entering. The o-ring helps to keep your pump waterproof. It
is recommended that you change the battery cap/vent once a year. If you work in a dusty environment
such as a construction site, mill, cement factory, etc., or if you are a frequent swimmer, you should
change your battery cap every 6 months. You can call Animas
®
to order an extra battery cap.
12
I
Animas
®
Insulin Pump
Vent Hole
O-ring
WARNING: Under no circumstances should you introduce any kind of sharp object into the
vent openings to clean them. Doing so could compromise your pump’s waterproof capabilities.
If at any time you suspect the vent opening is clogged, replace the battery cap.
Cleaning
CAUTION: Do Not use household or industrial cleaners, chemicals, solvents, bleach,
scouring pads or sharp instruments to clean your pump. Never put your pump in the dishwasher
or use very hot water to clean it. Use only a very mild detergent (for example a drop of liquid
soap in a glass of water) and a lint-free cloth.
Never put your pump in a microwave oven or baking oven to dry it. Use a soft towel.
Never clean the battery or insulin cartridge compartments.
General Wear and Tear
If you drop your pump or it has been hit against something hard, inspect it to be sure it is still working
properly. Check that the display screen is working and clear, that the cartridge cap, battery cap and
infusion set are properly in place. Check for leaks around the cartridge by wrapping a piece of tissue
around the connection area. Cracks, chips or damage to your pump may impact the battery contact
and/or the waterproof feature of your pump. Call our Customer Service representatives at
1-999-999-9999 if you identify or suspect your pump is damaged. They will help determine if your
pump should be replaced.
73

Draft. 410-106-00 Rev. A
CHAPTER 12 - C A R E A N D M A I N T E N A N C E
Disposal
International and US regulations require controlled disposal of devices such as insulin pumps.
Dispose of batteries according to your local environmental regulations.
I
Insulin Pump
®
Animas
74

Alert
Confirm
Basal Menu
Your active
basal
program
is empty.
0.000U/Hr
Draft. 410-106-00 Rev. A
CH A PT ER 13 - SAF ETY SYST E M A N D AL A RM S
Alerts, Warnings and Alarms
Your pump has a progressive warnings and alarms safety system. This means if you do not confirm the
warning or alarm, it will progress to the sweep alarm with vibrate within one hour. At the high volume
stage, if you do not confirm the warning or alarm, the sweep alarm will begin and will not stop until
appropriate action is taken.
NOTE: Your pump uses battery power to notify you of alerts, warnings, and alarms. If you do not
confirm the notification, your pump will continue to use battery power as the notifications repeat and
progress. This will result in reduced battery life and the Replace Battery Alarm screen appearing sooner
than expected.
Additionally, certain warnings (e.g., Low Cartridge Warning, Occlusion Alarm) take precedence over
less critical ones (e.g., Low Battery Warning). This means if you do not confirm the more critical
warning, battery life will be reduced and your pump may skip the Low Battery Warning and go directly
to the Replace Battery Alarm, or battery life will end before a Replace Battery Alarm is displayed.
Alerts are automatically displayed to remind you of a function that you’ve set or a condition that exists.
Warnings are triggered for a variety of reasons. They require you to confirm the warning by pressing
and/or taking action to address the warning. Alarms are triggered by several conditions. All require you
to address the alarm by taking appropriate action in order to clear the alarm condition.
13
I
Animas
®
Insulin Pump
- Indicates that this alert, warning or alarm can play a tune as the initial notification for medium and
high volume settings. The pump default for sounds at the low volume setting is a factory-set sound
and cannot be modified with ezManager
IMPORTANT: Many of the following pump alerts, warnings and alarms will also sound and/or display
on your meter remote, once you begin using the devices together as a system. See Chapter 6 in
Section III, pages 207–216 for a complete list.
NOTE: Alarms, warnings and alerts will display actual insulin units during pump operation, rather than
the “XX” or “XXX” units displayed on some of the screens in this list.
Alert: Active Basal Program Empty
Cause
Effect
Message
Action
Empty basal program activated.
No basal deliveries.
Displayed once until confirmed or until pump goes to
sleep and each time manually awakened.
None required but can confirm or select Basal Menu.
®
Software.
Beeps/Vib
User selected, one time and each time manually
awakened. No progression.
75

Alert
Pump Suspended
If active,
Temp Basal &
Combo Bolus
have been
canceled.
Alert
LOW BG
Confirm
Treat low BG.
No bolus
recommended.
Monitor BG.
Draft. 410-106-00 Rev. A
Alert
Temp Active
M
inimum
Basal rate
limited to
0.025U/Hr
CHAPTER 13 - SAFETY S Y STEM A N D A L A R M S
Alerts, Warnings and Alarms
Alert: Temp Basal Minimum Rate
Cause
I
Effect
Message
Action
Insulin Pump
®
Animas
Beeps/Vib
Alert: Suspend (Temp Basal/Combo Bolus Canceled)
Cause
Effect
Message
Negative Temp Basal activated.
Basal delivery will not go below 0.025U/Hr.
Displayed once for 3 seconds.
None required.
User selected, one time. No progression.
Pump suspended
Any active Temp Basal/Combo Bolus canceled.
Displayed once for 3 seconds.
Action
Beeps/Vib
Alert: Low BG
Cause
Effect
Message
Action
Beeps/Vib
None required.
User selected, one time. No progression.
BG entry below 70 mg/dL.
Requires user confirmation to continue.
Displayed until confirmed or until pump goes to sleep.
Press to confirm.
User selected, one time. No progression.
76

Alert
Clear Program
Basal Options
Clear Program
deletes all
basal segments
in this program.
Alert
1-weekday
must be the
active program
to change the
basal display
setting.
Confirm
Alert
HIGH BG
Confirm
Treat high
BG.
Check site.
Check
ketones.
Monitor BG.
HAPTER 13 - SAFETY S Y STEM A N D A L A R M S
C
Alerts, Warnings and Alarms
Alert: High BG
Draft. 410-106-00 Rev. A
Cause
Effect
Message
Action
Beeps/Vib
BG entry above 250 mg/dL.
Requires user confirmation to continue.
Displayed until confirmed or until pump goes to sleep.
Press to confirm.
User selected, one time. No progression.
Alert: Clear Program Basal Segments
Cause
Effect
Message
Clear command selected from BASAL OPTIONS screen.
Requires user confirmation to continue.
Displayed until one of the two options is selected or
until pump goes to sleep.
I
Animas
®
Insulin Pump
Action
Beeps/Vib
Select “Clear Program” or “Basal Options”.
User selected, one time.
Alert: Basal Program Display Change
Cause
Effect
Message
Action
Beeps/Vib
Changing display of basals from 4 to 1 but program 1 is
not currently active.
Requires user confirmation to continue.
Displayed until confirmed or until pump goes to sleep.
Press to confirm.
User selected, one time.
77

Warning
Confirm
No delivery.
Pump is
suspended.
Warning
Confirm
No cartridge
detected.
Delivery
disabled.
Draft. 410-106-00 Rev. A
Warning
Edit Basal
Basal edit
not saved.
Basal
d
elivery
suspended.
CHAPTER 13 - SAFETY S Y STEM A N D A L A R M S
Alerts, Warnings and Alarms
Warning: Basal Delivery Suspended
Cause
Basal Edit was not saved.
I
Effect
Message
Action
Insulin Pump
®
Beeps/Vib
Animas
Warning: Suspend
Cause
Effect
Message
Basal delivery stopped.
Displayed when manually awakened until confirmed.
Press to select “Edit Basal”. Review basal edits and
select “Save/Review”.
User selected, every 3 minutes until confirmed. If not
confirmed, progresses to sweep/vibe within one hour.
Pump suspended manually.
All deliveries stop.
Displayed each time pump is awakened until confirmed
and once every 15 minutes until action is taken.
Action
Press to confirm. Resume delivery.
User selected, once every 15 min. No progression if
Beeps/Vib
confirmed each time displayed. Sweep/vibe within one
hour if not confirmed.
Warning: No Cartridge Detected, Deliveries Disabled
Cause
Effect
Message
Action
No cartridge detected after “Load cartridge” step during
Rewind/Prime.
No deliveries.
Displayed when manually awakened until confirmed.
Press to confirm. Be sure Rewind/Prime sequence is
completed with cartridge properly in place.
User selected, once every 3 min. No progression if
Beeps/Vib
confirmed each time displayed. Sweep/vibe within one
hour if not confirmed.
78

Warning
Confirm
Low
cartridge
XX U or
less left.
Warning
Confirm
Exceeds
max bolus
XX.XX U.
No bolus
delivery.
Warning
Confirm
Low
battery.
HAPTER 13 - SAFETY S Y STEM A N D A L A R M S
C
Alerts, Warnings and Alarms
Warning: Low Battery
Draft. 410-106-00 Rev. A
Cause
Effect
Battery life will only last a minimum of 30 minutes.
Deliveries continue.
Displays when pump is awake until confirmed. Displays
Message
when triggered by event (such as bolus) & when
manually awakened.
Action
Beeps/Vib
Press to confirm. Insert new battery.
User selected, every 3 minutes until confirmed. If not
confirmed, progresses to sweep/vibe within one hour.
Warning: Low Cartridge
Cause
Effect
Message
Low insulin level reached.
Deliveries may continue until Empty Cartridge alarm is
triggered.
Displayed when manually awakened until confirmed.
I
Animas
®
Insulin Pump
Action
Beeps/Vib
Press to confirm. Replace with filled cartridge.
User selected, every 3 minutes until confirmed. If not
confirmed, progresses to sweep/vibe within one hour.
Warning: Exceeds Max Bolus
Cause
Effect
Message
Action
Audio bolus delivery exceeds user-set maximum.
Bolus delivery stops.
Displayed when manually awakened until confirmed.
Press to confirm. Reprogram max bolus amount in
the Setup Advanced menu.
Beeps/Vib
User selected, every 3 minutes until confirmed. If not
confirmed, progresses to sweep/vibe within one hour.
79

Warning
Confirm
Exceeds
max basal
XXX U/Hr.
No basal
delivery.
Draft. 410-106-00 Rev. A
Warning
Confirm
Exceeds
max TDD
XXX U.
No delivery.
CHAPTER 13 - SAFETY S Y STEM A N D A L A R M S
Alerts, Warnings and Alarms
Warning: Exceeds Max TDD
Cause
I
Effect
Message
Bolus delivery exceeds user-set maximum.
All deliveries stop until action is taken. Any Combo
Bolus or Temp Basal is temporarily suspended.
Displayed when manually awakened until confirmed.
Press to confirm. Reprogram max TDD amount in the
Setup Advanced menu. If the Warning is not confirmed
Action
Insulin Pump
®
by the time your pump clock passes midnight, the
message will continue to be displayed, but any Combo
Bolus or Temp Basal that is currently suspended will
resume.
Animas
Beeps/Vib
User selected, every 3 minutes until confirmed. If not
confirmed, progresses to sweep/vibe within one hour.
Warning: Exceeds Max Basal
Cause
Basal delivery rate (or Temp Basal delivery) exceeds
user-set maximum.
Effect
Message
Action
Beeps/Vib
Basal delivery stops.
Displayed when awakened (by basal delivery attempt
every 3 min. or manually) until confirmed.
Press to confirm. Reprogram Max Basal amount in
the Setup Advanced menu (or reprogram Temp Basal).
User selected, every 3 minutes until confirmed. If not
confirmed, progresses to sweep/vibe within one hour.
80
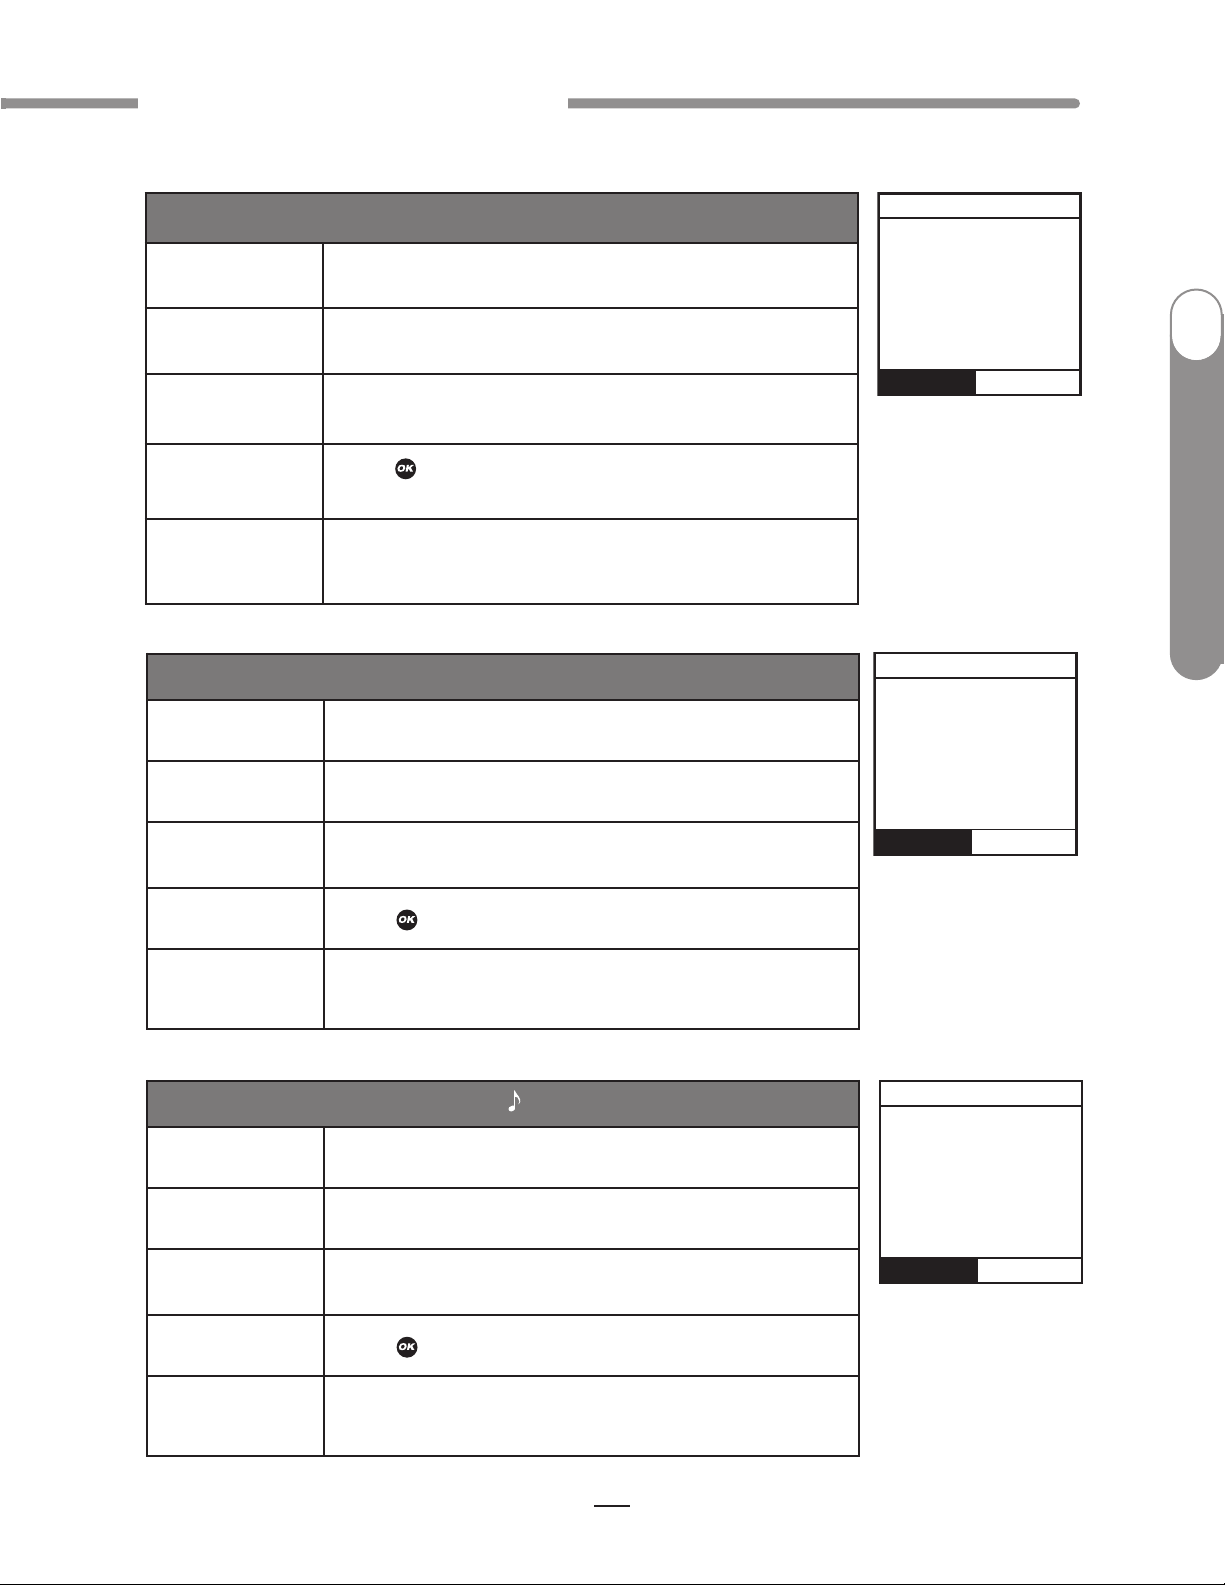
Warning
Confirm
Pump is
not primed.
No delivery.
Warning
Confirm
Exceeds
max 2 Hr
XX U.
No delivery.
Warning
Confirm
Delivery
canceled
due to
low
cartridge.
HAPTER 13 - SAFETY S Y STEM A N D A L A R M S
C
Alerts, Warnings and Alarms
Warning: Exceeds Max 2-hour Delivery
Draft. 410-106-00 Rev. A
Cause
Effect
Message
Action
Combined basal and bolus delivery exceeds user-set
2-hour maximum.
Insulin delivery stops.
Displayed when manually awakened until confirmed.
Press to confirm. Reprogram Max 2-Hr amount in the
Setup Advanced menu.
Beeps/Vib
User selected, every 3 minutes until confirmed. If not
confirmed, progresses to sweep/vibe within one hour.
Warning: Delivery Canceled due to Low Cartridge
Cause
Effect
Message
Basal or Bolus delivery exceeds insulin remaining in
cartridge.
Basal or Bolus delivery stopped.
Once per occurrence and each time awakened until
confirmed.
I
Animas
®
Insulin Pump
Action
Beeps/Vib
Press to confirm. Replace with full cartridge.
User selected, every 3 minutes until confirmed. If not
confirmed, progresses to sweep/vibe within one hour.
Warning: No Prime, No Delivery
Cause
Effect
Message
Action
Beeps/Vib
Pump is not primed.
All deliveries stop.
Every 3 minutes or when awakened manually.
Press to confirm. Disconnect, reprime.
User selected, every 3 minutes until confirmed. If not
confirmed, progresses to sweep/vibe within one hour.
81

Draft. 410-106-00 Rev. A
ALARM
Confirm
OCCLUSION
DETECTED
No delivery.
Suspend
Warning
Confirm
Battery
change
requires
Rewind-Prime.
Warning
Confirm
Bolus
delivery
c
anceled by
user button
press.
Delivered:
X
.XX U of X.XX U
CHAPTER 13 - SAFETY S Y STEM A N D A L A R M S
Alerts, Warnings and Alarms
Warning: Bolus Delivery Canceled
Cause
User pressed function button on pump during bolus
delivery.
I
Effect
Message
Action
Insulin Pump
®
Beeps/Vib
Animas
Warning: Battery Change Requires Rewind Prime
Cause
Effect
Message
Bolus delivery stopped.
Every 3 minutes.
Press to confirm. If button was pressed accidentally,
repeat steps to deliver remaining insulin units.
User selected, every 3 minutes until confirmed. If not
confirmed, progresses to sweep/vibe within one hour.
Prime attempted without rewind.
All deliveries stopped.
Every 3 minutes or when awakened manually.
Action
Beeps/Vib
Alarm: Occlusion
Cause
Effect
Message
Action
Beeps/Vib
Press to confirm. Rewind and prime.
User selected, every 3 minutes until confirmed. If not
confirmed, progresses to sweep/vibe within one hour.
Occlusion detected.
All deliveries stop.
Continuous until confirmed.
Press to confirm. Disconnect and prime to clear
occlusion. Option to select Suspend (see Suspend
Warning screen, page 78).
User selected, every 3 minutes until confirmed. If not
confirmed, progresses to sweep/vibe within one hour.
(Once confirmed, No Prime warning triggered, see No
Prime Warning screen, page 81.)
82

ALARM
REPLACE
BATT ERY
Remove battery
to silence
the alarm.
No delivery.
ALARM
Confirm
EMPTY
CARTRIDGE
No delivery.
Replace
cartridge.
Suspend
HAPTER 13 - SAFETY S Y STEM A N D A L A R M S
C
Alerts, Warnings and Alarms
Alarm: Empty Cartridge
Draft. 410-106-00 Rev. A
Cause
Effect
Message
Cartridge empty.
All deliveries stop.
Continuous until confirmed.
Press to confirm. Replace with full cartridge. Option
Action
to select “Suspend” (see Suspend Warning screen,
page 78).
User selected, every 3 minutes until confirmed. If not
Beeps/Vib
confirmed, progresses to sweep/vibe within one hour.
(Once confirmed, No Prime warning triggered, see No
Prime Warning screen, page 81.)
Alarm: Replace Battery
Cause
Effect
Battery either has minimum 3 minutes left or battery is
dead.
All deliveries stop.
I
Animas
®
Insulin Pump
Message
Action
Beeps/Vib
Continuous until battery is removed.
Remove battery to silence alarm. Insert new battery.
MAX volume every 3 minutes until action taken. If not
confirmed, will progress to 4 long tones/vib.
83

Draft. 410-106-00 Rev. A
ALARM
Confirm
AUTO-OFF
No button
presses in last
XX hours.
No delivery.
ALARM
CALL SERVICE
Remove battery
to silence
the alarm.
No delivery.
054-0108
CHAPTER 13 - SAFETY S Y STEM A N D A L A R M S
Alerts, Warnings and Alarms
Alarm: Call Service
Cause
Hardware or software problem detected.
I
Effect
Message
Action
Insulin Pump
®
Animas
Beeps/Vib
NOTE: Some Call Service Alarms have a unique sound/vibration sequence
and cannot be silenced by pressing.
For these Alarms the usual progression is replaced by 3 chirps/vib repeated
every 9 minutes for the first half hour. This is followed by 4 long tones/vib
after that.
All deliveries stop.
Continuous until battery is removed.
Press to silence alarm for 30 minutes (alarm can only
be silenced once). Call Customer Service at 1-999-999-
9999.
User-selected, every 3 minutes. If not confirmed,
progresses to sweep/vibe within one hour.
Alarm: Auto-Off
Cause
Effect
Message
Action
Beeps/Vib
Suspended due to no key press in user-set time period.
All deliveries stop.
Continuous until confirmed.
Press to confirm. Adjust time period in the Setup
Advanced menu.
MAX volume every 3 minutes. If not confirmed,
progresses to sweep/vibe within one hour.
(Once confirmed, No Prime warning triggered, see
No Prime Warning screen, page 81.)
84

Draft. 410-106-00 Rev. A
CH A PT ER 14 - T R OU B LES HO OT I NG G U ID E LI N ES
It’s a good idea to set up a troubleshooting procedure to use anytime you suspect something might be
wrong. Work with your health care team to establish guidelines* in the event of a problem.
Hypoglycemia
14
WARNING: Low blood glucose is a risk for anyone using insulin therapy. You may experience
one or more of the following symptoms:
• Shakiness; rapid heart rate; nervousness; perspiration; cold, clammy skin; weakness; blurred
or double vision; sudden hunger; tingling in your hands, lips, or tongue; headache and
confusion.
• If you experience symptoms of hypoglycemia, you should immediately eat a quick-acting
carbohydrate (glucose tablets, juice, or hard candy).
• If your BG is abnormally low, Do Not attempt to program your pump yourself. Get help.
• Treat hypoglycemia immediately
Rule of 15
1. Consume 15 grams of quick-acting carbohydrate
2. Wait 15 minutes
3. Recheck BG
4. If BG is < 70 mg/dL, repeat above
I
Animas
®
Insulin Pump
Troubleshooting hypoglycemia:
INSULIN PUMP
POSSIBLE CAUSE OF LOW BG SUGGESTED SOLUTION
Basal rate programmed incorrectly
Clock time incorrect
Pump exposed to MRI
* Walsh JA & Roberts R, Pumping Insulin. 2006. San Diego: Torrey Pine Press.
Check times and rates, remember to review basal programs
when making any changes.
Reset clock to current time, being careful to check AM & PM.
Disconnect from pump.
Call Customer Service at 1-999-999-9999
85

Draft. 410-106-00 Rev. A
CHAPTER 14 - T R O U B L ESHOOTING GUIDELINES
Troubleshooting hypoglycemia:
FOOD INTAKE
OSSIBLE CAUSE OF LOW BG SUGGESTED SOLUTION
P
Bolus too large
I
Low carbohydrate intake for bolus
Improper timing of bolus
Insulin Pump
®
Alcohol consumption
Animas
Check bolus amounts and times.
Bolus only enough to lower your BG to normal level.
Measure carbohydrates accurately.
See dietitian for carb counting review.
May need recalculation of I:C ratio; consult with health care
team.
Match timing of bolus with intake of food.
Check BG prior to meal bolus and adjust accordingly.
May cause hypoglycemia.
Eat food when drinking alcohol.
Be cautious with bedtime bolus.
Always check BG before going to bed.
Check BG at 3 am.
Consult health care team.
ACTIVITY
POSSIBLE CAUSE OF LOW BG SUGGESTED SOLUTION
Did not Suspend pump or activate
Temp Basal
Low carbohydrate intake prior to
exercise
Unplanned activity (shopping)
Long or intensive exercise
Consult health care team for guidelines for use of Temp
Basal rate during exercise.
If not decreasing insulin prior to exercise, may need to eat
foods containing carbohydrate prior to exercise.
If BG is <100 mg/dL, eat snack prior to exercise.
Frequent BG testing before, during and after any activity.
Effects of exercise can be present for hours after activity
has stopped. Consult with health care team for specific
guidelines.
86

Draft. 410-106-00 Rev. A
HAPTER 14 - T R O U B L ESHOOTING GUIDELINES
C
Preventing hypoglycemia:
Check BG a minimum of four times a day, and more frequently with exercise.
•
Keep accurate track of carbohydrates in the foods you eat.
•
Consult your health care professional if you are experiencing frequent hypoglycemia.
•
If you experience frequent or severe episodes of hypoglycemia, contact your health care team. It may
be necessary to adjust your basal rates, bolus doses, or review your BG Target goals, along with your
daily regimen of food and exercise. If you have a low BG level (hypoglycemia), follow the routine
established for you by your health care team.
It is important to monitor your BG frequently, including periodic checks at 3:00 AM.
•
Investigate the cause of hypoglycemia.
•
Hyperglycemia
I
Animas
®
Insulin Pump
Because your pump uses only rapid-acting insulin, you will not have a reserve of long-acting insulin in
your body. This means that any interruption in the delivery of insulin by your pump can quickly result in
a sharp rise of your BG levels.
Hyperglycemia (high BG) can occur within two to four hours after insulin delivery stops, and DKA
(diabetic ketoacidosis) can develop within four to ten hours.
Several things can cause a high BG reading. The most common problems and causes of high BG are
listed in the following table, as are some suggested solutions.
87

Draft. 410-106-00 Rev. A
CHAPTER 14 - T R O U B L ESHOOTING GUIDELINES
Troubleshooting hyperglycemia:
INFUSION SET
POSSIBLE CAUSE OF HIGH BG SUGGESTED SOLUTION
Redness, irritation, inflammation,
swelling, discharge or discomfort
Change infusion set tubing and site. Contact health care
team.
I
Bump or nodule at infusion site
Scar tissue
Catheter inserted in area of friction
Insulin Pump
®
Kink in tubing/catheter
Infusion set not primed (air in tubing)
Animas
POSSIBLE CAUSE OF HIGH BG SUGGESTED SOLUTION
Cloudy, clumpy, crystallized, expired
or insulin exposed to extreme
temperatures
Change infusion set and rotate sites.
Avoid this area for site selection.
Avoid this area for site selection.
Avoid waistline and friction areas.
Change infusion set tubing and site.
Disconnect tubing from body. Prime tubing completely.
INSULIN
Remove infusion set and cartridge and discard.
Use new insulin vial.
FOOD INTAKE
POSSIBLE CAUSE OF HIGH BG SUGGESTED SOLUTION
Bolus insufficient or omitted
High protein or fat intake
Long meal (holiday), continuous
snacking, slowly absorbed food (high
fiber), delayed digestion
(gastroparesis)
Improper bolus timing
Review carbohydrate counting and I:C ratio settings.
Consult dietitian; may need to count protein and fat.
Consult health care team. May need to use extended bolus
or combination bolus option.
Consult health care team.
88
 Loading...