

Page 1
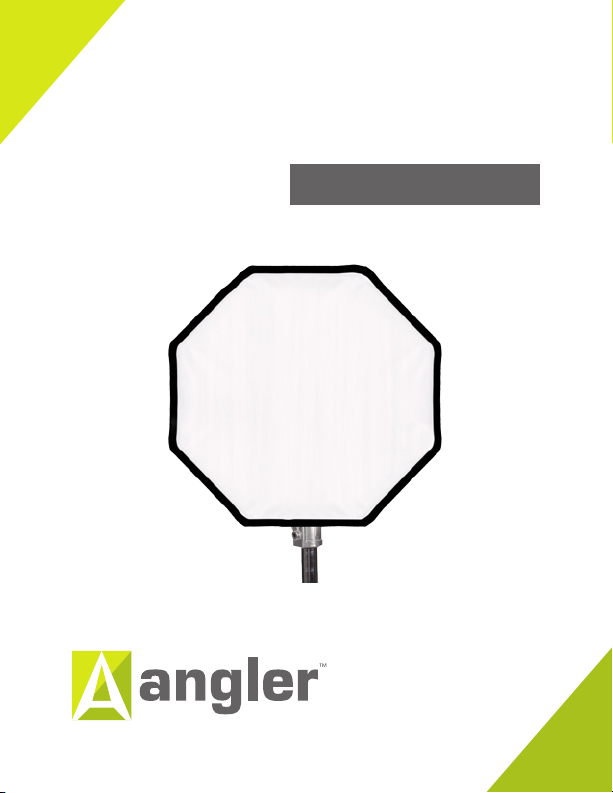
silverbox softbox 18”ʺ
7262-S-18
INSTRUCTIONS
Page 2

Introduction
Congratulations on your purchase of the Angler Silver 18˝ softbox!
The Angler 7262-S-18 is a compact yet full-featured octagonal softbox. It enables
photographers to pinpoint a light source so that the subject can be easily separated from
the background. It’s ideal for controlling spillover on more intimate head and shoulder
portraits while retaining the wrap-around light and circular highlights of a conventional
softbox. This softbox can also be used as an eective hair light, for highlighting a
particular area of the subject, or as a soft background spot.
The compact size makes it an integral tool for product photography, tabletop
photography, and food or macro photography where larger softboxes don’t oer the
control needed for these types of subjects. The textured silver interior provides a
punchy and high-contrast light, but the included interior bae and front diuser give
the photographer control over the level of diusion.
This softbox features a 12-inch deep parabolic design that gives it a long throw and
pointed directionality ideal for portraits. It minimizes spillover around the edges and
oers more control over your subject in the foreground. Adding a fabric grid (not
included) will narrow the light output and control unwanted light spill even further.
This versatile light shaping tool is compatible with most popular brands of speed rings.
It can be used with most strobes and, with the appropriate adapter, most speedlights. It
quickly folds down for convenient transport making it a superb choice for location and
event photographers.
2
Page 3

Highlights
For strobe, fluorescent, and LED lights
Textured silver interior
Deep parabolic design
Removable, recessed front diuser
Removable inner bae
Fits most popular brands of speed rings and lights
Accepts optional fabric grids
3
Page 4
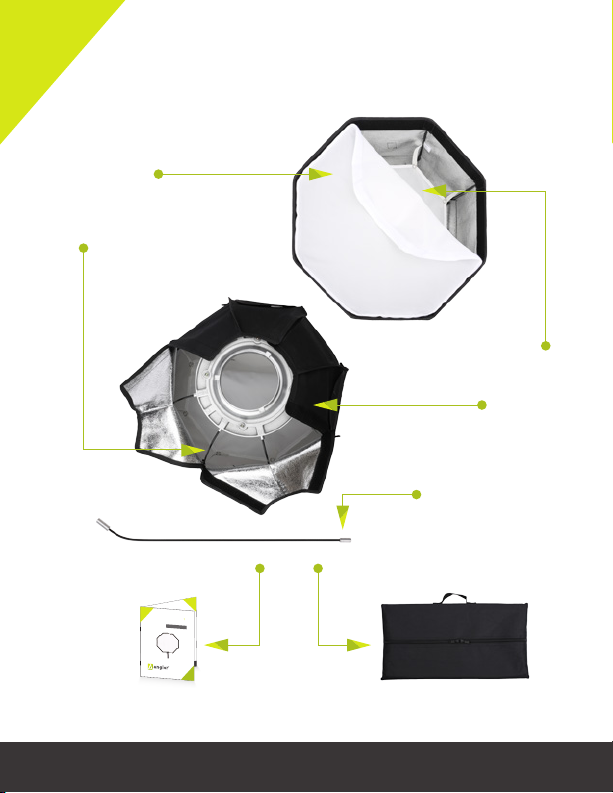
Contents
User Instructions
Folding the background
1. Grasp the background at two adjacent
corners. Lift the backdrop a little. The
backdrop’s own weight will assist the
folding process. Fold the two ends
together. The background will look like a
2. Pass one hand behind the other in an
overlapping motion—right hand to left
hip and vice versa.
3. Sweep the corner that is in front over the
corner closest to you.
4. Continue folding one side over the other
until both align. The background will now
fit in its carry bag.
1
2
3
4
Front diuser
Pre-shaped flex rods (×8)
User manual Carrying case
collapsible background
silver softbox
8“
2254-BW-57
7262-S-18
INSTRUCTIONS
INSTRUCTIONS
Interior bae
Fabric shell
Spare pre-shaped flex rod
4
Page 5

User Instructions
Please follow these instructions carefully
when assembling your Angler softbox.
There are four parts to your softbox:
1. The softbox fabric shell
2. Pre-shaped flex rods
3. Front diuser
4. Removable internal bae
A speed ring (not included) is required to
assemble the Angler softbox and mount it to
a light. Speed rings are available separately.
1
2
3
4
5
Page 6

Assembling the softbox
1. Insert the small tip of a flex rod through the
guide loop along the seam of the softbox fabric
shell. Insert the tip into the anchoring pocket
at the front end of the softbox. The large tip
at the curved end of the pre-shaped flex rod
should be positioned at the rear of the softbox
fabric shell. Repeat this step with the remaining
flex rods.
2. With the speed ring’s reflector mount facing
away from the softbox, insert the end of a flex
rod into a rod hole in the speed ring.
3. Insert the second flex rod in the softbox fabric
shell into the hole in the speed ring that is
directly opposite the first hole used. Flex the
rod gently but firmly until it is securely seated
in the speed ring.
1
2
4. Insert the third and fourth flex rods into the
speed ring in the same manner. As each flex rod
is inserted, flex it gently but firmly into position
until each rod is securely seated in the speed
ring. Continue in the same manner, always
working in opposite pairs.
NOTE: the second pair of flex rods installed should
be at a 90° orientation from the first pair so that a
square framework is established.
6
3
4
Page 7

5. Fold the flaps of the softbox shell over the
speed ring and press down on the touch
fasteners to close the back of the softbox. If
you’re using a hot light (quartz, tungsten, HMI,
etc.), make sure to open the four vents on the
sides of the softbox.
6. If you are using the internal bae, attach it to
the interior now, using the straps with snaps
that are built into the softbox.
7. Attach the front diuser to the front of the
softbox using the touch fastener, making sure
the diuser is in contact with the softbox all the
way around its perimeter so no direct light can
escape.
8. With your light unit’s power o, mount the
speed ring to the light unit according to its
manufacturer’s instructions.
5
6
7
8
7
Page 8

Using an optional grid
An optional grid provides more control over the
light of your softbox by producing a narrower beam
of light than the softbox alone.
1. Be sure to install the softbox front diuser at
the rear edge of the softbox touch fastener
strip.
2. Press the grid’s touch fastener firmly against
the softbox’s touch fastener strip as smoothly
as possible along the length of one side.
3. Repeat for the remaining sides of the grid,
attaching sides in opposite pairs.
1
2
8
Page 9

Disassembling the softbox
1. Turn o the power to your light head and disconnect the power cord from the power
supply.
2. Allow time for the light unit, flex rods and speed ring to cool o before proceeding.
3. Unmount the softbox assembly from the light head.
4. Pull the flex rods out of the speed ring using the same opposite rod pattern used
in assembly.
5. You can leave the flex rods, inner bae and front diuser in place if you wish. The
softbox will roll up for storage with its diuser and inner bae in place.
SPECIFICATIONS
Dimensions (H × W × D)
Shape Octagonal
Design type Deep parabolic
Compatibility
Weight
Removable front diffuser Yes
Removable interior baffle Yes
Accepts grids Yes
Requires speed ring Yes
18” × 18” × 12” (46 × 46 ×
30 cm)
Strobes, fluorescent,
LED lights.
1.75 lb. (0.8 kg)
9
Page 10

Warnings
Please read and follow these instructions and keep this manual in a safe
place.
Always follow your light’s manufacturer’s guidelines for safe operation of
your lights.
Do not leave you lights unattended during use.
Keep this unit away from water and any flammable gas or liquid.
Handle this unit with care.
Keep this unit away from children.
Use parts provided by the manufacturer only.
Make sure this item is intact and that no parts are missing.
All photos in this manual are for illustrative purposes only.
10
Page 11

One-Year Limited Warranty
ANGLER
A Gradus Group
Brand
TM
This Angler product is warranted to the original purchaser to be free from defects in materials and
workmanship under normal consumer use for a period of one (1) year from the original purchase date
or thirty (30) days after replacement, whichever occurs later. The warranty provider’s responsibility
with respect to this limited warranty shall be limited solely to repair or replacement, at the provider’s
discretion, of any product that fails during normal use of this product in its intended manner and in
its intended environment. Inoperability of the product or part(s) shall be determined by the warranty
provider. If the product has been discontinued, the warranty provider reserves the right to replace it
with a model of equivalent quality and function.
This warranty does not cover damage or defect caused by misuse, neglect, accident, alteration, abuse,
improper installation or maintenance. EXCEPT AS PROVIDED HEREIN, THE WARRANTY
PROVIDER MAKES NEITHER ANY EXPRESS WARRANTIES NOR ANY IMPLIED
WARRANTIES, INCLUDING BUT NOT LIMITED TO ANY IMPLIED WARRANTY OF
MERCHANTABILITY OR FITNESS FOR A PARTICULAR PURPOSE. This warranty provides you
with specific legal rights, and you may also have additional rights that vary from state to state.
To obtain warranty coverage, contact the Angler Customer Service Department to obtain a return
merchandise authorization (“RMA”) number, and return the defective product to Angler along with
the RMA number and proof of purchase. Shipment of the defective product is at the purchaser’s own
risk and expense.
For more information or to arrange service, visit www.anglerlights.com or call Customer Service at
212-594-2353.
Product warranty provided by the Gradus Group.
www.gradusgroup.com
Angler is a registered trademark of the Gradus Group.
© 2015 Gradus Group LLC. All Rights Reserved.
GG1
11
Page 12

anglerlights.com
 Loading...