

Anets MX-14AA Installation Manual
Instructions For Electronic Ignition Models
Normal operation of an ANETS Fryer requires that the kettle is filled with liquid shortening above the
lower indent level, marked on the rear of the kettle, before lighting the fryer.
CAUTION: Shortening MUST be in liquid form to avoid scorching or discoloration and possible
!
damage to the kettle. Damage caused by melting solid shortening will NOT be covered by the warranty.
LIGHTING PROCEDURE
NOTE: The gas line of a new fryer installation
may contain a considerable amount of air which
will hinder immediate lighting. Y ou may have to
repeat the lighting procedure several times to
purge air , before the pilot flame lights and burns
steadily .
1. Switch the circuit breaker controlling electric
power to the fryer to ON.
2. Ensure that the fryer’s thermostat knob is set
to OFF.
3. Open the gas supply line inlet valve to the
fryer by aligning the gas valve handle with the
gas line piping.
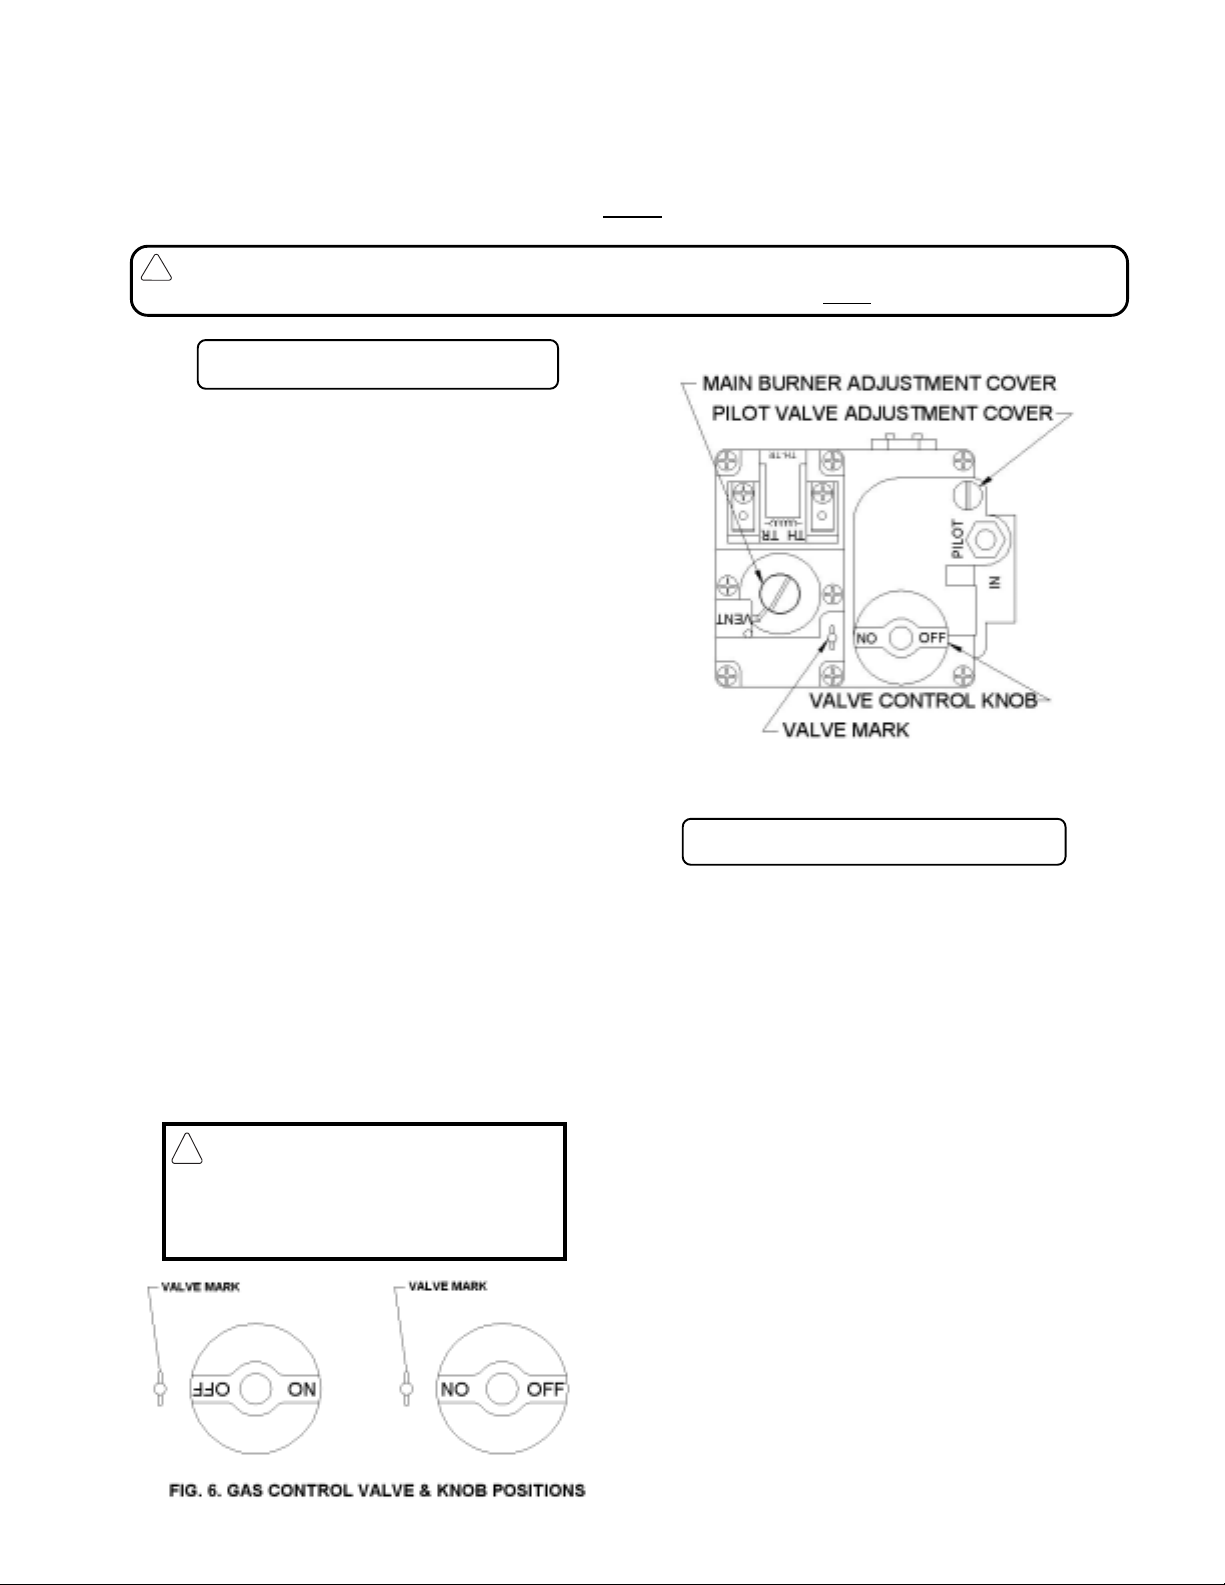
4. Turn the gas control valve knob to align the
ON setting with the valve mark.
5. Close the front door and switch the fryer
POWER switch ON.
NOTE: A fryer equipped with built-in filtering system (Filtronic or Filter Mate)
requires the front door to be closed before
switching the POWER switch to ON.
CAUTION: Ensure that both pilot
!
viewing/lighting ports are closed, to
prevent excessive heat from damaging the gas controls.
ONOFF
SHUTDOWN PROCEDURE
NOTE: Shutdown is recommended at the end of
a workday or whenever no frying is required for a
period of several hours. The fryer MUST be
shutdown during any power outage or interruption
of gas service. T o prevent damage, the fryer
MUST also be shutdown whenever there is no
shortening in the kettle.
1. T o extinguish the pilot burner, turn fryer
power switch to “OFF” position.
2. If shutting down fryer for an extended period
for servicing, cleaning or to drain kettle turn all
manual valves to “OFF”. Also switch the circuit
breaker for this fryer off.
NOTE: Allow the fryer to vent for at least 5
minutes before relighting.
June 24, 2002
1
 Loading...