


Personal Mobile Alert System
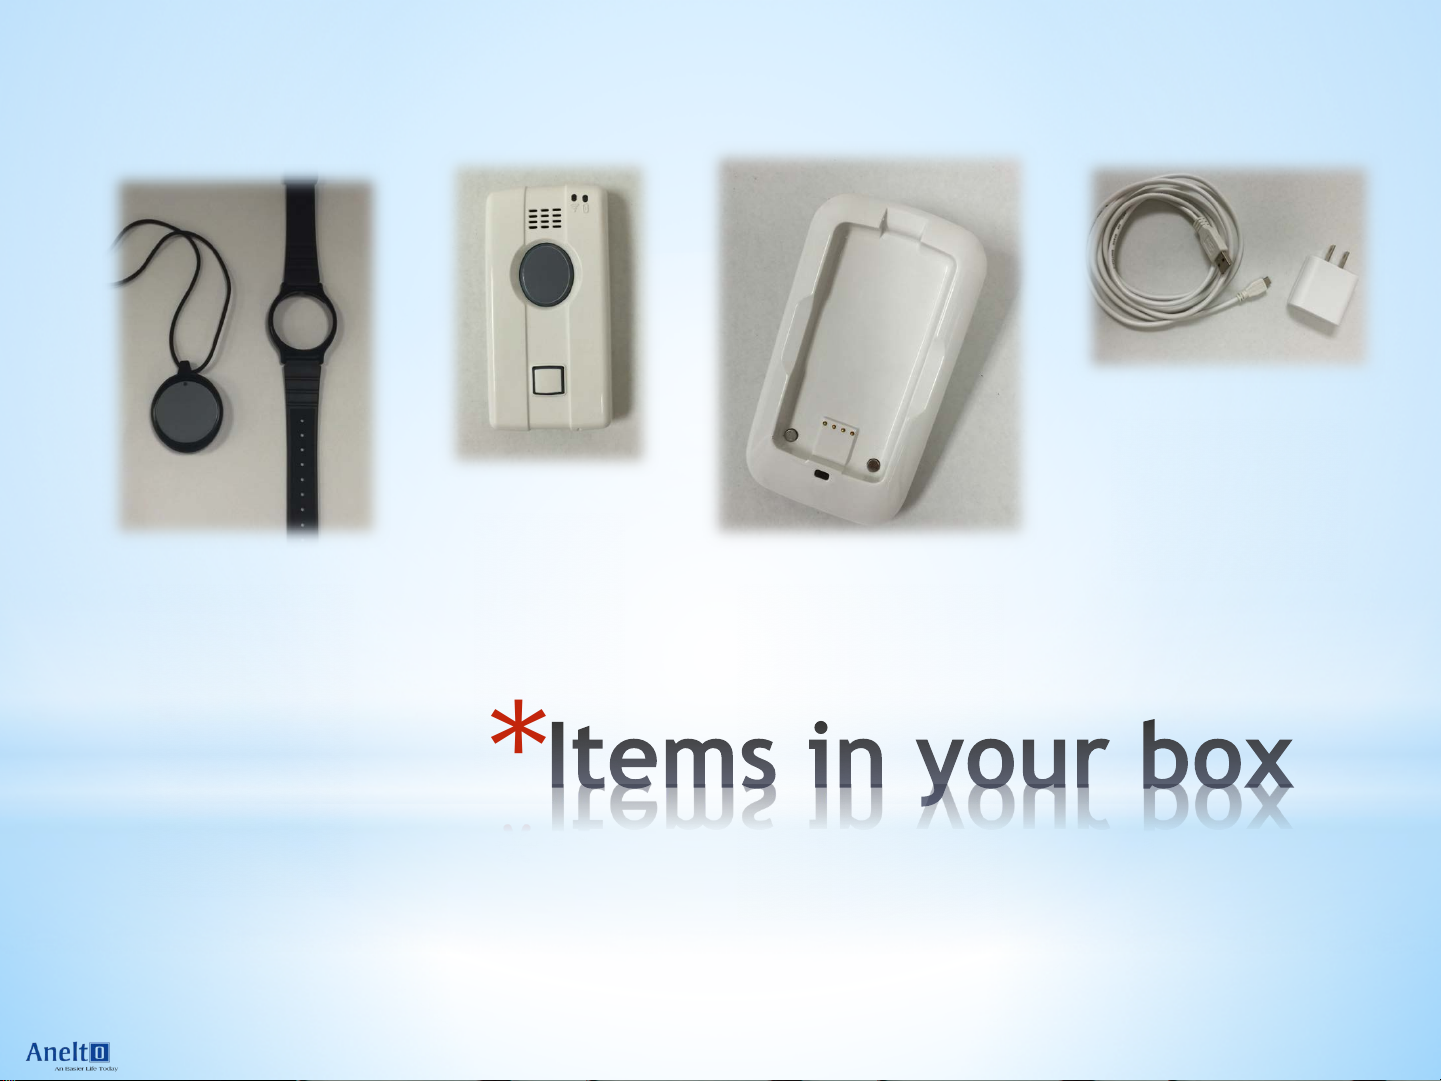
1 Wearable
(+Pendant and Watch Accessories)
Phone
Charging Cradle Power Cord & Adapter
Quick Start Guide
*
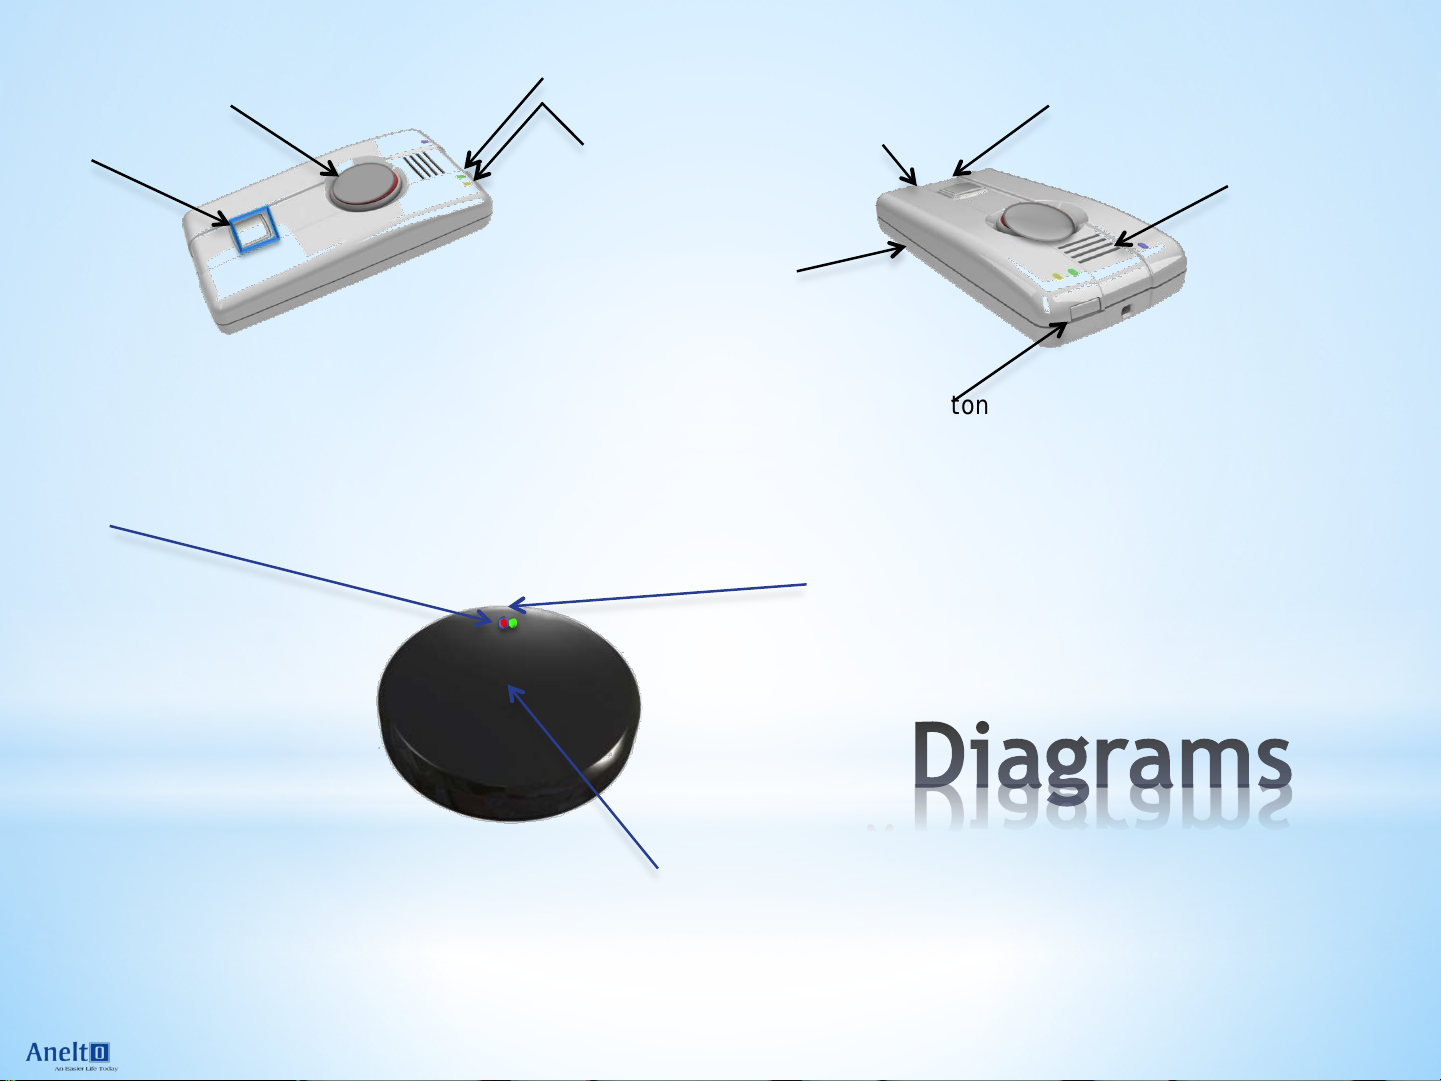
EMERGENCY Call
Button
MESSAGE
Button
LED (Green or Red) Call Indicator
Network LED
USB for travel charger
Microphone
POWER LED
Speaker
Charger Pins for
Cradle
ON/OFF Button
Accessory Key to Align in
Bezel at 12 o’Clock
Quick Start Guide
*
Center CALL Button
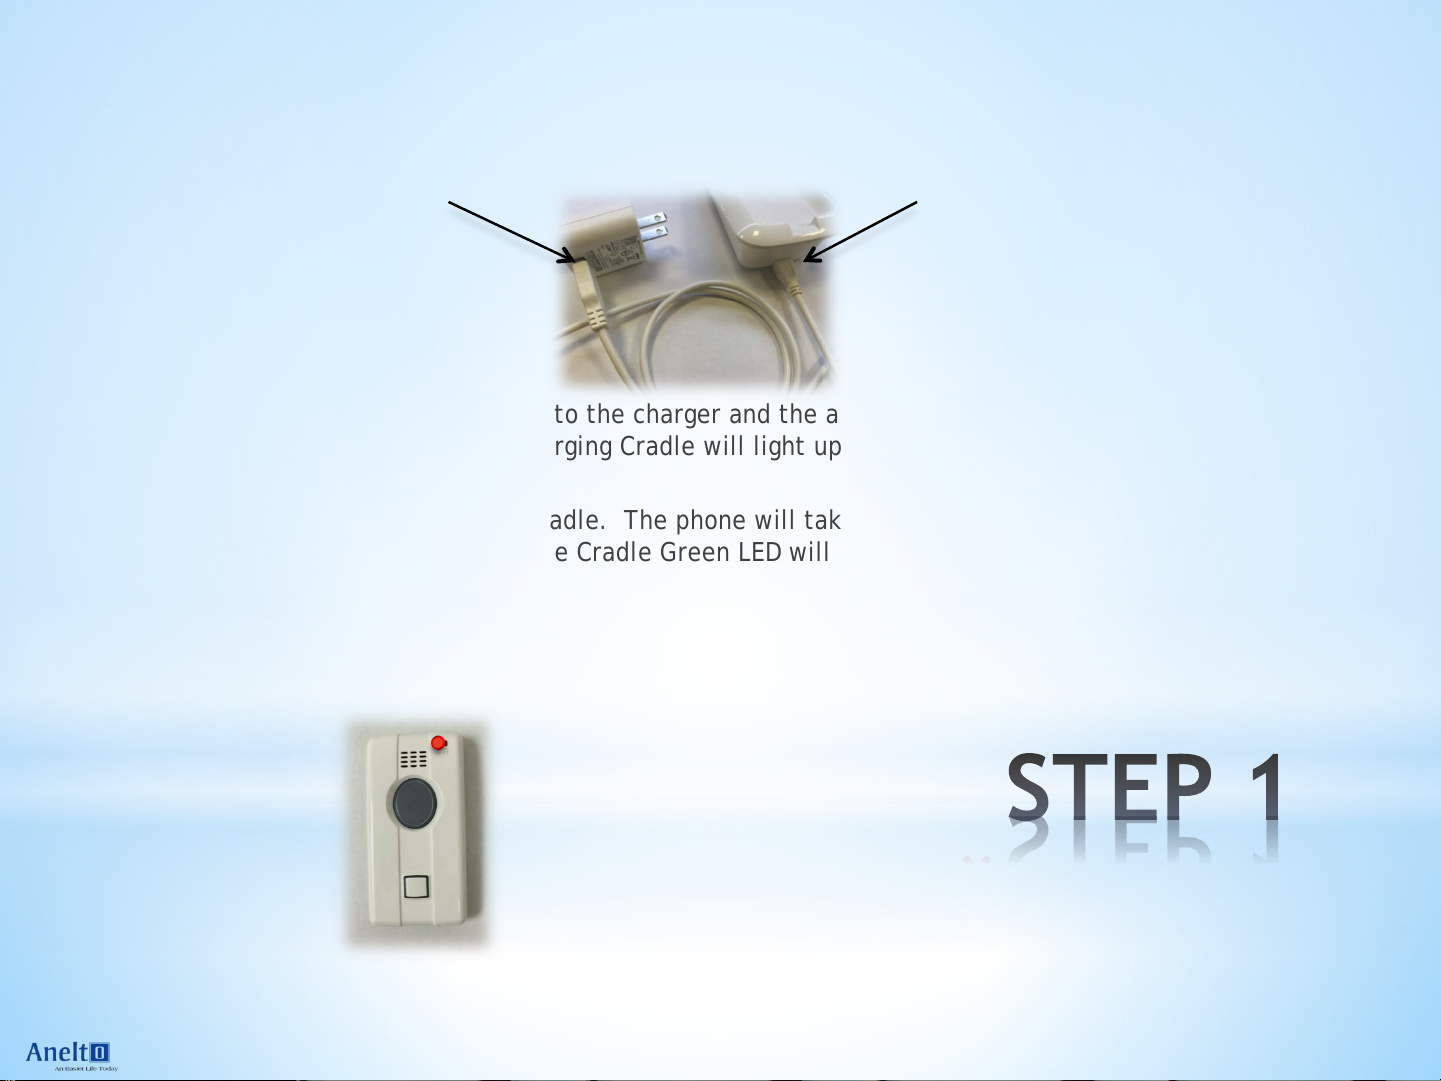
1. Locate a place in your home that is central and is near a standard wall outlet.
2. Connect the power cord to the adapter and the Charging Cradle at the USB connections.
3. Plug the micro USB end into the charger and the adapter end into a standard wall outlet.
The green LED on the Charging Cradle will light up and blink to show you that the Cradle is
correctly plugged in.
4. Place the Phone in the Cradle. The phone will take a few moments to wake up. It will
announce “Charging”. The Cradle Green LED will stay on, indicating that your Cradle is
powered on.
5. The Power LED on the Phone will blink RED while it is charging. Please proceed to Step 2.
Preparing your System
*
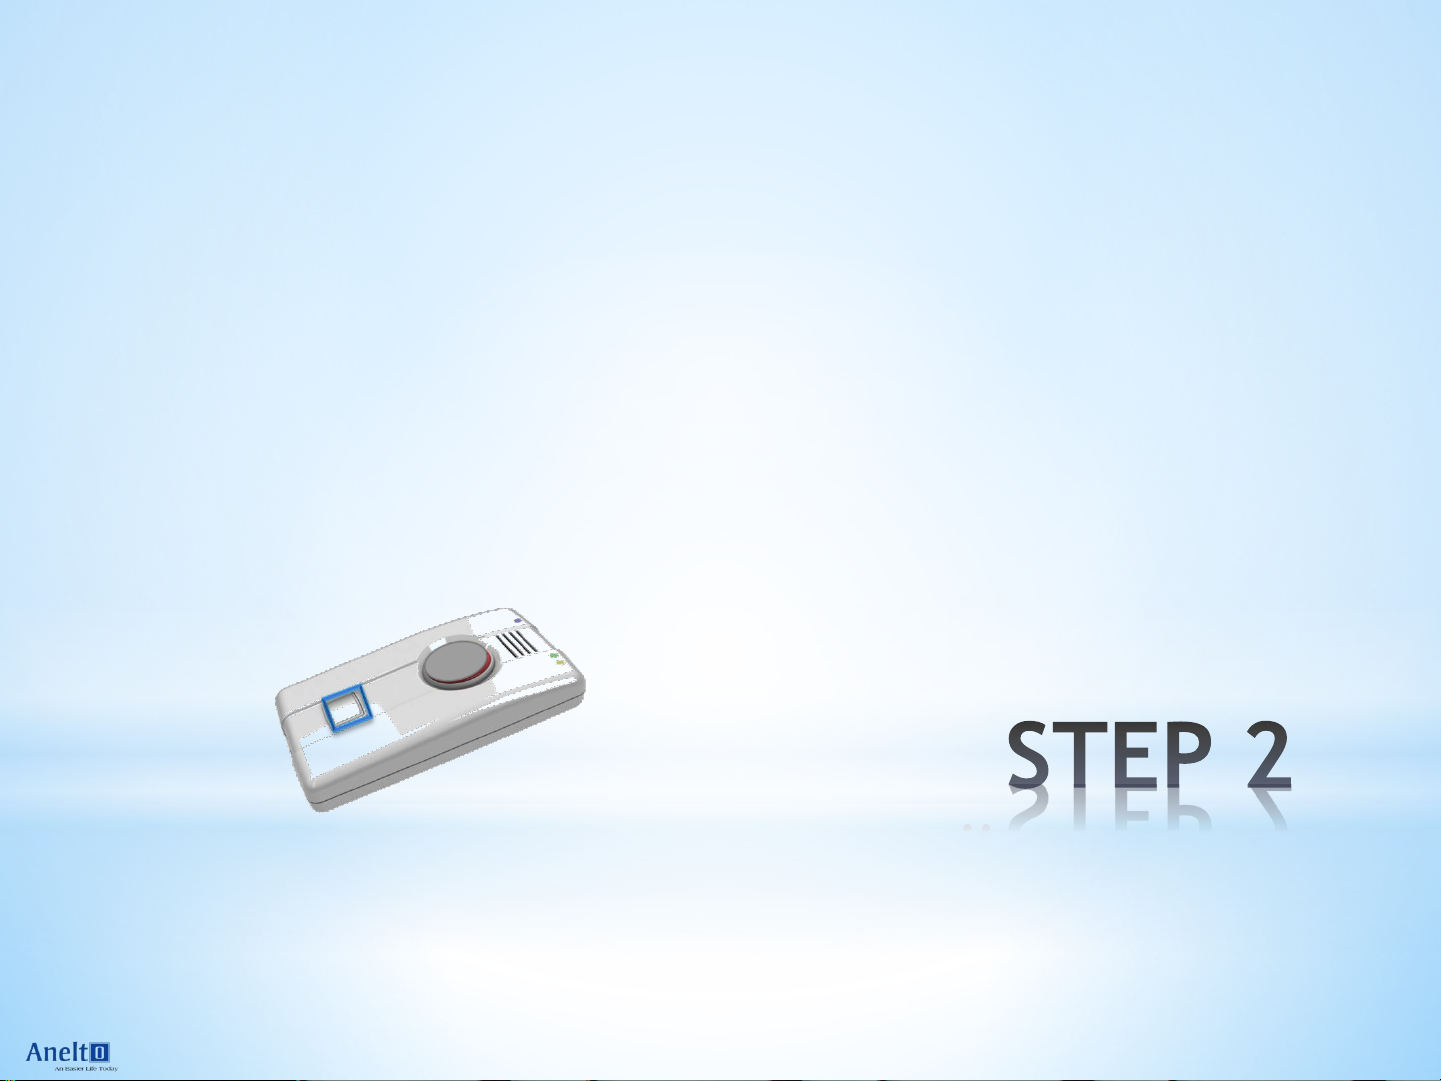
1. Your Phone will prompt you and guide you through the remaining setup.
2. The Phone will say “It’s time to call the call center. Please press and hold the
Emergency button for two seconds to call the call center now.”
3. Press and hold (greater than 2 seconds) the EMERGENCY Button. You will hear
a tone and the RED lights around the EMERGENCY Button will turn on. At this
point you should release the button and the phone will announce “Dialing call
center”.
4. You will hear a ring-back sound from your phone and an operator from the call
center will answer your call.
*
Activating Your System

1. The operator should have your name from your original order form, as well as the
address where your cradle will be located. The operator will confirm:
a. Your Name
b. Your Address**
c. The call quality of your call
d. Confirm your location
e. Answer any questions you may have
2. The Phone will automatically end the call when the operator hangs up.
3. The Phone will announce “Thank you, call ended”.
4. Place your phone back on the Cradle. When you are home, your Phone should
always be returned to the Charging Cradle.
**Please note that the location of the Cradle at your call center registered address is a
key part of identifying your location. PLEASE DO NOT MOVE THE CRADLE TO ANOTHER
ADDRESS WITHOUT NOTIFYING THE CALL CENTER
*
Talking to the Call Center

1. Locate your Wearable which is installed in the Pendant accessory.
2. The Wearable is ready to use. Press the center of the Wearable (this is where the call
button is located) for 2 seconds.
3. You will feel the click of the button when you first push it. Hold the button down
until the green LED turns on (~2 seconds) and then release the button. You will see
the LED at the top of the button start to flash. A green LED flash indicates that you
are initiating a call to the call center. While the green LED is flashing you may cancel
the call by pressing and holding the button for two seconds. The LED will stop
flashing and the call will be canceled.
4. A red LED flash indicates that your wearable is unable to initiate a call from your
phone. Please locate your phone and try again.
5. Whenever a call is initiated, the Phone will announce “Dialing Call Center”. You may
cancel this call by pressing and holding the call button on the Wearable for 2 seconds.
The Green LEDs will stop flashing and the Phone will announce “Call Canceled”.
6. If the call goes through, please tell the Call Center that you are OK and that this is a
test call.
7. Your Wearable is now paired and you have verified that you are able to start a call to
the call center on the Wearable.
8. Your Wearable is water proof, so you may wear it in the shower, bath, or while
swimming.
*
Setting up your Wearable

1. The Wearable comes pre-configured as a pendant. You may
change this to a watchband as follows
a. Locate the watchband accessory.
b. Remove the Wearable button from the pendant accessory
by pressing on the front of the Wearable while holding the
outside bracket. Sufficient force is required to push the
wearable out of the accessory.
c. Turn the watchband over and place on a solid surface so
that you are looking at the back of the watchband. You
will insert the wearable button into the watchband from
the back. With the grey button side facing down, you
should be able to see the small alignment key on the
wearable and the small notch at the top 12 O’clock
position of the watchband accessory. Align these two.
d. Use sufficient force to push and lock the Wearable Button
into the Watchband accessory.
12 O’clock notch
Alignment key
*
Changing your Wearable from Pendant to Watchband

* When traveling on a plane, press the ON/OFF button on top of the Phone to turn it off. Turn
the Phone back on at the end of your flight.
* For your added safety, the phone can place a call even when it has been turned off. It only
needs a sufficient charge on its battery. This means that you can place an EMERGENCY call,
even if the LEDs on the Phone are off, by pressing either the EMERGENCY button on the
Phone or the Wearable.
* The Phone is designed to last 48 hours from a full charge before having to re-charge. The
Wearable is designed to last 3 years, at which time a new Wearable will be sent
automatically to replace the old one.
* If your Phone battery has a charge of less than 20% the Phone will announce “Low battery,
please place your device on the charger now”. It is important that you place your Phone on
the Charging Cradle as soon as possible.
* If you do not place the Phone on the Cradle, then the blue message button LED will light.
Push the BLUE message button and the phone will remind you “Low battery, please place
your device on the charger now”. This sequence will repeat every 5 minutes until your
handset is placed on the Cradle.
*

* The Phone is programmed with multiple audio prompts to make it easier to use. Please follow
the audio prompts if they occur.
* The following is a guide to the LED indicators on the Cradle, Phone, and Wearable
* CRADLE GREEN LED - Solid Green: Cradle is plugged in and has power. No LED, no power.
* PHONE GREEN LED (above Signal icon) - Solid Green: Phone is registered to network and able
to make calls. Blinking Green: Phone is attempting to register to the network.
* PHONE RED LED (above Battery icon) - Solid Red: low battery and Phone must be charged.
Blinking Red: Phone is charging. The Phone will also announce:” Charging” when placed
correctly on the Cradle. No LED: Phone is properly charged.
* PHONE EMERGENCY Call Button RED Ring - Blinks around Call Button while making a call.
Turns solid red when the call is connected. Turns off at the end of a call.
* PHONE Message Button BLUE Ring – Solid Blue: you have a voice message telling you to place
the phone on the charging cradle. Blinking Blue: you have a new voice message available.
Push the Message Button to play the message. The BLUE Message LED will turn off after all
messages are played.
* WEARABLE LED – Blinking Red: Wearable is NOT in communication with Phone and NO CALL
can be made. Blinking Green: Call is being initiated from Wearable (will cease to blink after
~7 seconds).
*

HAVE QUESTIONS?
Please refer to the more detailed User’s Guide
or
Call Customer support at 469-867-2900

REGULATORY COMPLIANCE
FCC
The user’s manual or instruction manual for an intentional or unintentional radiator shall caution the user
that changes or modifications not expressly approved by the party responsible for compliance could void the
user's authority to operate the equipment.
This device complies with Part 15 of the FCC Rules. Operation is subject to the following two conditions: (1)
This device may not cause harmful interference, and (2) this device must accept any interference received,
including interference that may cause undesired operation.
!
For a Class B digital device or peripheral, the instructions furnished the user shall include the following or
similar statement, placed in a prominent location in the text of the manual:
NOTE: This equipment has been tested and found to comply with the limits for a Class B digital device,
pursuant to part 15 of the FCC Rules. These limits are designed to provide reasonable protection against
harmful interference in a residential installation. This equipment generates, uses and can radiate radio
frequency energy and, if not installed and used in accordance with the instructions, may cause harmful
interference to radio communications. However, there is no guarantee that interference will not occur in a
particular installation. If this equipment does cause harmful interference to radio or television reception,
which can be determined by turning the equipment off and on, the user is encouraged to try to correct the
interference by one or more of the following measures:
Reorient or relocate the receiving antenna.
Increase the separation between the equipment and receiver.
Connect the equipment into an outlet on a circuit different from that to which the receiver is connected.
Consult the dealer or an experienced radio/TV technician for help.
This equipment has been tested and found to comply with the limits pursuant toPart15SubpartB, Part22, and
Part 24 of the FCC rules. These limits are designed to provide reasonable protection against harmful
interference in an appropriate installation. This equipment generates, uses, and can radiate radio frequency
energy and, if not used in accordance with instructions, can cause harmful radiation to radio communication.
However, there is no guarantee that interference will not occur in a particular installation.

RF Exposure
Your device is a radio transmitter and receiver. It is designed and manufactured not to exceed the emissions
limits for exposure to radio frequency (RF) energy set by the Federal Communications Commission (FCC) of
the U.S. Government and Industry Canada of the Canadian Government. These limits are part of
comprehensive guidelines and establish permitted levels of RF energy for the general population. These
guidelines are based on the safety standards previously set by the U.S. and international standards bodies.
The standards include a substantial safety margin designed to assure the safety of all persons, regardless of
age and health.
The exposure standard for wireless RF devices, such as the device, employs a unit of measurement known as
the Specific Absorption Rate, or SAR. The SAR limit set by the FCC/IC is 1.6W/kg. SAR values at or below that
limit are considered safe for the general public.
Before a wireless RF device is made available for sale to the Public, it must be tested and certified to the
FCC/IC that it does not exceed the SAR limits established by the FCC/IC. Tests for SAR are conducted using
the positions and locations (e.g., at the ear or worn on the body) as required by the FCC/IC for each device
model.
The device has been tested and meets the FCC/IC RF exposure guidelines when used against the body under
normal usage conditions.
To comply with FCC/IC RF exposure requirements, a minimum separation distance of 10mm must be
maintained.

IC RSS-Gen section 8.4
English
This device complies with Industry Canada’s license-exempt RSSs. Operation is subject to the following two
conditions:
(1) This device may not cause interference; and
(2) This device must accept any interference, including interference that may cause undesired operation of
the device.
!
French
Le présent appareil est conforme aux CNR d’Industrie Canada applicables aux appareils radio exempts de
licence. L’exploitation est autorisée aux deux conditions suivantes:
(1) l’appareil ne doit pas produire de brouillage;
(2) l’utilisateur de l’appareil doit accepter tout brouillage radioélectrique subi, même si le brouillage est
susceptible d’en compromettre le fonctionnement.
 Loading...