

Page 1
A1 Stereo Power Amplifier
Operating Manual
Page 2

Anedio A1 Power Amplifier 1
Welcome
Thank you for purchasing the Anedio A1 Power Amplifier!
Anedio is founded upon the principle that the enjoyment of highestquality music should be available for everyone, not just for the
esoteric few. Our quest is to attain the most realistic and faithful
reproduction of music, enabling the listener to experience its beauty,
pathos, joy, and delight more fully. At the same time, we strive to
make our products affordable by focusing on the essentials and
using the most cost-effective technologies. The result, we believe, is
a unique combination of sonic excellence and superb value.
The Anedio A1 Power Amplifier offers vanishingly low distortion —
0.0007% THD+N and 0.0002% IMD at 70W into 8 ohms. Such a
level of performance is achieved, not merely in an ideal bench-top
setup, but in real systems found in typical homes. Our exquisitelytuned symmetric circuit keeps the hum and noise well below the
threshold of audibility. You will experience an extraordinary level of
sonic transparency that heightens the emotional impact of music.
The Anedio amplifier is exceptionally adept at handling real
loudspeaker loads. It is perfectly stable driving a 2uF capacitor, just
about the worst capacitance that may be encountered. Even the
most complex and dynamic musical passages are produced with
effortless speed and authority.
Moreover, quality components are used judiciously throughout
critical paths, such as gold-plated connectors, a magneticallyshielded toroidal power transformer, 0.5% precision film resistors,
polypropylene capacitors, and high-reliability supply capacitors.
All of this is packaged in a solid aluminum enclosure, with all nonferromagnetic material for the lowest inductance. It is tightly
coupled to an internal copper heat spreader, which together act as a
rigid structure, immune to acoustically-induced vibrations.
We hope you will experience many years of joy and pleasure in
listening to music.
Page 3

2 Anedio A1 Power Amplifier
Important Safety Instructions
The lightening symbol within an equilateral triangle is intended to
alert the user to the presence of un-insulated dangerous voltage
within the product’s enclosure that may constitute a risk of electric
shock.
The exclamation mark within an equilateral triangle is intended to
alert the user to important operating and maintenance instructions.
1. Read these instructions.
2. Keep these instructions.
3. Heed all warnings.
4. Follow all instructions.
5. Do not use this apparatus near water.
6. Clean only with dry cloth.
7. Do not block any ventilation openings. Install in accordance with
the manufacturer’s instructions.
8. Do not install near any heat sources such as radiators, heat
registers, stoves, or other apparatus (including amplifiers) that
produce heat.
9. Do not defeat the safety purpose of the polarized or groundingtype plug. A polarized plug has two blades with one wider than
the other. A grounding type plug has two blades and a third
grounding prong. The wide blade or the third prong are provided
for your safety. If the provided plug does not fit into your outlet,
consult an electrician for replacement of the obsolete outlet.
10. Protect the power cord from being walked on or pinched
particularly at plugs, convenience receptacles, and the point
where they exit from the apparatus.
11. Only use attachments/accessories specified by the manufacturer.
12. Use only with the cart, stand, tripod, bracket, or table specified
by the manufacturer, or sold with the apparatus. When a cart is
used, use caution when moving the cart/apparatus combination
to avoid injury from tip-over.
13. Unplug this apparatus during lightning storms or when unused
for long periods of time.
Page 4

Anedio A1 Power Amplifier 3
14. Refer all servicing to qualified service personnel. Servicing is
required when the apparatus has been damaged in any way, such
as power-supply cord or plug is damaged, liquid has been spilled
or objects have fallen into the apparatus, the apparatus has been
exposed to rain or moisture, does not operate normally, or has
been dropped.
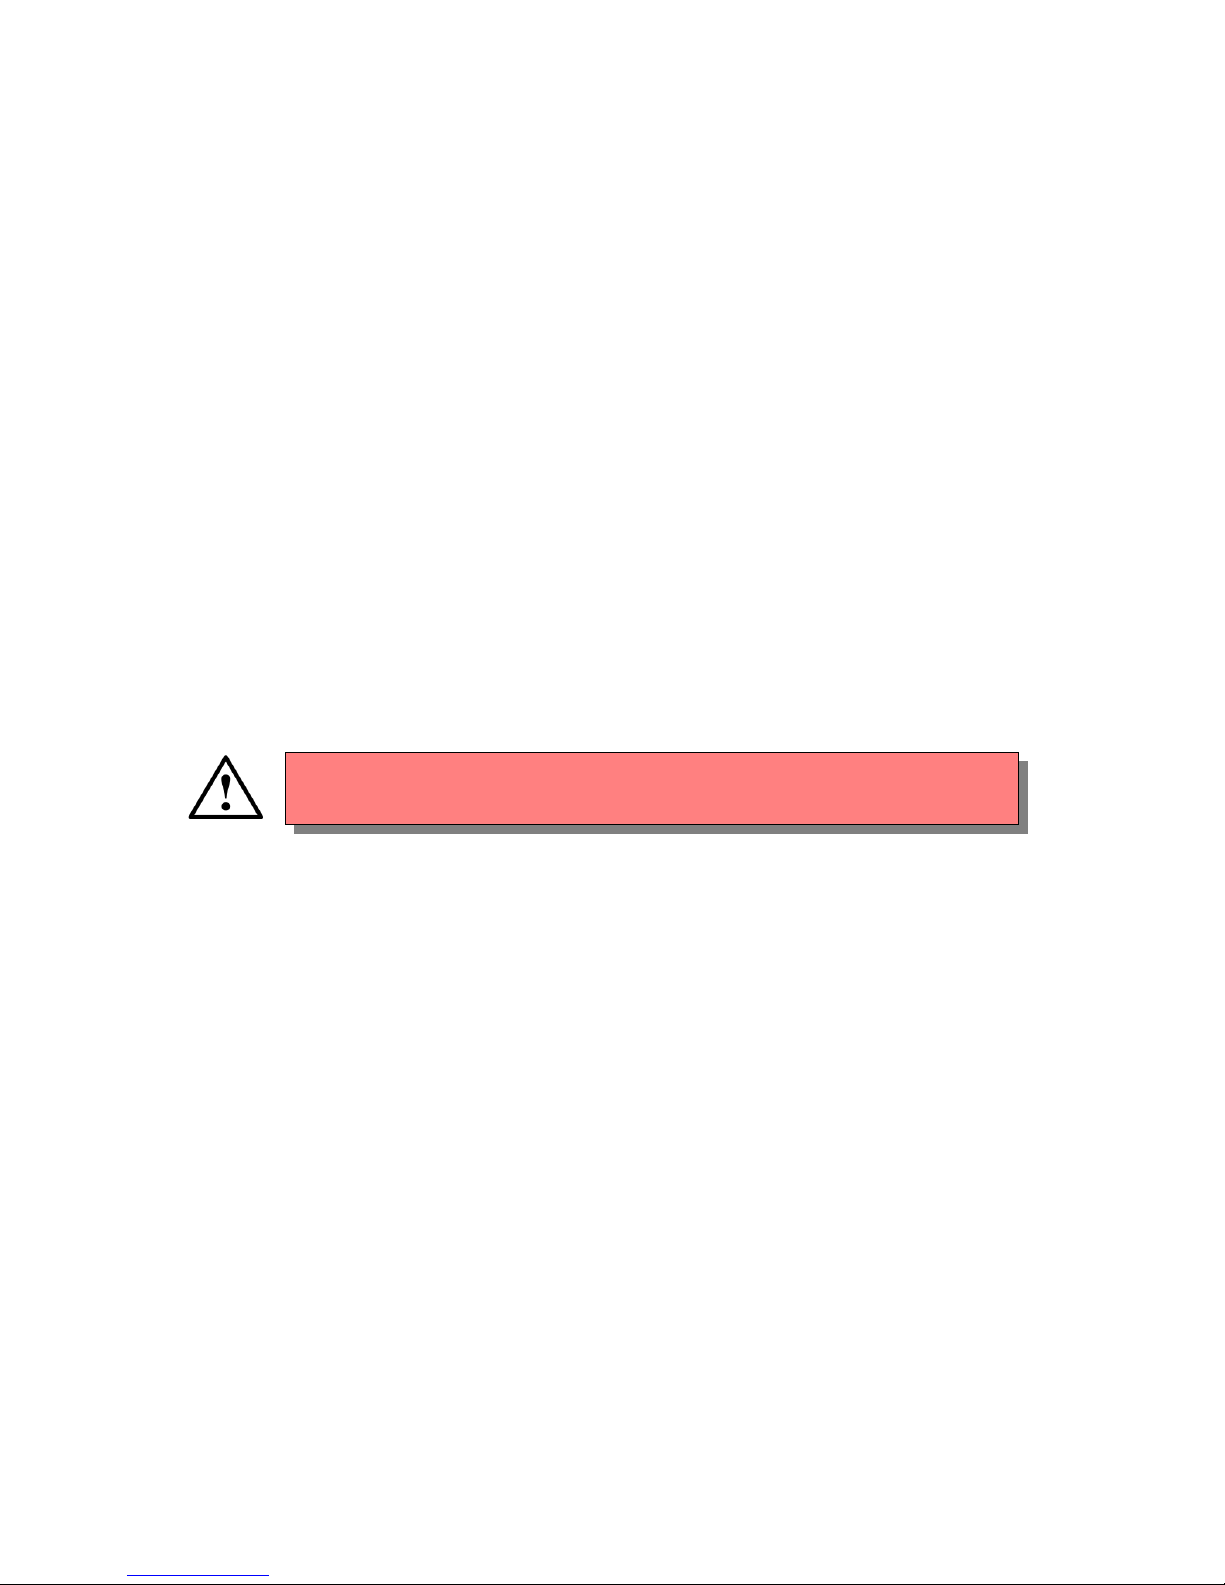
WARNING: To reduce the risk of fire or electric shock, do not
expose this apparatus to rain or moisture. The apparatus shall
not be exposed to dripping or splashing, and no objects filled
with liquids, such as vases, shall be placed on the apparatus.
To completely disconnect this equipment from the ac mains,
disconnect the power supply cord plug from the ac receptacle.
The mains plug of the power supply cord shall remain readily
operable.
Page 5
4 Anedio A1 Power Amplifier
Setting Up
Package Contents
• Model A1 Stereo Power Amplifier
• AC Power Cord, 16 AWG
• Extra Fuses
• User Manual
• Measurements of Each Unit
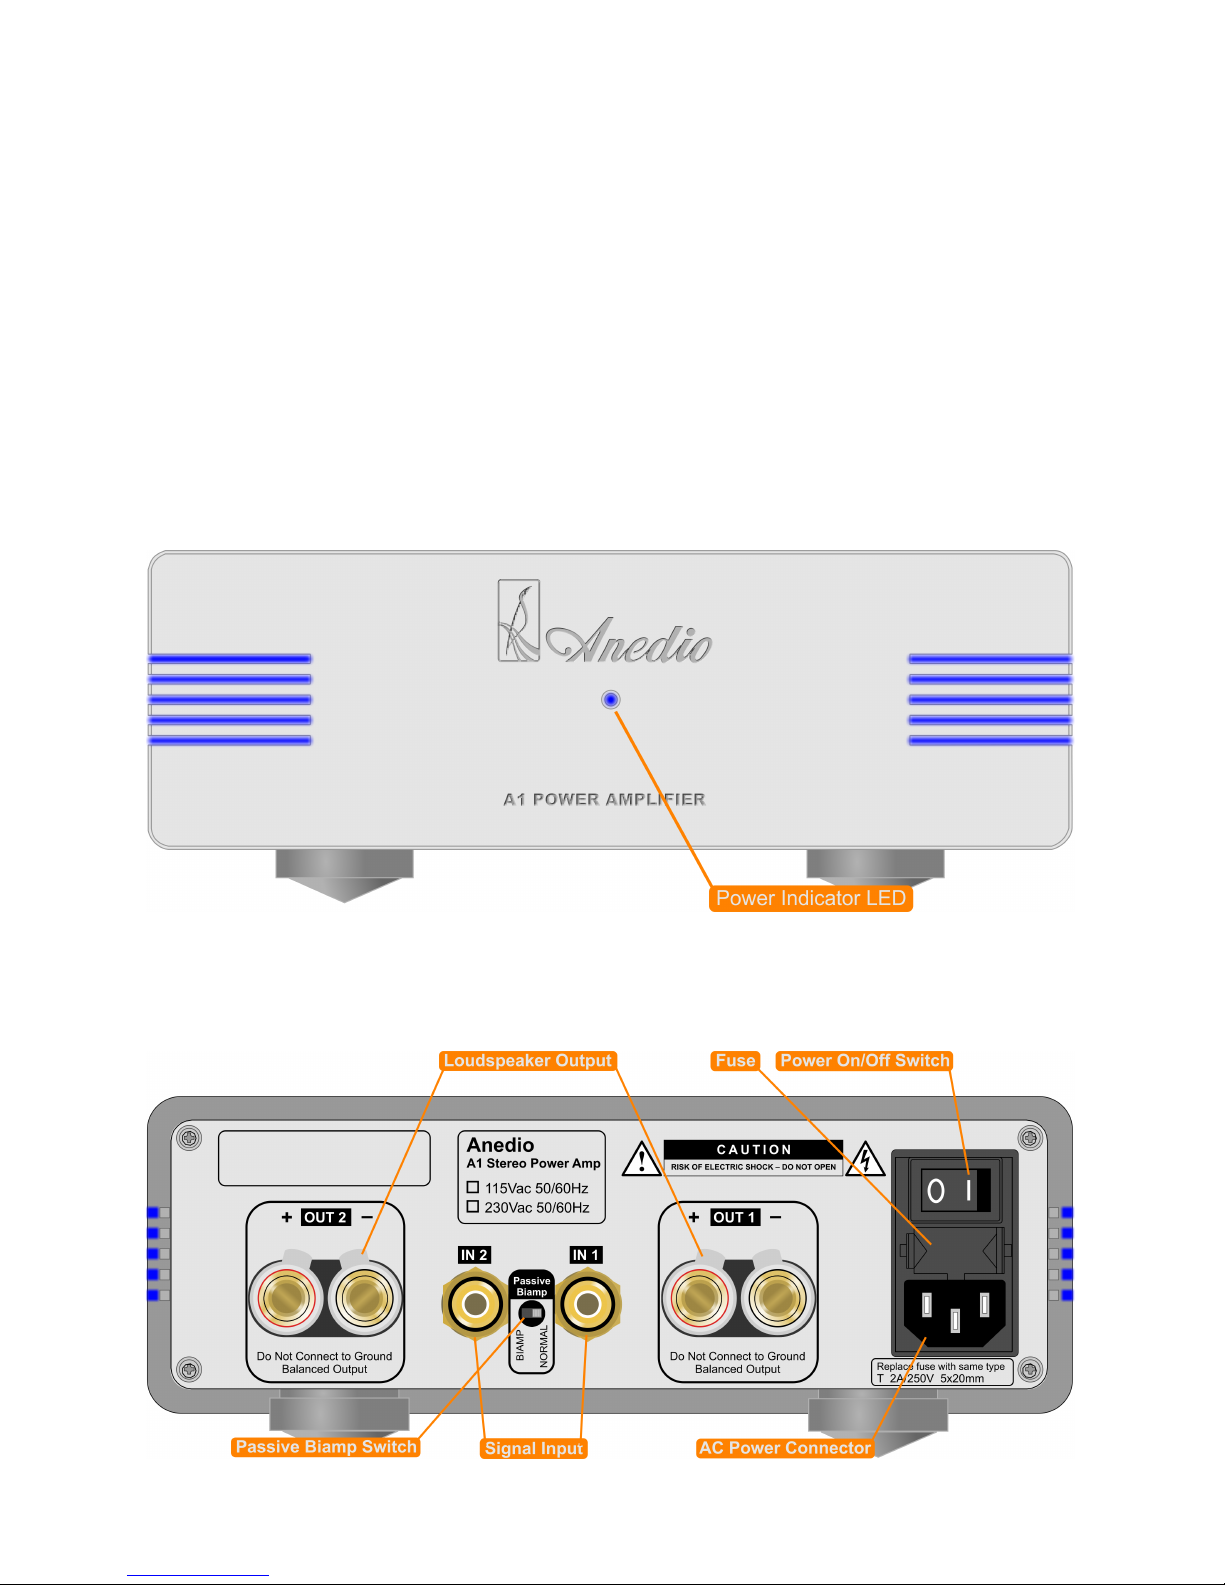
Front Panel
Rear Panel
Page 6
Anedio A1 Power Amplifier 5
Setting Up
Placement of the Amplifier
Place the amplifier between the two loudspeakers, instead of setting
it off to one side. This keeps the lengths of interconnects and
speaker cables short for optimal sonic performance.
Remember that the ideal cable is no cable. The signal can never be
improved by going through a longer cable. As you shorten the
cable length, the signal fidelity approaches that of the ideal cable.
The best practice, therefore, is to keep the cables as short as possible
by placing the amplifier between the loudspeakers.
Make sure that there is enough space around the amplifier for
ventilation, and do not block the ventilation slots on the top of the
amplifier. We recommend at least 3 inches of space on the top.
Connecting Interconnects and Cables
Before connecting, turn off the power to all the components in
your system.
Input: Connect the left and right channels to the line-level source
using a pair of RCA interconnects.
Extravagant interconnects with exotic materials are unnecessary.
Two characteristics, however, are important: (a) low shield (outer
conductor) resistance; (b) robust mechanical design for reliable
electrical contact.
Output: Connect loudspeaker cables to multi-way binding posts
that can accept banana plugs or stripped wires.
Again, extravagant cables with exotic materials are unnecessary. As
long as the length is kept short by placing the amplifier between the
loudspeakers, a 14 AWG cable or thicker will be sufficiently
transparent. The shorter the cable, the more transparent your
system will be.
For those concerned with EMI (Electromagnetic Interference), starquad cables will significantly improve immunity to external
interferences.
Polarity of loudspeaker connection is critical to the quality of
imaging. Check the positive and negative terminals of the amplifier
Page 7
6 Anedio A1 Power Amplifier
and those of the loudspeakers.
Never connect the output terminals to the chassis or to the
ground. This will cause a short circuit and may damage the
amplifier. The outputs are balanced, i.e., both positive (+) and
negative (-) terminals move differentially with respect to the
ground, and they are not to be shorted to the ground.
Connecting Power Cord
For the lowest ground noise and hum, it is highly recommended that
the power cords of all components be connected to a single point —
usually a single surge protector with multiple outlets. This keeps all
components referenced to a single point, as far as it is practically
possible, thus minimizing the differences in ground potentials
among the components.
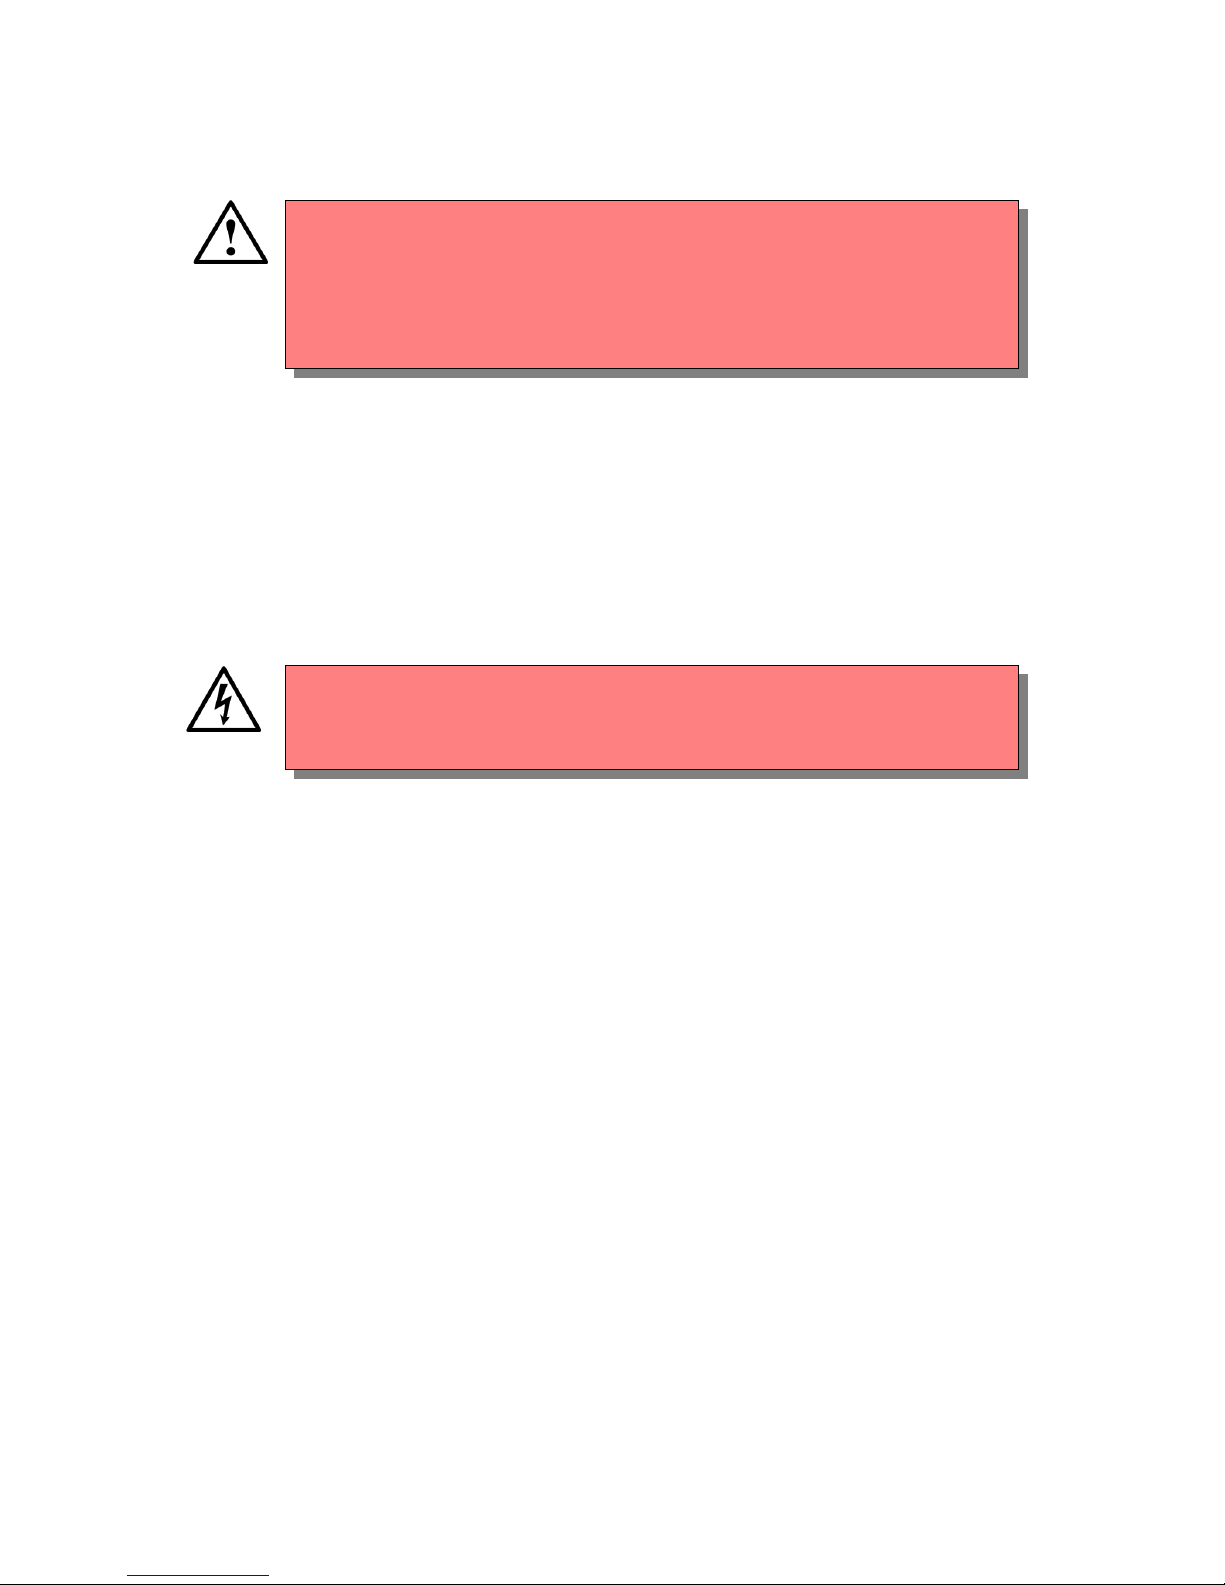
Never use a 3-prong-to-2-prong adapter to fix a ground loop
problem. This will disable the safety earth ground and may
cause electric shocks.
Isolating Cable TV Ground
If you have a cable TV connected to your audio system, ensure that
the cable ground is galvanically isolated from the audio ground. The
cable TV ground, tied to the earth outside your home, is at a
significantly different potential and can cause audible hum if it is
not isolated properly. If you suspect this is the case, insert a cable
TV ground isolator inside your home, just before your cable set-top
box or TV RF input.
Surge Protectors
A surge protector is strongly recommended so that the components
are protected from large power lines spikes, which can occur, for
instance, from lightning strikes.
Power Switch
The power switch is located in the back panel. Toggle the switch to
the “1” position to turn power on. To turn power off, toggle the
switch to the “0” position.
Page 8

Anedio A1 Power Amplifier 7
When turning on and off your music system, the power
amplifier should be the last component to be turned on and the
first component to be turned off. This prevents power on/off
transients from being transmitted to loudspeakers.
Power Indicator LED
The blue LED light at the center of the front panel, along with the
blue side bars, indicate that power is on.
When the center LED indicator switches to purple, it most likely
means that the amplifier has detected a short circuit at the output.
Immediately turn off the power switch. Clear the shortcircuit condition. Examine carefully if any exposed part of the
loudspeaker cables is shorted together or touches the enclosure.
Only after the short-circuit condition is cleared, turn the power
switch on. If the problem persists, please see the trouble shooting
section.
Check the Phase
After the audio system is set up, double check the phase (or polarity)
of the loudspeaker connection by listening to a phase test CD or
soundtrack.
Page 9
8 Anedio A1 Power Amplifier
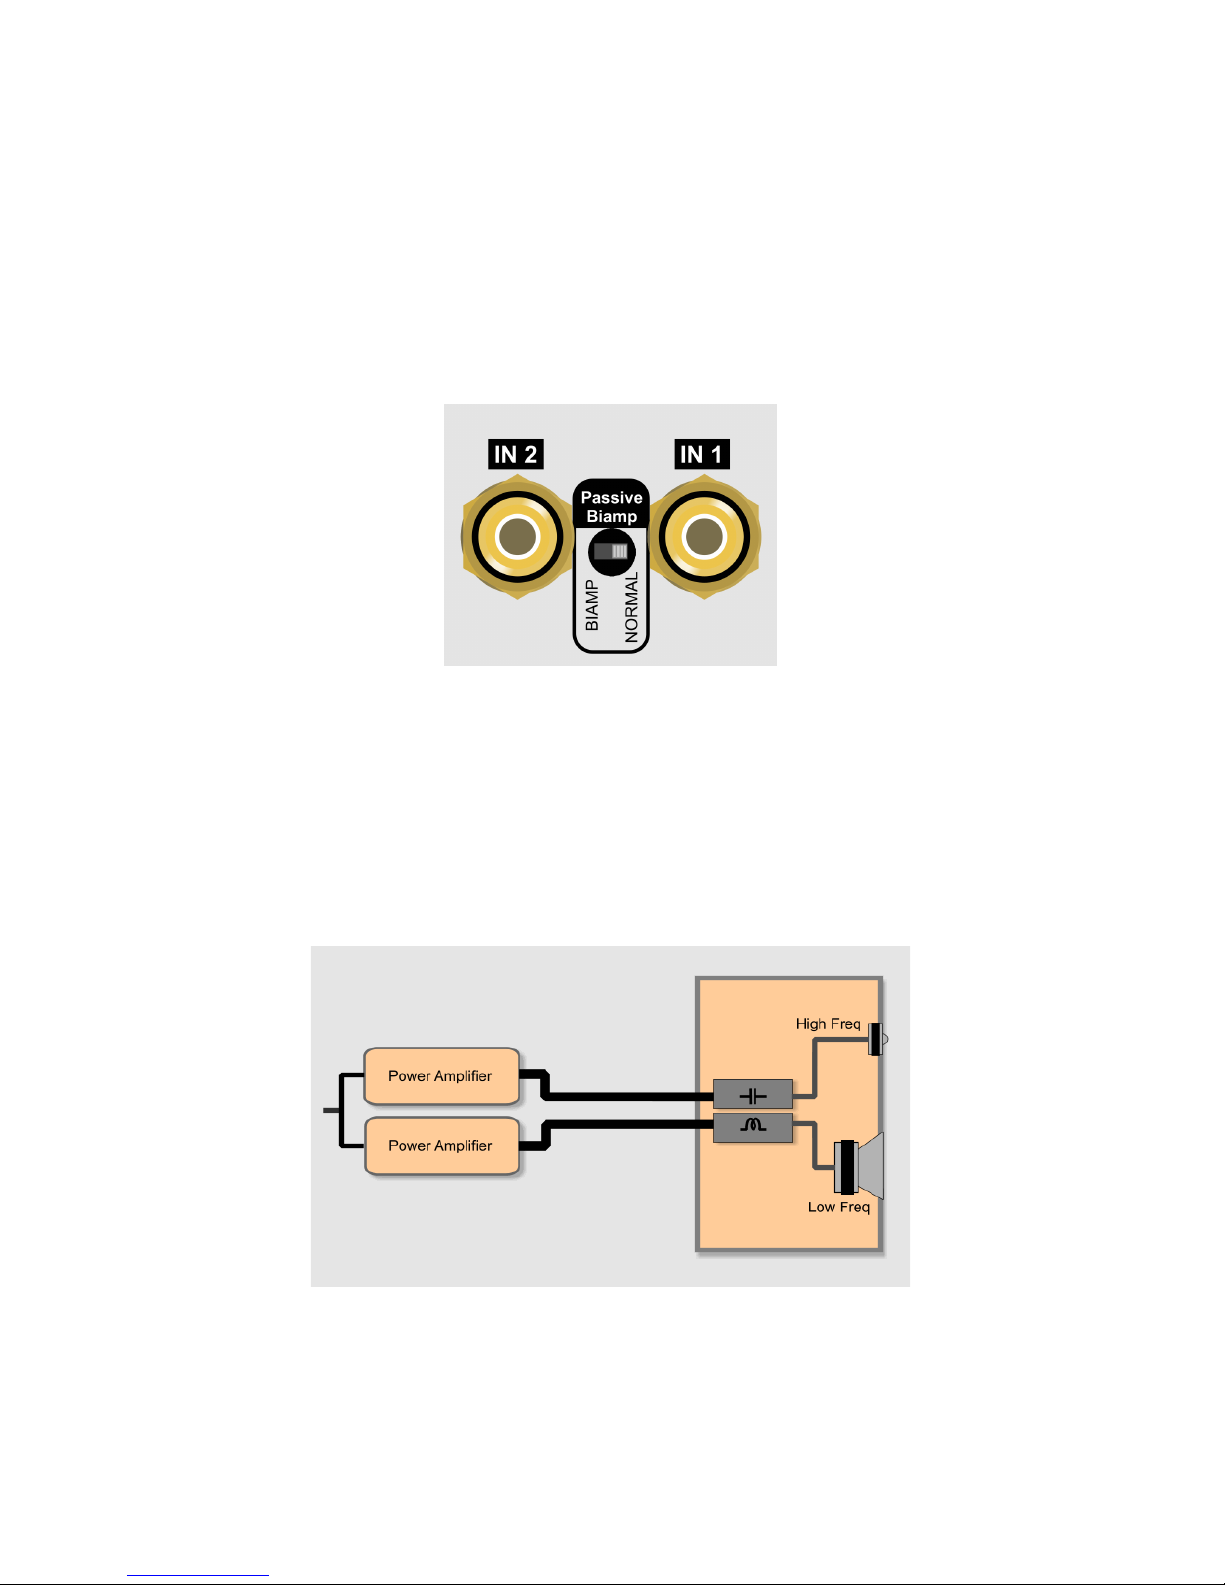
Passive Bi-amp Mode
Normal (Stereo) Mode
For normal (stereo) operation, set the bi-amp switch to “NORMAL.”
This is the default setting. The switch is intentionally recessed so
that its setting cannot be changed accidentally.
Why Passive Bi-amplification?
Passive bi-amplification can improve the sonic quality of the system
in a subtle but significant way. The Anedio A1 Power Amp is
conceived specifically to take full advantage of the benefits of
passive bi-amplification.
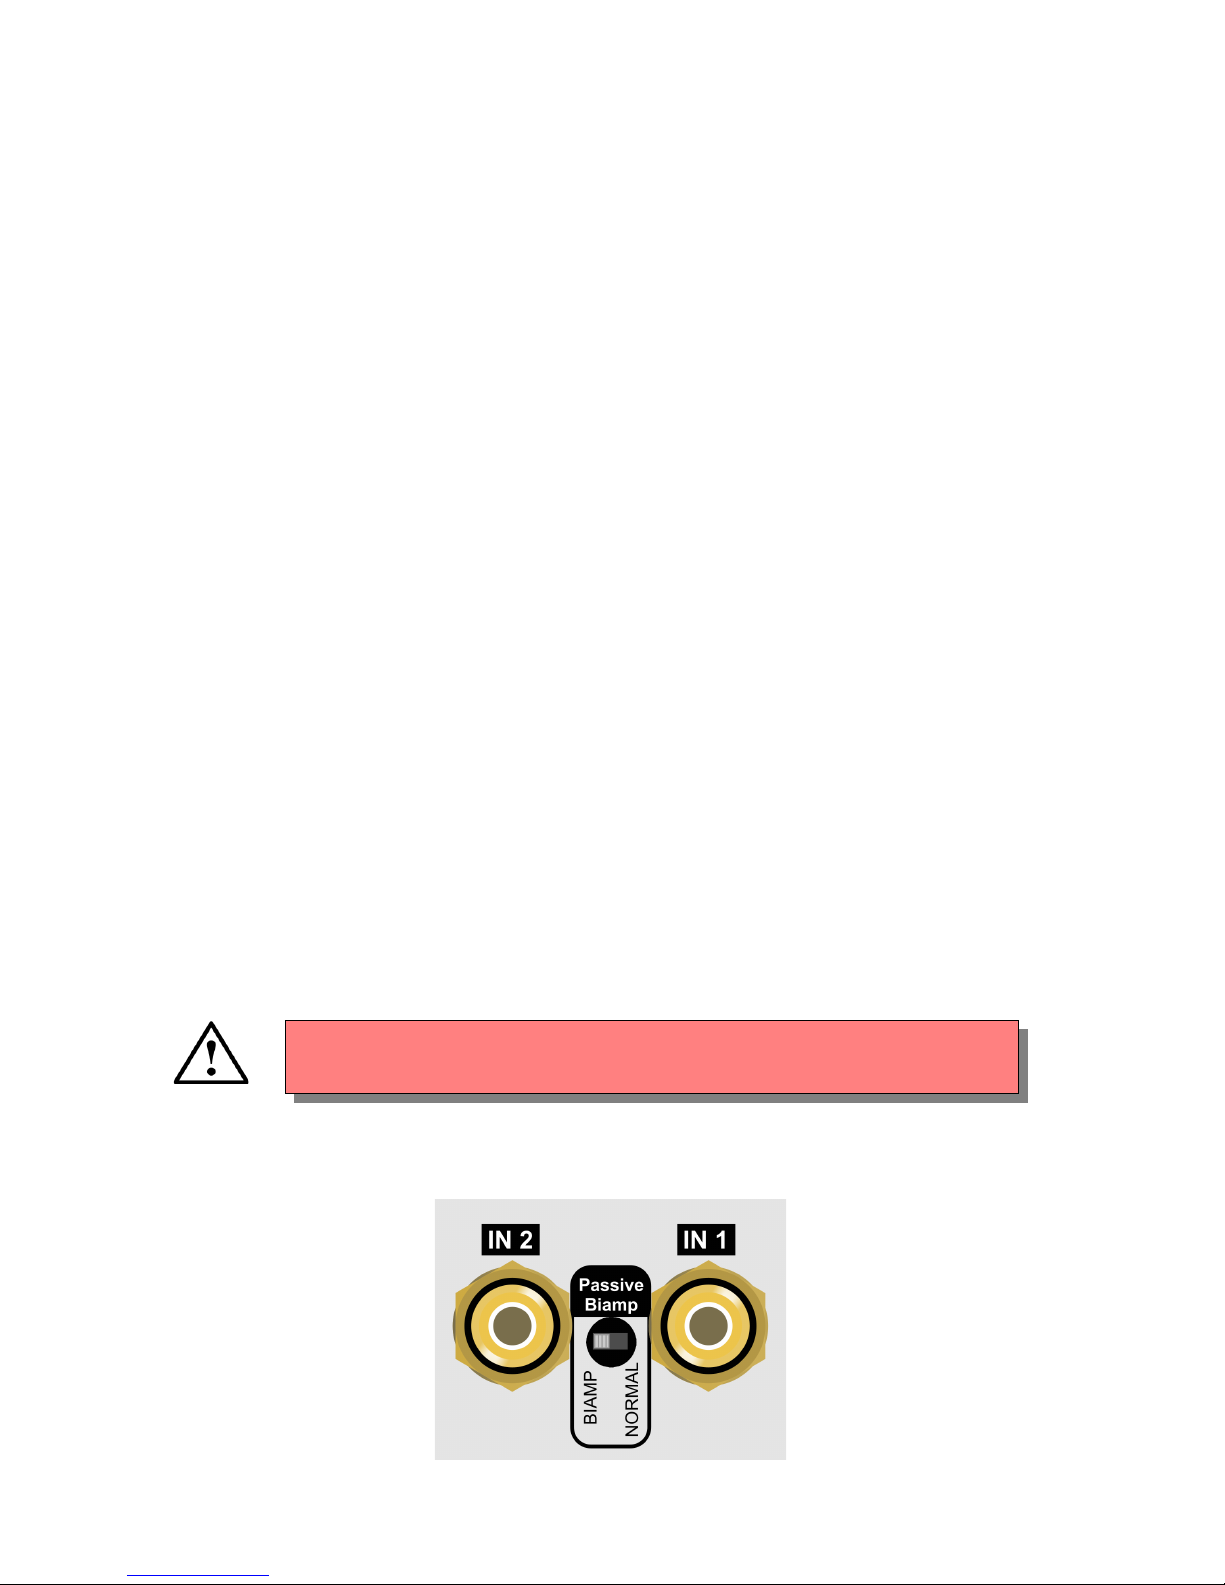
In the passive bi-amp mode, two amplifier channels are used to
drive a single loudspeaker, one channel for the low frequency path
and another for the high frequency path. The two paths are now
completely isolated from each other, and any potential interaction
between the two paths is eliminated. The resulting improvement
Page 10
Anedio A1 Power Amplifier 9
can be significant, revealing another layer of sonic information.
We believe that a pair of amplifiers with moderate current capacity,
when used in passive bi-amplification, is sonically superior to a
single amplifier with massive current capacity. For more
information, please see “Bi-wiring and Bi-amplification” on
www.anedio.com.
Benefit of Anedio’s Implementation
Anedio's implementation of passive bi-amplification offers an
important benefit — immunity to ground-loop noise when
two amplifier channels are tied to a single input.
A pitfall in bi-amplification is the potential ground loop introduced
when the two inputs of the stereo channels are tied together.
Depending on how the amplifier grounding system is designed, the
additional ground noise can be quite high. That is why, in some
systems, passive bi-amping actually degrades the sonic quality.
In the A1 Amp, the bi-amplification feature was conceived at the
very beginning of the design stage, not as an afterthought, and is
optimized for the lowest ground noise. Even when the two amplifier
channels are configured for bi-amplification, the noise level remains
extraordinarily low. Moreover, the bi-amplification mode is
activated with a built-in switch, and there is no need for an external
Y cable.
Setting Passive Bi-amp Mode
Before changing the switching setting, turn off the power to the
A1 Amplifier.
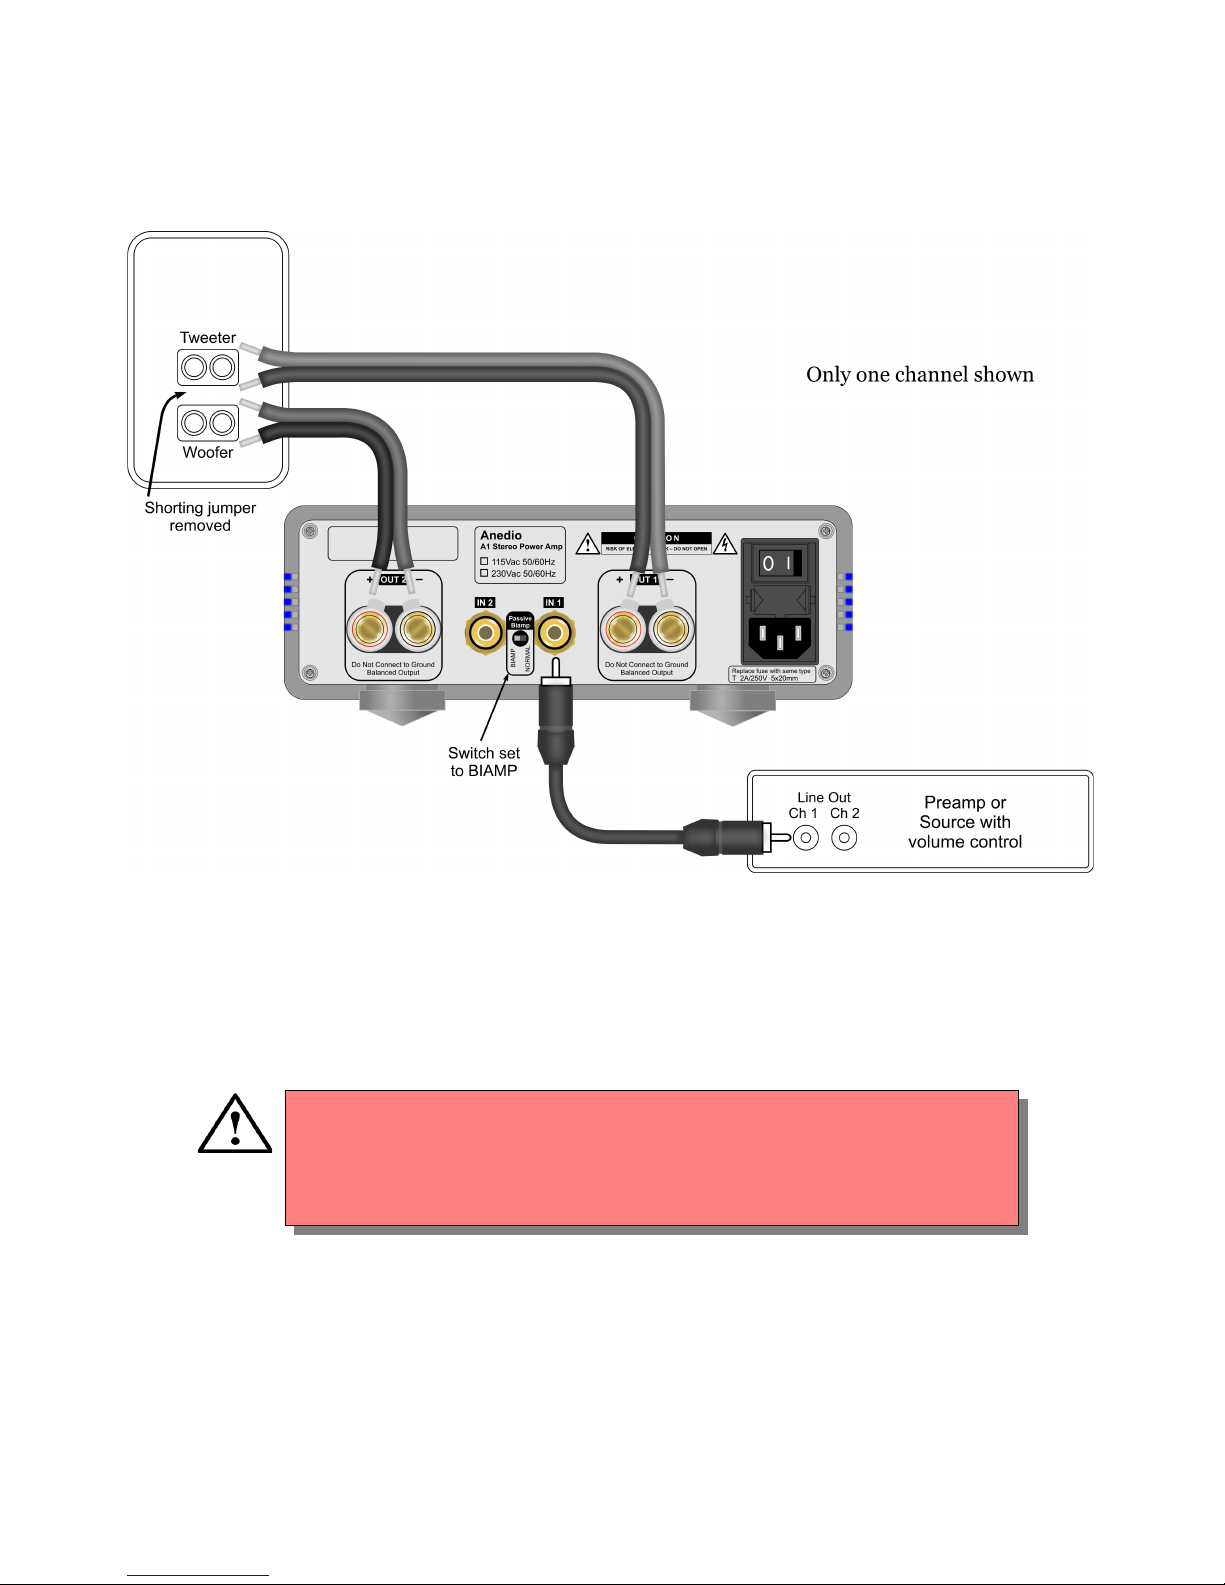
For passive bi-amp operation, use a small flat screw driver to slide
the switch to “BIAMP”as shown below.
Connect the input signal to either IN1 or IN2 (but not both, since
Page 11
10 Anedio A1 Power Amplifier
IN1 and IN2 are internally connected together in the passive bi-amp
mode).
Please note that this mode can be used only for those loudspeakers
that have separate terminals for low and high frequency drivers.
Two A1 Amplifiers are requires for a stereo setup in the passive biamp mode.
Make sure that the shorting jumpers across the high and low
frequency drivers of the loudspeakers are removed for the
passive bi-amp operation. Leaving the shorting jumpers in the
passive bi-amp mode may damage the amplifier.
Page 12

Anedio A1 Power Amplifier 11
Specifications
Continuous Power Output: 70 watts per channel (8 ohms)
75 watts per channel (4 ohms)
Both channels driven simultaneously
Dynamic Power Output
(CEA-2006):
90 watts per channel (8 ohms)
105 watts per channel (4 ohms)
Both channels driven simultaneously
Total Harmonic Distortion
+ Noise:
0.0007% @ 1KHz (60W into 8 ohms)
0.0010% @ 1KHz (70W into 4 ohms)
Intermodulation Distortion: 0.0002% @ 19KHz + 20KHz
2nd order IMD (60W into 8 ohms)
Signal-to-Noise Ratio: 96 dB, A-weighted (1W into 8 ohms)
114 dB, A-weighted (70W into 8 ohms)
Gain: 26.5 dB
Phase: Non-inverting
Frequency Response: 4 Hz - 140 KHz (-3dB)
Slew Rate: 50 V/us
Channel Separation: 115 dB @ 1KHz
95 dB @ 20KHz
Peak Output Current: 10 Amperes
Minimum Load: 4 ohms
Input Impedance: 41 Kohms
Output Impedance: 0.15 ohms @ 1KHz
0.16 ohms @ 20KHz
Output Offset: 35 mV max
Input: Single-ended, RCA jacks with gold-plated
contacts and Teflon dielectric
Output: Balanced outputs, gold-plated insulated
binding posts
Power Consumption: 14 W with no signal
Dimensions (W x H x D): 9.0 x 3.4 x 13.0 inches (229 x 86 x 330 mm)
Weight: 17 lbs (7.7 Kg)
Page 13

12 Anedio A1 Power Amplifier
Trouble Shooting
Symptoms Remedy
No power
• Ensure the power cord is plugged in fully.
• Check the fuse. If blown, ensure that the
outputs are not shorted. Replace it only
with 2A/250V 5x20mm time-lag
(slow-blo). Using an incorrect fuse will
void the warranty.
Power on but no
sound
• Ensure that the source component is turned
on.
• Ensure that the interconnects and cables
are plugged in fully and seated properly.
LED indicator
changed to purple
• Immediately turn off the power.
• Ensure that the output terminals and the
loudspeaker terminals are not shorted.
• (In the passive bi-amp mode only) ensure
that the high and low frequency drivers of
the loudspeakers are not shorted together.
• Once the short-circuit condition is cleared,
wait about 1 minute and turn on power.
Hum
• Ensure that all components are connected
to a single power strip.
• If there is a cable TV or antenna connection,
ensure that the cable/antenna grounds are
galvanically isolated from the audio ground.
This may require inserting a ground
isolator.
Diffused stereo
imaging
• Ensure that the loudspeaker phase is not
inverted.
Mono sound
• For “normal” (stereo) mode, ensure that the
passive bi-amp switch is set to “normal.” If
it is unintentionally set to “biamp,” the
resulting sound will be mono.
If the problem persists, please contact Anedio via the Contact page
at www.anedio.com.
WARNING: Repairs are to be performed by qualified service
personnel only. To reduce the risk of electric shock, do not perform
any servicing other than that contained in the operating
instructions.
Page 14

Anedio A1 Power Amplifier 13
WARNING: Do not attempt to remove the cover, as doing so
will break the tight thermal bond between the heat spreader
and the cover.
Warranty & Repair
One-Year Limited Warranty
Anedio warrants this product to be free from defects in materials
and workmanship, subject to the terms set forth below, for periods
up to one year from the date of original purchase. The warranty
includes parts and labor.
Anedio will remedy the problem by repair or replacement, as we
deem necessary, to restore the product to full performance. Anedio
will pay the shipping cost one way (the return portion).
This warranty does not cover cosmetic damage or damage due to
accident, misuse, abuse, negligence while in the possession of the
customer.
Tampering by persons other than factory-authorized service
personnel or failure to fully comply with the operating instructions
specified in the manual will void the warranty. Any unauthorized
disassembly, component replacement, or modifications performed
to the product will void the warranty.
The warranty is transferable from the original owner to a
subsequent owner as long as a copy of the bill-of-sale from Anedio
accompanies the re-sale.
Repair
In the event of a defect or malfunction, contact Anedio for return
authorization (via the Contact page at www.anedio.com).
Unauthorized returns will not be accepted.
Products must be returned using original packaging material only.
Anedio is not responsible for damages incurred during transit if the
original factory packaging is not used. The packaging material may
be purchased from Anedio if necessary.
 Loading...