

Page 1
UPHOLSTERED DAYBED
Side Panels & Slats - Fog
Back Panel & Side Rails - Fog
Side Panels & Slats - Smoke
Back Panel & Side Rails - Smoke
Examine all packaging material for small parts that may have come loose during shipment. Periodic checks are recommended to insure that all
components are in proper position, tight and free from damage. Keep this assembly instruction for future reference. Adult assembly is required
The product is designed for residential use only.
Page 1 of 1
QTYCODE HARDWARE
A
B
C
D
E
8
M8 x 20mm Bolts
4
M6 x 45mm Bolts
4
M6 x 13mm Spring Washers
4
M6 x 19mm Flat Washers
1
M4 x 65mm Allen Wrench
1F M5 x 65mm Allen Wrench
8G M4 X 32mm Wood Screws
4H M6 x 35mm Bolts
K
QTYCODE COMPONENTSCOMPONENTS
1J
1L Front Rail
N Ma�res Support2 O Wooden Foot4
CODE
K Side PanelBack Panel
M Back Rail1
QTY
2
B
C
D
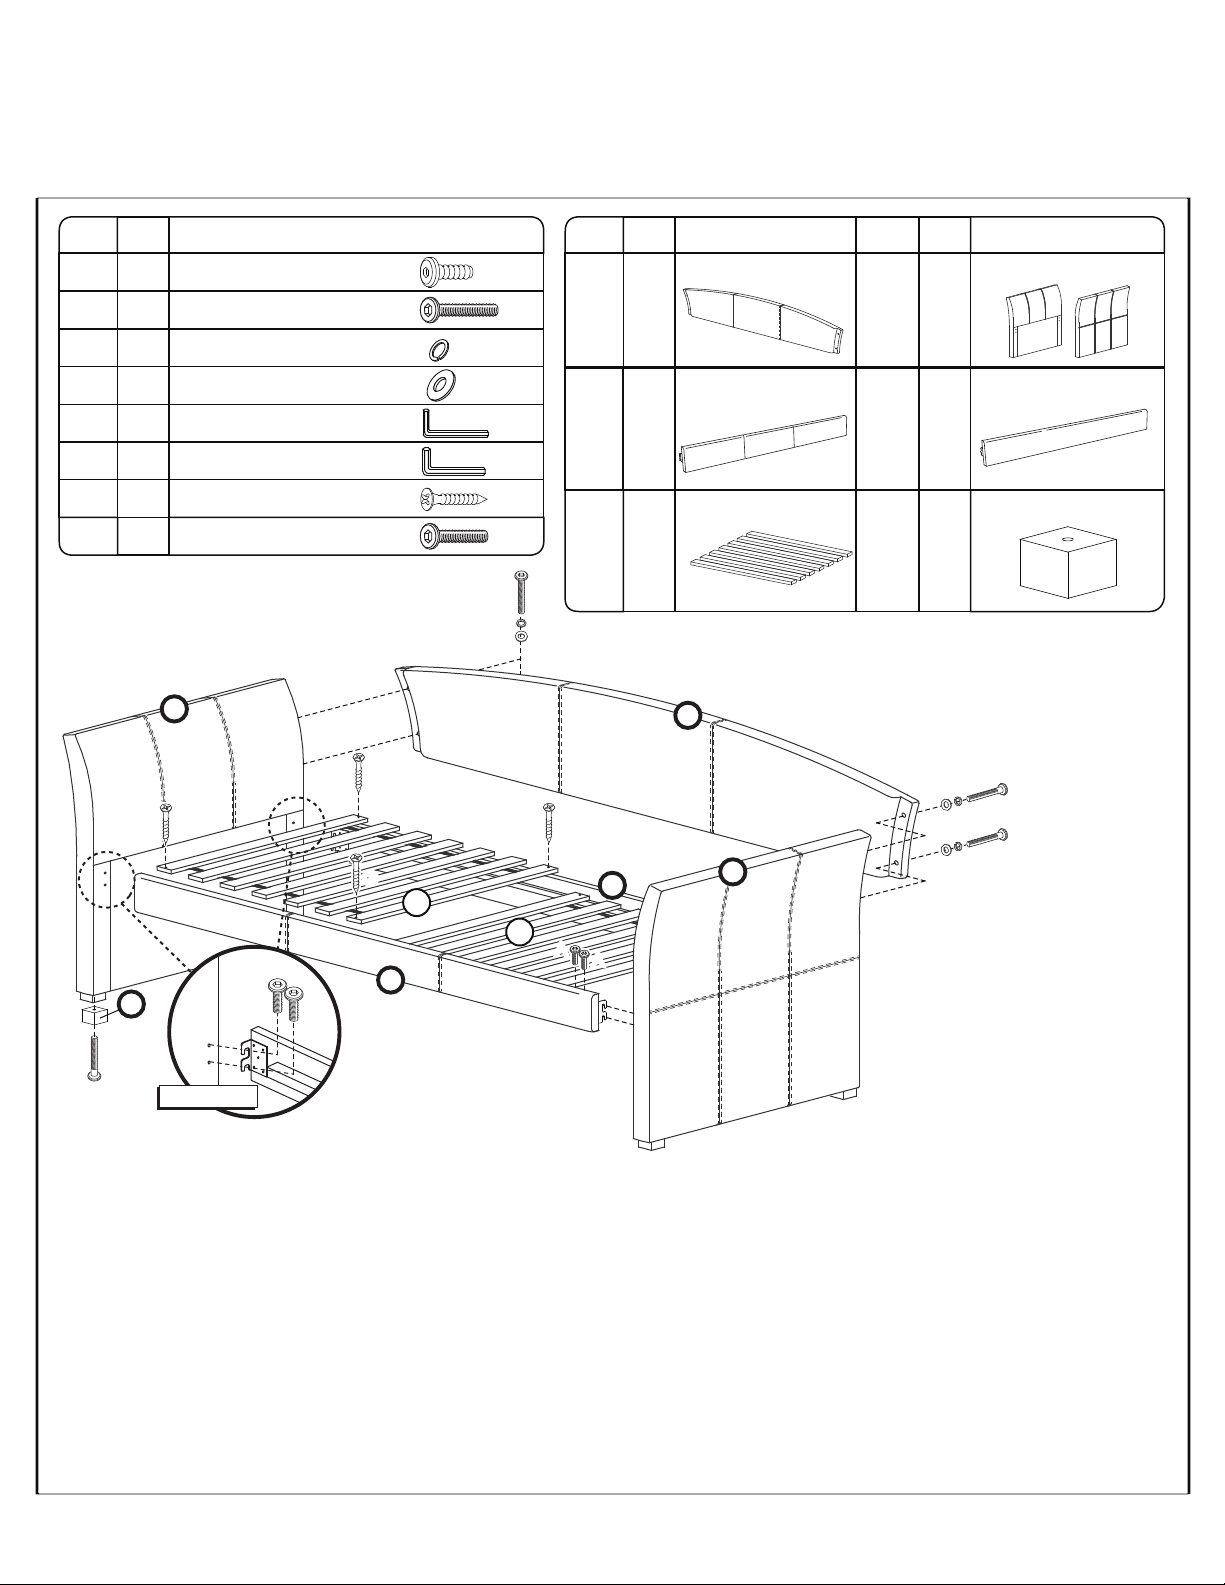
STEP 1
Begin assembly by attaching each
Wooden Foot (O) to the bottom of the
J
Side Panel (K) using 2 Allen Bolts (H)
per panel. Fully tighten all bolts using
Allen Wrench (E).
GG
B
C
D
GG
GG
GG
M
K
N
N
A
A
A
O
A
A
L
A
H
FIGURE 1
STEP 2
Attach the Back Panel (J) to the back of each Side Panel (K) by aligning the holes and
securing with 2 Allen Bolt (B), 2 spring Washer (C) & 2 Flat Washer (D) from the backside
per each end. Do not fully tighten bolts for this step.
STEP 3
Next attach the Back Rail (M) to the inside of each Side Panel (K) at the back by aligning the holes and securing with 2 Allen
Bolts (A) per each end. See Figure 1. Do not fully tighten bolts for this step.
STEP 4
Attach the Front Rail (L) to the inside of each Side Panel (K) at the front by aligning the holes and securing with 2 Allen Bolts
(A) per each end. See Figure 1. Tighten all bolts from STEP 2 through 4.
STEP 5
Attach each Mattress Support (N) to Front & Back Rails (L&M) by unrolling and securing with 4 Wood Screws (G) 2 per each
side. Tighten all screws using Philips screwdriver (*not incleded). Your new Daybed is now complete.
CARE & MAINTENANCE: The touch of a soft cloth is all the maintenance the finish will ever need. Please do not use harsh or abrasive cleaners for polishing,
as they may cause damage to the finish. Periodic checks are recommended to make sure that all hardware is securely tightened.
 Loading...