

Page 1
1
Please Read Before Installing
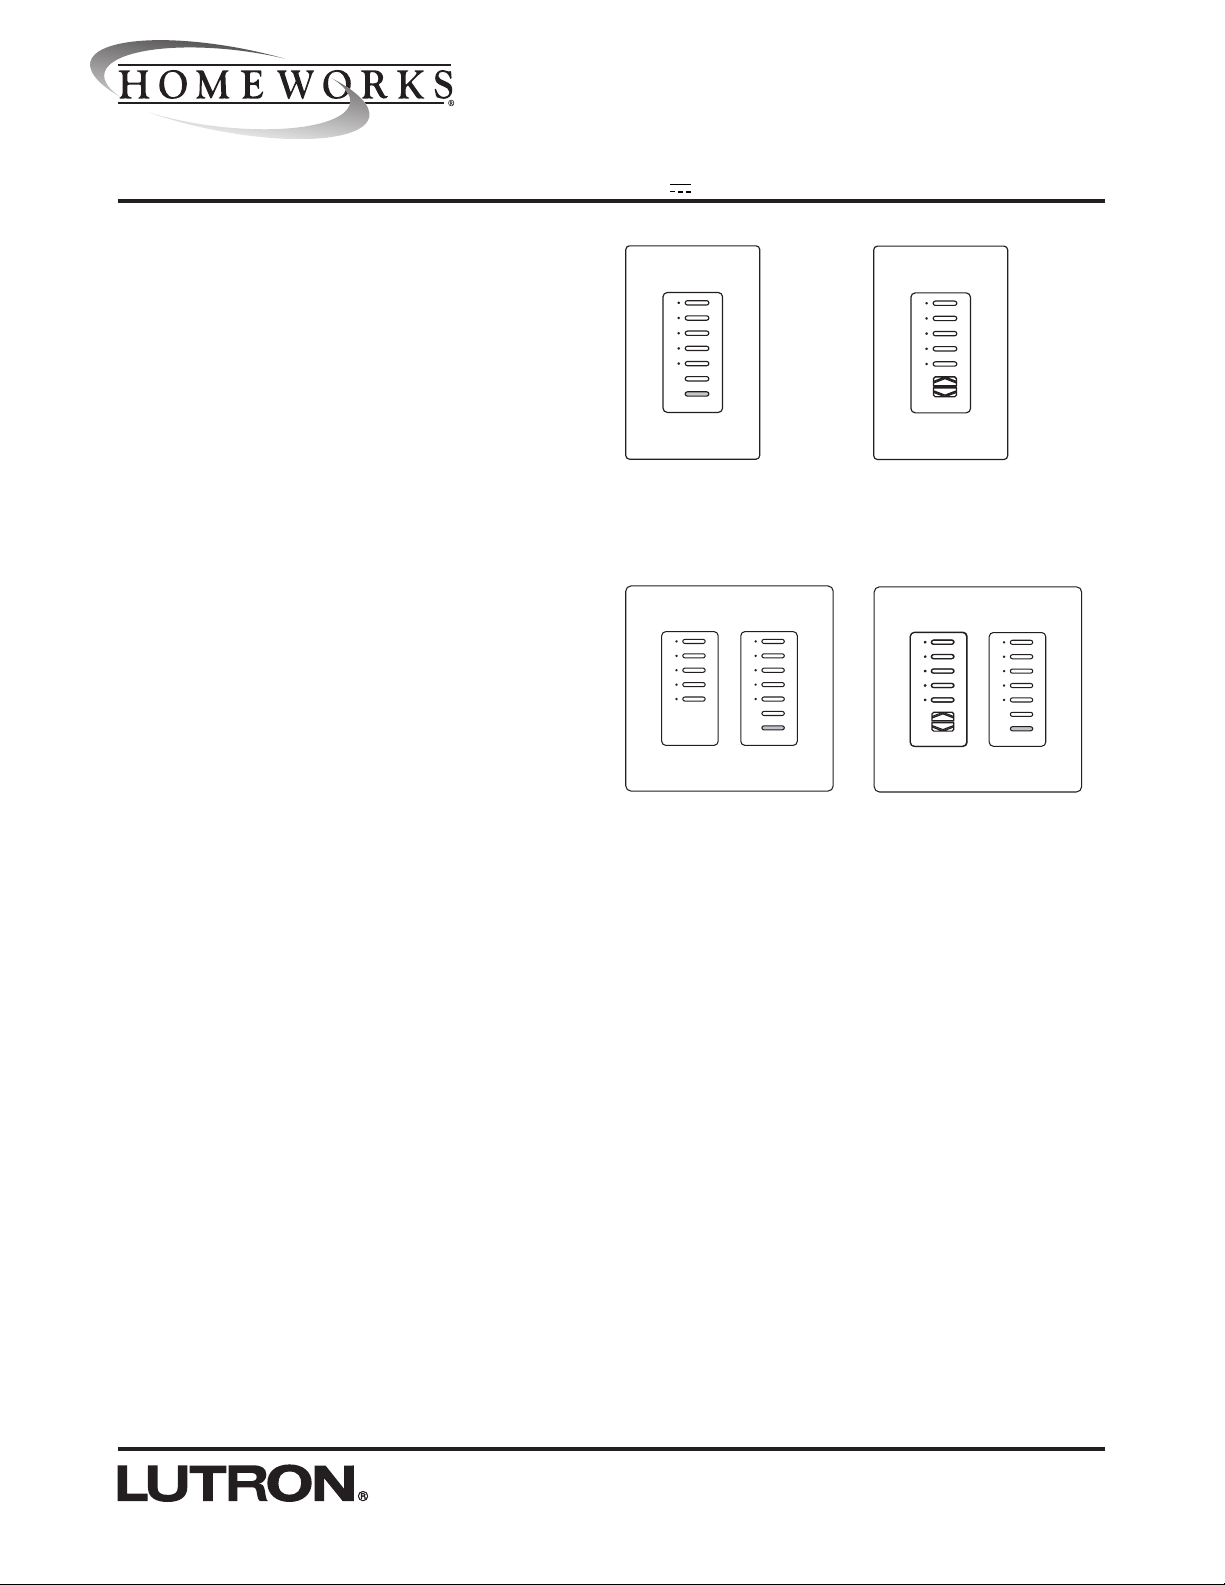
Designer-Style Wired
Slim-Button Keypads
HWD-5KP, -5RL, -10KP, -10RL
15 V , 42 mA
Installation Instructions
Description
The HWD-5KP, -5RL and HWD-10KP, -10RL keypads
are for use with HomeWorks systems. The keypad
buttons are programmed with a personal computer
using the HomeWorks Utility.
Up to 32 keypads, each with a unique address, can be
connected to each keypad link on the HomeWorks
Wired Processor. A maximum of 300 keypad LEDs
can be connected per processor. To increase the
number of LEDs, see the HomeWorks Technical
Reference Guide.
Important Notes
Codes: Install in accordance with all local and national
electrical codes.
Environment: Ambient operating temperature:
0-40°C, 32-104°F, 0-90% humidity, non-condensing.
Indoor use only.
Wallplates: Lutron Claro
® and Satin ColorsTM wallplates
are recommended for best color match and clean aesthetic appearance. Do not paint controls or wallplates.
Cleaning: To clean, wipe with a clean damp cloth. DO
NOT use any chemical cleaning solutions.
Wallboxes: Lutron recommends using 3 1/2" (89mm)
deep wallboxes for easier installation.
HWD-5KP
HWD-10KP
HWD-10RL
HWD-5RL
Page 2
2
Installation
1.
Disconnect power to the keypads by turning off all
circuit breakers connected to the HomeWorks
®
Processor or keypad link auxiliary power supply.
Danger - Wiring with power ON may result in
personal injury.
2. Address keypads. Assign a unique address to
each keypad using the DIP switch on the back of
the keypad. See Figure 2 (page 3) for DIP switch
location. See Figure 3 (page 4) for DIP switch settings. Be sure to record the address for future programming purposes.
3. Strip insulation from wires to 3/8" (10mm). Each
terminal will accept one or two 18-gauge (1.0mm
2
)
wires.
4. Unplug terminal block from the keypad circuit
board.
5. Connect wiring to terminal block as shown in
Figures 1 and 2 (page 3).
6. Plug the keypad terminal block back onto the cir-
cuit board. Be sure to orient the terminal block
correctly.
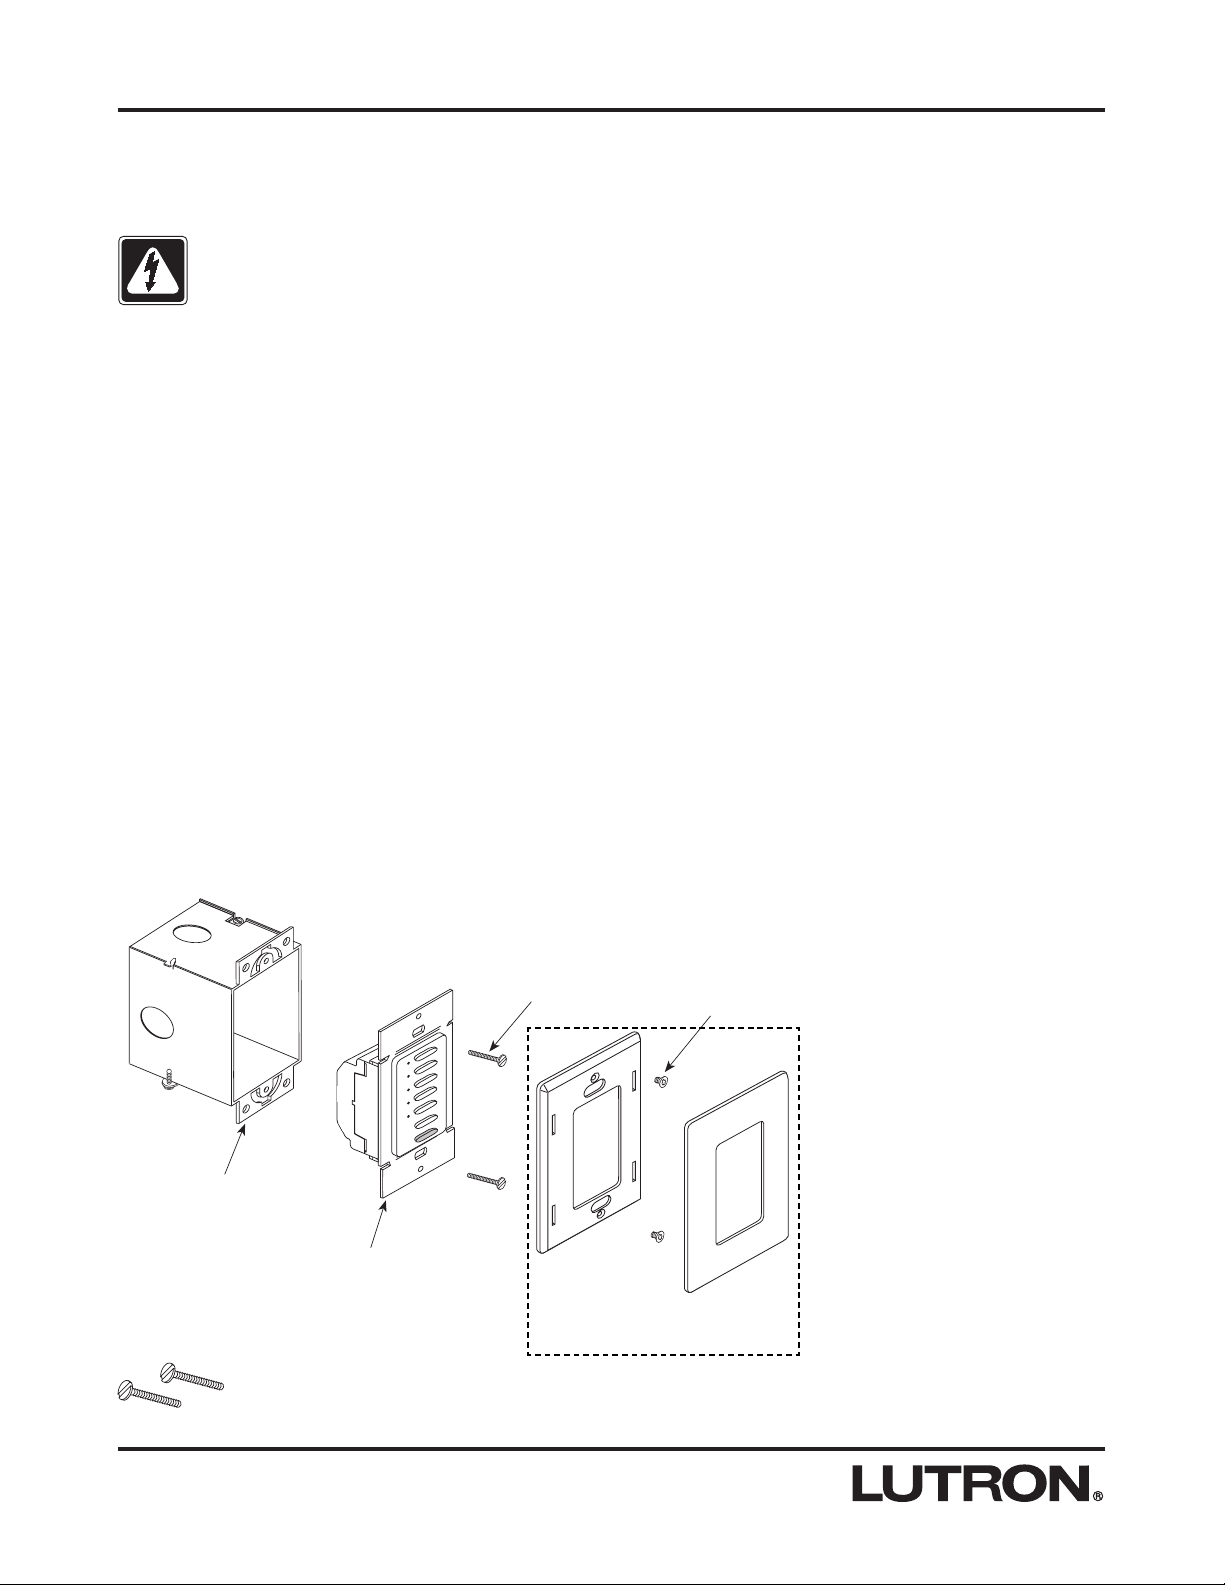
7. Mount keypad as shown in Figure 4 (page 4). Do
not over-tighten mounting screws.
8. Restore power to the HomeWorks Processor or
keypad link auxiliary power supply.
Mounting Diagram
Wallbox
Keypad
Mounting
Screws
Keypad
Adapter
Mounting
Screws
Wallplate and Adapter are purchased separately.
Included:
Mounting Screws (2)
Page 3

3
Low-Voltage (Class 2/PELV) Wiring Diagram
Keypads can be connected to
any of these three links
depending on the configuration
of the HomeWorks
® Utility
Pins 1 & 2 - 1 pair #18 AWG (1.0mm2) for power
Pins 3 & 4 - 1 pair #18-22 AWG (1.0 - 0.5mm
2
)
twisted shielded for data
1234
DIP switches 1-5 for
setting address, DIP
switch 6 does not
affect keypad address.
PELV (Class 2:
USA) wiring connections to
HomeWorks
Wired Processor
or other Keypads.
MUX
MUX
+15VDC
COM
Keypad Addressing
Set DIP switches 1-5 to give the keypad a unique HomeWorks system address from 1 to 32.
Switch
Settings
Switch
Settings
Switch
Settings
Switch
SettingsAddress
#
Address
#
Address
#
Address
#
UP (ON)
DOWN (OFF)
Example: Setting Switch #1 ON.
Keypad Rear View
DIP Switches
123456
1
2
3
4
5
6
7
8
ON
123456
ON
123456
ON
123456
ON
123456
ON
123456
ON
123456
ON
123456
ON
123456
9
10
11
12
13
14
15
16
ON
123456
ON
123456
ON
123456
ON
123456
ON
123456
ON
123456
ON
123456
ON
123456
17
18
19
20
21
22
23
24
ON
123456
ON
123456
ON
123456
ON
123456
ON
123456
ON
123456
ON
123456
ON
123456
25
26
27
28
29
30
31
32
ON
123456
ON
123456
ON
123456
ON
123456
ON
123456
ON
123456
ON
123456
ON
123456
ON
123456
Page 4

LIMITED WARRANTY
Lutron will, at its option, repair or replace any unit that is defective in materials or manufacture within two years after purchase. For warranty service, return unit to place of purchase or
mail to Lutron at 7200 Suter Rd., Coopersburg, PA 18036-1299, postage pre-paid. Telephone
the Lutron Technical Support Center toll free at 800-523-9466. After the two year period, a
pro-rated warranty applies to this product until eight years after the purchase. For more information regarding this warranty contact your Lutron representative.
THIS WARRANTY IS IN LIEU OF ALL OTHER EXPRESS WARRANTIES, AND THE
IMPLIED WARRANTY OF MERCHANTABILITY IS LIMITED TO TWO YEARS FROM PURCHASE. THIS WARRANTY DOES NOT COVER THE COST OF INSTALLATION,
REMOVAL OR REINSTALLATION, OR DAMAGE RESULTING FROM MISUSE, ABUSE,
OR IMPROPER OR INCORRECT REPAIR, OR DAMAGE FROM IMPROPER WIRING OR
INSTALLATION. THIS WARRANTY DOES NOT COVER INCIDENTAL OR CONSEQUENTIAL DAMAGES. LUTRON’S LIABILITY ON ANY CLAIM FOR DAMAGES ARISING OUT
OF OR IN CONNECTION WITH THE MANUFACTURE, SALE, INSTALLATION, DELIVERY,
OR USE OF THE UNIT SHALL NEVER EXCEED THE PURCHASE PRICE OF THE UNIT.
This warranty gives you specific legal rights, and you may also have other rights which vary
from state to state. Some states do not allow limitations on how long an implied warranty lasts,
so the above limitation may not apply to you. Some states do not allow the exclusion or limitation of incidental or consequential damages, so the above limitation or exclusion may not
apply to you.This product may be covered by one or more of the following U.S. patents:
4,835,343; 4,889,999; 5,170,068; 5,237,207; D344,068; D378,814 and corresponding foreign
patents. U.S. and foreign patents pending. Lutron, Claro, and HomeWorks are registered
trademarks and Satin Colors is a trademark of Lutron Electronics Co., Inc.
© 2003 Lutron Electronics Co., Inc.
Technical and Sales Assistance
If you need assistance, call the toll-free Lutron
Technical Support Center. Please provide exact
model number when calling.
(800) 523-9466 (U.S.A., Canada and the Caribbean)
Other countries call:
Tel: (610) 282-3800
Fax: (610) 282-3090
Visit our Web site at www.lutron.com
Troubleshooting Guide
Symptom Cause and Action
Power is not present at keypad.
• Make sure HomeWorks Processor is powered.
• Check for 15 VDC between pins 1 & 2 on the keypad
connector.
• Remove connector from back of keypad, check connections and replace.
Keypad is working properly but is not communicating with
the processor.
• Verify that the processor is powered.
• Check that keypad wires 3 & 4 are properly connected.
• Check that keypad link is plugged into correct connector
at processor.
• Verify that link is configured for HomeWorks keypads in
the HomeWorks Utility.
• Check keypad for proper address using table on previous
page.
• Check system programming.
LEDs don't light up even when buttons are pushed.
LEDs cycle from top to bottom sequentially.
LEDs light when button is pressed, but the system
response isn't correct.
Lutron Electronics Co., Inc.
7200 Suter Road
Coopersburg, PA 18036-1299
Made and printed in the U.S.A. 3/03 P/N 043-121 Rev. A 93-2605-03
 Loading...