

Page 1

instruction manual
Design XPress for
NetLinx Studio
version 1.5
Installer’s Guide
Page 2

Software License and Warranty Agreement
LICENSE GRANT.
AMX grants to Licensee the non-exclusive right to use the AMX Software in the manner described in this License. The AMX Software
is licensed, not sold. The AMX Software consists of generally available programming and development software, product
documentation, sample applications, tools and utilities, and miscellaneous technical information. Please refer to the README.TXT
file on the compact disc or download for further information regarding the components of the AMX Software. The AMX Software is
subject to restrictions on distribution described in this License Agreement. YOU MAY NOT LICENSE, RENT, OR LEASE THE AMX
SOFTWARE. You may not reverse engineer, decompile, or disassemble the AMX Software.
INTELLECTUAL PROPERTY.
The AMX Software is owned by AMX and is protected by United States copyright laws, patent laws, international treaty provisions,
and/or state of Texas trade secret laws. Licensee may make copies of the AMX Software solely for backup or archival purposes.
Licensee may not copy the written materials accompanying the AMX Software.
TERMINATION. AMX RESERVES THE RIGHT, IN ITS SOLE DISCRETION, TO TERMINATE THIS LICENSE FOR
ANY REASON AND UPON WRITTEN NOTICE TO LICENSEE.
In the event that AMX terminates this License, the Licensee shall return or destroy all originals and copies of the AMX Software to
AMX and certify in writing that all originals and copies have been returned or destroyed.
PRE-RELEASE CODE.
Portions of the AMX Software may, from time to time, as identified in the AMX Software, include PRE-RELEASE CODE and such
code may not be at the level of performance, compatibility and functionality of the final code. The PRE-RELEASE CODE may not
operate correctly and may be substantially modified prior to final release or certain features may not be generally released. AMX is
not obligated to make or support any PRE-RELEASE CODE. ALL PRE-RELEASE CODE IS PROVIDED "AS IS" WITH NO
WARRANTIES.
LIMITED WARRANTY.
AMX warrants that the AMX Software will perform substantially in accordance with the accompanying written materials for a period of
ninety (90) days from the date of receipt. AMX DISCLAIMS ALL OTHER WARRANTIES, EITHER EXPRESS OR IMPLIED,
INCLUDING, BUT NOT LIMITED TO IMPLIED WARRANTIES OF MERCHANTABILITY AND FITNESS FOR A PARTICULAR
PURPOSE, WITH REGARD TO THE AMX SOFTWARE. THIS LIMITED WARRANTY GIVES YOU SPECIFIC LEGAL RIGHTS.
Any supplements or updates to the AMX SOFTWARE, including without limitation, any (if any) service packs or hot fixes provided to
you after the expiration of the ninety (90) day Limited Warranty period are not covered by any warranty or condition, express, implied
or statutory.
LICENSEE REMEDIES.
AMX's entire liability and your exclusive remedy shall be repair or replacement of the AMX Software that does not meet AMX's
Limited Warranty and which is returned to AMX. This Limited Warranty is void if failure of the AMX Software has resulted from
accident, abuse, or misapplication. Any replacement AMX Software will be warranted for the remainder of the original warranty period
or thirty (30) days, whichever is longer. Outside the United States, these remedies may not available.
NO LIABILITY FOR CONSEQUENTIAL DAMAGES. IN NO EVENT SHALL AMX BE LIABLE FOR ANY DAMAGES
WHATSOEVER (INCLUDING, WITHOUT LIMITATION, DAMAGES FOR LOSS OF BUSINESS PROFITS, BUSINESS
INTERRUPTION, LOSS OF BUSINESS INFORMATION, OR ANY OTHER PECUNIARY LOSS) ARISING OUT OF THE USE OF OR
INABILITY TO USE THIS AMX SOFTWARE, EVEN IF AMX HAS BEEN ADVISED OF THE POSSIBILITY OF SUCH DAMAGES.
BECAUSE SOME STATES/COUNTRIES DO NOT ALLOW THE EXCLUSION OR LIMITATION OF LIABILITY FOR
CONSEQUENTIAL OR INCIDENTAL DAMAGES, THE ABOVE LIMITATION MAY NOT APPLY TO YOU.
U.S. GOVERNMENT RESTRICTED RIGHTS. The AMX Software is provided with RESTRICTED RIGHTS. Use, duplication, or
disclosure by the Government is subject to restrictions as set forth in subparagraph (c)(1)(ii) of The Rights in Technical Data and
Computer Software clause at DFARS 252.227-7013 or subparagraphs (c)(1) and (2) of the Commercial Computer Software
Restricted Rights at 48 CFR 52.227-19, as applicable.
This Agreement replaces and supercedes all previous AMX Software License Agreements and is governed by the laws
of the State of Texas, and all disputes will be resolved in the courts in Collin County, Texas, USA. Should you have any
questions concerning this Agreement, or if you desire to contact AMX for any reason, please write: AMX Corporation,
3000 Research Drive, Richardson, TX 75082.
Page 3

Table of Contents
Table of Contents
Introduction ...............................................................................................................1
Overview ........................................................................................................................... 1
Scope of This Document.......................................................................................................... 1
DXP v1.5 System Capabilities........................................................................................... 1
DXP v1.5 Configuration Capabilities ........................................................................................ 2
Supported Subsystems and Equipment ............................................................................ 2
AMX NetLinx Integrated Controllers......................................................................................... 2
AMX Touch Panels .................................................................................................................. 2
MAX Content Servers by AMX ................................................................................................. 3
Lighting..................................................................................................................................... 3
HVAC/Environment .................................................................................................................. 3
Whole House A/V Selection and Distribution ........................................................................... 4
MP3 Players............................................................................................................................. 4
Receivers ................................................................................................................................. 4
User Interfaces......................................................................................................................... 4
Doorphones.............................................................................................................................. 4
Supported integration!Solutions Applications........................................................................... 4
Related Documents........................................................................................................... 5
One Step at a Time ........................................................................................................... 5
Label every wire termination point. .......................................................................................... 5
Don't get ahead of yourself. ..................................................................................................... 5
Use the auto-generated report file as your installation check list. ............................................ 5
The Design XPress Application......................................................................................... 6
Custom Modifications ........................................................................................................ 6
Adding and Modifying Software ............................................................................................... 6
Common Mistakes ................................................................................................................... 6
Understanding the Report File ................................................................................9
Device Addressing ............................................................................................................ 9
Wiring/Connections ........................................................................................................... 9
General Information........................................................................................................... 9
AMX Recommended Equipment List .............................................................................. 10
Installation Instructions.................................................................................................... 10
Using NetLinx Studio .............................................................................................11
Setting Up the Master...................................................................................................... 11
Addressing the System ................................................................................................... 12
Addressing the Devices................................................................................................... 12
esign XPress Installer’s Guide
i
Page 4

Table of Contents
Downloading Software and Transferring Files ................................................................ 13
Using TPDesign3 to Download Panel Pages......................................................................... 13
Transferring Preset Button Text to the Master via FTP.......................................................... 13
Startup.................................................................................................................................... 14
Appendix .................................................................................................................15
Address Formats For Supported Lighting Systems ........................................................ 15
Note for ALD-D48 Lighting Systems ...................................................................................... 15
Note for Radia Lighting Systems............................................................................................ 15
Format of IR Files For Audio Sources............................................................................. 16
Channel Map - Function Codes ..................................................................................... 18
ii
Design XPress Installer’s Guide
Page 5

Introduction
Overview
Design XPress was designed with the sole purpose of reducing the amount of programming and
integration time required for an installation. Design XPress was designed to give the dealer/installer
a quick start on the custom installations by quickly setting up common controls. For installations
where one install is relatively similar to another, Design XPress can generate 90 - 100% of the
software required.
Design XPress consists of several functional elements:
1. Design XPress application/wizard running on a PC for defining the system
2. NetLinx software generated by the Design XPress application
3. NetLinx Studio application for compiling, managing, and modifying the NetLinx software, as
well as downloading NetLinx files to the master.
4. Auto-generated touch panel files and DMS keypad files
5. Auto-generated text files for CD titles, tuner presets, satellite favorites, etc.
Introduction
Design XPress will generate all of the program and configuration files the installer needs. It will
also generate a report file that contains an equipment list, addresses for all devices in the system, a
device wiring and connection list detailing where the devices should be plugged in, and installation
instructions.
It should be noted that Design XPress can be used by anyone. However, because the software will
be compiled and downloaded using NetLinx Studio, it is highly desirable to be familiar with that
application. Further, a good understanding of the NetLinx programming language is beneficial.
Scope of This Document
This document is intended to help an installer understand how Design XPress operates. By
understanding the basic behavior of the software package the installer can avoid common mistakes
and, therefore, get in and out of a job more quickly. This document will explain the layout of the
system but only at a high level. It will also address the things that should be avoided and the steps
required for installing the system.
DXP v1.5 System Capabilities
Design XPress (DXP) is a Wizard which quickly creates a multi-room control system file set. DXP
generates all required TPD and KPD files along with NetLinx Studio project files. Additionally a
DXP-generated HTML file identifies the specific hardware addressing, baud rates and cabling
configuration required for setting up the control system hardware. All DXP-created files will
operate the control system without further modification. Add only the manufacturer-specific IR
files for each Audio and Video source to complete the control system.
For more customized user interfaces, use TPDesign4 or TPDesign3 to easily customize the Touch
Panel pages and/or buttons to the end-users' preferences in colors and/or button shapes and sizes.
An advanced NetLinx programmer may also use NetLinx Studio to modify The NetLinx source
code for greater customization of the control system.
esign XPress Installer’s Guide
1
Page 6

Introduction
DXP v1.5 Configuration Capabilities
1-30 Audio Zones
1-8 Audio/Video Sources (MAX by AMX, CD/DVD, CD Changer, DSS, MP3 Players or
Tuners)
1-25 controllable MAX Zones
1-32 DMS Keypads
1-16 Touchpanels
0-32 HVAC Zones (ViewStat ICSNet, ViewStat RS-422 or OPStat)
0-32 SB2 Keypads
0-4 Door Phones (Techlon Instruments, Inc. or Generic I/O based)
0-24 Video Inputs
Supported Subsystems and Equipment
Design XPress (v1.5) supports the following subsystems and equipment:
AMX NetLinx Integrated Controllers
NI-2000
NI-3000
NI-4000
NXC-ME260/64
AMX Touch Panels
G4 Firmware Panels:
MVP-7500: Wireless Panel
MVP-8400: Wireless Video Panel
NXT/NXD-CV7: 7" Touch Panel with video
NXT/NXD-CA12: 12" Touch Panel
NXT/NXD-CV12: 12" Touch Panel with video
NXT/NXD-CA15: 15" Touch Panel
NXT/NXD-CV15: 15" Touch Panel with video
NXT/NXD-CV17: 17" Touch Panel with video
The nomenclature " NXT" indicates the table-top (tilt) model, and "NXD" represents
the wall-mount version.
2
Design XPress Installer’s Guide
Page 7

G3 Firmware Panels:
AXT/AXD-CP4/A: 4" Touch Panel
AXD-CV6: 6" Video Touch Panel
AXT/AXD-CA10: 10" Touch Panel
AXT/AXD-CG10: 10" Touch Panel
AXT/AXD-CV10: 10" Video Touch Panel
The nomenclature " AXT" indicates the table-top (tilt) model, and "AXD" represents
the wall-mount version.
Note: G3 panels do not support PictureFrame.
MAX Content Servers by AMX
MAX-MMS MultiMedia Servers
MAX-IMS Integrated Music Servers
Introduction
MAX-BSM Backup Storage Module
MAX-AVM Audio/Video Module
Lighting
AMX ALD-D48 (FW build 2.1 or later, via ISCP only)
AMX Radia
Clipsal C-Bus
DynaLite
LiteTouch 5000LC
Lutron GRAFIK Eye
Lutron Homeworks Interactive
Lutron RadioRA
Vantage Q
The Clipsal C-Bus and Dynalite lighting systems are primarily used outside the U.S.
HVAC/Environment
AMX OPStat thermostats
AMX ViewStat thermostats (ICSNET and RS-422)
esign XPress Installer’s Guide
3
Page 8

Introduction
Whole House A/V Selection and Distribution
AMX AS8/16 audio switcher
PLH-VS8 video switcher
Any audio or video source equipment that uses IR
MP3 Players
Integra NAS-2.3 Net-Tune (XIVA protocol-controlled)
Imerge SoundServer (XIVA protocol-controlled)
Marantz DH9300 (XIVA protocol-controlled)
ReQuest ARQ2
Any XIVA protocol MP3 player can be used by specifying one of the supported XIVA
MP3 players, and physically connecting a different player (since the XIVA protocol is
the same across all devices that use it). In this case the name of the player will be
represented by DXP as the selected make and model MP3 player, as opposed to the
actual make/model of the connected MP3 player.
Receivers
DXP v1.5 supports any audio or video source equipment that uses IR.
User Interfaces
AMX Touch Panels
AMX DMS keypads
AMX SB2 keypads (for volume control only)
Doorphones
Generic
Techlon Instruments
Supported integration!Solutions Applications
i!-Weather
i!-TimeManager
i!-Schedule
4
Design XPress Installer’s Guide
Page 9

Introduction
Related Documents
This document will not attempt to explain the architecture of the NetLinx software that is
automatically generated by Design XPress. That is left for another document and potentially
another audience. The related documents listed below are all available (as PDF files) on-line at
www.amx.com.
Related Documents
• Design XPress for NetLinx Studio Programmer’s
Guide
• Design XPress for NetLinx User Interface Guide Provides a detailed description of the Design XPress for
• NetLinx Studio Instruction Manual Provides a detailed description of the NetLinx Studio
• NetLinx Programming Language Reference Guide Provides a comprehensive listing of the commands that
AMX University offers several courses that teach basic and advanced NetLinx
programming and system design concepts. Contact AMX University, or refer to the
Training@AMX University page on AMX.COM for details and scheduling information.
Describes using the Design XPress application to design
Design XPress systems.
NetLinx Studio user-interface.
software application.
comprise the NetLinx Programming Language.
One Step at a Time
Design XPress is easiest to install if taken one step at a time. Because of the number of devices,
wiring connections and files, it can quickly become confusing, especially the first time one does an
installation. There are some common sense rules that apply, as in most installations:
Label every wire termination point.
This is critical. The wiring list that Design XPress generates is based on the location where the wire
terminates. For example, it will state that the DMS keypad in the kitchen should connect to port 4
on the microphone hub. Unless the cables are properly labeled it will take a time consuming search-
until-you-find-it approach to discover the proper cable. However, if the cables are labeled as they
are pulled this becomes a very simple exercise.
Don't get ahead of yourself.
Skipping steps in the installation process can cause problems in later steps. This will cost you more
installation time.
Use the auto-generated report file as your installation check list.
Design XPress generates a report file named report.html, which can be opened in any web browser.
It identifies each step in the installation process. Follow the steps in the report and installation
problems will be minimized.
esign XPress Installer’s Guide
5
Page 10

Introduction
The Design XPress Application
The first step in defining the system is to run the Design XPress application. This Windows® based
wizard should probably be run in the office well in advance of going on-site. With this wizard you
define the locations of all equipment, the number of user interface devices, lighting scenes, audio
source equipment, etc. The Design XPress for NetLinx Studio Programmer’s Guide gives a good
overview of this application.
One note, however, related to the lighting addresses: Lighting addresses consist of a keypad address
and button. The keypad address is the address of the keypad for the lighting system being used, and
must be represented in the format for that lighting system.
Custom Modifications
There are limitations when creating a system using Design XPress. Design XPress systems can be
customized by adding programming to the "custom.axi" file included in the project, or by
modifying the user interfaces created.
For more information on adding custom modifications we recommend that you attend the AMX
programming classes. The course descriptions and schedules for these classes are available on the
AMX web site at www.amx.com.
Adding and Modifying Software
Each time the Design XPress application is run, it will generate the necessary software files. If
changes are made to any existing software file to modify behavior for job-specific items, the next
time Design XPress is run the changes will be overwritten.
One of the files created in the project by Design XPress is
CUSTOM.AXI. This file is provided
because all custom software changes made in this file will never be overwritten by the Design
XPress application. So, for example, if a home theater is added to a Design XPress-created system,
and those changes are made in
CUSTOM.AXI, any changes made down the road via the Design
XPress application will not affect the home theater code when the files are regenerated.
Sooner or later someone will make a change that gets overwritten so it is worth repeating to avoid
the resulting frustration: If you make changes to any file other than
CUSTOM.AXI you are taking it
upon yourself to not use the application for any further updates. Using the application will
overwrite your changes.
In a sense this is one of the nice features of Design XPress. Because all of the software is made
available, an installer who is a strong NetLinx programmer could use the Design XPress
application as a starting point. The resulting files could get most of the job complete. Not a bad
start! The installer could then go in and modify the software to be job specific and complete the job,
never intending to use the application again. Conversely, there will be installers who will use the
application to do almost all of the work relying on the
CUSTOM.AXI file for any small changes that
may be required.
Common Mistakes
The most common mistake made is modifying the software and then using the application to make
changes.
All software changes outside of the special
6
CUSTOM.AXI file will be overwritten.
Design XPress Installer’s Guide
Page 11

Introduction
Only modify the source code generated by Design XPress if there is a strong desire to alter the
behavior of the code. To add features, new subsystems, etc. make the changes in the custom file to
save yourself the frustration.
Design XPress is not a "simple" NetLinx program. Because of the scope and number of features
designed into the system, the code can be quite daunting to someone looking at it, even an
experienced NetLinx programmer. Installers with NetLinx experience should not expect to be able
to modify the software the first time they see it. Most of the features are tied into another feature or
affect another part of the software. The architecture of the system design and the function of the file
being modified should be understood prior to proceeding with changes.
Another common mistake is forgetting to properly address a device. Unless all devices are
addressed as defined in the report file the system will not work as desired.
esign XPress Installer’s Guide
7
Page 12

Introduction
8
Design XPress Installer’s Guide
Page 13

Understanding the Report File
The report file (report.html) automatically generated by Design XPress should be used as a step-by-
step guide to installing the system. The report is broken down into the following five sections:
Installation Instructions
Device Addressing
Wiring/Connections
General Information
AMX Recommended Equipment List
Device Addressing
This section defines the device IDs of all the devices defined by Design XPress. The devices listed
in this section must be set to the given device IDs. If this is not done the system will not behave
properly. This section is divided up by device type: touch panels, DMS keypads, SB2 keypads, door
phones, amplifiers, and miscellaneous. The report will detail which room each device is in and
what its device ID must be set to. For example:
Keypad 1 is located in Kitchen, NetLinx address 10001:1:0
Most devices will need to have their device IDs set using NetLinx Studio. The exceptions to this are
the touch panels.
Understanding the Report File
For G3 panels, device IDs must be set from the setup screen on the panel itself. Make sure when the
device ID is set that the number of devices used on the touch panel is also set. Design XPress uses 4
devices on each touch panel. So, if the touch panel is set to use device ID 128 with 4 devices used,
that panel will actually occupy device IDs 128, 129, 130, and 131.
This does not apply to G4 panels, since their device address is set by the TPD4 file.
Wiring/Connections
This section details the locations where all of the cables will connect. It will define the connections
for all of the AMX equipment as well as the audio source equipment, IR ports, and any other
connection that must be made. Examples:
Touch Panel 1 (Study) is connected to video switcher output 1
Mom's CD is connected to NetLinx using IR port 2, IR pulse time 3/10 second
Tuner is connected to audio switcher input 1
DMS keypad 2 (Dining) connects to Mic Hub 1, PHASTlink Port 2
Mic Hub 1, line out 1 connects to audio switcher mono input 16L
Go through this section of the report one item at a time and perform each connection. Use this
section as a list of connections to make and check them off as you go.
General Information
This section of the report details the user interface file names for each touch panel and DMS
keypad, which files need to be transferred to the master, which group each audio zone is in, the
locations of each device, lighting scene addresses, file names of the generated NetLinx software,
etc.
esign XPress Installer’s Guide
9
Page 14

Understanding the Report File
AMX Recommended Equipment List
This section of the report lists all of the AMX equipment which will be needed to build, install, and
run the system. Both model numbers and descriptions are given to make ordering the equipment a
simple process.
Installation Instructions
This section of the report indicates which files need to be downloaded, and describes device
mapping, working with IR files, compile and download operations (via NetLinx Studio), how to
FTP externally, and how to reboot the NetLinx master.
10
Design XPress Installer’s Guide
Page 15

Using NetLinx Studio
Upon completion of the Design XPress application the next step is to use NetLinx Studio to open
the created project file. From this point on, this document will assume the installer has a good
understanding of NetLinx Studio (it can be a difficult installation if the installer is a first time
Design XPress user and a first time NetLinx Studio user).
To open the project file, use the Open Project option on the File menu and traverse to the path
where your project file resides. Once the project is open, expand all branches of the Navigator view
to see the files that have been created in the project.
There is only one file under the Source Code branch: Main.axs. This is the main file and contains
most of the system configuration information entered into the application/wizard. All other
NetLinx software files are under the Include branch of the tree. There are a lot of include files
because the code is broken up by function. For example, Lights_Dms.axi contains all software for
controlling lights via the DMS keypad. Lights_Tp.axi contains the software for controlling lights
via the touch panels. All of the touch panel and DMS keypad files are located under the User
Interface branch . The text files and report file are located under the Other branch.
Using NetLinx Studio
To compile your project, open up the main source file and then select the Build System option
under the Build menu. Any time changes are made, the software has to be compiled.
Setting Up the Master
Some files will need to be transferred to the master outside of NetLinx Studio, using FTP (file
transfer protocol). To accomplish this, communication cannot take place over a serial cable using
the program port on the master. Instead, it must be done via Ethernet. Therefore it is always
recommended that downloads and all communication between NetLinx Studio and the master be
done via Ethernet. Using Ethernet will also make downloads quicker.
When the NetLinx master ships, it is configured for serial communication at 38,400 baud. To
configure the NetLinx master to use Ethernet communication requires a serial connection. Make
sure the correct serial port is selected and the baud rate is correct on the Master Comm Settings
page under the Tools menu. Once a connection is made, select the NetLinx Diagnostics option on
the Tools menu. Click on the Networking tab and then the Get IP Info button.
By default, the master ships with the option set to wait for a server to assign it an IP address via
DHCP. If there is no DHCP server on the network it will greatly increase startup time while the
master waits for an address to be assigned. Therefore, it is recommended that the IP address be set
to a static address. To do this, select Specify IP Address and enter the IP address you want to
assign to the master, the subnet mask to apply, and the gateway address, if applicable. When all
entries are filled, click the Set IP Info button. The master will need to be rebooted for the changes
to take affect.
esign XPress Installer’s Guide
11
Page 16

Using NetLinx Studio
Addressing the System
The NetLinx NXI system used by Design XPress consists of two devices: the master and the NXI
(serial ports, relays, IR ports, and I/O ports). Each is addressed separately on the NetLinx bus with
a unique device ID. There is no need to modify the device ID of the master unless the system is
being installed in a multi-master system. However, the device ID of the NXI may need to be
changed. Design XPress expects this device ID to be 5001:1:0.
To modify device IDs in NetLinx the current ID must be known so it can be directly told to change
to a new device ID. To determine the current device ID of the NXI use the online tree in NetLinx
Studio to view a list of all the current online devices the master recognizes. This list will show the
device ID and the type of device. Find the one that identifies itself as "NXI", and note its device ID.
To change the device ID, select the NetLinx Diagnostics option on the Tools menu and click on the
Device Addressing tab. Make sure the Change To Device check box is selected and the Change
To Sy s te m check box is not selected. In the Device To Change box enter the current device ID of
the NXI in the Device field. Enter the new device ID, 5001, in the Change To Device field. Click
the Change Device/System Number button to make the change. Your online tree should change to
reflect the new ID of the NXI.
Addressing the Devices
Each device used by Design XPress and identified in the report file must have a unique NetLinx ID.
Therefore, each device will need to be addressed so it can be properly controlled. The easiest
method for setting device addresses is to connect each device onto the bus one at a time. The online
tree in NetLinx studio can be used to quickly identify which device was just added to the system.
When a device is plugged into the bus it should display in the online tree in a matter of seconds. If a
device is unplugged from the bus it will take a little longer to disappear because the master is
constantly sampling the bus for devices. When a new device is discovered it is immediately added
to the system. However, if a device disappears from the bus, the master will give it several retries
before giving up and removing it.
By addressing devices one at a time in this fashion it is very easy to do the addressing away from
the job site (office, home, etc.). This can save time and leg work while on-site where there are
always a million other things to get done.
Once the new device shows up in the online tree, its device ID and device type is displayed. Use
this device ID to change to the new value specified in the report file. To change the device ID, select
the NetLinx Diagnostics option on the Tools menu and click on the Device Addressing tab. Make
sure the Change To Device check box is selected and the Change To System check box is not
selected. In the Device To Change box enter the current device ID in the Device field. Enter the new
device ID (as specified in the report file) in the Change To Device field. Click the Change Device/
System Number button to make the change. Your online tree should change to reflect the new
device ID (the old device ID may hang around for a few seconds before disappearing).
12
Design XPress Installer’s Guide
Page 17

Using NetLinx Studio
Downloading Software and Transferring Files
In order for the system to operate, the NetLinx program and all supporting files (touch panels, DMS
keypads, IR files, text files, etc.) must be downloaded to the master. NetLinx studio can be used for
most downloads, but any file in the Other branch of the project tree will need to be loaded on the
master using FTP (file transfer protocol).
You can use TPDesign3, TPDesign4 or NetLinx Studio to download touch panel files to the panels.
Refer to the on-line help files for detailed instructions on transferring files to the
panels.
This document will assume the reader knows how to download files using NetLinx Studio. Compile
the main software file (main.axs) and download it to the master. Download all touch panel files,
DMS keypad files, and IR files for each audio source. Since the Include files are compiled into the
main program there is no need to download them individually.
All other files such as CD titles, DSS favorites, and tuner presets must be downloaded using an FTP
program. There are many of these available on the web, most of them freeware. Connect to the
master and download all of the required files into the root directory (top-most directory) of the
master. See Transferring Preset Button Text to the Master via FTP section (below) for details.
Once everything is downloaded, the master will require a reboot to load the new configuration.
Allow 20-30 seconds for the Master to reboot.
Using TPDesign3 to Download Panel Pages
If you are using TPDesign3 to download, verify that all Color Optimization options are turned off.
There are two places in TPDesign3 where bitmap optimization can be selected: The Bitmap
Manager, and the Download to Panel dialogs.
1. In the Bitmap Manager dialog (Panel > Bitmap Manager), make sure that you do not click
the Optimize button at any time that the project is open. If by mistake you optimize the
bitmaps in your project, you must close the TPD project without saving any changes, and re-
open.
2. In the Download to Panel dialog (Comm Settings tab), verify that Optimize Bitmap Colors is
not selected. This dialog is accessible via the File menu.
There are no optimization issues when downloading via NetLinx Studio.
Transferring Preset Button Text to the Master via FTP
Anytime that you assign text to any type of preset button in your project, you must transfer the
button text that appears on the buttons in Design XPress to the NetLinx Master, in order to display
the button text on the panel(s) in the system. This is true for CD Titles, Tuner Presets, Favorites
buttons, etc. Use File Transfer Protocol (FTP) to transfer the files.
It is recommended that you complete and then build your Project (in Design XPress)
and transfer it to the Master before you FTP the preset button text files to the Master.
To use FTP to transfer these files to the system's NetLinx Master, you'll need to know the IP
Address of the NetLinx Master:
esign XPress Installer’s Guide
13
Page 18

Using NetLinx Studio
1. Launch Windows Explorer, and navigate to the directory where your Design XPress project is
2. Locate and select every TXT file in the project folder. Be sure to select every TXT file, and
3. Copy the files to clipboard memory (right-click on the selection and select Copy).
4. Launch Internet Explorer.
5. In the Address box, enter FTP://, followed by the IP Address of the Master, and press Enter.
6. Assuming the IP Address was entered correctly, and the Master is connected properly, you are
7. Enter the User Name and Password, and click the Log On button. Once you are logged on to
8. Paste the copied TXT files into the root of this directory. Do not paste them into a folder or
9. Reboot the Master.
located.
only TXT files.
presented with a dialog prompting you to enter the User Name and Password for the Master.
The default User Name is administrator
The default Password is password.
the Master, you should see directories associated with your Design XPress project.
create a new folder for them; they must reside at the root.
Startup
Once the master boots up, give it a minute or two to become completely operational. If there are a
large number of devices it could take up to two minutes. This is due to the large amount of message
traffic as devices come online. DMS keypads must have their menus loaded during this time as
well.
DMS Keypads will display the message "Master Found Wire Is Good." when the roboot
is nearing completion, and will display the Main Page when the reboot is complate.
Touch Panels will beep twice to indicate that the system is fully operational.
14
Design XPress Installer’s Guide
Page 19

Appendix
Address Formats For Supported Lighting Systems
The Address and Button # fields in the House Lighting Scenes dialog correspond to either the
lighting controller address and the preset number (as with AMX Radia), or the address of the
keypad and the keypad button that will be emulated (as with the LiteTouch controller).
The only valid keypad address characters are 0-9, A-F, and : (colon).
For reference, here are the formats for the various supported lighting systems:
Appendix
Lighting Controller Address Format DXP-Example
AMX ALD-D48 The Address value is fixed at a value of 1 and is
disabled.
AMX Radia AXlink Device ID (1-255).The Address is the
AXlink device ID of the Radia MC.
Clipsal C-Bus Group Address:Network Address
(network address always = zero)
DynaLite DynaLite area (positive integer) 18
LiteTouch 5000LC Keypad Address (3 nibble hex value A3E
Lutron GRAFIK Eye Master (positive integer) 17
Lutron Homeworks Interactive Processor:Link:Keypad (positive integers) 1:4:9
Lutron RadioRA Keypad Address (positive integer)
Note: keypad address 12 is reserved as the
RS-232 RadioRA interface. This interface is a
virtual keypad, and does not contain any
buttons.
Vantage Qlink Master:Keypad (positive integers) 1:5
1 (read-only)
96
A1:00
12
Once the application entries are completed, the touch panel files, the DMS keypad files, source
code, NetLinx Studio project file, text files (CD titles, tuner presets, etc.), and report file are all
created.
Note for ALD-D48 Lighting Systems
For ALD-D48 Lighting Systems, each button on the touch panel or keypad corresponds to a
lighting preset.
For instructions on developing NetLinx code to program scenes for the D48, refer to Tech
Note # TN 543, available via www.amx.com (Dealers > Tech Center > Tech Notes).
For detailed configuration information on the ALD-D48, refer to the ALD-D48 Network
Lighting Solution Instruction Manual, also available via www.amx.com (Dealers > Tech
Center > Tech Docs > Instruction Manuals).
Note for Radia Lighting Systems
On Radia lighting systems, channels 1-128 represent Radia lighting presets 1-128. If a channel is
on, then the corresponding preset is on. However, on startup NetLinx resets all channels to 0 (OFF).
Radia does not report the status of its channels when the master comes up, and consequently the
software believes the state of all of the presets is OFF. Therefore, until a preset changes in the
system, the channel states are not reported.
esign XPress Installer’s Guide
15
Page 20

Appendix
Format of IR Files For Audio Sources
Design XPress directly supports three types of audio sources using IR: tuners, satellite receivers,
and CD players/changers. AMX has a library of thousands of IR files for equipment. Many of the
files have been captured to a standard template. Design XPress uses this template for its IR codes.
In some cases the IR file for new equipment may not have been captured or is not available for
download from the AMX website. Or perhaps the IR file is available on the web but one or two
codes were not captured in the right channels. In these cases it may be necessary for the installer to
capture the IR codes or, at least, modify the IR file.
When capturing or making changes the installer needs to know in which channel each IR code
should reside. The following tables define the IR channels required by Design XPress for each
equipment type. Only those channels used by Design XPress are represented in these tables. If the
installer needs to capture an IR remote, or make changes to an IR file, the IR functions must be
captured in the correct channels to work properly with Design XPress.
Format of IR Files For Audio Sources
Tuner Satellite CD Player
IR Channel Function IR Channel Function IR Channel Function
10 0 1 Play 1 Play
11 1 2 Stop 2 Stop
12 2 10 0 3 Pause
13 3 11 1 4 Next
14 4 12 2 5 Previous
15 5 13 3 6 Scan Forward
16 6 14 4 7 Scan Reverse
17 7 15 5 10 0
18 8 16 6 11 1
19 9 17 7 12 2
21 Enter 18 8 13 3
27 Power On 19 9 14 4
168 Preset + 21 Enter 15 5
22 Channel + 16 6
23 Channel - 17 7
27 Power On 18 8
44 Select 19 9
45 Up 21 Enter
46 Down 27 Power On
47 Left 50 Next Disc
48 Right 51 Previous Disc
49 Menu 52 Disc
50 Exit 56 Shuffle
53 Guide 69 Continue
Design XPress was designed with simple audio sources in mind (i.e. tuners, satellites, CD players,
etc). These devices are directly supported by Design XPress. But let's step outside the box for a
moment and think about how we control these devices: IR. Since IR is nothing more than a code
that gets delivered when we pulse a channel does it really matter what device is attached to the IR
16
Design XPress Installer’s Guide
Page 21

Appendix
emitter? Not really. In lab and field-testing of Design Xpress, many other types of products were
connected, most of them video. These included DVD players and VCRs. As long as the IR function
code for play on a DVD player is placed in the proper channel (1) in the IR file, Design XPress
doesn't know any different. Just tell Design XPress that your VCR is a CD player, make sure the IR
channels match the above specification for a CD player, and it will work.
Similarly, a Satellite receiver can be used for a Dish Network receiver. The lower numbered
channels are standard functions for all devices, with some deviation in the higher numbered
channels. Typically AMX has a standard for the lower IR channels and device functions.
esign XPress Installer’s Guide
17
Page 22

Appendix
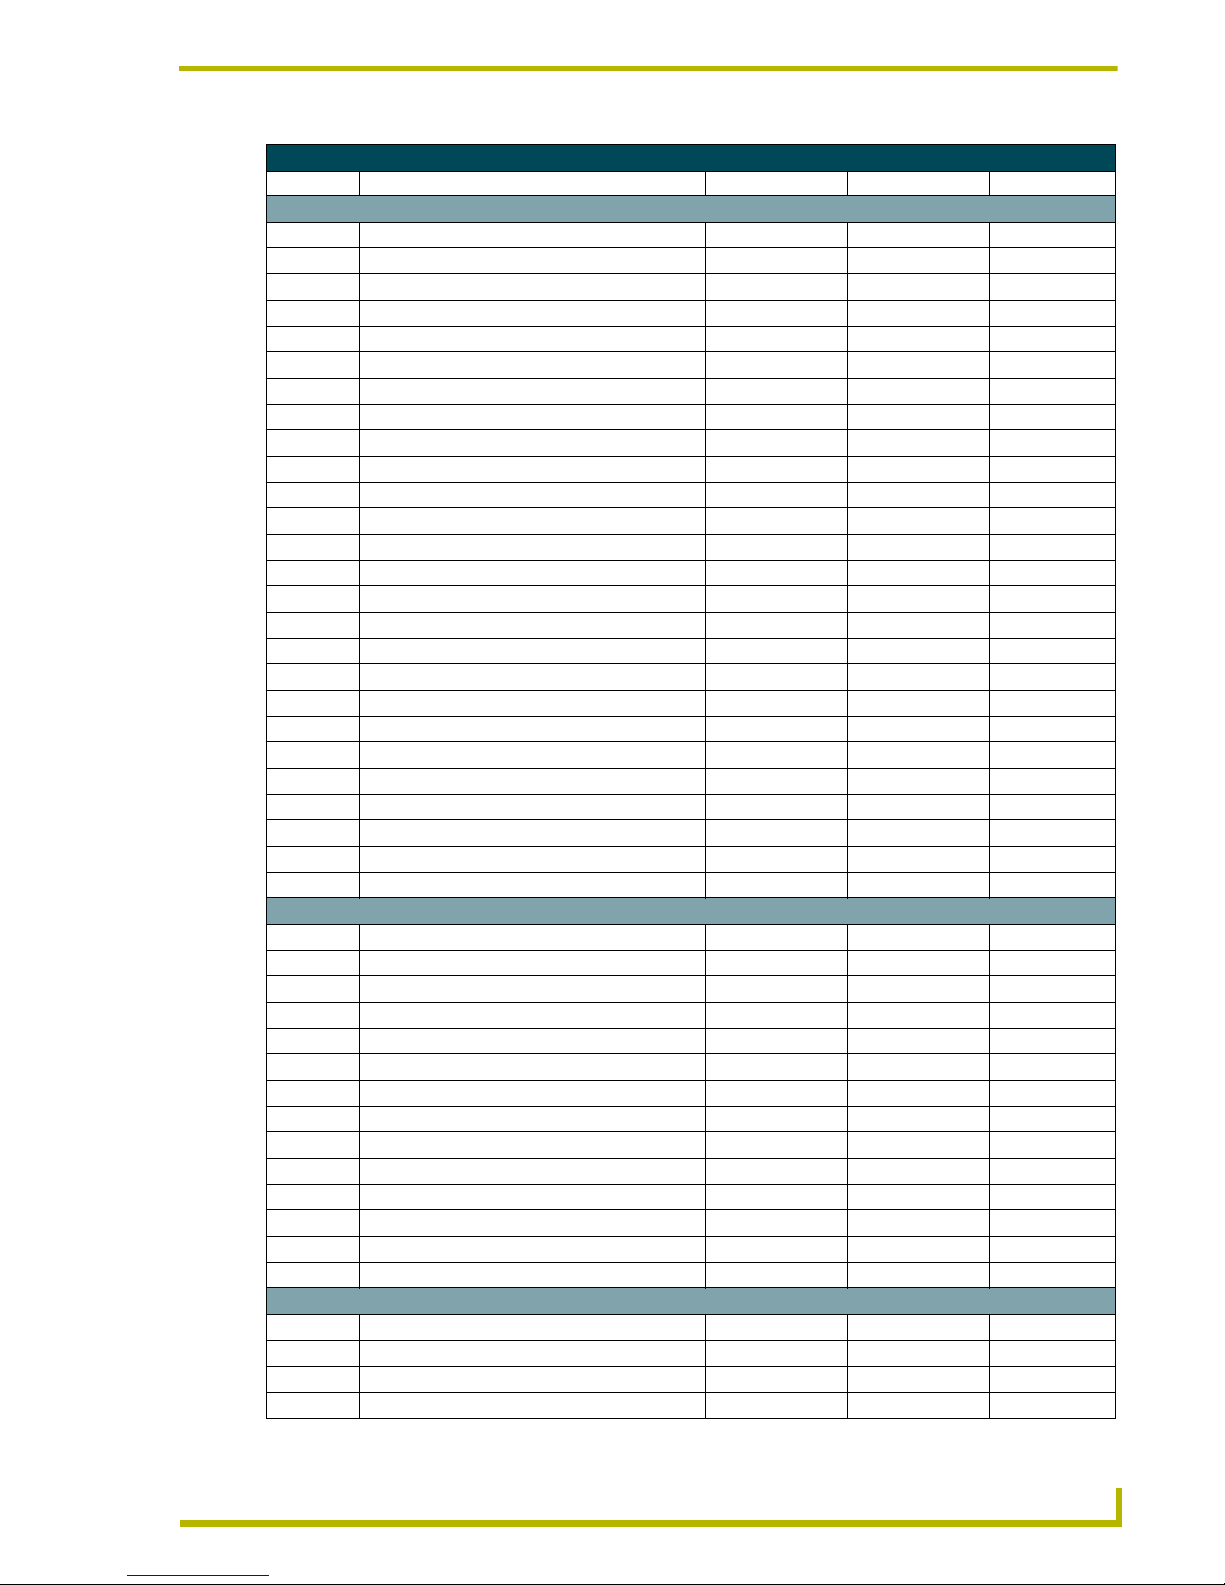
Channel Map - Function Codes
Function Codes
Page Name Button Name Channel Port:Code Address Port:Code Level Port:Code
Logo
SETUP 0:73
Copy of InfoButton 1:88
Main Page
CONTROL_TP_1_BUTTON 1:1
CONTROL_TP_2_BUTTON 1:2
CONTROL_TP_3_BUTTON 1:3
CONTROL_TP_4_BUTTON 1:4
CONTROL_TP_5_BUTTON 1:5
CONTROL_TP_6_BUTTON 1:65
CONTROL_TP_7_BUTTON 1:7
AUD_TP_VOL_DN_BUTTON 1:11
AUD_TP_VOL_UP_BUTTON 1:12
AUD_TP_MUSIC_OFF_BUTTON 1:10
AUD_TP_VOL_LEVEL 1:13 1:1
CONTROL_TP_1_DATE 0:152
CONTROL_TP_1_TIME 0:142
Button 13 1:1
HELP-ABOUT
AMX_SETUP_BUTTON 0:73
SCREEN_NAME 1:88
SLEEP_BUTTON 1:8
SYSINFO_IWEATHER 1:197
Debug
CONTROL_DEBUG_1_BUTTON 1:9
CONTROL_DEBUG_2_BUTTON 1:19
CONTROL_DEBUG_3_BUTTON 1:66
System Information 1:88
WeatherConfig
info 1:216 1:216
SN 1:250
SN 1:251
Video Select
BUTTON_BACK 1:6
Setup 3:100 3:100
VIDEO_TP_INPUT1_BUTTON 1:101 1:101
VIDEO_TP_INPUT2_BUTTON 1:102 1:102
VIDEO_TP_INPUT3_BUTTON 1:103 1:103
VIDEO_TP_INPUT4_BUTTON 1:104 1:104
VIDEO_TP_INPUT5_BUTTON 1:105 1:105
VIDEO_TP_INPUT6_BUTTON 1:106 1:106
VIDEO_TP_INPUT7_BUTTON 1:107 1:107
VIDEO_TP_INPUT8_BUTTON 1:108 1:108
VIDEO_SELECT_BUTTON 3:100 3:100
VIDEO_FULL_SCREEN_BUTTON 3:100 3:100
18
Design XPress Installer’s Guide
Page 23

Appendix
Function Codes (Cont.)
Page Name Button Name Channel Port:Code Address Port:Code Level Port:Code
Video Select (Cont.)
VIDEO_SETUP_BUTTON 0:97 0:81
TEMP_PREVIOUS_PAGE 1:89 1:89
TEMP_NEXT_PAGE 1:90 1:90
Tuner
SCREEN_NAME 1:12
RCVR1_TP_PRESET1_BUTTON 1:39 1:39
RCVR1_TP_PRESET2_BUTTON 1:40 1:40
RCVR1_TP_PRESET5_BUTTON 1:43 1:43
RCVR1_TP_PRESET6_BUTTON 1:44 1:44
RCVR1_TP_PRESET9_BUTTON 1:47 1:47
RCVR1_TP_PRESET10_BUTTON 1:48 1:48
RCVR1_TP_PRESET13_BUTTON 1:51 1:51
RCVR1_TP_PRESET14_BUTTON 1:52 1:52
RCVR1_TP_PRESET17_BUTTON 1:55 1:55
RCVR1_TP_PRESET18_BUTTON 1:56 1:56
RCVR1_TP_PRESET21_BUTTON 1:59 1:59
RCVR1_TP_PRESET22_BUTTON 1:60 1:60
BUTTON_BACK 1:6
RCVR1_TP_PRESET3_BUTTON 1:41 1:41
RCVR1_TP_PRESET7_BUTTON 1:45 1:45
RCVR1_TP_PRESET11_BUTTON 1:49 1:49
RCVR1_TP_PRESET15_BUTTON 1:53 1:53
RCVR1_TP_PRESET19_BUTTON 1:57 1:57
RCVR1_TP_PRESET23_BUTTON 1:61 1:61
RCVR1_TP_PRESET4_BUTTON 1:42 1:42
RCVR1_TP_PRESET8_BUTTON 1:46 1:46
RCVR1_TP_PRESET12_BUTTON 1:50 1:50
RCVR1_TP_PRESET16_BUTTON 1:54 1:54
RCVR1_TP_PRESET20_BUTTON 1:58 1:58
RCVR1_TP_PRESET24_BUTTON 1:62 1:62
RCVR1_TP_SCAN_DN_BUTTON 1:20
RCVR1_TP_SCAN_UP_BUTTON 1:63
ARQ2 Navigator
Presets 2:112 2:112
BUTTON_BACK 1:6
Presets 2:113 2:113
Presets 2:114 2:114
Presets 2:115 2:115
Presets 2:116 2:116
Presets 2:117 2:117
Presets 2:118 2:118
Presets 2:111 2:111
MP3 Player Control 2:11
M2:109
L2:108
Intro 2:133
esign XPress Installer’s Guide
19
Page 24

Appendix
Function Codes (Cont.)
Page Name Button Name Channel Port:Code Address Port:Code Level Port:Code
ARQ2 Navigator (Cont.)
Random 2:132
Repeat 2:130
Shuffle 2:131
Search 2:120
Select 2:110
Player 2:135
Jukebox 2:105
Album 2:104
Artist 2:103
All 2:102
Playlists 2:101
Song 2:119
OF050W050H 2:106
OF050W050H 2:107
CD List
CD1_TP_TITLE2_BUTTON 1:152 1:152
CD1_TP_TITLE3_BUTTON 1:153 1:153
CD1_TP_TITLE4_BUTTON 1:154 1:154
CD1_TP_TITLE5_BUTTON 1:155 1:155
CD1_TP_TITLE6_BUTTON 1:156 1:156
CD1_TP_TITLE7_BUTTON 1:157 1:157
CD1_TP_TITLE8_BUTTON 1:158 1:158
CD1_TP_TITLE9_BUTTON 1:159 1:159
CD1_TP_TITLE10_BUTTON 1:160 1:160
CD1_TP_TITLE1_BUTTON 1:151 1:151
SCREEN_NAME 1:11
CD1_TP_PAGENEXT_BUTTON 1:150
CD1_TP_PAGEPREV_BUTTON 1:149
CD_SKIPSIZE_BUTTON 1:147 1:147
CD_NAME_SORT 1:162
CD_DISC_SORT 1:161
SourceSelect
AUD_TP_INPUT4_BUTTON 1:244
AUD_TP_INPUT1_BUTTON 1:241
AUD_TP_INPUT8_BUTTON 1:248
AUD_TP_INPUT7_BUTTON 1:247
AUD_TP_INPUT3_BUTTON 1:243
AUD_TP_INPUT2_BUTTON 1:242
AUD_TP_INPUT6_BUTTON 1:246
AUD_TP_INPUT5_BUTTON 1:245
AUD_TP_ZONE_OFF_BUTTON 1:240
Music
AUD_TP_ZONE1_BUTTON 1:221
AUD_TP_ZONE1_STATE 1:221 2:61
AUD_TP_ZONE2_BUTTON 1:222
AUD_TP_ZONE2_STATE 1:222 2:62
20
Design XPress Installer’s Guide
Page 25

Appendix
Function Codes (Cont.)
Page Name Button Name Channel Port:Code Address Port:Code Level Port:Code
Music (Cont.)
AUD_TP_ZONE3_BUTTON 1:223
AUD_TP_ZONE3_STATE 1:223 2:63
AUD_TP_ZONE4_BUTTON 1:224
AUD_TP_ZONE4_STATE 1:224 2:64
AUD_TP_ZONE5_BUTTON 1:225
AUD_TP_ZONE5_STATE 1:225 2:65
AUD_TP_ZONE6_BUTTON 1:226
AUD_TP_ZONE6_STATE 1:226 2:66
AUD_TP_ZONE7_BUTTON 1:227
AUD_TP_ZONE7_STATE 1:227 2:67
AUD_TP_ZONE8_BUTTON 1:228
AUD_TP_ZONE8_STATE 1:228 2:68
AUD_TP_ZONE9_BUTTON 1:229
AUD_TP_ZONE9_STATE 1:229 2:69
AUD_TP_ZONE10_BUTTON 1:230
AUD_TP_ZONE10_STATE 1:230 2:70
AUD_TP_ZONE11_BUTTON 1:231
AUD_TP_ZONE11_STATE 1:231 2:71
AUD_TP_ZONE12_BUTTON 1:232
AUD_TP_ZONE12_STATE 1:232 2:72
AUD_TP_ZONE13_BUTTON 1:233
AUD_TP_ZONE13_STATE 1:233 2:73
AUD_TP_ZONE14_BUTTON 1:234
AUD_TP_ZONE14_STATE 1:234 2:74
AUD_TP_ZONE15_BUTTON 1:235
AUD_TP_ZONE15_STATE 1:235 2:75
AUD_TP_ZONE16_BUTTON 1:236
AUD_TP_ZONE16_STATE 1:236 2:76
AUD_TP_ZONE17_BUTTON 1:67
AUD_TP_ZONE17_STATE 1:67 2:77
AUD_TP_ZONE18_BUTTON 1:68
AUD_TP_ZONE18_STATE 1:68 2:78
AUD_TP_ZONE19_BUTTON 1:69
AUD_TP_ZONE19_STATE 1:69 2:79
AUD_TP_ZONE20_BUTTON 1:70
AUD_TP_ZONE20_STATE 1:70 2:80
AUD_TP_ZONE21_BUTTON 1:71
AUD_TP_ZONE21_STATE 1:71 2:81
AUD_TP_ZONE22_BUTTON 1:72
AUD_TP_ZONE22_STATE 1:72 2:82
AUD_TP_ZONE23_BUTTON 1:73
AUD_TP_ZONE23_STATE 1:73 2:83
AUD_TP_ZONE24_BUTTON 1:74
AUD_TP_ZONE24_STATE 1:74 2:84
AUD_TP_ZONE25_BUTTON 1:75
AUD_TP_ZONE25_STATE 1:75 2:85
esign XPress Installer’s Guide
21
Page 26

Appendix
Function Codes (Cont.)
Page Name Button Name Channel Port:Code Address Port:Code Level Port:Code
Music (Cont.)
AUD_TP_ZONE26_BUTTON 1:76
AUD_TP_ZONE26_STATE 1:76 2:86
AUD_TP_ZONE27_BUTTON 1:77
AUD_TP_ZONE27_STATE 1:77 2:87
AUD_TP_ZONE28_BUTTON 1:78
AUD_TP_ZONE28_STATE 1:78 2:88
AUD_TP_ZONE29_BUTTON 1:79
AUD_TP_ZONE29_STATE 1:79 2:89
AUD_TP_ZONE30_BUTTON 1:80
AUD_TP_ZONE30_STATE 1:80 2:90
AUD_TP_GOTO_SOURCE_BUTTON 1:220
AUD_TP_MULTISEL_BUTTON 1:238
AUD_TP_SELALL_BUTTON 1:237
Temperature
HVAC_NAME_ZONE1 3:43
HVAC_OVERVIEW_TEMPERATURE_ZONE1 3:1 3:1
HVAC_OVERVIEW_COOL_POINT_ZONE1 3:2 3:2
HVAC_OVERVIEW_HEAT_POINT_ZONE1 3:3 3:3
HVAC_OVERVIEW_MODE_ZONE1 3:4 3:4
HVAC_OVERVIEW_FAN_ZONE1 3:5 3:5
HVAC_NAME_ZONE2 3:44
HVAC_OVERVIEW_TEMPERATURE_ZONE2 3:6 3:6
HVAC_OVERVIEW_COOL_POINT_ZONE2 3:7 3:7
HVAC_OVERVIEW_HEAT_POINT_ZONE2 3:8 3:8
HVAC_OVERVIEW_MODE_ZONE2 3:9 3:9
HVAC_OVERVIEW_FAN_ZONE2 3:10 3:10
HVAC_NAME_ZONE3 3:45
HVAC_OVERVIEW_TEMPERATURE_ZONE3 3:11 3:11
HVAC_OVERVIEW_COOL_POINT_ZONE3 3:12 3:12
HVAC_OVERVIEW_HEAT_POINT_ZONE3 3:13 3:13
HVAC_OVERVIEW_MODE_ZONE3 3:14 3:14
HVAC_OVERVIEW_FAN_ZONE3 3:15 3:15
HVAC_NAME_ZONE4 3:46
HVAC_OVERVIEW_TEMPERATURE_ZONE4 3:16 3:16
HVAC_OVERVIEW_COOL_POINT_ZONE4 3:17 3:17
HVAC_OVERVIEW_HEAT_POINT_ZONE4 3:18 3:18
HVAC_OVERVIEW_MODE_ZONE4 3:19 3:19
HVAC_OVERVIEW_FAN_ZONE4 3:20 3:20
HVAC_NAME_ZONE5 3:47
HVAC_OVERVIEW_TEMPERATURE_ZONE5 3:21 3:21
HVAC_OVERVIEW_COOL_POINT_ZONE5 3:22 3:22
HVAC_OVERVIEW_HEAT_POINT_ZONE5 3:23 3:23
HVAC_OVERVIEW_MODE_ZONE5 3:24 3:24
HVAC_OVERVIEW_FAN_ZONE5 3:25 3:25
HVAC_NAME_ZONE6 3:48
HVAC_OVERVIEW_TEMPERATURE_ZONE6 3:26 3:26
22
Design XPress Installer’s Guide
Page 27
Appendix
Function Codes (Cont.)
Page Name Button Name Channel Port:Code Address Port:Code Level Port:Code
Temperature (Cont.)
HVAC_OVERVIEW_COOL_POINT_ZONE6 3:27 3:27
HVAC_OVERVIEW_HEAT_POINT_ZONE6 3:28 3:28
HVAC_OVERVIEW_MODE_ZONE6 3:29 3:29
HVAC_OVERVIEW_FAN_ZONE6 3:30 3:30
HVAC_NAME_ZONE7 3:49
HVAC_OVERVIEW_TEMPERATURE_ZONE7 3:31 3:31
HVAC_OVERVIEW_COOL_POINT_ZONE7 3:32 3:32
HVAC_OVERVIEW_HEAT_POINT_ZONE7 3:33 3:33
HVAC_OVERVIEW_MODE_ZONE7 3:34 3:34
HVAC_OVERVIEW_FAN_ZONE7 3:35 3:35
HVAC_NAME_ZONE8 3:50
HVAC_OVERVIEW_TEMPERATURE_ZONE6 3:36 3:36
HVAC_OVERVIEW_COOL_POINT_ZONE8 3:37 3:37
HVAC_OVERVIEW_HEAT_POINT_ZONE8 3:38 3:38
HVAC_OVERVIEW_MODE_ZONE8 3:39 3:39
HVAC_OVERVIEW_FAN_ZONE8 3:40 3:40
HVAC_UI_ZONE1 3:201
HVAC_UI_ZONE2 3:202
HVAC_UI_ZONE3 3:203
HVAC_UI_ZONE4 3:204
HVAC_UI_ZONE5 3:205
HVAC_UI_ZONE6 3:206
HVAC_UI_ZONE7 3:207
HVAC_UI_ZONE8 3:208
TEMP_PREVIOUS_PAGE 3:41 3:41
TEMP_NEXT_PAGE 3:42 3:42
Video
VIDEO_SELECT_BUTTON 3:100 3:100
VIDEO_FULL_SCREEN_BUTTON 3:100 3:100
VIDEO_VIDEO_WINDOW 3:100 3:100
VIDEO_SETUP_BUTTON 0:97 0:81
CD1_TP_PLAY_BUTTON 1:21
CD1_TP_STOP_BUTTON 1:24
CD1_TP_PAUSE_BUTTON 1:27
CD1_TP_PREV_BUTTON 1:25
CD1_TP_NEXT_BUTTON 1:26
SAT1_TP_RIGHT_BUTTON 2:3
SAT1_TP_DOWN_BUTTON 2:4
SAT1_TP_LEFT_BUTTON 2:2
SAT1_TP_UP_BUTTON 2:1
SAT1_TP_SELECT_BUTTON 2:5
Lighting
LS1_TP_HOUSE_SCENE1_BUTTON 1:171
LS1_TP_HOUSE_SCENE2_BUTTON 1:172
LS1_TP_HOUSE_SCENE3_BUTTON 1:173
LS1_TP_HOUSE_SCENE4_BUTTON 1:174
esign XPress Installer’s Guide
23
Page 28

Appendix
Function Codes (Cont.)
Page Name Button Name Channel Port:Code Address Port:Code Level Port:Code
Lighting (Cont.)
LS1_TP_HOUSE_SCENE5_BUTTON 1:175
LS1_TP_HOUSE_SCENE6_BUTTON 1:176
LS1_TP_HOUSE_SCENE7_BUTTON 1:177
LS1_TP_HOUSE_SCENE8_BUTTON 1:178
LS1_TP_HOUSE_SCENE9_BUTTON 1:179
LS1_TP_HOUSE_SCENE10_BUTTON 1:180
LS1_TP_HOUSE_SCENE11_BUTTON 1:181
LS1_TP_HOUSE_SCENE12_BUTTON 1:182
LS1_TP_ROOM1_SCENE1_BUTTON 1:191
LS1_TP_ROOM1_SCENE2_BUTTON 1:192
LS1_TP_ROOM1_SCENE3_BUTTON 1:193
LS1_TP_ROOM1_SCENE4_BUTTON 1:194
LS1_TP_ROOM1_SCENE5_BUTTON 1:195
LS1_TP_ROOM1_SCENE6_BUTTON 1:196
LS1_TP_ROOM2_SCENE1_BUTTON 1:201
LS1_TP_ROOM2_SCENE2_BUTTON 1:202
LS1_TP_ROOM2_SCENE3_BUTTON 1:203
LS1_TP_ROOM2_SCENE4_BUTTON 1:204
LS1_TP_ROOM2_SCENE5_BUTTON 1:205
LS1_TP_ROOM2_SCENE6_BUTTON 1:206
Weather
WEATHER_LOCATION 1:171
83° F 1:172
96° F 1:192
73° F 1:197
South @ 23 mph 1:174
89° F 1:175
83° F 1:176
70% 1:177
72° F 1:178
Hi Temp 1:179
sSunny 1:181
Hot 1:173
sPartlyCloudy 1:202
sMostlyCloudy 1:203
sThunderstorms 1:204
sPartlyCloudy 1:205
sThunderstorms 1:206
98° F 1:192
76° F 1:197
94° F 1:193
72° F 1:198
89° F 1:194
69° F 1:199
86° F 1:195
67° F 1:200
24
Design XPress Installer’s Guide
Page 29

Appendix
Function Codes (Cont.)
Page Name Button Name Channel Port:Code Address Port:Code Level Port:Code
Weather (Cont.)
99° F 1:196
78° F 1:201
Refresh 1:218
Update Locations 1:81
Select Locations 3:100 3:100
Partly Cloudy 1:187
Cloudy 1:188
Thunderstorms 1:189
Partly Cloudy 1:190
Thunderstorms 1:191
Monday 1:182
Tuesday 1:183
Wednesday 1:184
Thursday 1:185
Friday 1:186
Tem p E dit
HVAC_UI_ZONE_NAME_DISPLAY 3:184
TEMP 3:185
HEAT_SET 3:186
HVAC_UI_HEAT_DN 3:181
HVAC_UI_HEAT_UP 3:180
COOL_SET 3:187
HVAC_UI_COOL_DN 3:183
HVAC_UI_COOL_UP 3:182
Auto 3:192
On 3:193
Mode 3:191
Fan 3: 18 9
WeatherLocation
PRESET1 1:207 1:207
PRESET2 1:208 1:208
PRESET3 1:209 1:209
PRESET4 1:210 1:210
Save 1:213
Browse International 1:109
LOCATION 1:171
Twice a Day 1:190
Off 1:187
Twice an Hour 1:188
6 Times a Day 1:189
WeatherZipCode
Enter Zip Code 1:218
Done 1:214
WeatherBrowse
Presets 1:111 1:111
Presets 1:112 1:112
esign XPress Installer’s Guide
25
Page 30

Appendix
Function Codes (Cont.)
Page Name Button Name Channel Port:Code Address Port:Code Level Port:Code
WeatherBrowse (Cont.)
Presets 1:113 1:113
Presets 1:114 1:114
Presets 1:115 1:115
Presets 1:116 1:116
Presets 1:117 1:117
Presets 1:118 1:118
BROWSE_DN 1:120
BROWSE_UP 1:119
PROGRESS_BAR 1:134 1:8
Please Select A City Below 1:253
Please Select A City Below 1:254
Back 1:169
Select 1:110
WeatherDownload
PROGRESS 1:7
Start Download 1:82
Clear 1:83 1:83
percent 1:84
BackArrow 1:85
CD Changer
Disc Selection 1:148
Shuffle 1:18
CD1_TP_CONTINUE_BUTTON 1:17
SCREEN_NAME 1:10
BUTTON_BACK 1:6
CD1_TP_PLAY_BUTTON 1:21
CD1_TP_STOP_BUTTON 1:24
CD1_TP_PAUSE_BUTTON 1:27
CD1_TP_REV_BUTTON 1:22
CD1_TP_FWD_BUTTON 1:23
CD1_TP_PREV_BUTTON 1:25
CD1_TP_NEXT_BUTTON 1:26
CD1_TP_1_BUTTON 1:28
CD1_TP_2_BUTTON 1:29
CD1_TP_3_BUTTON 1:30
CD1_TP_4_BUTTON 1:31
CD1_TP_5_BUTTON 1:32
CD1_TP_6_BUTTON 1:33
CD1_TP_7_BUTTON 1:34
CD1_TP_8_BUTTON 1:35
CD1_TP_9_BUTTON 1:36
CD1_TP_0_BUTTON 1:38
CD1_TP_DISKPREV_BUTTON 1:16
CD1_TP_DISKNEXT_BUTTON 1:15
CD1_TP_ENTER_BUTTON 1:37
CD1_TP_DISK_BUTTON 1:14
26
Design XPress Installer’s Guide
Page 31

Appendix
Function Codes (Cont.)
Page Name Button Name Channel Port:Code Address Port:Code Level Port:Code
Sources
SOURCE_TP_3_BUTTON 1:93
SOURCE_TP_1_BUTTON 1:91
SOURCE_TP_7_BUTTON 1:97
SOURCE_TP_5_BUTTON 1:95
SOURCE_TP_4_BUTTON 1:94
SOURCE_TP_2_BUTTON 1:92
SOURCE_TP_8_BUTTON 1:98
SOURCE_TP_6_BUTTON 1:96
CD1_TP_1_BUTTON 1:64
DSS
SAT1_TP_DSSTVFAVORITES_BUTTON 2:23
SAT1_TP_DSSMUSICFAVORITES_BUTTON 2:22
SCREEN_NAME 2:10
BUTTON_BACK 1:6
SAT1_TP_1_BUTTON 2:11
SAT1_TP_2_BUTTON 2:12
SAT1_TP_3_BUTTON 2:13
SAT1_TP_4_BUTTON 2:14
SAT1_TP_5_BUTTON 2:15
SAT1_TP_6_BUTTON 2:16
SAT1_TP_7_BUTTON 2:17
SAT1_TP_8_BUTTON 2:18
SAT1_TP_9_BUTTON 2:19
SAT1_TP_CH_DN_BUTTON 2:10
SAT1_TP_CH_UP_BUTTON 2:9
SAT1_TP_ENTER_BUTTON 2:21
SAT1_TP_0_BUTTON 2:20
SAT1_TP_EXIT_BUTTON 2:8
SAT1_TP_MENU_BUTTON 2:7
SAT1_TP_GUIDE_BUTTON 2:6
SAT1_TP_RIGHT_BUTTON 2:3
SAT1_TP_DOWN_BUTTON 2:4
SAT1_TP_LEFT_BUTTON 2:2
SAT1_TP_UP_BUTTON 2:1
SAT1_TP_SELECT_BUTTON 2:5
DSS Music
Presets 2:31 2:31
Presets 2:32 2:32
Presets 2:33 2:33
Presets 2:34 2:34
Presets 2:35 2:35
Presets 2:36 2:36
Presets 2:37 2:37
Presets 2:38 2:38
Presets 2:39 2:39
Presets 2:40 2:40
esign XPress Installer’s Guide
27
Page 32

Appendix
Function Codes (Cont.)
Page Name Button Name Channel Port:Code Address Port:Code Level Port:Code
DSS Music (Cont.)
Presets 2:30 2:30
Presets 2:42 2:42
Presets 2:43 2:43
Presets 2:44 2:44
Presets 2:45 2:45
Presets 2:46 2:46
Presets 2:47 2:47
Presets 2:48 2:48
Presets 2:49 2:49
Presets 2:50 2:50
Presets 2:51 2:51
Presets 2:41 2:41
DSS Music 2:11
DSS Favorites
SAT1_TP_FAVORITE2_BUTTON 2:221 2:221
SAT1_TP_FAVORITE3_BUTTON 2:222 2:222
SAT1_TP_FAVORITE4_BUTTON 2:223 2:223
SAT1_TP_FAVORITE5_BUTTON 2:224 2:224
SAT1_TP_FAVORITE6_BUTTON 2:225 2:225
SAT1_TP_FAVORITE7_BUTTON 2:226 2:226
SAT1_TP_FAVORITE8_BUTTON 2:227 2:227
SAT1_TP_FAVORITE9_BUTTON 2:228 2:228
SAT1_TP_FAVORITE10_BUTTON 2:229 2:229
SAT1_TP_FAVORITE11_BUTTON 2:230 2:230
SAT1_TP_FAVORITE1_BUTTON 2:220 2:220
SAT1_TP_FAVORITE13_BUTTON 2:232 2:232
SAT1_TP_FAVORITE14_BUTTON 2:233 2:233
SAT1_TP_FAVORITE15_BUTTON 2:234 2:234
SAT1_TP_FAVORITE16_BUTTON 2:235 2:235
SAT1_TP_FAVORITE17_BUTTON 2:236 2:236
SAT1_TP_FAVORITE18_BUTTON 2:237 2:237
SAT1_TP_FAVORITE19_BUTTON 2:238 2:238
SAT1_TP_FAVORITE20_BUTTON 2:239 2:239
SAT1_TP_FAVORITE21_BUTTON 2:240 2:240
SAT1_TP_FAVORITE22_BUTTON 2:241 2:241
SAT1_TP_FAVORITE12_BUTTON 2:231 2:231
DSS Music 2:12
Video Full Screen
Setup 3:100 3:100
CD1_TP_PLAY_BUTTON 1:21
CD1_TP_STOP_BUTTON 1:24
CD1_TP_PAUSE_BUTTON 1:27
CD1_TP_PREV_BUTTON 1:25
CD1_TP_NEXT_BUTTON 1:26
SAT1_TP_RIGHT_BUTTON 2:3
SAT1_TP_DOWN_BUTTON 2:4
28
Design XPress Installer’s Guide
Page 33

Appendix
Function Codes (Cont.)
Page Name Button Name Channel Port:Code Address Port:Code Level Port:Code
Video Full Screen (Cont.)
SAT1_TP_LEFT_BUTTON 2:2
SAT1_TP_UP_BUTTON 2:1
SAT1_TP_SELECT_BUTTON 2:5
ARQ2 Player
BUTTON_BACK 1:6
MP3 Player Control 2:11
M2:129
L2:128
Intro 2:133
Random 2:132
Repeat 2:130
Shuffle 2:131
Navigator 2:134
A2:121
B2:122
C2:123
G2:125
F2:124
E2:127
D2:126
Song Name 2:121
Artist Name 2:122
Album Title 2:123
Playlist Name 2:124
Next Song Title 2:125
Song 2:126
Song 2:127
Song 2:128
MP3_PROGRESS_BAR 2:1
DialogBox
SCREEN_NAME 1:5
SCREEN_NAME 1:6
SCREEN_NAME 1:7
SCREEN_NAME 1:8
Sources 1:9
DialogBox_Centered
Sources 1:5
Sources 1:6
Sources 1:7
Sources 1:8
Sources 1:9
Audio Zone Settings
Audio Zone Settings 1:13
VOL_DN 1:122
VOL_UP 1:121
ZONE_AUDIO_MUTE 1:129
esign XPress Installer’s Guide
29
Page 34

Appendix
Function Codes (Cont.)
Page Name Button Name Channel Port:Code Address Port:Code Level Port:Code
Audio Zone Settings (Cont.)
ZONE_AUDIO_LOUD 1:130
ZONE_VOL_LEVEL 1:2
BASS_DN 1:124
BASS_UP 1:123
ZONE_BASS_LEVEL 1:131 1:3
TREB_DN 1:126
TREB_UP 1:125
ZONE_TREBLE_LEVEL 1:132 1:4
BAL_LEFT 1:127
BAL_RIGHT 1:128
Button 1:133 1:5
XIVA Navigator
Presets 2:112 2:112
BUTTON_BACK 1:6
Presets 2:113 2:113
Presets 2:114 2:114
Presets 2:115 2:115
Presets 2:116 2:116
Presets 2:117 2:117
Presets 2:118 2:118
Presets 2:111 2:111
MP3 Player Control 2:11
M2:109
L2:108
Random 2:132
Repeat 2:130
Search 2:120
Select 2:110
Player 2:135
Album 2:104
Artist 2:103
Genre 2:102
Playlists 2:101
Song 2:119
OF050W050H 2:106
OF050W050H 2:107
XIVA Player
BUTTON_BACK 1:6
MP3 Player Control 2:11
M2:129
L2:128
Random 2:132
Repeat 2:130
Navigator 2:134
A2:121
B2:122
30
Design XPress Installer’s Guide
Page 35

Appendix
Function Codes (Cont.)
Page Name Button Name Channel Port:Code Address Port:Code Level Port:Code
XIVA Player (Cont.)
C2:123
G2:125
F2:124
Song Name 2:121
Artist Name 2:122
Album Title 2:123
Playlist Name 2:124
Genre Title 2:125
Song 2:126
Song 2:127
Song 2:128
MP3_PROGRESS_BAR 2:1
NTSC Video
VIDEO_SELECT_BUTTON 3:100 3:100
VIDEO_FULL_SCREEN_BUTTON 3:100 3:100
VIDEO_VIDEO_WINDOW 3:100 3:100
VIDEO_SETUP_BUTTON 0:97 0:81
CD1_TP_PLAY_BUTTON 1:21
CD1_TP_STOP_BUTTON 1:24
CD1_TP_PAUSE_BUTTON 1:27
CD1_TP_PREV_BUTTON 1:25
CD1_TP_NEXT_BUTTON 1:26
SAT1_TP_RIGHT_BUTTON 2:3
SAT1_TP_DOWN_BUTTON 2:4
SAT1_TP_LEFT_BUTTON 2:2
SAT1_TP_UP_BUTTON 2:1
SAT1_TP_SELECT_BUTTON 2:5
NTSC Video Full Screen
Setup 3:100 3:100
CD1_TP_PLAY_BUTTON 1:21
CD1_TP_STOP_BUTTON 1:24
CD1_TP_PAUSE_BUTTON 1:27
CD1_TP_PREV_BUTTON 1:25
CD1_TP_NEXT_BUTTON 1:26
SAT1_TP_RIGHT_BUTTON 2:3
SAT1_TP_DOWN_BUTTON 2:4
SAT1_TP_LEFT_BUTTON 2:2
SAT1_TP_UP_BUTTON 2:1
SAT1_TP_SELECT_BUTTON 2:5
MAX Audio
BUTTON_BACK 1:6
MP3 Player Control 2:11
Random 2:132
Navigator 2:134
A1:21
B1:24
esign XPress Installer’s Guide
31
Page 36

Appendix
Function Codes (Cont.)
Page Name Button Name Channel Port:Code Address Port:Code Level Port:Code
MAX Audio (Cont.)
C1:27
G1:25
F1:26
Song Name 2:121
Artist Name 2:122
Album Title 2:123
Playlist Name 2:124
Next Song Title 2:125
Song 2:126
Song 2:127
Song 2:128
MP3_PROGRESS_BAR 2:1
MAX Navigator
Presets 2:112 2:112
BUTTON_BACK 1:6
Presets 2:113 2:113
Presets 2:114 2:114
Presets 2:115 2:115
Presets 2:116 2:116
Presets 2:117 2:117
Presets 2:118 2:118
Presets 2:111 2:111
MP3 Player Control 2:11
M2:109
L2:108
Intro 2:133
Random 2:132
Shuffle 2:131
Search 2:120
Select 2:110
Player 2:135
Jukebox 2:105
Album 2:104
Artist 2:103
All 2:102
Playlists 2:101
Song 2:119
OF050W050H 2:106
OF050W050H 2:107
Video 2:100
MAX Video
BUTTON_BACK 1:6
MP3 Player Control 2:11
Intro 2:133
Repeat 2:130
Shuffle 2:131
32
Design XPress Installer’s Guide
Page 37

Appendix
Function Codes (Cont.)
Page Name Button Name Channel Port:Code Address Port:Code Level Port:Code
MAX Video (Cont.)
Navigator 2:134
A1:21
B1:24
C1:27
G1:25
F1:26
Song Name 2:121
Album Title 2:123
Song 2:126
Song 2:127
Song 2:128
MP3_PROGRESS_BAR 2:1
MAX_VIDEO_SELECT 2:5
MAX VIDEO UP 2:1
MAX VIDEO DN 2:4
MAX VIDEO LEFT 2:2
MAX VIDEO RIGHT 2:3
_keyboardVirtual
F1 0:559
F2 0:560
F3 0:561
F4 0:562
F5 0:563
F6 0:564
F7 0:565
F8 0:566
F9 0:567
F10 0:568
F11 0:587
F12 0:588
Esc 0:501
~ ` 0:541
! 1 0:502
@ 2 0:503
# 3 0:504
$ 4 0:505
% 5 0:506
^ 6 0:507
& 7 0:508
* 8 0:509
( 9 0:510
) 0 0:511
_ - 0:512
+ = 0:513
Bksp 0:514
Ta b 0 : 5 15
esign XPress Installer’s Guide
33
Page 38

Appendix
Function Codes (Cont.)
Page Name Button Name Channel Port:Code Address Port:Code Level Port:Code
_keyboardVirtual (Cont.)
Q0:516
W0:517
E0:518
R0:519
T0:520
Y0:521
U0:522
I0:523
O0:524
P0:525
{ [ 0:526
} ] 0:527
| \ 0:543
Caps 0:558
A0:530
S0:531
D0:532
F0:533
G0:534
H0:535
J0:536
K0:537
L0:538
: ; 0:539
" ' 0:540
Enter 0:528
Shift 0:542
Z0:544
X0:545
C0:546
V0:547
B0:548
N0:549
M0:550
< , 0:551
> . 0:552
? / 0:553
Shift 0:554
Ctrl 0:529
Alt 0:556
Alt 0:600
Ctrl 0:597
Space 0:557
d0:605
a0:608
f0:606
34
Design XPress Installer’s Guide
Page 39

Appendix
Function Codes (Cont.)
Page Name Button Name Channel Port:Code Address Port:Code Level Port:Code
_keyboardVirtual (Cont.)
s0:603
Del 0:611
End 0:607
pg dn 0:609
Ins 0:610
Hm 0:602
pg up 0:604
Button 83 0:70
esign XPress Installer’s Guide
35
Page 40

Appendix
36
Design XPress Installer’s Guide
Page 41

Appendix
Design XPress Installer’s Guide
37
Page 42

AMX reserves the right to alter specifications without notice at any time.
ARGENTI NA • AUST RALIA • B ELGIUM • BRAZIL • CANADA • CHINA • E NGLAND • FRANCE • GERMANY • GREECE • HONG K ONG • INDI A • INDON ESIA • ITALY • JAPAN
LEBANON • MALAYSIA • MEXICO • NETHERLANDS • NEW ZEALAND • PHILIPPINES • PORTUGAL • RUSSIA • SINGAPORE • SPAIN • SWITZERLAND • THAILAND • TURKEY • USA
ATLANTA • BOSTON • CHICAGO • CLEVELAND • DALLAS • DENVER • INDIANAPOLIS • LOS ANGELES • MINNEAPOLIS • PHILADELPHIA • PHOENIX • PORTLAND • SPOKANE • TAMPA
3000 RESEARCH DRIVE, RICHARDSON, TX 75082 USA • 800.222.0193 • 469.624.8000 • 469-624-7153 fax • 800.932.6993 technical support • www.amx.com
2005 AMX Corporation. All rights reserved. AMX, the AMX logo, the building icon, th e home icon, and the light bulb icon are all trademarks of AMX Corporation.
©
033-004-2663 3/05
In Canada doing business as Panja Inc.
 Loading...