

AMT Datasouth Fastmark 4600 PLUS User Manual
Quick Installation Guide
TIA-230E
Model No.
Serial No.
FM12345678
Direct and Transfer Thermal Printer
Overview
The enclosed printer is currently
comprised of two models:
203dpi (dots per inch) model
300dpi (dots per inch) model
Unpacking
1. Remove top foam packing piece.
2. Lift printer straight up out of box.
3. Remove accessory kit and supplies.
4. Remove printer from plastic bag.
NOTE: Save box and all packing
materials for future use in the event
the printer needs to be shipped.
P/N 140121 Rev B Page 1/6

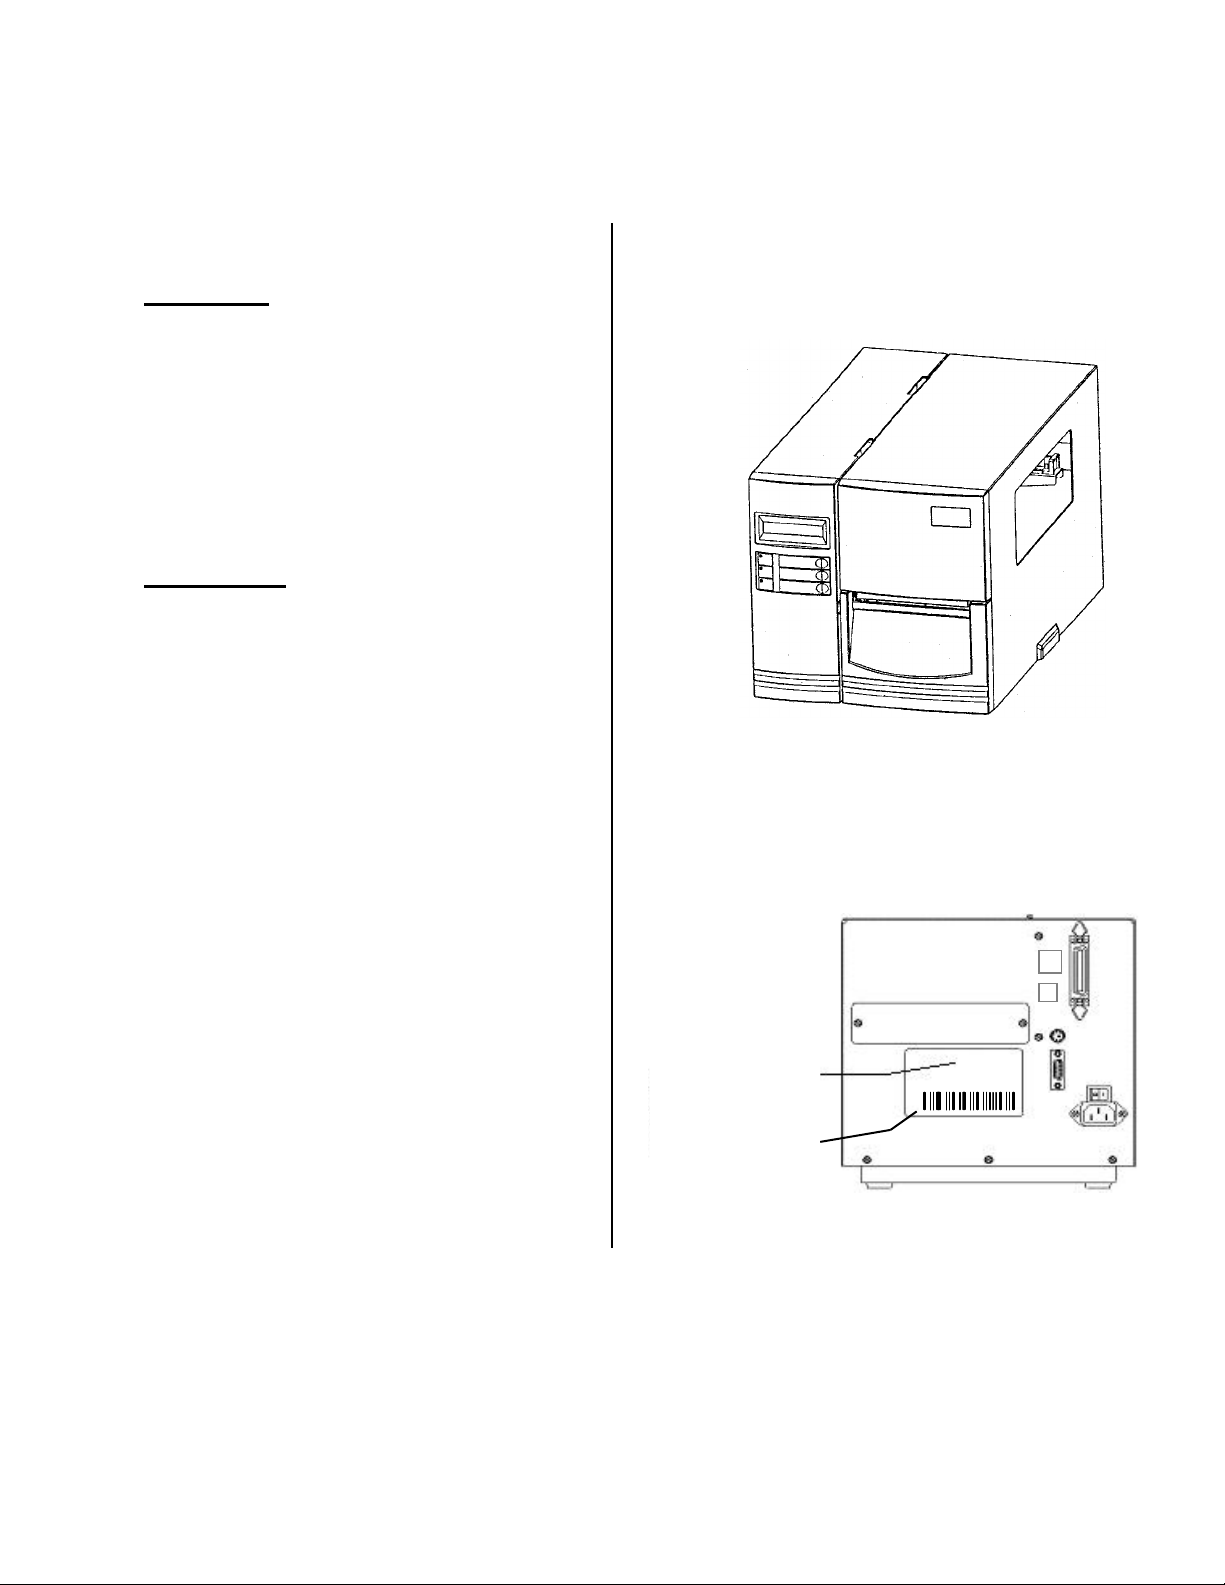
Installation
External Label
Feed Slot
Cover
Parallel Port
AC Inlet
Receptacle
Power Switch
LCD
FEED / CONFIG.
CANCEL / RESET
PAUSE / CALIBR.
Media Viewing
Window
Media Access
Cover
Media Exit
Front Access
Door
Product No
Serial No.
Serial Port
PS2 Port
Ethernet
USB Port
TIA-230E
FM12345678
1. Determine a suitable location for the
printer with the following
requirements:
Flat stable surface with sufficient
clearance to allow for interface
cables and media loading.
Free from excessive direct
sunlight, temperature, humidity,
dust, dirt, and debris.
Near a grounded AC power
receptacle wired in compliance
with local ordinances.
2. Ensure printer Power Switch is
off "0".
3. Connect the power cord to the AC
Inlet Receptacle located on the
back of the printer.
Front View
4. Connect AC power plug to a suitable
AC source.
5. Connect a suitable interface cable
(i.e. Parallel, Serial, USB or
Ethernet).
NOTE: The default serial interface
parameters are: 9600, 8 data bits, 1
stop bit, XON/XOFF and RTS/CTS.
Back View
P/N 140121 Rev B Page 2/6
 Loading...