

Page 1
Installation Guide
V 1.2 December 2014 © Amina Technologies Ltd
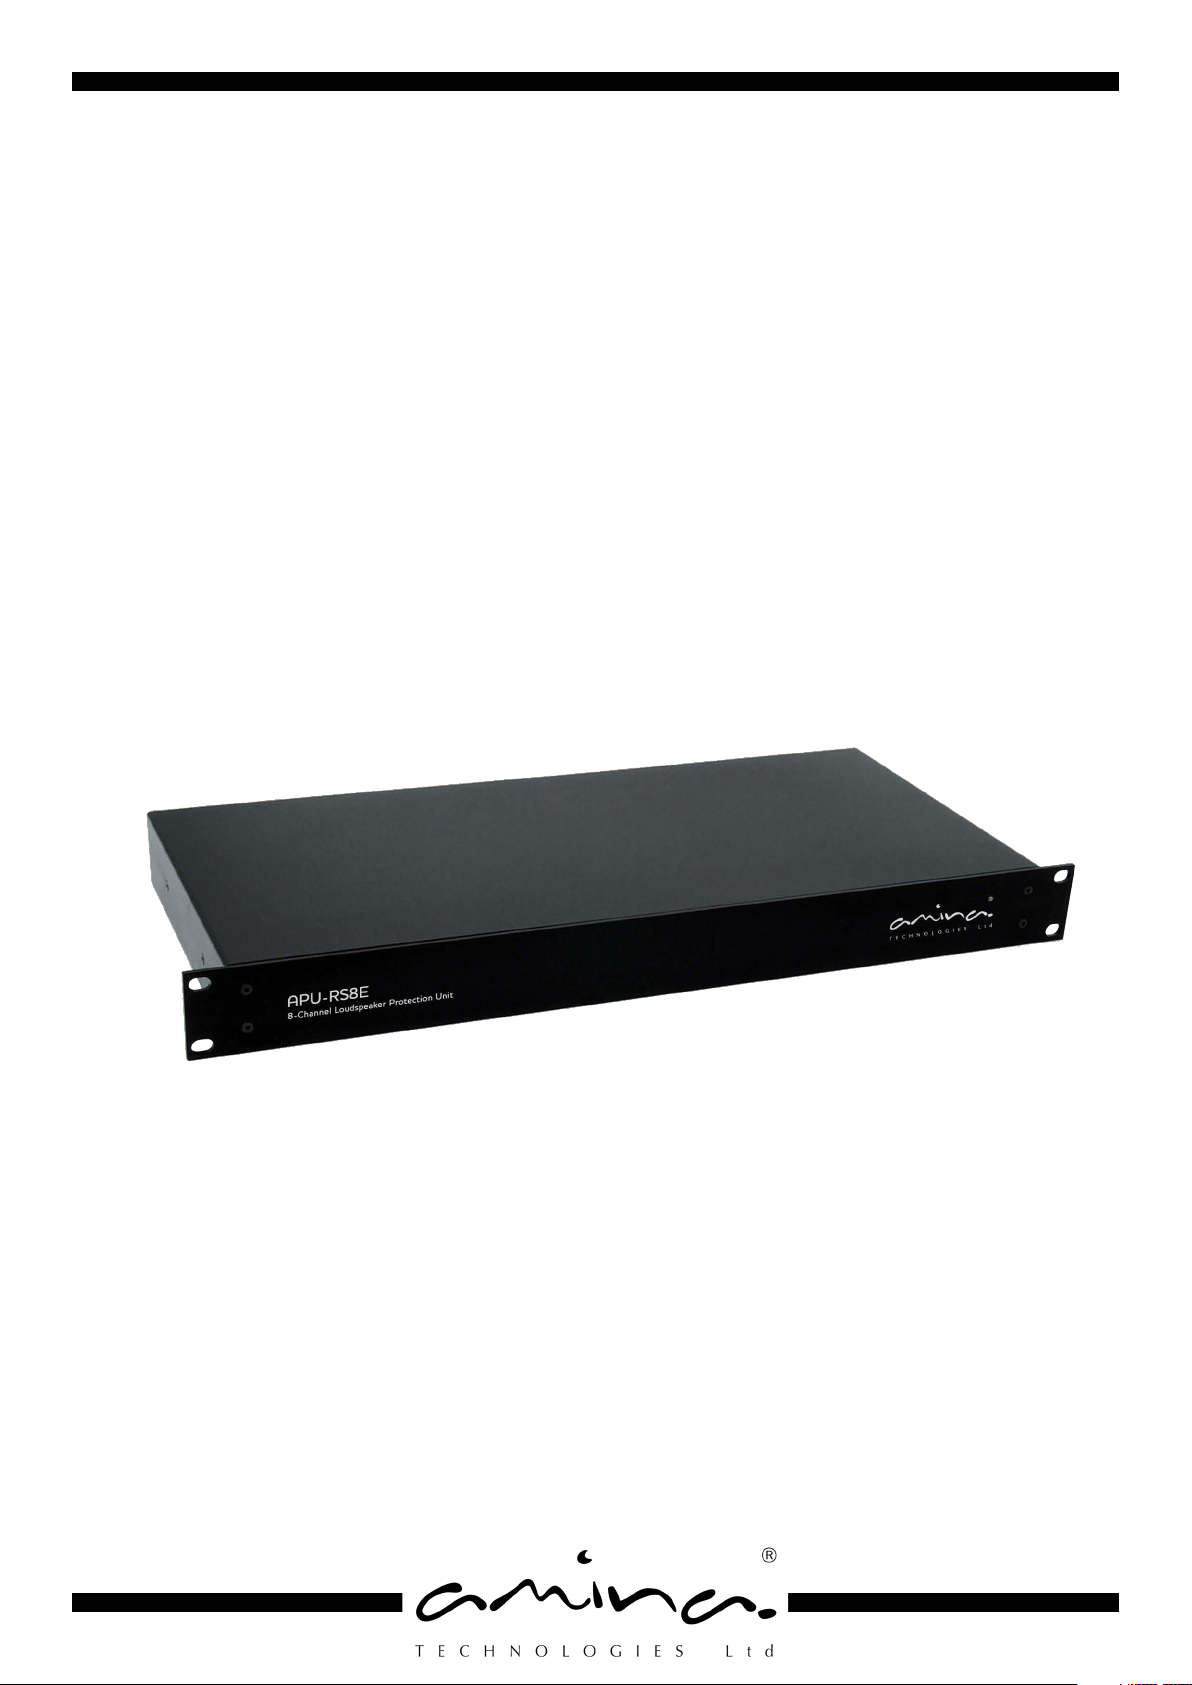
APU-RS8E
19” Rack Mount, 1U,
Multi-channel Loudspeaker
Protection Unit
Page 2
Caution: Read before installing this product
• To ensure optimal performance, please
read this guide carefully. Keep it in a
safe place for future reference.
• Install this product in a cool, dry and
clean place - away from direct sunlight,
heat sources, vibration, dust and moisture.
• Do not expose this unit to sudden temperature changes or locate it in an environment with high humidity. This is to
prevent condensation forming inside
which may cause damage to this unit
and possibly to devices connected to it.
Limited Warranty:
The APU-RS8E is designed to operate reliably for many years. Correctly
installed and operated in accordance with these instructions, Amina warranties the APU-RS8E against defective materials and workmanship for a
period of 1 year.
• Do not clean this unit with chemical
solvents as this might damage the finish.
Use a clean, dry or damp cloth.
• Do not attempt to modify or repair this
unit.
• Contact your distributor or the manufacturer if a fault should occur.
• This unit features internal jumpers that
may be adjusted by the installer. Please
take care when removing and re-fitting
the lid not to damage the four machine
screws. Ensure the screws are tight
when re-fitting them.
The APU-RS8E features only
passive circuit components. It
should NEVER be connected to
the mains electrical supply.
Setting the internal jumpers
The APU-RS8E must be correctly configured for the model of Evolution Series loudspeakers it will be used with.
The APU-RS8E is a low voltage, passive
device, however ALWAYS disconnect it from
all speakers and amplifiers before adjusting
the internal jumpers.
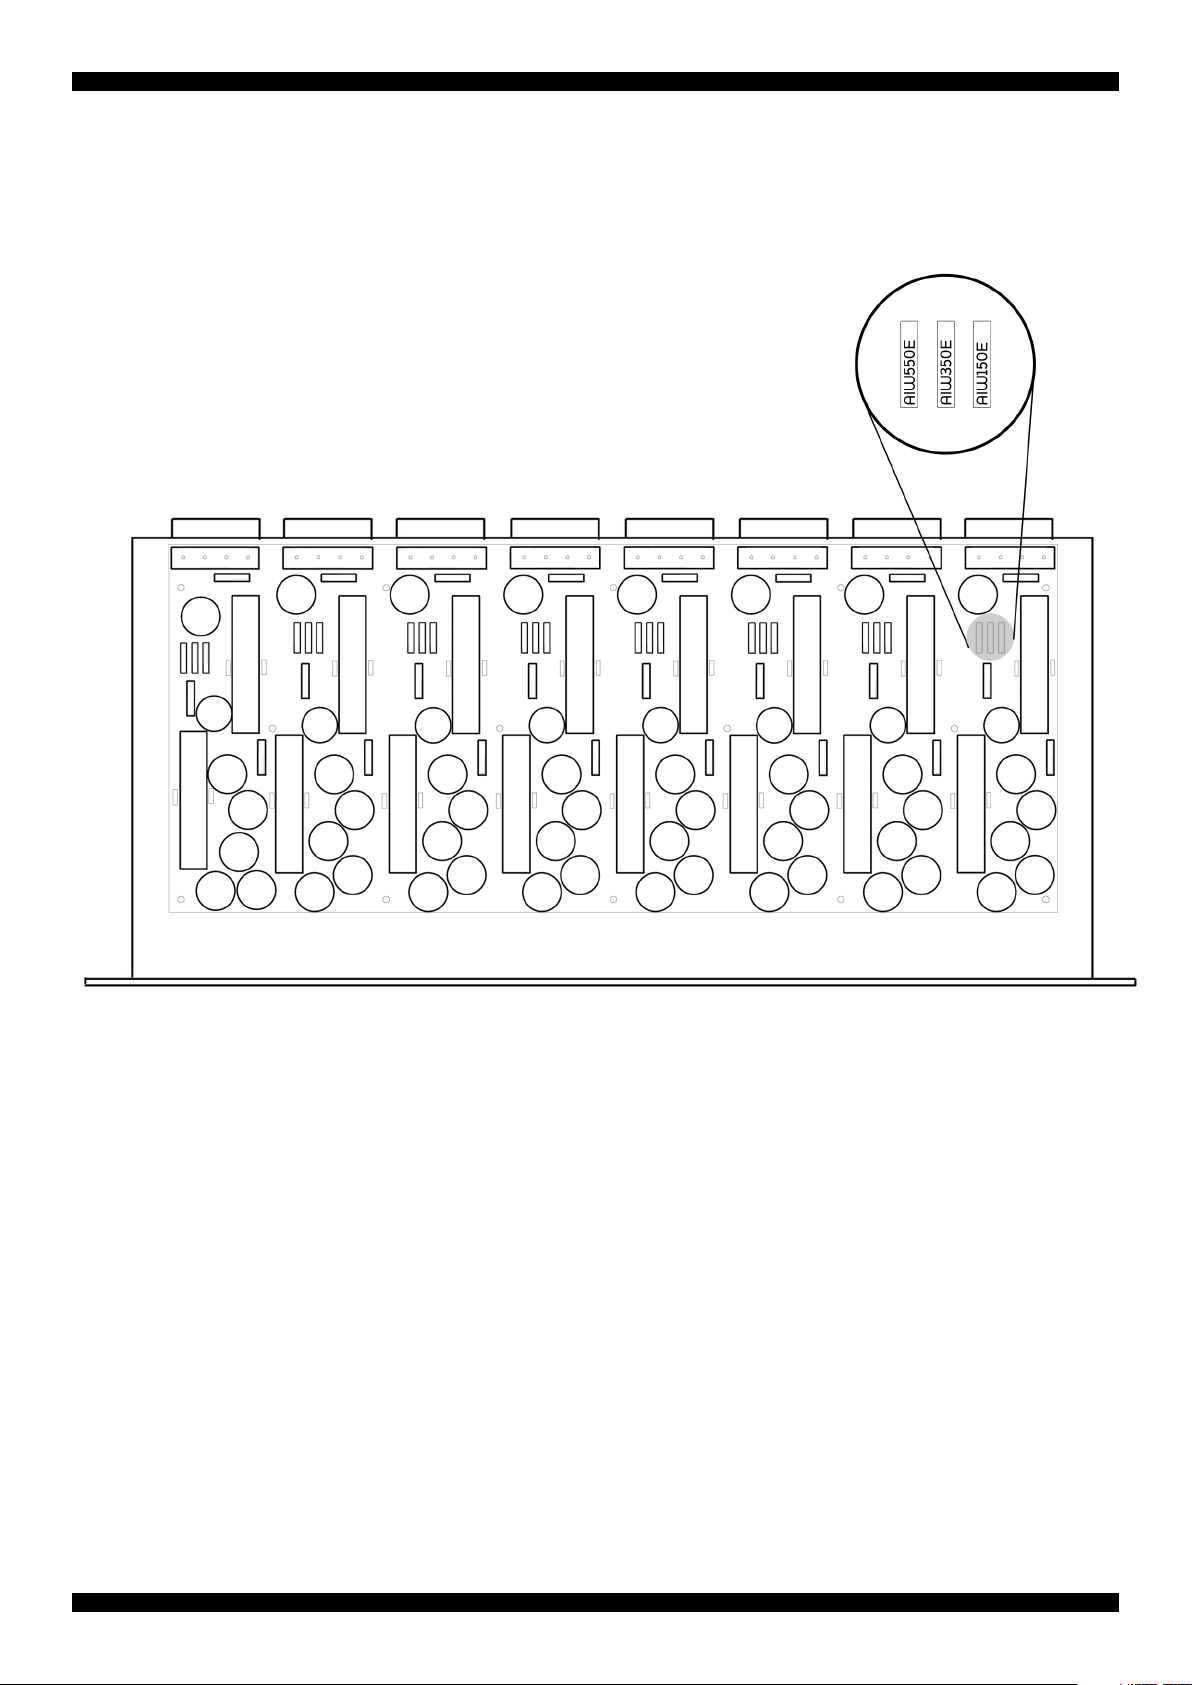
The circuit board inside the APU-RS8E comprises of eight separate audio channels.
Each channel features three sets of pins
and one connecting jumper.
There is an area on the product serial number label where the individual channel
designation can be marked once the jumpers have been set.
Set the jumper for each channel according
to the speaker model legend next to each
jumper.
Jumper Legend Compatible Speakers
AIW550E AIW550E/ AIW550i,
AIW450i
AIW350E AIW350E/ AIW350i,
AIW350E-S200,
AIW350E-S200, iQ3,
AIW250i
AIW150E AIW150E/ AIW150i,
AIW150E-S200
AIW150i-S200, iQ1, iQ2
IMPORTANT: no more than one jumper
should be used per bank of 3 pins, e.g.
Note: unless specified
otherwise jumpers are set
for AIW550E/AIW550i as
the factory default
Page 3
Setting the internal jumpers - continued
Inside the APU-RS8E
To set the jumpers the lid of the
APU-RS8E must be removed by
carefully unscrewing the four machine
screws on the sides of the chassis.
The jumpers for each channel are
positioned as indicated in the diagram
below.
Diagram 1: Internal circuit board layout of APU-RS8E
Important:
Ensure that the jumpers are fully pushed down onto the
pins.
Only remove and replace the lid fixing screws by hand.
Always use the correct tool and do not over tighten.
Ensure the lid is securely fitted to the product before it
is installed.
Mark each channel’s fuse setting on the product serial
number label for future reference.
Page 4
Connecting the APU-RS8E
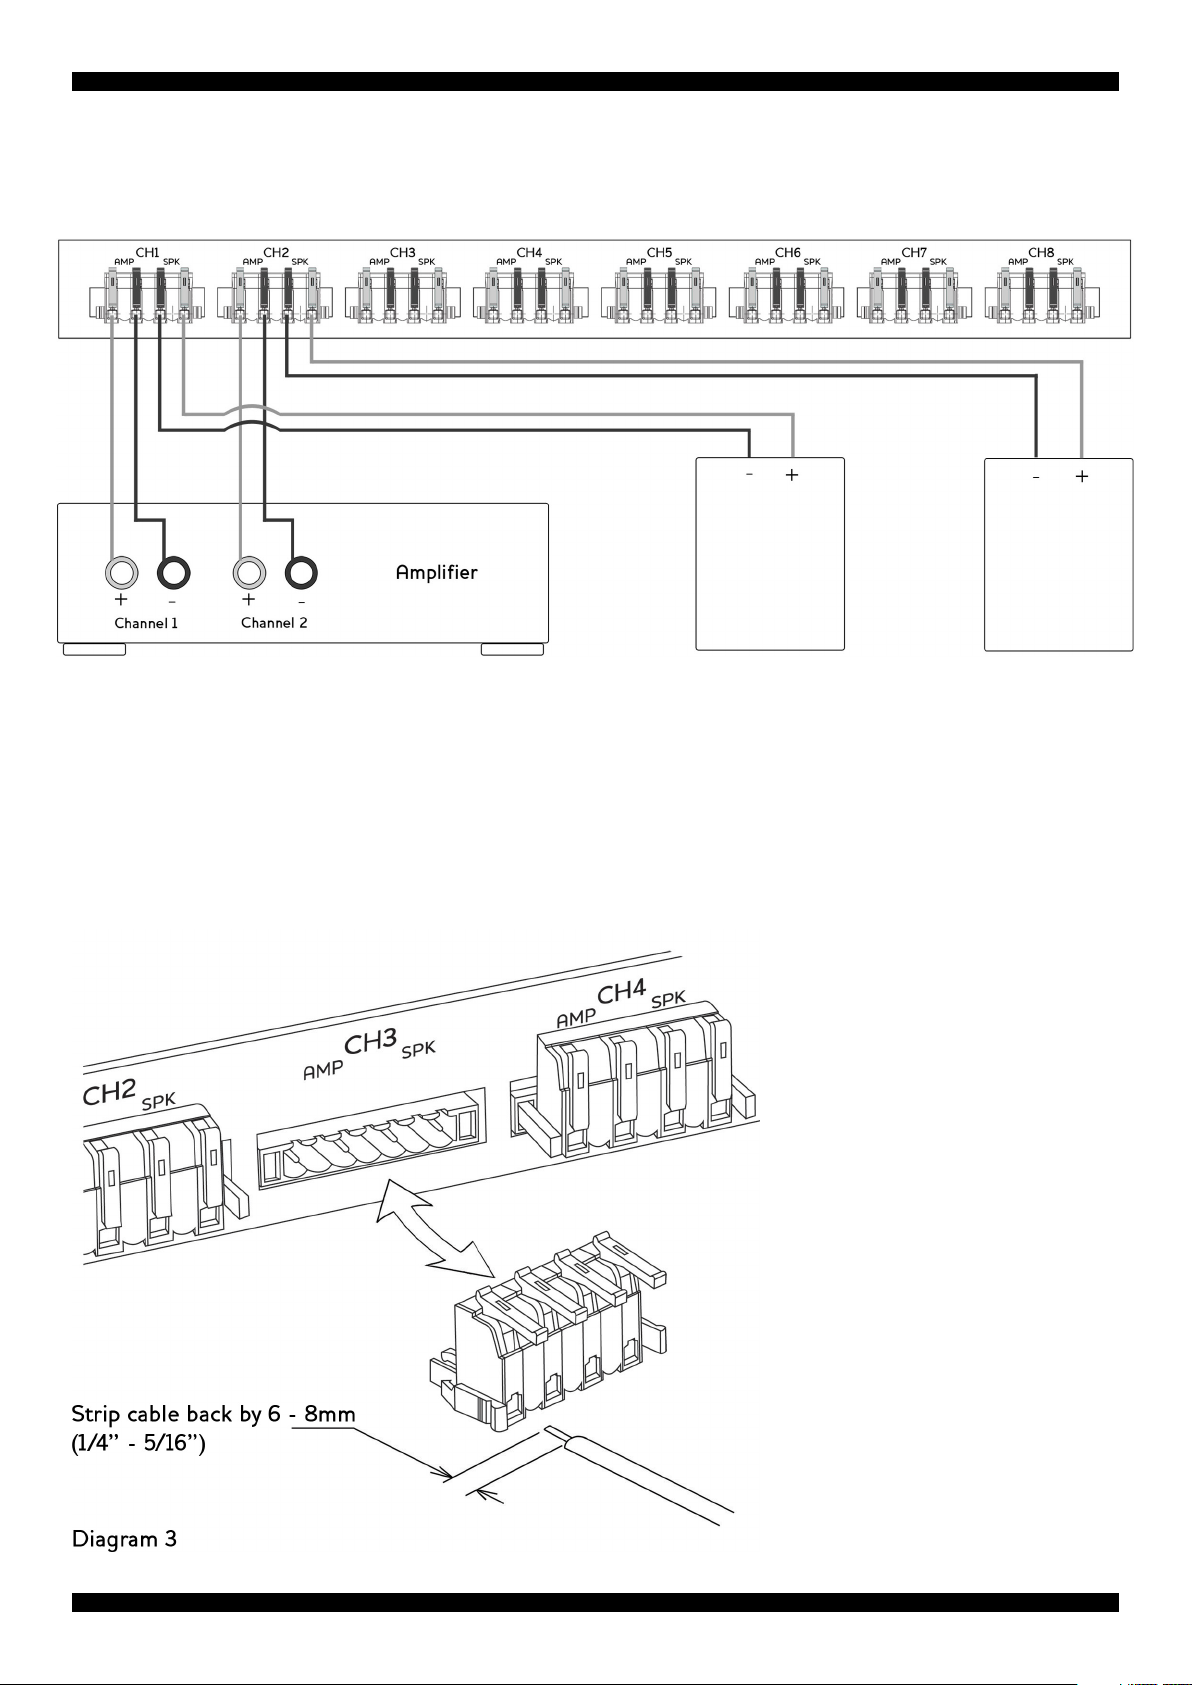
2 Channel example writing schematic:
Diagram 2
Note:
In this example the red levers (shown
as light grey in the diagram) on the
Springcon ® plugs are used for the “+”
loudspeaker connections. Keep the
connection polarity consistent on all
channels.
iQ Series or
Evolution
Series
Loudspeaker
when the Springcon ® levers
iQ Series or
Evolution
Series
Loudspeaker
Note:
Ensure that cables are
securely clamped
are down.
To remove the plugs from the
connecting headers press the
two clips on either side
to release.
Page 5
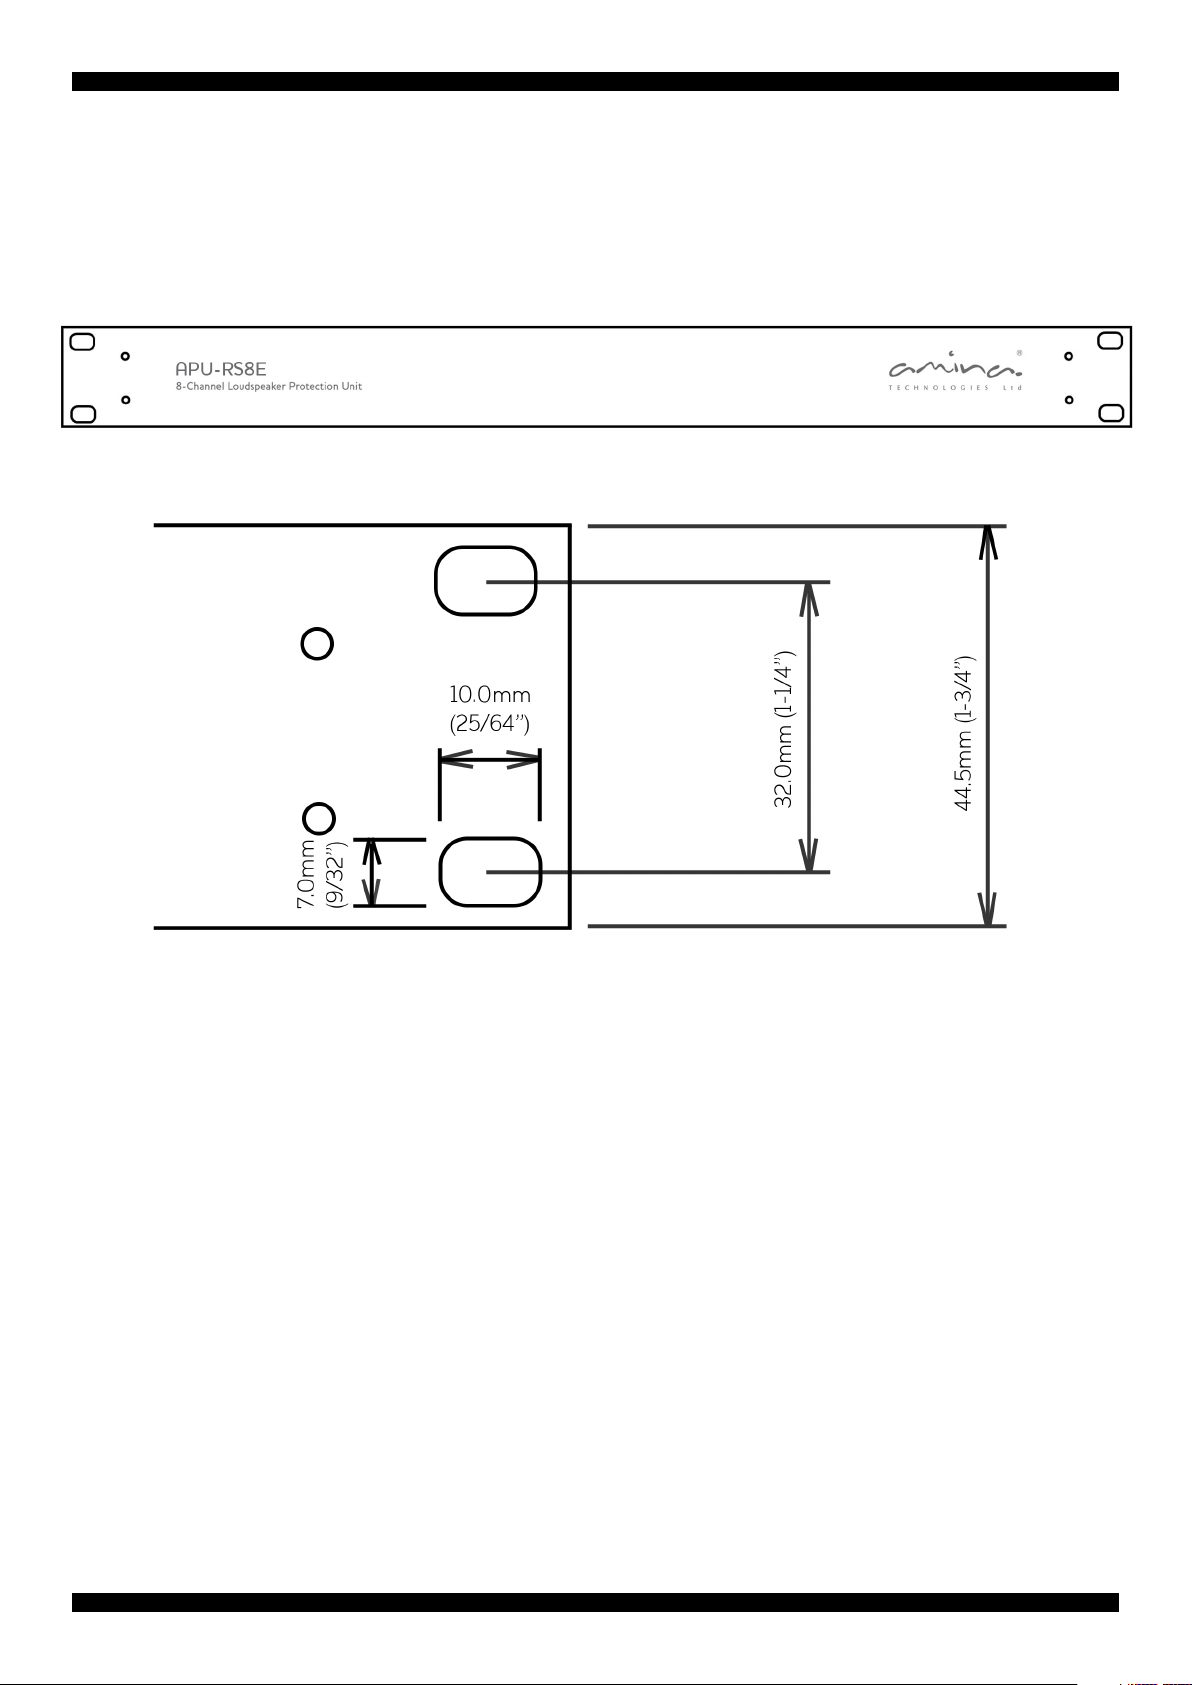
Positioning the APU-RS8E
The APU-RS8E is designed to fit into a
standard 19 inch equipment rack via 4
mounting holes and has a height of 1U
(45mm/1.75 inches).
Diagram 4: APU-RS8E front panel
Diagram 5: APU-RS8E fixing points detail
Alternatively, the APU-RS8E can the placed on a
shelf. Other equipment (up to 10kg/22lbs) may
be placed on top if necessary. Take care not to
scratch the top of the case and that any weight is
not directly over the centre of the APU-RS8E.
Note:
The APU-RS8E does NOT require ventilation and
therefore its installation position is not critical.
However, the product should ALWAYS be installed
in a dry environment that does not exceed 35 degree Centigrade (95 degree Fahrenheit).
The product’s steel case provides all necessary
shielding from magnetic fields generated by the
APU-RS8E itself (these are very small) or from
other equipment placed nearby.
Page 6
Important information
The APU-RS8E has been designed specifically to enhance the reliability of your
Evolution Series loudspeakers. It features a high-pass filter and a current sensing fuse
to protect the loudspeaker from being over-driven and potentially damaged. If the
APU-RS8E senses excessive drive current from the system’s amplifier it will
automatically reduce the sound level from the speaker until the amplifier’s volume is
reduced.
It is important to note the following:
• Ensure that the correct internal jumper setting is used on each channel. Failure to do
so could result in speaker damage
• NEVER connect more than one Evolution Series loudspeaker to an output channel
• Be sure that all connections are made in accordance with this guide
• It is not recommended that you use amplifiers with power outputs that are far greater than the loudspeaker’s peak power rating
• It is not recommended that you intentionally cause the APU-RS8E to automatically
protect the loudspeakers by deliberately over-driving them
• If you find that the APU-RS8E automatically reduces the audio volume from the
loudspeakers frequently it may suggest that the amplifier being used is too powerful
or that the layer of plaster over the speakers is too thick.
WARNING: DO NOT switch on the amplifier unless both APU-RS8E
and Evolution Series loudspeakers are connected to it. Damage may
occur to the amplifier if it is operated without a loudspeaker connected
to the output of the APU-RS8E.
THE APU-RS8E IS NOT SUITABLE FOR 100V/70V LINE SYSTEMS OR
OTHER MANUFACTURER’S LOUDSPEAKERS
Specifications
Dimensions: 1U height front panel, 482mm x 44.4mm (19” x 1.75”),
case depth, 213mm (8.375”)
Weight: 3.6Kg (8lbs) Nett, 4.2Kg (9.2lbs) Gross
Fuse protection: Self-resetting, current sensing type. Fuse threshold set
via internal jumpers
Compatibility: Suitable for use with Amina AIW150E/i;
AIW150E/i-S200, AIW250i; AIW350E/i;
AIW350E/i-S200; AIW450i;AIW550E/i; iQ1; iQ2; iQ3 only
Number of channels: 8
Connection type: 1x Springcon ® 4 pole connector per channel.
Connector carries input and output for each channel
Maintenance requirements: Protection fuses can be set by installer if necessary.
Repeated tripping of fuses may require fuse
replacement by the manufacturer to ensure optimal
speaker performance
Page 7

European Union WEEE regulations:
The product is fully RoHS compliant, eliminating to a minimum the use of hazardous
materials within its manufacture. At the end of its useful life it should be returned to the
manufacturer for recycling according to the European Union’s WEEE directive.
All products are subject to change without notification. E&OE
Amina Technologies Ltd
Cirrus House, Glebe Road,
Huntingdon, Cambridgeshire
PE29 7DL, UK
T:+44 1480 354390
W: www.amina.co.uk
 Loading...