

Page 1

Installation Instructions
Regal Series
Surface Mount Flatwall
Corporation
Page 2

Note
Flatwall installation should conform to local building codes
The installation instructions provided are for the Amico standard products. Slight
modications to the installations may be required. The product shipped to the job
site may not be exactly as shown on the installation drawings.
1 Amico Architectural
Page 3

Before Installation
1.
Review a copy of the nal approved shop drawing(s) and/or submittal package. These
documents will provide you with technical information specic to your installation, such as:
- equipment types & quantities
- room numbers and location
- shop drawings of each unit type
- wiring diagrams and rough-in locations
2.
Locate the atwall unit from the shipping boxes that you wish to install.
The contents of each shipping box are listed on the shipping document(s).
www.amico.com 2
Page 4

Installation
1.
Remove laminate panels from atwall (using tool provided) by lifting panels vertically until
resistance is felt, then rotate bottom of panel out and pull down. Be careful not to drop panel.
1
tool provided:
suction cup
2
3 Amico Architectural
Page 5
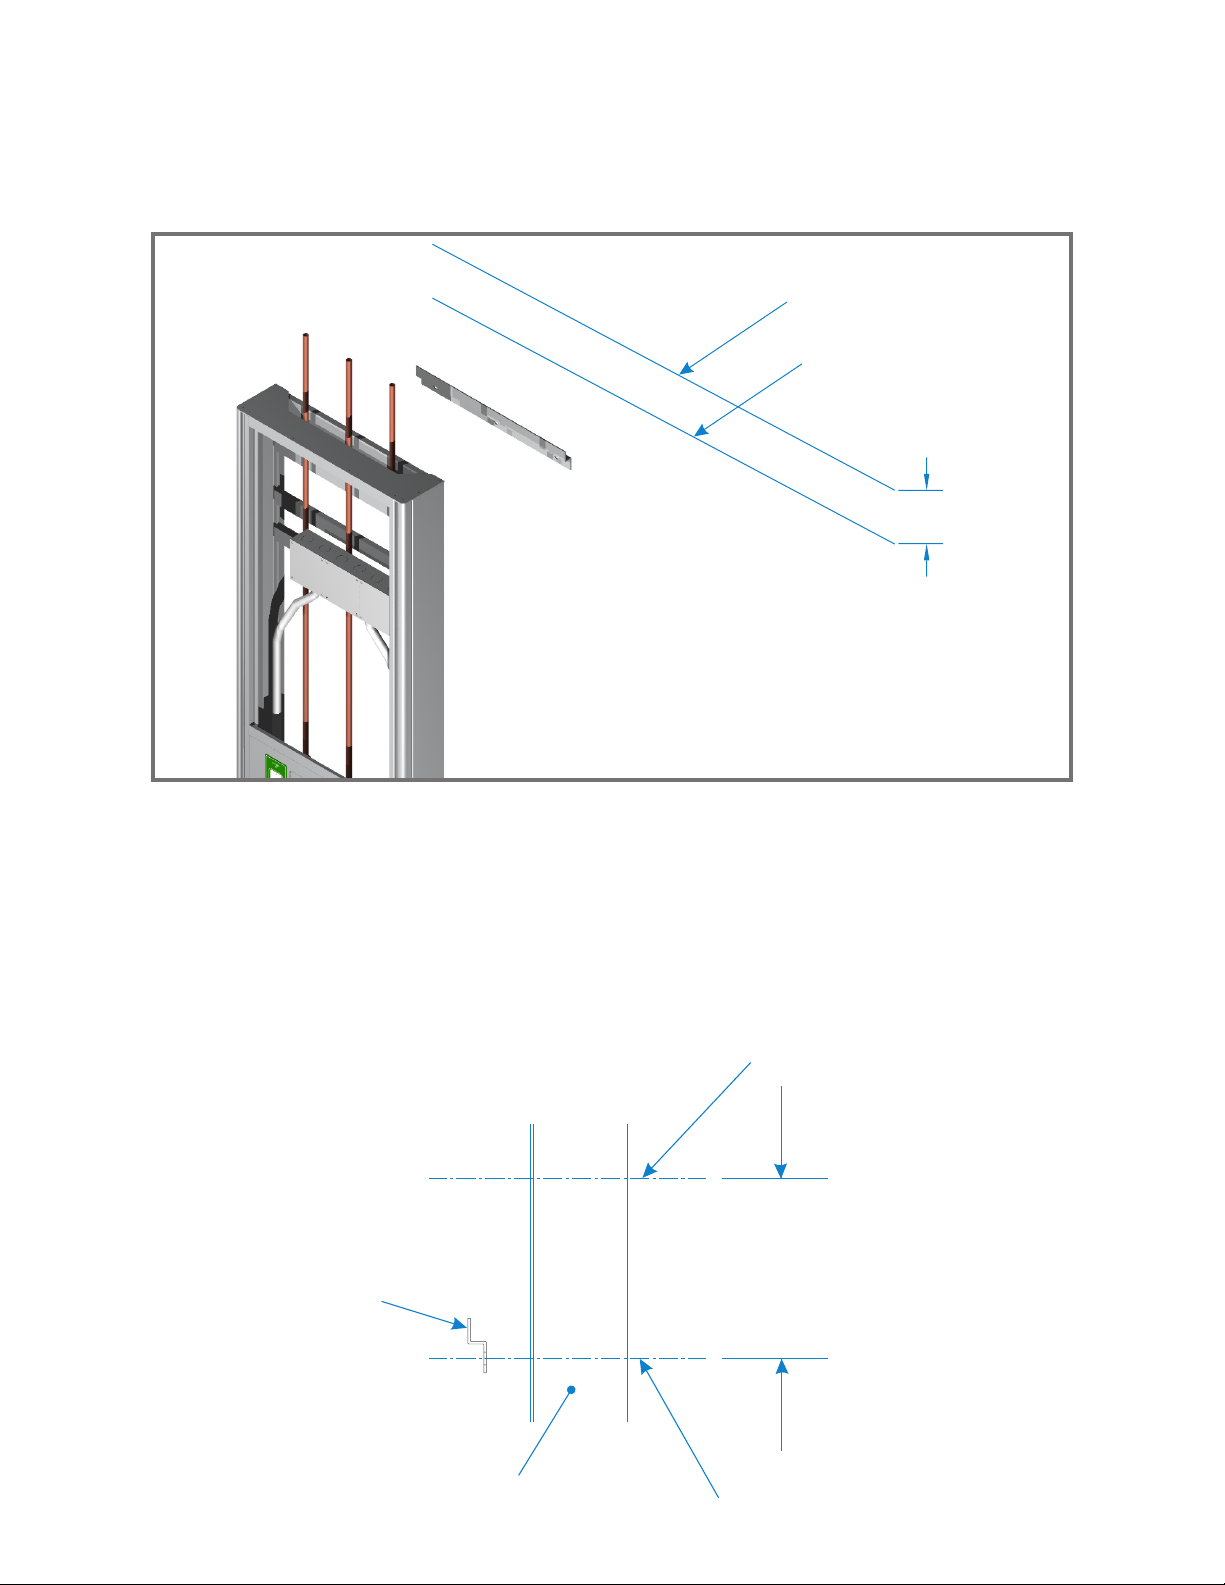
2.
Mark horizontal line 7” below nished ceiling line. This line will be used to locate drilling for
mounting of hanging bracket.
nished ceiling line
hanging bracket
mounting line
7”
3.
Align bracket horizontally according to atwall mounting location. Refer to drawings. Mount
the bracket on the wall using hardware compliant to local building codes (supplied by others).
Use mounting line from step 2 to locate mounting holes vertically. Ensure hanging bracket is
secured to wall studs or blocking behind the drywall.
nished ceiling line
7”
hanging bracket
wall stud
www.amico.com 4
Page 6

Hang the unit over the hanging bracket. Secure the unit through lower rear bracket to wall.
4.
Ensure hanging bracket is secured to wall studs. Use similar hardware as previously used to
secure hanging bracket.
Note
Dimensions above nished oor for lower bracket vary for each type of atwall. Please contact
Amico if exact dimensions are required for blocking purposes.
atwall securing locations
Make all electrical and piping connections. Electrical services are terminated at junction boxes.
5.
Medical gas pipes are terminated as per shop drawings.
Replace laminate panels removed in step 1.
6.
5 Amico Architectural
Page 7

www.amico.com
Amico Architectural | www.amico.com
85 Fulton Way, Richmond Hill
Ontario, L4B 2N4, Canada
71 East Industry Court, Deer Park
NY 11729, U.S.A
Toll Free Tel: 1.877.264.2697
Toll Free Fax: 1.866.440.4986
Tel: 905.763.7778
Fax: 905.763.8587
Email: info@amico.com
C US LISTED
INSTALL INSTR. REGAL SERIES SURFACE MOUNTED FLATWALL 2011
 Loading...