

Page 1

Page 2

1
Table of Contents
1. Security ............................................................................................................................................................................................................................. 3
2. Getting Started ................................................................................................................................................................................................................. 3
2.1.1. Installing and uninstalling SIM card ........................................................................................................................................................... 3
2.1.2. Charging the battery .................................................................................................................................................................................. 4
2.2. Connecting to the Network ...................................................................................................................................................................................... 4
2.2.1. SIM card ..................................................................................................................................................................................................... 4
2.2.2. Connecting to the network ......................................................................................................................................................................... 4
3. Facebook .......................................................................................................................................................................................................................... 4
4. Phonebook ........................................................................................................................................................................................................................ 5
5. Call logs ............................................................................................................................................................................................................................ 5
6. Messaging ......................................................................................................................................................................................................................... 5
6.1. Write message ......................................................................................................................................................................................................... 5
6.2. Inbox / Outbox/ Drafts/Sent box .............................................................................................................................................................................. 5
6.3. Security inbox .......................................................................................................................................................................................................... 6
6.4. Templates ................................................................................................................................................................................................................ 6
6.5. Broadcast Messages ............................................................................................................................................................................................... 6
6.6. Voice mail service .................................................................................................................................................................................................... 6
6.7. Message settings ..................................................................................................................................................................................................... 6
7. Internet .............................................................................................................................................................................................................................. 6
8. Multimedia ........................................................................................................................................................................................................................ 6
8.1. File manager ............................................................................................................................................................................................................ 6
8.2. Image viewer ........................................................................................................................................................................................................... 6
8.3. FM radio ................................................................................................................................................................................................................... 6
8.4. Audio player ............................................................................................................................................................................................................. 7
8.5. Video recorder ......................................................................................................................................................................................................... 7
8.6. Video player ............................................................................................................................................................................................................. 7
8.7. Sound recorder ........................................................................................................................................................................................................ 8
9. Camera .............................................................................................................................................................................................................................. 8
10. Fun&Games .................................................................................................................................................................................................................... 8
11. Organizer ........................................................................................................................................................................................................................ 8
11.1. STK ........................................................................................................................................................................................................................ 8
11.2. BT .......................................................................................................................................................................................................................... 8
Page 3

2
11.3. Calendar ................................................................................................................................................................................................................ 9
11.4. Calculator ............................................................................................................................................................................................................... 9
11.5. Alarm ...................................................................................................................................................................................................................... 9
11.6. Stopwatch .............................................................................................................................................................................................................. 9
11.7. Auto call record ...................................................................................................................................................................................................... 9
11.8. Torch ...................................................................................................................................................................................................................... 9
14. Settings ......................................................................................................................................................................................................................... 10
12.1. User Profiles ........................................................................................................................................................................................................ 10
12.2. Phone settings ..................................................................................................................................................................................................... 10
12.3. Display settings .................................................................................................................................................................................................... 10
12.4. Security settings .................................................................................................................................................................................................. 11
12.5. Call settings ......................................................................................................................................................................................................... 11
12.6. Dual SIM settings................................................................................................................................................................................................. 11
12.7. Network Settings .................................................................................................................................................................................................. 11
12.8. Restore Factory ................................................................................................................................................................................................... 11
12.9. SOS settings ........................................................................................................................................................................................................ 12
Manual Statements
Thank you for choosing UNIKO mobile phone. Please read this manual before operating your phone and keep it for future reference.
Note:
Use only accessories approved by the phone manufacturer to ensure safety. Failing to comply with this will violate the terms and conditions of the
warranty.
If the contents and displays described in this user guide do not match the actual operation of the phone set, please use the display of the actual
phone set. We reserved the rights to change the mechanisms of the phone without notice.
Protect your environment! We strive to produce products in compliance with global environmental standards. Please consult your local
authorities for proper disposal.
Page 4

3
General Information
1. Security
Emergency call
In any country, you can dial 911 (or other emergency call number) for emergency help.
Note: Based on the nature of cellular networking, the success of the emergency call cannot be guaranteed.
Safety Precautions
Before using your phone, please read the following important information to eliminate or reduce any possibility causing damage and personal injury.
Do not use wireless phones while driving.
Switch off wireless devices in aircraft.
Do not use mobile phones at refueling point. Don’t use near fuel or chemicals.
Follow regulations or rules in hospital and health care facilities. Switch phone off.
Only qualified service personnel can install or repair this device.
Use only approved accessories and batteries.
Battery Information
Information Charging and Discharging
.
Do not charge the phone in wet and damp conditions.
We strive to produce products in compliance with global environmental standards.
When a charger is not in use, disconnect it from the power source. Do not leave the battery connected a charger for longer than 12 hours,
since overcharging may shorten its life.
Tips for Battery
Do not disassemble or modify the battery by yourself.
Do not short-circuit the battery.
Do not dispose of batteries in fire.
If you smell anything strange from the battery or find that the battery is overheated, you should stop using it immediately and contact the
authorized Service Center in your region.
2. Getting Started
2.1.1. Installing and uninstalling SIM card
Switch off the phone; remove the back cover, battery and other external power source. Fit the SIM card into the SIM card slot.
Page 5

4
2.1.2. Charging the battery
Plug the charger into the socket on the side of your phone. Connect the charger to an AC wall socket. The blinking of the battery level icon indicates the
battery is being charged. When the blinking stops, it indicates the charging is finished
During charging, the phone and charger will feel warm to the touch. This is normal.
Warning:
Use only chargers approved by the phone manufacturer to ensure safety. Failing to comply with this will violate the terms and conditions of the
warranty.
2.2. Connecting to the Network
2.2.1. SIM card
Please insert available Subscriber Identity Module (SIM) card into your phone before using it. SIM card is supplied by your network carrier. All the
information related to network connection is recorded on the SIM card, so are the contact information such as names, phone numbers and SMS that
you set to store on the SIM. You can take out the SIM card from the phone and insert it into another GSM phone to use it. Most new phones will
recognize the SIM card automatically.
2.2.2. Connecting to the network
After the SIM card is unlocked, you phone will automatically search for the registered network or other local available network. Once connected, the
name of the network carrier will appear on the top of the screen.
You phone is now in Standby mode, ready for making and receiving call
Main menu
3. Facebook
Facebook: Be able to browse the Facebook home page.
All the functions of this menu will work only if GPRS is activated on your SIM card.
Page 6

5
4. Phonebook
You can save a phone number in the memories of SIM cards or phone. Select a contact in the contact list window and press LSK KEY to perform:
New: Create a new contact inside phonebook.
SMS: Directly input the SMS and send it to the searched phone number.
Call: Call the current contact.
Delete: Delete the current contact.
Delete multiple: Delete all the marked contacts in one time.
Delete all: Delete all the contacts.
Delete phone: Delete all the contacts stored in phone.
Delete SIM1l: Delete all the contacts stored in SIM1.
Delete SIM2: Delete all the contacts stored in SIM2.
Copy/Move: Move or copy contacts.
Import/Export: Export the contacts from SIM card & phone memory / Import the backup from memory card.
Send vCard: Send a vCard via SMS or BT.
Others:You can set up the speed dial number and check the Own number, Service number and Memory status.
5. Call logs
With this function, you can view the information of Missed calls、Dialed calls、Received calls、Rejected calls 、Call timers、GPRS counter and also you
can clean all these records via Delete Call Logs.
6. Messaging
You can send and receive the SMS as well as use Cell Location Display with this function.
6.1. Write message
Insert text, phone number and others.
Send: Insert the number of the contacts and then send SMS to this number.
6.2. Inbox / Outbox/ Drafts/Sent box
This function is used to check messages in Inbox/ Outbox/ Drafts / Sent box.
Page 7

6
6.3. Security inbox
You can create a security message inside this folder, user to open it, must need the password, the default password is “1234”
6.4. Templates
Some message templates given inside this menu.
6.5. Broadcast Messages
Look up the broadcast messages.
6.6. Voice mail service
This is similar to the Answer machine. You may transfer the incoming call that you fail to answer duly to your Voice mail server, where the caller can
leave message.
6.7. Message settings
You can modify the SMS Settings, push message, and check Message capacity.
7. Internet
Internet browser: All the functions of this menu will work only if GPRS is activated on your SIM card.
Option: You can enter the Homepage and modify the default settings, like the Account settings.
8. Multimedia
8.1. File manager
The File Manager lists the all the files stored in your memory card.
8.2. Image viewer
You can view the photos snapped with the camera through this function.
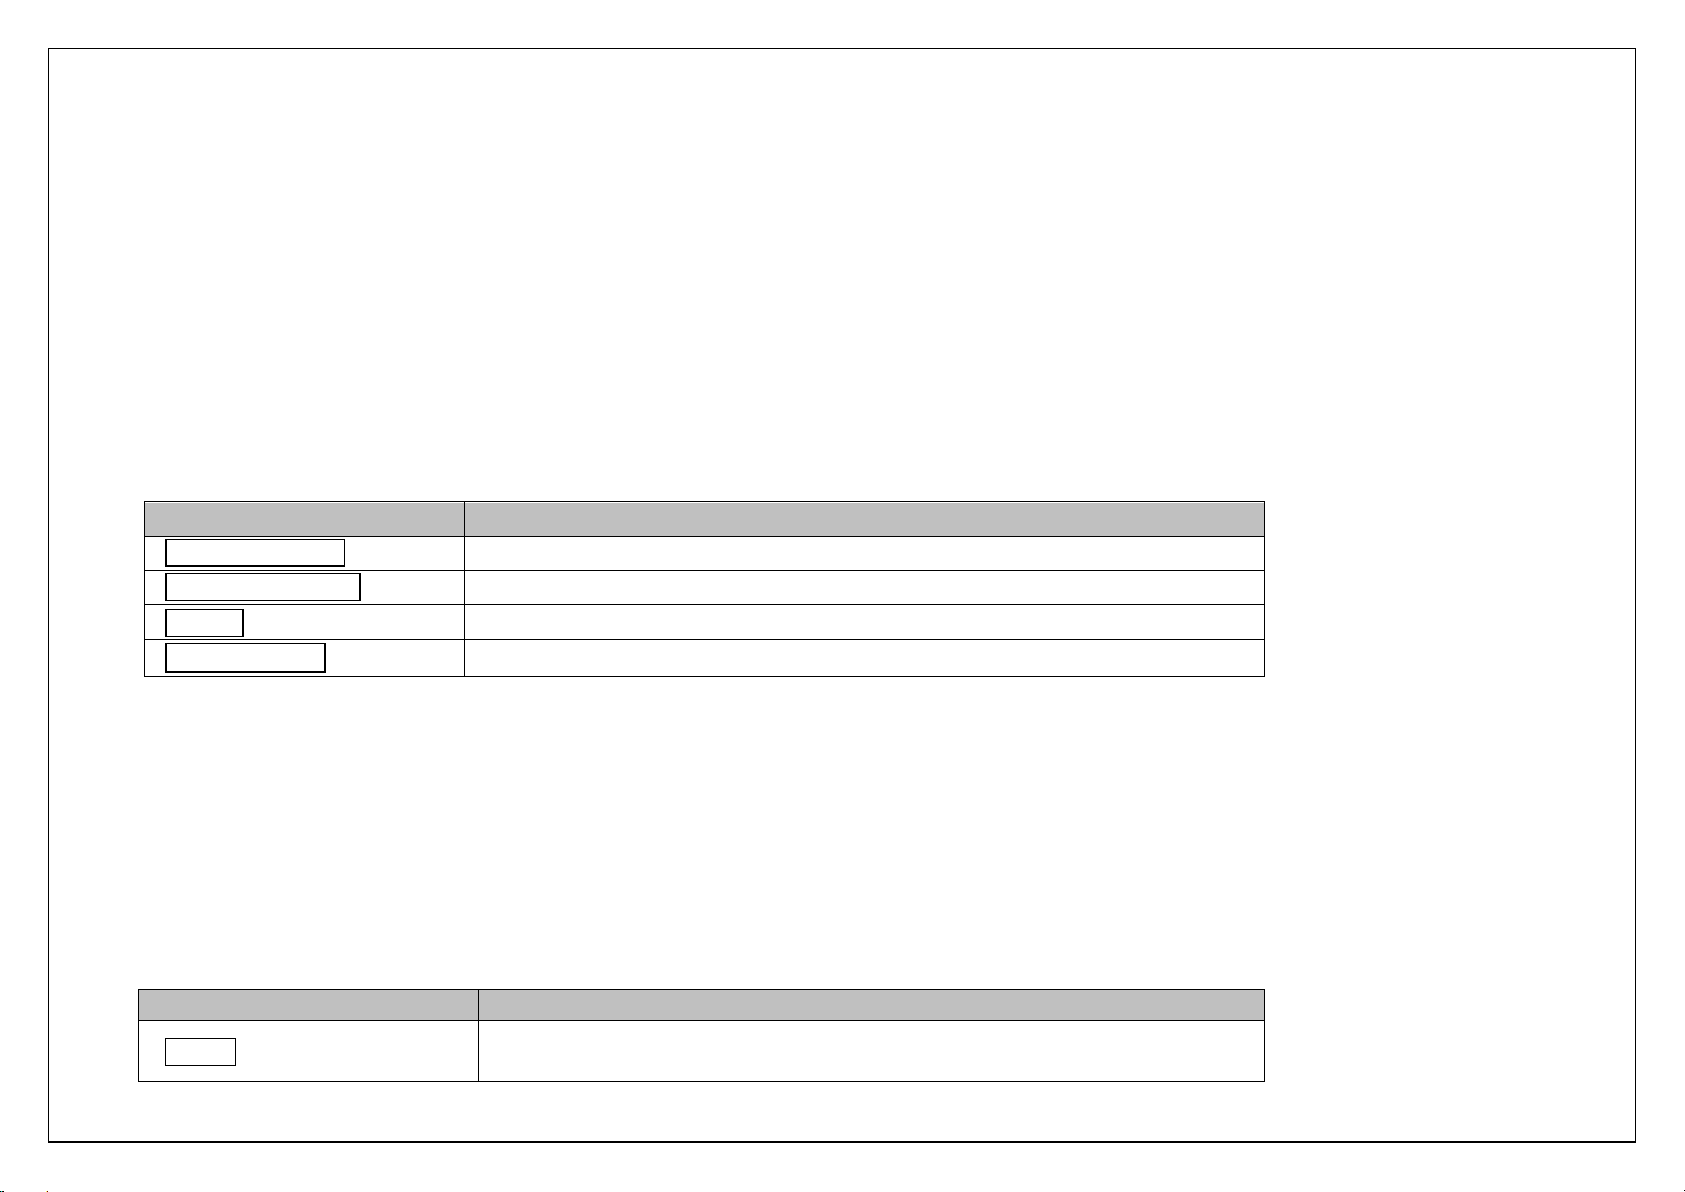
8.3. FM radio
You can listen the FM radio with this phone, and records the FM radio station which do you want recording.
Page 8
7
Auto search and save: Search and save the channels.
Key
Function
Left direction Key
Press to switch to a previous song with cursor. Press and hold: go backwards
Right direction Key
Press to switch to a next song with cursor. Press and hold: go forwards
OK Key
Press to play/pause the Audio.
Up 、Down key
Press to volume up and down.
Key
Function
Up key
Press to go backwards. Press and hold to continuously go
backwards.
Channel List: Play, edit or delete the saved channels.
Save: Save current playing frequency into channel list.
Manual search: Search the radio by manual.
Open speaker: Playing FM in loudspeaker mode. (It active when headset inserted only)
Background play: Return the standby interface and keep paying FM radio.
Scheduled Recording: Record the currently-hearing FM.
Record files List: View the recorded files list.
Storage: You can choose the storage location.
Help: You can get the operation guide in here.
8.4. Audio player
You can enjoy the music with this function. You can use the following keys during the play.
8.5. Video recorder
With this function you can record video for some interesting moments. For more information please read the Camera presentation.
In video recorder, your options include:
View video directory: Go to the video folder.
More options: You can modify the DC mode and Effect.
Settings: You can select different Size, Banding and others.
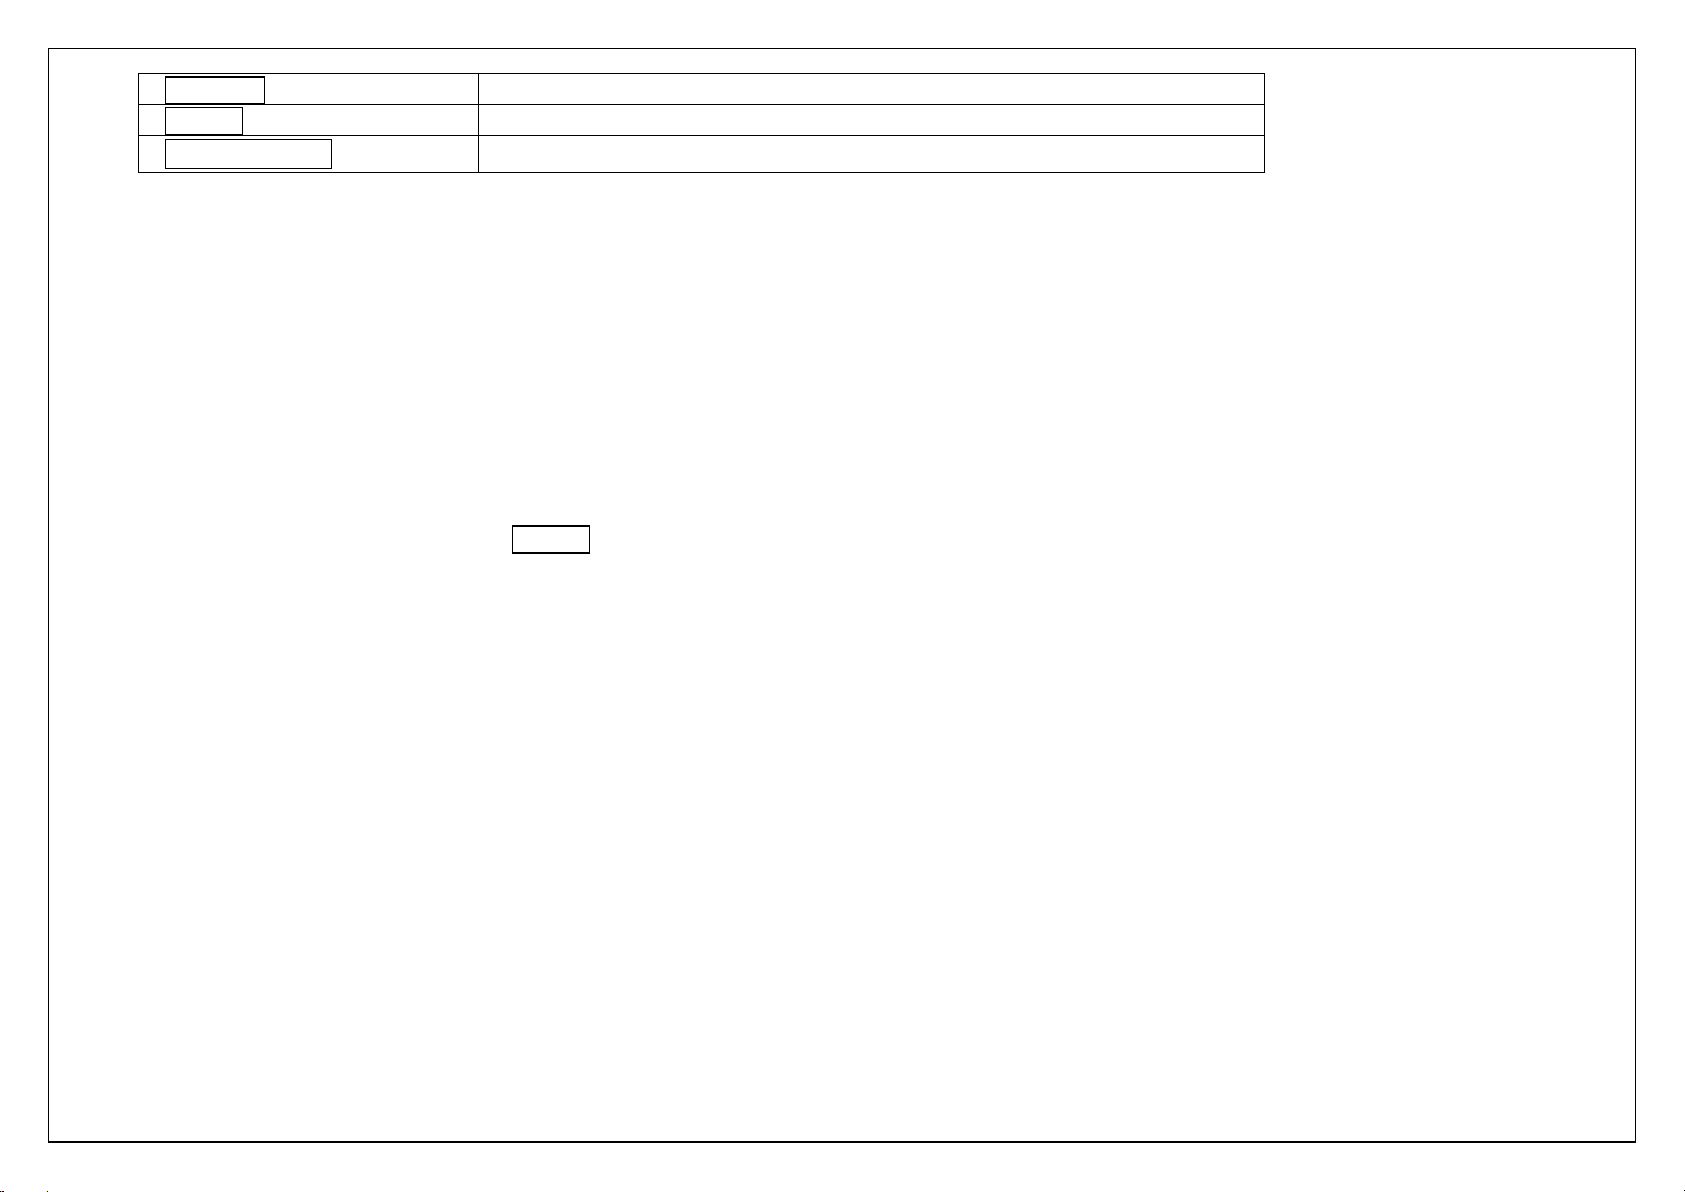
8.6. Video player
You can play the video with this function. You can use the following keys during the play.
Page 9
8
Down key
Press to go forwards. Press and hold to continuously go forwards.
OK Key
Press to play/pause the video.
Left 、Right key
Press to volume up and down.
8.7. Sound recorder
You can take a recorder in this function. After record, access Options:
Start recording: Select this option to record the sound.
Record file List: View the currently-selected sound files.
Storage: Change the file path for sound record file.
File format: You can choose the format for record file. AMR or WAV.
9. Camera
With this function, you can snap. Press OK Key to snap under the view-finding window. Enter Camera Option, Your options include:
Image viewer: Enter in the album folder.
More options: You can modify the DV mode and Effect.
Settings: You can select different Size, Quality, Banding and others.
10. Fun & Games
There are games that can be played.
All the functions of this menu will work only if GPRS is activated on your SIM card.
11. Organizer
11.1. STK
Only SIM Card support is required in this service.
11.2. BT
This phone has a special designs BT feature, which can allows automatic synchronization the Music, contact, message and call log by another phone.
BT: Open or close the BT
Page 10

9
BT visibility: Open or close the visibility.
Paired device: Show the device which is connected
Share folder settings: To set shared contents and authorities of FTP service.
Device name: Show off the device name.
BT file Storage: You can select Storage memory card.
Help: You can read some help information from it.
11.3. Calendar
The screen will highlight the date of today after displays the monthly calendar when you enter in the calendar function.
GPRS Service: enable/disable the GPRS network.
Add new schedule: Select Menu →Add new schedule→Write the schedule details →Select Store.
11.4. Calculator
Press OK Key to view the calculation results. Press the up, down, left, right and OK key to select +, -, *, /, = respectively. Press Clear to delete the
figure.
11.5. Alarm
You can set up that the alarm clock will ring at a specific time with this function.
11.6. Stopwatch
Select "Start" to start timing, select "Stop" to stop timing
Select "Start" to start timing, select "Count" calculation segmentation time
Select "Stop" to stop time, choose the "Reset" perform Reset
Select the "Reset" repeat timing
11.7. Auto call record
To turn on this feature, you can automatically record during a call.
11.8. Torch
Turn on or turn off the torch here.
Page 11

10
12. Settings
12.1. User Profiles
Enter in the function; display the profile mode list including: General, Silent, Meeting, Indoor, Outdoor, Earphone and BT.
Activate: Press OK key to activate the profile mode.
Settings: Customize the profile mode.
Rename: Change the profile mode’s name.
Ring settings: Select the ringtone for the SIM1/SIM2. You can also select the ringtone from T card.
Adjust volume:Set the volume for Caller Volume, Message Volume, Alarm & calendar ringtone, Call volume, Power ringtone.
Ring Type: Set the ring type such as Ringtone Silent, Vibrate, Ringtone and Vibrate or Ringtone then Vibrate.
Other alert rings: Select the key tone 、battery low alert 、power ringtone and dial tone.
Note1: After plugging in the headset, ringtone will output from the headset as well as the phone, when there is incoming call or message.
12.2. Phone settings
You can customize your favorite phone functions based on your interest with this function.
Date & Time: You can set time, date and format for your phone.
Language settings:Set the current system language.
Shortcut settings: You can set the navigation keys designated menu.
Auto power on/off:Phone can power on/off according to your preset time.
Restore factory settings: You can recover the phone into the initial settings with this function. The default password is: 1234.
12.3. Display settings
Power on/off display: Set the power-On or power-Off animations.
Wallpaper settings: Set an image as wallpaper.
Idle display settings: On, it will be displayed in the standby interface.
Contrast: Adjust the displaying contrast.
Backlight: Set the backlight time.
Keypad backlight time: Set the duration for keypad backlight.
Page 12

11
12.4. Security settings
The phone lock password, SIM card password and PIN2 support 4-8digit numbers, do not support other characters. The default password of the phone
when leaving the factory is 1234.The PUK /PUK2 are required to input if you want to unlock the SIM card. The PUK/PUK2 is provided by the network
operator.
PIN: open or close the PIN lock function. When PIN lock is launched, the PIN shall be input upon each power-on.
Modify PIN2: Input the correct PIN 2. Just can be change.( The SIM2 security setup is same to the SIM1 security setup.)
Phone locked: Open or close the phone lock function. When the phone lock is launched, the phone lock password shall be input upon each
power-on.
Modify the cellphone password: You can change the phone password.
Privacy: If you select these modules for Data security, you must input the correct password when you want to view these modules.
Auto keypad lock: Set to lock the keypad.
Lock screen by end-key: Activate, in the idle mode, you can use the power-key to lock the screen.
Fixed dialing: Add the numbers for fixed dialing.
Blacklist: You can check the black list number in here and set the feature whether need to act on calling or messaging. If you added the current
contact to blacklist you will be not received the call or messages from this number.
12.5. Call settings
Call divert: Divert an incoming call to a designated phone number under the presetting condition. This function can be launched or closed.
Call waiting: The network will inform you for a newly incoming call during the call. Please contact with your network operator to launch or close the
function because the function requires the network support.
Call barring: Set up the right of calling and answering. This function requires the network support. You can launch or close the function.
Hide ID: Default status is Display ID by network.
Others: The settings item include Call tome minute reminder, Auto redial, Vibration when connection, Reply SMS after reject and Auto record
voice call.
12.6. Dual SIM settings
Dual-SIM: You can set your phone network status, including Standby mode, Reply by original SIM, Set SIM name.
12.7. Network Settings
Network selection: choice the modes of searching the phone network, including Auto and Manual modes.
12.8. Restore Factory
Restore Factory: You can recover the phone settings into the initial settings with this function. The default password is: 1234.
Page 13

12
12.9. SOS settings
SOS number list: You can check the SOS number list number in here and set the feature whether need to act on calling or messaging. When you
turn on this feature, you will call the number in the list and send a text message.
SOS message settings: Edit the content of the message you want to send.
SOS settings: When you turn on this feature, you can choose to check between SOS setting and SOS Ring Alert.
Help: Help you know more about this function.
FCC Warning:
Any Changes or modifications not expressly approved by the party responsible for compliance could void the user’s authority to operate the equipment.
This device complies with part 15 of the FCC Rules. Operation is subject to the following two conditions: (1) This device may not cause harmful
interference, and (2) this device must accept any interference received, including interference that may cause undesired operation.
Note: This equipment has been tested and found to comply with the limits for a Class B digital device, pursuant to part 15 of the FCC Rules. These
limits are designed to provide reasonable protection against harmful interference in a residential installation. This equipment generates, uses and can
radiate radio frequency energy and, if not installed and used in accordance with the instructions, may cause harmful interference to radio
Communications However, there is no guarantee that interference will not occur in a particular installation. If this equipment does cause harmful
interference to radio or television reception, which can be determined by turning the equipment off and on, the user is encouraged to try to correct the
interference by one or more of the following measures:
—Reorient or relocate the receiving antenna.
—Increase the separation between the equipment and receiver.
—Connect the equipment into an outlet on a circuit different from that to which the receiver is connected.
—Consult the dealer or an experienced radio/TV technician for help.
Specific Absorption Rate (SAR) information:
SAR tests are conducted using standard operating positions accepted by the FCC with the phone transmitting at its highest certified power level in all
tested frequency bands. Before a new model phone is available for sale to the public, it must be tested and certified to the FCC that it does not exceed
the exposure limit established by the FCC, Tests for each phone are performed in positions and locations (e.g. at the ear and worn on the body)as
required by the FCC.
For body worn operation, this model phone has been tested and meets the FCC RF exposure guidelines when used with an accessory designated for
this product or when used with an accessory that contains no metal and that positions the handset a minimum of 0.5 cm from the body. Noncompliance
with the above restrictions may result in violation of RF exposure guidelines.
Page 14

13
Tabla de contenido
1. Seguridad .......................................................................................................................................................................................................................... 3
2. Los primeros pasos ......................................................................................................................................................................................................... 3
2.1.1. Instalación y desinstalación de la tarjeta SIM ........................................................................................................................................... 3
2.1.2. Cargando la batería ................................................................................................................................................................................... 4
2.2. Conexión a la red ..................................................................................................................................................................................................... 4
2.2.1. tarjeta SIM .................................................................................................................................................................................................. 4
2.2.2. Conexión a la red ....................................................................................................................................................................................... 4
3. Facebook .......................................................................................................................................................................................................................... 4
4. Guía telefónica ................................................................................................................................................................................................................. 5
5. Los registros de llamadas............................................................................................................................................................................................... 5
6. Mensajería ......................................................................................................................................................................................................................... 5
6.1. Escribe un mensaje ................................................................................................................................................................................................. 5
6.2. Bandeja de entrada / Bandeja de salida/ Borrador / Enviados ............................................................................................................................... 5
6.3. bandeja de entrada de seguridad ............................................................................................................................................................................ 6
6.4. Plantillas ................................................................................................................................................................................................................... 6
6.5. Mensaje de difusión ................................................................................................................................................................................................. 6
6.6. Servicio de correo de voz ........................................................................................................................................................................................ 6
6.7. ajustes de los mensajes .......................................................................................................................................................................................... 6
7. Internet .............................................................................................................................................................................................................................. 6
8. Multimedia ........................................................................................................................................................................................................................ 6
8.1.Administrador de archivos ........................................................................................................................................................................................ 6
8.2.Visor de imágenes .................................................................................................................................................................................................... 6
8.3.Radio FM .................................................................................................................................................................................................................. 6
8.4.Reproductor de música ............................................................................................................................................................................................ 7
8.5.Grabadora de vídeo .................................................................................................................................................................................................. 7
8.6.Reproductor de video ............................................................................................................................................................................................... 7
8.7.Grabador de sonido .................................................................................................................................................................................................. 8
9. cámara ............................................................................................................................................................................................................................... 8
10. Diversión y juegos ......................................................................................................................................................................................................... 8
11.Organizador ..................................................................................................................................................................................................................... 8
11.1.STK ......................................................................................................................................................................................................................... 8
11.2.BT ........................................................................................................................................................................................................................... 8
11.3.Calendario .............................................................................................................................................................................................................. 9
Page 15

14
11.4.Calculadora ............................................................................................................................................................................................................. 9
11.5.Alarma ..................................................................................................................................................................................................................... 9
11.6.Cronómetro ............................................................................................................................................................................................................. 9
11.7.registro de llamada automática .............................................................................................................................................................................. 9
11.8.Linterna ................................................................................................................................................................................................................... 9
14. Configuración ............................................................................................................................................................................................................... 10
12.1.Perfiles .................................................................................................................................................................................................................. 10
12.2.Teléfono .............................................................................................................................................................................................................. 10
12.3.Pantalla ................................................................................................................................................................................................................. 10
12.4.Seguridad ............................................................................................................................................................................................................. 11
12.5.Todos los ajustes .................................................................................................................................................................................................. 11
12.6.Ajsutes SIM ......................................................................................................................................................................................................... 11
12.7.Configuración de la red ........................................................................................................................................................................................ 11
12.8.Restauración de fábrica ........................................................................................................................................................................................ 11
12.9.Llamada de emergencia ....................................................................................................................................................................................... 12
Declaración del manual.
Gracias por elegir el teléfono móvil UNIKO. Por favor lea este manual antes de usar el telefono y conservelo para futuras referencias.
Nota:
Usar únicamente accesorios aprobados por el fabricante del teléfono para garantizar la seguridad. No cumplir con esta violará los términos y
condiciones de uso.
El contenido descrito en este manual debe ser seguido apropiadamente Nos reservamos el derecho de cambiar las funciones del teléfono sin
previo aviso.
Proteger su medio ambiente! Nos esforzamos para producir productos de acuerdo con las normas ambientales a nivel mundial. Consulte a las
autoridades locales para el reciclaje adecuado.
Page 16

15
Información general
13.Seguridad
Llamada de emergencia
En cualquier país, puede marcar el 911 (u otro número de llamada de emergencia) para obtener ayuda de emergencia.
Nota: Basado en la naturaleza de las redes celulares, el éxito de la llamada de emergencia no se puede garantizar.
Precauciones de seguridad
Antes de utilizar su teléfono, lea la siguiente información importante para eliminar o reducir cualquier posibilidad de causar daños y lesiones
personales.
No utilice los teléfonos inalámbricos mientras se conduce.
Apagar los dispositivos inalámbricos en los aviones.
No utilice los teléfonos móviles en las estaciones de servicio. No utilice cerca de combustible o productos químicos.
Siga las normativas existentes en los centros hospitalarios y de atención médica. Apague el teléfono.
Sólo personal de servicio especializado puede instalar o reparar este dispositivo.
Utilice únicamente accesorios y baterías aprobados.
.
Información de la batería
Carga y descarga de información
.
No cargue el teléfono en condiciones mojadas y húmedas.
Nos esforzamos para producir productos de acuerdo con las normas ambientales a nivel mundial.
Cuando el cargador no está en uso, desconéctelo de la fuente de alimentación. No deje la batería conectada a un cargador durante más de
12 horas, ya que la sobrecarga puede acortar su vida.
Consejos para la batería
No desmonte ni modifique la batería por sí mismo.
No provoque un cortocircuito en la batería.
No tire las pilas al fuego.
Si huele algo extraño en la batería o la batería se sobrecalienta, debe dejar de usarlo inmediatamente y póngase en contacto con el centro
de servicio autorizado en su región.
14.Empezando
14.1.1. Instalación y desinstalación de la tarjeta SIM
Apagar el teléfono; retirar la cubierta posterior, la batería y cargador. Montar la tarjeta SIM en la ranura para tarjetas SIM.
Page 17

16
14.1.2. Cargando la batería
Enchufe el cargador en el zócalo de la parte lateral del teléfono. Conectar el cargador a una toma de corriente AC. El parpadeo de el icono de nivel de
batería indica que la batería está siendo cargado, Cuando se detenga el parpadeo, eso indica el carga a terminado
Durante la carga, el teléfono y el cargador se siente caliente al tacto. Esto es normal.
Advertencia:
Utilice sólo cargadores aprobados por el fabricante del teléfono para garantizar la seguridad. No cumplir con esta violará los términos y
condiciones de uso.
14.2. Conexión a la red
14.2.1. Tarjeta SIM
Por favor, inserte la tarjeta disponible Subscriber Identity Module (SIM) en el teléfono, Toda la información relacionada con la conexión de red es
registra en la Tarjeta SIM, por lo que son la información de contacto tal como nombres, número de teléfonos y SMS que se establece a almacenar en
el SIM. Usted puede sacar la tarjeta SIM del teléfono e insertarlo en otra GSM teléfono para usarlo. Nuevos teléfonos reconocerán la tarjeta SIM de
forma automática.
14.2.2. Conexión a la red
El teléfono buscará automáticamente la red registrada u otra red disponible local. Una vez conectado, el nombre del operador de red aparecerá en la
parte superior de la pantalla.
Su teléfono está en modo de espera, listo para hacer y recibir llamadas.
Menú principal
15. Facebook
Facebook: Navegar por la página de inicio de Facebook.
Todas las funciones de este menú sólo funcionarán si GPRS está activado en su tarjeta SIM.
Page 18

17
16. Directorio telefónico
Puede guardar un número de teléfono en la memoria de las tarjetas SIM o teléfono. Seleccione un contacto en la ventana de la lista de contactos y
presione tecla izquierda:
Nuevo: Crear un nuevo contacto en el interior de la agenda.
SMS: Introducir directamente el SMS y lo envía al número de teléfono registrado.
Llamada: Llamar al contacto actual.
Borrar: Eliminar el contacto actual.
Eliminar múltiples: Eliminar todos los contactos marcados en un momento dado.
Eliminar todos: Eliminar todos los contactos.
Eliminar el teléfono: Eliminar todos los contactos almacenados en el teléfono.
Eliminar SIM1: Eliminar todos los contactos almacenados en la tarjeta SIM1.
Eliminar SIM2: Eliminar todos los contactos almacenados en SIM2.
Copiar / Mover: Mover o copiar contactos.
Importación y exportación: Exportar los contactos de la tarjeta SIM y la memoria del teléfono / importar la copia de seguridad desde la tarjeta de
memoria.
Enviar vCard: Enviar una vCard a través de SMS o BT.
Otros:Puede configurar el número de marcación rápida y compruebe el número, números de servicio y la memoria de estado propio.
17. Registros de llamadas
Con esta función, puede ver la información de las llamadas perdidas, Llamadas realizadas, Llamadas recibidas, Llamadas rechazadas,
Temporizadores, Contador GPRS y también se puede limpiar todos estos registros a través de los registros de llamadas de eliminación.
18. Mensajería
Puede enviar y recibir SMS, así como el uso de la célula visualización de ubicación con esta función.
18.1. Escribe un mensaje
Insertar texto, número de teléfono y otros.
Enviar: Introduzca el número de los contactos y enviar SMS a este número.
18.2. Bandeja de entrada /Bandeja de salida/ Borrador / Enviados
Esta función se utiliza para comprobar mensajes en la bandeja / Bandeja de salida / Borrador / Enviados.
Page 19

18
18.3. Bandeja de entrada de seguridad
Se puede crear un mensaje de seguridad dentro de esta carpeta, el usuario para abrirlo, debe necesitar la contraseña, la contraseña predeterminada
es “1234”
18.4. Plantillas
Algunas plantillas de mensajes dados dentro de este menú.
18.5. Mensajes de diffusion.
Busque los mensajes de difusión.
18.6. Servicio de correo de voz
Usted puede transferir la llamada entrante que no se consigue responder debidamente a su servidor de correo de voz, donde la persona que llama
puede dejar el mensaje.
18.7. Ajustes de los mensajes
Puede modificar la configuración de SMS, mensajes de inserción, y comprobar la capacidad del mensaje.
19. Internet
Navegador de Internet: Todas las funciones de este menú sólo funcionarán si GPRS está activado en su tarjeta SIM.
Opción: Puede entrar en la página de inicio y modificar la configuración predeterminada, como la configuración de la cuenta.
20.Multimedia
20.1. Administrador de archivos
El administrador de archivos se enumeran los todos los archivos almacenados en la tarjeta de memoria.
20.2. Visor de imágenes
Puede ver las fotos se quebró con la cámara a través de esta función.
Page 20

19
20.3. Radio FM
Tecla
Función
TECLA IZQUIERDA
Pulse para cambiar a una canción anterior con el cursor. Pulsar prolongadamente:
ir hacia atrás
TECLA DERECHA
Pulse para cambiar a la siguiente canción con el cursor. Pulsar prolongadamente:
ir hacia delante
Tecla OK
Pulse para reproducir / pausar el audio.
Arriba, Abajo
pulse para volumen hacia arriba y hacia abajo.
Puede escuchar la radio FM con este teléfono, y registra la estación de radio de FM, que es lo que quieres grabar.
Búsqueda automática y guardar: Buscar y salvar a los canales.
Emisoras: editar o borrar los canales guardados.
Salvar: Guardar la frecuencia de juego actual en la lista de canales.
Búsqueda manual: Buscar la radio por el manual.
altavoz abierto: Reproducción de FM en el modo de altavoz. (Se activa cuando el auricular inserta solamente)
juego del fondo: Devolver la interfaz de espera y seguir pagando la radio FM.
programar Grabar: Grabe la emisora que se está escuchando.
archivos de registro: Ver la lista de archivos grabados.
Almacenamiento: Se puede elegir la ubicación de almacenamiento.
Ayuda: Usted puede obtener la guía de operación aquí.
20.4. Reproductor de música
Usted puede disfrutar de la música con esta función. Puede utilizar las siguientes teclas durante el juego.
20.5. Grabadora de vídeo
Con esta función, puede grabar vídeo durante algunos momentos interesantes. Para obtener más información, puede leer la presentación de la
cámara.
Grabador de vídeo, las opciones incluyen:
Ver directorio de video: Ir a la carpeta de vídeo.
Mas opciones: Puede modificar el modo DC y efecto.
ajustes: Puede seleccionar diferentes tamaños, bandas y otros.
Page 21

20
20.6. Reproductor de video
Tecla
Función
arriba
Pulse para ir hacia atrás. Mantenga pulsada la tecla para ir continuamente hacia
atrás.
abajo
Pulse para ir hacia delante. Mantenga pulsada la tecla para ir hacia delante de
forma continua.
Tecla OK
Pulse para reproducir / pausar el video.
Tecla izquierda, derecha
pulse para volumen hacia arriba y hacia abajo.
Puede reproducir el video con esta función. Puede utilizar las siguientes teclas durante el juego.
20.7. Grabador de sonido
Usted puede tomar una grabadora en esta función. Después de registro, las opciones de acceso:
Empezar a grabar: Seleccione esta opción para grabar el sonido.
Grabar lista de archivos: Ver los archivos de sonido seleccionados en ese momento.
Almacenamiento: Cambiar la ruta del archivo para el archivo de registro de sonido.
Formato de archivo:Se puede elegir el formato de archivo de registro. AMR o WAV.
21. Cámara
Con esta función, puede romperse. presiona OK Tecla para romper bajo la ventana de la vista de los hechos. Introduzca opción de cámara, Sus
opciones incluyen:
Visor de imágenes: Entrar en la carpeta del álbum.
Mas opciones: Puede modificar el modo de DV y efecto.
ajustes: Puede seleccionar diferentes tamaño, la calidad de las bandas y otros.
22. Juegos & divercion
Hay juegos que se pueden jugar.
Todas las funciones de este menú sólo funcionarán si GPRS está activado en su tarjeta SIM.
23. Organizador
Page 22

21
23.1. STK
Sólo se requiere el apoyo tarjeta SIM en este servicio.
23.2. BT
Este teléfono tiene una función BT especial, que puede permite la sincronización automática de la música, contactos, mensajes y Registro de llamadas,
otro teléfono.
BT: Abrir o cerrar el BT
BT visible: Abrir o cerrar la visibilidad.
Emparejado dispositivo: Mostrar el dispositivo que está conectado
Configuración de la carpeta Compartir: Para establecer los contenidos compartidos y las autoridades del servicio FTP.
Dispositivo nombre: Mostrar el nombre del dispositivo.
Archivo de almacenamiento: Se puede seleccionar la tarjeta de memoria de almacenamiento.
Ayuda: Usted puede leer alguna información de ayuda de ella.
23.3. Calendario
Hará hincapié en la pantalla de la fecha de hoy, después muestra el calendario mensual cuando se entra en la función de calendario.
Servicio GPRS: activar / desactivar la red GPRS.
Añadir horario : Seleccione Menú → Agregar nuevo horario → Escriba los detalles de la programación → Seleccionar tienda.
23.4. Calculadora
Pulse Tecla OKpara ver los resultados del cálculo. Presione el arriba, abajo, izquierda, derecha y la tecla OK para seleccionar +, -, *, /, =,
respectivamente. Pulse Borrar para eliminar la cifra.
23.5. Alarma
Puede establecer que el reloj de alarma sonará en un momento específico con esta función.
23.6. Cronómetro
Seleccione "Inicio" para iniciar la sincronización, seleccione "Stop" para detener el cronometraje
Seleccione "Inicio" para iniciar la sincronización, seleccione "Contar" tiempo de cálculo de la segmentación
Seleccione "Stop" para detener el tiempo, elegir la opción "Reset" realice una Reposición
Seleccione la opción "Reset" tiempo de repetición
Page 23

22
23.7. Registro de llamada automática
Para activar esta función, puede grabar automáticamente durante una llamada.
23.8. Linterna
Encender o apagar la antorcha aquí.
24. Ajustes
24.1. Perfiles
Introducir en la función; mostrar la lista de modos incluyendo el perfil: General, Silencio, Reunión, cubierta, Al aire libre, auriculares, BT.
Activar: Pulse la tecla OK para activar el modo de perfil.
Ajustes: Personalizar el modo de perfil.
Renombrar: Cambiar el modo de perfil'
Configuración de tono: Seleccione el tono de timbre para el SIM1 / SIM2. También puede seleccionar el tono de la tarjeta T.
Ajusta el volumen: Ajustar el volumen de llamada volumen, Mensaje Volumen, Alarma y calendario de tono, el volumen de llamada.
Tipo de Tono: Ajuste el tipo de tono tal como: Tono de timbre, Vibrar, Tono y vibrar o tono de timbre y vibración.
Otros tonos de alerta: Selecciona el tono de tecla, batería baja de alerta, tono de llamada de potencia y tono de marcado.
Nota 1: Después de conectar los auriculares, salida de tono de la voluntad de los auriculares, así como el teléfono, cuando hay una llamada entrante o
un mensaje.
24.2. Ajustes
Puede personalizar sus funciones favoritas del teléfono basado en su interés con esta función.
Fecha y hora: Puede configurar la hora, fecha y formato para su teléfono.
Ajustes de idioma: Establecer el idioma del sistema actual.
Configuración de acceso directo: Se puede establecer el navegación llaves Menú designado.
Encendido Automático :Teléfono puede encender / apagar de acuerdo a su tiempo preestablecido.
Restaurar la configuración de fábrica:Puede recuperar el teléfono en los ajustes iniciales con esta función. La contraseña por defecto es: 1234.
Page 24

23
24.3. Pantalla
Encendido / apagado de la pantalla: Ajuste el animaciones de apagado y encendido .
programación de fondo: Establecer una imagen como fondo de pantalla.
configuración de la pantalla de inactividad: Activada, se mostrará en la interfaz de espera.
Contraste: Ajustar el contraste de visualización.
Iluminar desde el fondo: Ajuste el tiempo de luz de fondo.
Teclado tiempo de retroiluminación: Establecer la duración de iluminación del teclado.
24.4. Seguridad
La contraseña de bloqueo del teléfono, contraseña de la tarjeta SIM y PIN2 admiten números 4-8digit, no son compatibles con otros personajes. La
contraseña por defecto del teléfono al salir de la fábrica es 1234.The PUK / PUK2 son necesarios para la entrada si desea desbloquear la tarjeta SIM.
El código PUK / PUK2 es proporcionada por el operador de red.
PIN: abrir o cerrar la función de bloqueo de PIN. Cuando se inicia el bloqueo del PIN, el PIN será de entrada sobre cada uno de encendido.
Modificar PIN2: Introducir el PIN correcto 2. Sólo se puede cambiar. (La configuración de seguridad SIM2 es igual a la configuración de seguridad
SIM1).
Teléfono bloqueado: Abrir o cerrar la función de bloqueo del teléfono. Cuando se inicia el bloqueo del teléfono, la contraseña de bloqueo del
teléfono será de entrada sobre cada uno de encendido.
Modificar la contraseña del teléfono móvil: Puede cambiar la contraseña del teléfono.
Intimidad: Si selecciona estos módulos de seguridad de los datos, debe introducir la contraseña correcta cuando se quiere ver estos módulos.
Auto bloqueo del teclado: Ajuste para bloquear el teclado.
pantalla de bloqueo por tecla encendido: Activar, en el modo de reposo, puede utilizar la tecla de encendido para bloquear la pantalla.
Marcación fija: Añadir los números de marcación fija.
Lista negra: Puede comprobar el número de lista de negro aquí y establecer la función de si necesidad de actuar en llamar o mensajes. Si ha
añadido el contacto actual a la lista negra no se le recibió la llamada o mensajes de este número.
24.5. Todos los ajustes
Desvío de llamadas: Desviar las llamadas entrantes a un número de teléfono designado bajo la condición de ajuste previo. Esta función puede
ser lanzado o se cierra.
Llamada en espera: La red le informará de una llamada entrante recién durante la llamada. Por favor, póngase en contacto con su operador de
red para iniciar o cerrar la función debido a que la función requiere el soporte de la red.
Bloqueo de llamadas: Establecer el derecho de llamada y de respuesta. Esta función requiere el apoyo de la red. Puede iniciar o cerrar la
función.
Ocultar ID: estado por defecto es exhibición de la identificación de red.
Page 25

24
Otros: opciones de artículos que incluye Llamar tomo recordatorio minutos, rellamada automática, la vibración cuando la conexión, Responder
SMS después de rechazar la llamada de voz y grabación automática.
24.6. Ajustes de SIM
Doble SIM: Puede configurar su estado de la red telefónica, incluyendo el modo de espera, Respuesta de SIM original, nombre Set SIM.
24.7. Configuración de la red
Seleccion de red: la elección de los modos de búsqueda de la red de telefonía, incluyendo los modos manual y automático.
24.8. Restauración de fábrica
Restauración de fábrica: Puede recuperar los ajustes del teléfono a los ajustes iniciales con esta función. La contraseña por defecto es: 1234.
24.9. Llamada de emergencia
Lista de números SOS: Puede comprobar el número de lista de números de SOS en aquí y establecer la función de si necesidad de actuar en
llamar o mensajes. Cuando se activa esta función, se le llama al número en la lista y enviar un mensaje de texto.
Ajustes de mensajes de SOS: Editar el contenido del mensaje que desea enviar.
SOS ajustes: Cuando se activa esta función, se puede elegir para comprobar entre el ajuste de SOS.
Ayuda: Ayudará a saber más acerca de esta función.
Advertencia de la FCC:
Cualquier cambio o modificación no aprobados expresamente por la parte responsable del cumplimiento podrían anular la autoridad del usuario para
operar el equipo.
Este dispositivo cumple con la parte 15 de las normas de la FCC. El funcionamiento está sujeto a las dos condiciones siguientes: (1) Este dispositivo
no puede causar interferencias perjudiciales, y (2) este dispositivo debe aceptar cualquier interferencia recibida, incluyendo la interferencia que pueda
provocar un funcionamiento no deseado.
Nota: Este equipo ha sido probado y cumple con los límites para un dispositivo digital de Clase B, según la parte 15 de las normas de la FCC. Estos
límites están diseñados para proporcionar una protección razonable frente a interferencias perjudiciales en una instalación residencial. Este equipo
genera, utiliza y puede irradiar energía de radiofrecuencia y, si no se instala y utiliza de acuerdo con las instrucciones, puede causar interferencia
dañina a la radio
Comunicaciones Sin embargo, no hay garantía de que no se produzcan interferencias en una instalación particular. Si este equipo causa interferencias
perjudiciales en la recepción de radio o televisión, lo cual puede determinarse apagándolo y encendiéndolo, se recomienda al usuario que intente
Page 26

25
corregir la interferencia mediante una o más de las siguientes medidas:
-Reorientar o reubicar la antena receptora.
-Aumente la separación entre el equipo y el receptor.
-Conecte el equipo a una toma de corriente de un circuito distinto de aquel al que está conectado el receptor.
Consulte al vendedor o un técnico de radio / TV para obtener ayuda.
Tasa de absorción específica (SAR):
Las pruebas de SAR se realizan en posiciones de funcionamiento estándar aceptadas por la FCC con el teléfono transmitiendo a su nivel de potencia
certificado en todas las bandas de frecuencia probadas. Antes de que un nuevo modelo de teléfono está disponible para la venta al público, debe ser
probado y certificado ante la FCC que no excede el límite de exposición establecido por la FCC, pruebas para cada teléfono se realizan en posiciones
y ubicaciones (por ejemplo, en el oído y usado en el cuerpo) indicados por la FCC.
Para usarlo en el cuerpo, este modelo de teléfono ha sido probado y cumple con las pautas de exposición a RF de la FCC cuando se utiliza con un
accesorio designado para este producto o cuando se utiliza con un accesorio que no contiene metal y que posiciona el dispositivo a una distancia
mínima de 0.5 cm del cuerpo . El incumplimiento de las restricciones anteriores puede resultar en violación de las normas de exposición RF.
Page 27

 Loading...