

Page 1
18421 Bothell-Everett Hwy.
Suite 150
Mill Creek, WA 98012-6825
Phone: (866) 614-4022 or (425) 368-0444
Fax: (425) 368-0555
E-mail: [email protected]
Web: www.amgmicro.com
Digital Inverted Microscope
The Microscope Evolved.
Quick Start Guide
Page 2
2
QUICK START GUIDE Advanced Microscopy Group
Contents EVOS
CONTENTS
PLAIN STAGE .....................................................................................................................................3
MECHANICAL STAGE
....................................................................................................................4
QUICK START
.................................................................................................................................5–6
SOFTWARE & DRIVER INSTALLATION
...................................................................................7
CUSTOMER SUPPORT/CONTACT INFORMATION
...........................................................8
Statement of Limited Product Warranty: EVOS™ microscopes are warranted to be free of all defects in material and
workmanship for a period of 60 months (5 years) from the date of delivery. The warranty does not apply to any instrument which
has become worn, defective, damaged or broken due to abuse, misuse, tampering, or unauthorized repairs. Under this warranty,
Advanced Microscopy Group will repair or replace, without charge to the purchaser, any part which upon our examination, appears
to be defective in materials or workmanship. Returned Goods Policy for Repair or Replacement Parts: To return goods for repair or
replacement, please contact Advanced Microscopy Group Customer Service.
diScLaimer: Information provided by Advanced Microscopy Group, Inc. is believed to be accurate and reliable. However, no
responsibility is assumed by Advanced Microscopy Group for its use. The information contained in this publication is subject to
change without notice. Words that Advanced Microscopy Group considers trademarks have been identied as such. However, neither
the presence nor absence of such identication aects the legal status of any trademark. Units of measurement in this document
conform to SI standards and practices. All rights reserved. No part of this publication may be reproduced, stored in a retrieval
system, or transmitted in any form, be it electronically, mechanically, or by any other means such as photocopying, recording, or
otherwise, without the prior written permission of Advanced Microscopy Group, Inc.
Page 3
3
QUICK START GUIDE Advanced Microscopy Group
EVOS
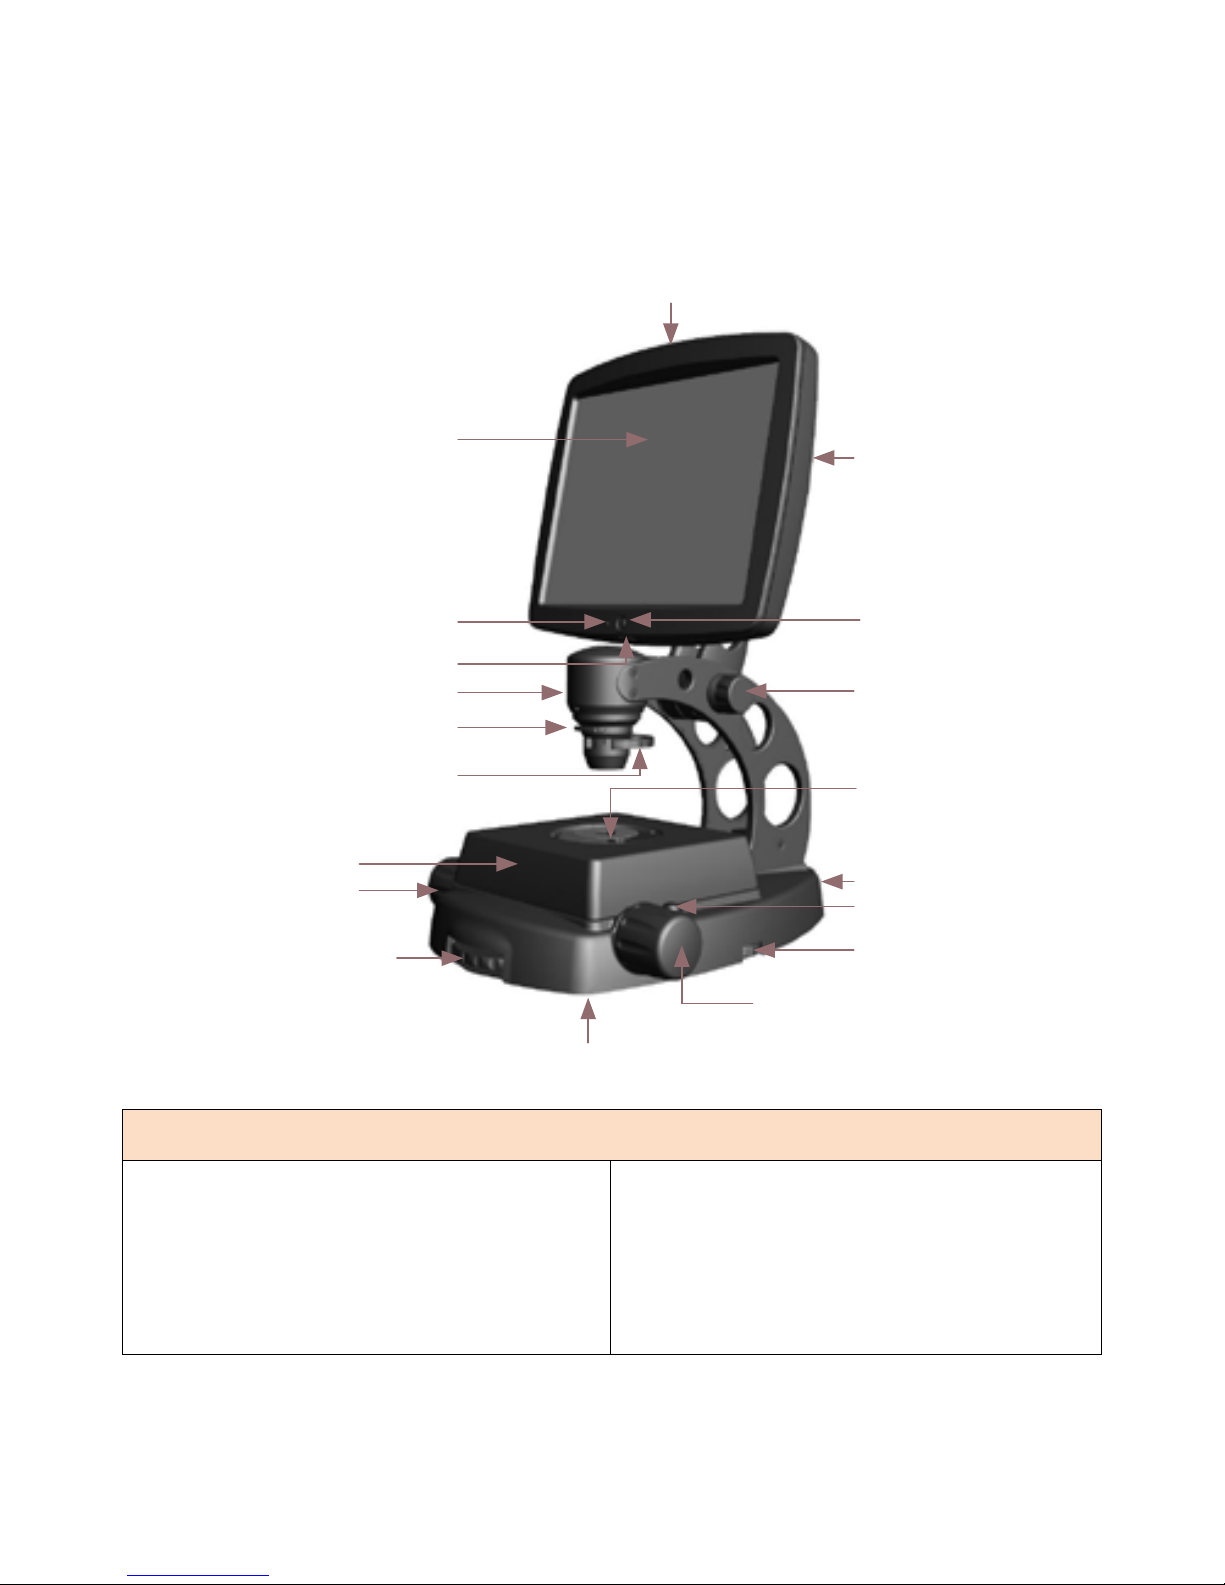
PLAIN STAGE
LCD Display
Plain Stage
Focus Control
LED Lamp House
Objective Select Wheel
Condenser Assembly
Phase Annuli Select Wheel
LCD Positioning Knob
USB Connect Port
Power Switch
Adjustable Rubber Feet (4)
Secure Digital (SD™) Card Slot
Dimmer Control
LCD Control
Power ON Indicator
Focus Control
Objectives
Image Capture Button
LCD Settings Button
ITEMS CHECKLIST
Microscope with LCD Display X
Objectives (installed, if included) X
3 Filter Slider Assemblies (Pinhole lter, X
Diuser lter, Green lter)
Power Adapter/Transformer/Power Cord
X
USB Cable X
Quick Start Guide X
CD Including: X
Micron(EVOS) Software•
Micron(EVOS) User Guide (PDF)•
EVOS User Guide (PDF)•
Note: Install software
before connecting USB.
Page 4
4
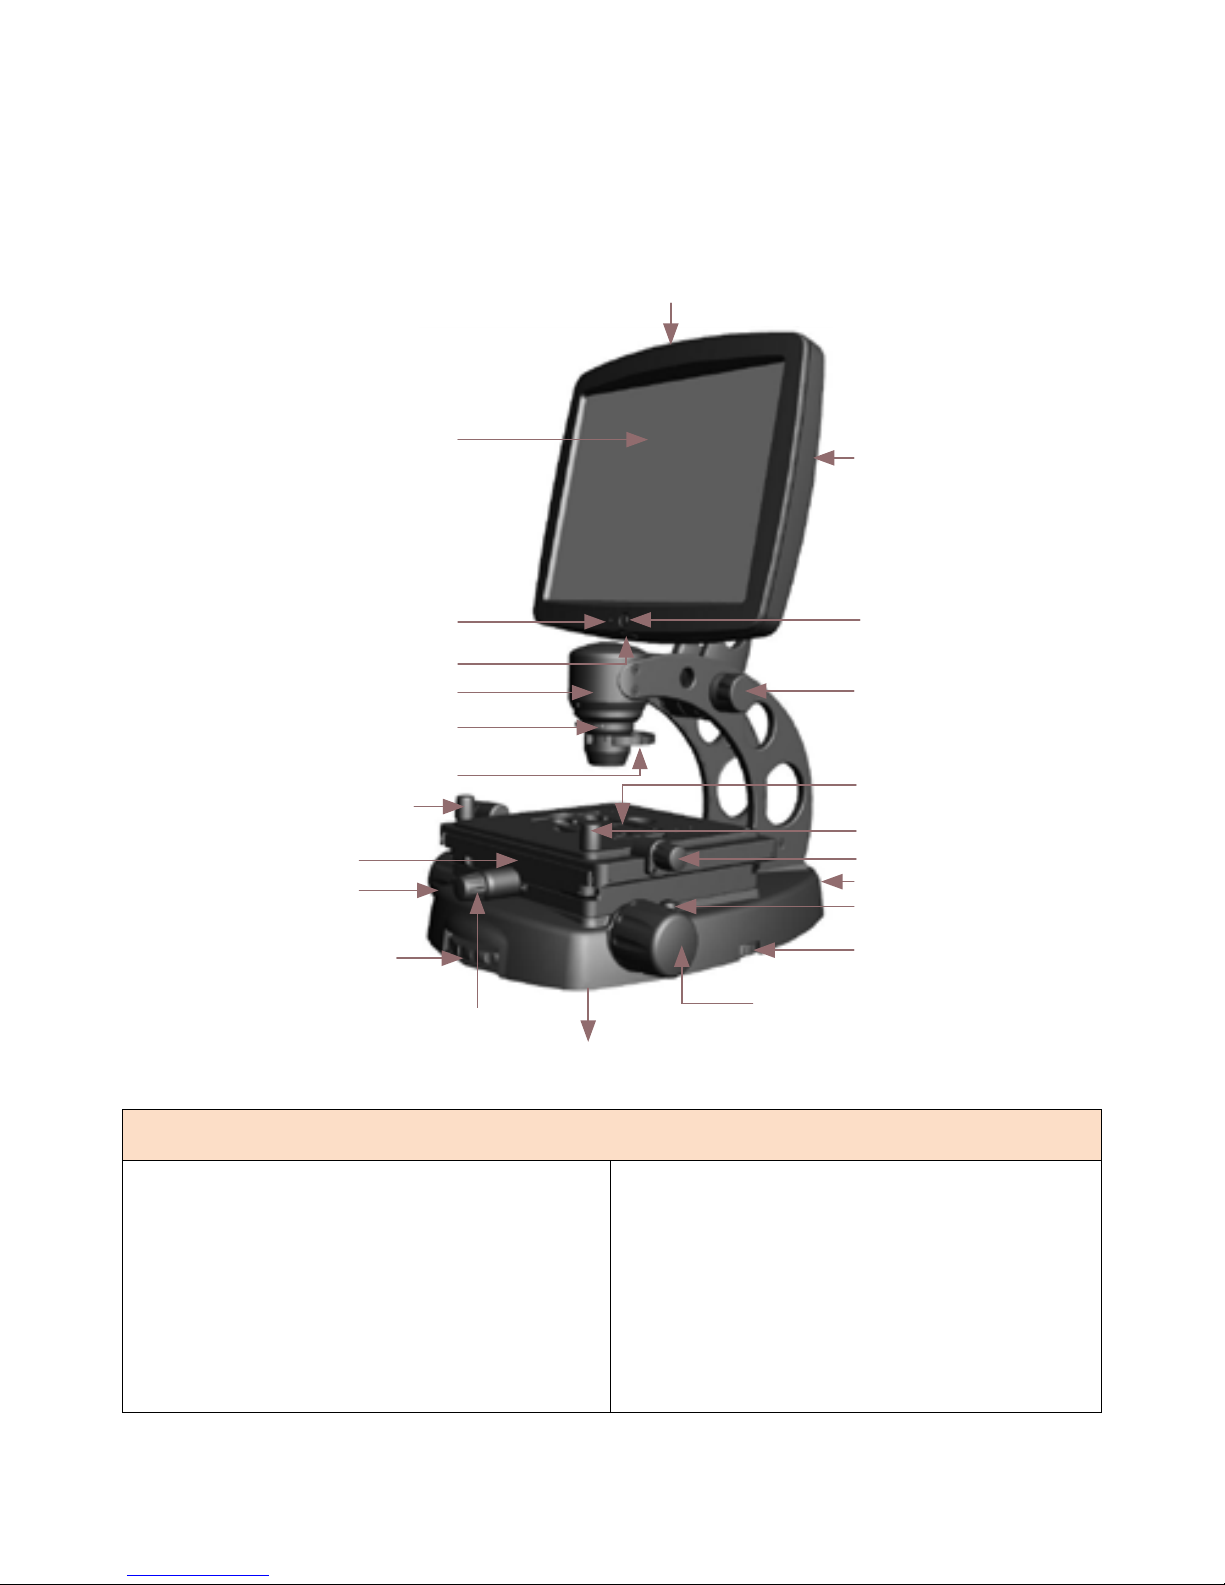
MECHANICAL STAGE
LCD Display
Mechanical Stage
Focus Control
LED Lamp House
Objective Select Wheel
Condenser Assembly
Phase Annuli Select Wheel
Fine Positioning Control
LCD Positioning Knob
USB Connect Port
Power Switch
Adjustable Rubber Feet (4)
Secure Digital (SD™) Card Slot
Dimmer Control
LCD Control
Power ON Indicator
Coarse Positioning Knob
Focus Control
Coarse Positioning Knob
Objectives
Image Capture Button
Fine Positioning Control
LCD Settings Button
ITEMS CHECKLIST
Microscope with LCD Display X
Objectives (installed, if included) X
3 Filter Slider Assemblies (Pinhole lter, X
Diuser lter, Green lter)
CD Including:
X
Micron(EVOS) Software•
Micron(EVOS) User Guide (PDF)•
EVOS User Guide (PDF)•
USB Cable X
Power Adapter/Transformer/Power Cord X
Multi-well Tray Stage Plate (installed) X
2 Coarse Positioning Knobs X
Hex Tool X
Stage Lock Pin X
Quick Start Guide X
QUICK START GUIDE Advanced Microscopy Group
EVOS
Note: Install software
before connecting USB.
Page 5
5
QUICK START GUIDE Advanced Microscopy Group
Quick Start EVOS
QUICK START
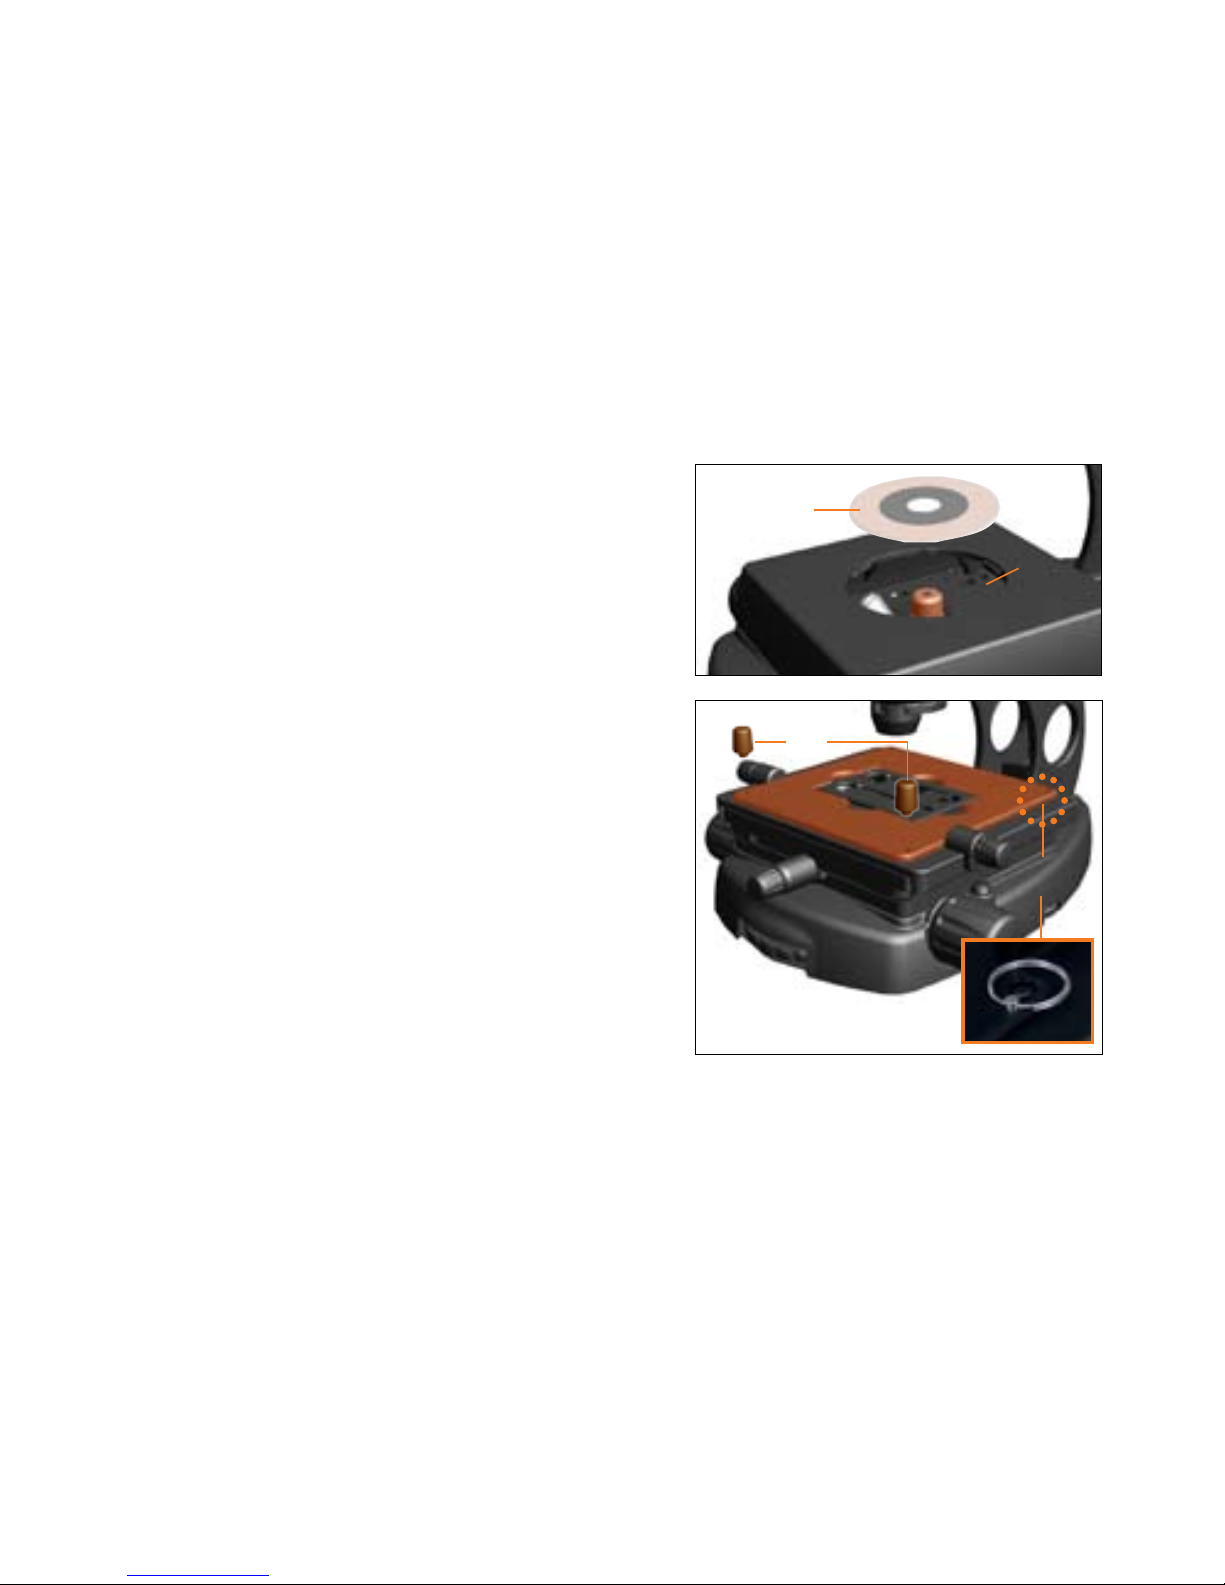
Place the microscope on a at level surface. 1.
Use the 4 adjustable rubber feet on the bottom of the base to adjust for uneven surfaces.
Prepare the stage assembly. 2.
Connect the power cord to the 3.
microscope, plug into a power
socket and turn power ON.
For PLAIN STAGE microscopes
Install thea. circular stage plate into
the round opening in the stage
.
For MECHANICAL STAGE microscopes,
follow the procedures below before use.
Screw in the 2 a. coarse positioning
knobs or the vessel holder
into the
front right and left-hand corners of
the stage assembly.
Remove the
b. stage lock pin
on the
back right-hand corner.
Place the specimen on the stage.4.
Select desired objective by turning 5.
the objective select wheel.
Page 6
6
QUICK START GUIDE Advanced Microscopy Group
Quick Start EVOS
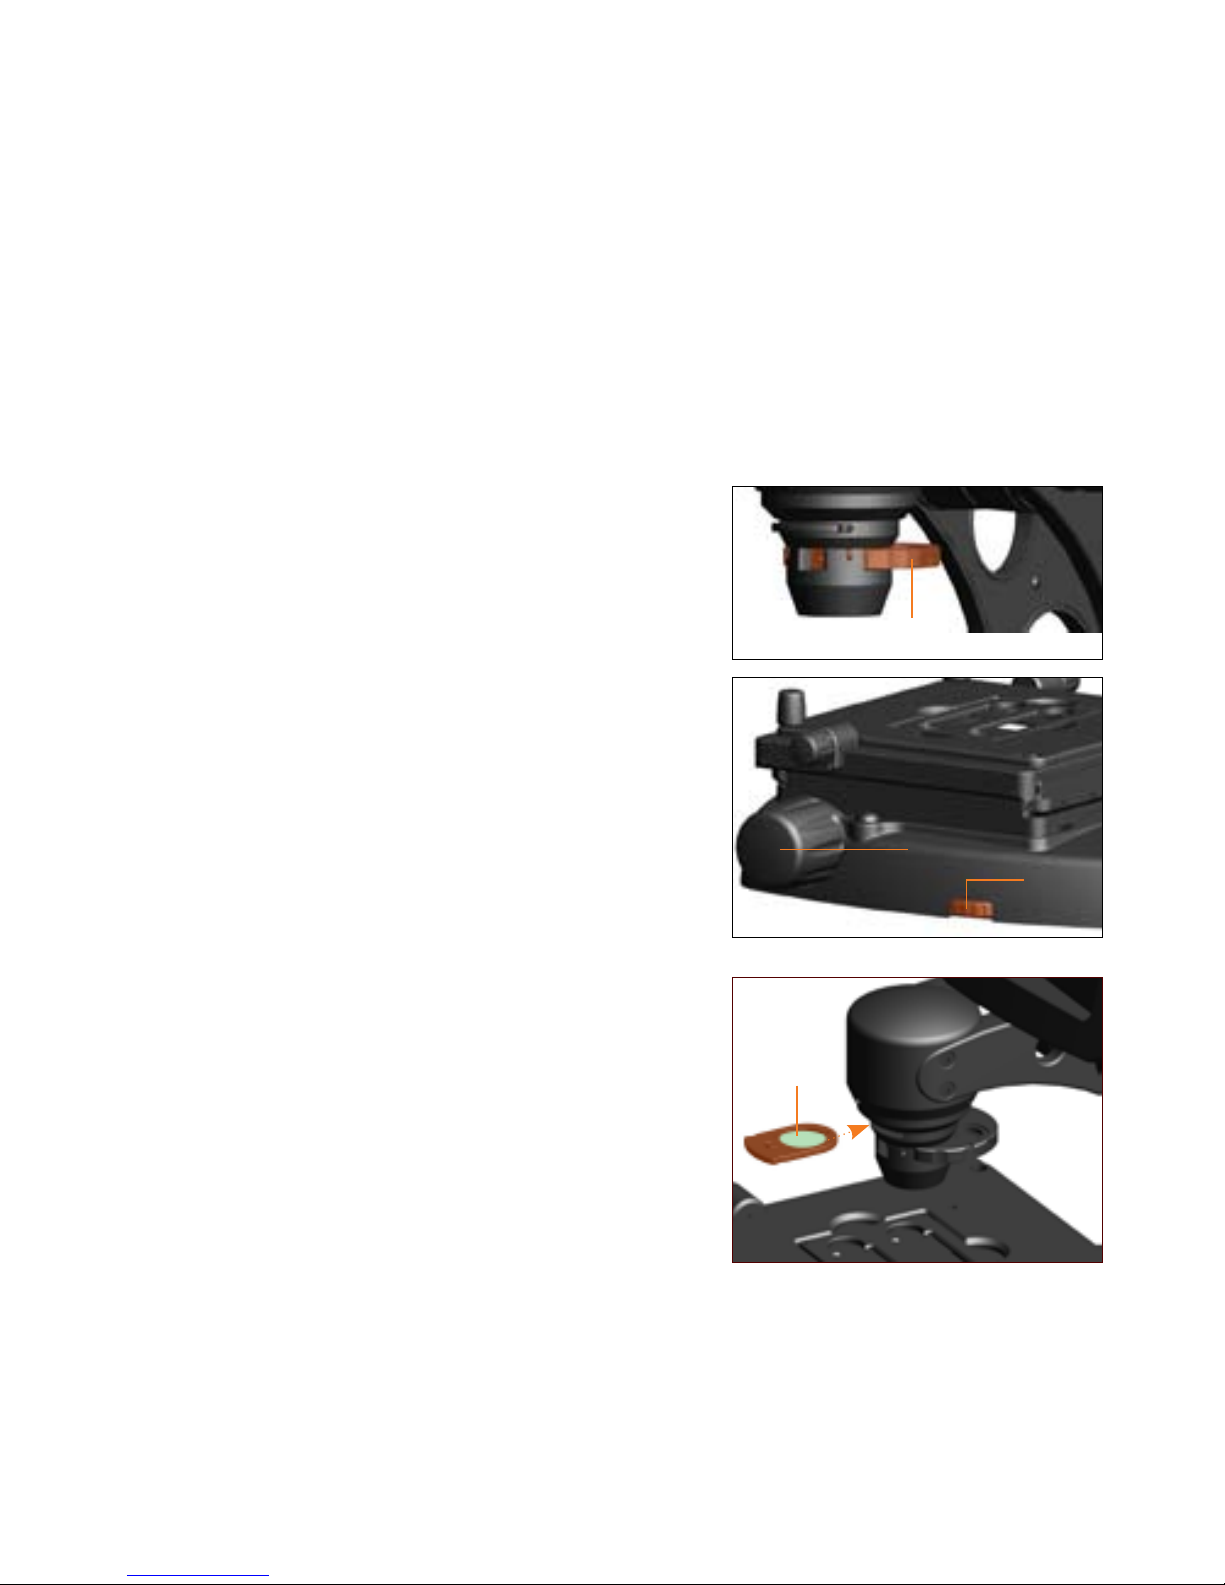
Turn the 6. phase annuli select wheel y to the position that corresponds
to the selected objective.
Adjust focus by turning the
7. focus control knob(s) z.
Adjust illumination on the LCD display by turning the
8. dimmer control
y
{
on the bottom right-hand side of
the base.
Three lter slider assemblies are included
with all EVOS microscopes. For brighteld
applications you MUST use the Pinhole or
Diuser lter.
Due to variances in sample size, color and
thickness, actual lter use may dier from the
standard lter use described below.
Pinhole lter slider assembly:
brighteld, low magnication (4x/10x)
Diuser lter slider assembly:
brighteld, high magnication
(10x/20x/40x)
Insert the lter slider assembly
| into the
lter slider slot on the condenser assembly.
IMPORTANT!
Use a lter assembly for brighteld.
|
Note: The green lter slider assembly may be
used for phase-contrast at all magnications
(optional).
Page 7
7
QUICK START GUIDE Advanced Microscopy Group
Software & Driver Installation EVOS
At the 4. Select Destination Location dialog, click Next to accept the default
application location to continue.
Insert the Micron(EVOS) CD into CD Drive1. .
At the 2. Welcome dialog, click Next to
continue.
At the 3. License Agreement dialog, select
“I accept the agreement” to continue.
System Requirements
(Minimum)
PC with Pentium® III 1.0 GHz X
CPU or higher
Windows® XP Operating X
System
30 MB of hard drive space for X
application software
One open USB 2.0 port X
256 MB RAM X
MICRONEVOS INSTALLATION
IMPORTANT! Install the
software before attaching
the microscope to PC.
}
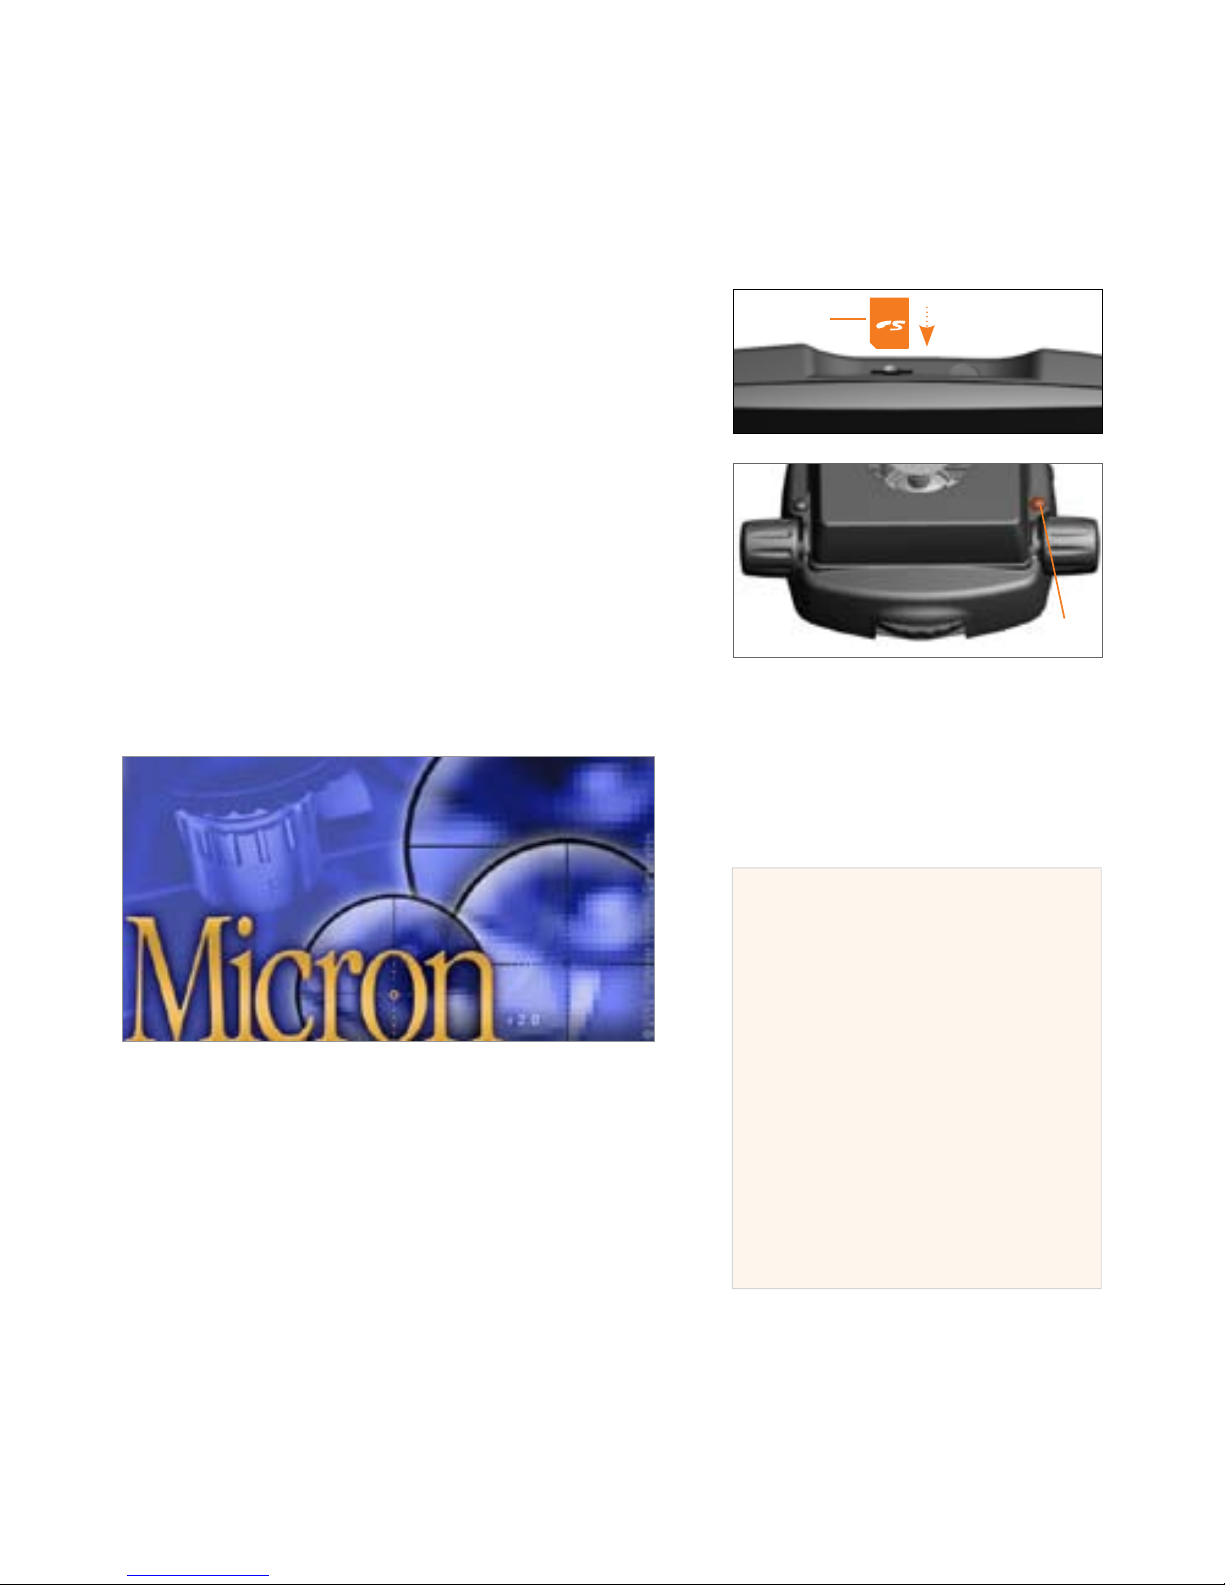
2. Press the image capture button ~
located on the right-hand side of the
microscope.
1. Insert a formatted Secure Digital
(SD™) memory card
} into the
memory slot on top of the LCD display
(note orientation of card). Press and
lock into position.
TO CAPTURE & SAVE IMAGE:
~
Note: (Do not remove SD card until “STORING:
EVOS____.DNG” clears from the LCD screen)
Page 8

8
QUICK START GUIDE Advanced Microscopy Group
Customer Support/Contact Information EVOS
CUSTOMER SERVICE
TOLL FREE (US & Canada)
X Customer & Technical Service 866-614-4022
Local & International
X Customer Service 425-368-0444
X Fax 425-368-0555
US Customer Service business hours are 7:00 a.m. – 4:00 p.m.
Pacic Standard Time (PST).
© 2008 Advanced Microscopy Group, Inc. All rights reserved.
Please have the following information available:
For Product Problems: For Software Problems:
Catalog Number and Serial Number (if applicable) Type of computer you are using
Description of problem Operating System you are using
Micron(EVOS) software version
CONTACTING CUSTOMER SUPPORT
Doc Control Number
ZP-PKG-0398
REV D2
DRIVER INSTALLATION
After installing Micron, connect the microscope to a PC using the USB2 cable.1.
When prompted, browse to the Micron(EVOS) CD and select the installation disk 2.
folder: CD Drive:\Westover USB2 EVOS Installation Disk\
At the 5. Select Additional Tasks menu, choose desired placement of available
icons and click Next to continue.
At the 6. Ready to Install dialog, review and verify install settings and click Install
to continue.
At the7. Information screen, click Next to continue.
At the8. Completion screen, click Finish to nalize software installation.
 Loading...