

Page 1
INSTALLATION
INSTRUCTIONS
T052430
T052432
Delancey
®
Diverter Trim Kit
Thank you for selecting American Standard...
the benchmark of ne quality for over 140 years.
To ensure that your installation proceeds smoothly-please
read these instructions carefully before you begin.
RECOMMENDED TOOLS
Flat Blade Screwdriver
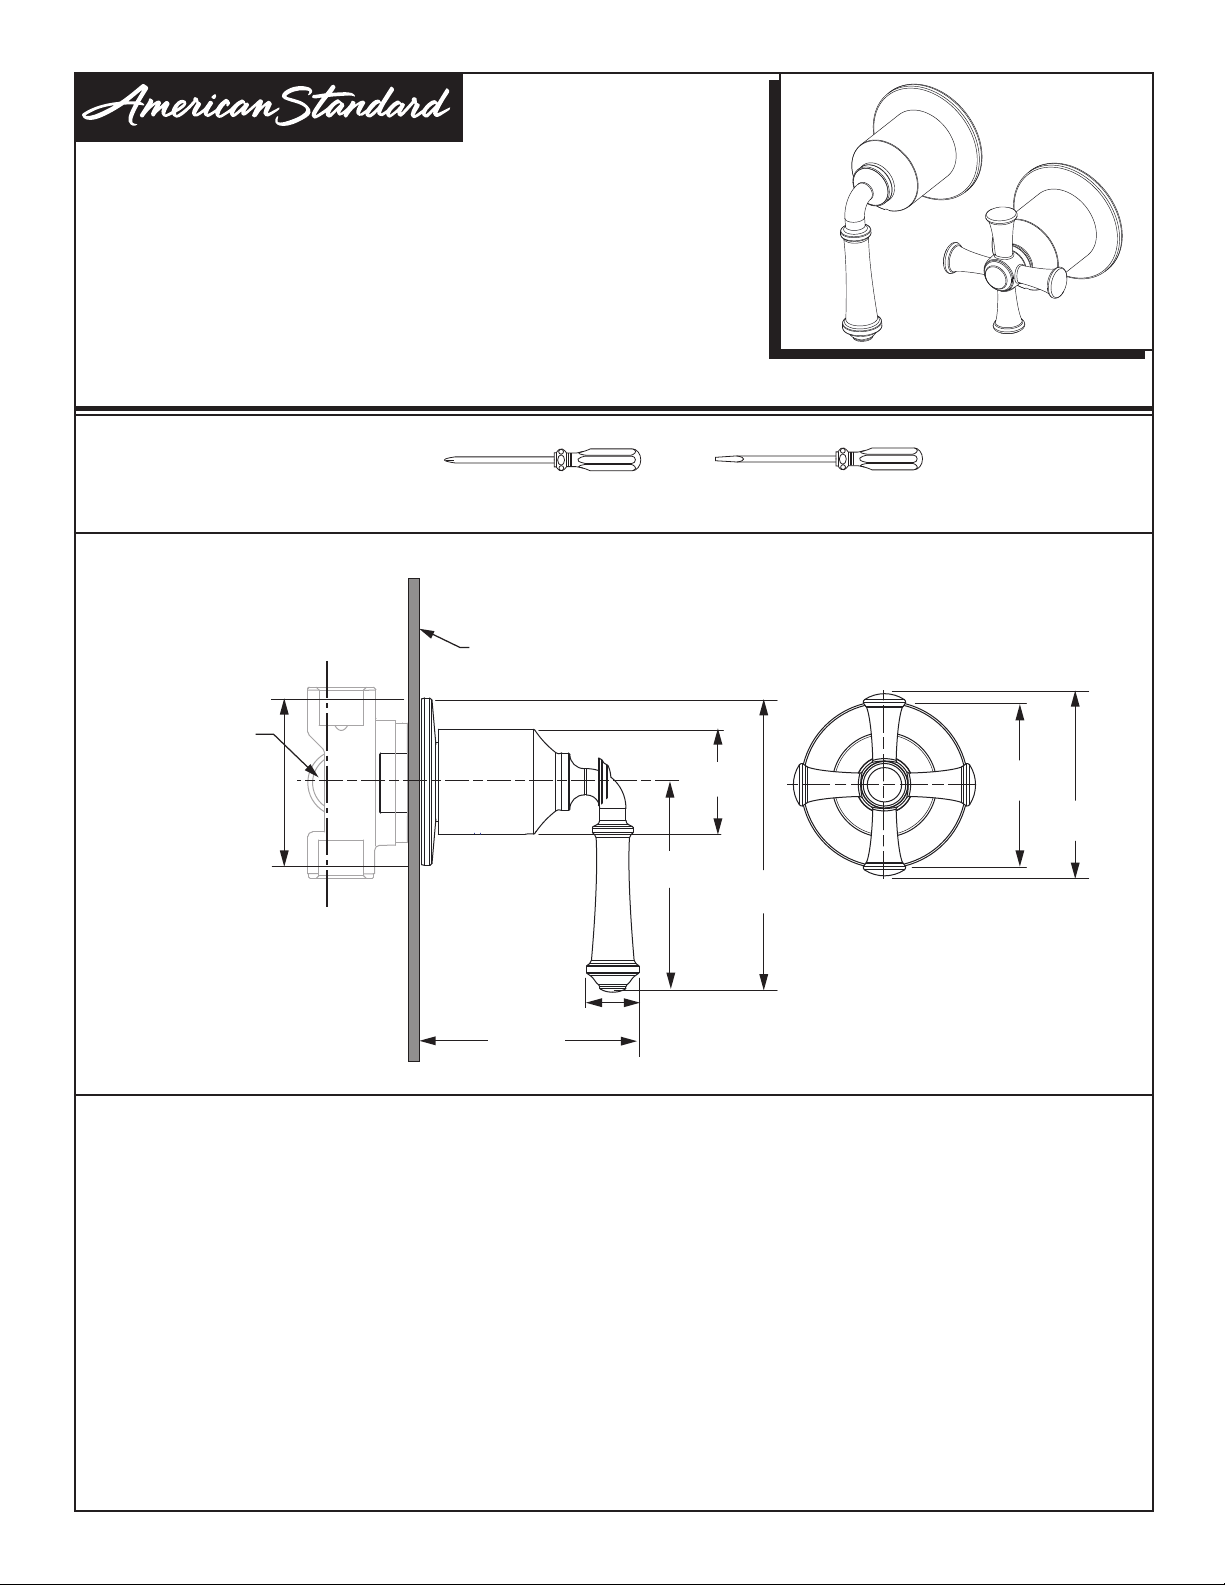
ROUGHING-IN DIMENSIONS
1/2" NPT INLETS
AND OUTLETS
3-1/16"
(76 mm)
FINISHED
WALL
LEVER
HANDLE
3-1/2"
(88 mm)
1-3/8"
(44 mm)
(123 mm)
Certied to comply with ANSI A112.18.1M
Phillips Screwdriver
CROSS
HANDLE
Ø 2-3/16"
(70 mm)
3-1/16"
(76 mm)
4-7/8"
CARE INSTRUCTIONS:
• To keep your new faucet looking new, please follow
these simple care instructions:
DO: – Simply rinse the faucet clean with clear water.
– Dry the faucet with a soft cotton cloth.
DO NOT:
– Do not use any abrasive cleaners, cloths,
or paper towels.
– Do not use any cleaning agents containing
acids, polish abrasives, or harsh cleaners
or soaps.
• Regular and routine cleaning will reduce the need for
heavy cleaning and polishing. If heavy cleaning is
required, the following procedures are recommended:
Product names listed herein are trademarks of AS America, Inc.
© AS America, Inc. 2018
(22 mm)
3-5/16"
(84 mm)
7/8"
• Remove as much surface dirt and lm using clear
water and soft cotton cloth (as described above).
– Use any of the following to remove tough surface
lm and build-up:
– Mild liquid detergents
– Clear ammonia free liquid glass cleaners
– Non-acidic, non-abrasive gentle liquid or fully dissolved
powder cleansers mixed according to manufacturers
directions
– Non-abrasive liquid polishers
• Once clean, rinse faucet again with clear water to
thoroughly remove cleaner or polish and blot dry with
a soft cotton cloth.
Failure to follow these care instructions may damage
the Faucet’s nish.
- 1 -
M965990 (10/18)
Page 2
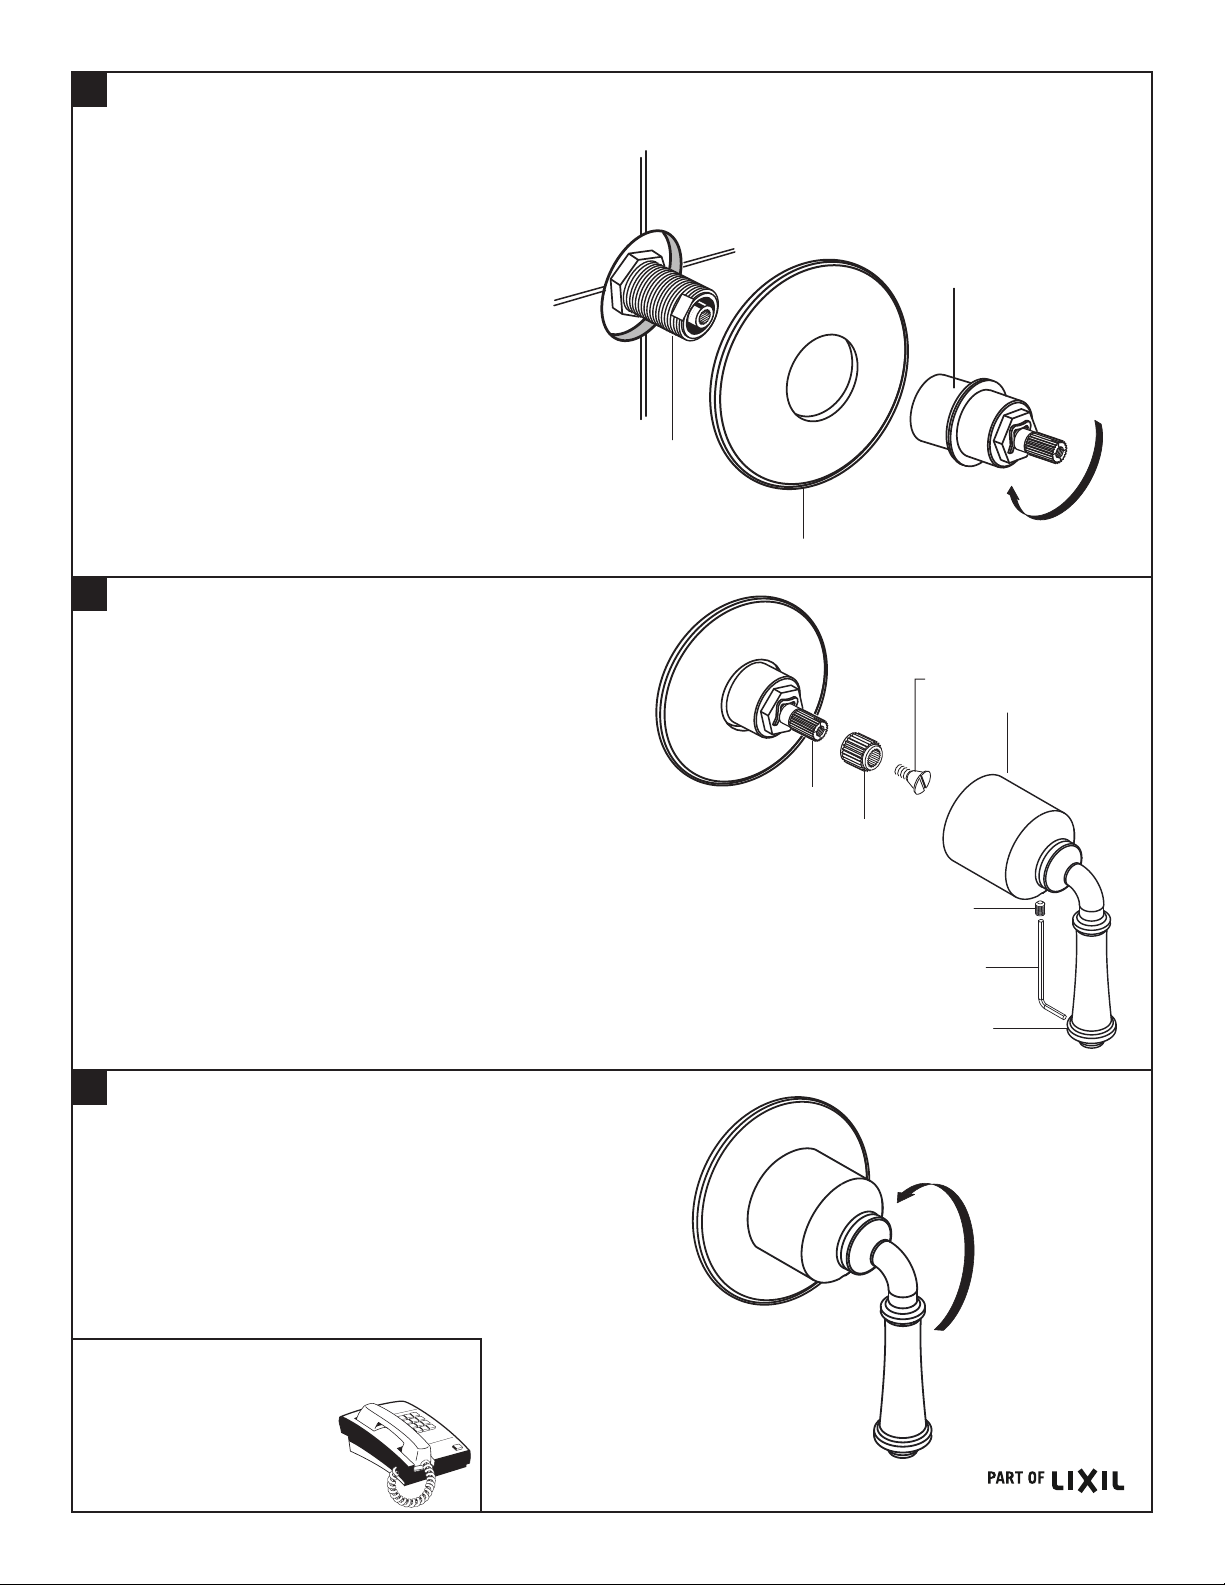
1
TRIM INSTALLATION
• Insert ESCUTCHEON (1) onto ESCUTCHEON
HOLDER (2).
• Align ESCUTCHEON (1). Thread ESCUTCHEON
HOLDER (2) onto DIVERTER VALVE (3).
• Tighten until ESCUTCHEON (1) is snug against
nished wall.
2
HANDLE INSTALLATION
• Install HANDLE ADAPTER (1) onto VALVE STEM (2).
• Install HANDLE SCREW (3) and tighten.
• Push HANDLE BASE (4) onto HANDLE ADAPTER (1).
• Align LEVER HANDLE (7) and push into HANDLE BASE (4).
• Use HEX WRENCH (5) supplied and tighten SET SCREW
(6) to secure HANDLE (7).
2
3
1
3
4
2
1
3
OPERATING THE VALVE
• Turn water supply on and test installed tting.
• Rotate handle to all diverter positions to check operation of valve.
• Check for leaks.
HOT LINE FOR HELP
For toll-free information and answers to your questions, call:
1 (800) 442-1902
Mon. - Fri. 8:00 a.m. to 8:00 p.m. EST
Saturday 10:00 a.m. to 4:00 p.m. EST
IN CANADA 1-800-387-0369
(TORONTO 1-905-306-1093)
Weekdays 8:00 a.m. to 7:00 p.m. EST
IN MEXICO 01-800-839-1200
- 2 -
6
5
7
OFF
M965990 (10/18)
 Loading...