

Page 1
Polar Neon, Bulk Reels
Installation instructions for PLR-NF Series
WARNING:
installed or attached in any way. Products should be installed in accordance with these
instructions, current electrical codes, and/or the current National Electric Code (NEC).
Use this product only with its attached plug-in power cord. Any other power cord
or feed may damage the xture. Not intended for hard wire use.
These products may represent a possible shock or re hazard if improperly
WARNINGS: READ ALL INSTRUCTIONS BEFORE YOU START:
CAUTION -
attention to this manual and stay within its guidelines when using this product.
Before use, note that this product requires an 120V AC outlet.
Ensure that the voltage of your power supply is compatible!
1. Do not cover this product as the covering may cause rope to overheat, melt, or ignite.
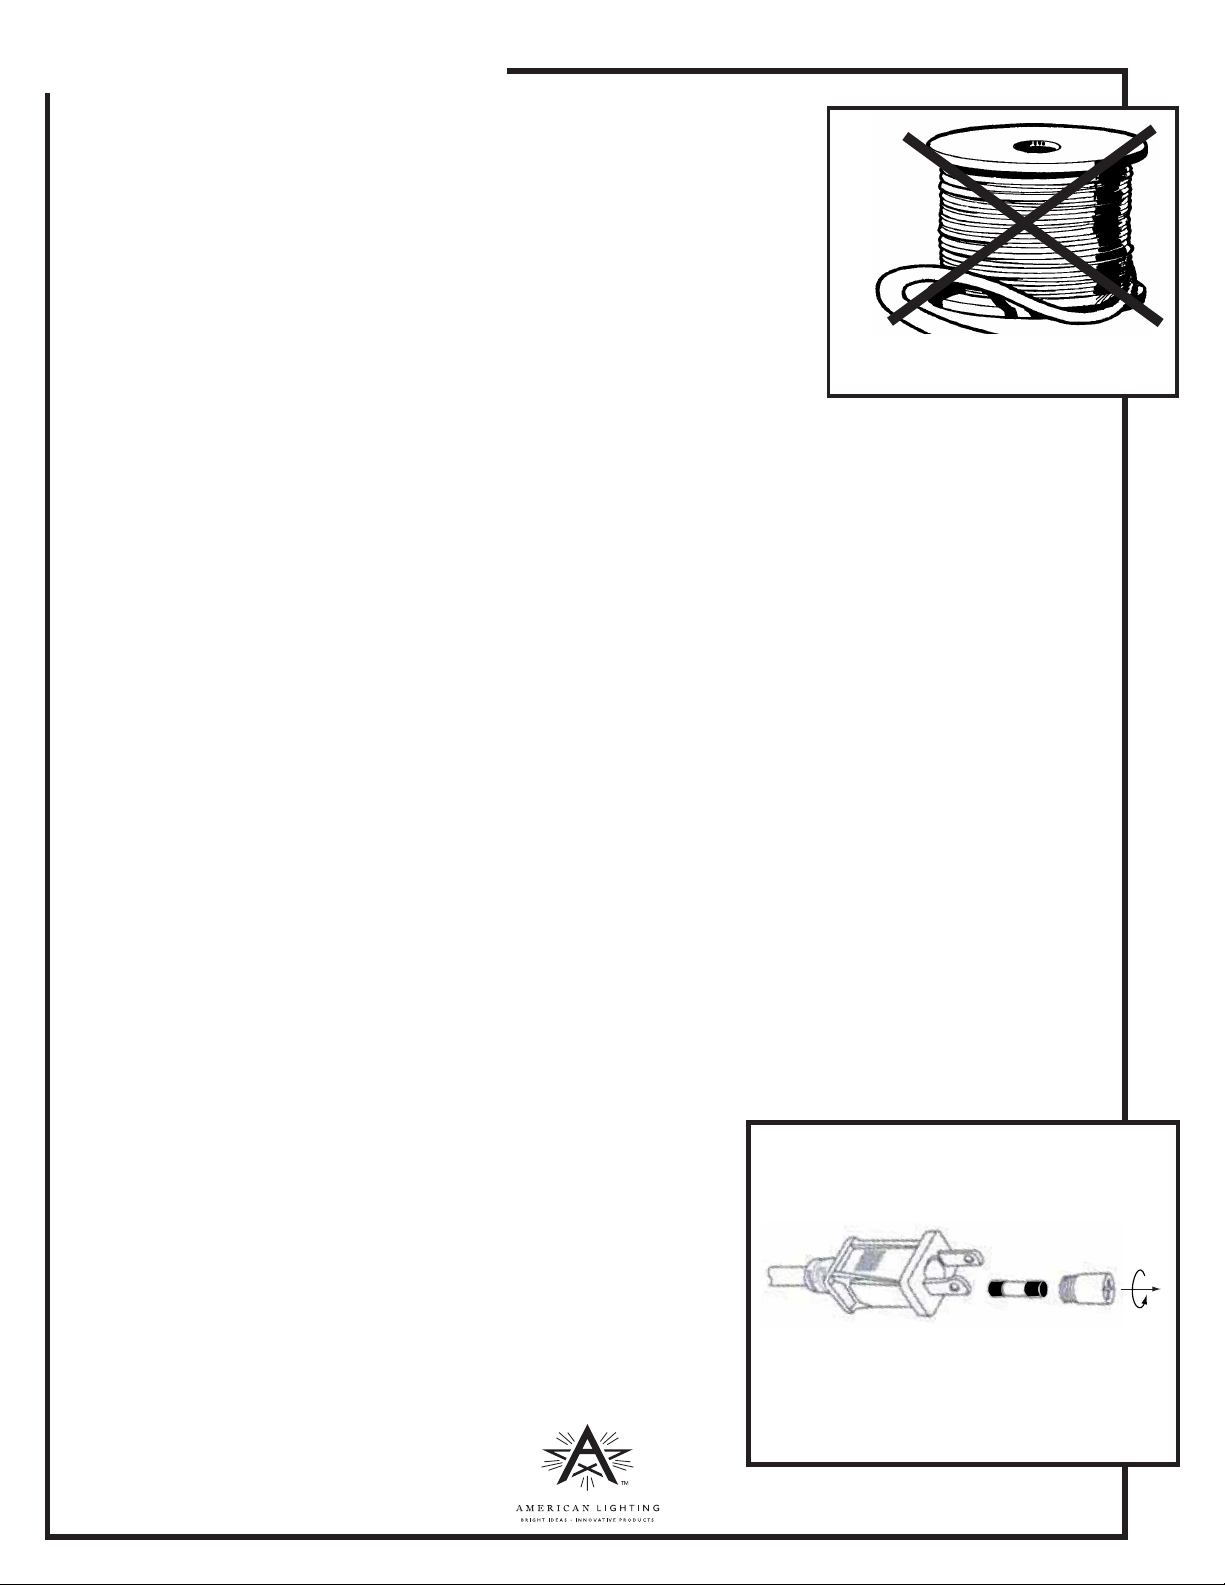
2. Do not operate Polar Neon while it is tightly coiled.
3. Do not submerge exible light in liquids, or use the product in the vicinity of standing water or other liquids.
4. Do not route the cord or Polar Neon through walls, ceilings, doors, windows, or any similar part of the building structure.
5. Secure this exible light using only the mounting clips provided or factory recommended mounting track (sold separately).
6. Do not secure this product or its cord with staples, nails, or like means that may damage the insulation.
7. Do not use if there is any damage to the PVC housing or power cord insulation. Inspect periodically.
8. Do not install on gates or doors, where subject to continuous exing.
9. Do not install in tanks or enclosures of any kinds.
10. Follow instructions carefully when splicing Polar Neon sections or attaching power cords. Ensure that all connections,
including the end cap on the last segment, are properly installed with dielectric grease and shrink tube to preclude the
entrance of water (outdoor applications).
11. Risk of re. Do not replace attachment plug. Discard product if attachment plug is damaged.
12. This product has a polarized plug (one blade is wider than the other) as a feature to reduce the risk of electric shock.
This plug will t in a polarized outlet only one way. If the plug does not t fully in the outlet, reverse the plug. If it still does
not t, contact a qualied electrician. Never use with an extension cord unless plug can be fully inserted. Do not alter plug.
13. Polar Neon can only be cut at specic intervals as indicated by the cutting marks printed on the side of the PVC
housing. Failure to cut at a cut mark, will result in a loss of light. Before making any cuts or attaching any power
cords or jumpers, be sure power source is disconnected!
14. This product is designed for use by a qualied installer.
15. This product is for decorative use only. Not to be used by children as a toy. Keep out of reach of small children.
16. Do not exceed 150.9’ maximum run distance in any single run.
To reduce risk of re, electric shock, or injury to persons, pay close
Do not operate Polar Neon
while it is tightly coiled.
CAUTION - To reduce the risk of re, electric shock, or injury to persons:
WARNING: When using outdoor portable lighting products, basic safety precautions should always
be followed to reduce the risk of re, electric shock, and personal injury, including the following:
1. Use dielectric grease and shrink tube at all power connections, including end cap when using outdoors.
2. Use ground fault circuit interrupter (GFCI) protection on the circuit(s) or outlet(s) when using outdoors.
3. Use only UL approved outdoor extension cords, such as type SW, SOW, STW, STOW, SJW, SJOW, SJTW, or
SJTOW. This designation is marked on the jacket of the extension cord.
TO REPLACE FUSE (see Figure 1):
This plug contains an electrical fuse as a safety feature.
Figure 1
1. Disconnect power before replacing the fuse.
2. Grasp plug and remove from the receptacle or other outlet device.
3. Do not unplug by pulling on the cord.
4. Unscrew the fuse access cover on top of the attachment plug.
(see Figure 1).
5. Remove old fuse carefully.
6. Never attempt to replace the fuse with a higher wattage fuse. Use
only 5 Amp 120 Volt fuse. Failure to do so may be a re hazard.
7. Set new fuse in holder and reinstall access cover.
Unscrew fuse access cover as shown.
Fuse is inside plug.
RV1433 WWW.AMERICANLIGHTING.COM
Page 2
Polar Neon, Bulk Reels
Installation instructions for PLR-NF Series
CONNECTING POWER CONNECTION KIT (See Figures 2, 3, and 4)
NOTE: Do not exceed 150.9’ maximum run distance in any single run.
1. Determine the required length for exible light.
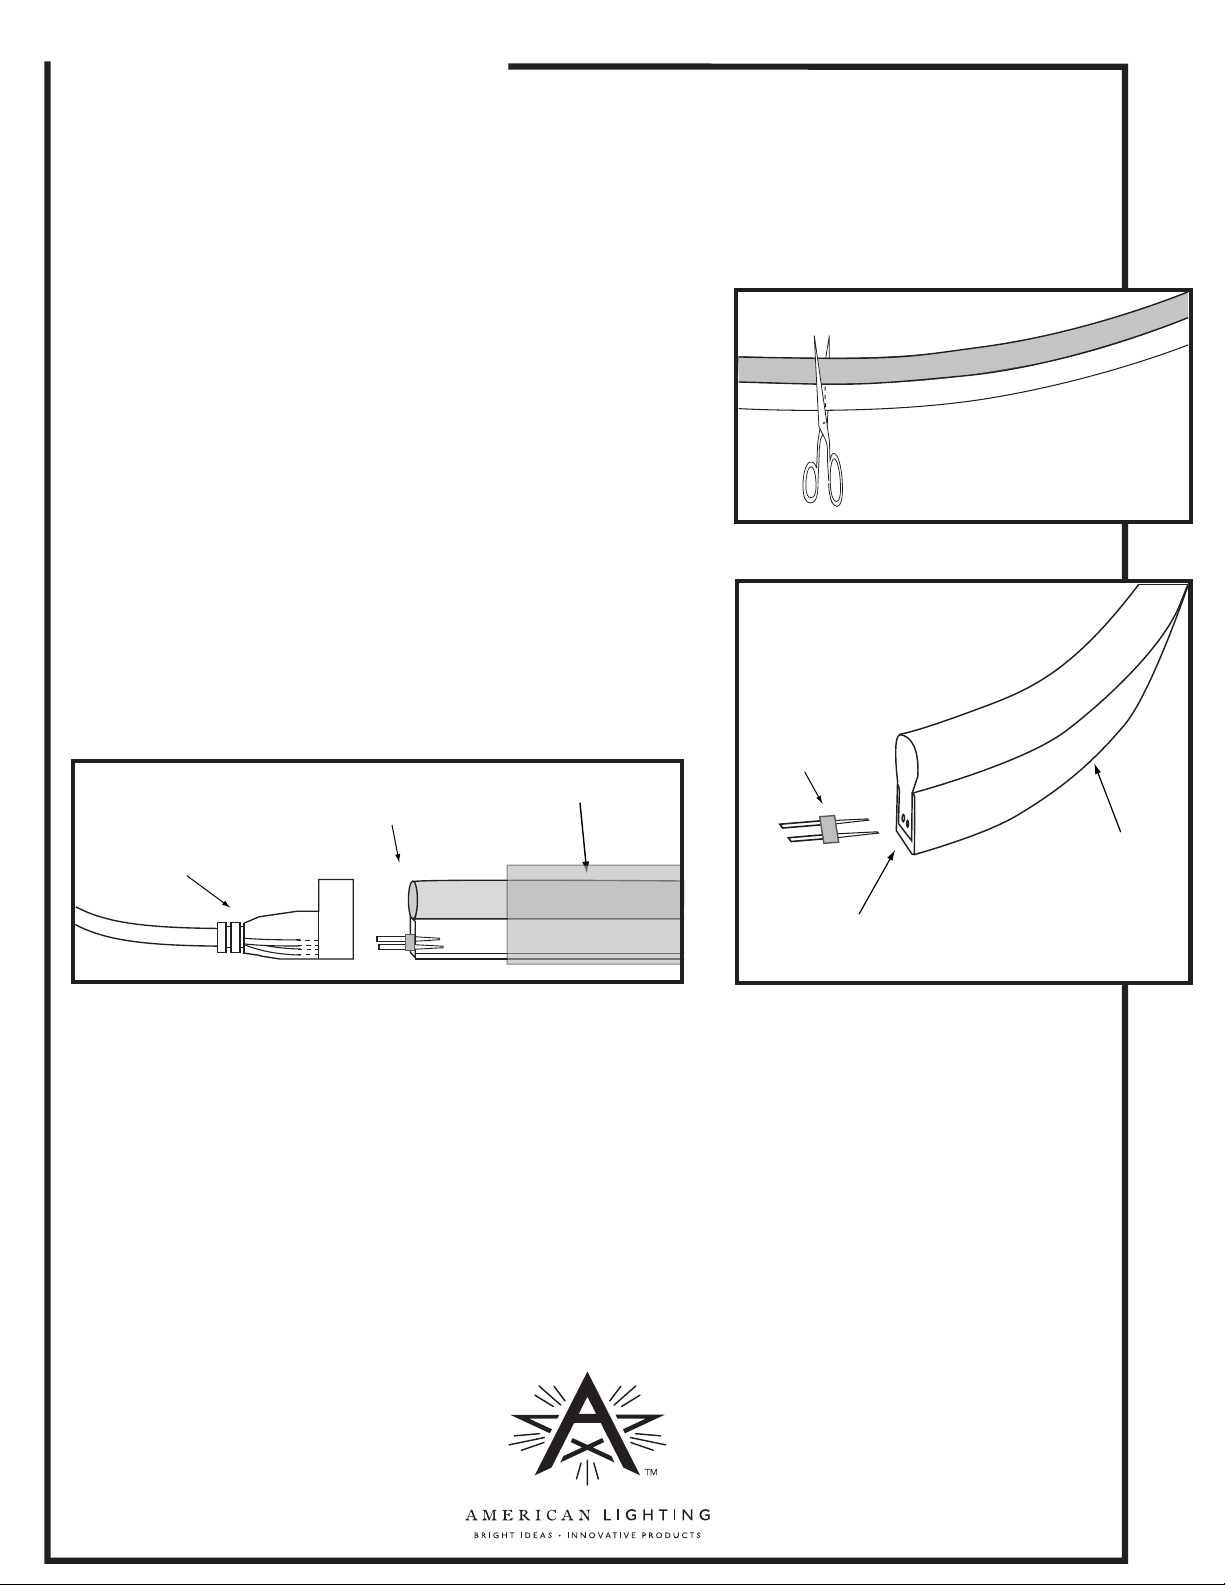
2. Cut the Polar Neon squarely at the nearest series increment cut
mark using a sharp rope light cutting tool or shears.
NOTE: Polar Neon is wired in series parallel. Cutting anywhere
other than the end/beginning of a series increment will result in a loss
of light. (see Figure 2)
3. Holding the smooth pins of the power pin with a pair of pliers, line up
the barbed pins with the two wires of the exible light. Push barbed pins
into Polar Neon until ush, being sure to make solid contact with the
exible light’s internal wires. (see Figure 3).
4. Slide the shrink tube over the assembly and onto the Neon Polar Neon.
5. Push the power cord sheath onto the assembly until fully seated.
6. Slide the heat shrink tube over the power cord sheath so that it is
centered over the junction of the Polar Neon and the power
cord sheath. (see Figure 4).
7. Attach end cap to other end of exible light to cover exposed dead end.
Figure 4
Polar Neon and
Heat shrink tube
power pin assembly
Power cord sheath
Figure 2
V
0
2
1
G
N
I
T
H
G
I
L
N
A
C
I
R
E
M
A
0
1
-
0
1
Series increments are marked on
the side of the housing as shown.
Figure 3
Line up the barbed ends of the
power pin with the wires inside and
push pin in to make solid contact.
Power pin
.
T
F
9
.
0
5
1
H
T
G
N
E
L
X
A
M
Z
H
0
6
,
Polar Neon
Trim o any wires that protrude from the
Polar Neon to prevent a short.
MOUNTING:
1. Make mounting clips using cut pieces of track (PLR-NF-TRACK-4, sold separately) or for straight line
applications, use PLR-NF-TRACK-4 mounting track; or use a combination of methods. PLR-NF-CHAN-1M
aluminum channel is also available (sold separately).
2. Make sure that the distance between any two parallel runs of lighting are at least 1/2” apart.
3. Gently press exible light into track or clips so that it snaps into place.
PROP 65 WARNING:
Handling the coated electrical wires of this product exposes you to lead, a chemical known to the State of
California to cause cancer, birth defects, and other reproductive harm. Wash hands after use.
RV1433 WWW.AMERICANLIGHTING.COM
 Loading...