

Page 1
LED Puck Light
Installation instructions for LPL Series
WARNING: These products may represent a possible shock or fire hazard if improperly installed or
attached in any way. Products should be installed in accordance with the owners manual, current
electrical codes and/or the current National Electric Code (NEC). Use this
fixture only with the plug-in power that is recommended for the fixture.
Any other power may damage the fixture and will void the warranty.
CAUTION - To reduce risk of fire, electric shock or injury to persons:
1. This light is intended for indoor use only.
2. Not intended for lighting aquariums.
3. Mount light only to surfaces that are mechanically sound.
4. Do not link more than three LED Puck Lights to one power supply since
this will exceed the capacity of the power supply and void the warranty.
When powering one, two or three puck lights, a power supply/junction
box kit is required (LPL-DR10-300PI, sold separately). LPL-DR10-300PI is
a c/UL/us Listed 350mA DC plug-in power supply for use with up to
three LED Puck Lights. (LPL series only). Factory warranty will be void if
used with a non-recommended power supply, transformer or driver.
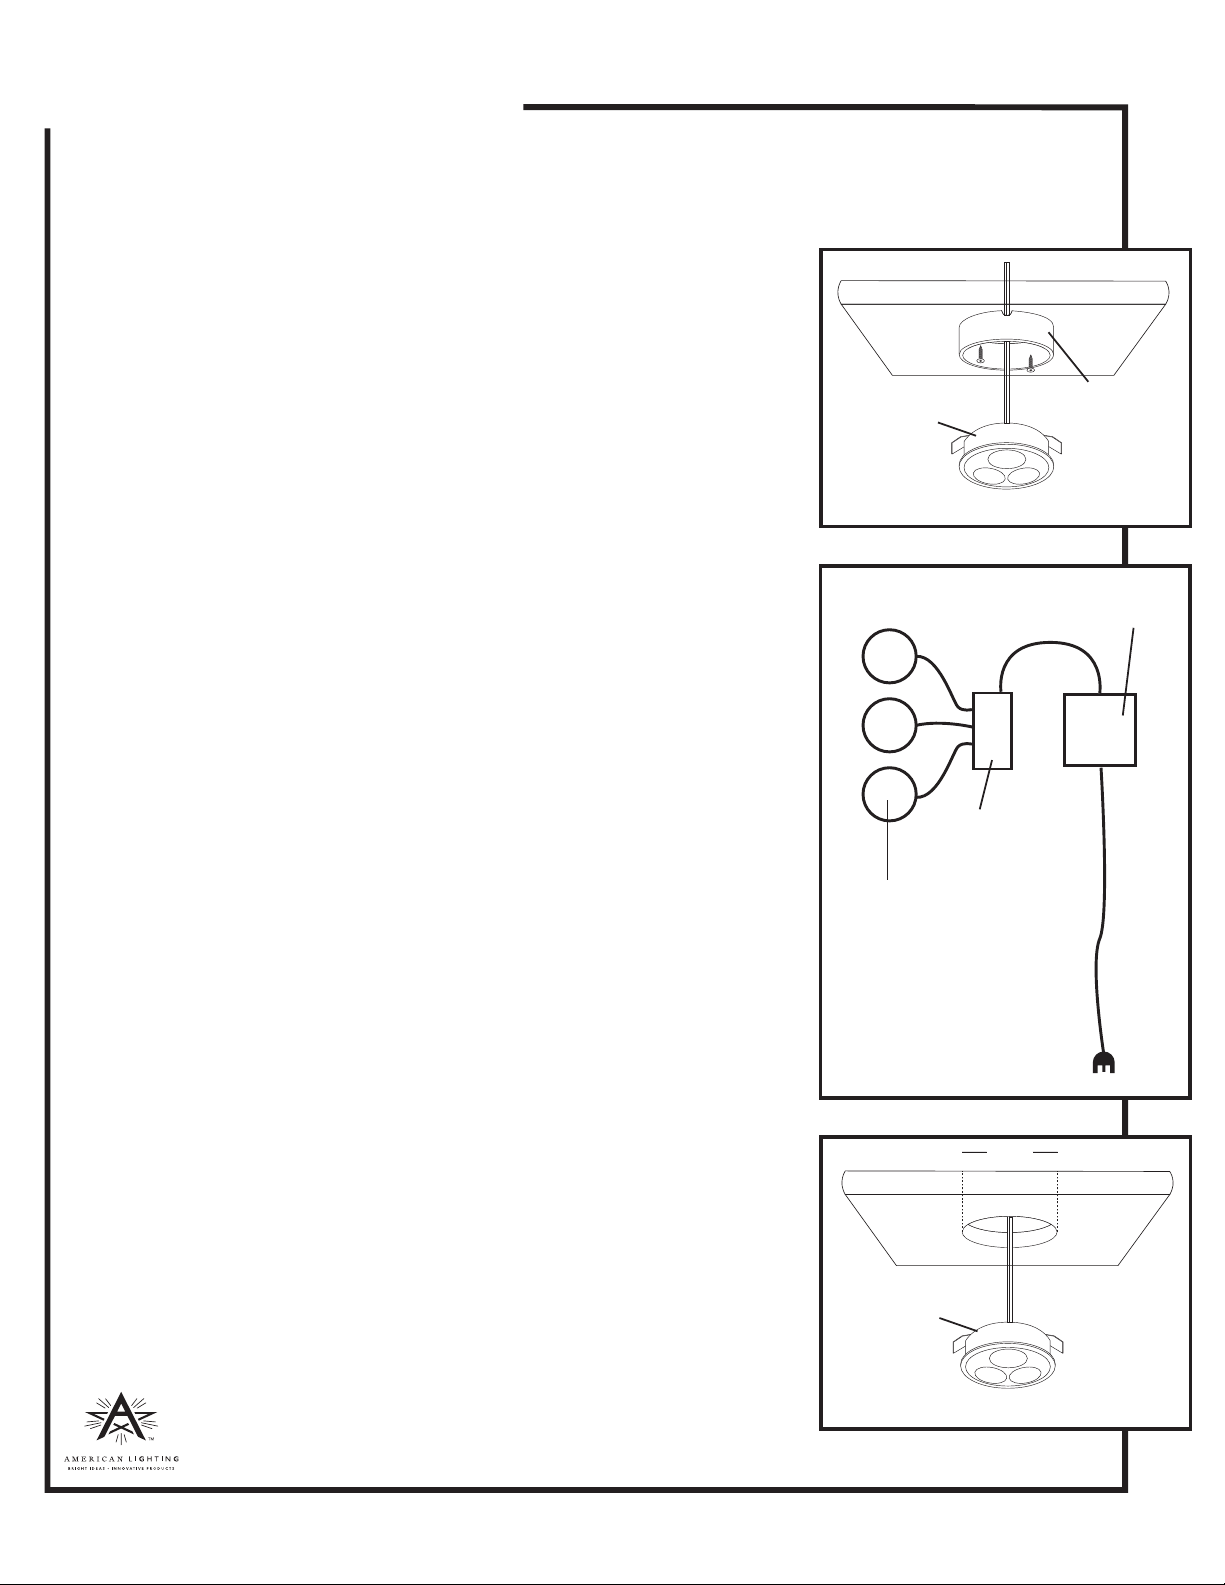
SURFACE MOUNTING (See Figure 1)
1. Locate desired position for puck light.
2. Install the mounting can to mounting surface using two screws supplied.
(Note: Be sure notch for wire faces direction you want wires to run and that
lead wire is already fed through notch.)
3. Snap housing into mounting can. Be sure to pull excess wire through notch
to prevent pinching or bunching of wires.
4. Do not conceal power supply cord (or power supply) inside a wall, ceiling,
soffit, kitchen cabinet or similiar permanent structure.
5. Do not run the power supply cord through holes in the walls, ceilings or
floors.
6. Determine the desired location for the junction box (See Figure 2) and
mount to surface using screws provided. The junction box is required for
1-light, 2-light or 3-light installations).
7. Plug the DC jack from each LED Puck Light into the junction box.
8. Plug the DC jack from the power supply into the side port of the junction
box. Attach to the power supply and plug the system into a standard
120-volt switched outlet.
Figure 1
Housing
Surface Mount
Figure 2
Junction Box
LED Puck Light
Power Cord
Figure 3
Power Supply
2 3/8”
Mounting
Can
RECESSED MOUNTING (See Figure 3)
1. Drill a
2. Feed wires through hole and push housing into hole. The housing’s spring
clips will snap to the edge of the hole to hold puck in place.
3. Follow steps 3-8 above.
2 3/
” hole in the desired location.
8
www.americanlighting.com
Housing
Recess Mount
RV1411
 Loading...