

Page 1
LED Thirty Puck Light
Installation intructions for LP30 Series
WARNING: These products may represent a possible shock or fire hazard if improperly installed or attached in any way.
Products should be installed in accordance these instructions, current electrical codes and/or the current
National Electric Code (NEC). Only use this fixture with the plug-in power supply that is supplied with the fixture.
Any other power supply may damage the fixture.
Kits include a 12V power supply. Individual pucks require a 12V DC power supply and terminal block (sold separately).
CAUTION - To reduce risk of fire, electric shock or injury to persons:
1. This light is intended for use as a cabinet light only.
2. Not intended for installation in ceilings and soffits.
3. Not intended for lighting aquariums.
4. Not intended for installation in plastic cabinets. Mount only on wood
or particleboard surfaces that are mechanically sound.
5. Route and secure cords so they will not be pinched or damaged
when the cabinet is pushed to a wall.
8. Use only insulated staples or plastic ties to secure cords.
WARNING: LEDs REQUIRE A 12V DC LED DRIVER. USE OF OTHER
POWER SUPPLY OR TRANSFORMER VOIDS WARRANTY!
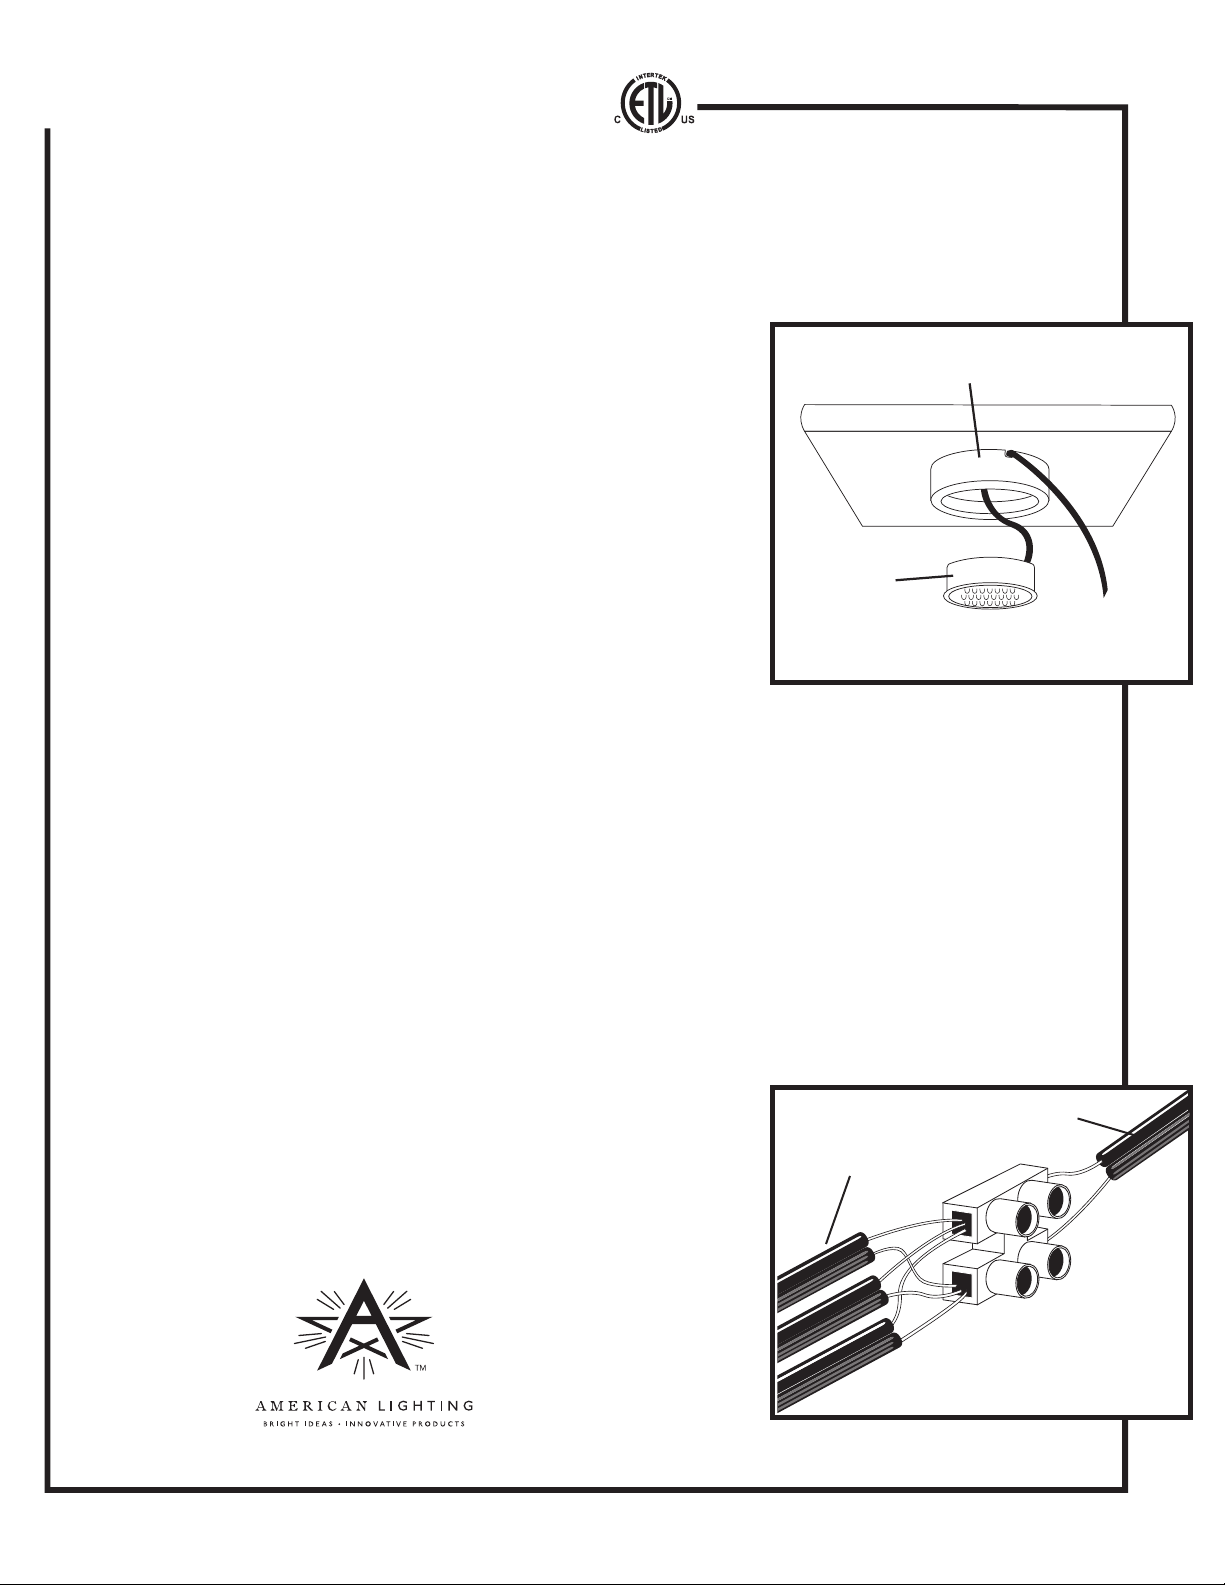
Surface Ring
Housing
SURFACE MOUNT
SURFACE MOUNTING
1. Hold the fixture so that the lens is facing away from you. Gently press
with thumbs on center of back while holding surface ring to separate housing from surface ring.
2. Locate desired position for light. Be sure to orient notch for wires in surface ring toward the back.
3. Drill 1/4” hole in mounting surface for wire to go through or use notch in surface ring to route wires.
4. Mount surface ring to surface using the screws provided and route wires through notch or hole.
5. Gently press fixture housing into surface ring.
6. Avoid placing the cord with any ombustibles such as plastics, paper goods, and the like, within or above,
behind or in contact with the fixture housing or reflector.
7. Route wires to the terminal block. Trim excess wire and strip 1/2” of the insulation from end of wires.
8. For two, three or more Puck lights (see Terminal Block Wire drawing):
Take the ribbed wire from each puck light and twist those together into one connection. Take the
remaining smooth wires (one from each puck) and twist them together into another connection.
10. Insert one set of twisted wires into one side of the terminal block
and tighten the retaining screw to hold the wires in place. Insert the
other set of twisted wires into the other side of terminal block and
tighten screw.
11. Attach the wires from the transformer to the terminal block in the
same fashion, the smooth wire across from the smooth wire cluster
and the ribbed wire coming from the 12V DC power supply across
from the ribbed wire cluster.
From Pucks
From Transformer
www.americanlighting.com
Terminal Block
Wire Drawing
RV-1103KB
Page 2
LED Thirty Puck Light
Installation intructions for models LP30 Series
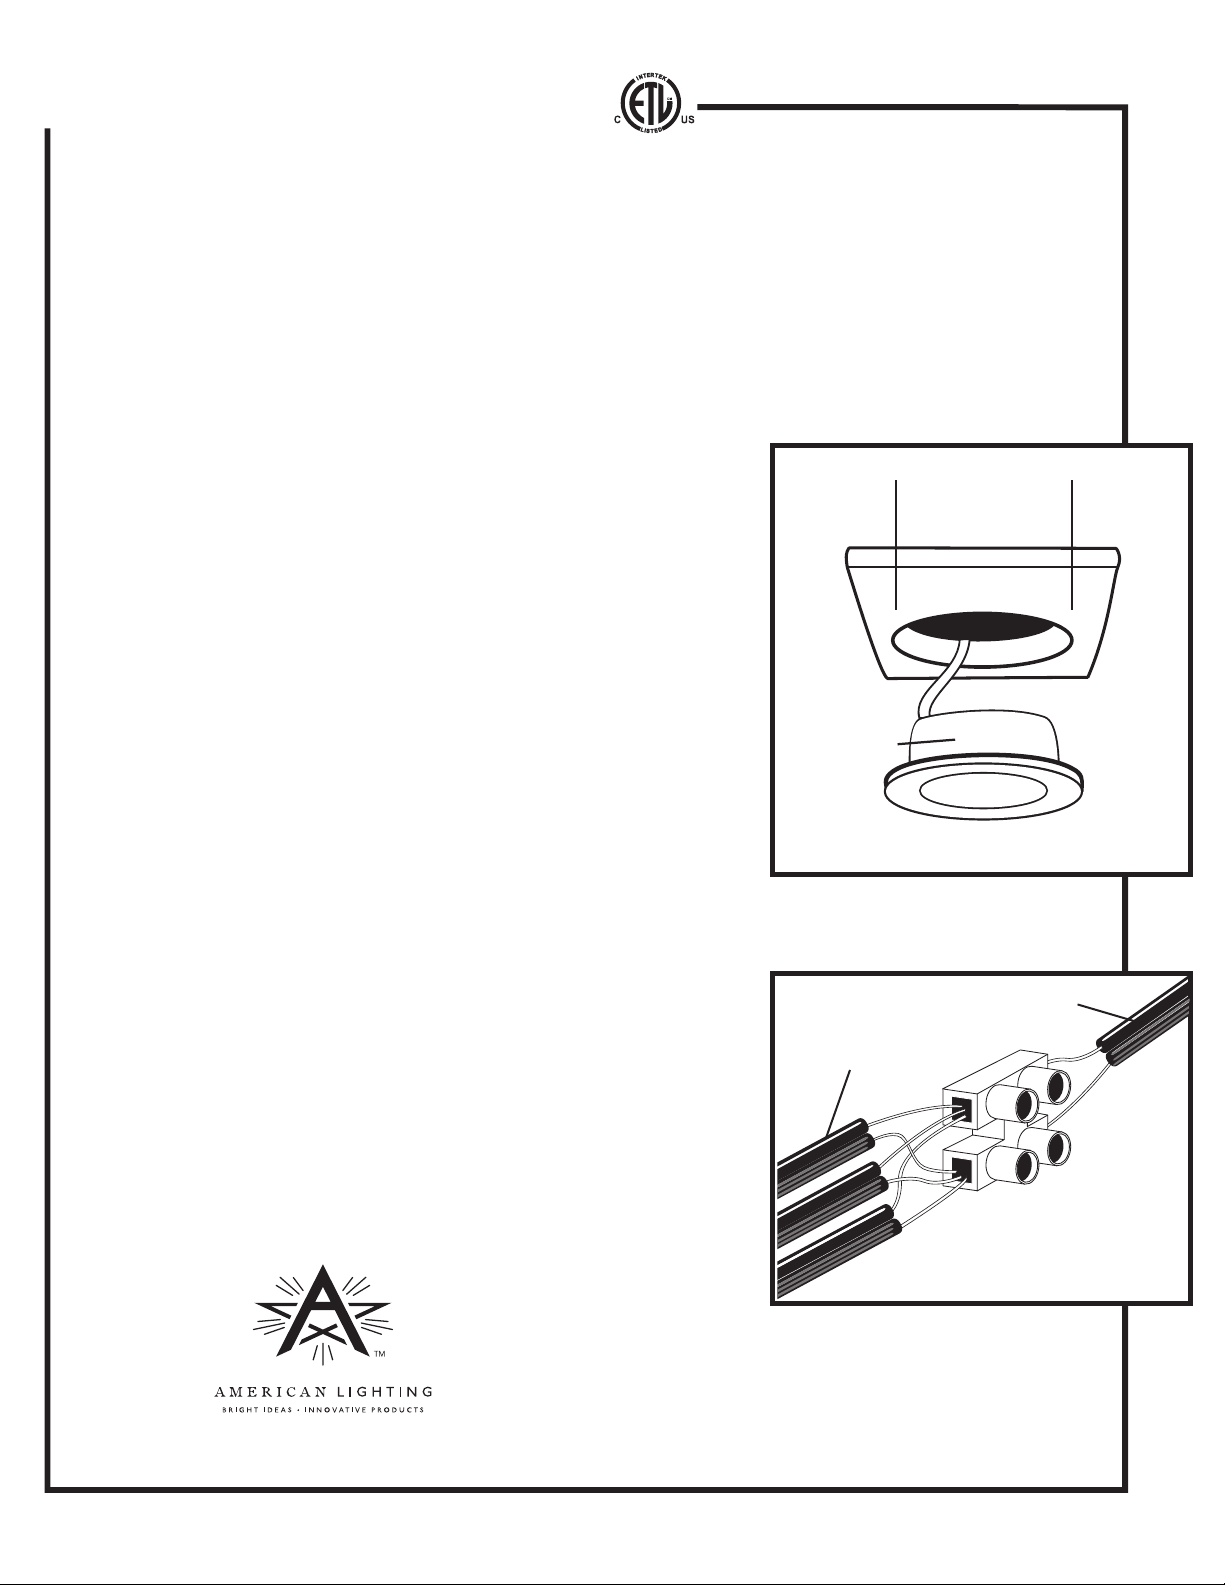
RECESSED MOUNTING
1. Remove surface ring from LED light housing and discard. See Step 1 in SURFACE MOUNTING
on reverse side.
2. Drill a 1¾" hole in desired location.
3. Feed wires through the hole and press the fixture into the cabinet
until the springs lock against the back side of the surface.
4. Repeat steps 1 to 3 for any remaining lights.
5. FOR TWO, THREE OR MORE PUCKS:
See Terminal Block Wiring Diagram and follow steps 9 - 11 from Surface Mounting
instructions (on reverse)
1-3/4” cut-out
POWER SUPPLIES
A plug-in 6 watt power supply is included with each kit, for use
with up to three LED Thirty Puck Lights only. For more than three,
use LED-DR-12 (sold separately), for up to sixteen LED Thirty Pucks.
ACCESSORIES
Optional Trim Rings (sold separately) can be used with
recessed LED Thirty Puck Lights. Simply press trim ring
onto outer edge of puck until it snaps into place.
Housing
for recessed
mounting
RECESSED MOUNT
From Pucks
From Transformer
Terminal Block
Wire Drawing
www.americanlighting.com
RV1103-KB
 Loading...